3
• HOST recommend that
this product is connected
to a circuit protected by an
appropriate RCD (Residual
Current Device).
Caution: Risk of Fire
• Do not store explosive
substances such as aerosol
cans with a flammable
propellant in this appliance.
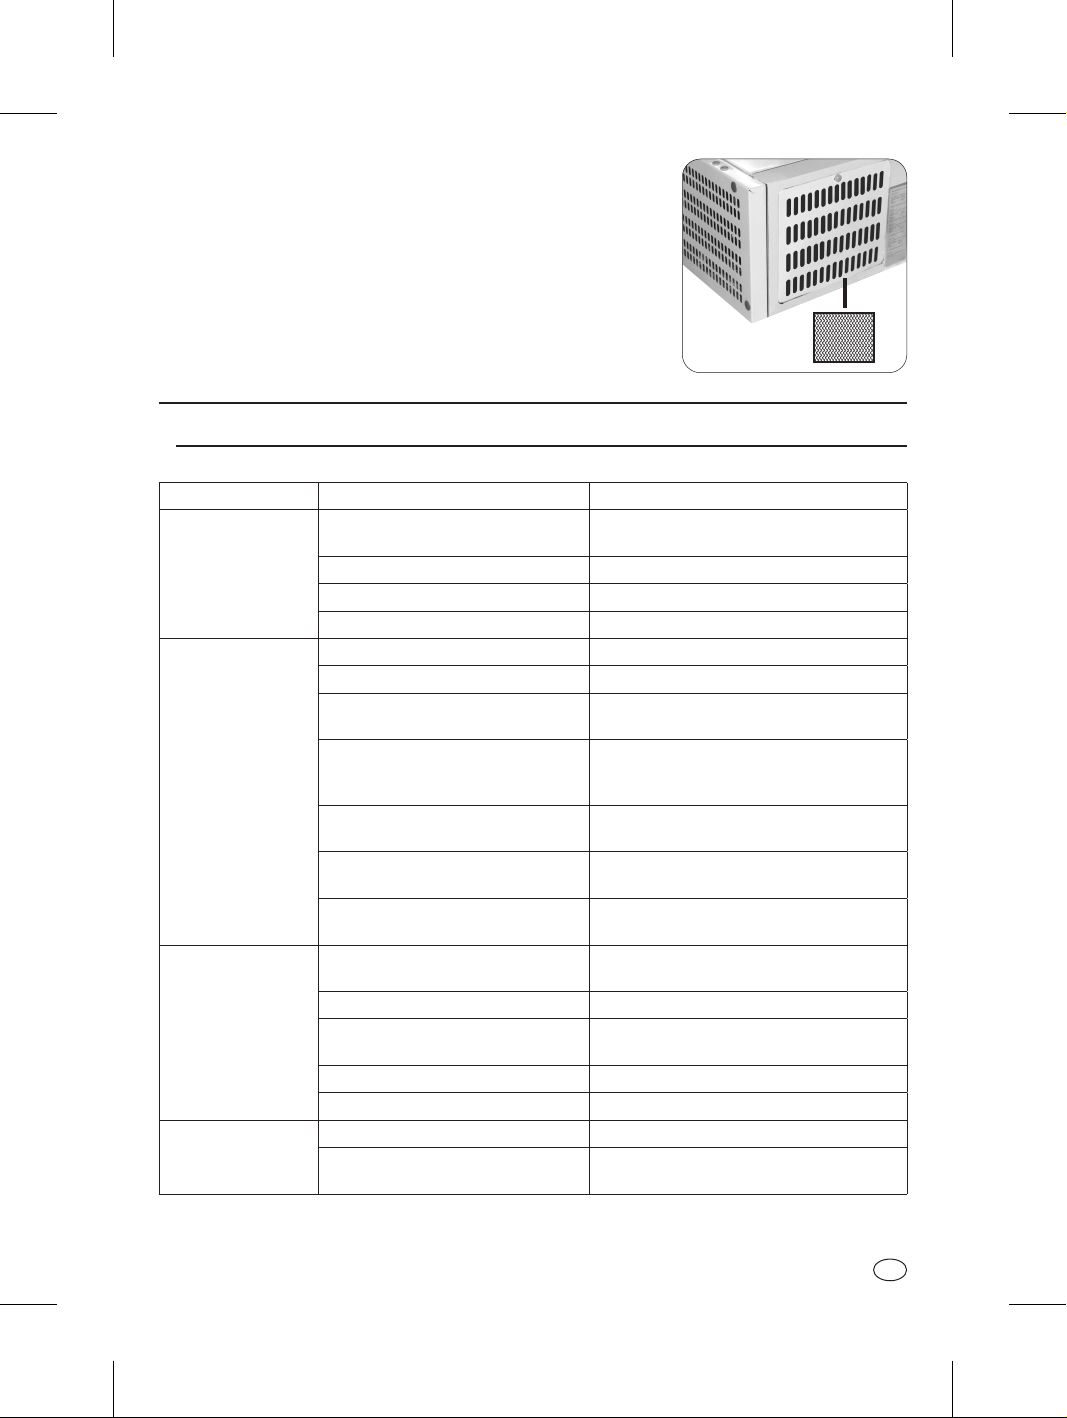
Warning: Keep all
ventilation openings clear
of obstruction. Unit should
not be boxed in without
adequate ventilation.
• Warning: Do not use
mechanical devices or other
means to accelerate the
defrosting process, other
than those recommended by
the manufacturer.
• Warning: Do not damage
the refrigerant circuit.
• Warning: Do not use
electrical appliances
inside the food storage
compartments of the
appliance.
Installation
Note:
Not for use in vans or trailers, food trucks or
similar vehicles.
If the unit has not been stored or moved in
an upright position, let it stand upright for
approximately 12 hours before operation. If in
doubt allow to stand.
1. Remove the appliance from the packaging.
Make sure that all protective plastic film and
coatings are thoroughly removed from all
surfaces.
2. To optimize performance and longevity, ensure
a minimum clearance of 2.5cm is maintained
between the unit and walls and other objects,
with a minimum 20cm clearance on the top.
NEVER LOCATE NEXT TO A HEAT SOURCE.
Note: Before using the appliance for the
first time, clean the shelves and interior with
soapy water.
3. Level the appliance by adjusting the screw
feet.
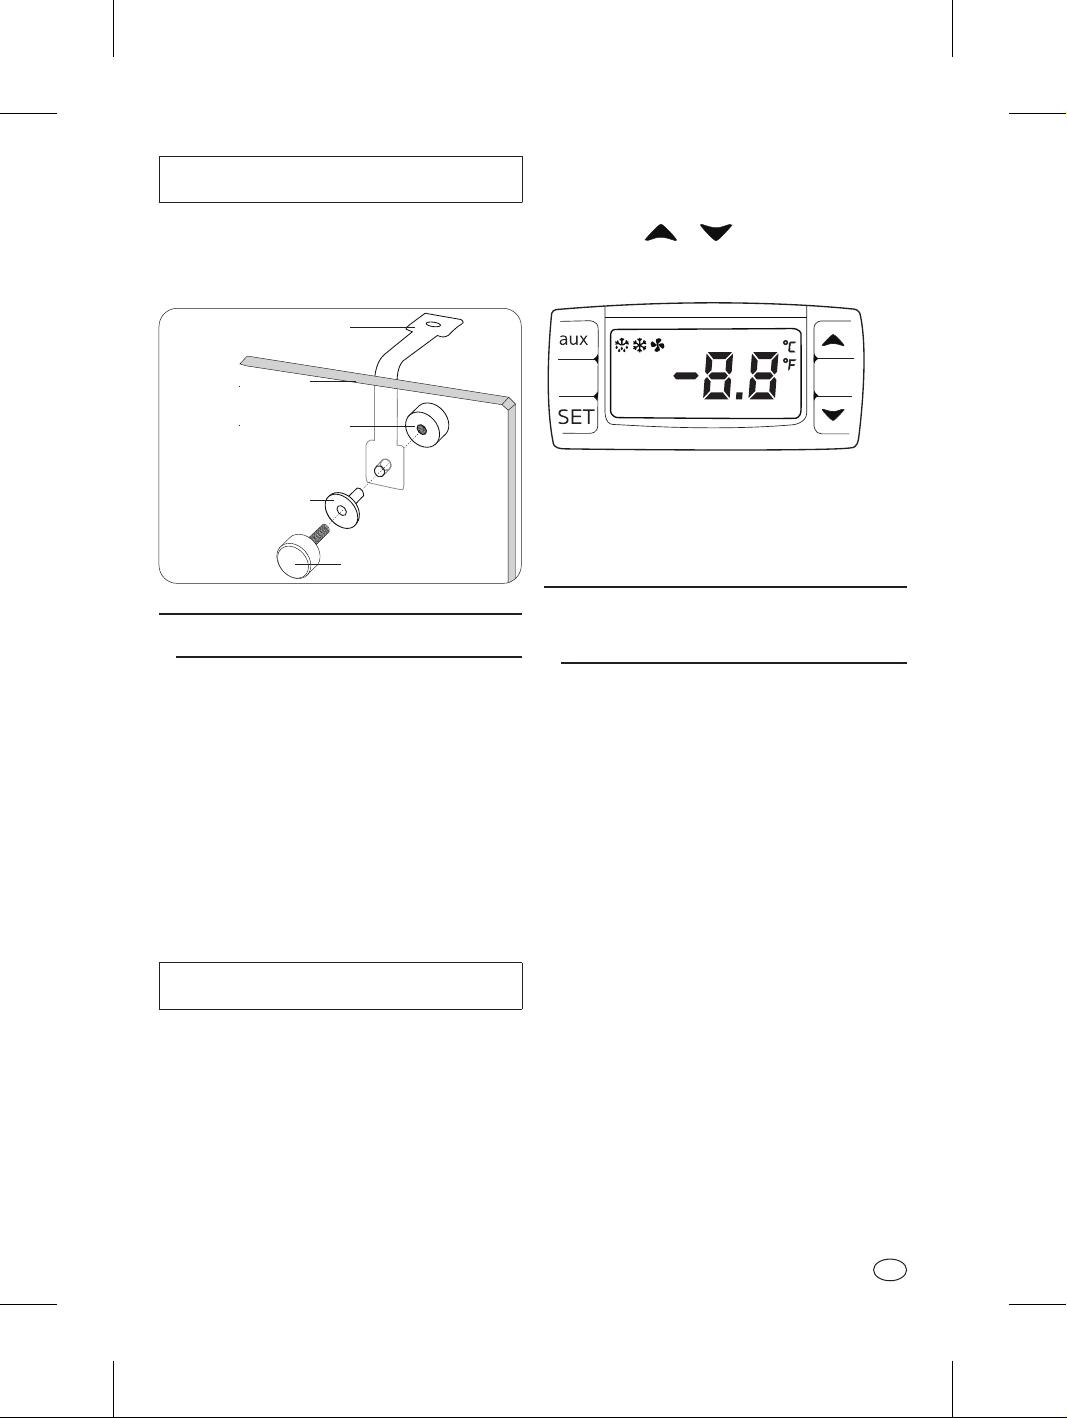
Fit Glass Panels
1. Screw the collars to the rim of the appliance.
Note: Ensure the hole in the collar for the
grub screw faces inwards.
2. Slot the two side panels into the collars, with
the holes in the glass at the top.
Note: Ensure the screw hole furthest from
the edge of the panel goes to the back of the
appliance.
3. Screw a grub screw into each collar to secure
the panels.
Note: Ensure the soft end of the grub screw is
the end making contact with the glass.
Do not overtighten the grub screws as it will
result in the glass breaking.
4. Slot the rear panel into the collars, with the
holes in the glass at the top.
5. Screw a grub screw into each collar to secure
the panel.
6. Slot the plastic plugs into each of the holes.
7. Screw the brackets to the inside of each pane
using the bolt assemblies.
HOST1305ST to HOST1308ST_EN_A5_v1_20220812.indb 3HOST1305ST to HOST1308ST_EN_A5_v1_20220812.indb 3 2022/8/12 18:14:352022/8/12 18:14:35