manuals.online logo
Brands
  1. Home
  2. •
  3. Brands
  4. •
  5. Hotpoint
  6. •
  7. Range
  8. •
  9. Hotpoint RB524 Installation guide

Hotpoint RB524 Installation guide

Howtogetthebesthorn
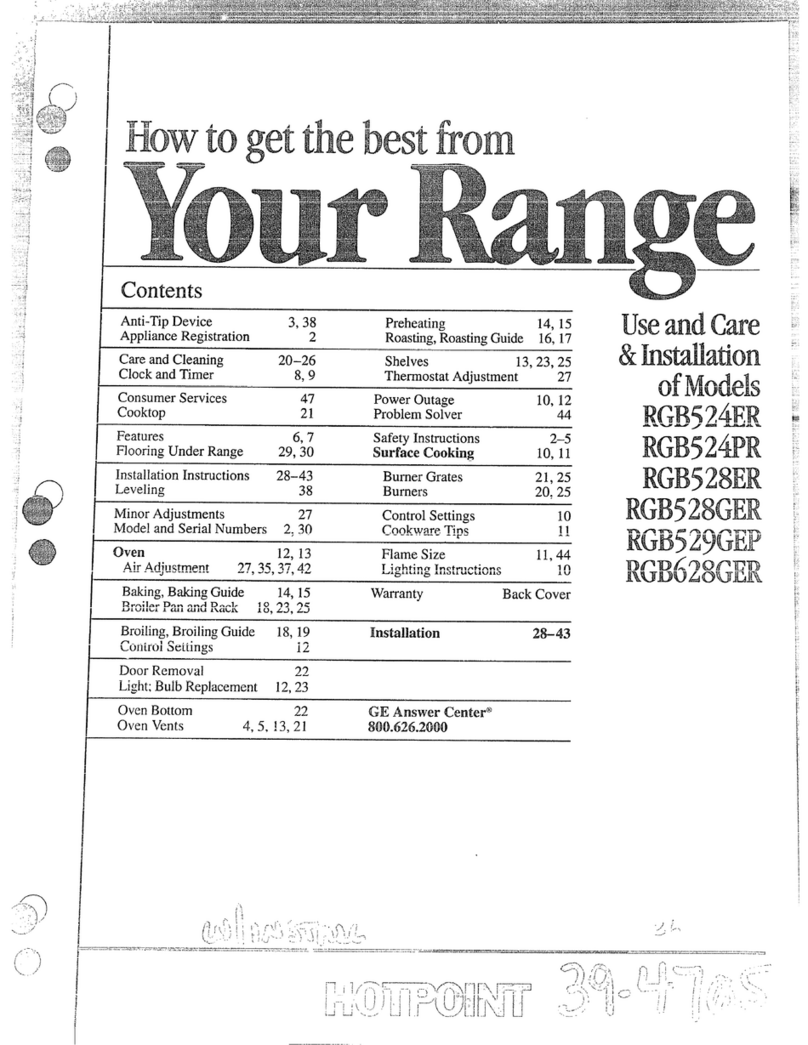
Contents
Ahminurn Foil 4,14,17,18 Roaating 17,18
Anti-1’lpDevice 3,21,27,29 shelves 4,11,13,23
ApplianceR@stration 2Storage Drawer 26
Care and Cleaning 21-26 rimed Baking 15,16
Clockmi 10,11 Oven Vent 26
Cmmrncr services 31 Problem Solver 30
~Phone Numbers 31 Tkmoatat Adjustment-
I?dxllx!$ (47 Do It Yme~ 16
InataIktion W&uctiomJ 27-29 S8fkty ImWucikna 3-5
Leveling 29 Surface Contmk 8-1o
Model &Serial Numbers 2canning Tips 10
oven 11-20 control Stttings 8
-12-14 Cooktop COmpamO“n 8
Broiling 19,20 cookware T’@ 9
COnthmous Cleaning 25 warranty Back Cover
LifkOfYDoor 24
Lighc Replacement la 23 GE Answer Centd
Preheating 13,19 8oo&6.2ooo
Useand Care
&hlstaua
tion
Instructionsfor
Standard
Ckanmodels
RB524
RB525
R13526
RB532
RB533
RB534
RB536
Continuous
Ckanmodels
l’unPo9NT Part no. 164D2966P076
Pub. no. 394740-1 12-94
#pJ~ ~f
AS
Hm4’pusHELPYou...
Before using your range,
read this guide carefhIly.
It is intended to help you
operate and maintain your new
range properly.
Keep it handy for answers to
your questions.
If you don’t understand something
or need more help, write (include
your phone number)
Consumer Afhirs
Hotpoint
Appliance Park
Louisville, KY 40225
t
Wtedownthe model
an serial mlmbersO
Y‘llfidtional*l
?
be the range door or behind
the torage drawer.
The#enumbersare alsoonthe
F
umer Product Ownership
Re “onCard that came with
yo range. Before sending in
this ~please write these
nunibers here:
sf)f@Nulnbeu
Use these numbers in any
+ndence or service calls
~g yourrange.
~
If you received -9A:’
adamaged range...
Immediately contact the dealer (or
builder) that sold you the range.
Save time and money.
Before you request
services..
Check the Problem Solver in the
back of this guide. It lists UUSeS of
minor operating problems that you
can correct yourself.
IFYOU NEED SEIWICE
To obtain servi~ see the Consumer Serviceq page in
the backofthisguidee
We’re proud of our service and want you to bp
pleased If for some reason you are not-with the
seMce you receive, here are 3steps to follou/ for
filrther help.
FIRST, contact the people who seMced your
appliance. Explain why you are not phased. @most
~this will solve the problem
NEXT,ifyou are stiIl not pleasec$write all the .m~
&tails-including your phone number-to: &~)
Manager, Consumer Relations
Hotpoint
Appliance Park
LOuidle, KY 40225
FINALLY,if your problem is still not resolve~ write:
Major Appliance Cunsumer Action Panel
20 North Wacker Drive
Chicago, IL 60606
2,
r
●
‘.&
IMl?0KE4Nf’SAFETYINSTRUCTIONS
Readall hstr@ioIss beftm usingthisappliance
whenusingd-~bask
precautionsshouldbefbbw* indudng
*
folluwin&
Wsethisap@aacedyforits~M
asdedbedinthis guide.
●emyoiglr ispmpedy
grounded by e!g$!%?i
withtheprovidedinstaationinsmctions+
d)onomtuiapttorepdror
yamrramgeunk!ams
M#isguidedmtherserviagahould
re$ixredtoactechniciam
“ AWMING-AQramgw
Cantipandiqjurycouldtin-
preventaecidti -ofthe
raagc+attachittothewauandfborby
.
mtdling theAnti-Tq devicesqpIiwL
Tocheckifthedevice isinstakdand
propedy,reanovethekick
%Iorsmragedrawerand”- !
•onotkave~~ ●nshould
notbeleftfdoneorunattendedinanareawherean
apphce is inuse.‘.h!y shouldneverbe allowed
to sit or standonanypartoftheappliance.
●lMaotaUOwan~ to_, _or~
omthe~=pmwlorsto~kwwor
cOOldOp.They could damage the range and even
tip it over,causingsevereprsonaI injury.
•~~()~m()F~~
CHILDRENSHOULDNOTBESTOREDIN
UBINETSABOVEARNWE ORONTHE
MQMPLMH OFARANGl&CHILDREN
CLIMBINGONTHERANGETO REACH
ITEMS COULDBESERIOUSLYINJURED.
●Neverwear loose-Sttiugorha3@xqJgarInents
whileasimgthe appliance.Becarefulwhen
[email protected]
mabrial amldbe ignited if brought in contact
with hot surfhce units or heating elements and
my cause SWeI’ebuns
recyclethefhxwent lightbillbiaxdiqgto
locd#ateandfederalcode& %
Oist
dhmdydlypdhdders—m
Pordamppotholderson hotsurf&xs
r“
a
mayresultinburnsfkomsteam.Do
notlet potholderstouchhotsurke unitsor
heating elements. Do not use atowel or other
bllllty Cloti
●FOPyoursalkty,neveruseyourappliance for
KE4N’11Si41?ETYINSTRU~ONS
(continued)
•~on@~~***-*~
elements or the interior
~ese SUd~ IIMybe hot
thoughtheyaredarkin mkx.
do nottoti or letclothingor other
materialscontacttheSurfke units,the*
nearbythe surhce unitsor anyinteriorar+aofthe
oww allowsuilkknt timeforooo~ @.
As
●Placetheovenshelfinthedesiredpositionwhik
theovenis COOLIf theshelvesmustbe handled ‘”
whenhogdonotIetpot holdercontacttheheating
elements.
●PuUingoutthesheMtotheshelfstop40ck
is aconvenienceinMing heavyfti.
Itisalsoaprecautionagainstburnsfromtouching
hot surfiwes of the door or oven walls.
Potentially hot surfaces include the coo
facingthecooktop ovenvent_
neartheopeningdxevicesmundti
theedgesofthe doorwindow~metibp
abovethedoor.
Rexnexn& The* surfaceof theovclnmay
be hotwhenthedooris opened.
i!!!!f-
●DontimwatHIJgmaseb
Neverpicknpa pan+mrn
themntrds off.Smothera “ pan
‘r
onasurfacx unitbycoveringthepancum etely
withawell-fittinglid,cookiesheetor flat y.Use
amulti-puqmsedrychemkal or f-- fire
-her”
Fkmillggreaseoutsideapancanbeput by
J
coveringitwithbakingsodaWif availab%by
usingaamulti-m drychemicalorf-type
fm extqudm ●
Flameintheovencanbesmotheredcom*tCly
byclosingthe owndoordbtiqmoff
or byusingam~ti-e dry clwmical @f--
typefireextmpsk
oven ,.
●
StandawayfMmtheq~ *=
themndoor.Hbttim-wM
causeburnstohanc&faceandor eyes.
Do not heatunopenedfoodcmtake=
RessurecouldbWq titie~ “@uld
b= causinganinjury.
Keepthe ovenvent duct umMm@d.
Keepthemn-*~-p+
●~*mk@~- “bagsrnthe
ovq foIlowthemanufWur8z’sdirections.
●DoIlotuseyouroventodrynewspapers.
Ifoverhea* theycancatchfire.
dkmotusetheovenf orastorageamao
Itemsstoredinanovencanignite.
●Donotleavepaperproductsscookingutensils
mfoodin theovenwhennotin use.
●For ~~WUS dean IIBO&&dOltOt US ova
the Cleanerson any Continuo= cleaning
Smfhce&amtinumscleaningsurfacescanbe
identifiedbytheirroughsurke -k
Surthcecookingunits
●UseproperpansHekct w
cookwarehavingflatbottomslarge
enoughtocoverthesurfkceunit
bthg elCmCXlt.
‘fileuseofundersizedcookware
Willexposeaportionofthesm tittiti
contactandmayresultin ignitionof clothing.
Properrelationshipof~ tosurf&xunit
willalsoimproveefficiency.
●Nevm~mveha bee ~ts unattended at
highheatsettiup ~flOVerScausesmokingand
mSpiuovm thatmaycatchonfire.
•~m~~~~~tdudmnot
coveAandarWi@MSIl@*nm&ng
cookingcould-vP-d*g”
.DO~otuseahuAx- f611tolinetie*P
oranywhe=inthtwmu~=des-k
titisgukkhdisuseco uld-tkash~ti
hazardordamage tofheq.
4alycertaimtype$of#=%t@=lc==@
earthenwareorothergiaaedcontainemare
suitablefm cooktop-o~e~ ~Y br~ _
becauseof thesuddendung cin temperature. f
:&
•~~~e poadbwy of-ignitionof
Ilammabiematerialsandspinqp$
thehandleofa
contabershouldbetumed-ti-~roftie
rangewithout extending
“Overtheneal’by surfa=tim
4
●Toavoidthepossibilityof aburnorek@ric
●
●
●
●
.P---
,.
b●
‘%-
sh~ alwayibecertah thatthecontrolsfor
allsurfaceunits areattheoffpitionda
coilsarecoolbeforeattemptingtoliftor ~ernove
aunk
Whenfkmingf*arem*tieh~-
thefanoff. T’hehJfq~my~d
theflame.
Donotimm-=-*~*-f=
Unit&Donotputtheinha-*
Keepaneyeonfb -Mat~m
mediumhighheats
Foodsforfryingshddh8$@=~k
Frostonfrozenf- ormoistureonikesi$f-
cancausehotfattobubbleupandoverthpsides
ofthepm
UseIittk tit fm efktive shalloworde@kt
_FMtie~~Mloftit-~~
Spilloverswhenf@ isadded.
IfacombinatiomofOikOrfWtik~
infryin&stir mgfxhef befm hea~ or$Sfa~
meltslowly.
AlwaysheatMslowly,andwatchasit h@s.
!,
. . .
1
-TURES OF YOUR RANGE
Not all f~tures are on all models.
Ji
1[1
Bmilm Pan and Grid
(on some modeis)
Some mcideh have lift-up
.
Cooktops for easier cleantig.
RB536
RB636
ce may vary)
6
p.
t.
%..-I’M’M’?!’
RB632
RB633
‘‘s
.RB524
.— ——.
RB525
RB526
qxp18ined
Ionpage Explained
on page
4,26
Featwe Index ~otaumows haveaukatum
1Stomge Dr8wer (on some models) 14 OvemVent Located under right rear
*unit.
26
2Aati-’np Labal —15 sUrfkceU* DripP8n$ 4,5,
8-10,22
3Antmp Device
sccw!hlsmationkmc&Mla. 3,21,
27,29 16 Oven Interior Li@t
(on some rnodcla) Comes on
automatically when door is opened
f:- ‘4Bti Element 4,19,
23-25
5WdelandSaiaiNumbem
BAindthcrangedloororbebind
the storage drawer.
21213,
17,20
17 (hem Slwlfsupports
Shclfpoaitiona for cooking arc
suggested in the_ Routing
and Broiling sections.
6Cookto@Afk-Up Cool@op
(on aornc mo&ls) k, 21,22
18 Oven SIMMwith Stop-Locks
(number may vary) 4,11,13,
14,17,23
7Smfkceudthoba 5,8,26
19 B8ke E3emmt May be lifted gently
for wiping oven floor. 4,23-25
8Oven LightSwitch
[onmociel$withoven window) 12
20 Lm4M?oveml)oorwith
BmiI Stop Poaitim Easily removed
for oven Clcanhlg.
24,25
9Ovensetmlob il, la 15,
17,26
10 AutomatkOwn~
cbck81kdMilB8temmer
(on-Imxkla)
10,15,
16,26 21 Brxtiler Panand Gdd
(on some models) 4,17,19,
20,23
11 slBr!hceudtwSl”h@atorL@t 8
12 oven lkmp Ebob 11, 1%
15-17,26
13 ova C@@ L#gbt
(9
*
—
HOW DOESTCOOKTOP COMP!!!!
To OUR OLD ONE? e...
Your new cooktop has electric coil surface @a. The best types of cookare to use, plus heat-up and *
If you are used to cooking with gas burners@ other cool-down times, depend upon the type of burners or
types of electric coo- you wiIl notice @me surface units you have.
~erences when you ~electric coik .
The following chart will heln you to understand the
differences l%twcen electric”c%ilsurface units and any
other type of cooktop you may have used in the past.
lypeof Cooktop 1~ I*it Worlul
scoil
Rsdiant
(Glass Ceramic)
Cooktop
n
Inductioo
o0
Flattenedmetal
tubing containing
electric resistsIMx
wire suspended
over adrip pan.
Electriccds
under aglass-
ceramic cooktop.
Iiiplfieq~
underaglass
Surfhcc.
H@s by direct contact with the pan and by heating the air under the pan. For best
WV fGS~* usc @q~ity PM. El-c coils arc more forgiving of
S~*~~t or =lid @ks. H** Upquicklybutdoes notchange
zaemngsas qwcklyas gasor induction. Electric coils stay hot enough to
tinuecookingforashort time after they are turned off.
$
Httravelsto the glass surfaceandthen to the cookware,sopans must be flat on
bottom fw goodcooking results. The #ass cooktop stays hot enough to
cdntinue *ng * it is tuti off. Rcrnove the pan fkomthesurfaceunit if
yQUwant cooking to stop.
P@a must be made of ferrous metais (metal that attracts amagnet). Heat is
#pducd by amagnetic circuit between the coil and the pan. Heats up right away
a@ changes heat settingsrightaway,likeagas cooktop. After turning the control
0$ the glass cooktop is hot fhxn the heat of the -but cooking stops right away.
Solidmsk
o
@Solid ast iron
disksealedmthe
--*
H~~&ti-=titi ti~m~muthfit ontie_for~
r‘gresuhs. Heats up and cools down more slowly than electric coils. The
@
“stays hot enough to continue cooking after it is turned off. Remove the pan ,
fr(xn the solid disk if youwantthecookingto stop.
Gas Burners
eiiB5 Regular or add Fl~ heat the pans directly. Pan fiatness is not critical to cooking results, but
gas burlwrs use p+s should be well balancd Gas burners heat the pan right away and change
either IX gas hdat settings right away.Whenyouturn the control off, cooking stops right away.
or natural gas.
-ACE CONTROLS
At both OFF and HI the control “clicks” *I position. StitChillg heats tO higher Settings idWiiJTS ahoWS
Youmayhearslight Wking’’aoundsdurill$ aquicker change than switching to alower setting.
cookingJndicatingt hecontroli skeepingthOnit
at the heat level you set.
How to Set the Contmb
F
4Puahtheknob iqandturn *sure you turn control to OFF when you finish
in either &ectio@ to the cooking.
setting you want, ‘l’h@surfhce unit ‘onw indbtor light wiIl gbw
*when ANY heat setting on any surface unit is on.
8
n
CookingGuideUsing Heat Settings
HI-Used to begin cooking or to bring water to aOFF
boil. Reduce hetil setting *r water kils.
Medium High-@etting hal~ay between ~and
r
Lo -““
MEI)) Maintains afast boil on large amounts of food. ●
MEIkSaut6 and_ keeps food at ame@urn I
boil or simmer.
Medium Low-(Setting haMuay between @and
LO) Cook after starting at HI; cooks with li~ water \
mdiunl~g i
●II
●
Medium
High
inciwered pan. -Mm
LO-Used-for long slow cooking (sirnrnerir$) to NOTE The surface unit “on” indicator light may
tenderize and develop flavors. Use this se- to melt glow between LO and OFF but there is no power
butter and chocolate or to keep foods warm. to the surface units.
Light Over the S-e hits (onstlme models)
The switch must be push@ held for sevmal stmmds and released for the
light to come o~
COOIKVVAREm
Cookwm
Use medium- or heavy-weight cookware. Alu@inum R#GHT
cookware cmduc$s heat faster than other met#ls.
Cast-iron and coated cast-iron cookware are s@w
to absorb he@ but generally cook evenly at low to
medium heat se-. Steal ~my cook uX&vCIdy
if not combined with other metak
For beatcookingredts pnsshould~Moqti
bottom.MatcMxesizeoftheSau=pantothe$izeof Notoverlinch
thesurfaoeunit.’I’ hepaaahoddn otextendowti
edge ofthesurfkceunitmorethan1inch.
WRONG
Over 1inch
Deep Fat Frying
DonotovGrfill coCdm?arewithfat thatmayap@mwb*fd
Frosty foods bubble_ y. W* food frjing at high temperatures.
Kceptherange andtid-ti~.
Wok Coding
WerecOmmdtMtyOu
use oniy aflat—b@Omed
wok They are available
at your local retail store.
Do not uaewoks tkt have
support rhgs. useof these types
*
of wok with or without the ring .
in place, can be dangerous.
Placiu the MjZover the surhcc
unitwiilcauseibuild-upof heat that will damage
the porcelain cooktop. Do not try to use such woks
without the ring. You could be seriously burned if
the wok tipped over. 9
HOIMECANNINGTIPS
Canning should be done on surface @@ @ly.
Pots that extend beyond one inch of surface @it’s
dlippanarenot rwmmdedformostsurfacp coo~
However, when canning with water-bath or #ressum
canner, larger-diameter pots may be used Ti+isis
because boiling watertemperatures(even unkier
pressure) are not harmful to cooktop surface$
surrounding the surface units.
e’
HOWEVER, DO NOT USE LARGE DIAMETER “
CANNERS OR OTHER LARGE DIAMETER POTS
FOR FRYING OR BOILING FOODS OTHER THAN
W-. Most syrup or sauce “
mutum+dalltypes
of “~k at temperatures much higher than
boiling water. Such temperatures could eventually
harm Cooktopsurfaces surrounding surface units.
Observethe Following Points in C@ming
l. Besurethecanncr fitsoverthecenter of*
surface unit. If your range or its location
snot
allow the canner to be centered on thes Unig
use sxnailerdiameter pots for good cannin$ results.
2. For best resul~ use canners with tit bottqms.
Canners with flanged or rippled bottoms (+ften
found in enamelware) do not make good cfmtact
withthesurfkce unitandtakc alongtimeto
boil water.
ni2!!fu2!!!!l
Flat-bottomedCaIuwm am mumnddd
3. When_ usc recipes and procedures fkom
reputable sources. Reliable recipes and produres
are available horn the manufacturer of your canneq
manufacturers of glass jam for canning, such as
Ball and Kerq and the United States Department of
Agriculture Extension Service.
4. Remember that canning is aprocess that generates
large amounts of steam. To avoid bums from steam
or hea~ be careful when canning.
NOTE If your house has low voltage, canning may
take longer than expecte~ even though directions
have been carefully followed.
The process time will be shortened by:
(1) using apressure canner, and @
(2) startkg with HOT tap water for fhstest heating
of large quantities of water.
AUTONfik~C TIMERS AND CLOCK
(onsome models)
The Clock
Tosetthecl~push theknobinandtum tl)eckk
hands tothecOrrect time. TheminUte*@r 12
willmovealso. LcMheknoboutJhenturnthleminute ‘u-’
%A
timer pointer to OFF.
,
The MinuteTimer
Theminutetimerhas beencOmMnedwith*~ To aet the minute timer, turn the center knob,
clock. Useittotimeall your-*g without pushing &wtil the pointer reaches number
operations. You’ll mcognke the minute timq as the of minutes you wish to time. (Minutes are mark~
pointer which is -erent in color and shape than the up to 60, in the center ring on the clc@.) At the end
clock hands. of the set time, abuzzer sounds to tell you time is up.’ e
Turn the knob, without pushing h~~ ~ pinter
reaches OFF and the buzzer stops.
“Questions and Answers
Q.Must the clock beseton the correct time $clay Q. Can Ichange the clock while I’m ‘1’imeBaking in
when Iwish to use the sutomatk timer fw i$aking? the oven?
tLYes, ifyouwishtoset the DELAY START(pn A. The time of day on the clock should not be changed
some models) or the SlllP TIME dials to ~on during any program that uses the oven timer. You
and Offat set times during timed functions. must either stop those programs or wait until they
Q. Can Iuse the minute timer&wing oven co@ng? are finished before changing the time.
A. The minute timer can be used during any c@dng
function. The automatic them (DELAY STJ%RT
and STOP TIMEdials) areusedwith the TI$#ED
BAKE function only.
USINGYOUR OVEN
Before Using Y-Oven
LLook at the controls. Be sure you understaz@how to 2. Check the oven interior. Look at the shelves. Take a
set them properly. Read over the directions f~ the practice run at removing and replacing them
Automatic Oven T-r so you understand itq use properly, to give sure, sturdy support.
with the controls. 3. Read over the information and tips that follow.
4Keepthisguide handy soyoucanreferto i~espdally
during the iirst weeks of using your new range.
Oven Controls
Somemodels
have 1oven control ~w
TEMP.Othermodels have2c0ntrol knobs—@ -m
ovENsETandthe oVENTEJUP. m
The OVEN SETimObhasseUings for~
TIMED ~BROIL and OFF.
The OVEN IXhSPlmobmaintains thete ture
?you sc$ hW- (MO’’F.)to BROIL (550 .). “e” W-
OVENTEMP
~.7. ●
#@
m!!
.
2q, “●489
.8
TheovencycMnglight @owauntiltheowmre4che$
yoursekctedtempemtuMhengo$sabldo!With --- may vary.)
the oven clement(s) during cooking.
Oven Shelves
l%eshdvesare d$dgned-~so t
r
whenpkedcormctiy ontheshdfsu- ey
Wiustopbefimecmnbgc-pbtdyoatikolnthe
oven@uiVrillnottiitwhenrem ovbgfd@”bm
or placing food on -
when placing cookwamona she~ptdlthe shclifoutto
dub ?~thesheifsuppmL Plaoethecookwbmon
theshe thenslidethe shelf backintothe over$.lllis
Toreplac qpiaceth eshelfonthe
shelf supportwiththestop-locks
(the curved extensionof sh@
-W=d-timofti
overLTitupfront andpushshelf
toward the backofthcovcnuntilit
WF@ tie b~p on the shelf suppofi Then lower
thcfrontoftheshelf andpushitallthe wayback
willehiinatemachi
ngintothehotwm. (Continwinmplge)
To m!movethe8helWafrolnkWenpullthesheJf
towardyouJiltthefmntendupwardandpullth e$helfow 11
I
USINGYOUR OVEN
(continued)
Shelf Positions
Theoven bfour ahclf supports identified in this
illustration as A(bottom), B, Cand D(top).
Shelf positions forcookingaresuggcs!edin@e
Baking Roaating and Broiling sections.
Oven Light (on some models)
The light comeson a@matkWy when **
door is opemed On models with anoven wh$dow,
Utie*ti~=tieli@tadoffwMnti
door is closed.
BAKING
Your oven temperature kcOntmWd very acqbmtely NOTE When the oven is ho~ the top and outside
uainganovcn mlltrolsyatem. wmcomme@that surfacea of the range get hot too.
you operate the raqe faa numberofwcekmaing the
timegivcnon recipeaasa guide to become f+miliar
with your new oven’s @ormmce .Ifyouth@an
adjua@wnt is mxxsary, acethe Adjust the Olwm
Thmo@ataectiorL Itgiveseaay Dolt Y~~
instr@ions onhuwtoa@lsttWhe rmoatat
Howto SetY-Rm@brMdq
To ●void poaaible b- place the shelv= @h
Correctposition bcfomyollturn theovaon=
l. TumtheovBN SETknob(onsomcmod@a)
to BAKEandthe OVBNTEMPknobtotiie
tempmture ya desire.
2*Checkfoodfordonemas at~tim
recipe. cook longer if ncccaaq.
OWENSET OVEN TEMP
a@O*.%% ●400
@
●
280.”●480
●●
aoOm ●-
WAA ●i
3. Turnthe OVEN SETlmob(onaOmC_)
andtheovBNTEMPknob tooRFdt4cJJ @ob appcwance -y V@
remove foods.
u
Oven Shelves
Arrange the oven
shelf or shelves in
the desired locations
while the oven ia
cool. The correct
shelf position
depends on the kind
of fd and the
browning desird
As ageneral rule,
IShelf Position I
IAngel food cake 1A I
IBiscuits or muffins IBorC I
Icookies or cupcakes IBorC I
IBrownies IBorC I
ILayer cakes IBorC I
place-most foods in the middle of the ove~ on eithm IBundt or pound cakes 1AorB I
;helf position Bor C. See the chart for sugges~
shelf pOSitiOIXLBwill be used more than CIPicsorpksheils IBorC I
iFrozen pies IA(on cookie sheet) I
Icasseroles IBorC I
Roaating IAor BI
Preheating
Preheat theoven iftherecipe calls fiiLPrehei$rneans Preheating is nwessary for good results when baking
bringing the oven up to the specified ~e bcfm cakesLcookies, pastry and breads. For most casseroles
putting foodintheoven. Topre~scttheoveln atthe and roas@ preheating is not neceswy. For ovens
~-~~a~b~ without apreheat indicator light or tone, preheat
doesnotsh&tenpreheat time.- - - 10 minuk Mter the oven is-@heat@ place the food
in the oven as quickly as possible to prevent heat
flom escapkg.
Baking Pans Pan Placement
For even cooking and proper browning there must be
enough room for air circulation in the oven. Baking
reaukswillbebetterifbakingp ansarecenteredas
much as possible rather than being placed to the tint
Ortotheback of theovm
Uaethepmperbakingpadh etypeoffiniah the
v%
pandeterminesthe amoantofbmwning that “loccuz
“Dar~rough ordullpansabaorb heatresultin$ina
browner, crisper mat. Uae this type for pica.
“Shiny,brightandamoothpansreflewwting
infighter, moreM*-ocakea*
Cookiesrequire thistypeofpam
Pam should not touch each other or the walls of the
overLAllow 1- to M4nch apace between pans as well
asikomtheback of theov~the doorandthesik.
Ifyouneedto uaetwoshelv* Stagger tie~m
one is not directly above the other.
●G~ baking diahesalaoabaOrbheat WhenM
inglaaabaking diahe&mducethe—pemtu@
by 25%
13
II II
.
BAKING
(continued)
Baking Guides
When using prepared baking mix= foIlow package recipe or instructions
for the best baking results.
cookies
When baking cookies, flat cookie sheets (w$thout
sides) produce better-looking cookies. CO@ies baked
in ajelly roll pan (short sides all around) *y have
darker edges and pale or light browningmay occur.
Do not usc acookie sheet so large that it toqches the
walls or the door of the oven. Never entirely cover a
shelf with alarge cookie sheet.
For best resul@ use only one cookie sheet hthe oven
at atime.
Pies
For bcstresul~bakepies in@mughordullpans When baking ~warped or bent pans will cause
toproduceabrowner ,crisper crust. Frozen ●CSin foil
&uneven baking results and pooriy shaped products.
Pansshotddbe piacedonanaluminum “sheet Acakebaked inapanhrgerth antherecipe
for baking since the shiny foil pan reflects *t away recommends will usually be crisper, thinner and drier
fkom the pie ~, the cookie sheet hel~ *it thanitshouldbe. If baked inapansmallerthan o
recomme~
it may be undercooked and batter may
overflow. Check therecip tomakesure thepansize
usedistheone recommended
AluminumFoil
Never entirely cover ashclfwith aluminum foil. This
Willdisturb theheatcirdation andresultiqpoor
baking. Asmallersheetof foilmaybeusedBo ciatia
spilkwer by placing it on alower shelf seve@ inches
below the food.
Don’t Peek
Setthetimcrforthc estirnatcd-~_mddo
not open the door to look at your fd Most recipes
provide minimum and *- baking tinles such
as “bake 30-40 minutes.”
DO NOTopenthc doortoch@@tie
minimum time. Opening the oven door frequently
during cooking allows heat to escape and makes
_times longer. Your baking results may also ‘@
be affected
14
I
TliMEDBAKING
(on some models)
How to Time Bake
Your oven can beset to turn on and off autom@aliy.
NOTE ~fore be@nnin& make sure the OVC4clock
shows the correct time of day.
u!
How to set hnmedbte Start and ~tOJIUItiC stop
To avoid tile ~#ace theShChS in
the correct position before you turn the oven a.
Theovenwill turnon” unmdately, and cook f~ a
selected length of time. At the end of Cook Tx, the
oven will turn off automatically.
NOTE To start cooking immediately and ~off
automatically, you must turn the OVEN SET
knob to TIMED BAKE.
mm mvmm
(z (~
?Nllmm
LTosetthc St@ Tii, mashintheknobonthe
3. Remove the food horn the oven. Remember, foods
that arc left in the oven continue cooking after the
controls are off.
NOTE: Foods that are highly perishable, such as
rnil~ e= fi@ stuflh~ poultry and pork should
not be allowed to sit for more than one hour before or
after cooking. Room temperature promotes the growth
of harmful bacteria. Be sure that the oven light is off
because heat fromthebulbwill speed harmful
bacteria growth.
(Cmzinuednmpulgl?)
STOP TIMEaialand-mthe pointer tothe@ne
you want the oven to turn ti, fm example 6@0.
The DEIAYS’MKMialshouldbeatthesqne
position asthetimeofday ontheclock.
ovENsE’r IOVENTEMP
2.Tllx’ntheovENsBTknobtoTrMBDBAKQ’Ikn
theoV’E?WTE!MPknobtothedeaircdoven
temperate, forexample 25(Y’F. The oven I@ @art
.
unmediwly, continue tocookforthe~
amount of timq tkn shut (m M0matk4y.
ls
TIMEDBAKING
(continued)
HOW to&!t Dday Start and Automatic Stop
To avoid possible b- place the shelves in
the correct position before you turn the oven on.
You can set the oven control to &lay-at@ cook for a
specific length of time and then turnoff automatically.
NOTE: You must use the TIMED BAKE setting.
1. To set the Start Tree, push in the knob on the
DEXAY START dial and turn the pointer to the
time you want the oven to turn o%for example 3:30.
2. To set the Stop Time, push in the knob on the
STOP TIME dial and turn the pointer to the time
you want the oven to turnoff, for example 6:00.
This means your recipe called for 2%hours of
baking time.
The time on the STOP TIME dial must be later
than the time shown on the range clock and the
DEIAY START dial.
3. Turn the OVEN SET knob to TIMED BAKE. Turn
the OVEN TEMP knob to the desired temperature.
4. When cooking is complet~ turn the OVEN SET
knob (on some models) and the OVEN TEMP
knob to OFF and remove the food from the
oven. Remember, foods that are left in the
oven continue cooking after the controls are off.
NOTE:
QFoods that are highly perishable, such as rnil~
e= fish, stuffings, poultry and pork should not
be allowed to sit for more than one hour before or
after rooking. Room temperature promotes the
growth of harmful bacteria. Be sure that the oven
light is off because heat from the bulb wiIl speed
harmfid bacteria growth.
‘The oven indicator light(s) at the TIMED BAKE
setting may work diHerently than they do at the
BAI@ sehg. .-
ADJUSTTHE OVEN THERMOSIXT-DO ITYOURSEW! o
OVENTEMP OVEN TEMP
3ooe.3P.#OFF
oQ
●
2$0.’
II
●4s0 r
●●s~
200° ●=%@
I
W& ●~OIL *c@
es
FrontofOvenTempKnob FrontofOven TempKnob
(onsome models) (onsome models)
(ISnobappearance may vary)
You may f=l that your new oven cooks differently
than the one it replaced. We recommend that you
use your new oven for afew weeks to become more
familiar with i~ following the times given in your
recipes as aguide.
If you think your new oven is too hot or too col~
you can a@st the temperature yourself. If you
think it is too ho$ adjustthethermostat to make it
cooler. If you think it is too cool, adjust the thermostat
to make it hotter.
We do not recommend the use of inexpensive
thermomete~ such as those found in grocery stores,
to check the temperature setting of your new oven.
These thermometers may vary 20=40 degrees.
Pointer
BackofOven TempKnob
(onsome models)
Pointer
BaokofOvenTemoKnob
(onsome modds)
To A~ust the Thermostat
1. pull the OVEN TEMPknob off the@ look at
the back of the knob and note the current setting
before makingany adjustments.
2. Loosen both screws on the back of the knob.
3. To increase the oven temperature, move the
pointer 1notch toward the words “MAKE
HOH.”
To decrease the oven temperature, turnthepointer
1notch toward the words “MAKE COO~R.”
Each notch changes the temperature by 10 degrees
Fahrenheit.
4. Tighten the screws.
5. Replace the knob, matching the flatareaof the ‘t
knob to the shaft.
16
ROASTING
C
.
,..
.
Roasting is cooking by dry heat. Tender meat or
poultry can be roasted uncovered in your oven.
Roasting temperatures, which should be low and
steady, keep spattering to aminimum
Roasting is really abaking procedure used for meats.
Therefore, oven controls are set to Baking or Timed
Baking (on some models). (You may hear aslight
clicking soun~ indicating the oven is working
properly.) Timed Baking (on some models) will turn
the oven on and off automatically.
Most meats continue to aok slightly while standing,
after being removed from the oven. Standing time
recommended for roasts is 10 to 20 minutes. This
allows roasts to firm up and makes them easier to
carve. Internal temperature will rise about 5° to 10”F.;
to compensate for temperature rise, if desired remove
roast from oven sooner (at 5° to 10”F. less than
temperature in the guide).
Remember that food will continue to cook in the
hot oven and therefore should be removed when
the desired internal temperature has been reached.
1.Place the shelf in Aor Bposition. No preheating
is necessary.
2. Check the weight
of the meat. Place it fat-
side-up (or poultry
breast side-up), on a
roasting grid in a
shallow pan. The
melting fat will baste
the meat. Select apan as
close to the size of the meat as possible. (The
broiler pan with grid is agood pan for this.)
OVENSEr
OFF
OVENTEMP
3s0
(Knob appearance may WXY)
3. Turn the OVEN SET knob (on some models) to
BAKE and the OVEN TEMP knob to the
temperature you desire.
4. After roasting is complete, turn the OVEN SET
knob (on some models) and the OVEN TEMP knob
to OFF.
Use of Aluminum Foil
You can use aluminum foil to line the broiler pan.
This makes clean-up easier when using the pan for
marinating, cooking with hits, cooking heavily
cured meats or basting food during cooking. Press
the foil tightly around the inside of the pan.
(continued neatpage)
o
17
I*
is
—
ROASTING
(continued)
Questions and Answers
Q. Is it necessary to check for doneness with aQ. Do Ineed to preheat my oven each time Icook
meat thermometer? aroast or poultry?
A. Checking the finished internal temperature at A. It is not necessary to preheat your oven.
the completion of cooking time is recommended.
Temperatures are shown in the Roasting Guide. Q. When buying aroas~ are there any special tips
that would help me cook it more evenly?
For roasts over 8lbs., check with thermometer
at half-hour intexvals after half the cooking time A. Yes. Buy aroast as even in thickness as possible,
has passed. or buy rolled roasts.
Q. Why is my roast crumbling when Itry to Q. Can Iseal the sides of my foil “tent” when
carve it? roasting aturkey?
A. Roasts are easier to s~iceif allowed to cool 10 to ASealing the foil will steam the meat. Leaving it
20 minutes after removing from oven. Be sure to unsealed allows the air to circulate and brown
cut across the grain of the meat. the meat.
ROASTINGGUIDE
Frozen Roasts
Frozen roasts of beef, pork lamb, etc., can be started Make sure poultry is thawedbefore roasting. Unthawed
without thawing, but allow 10 to 25 minutes per poultry often does not cook evenly. Some umunercial
pound additional time (10 minutes per pound for fkozenpoultry can be rooked successfully without
roasts under 5pounds, more time for larger roasts). thawing.Follow the directionsgiven on the packagelabel. o
Oven ApproximateRoastingTime Internal
Temperatum Doneness in Minutes per Pound Temperatum ‘F.
,
Meat
Tendercuts;rib,high quality
sirlointip, rumpor top round*
Lamblegor bone-inshoulder”
Veal shoulder,legor loin*
Porkloi~ rib or shoulder*
Ham,precooked
Pod@
Chickenor Duck
Chickenpieces
Turkev
325°
325°
325°
325°
325°
325°
350°
325°
Rare:
Medium:
WellDone:
Rare:
Medium:
WellDone:
WellDone:
WellDone:
ToWarm:
Well Done:
Well Done:
Well Done:
3t051b*
24-33
35-39
40+5
21-25
25-30
3(L35
35-45
3$45
6to8Ibs.
18-22
22-29
30-35
20-23
X48
2&33
3040
30-40
17-20 minutesper pound (anyweight)
3to 5lbs. Over 5lbs.
35-40 30-35
3540
10to 15lbs. Over 15 M.
1s25 15-20
140°-1500’#’
150°–1600
170°-1850
140°-1500t
150°-1600
170”-185°
170°-1800
170°-1800
115°-1200
185°-1900
185°-1900
In tldglx
185°-1900
I11
*For&eless rolledroastsover6inchesthick,add 5to 10minutesper poundto timesgivenabove.
tThe U.S. Department of Agriculture says “Rare beef is popular, but you should know that cooking it to only 140°F. means
some food poisoning organisms may survive.” (Source: Safe Food Book. Your I@@ Gu
.ide. USDA Rev.June 1985.)
18
-———-———
———_________.
BROILING
Broiling is cooking food by intense radiant heat from
the upper element in the oven. Most fish and tender
cuts of meat can be broiled. Follow these directions to
keep spattering and smoking to aminimum.
Turn the food only onw during broiling. Time the foods
for the first side according to the Broiling Guide.
Turn the foo~ then use
the times given for the
second side as aguide
to the preferred doneness.
1. If themeat has fat or gristle around the edge, cut
vertical slashes through both about 2inches apart.
If desir~ the fat maybe trirnme~ leaving the layer
about 1/8 inch thick.
2. Place the meat on the broiler grid in the broiler pan.
Always use the grid so the fat drips into the broiler
pm, otherwise the juices may become hot enough to
catch on fire.
3. Position the shelf on the recommended shelf
position as suggested in Broiling Guide.
4. Leave the door open to
the broil stop position. The
door stays open by itself, yet
the proper temperature is
maintained in the oven.
5. Turn the OVEN SET (on some
models) and the OVEN TEMP knobs to BROIL.
Preheating the elements is not necessary.
6. When finished broiling, turn the OVEN SET knob
(on some models) and the OVEN TEMP knob to
OFF (depending on your model). Serve the food
immediately, leaving the broiler pan and grid outside
the oven to cool during the meal for easiest cleaning.
Use of Aluminum Foil
You can use aluminum foil to line your broiler pan
and the broiler grid. However, you must mold the foil
tightly to the grid and cut slits in it just like the grid.
Without the slits, the foil will prevent the fat and meat
juices from draining to the broiler pan. The juices
could become hot enough to catch on fire. If you do
not cut the slits, you are frying, not broiling.
Questions &Answem
Q. Should Isalt the meat before broiiing?
A. No. Salt draws out the juices and allows them
to evaporate. Always salt after cooking. Turn
the meat with tongs; piercing the meat with a
fork allows juices to escape. When broiling
poultry or fiib brush each side often with butter.
Q.why are my meats not turning out as brown as
they should?
AIn some area the power (voltage) to the oven may
be low. In these cases, preheat the broil element for
10 minutes before placing the broiler pan with the
food in the oven. Check to see if you are using the
recommended shelf position. Broil for the longest
period of time indicated in the Broiling Guide.
Turn the food only once during broiling.
Q. Do Ineed to grease my broiler rack to prevent
meat from sticking?
ANo. Thebroiler grid is designed to reflect broiler
heat, thus keeping the surface cool enough to
prevent the meat from sticking to the surface.
However, spraying the broiler grid lightly with a
vegetable cooking spray before cooking will make
clean-up easier.
Q. When broiling, is it necessary to always use a
grid in the pan?
AYes. Using the grid suspends the meat over the
pan. As the meat cooks, the juices fall into the pan,
thus keeping meat drier. Juices are protected by the
grid and stay cooler, thus preventing excessive
spatter and smoking.
(continued ne.xtpuge) ●
19
BROILING GUIDE
When arranging food on pan, do not let fatty t
edges hang over the sides. These could soil the
oven bottom.
Frozen steaks can be broiled by positioning
the oven shelf at next lowest shelf position and
increasing cooking time given in this guide
1?4times per side.
Always use abroiler pan and grid. They are designed ●
to minimize smoking and spattering by trapping
juices in the shielded lower part of the pan.
The oven door should be open to the broil stop ●
●
●
●
—
position.
If desired marimte meats or chicken before
broiling, or brush with barbecue sauce M5
to 10 dnutes only.
Quantity and/or
‘I%ickness Shelf
Position
c
First Side
Time, Minutes
4%
Second Side
Time, Minutes
Food Comments
Bacon 1/2 lb. (about 8
thin slices) 4?4 A.nange in single layer.
Ground Beef
Well Done 1lb. (4 patties)
1/2 to 3/4 inch thick Space evenly.
Up to 8patties take about same time.
Steaks less than 1inch thick cook
through before browning. Pan frying
is recommended.
Slash fat.
c10 7
BeefSteaks
Rare
Medium
WellDone
Rare
Medium
WellDone
1inch thick
(1 to 1%lbs.) c
c
c
c
c
c
6
8
12
10
15
25
5
6
11
7-8
14-16
20-25
1%inch thick
(2 to 2?4Ibs.)
1whole
(2 to 2?4Ibs.),
split lengthwise
A35 l&15 Reduce time about 5to 10 minutes
per side for cut-up chicken. Brush
each side with melted butter. Broil
skin-side-down first. o
Space evenly. Place English muffhs
cut-side-up and brush with butter,
if desired.
Bakery Products
Bread (Toast) or
Toaster Pastries
Endish MuffIns
2to 4slices
1pkg. (2)
2(sDlit)
Cor D
Cor D
1%=2
3-4
1/2
\*,
24
(6 to 8oz. each)
bbster Tails B13-16 Do not
turn over. Cut through back of shell. Spread
open. Brush with melted butter before
broilin~ and after half of broilirw time.
l-lb. fillets 1/4 to
1/2 inch thick c5 5 Handle and turn very carefully. Brush
with lemon butter before and during
cooking, if desired. Preheat broiler to
increase brownin~.
Ham slices
hecooked) 1inch thick B8 8 Increase time 5to 10 minutes per side
for 1%inch thick or home cured ham.
Pork Chops
WellDone c
B10
13
2(
2(
ah
—
1/2inch thick)
Linch thick),
lut1lb.
10
13 Slash fat.
LambChops
Medium
Well Done
Medium
Well Done
c
c
c
B
10
12
14
17
9
10
12
12-14
Slash fat.
2(1 inch thick),
about 10 to 12 oz.
2(1% inch thick),
about 1lb.
Wienersand
similar precooked
sausages,
bratwurst
l-lb. pkg. (10) c61-2 [fdesireG split sausages in half
lengthwise;cut into 5-to 6-inch pieces.
20

Other manuals for RB524

1

This manual suits for next models

9

Other Hotpoint Range manuals

Hotpoint SA2840P Installation and operation manual

Hotpoint

Hotpoint SA2840P Installation and operation manual

Hotpoint RB790 - 30 in. Electric Range User manual

Hotpoint

Hotpoint RB790 - 30 in. Electric Range User manual

Hotpoint RB734J User manual

Hotpoint

Hotpoint RB734J User manual

Hotpoint RA513 Installation instructions

Hotpoint

Hotpoint RA513 Installation instructions

Hotpoint RB754 User manual

Hotpoint

Hotpoint RB754 User manual

Hotpoint RGB744 Installation guide

Hotpoint

Hotpoint RGB744 Installation guide

Hotpoint RGB790SEP User manual

Hotpoint

Hotpoint RGB790SEP User manual

Hotpoint RGB747GER Installation guide

Hotpoint

Hotpoint RGB747GER Installation guide

Hotpoint RA720 Original instructions

Hotpoint

Hotpoint RA720 Original instructions

Hotpoint RGA724EKWH - R 24 Inch Gas Range User manual

Hotpoint

Hotpoint RGA724EKWH - R 24 Inch Gas Range User manual

Hotpoint RS734GP Specification sheet

Hotpoint

Hotpoint RS734GP Specification sheet

Hotpoint RB632GJ Installation instructions

Hotpoint

Hotpoint RB632GJ Installation instructions

Hotpoint RGA820 Original instructions

Hotpoint

Hotpoint RGA820 Original instructions

Hotpoint RB 735 User manual

Hotpoint

Hotpoint RB 735 User manual

Hotpoint RGB745DEP Manual

Hotpoint

Hotpoint RGB745DEP Manual

Hotpoint RGB532BEAAD Service manual

Hotpoint

Hotpoint RGB532BEAAD Service manual

Hotpoint RGA520EW User manual

Hotpoint

Hotpoint RGA520EW User manual

Hotpoint RB800BJBB User guide

Hotpoint

Hotpoint RB800BJBB User guide

Hotpoint RA824DDWW User manual

Hotpoint

Hotpoint RA824DDWW User manual

Hotpoint RF43 Installation instructions

Hotpoint

Hotpoint RF43 Installation instructions

Hotpoint RGB526DETBB User instructions

Hotpoint

Hotpoint RGB526DETBB User instructions

Hotpoint RF725GP Installation instructions

Hotpoint

Hotpoint RF725GP Installation instructions

Hotpoint RGB532BEAWH Service manual

Hotpoint

Hotpoint RGB532BEAWH Service manual

Hotpoint RGB744GEN Installation guide

Hotpoint

Hotpoint RGB744GEN Installation guide

Popular Range manuals by other brands

Caloric CST 6003 owner's manual

Caloric

Caloric CST 6003 owner's manual

Galaxy 790.6004 Series Use & care guide

Galaxy

Galaxy 790.6004 Series Use & care guide

Frigidaire FGEF302TN F Installation guidelines

Frigidaire

Frigidaire FGEF302TN F Installation guidelines

AGA Total Control ATC3 installation guide

AGA

AGA Total Control ATC3 installation guide

Falcon Classic Deluxe 110 Dual Fuel User guide & installation & service instructions

Falcon

Falcon Classic Deluxe 110 Dual Fuel User guide & installation & service instructions

Roper FGS397X Use and care guide

Roper

Roper FGS397X Use and care guide

U.S. Range C0836-17 Specifications

U.S. Range

U.S. Range C0836-17 Specifications

GE RB533 owner's manual

GE

GE RB533 owner's manual

ITW MBM MINIMA Series Installation, use and maintenance instructions

ITW

ITW MBM MINIMA Series Installation, use and maintenance instructions

Crosley CRG3120LWE installation instructions

Crosley

Crosley CRG3120LWE installation instructions

LG LDG3037ST owner's manual

LG

LG LDG3037ST owner's manual

Whirlpool RFOIOEXR Use & care guide

Whirlpool

Whirlpool RFOIOEXR Use & care guide

Casselin CCAP1G manual

Casselin

Casselin CCAP1G manual

Lotus CF4-68ET Installation and operating instructions

Lotus

Lotus CF4-68ET Installation and operating instructions

Frigidaire FEF388CJSB owner's guide

Frigidaire

Frigidaire FEF388CJSB owner's guide

Jenn-Air JDS9860AAP installation manual

Jenn-Air

Jenn-Air JDS9860AAP installation manual

AMERICANA Americana AGBS300P Installation and owner's instructions

AMERICANA

AMERICANA Americana AGBS300P Installation and owner's instructions

Maytag MER5570BCQ user guide

Maytag

Maytag MER5570BCQ user guide

manuals.online logo
manuals.online logoBrands
  • About & Mission
  • Contact us
  • Privacy Policy
  • Terms and Conditions

Copyright 2025 Manuals.Online. All Rights Reserved.