manuals.online logo
Brands
  1. Home
  2. •
  3. Brands
  4. •
  5. Hotpoint
  6. •
  7. Washer
  8. •
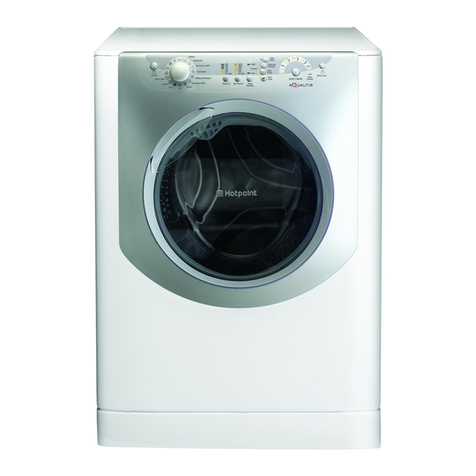
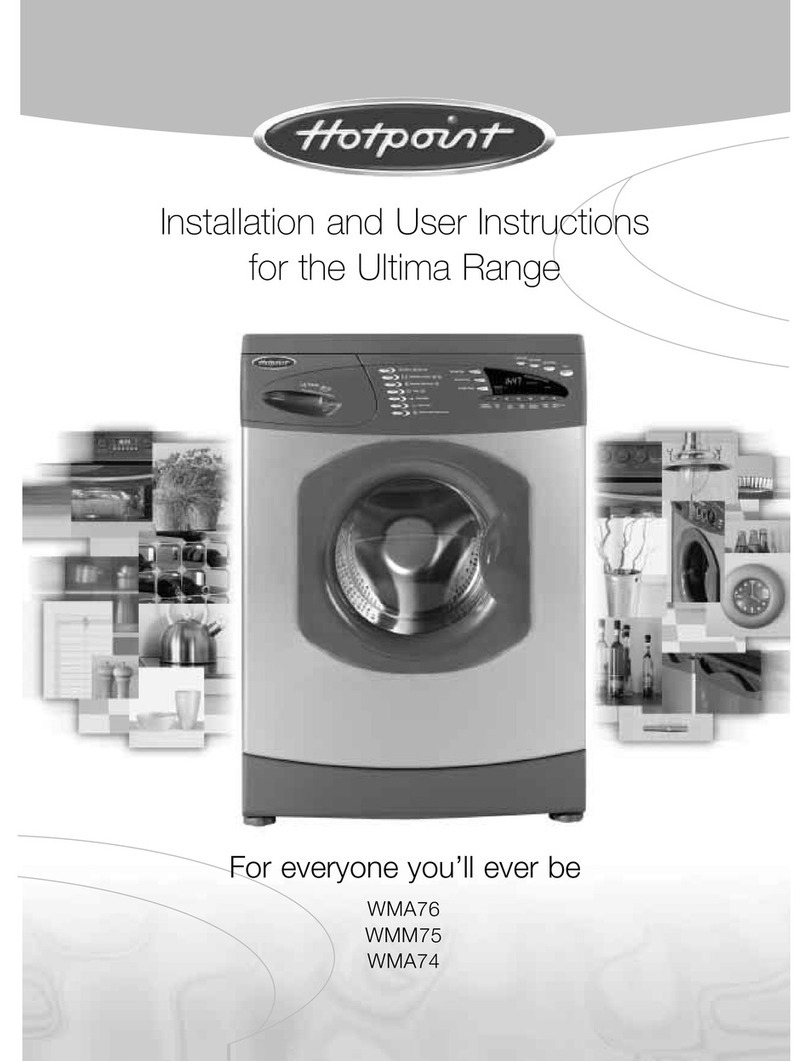
  9. Hotpoint AQUALTIS AQLF9D 69 U Instructions for and... User manual

Hotpoint AQUALTIS AQLF9D 69 U Instructions for and... User manual

Other manuals for AQUALTIS AQLF9D 69 U Instructions for and...

2

This manual suits for next models

1

Other Hotpoint Washer manuals

Hotpoint RSG 864 J User manual

Hotpoint

Hotpoint RSG 864 J User manual

Hotpoint Aqualtis AQ113L 297I User manual

Hotpoint

Hotpoint Aqualtis AQ113L 297I User manual

Hotpoint Style WMYL 8352 User manual

Hotpoint

Hotpoint Style WMYL 8352 User manual

Hotpoint ECOT7F 1292 User manual

Hotpoint

Hotpoint ECOT7F 1292 User manual

Hotpoint WLW3505A User manual

Hotpoint

Hotpoint WLW3505A User manual

Hotpoint BHWMD 732 User manual

Hotpoint

Hotpoint BHWMD 732 User manual

Hotpoint AQUALTIS AQ7F 29 I User manual

Hotpoint

Hotpoint AQUALTIS AQ7F 29 I User manual

Hotpoint WMD 940 P User manual

Hotpoint

Hotpoint WMD 940 P User manual

Hotpoint ARTL 104 User manual

Hotpoint

Hotpoint ARTL 104 User manual

Hotpoint WMEUF 944 User manual

Hotpoint

Hotpoint WMEUF 944 User manual

Hotpoint Ultima LCD User manual

Hotpoint

Hotpoint Ultima LCD User manual

Hotpoint VLSR1090GWW Manual

Hotpoint

Hotpoint VLSR1090GWW Manual

Hotpoint WW331OR Installation instructions

Hotpoint

Hotpoint WW331OR Installation instructions

Hotpoint WMAL 621 User manual

Hotpoint

Hotpoint WMAL 621 User manual

Hotpoint WMD 843 User manual

Hotpoint

Hotpoint WMD 843 User manual

Hotpoint WTL 500 User manual

Hotpoint

Hotpoint WTL 500 User manual

Hotpoint WMG 602 User manual

Hotpoint

Hotpoint WMG 602 User manual

Hotpoint WMBF 742 Troubleshooting guide

Hotpoint

Hotpoint WMBF 742 Troubleshooting guide

Hotpoint ARXXF 145 User manual

Hotpoint

Hotpoint ARXXF 145 User manual

Hotpoint WMA20 User manual

Hotpoint

Hotpoint WMA20 User manual

Hotpoint WLW3760 Installation instructions

Hotpoint

Hotpoint WLW3760 Installation instructions

Hotpoint WW3440S User manual

Hotpoint

Hotpoint WW3440S User manual

Hotpoint WMF 940 P User manual

Hotpoint

Hotpoint WMF 940 P User manual

Hotpoint ARTL 83 User manual

Hotpoint

Hotpoint ARTL 83 User manual

Popular Washer manuals by other brands

Zanussi ZWF 14080 W user manual

Zanussi

Zanussi ZWF 14080 W user manual

Zanussi FV 825 N Instruction booklet

Zanussi

Zanussi FV 825 N Instruction booklet

LG WM8000HVA Specifications

LG

LG WM8000HVA Specifications

Whirlpool 3RGSC9400 Use and care guide

Whirlpool

Whirlpool 3RGSC9400 Use and care guide

Zanussi TJ 1284 H instruction manual

Zanussi

Zanussi TJ 1284 H instruction manual

AEG KO-LAVAMAT 74740 User information

AEG

AEG KO-LAVAMAT 74740 User information

Beko WSRE7512PRA user manual

Beko

Beko WSRE7512PRA user manual

Whirlpool LA5OOOXP Use and care guide

Whirlpool

Whirlpool LA5OOOXP Use and care guide

Miele PW 6207 operating instructions

Miele

Miele PW 6207 operating instructions

GE GE Profile WWSE3160AAA Specifications

GE

GE GE Profile WWSE3160AAA Specifications

Bush WMNB712EB instruction manual

Bush

Bush WMNB712EB instruction manual

ALLIANCE UW60AV Information manual

ALLIANCE

ALLIANCE UW60AV Information manual

Bosch WAN280H3 User manual and installation instructions

Bosch

Bosch WAN280H3 User manual and installation instructions

Maytag MAT15MNAW installation instructions

Maytag

Maytag MAT15MNAW installation instructions

LG T2109VSAL owner's manual

LG

LG T2109VSAL owner's manual

Indesit IWC 61481 Instructions for use

Indesit

Indesit IWC 61481 Instructions for use

Electrolux EWF12843 user manual

Electrolux

Electrolux EWF12843 user manual

Indesit WIN 70 Instructions for use

Indesit

Indesit WIN 70 Instructions for use

manuals.online logo
manuals.online logoBrands
  • About & Mission
  • Contact us
  • Privacy Policy
  • Terms and Conditions

Copyright 2025 Manuals.Online. All Rights Reserved.

EN
1
English,1
Contents
Installation, 2-3-4-5
Unpacking and levelling
Connecting the electricity and water supplies
Technical data
Description of the machine, 6-7
Touch control panel
A to Dose System, 8-9
R nning a wash cycle, 10
Wash cycles and options, 11
Table of wash cycles
Wash options
Detergents and la ndry, 12
Detergent
Preparing the laundry
Washing recommendations
Load balancing system
Preca tions and advice, 13
General safety
Disposal
pening the porthole door manually
Care and maintenance, 14
Cutting off the water and electricity supplies
Cleaning the machine
Cleaning the detergent dispenser drawer
Caring for your appliance drum
Cleaning the pump
Checking the water inlet hose
Tro ble shooting, 15-16
Assistance, 17-18
EN
WASHING MACHINE
AQUALTIS
AQLF9D 69 U
Instr ctions for
installation and se
EN
2
Installation
 This instruction manual should be kept in a safe place
for future reference. If the washing machine is sold,
given away or moved, please ensure the manual is kept
with the machine, so that the new owner may benefit
from the advice contained within it.
 Read these instructions carefully: they contain vital
information relating to the safe installation and operation
of the appliance.
 Inside the pack containing this manual, you will also
find the guarantee and all the details necessary for
installation.
Unpacking and levelling
Unpacking
1. nce you have removed all the packaging from the
washing machine, make sure it has not been damaged
during transportation.
If it has been damaged, contact the retailer and do not
proceed any further with the installation process.
2. Remove the 4
protective screws (used
during transportation) and
the corresponding spacer,
located on the rear part of
the appliance (see figure).
3. Close off the holes using the plastic plugs supplied in
the pack.
4. Keep all the parts in a safe place; they will be
needed again if the washing machine is moved to
another location, to prevent the inside of the
appliance being damaged.
 Packaging materials should not be used as toys for
children.
Levelling
1. Place the washing machine on a flat sturdy floor,
without resting it up against walls or cabinets.
2. If the floor is uneven,
the front feet of the
machine may be adjusted
until it reaches a horizontal
position (the angle of
inclination must not
exceed 2 degrees).
 If the appliance is levelled correctly, it will be more
stable and much less likely to cause vibrations and noise
while it is operating, particularly during the spin cycle.
 If it is placed on carpet or a rug, adjust the feet in such
a way as to allow a sufficient ventilation space
underneath the washing machine.
Connecting the electricity and water
s pplies
Connecting the water inlet hose
 Before connecting the inlet hose to the water supply,
run the water until it is perfectly clear.
1. Connect the inlet hose
to the machine by
screwing it onto the cold
water inlet of the
appliance, which is
situated on the top right-
hand side of the rear part
of the appliance (see
figure).
2. Connect the inlet hose
by screwing it to a cold
water tab using a 3/4 gas
threaded connection (see
figure).
3. Make sure that the hose is not folded over or bent.
 The water pressure at the tap must fall within the
values indicated in the Technical data table (see next
page).
 If the inlet hose is not long enough, contact a
specialised shop or an authorised technician.
 Never use second-hand or old inlet hoses; use the
products supplied with the machine.
EN
3
Connecting the drain hose
Connect the drain hose,
without bending it, to a
draining duct or a wall
drain situated between
65 and 100 cm from the
floor;
The drain hose may be
connected to an under-
sink trap. Before
connecting the drain
hose from the machine
ensure that any blanks
or removable ends have
been taken off the
spigot.
If it is place over the
edge of a basin or sink
be sure the free end of
the hose should not be
underwater.
 We advise against the use of hose extensions; in
case of absolute need, the extension must have the
same diameter as the original hose and must not
exceed 150 cm in length.
Ensure that if the drain hose is pushed into a
standpipe, that the end does not go down more than
15cms (6 inches). If the hose is pushed down too far,
this may cause the machine to self -syphon ie.
continuously empty as it is filling.
Electric connection
Before plugging the appliance into the mains socket,
make sure that:
 the socket is earthed and in compliance with the
applicable law;
 the socket is able to sustain the appliance's
maximum power load indicated in the Technical details
table (see page 5);
 the supply voltage is included within the values i
ndicated on the Technical details table (see page 5);
 the socket is compatible with the washing
machine's plug. If this is not the case, replace
the socket or the plug.
Your appliance is now supplied with a 13 amp fused plug
it can be plugged into a 13 amp socket for immediate
use. Before using the appliance please read the
instructions below.
WARNING - THIS APPLIANCE MUST BE EARTHED.
THE F LL WING PERATI NS SH ULD BE
CARRIED UT BY A QUALIFIED ELECTRICIAN.
Replacing the fuse:
When replacing a faulty fuse, a 13 amp ASTA approved
fuse to BS 1362 should always be used, and the fuse
cover re-fitted. If the fuse cover is lost, the plug must not
be used until a replacement is obtained.
Replacement fuse covers:
If a replacement fuse cover is fitted, it must be of the
correct colour as indicated by the coloured marking or
the colour that is embossed in words on the base of the
plug. Replacements can be obtained directly from your
nearest Service Depot.
Removing the plug:
If your appliance has a non-rewireable moulded plug and
you should wish to re-route the mains cable through
partitions, units etc., please ensure that either:
the plug is replaced by a fused 13 ampere rewireable
plug bearing the BSI mark of approval.
or:
the mains cable is wired directly into a 13 amp cable
outlet, controlled by a switch, (in compliance with BS
5733) which is accessible without moving the appliance.
Disposing of the plug:
Ensure that before disposing of the plug itself, you make
the pins unusable so that it cannot be accidentally
inserted into a socket.
Instructions for connecting cable to an alternative plug:
Important: the wires in the mains lead are coloured in
accordance with the following code:
Green & Yellow Earth
Blue Neutral
Brown Live
65 - 100 cm
Where it connects to
the waste water pipe
cut end off spigot or
remove the blanking cap
EN
4
As the colours of the wires in the lead may not
correspond with the coloured markings identifyng the
terminals in your plug, proceed as follows:
Connect Green & Yellow wire to terminal marked E or
or coloured Green or Green & Yellow.
Connect Brown wire to terminal marked L or coloured
Red.
Connect Blue wire to terminal marked N or coloured
Black.
If a 13 amp plug (BS 1363) is used it must be fitted with a
13 amp fuse, either in the plug or adaptor or at the
distribution board.
If you are in any doubt the electrical supply to your
machine, consult a qualified electrician before use.
How to connect an alternative plug:
The wires in this mains lead are coloured in accordance
with the following code:
BLUE NEUTRAL (N)
BROWN LIVE (L)
GREEN & YELLOW EARTH (E)
Disposing of the appliance:
When disposing of the appliance please remove the plug
by cutting the mains cable as close as possible to the
plug body and dispose of it as described above.
 The washing machine should not be installed in an
outdoor environment, not even when the area is
sheltered, because it may be very dangerous to leave it
exposed to rain and thunderstorms.
 When the washing machine is installed, the mains
socket must be within easy reach.
 Do not use extensions or multiple sockets.
 The power supply cable must never be bent or
dangerously compressed.
 The power supply cable must only be replaced by an
authorised serviceman.
Warning! The company denies all liability if and when
these norms are not respected.
GREEN &
YELLOW
BROWN
BLUE
13 ampere fuse
CROSS-BAR
CORD GRIP
EN
5
Technical data
Model AQLF9D 69 U
Dimensions
width 59.5 cm
height 85 cm
depth 64,5 cm
Capacity from 1 to 9 kg
Electrical
connections
please refer to the technical data
plate fixed to the machine
Water connections
maximum pressure 1 MPa (10 bar)
minimum pressure 0.05 MPa (0.5 bar)
drum capacity 62 litres
Spin speed up to 1600 rotations per minute
Energy rated
programmes
according to
reg lation
EN 60456
programme ; temperature 60°C;
using a load of 9 kg.
This appliance conforms to the
following EC Directives:
- 89/336/EEC dated 03/05/89
(Electromagnetic Compatibility) and
subsequent modifications
- 2006/95/EC (Low Voltage)
- 2002/96/EC
EN
6
Description of the machine
PORTHOLE DOOR
Always use the handle to
open the porthole door (see
figure).
DETERGENT DISPENSER DRAWER
The detergent dispenser
drawer is located inside the
machine and can be
accessed by opening the
door.
Refer to the chapter "Auto
Dose ystem" for information
on operation.
TOUCH CONTROL PANEL
To adjust the settings, gently
press the icon inside the
sensitive (touch control) area
as illustrated in the figure.
Standby mode
This washing machine, in compliance with new energy
saving regulations, is fitted with an automatic standby
system which is enabled after about 30 minutes if no
activity is detected. Press the N- FF button briefly
and wait for the machine to start up again.
CONTROL
PANEL
PORTHOLE DOOR
PORTHOLE DOOR
HANDLE
KICK STRIP
ADJUSTABLE FEET
EN
7
WASH CYCLE
SELECTOR knob
ON/OFF Button with
indicator light
To ch control panel
TEMPERATURE
button
OPTION
buttons
DISPLAY
ECO
indicator light
START/PAUSEbutton
with indicator light
DOOR LOCKED
indicator light
WASH
CYCLE
PHASE
icons
SPIN SPEED
button
DELAY
TIMER button
CHILD LOCK button
with indicator light
Button with ON/OFF indicator light: press this briefly to switch
the machine on or off. The green indicator light indicates that the
machine is switched on. To switch off the washing machine during
the wash cycle, press and hold the button for approximately 3
seconds; if the button is pressed briefly or accidentally the machine
will not switch off. If the machine is switched off during a wash
cycle, this wash cycle will be cancelled.
WASH CYCLE SELECTOR knob: may be turned in either
direction. To select the most suitable wash cycle, please refer
to the Table of wash cycles.
The knob will not move during the wash cycle.
TEMPERATURE button: press to modify or exclude the
temperature setting; the value selected will appear on the
display above (see Running a wash cycle).
SPIN SPEED CYCLE button: press to modify or exclude
the spin cycle; the value selected will appear on the display
above (see Running a wash cycle).
DELAY TIMER button: press to set a delayed start for
the selected wash cycle; the set delay time will appear on the
display above (see Running a wash cycle).
OPTION buttons with indicator lights: press to select the
available options. The indicator light corresponding to the
selected option will remain lit (see Running a wash cycle).
DETERGENT and SOFTENER buttons : refer to
"Modifying pre-set parameters" in the chapter "Auto Dose
ystem".
DETERGENT DILUTION button: refer to "Filling the
tanks" in the chapter "Auto Dose ystem".
WASH CYCLE PHASE icons: these illuminate to indicate the
progress of the wash cycle (Wash  Rinse  Spin 
Drain ). The text lights up when the cycle is complete.
START/PAUSE button with indicator light: when the green
indicator light flashes slowly, press the button to start a wash
cycle. nce the cycle has begun the indicator light will remain
lit in a fixed manner. To pause the wash cycle, press the button
again; the indicator light will flash in an orange colour. If the
Door locked indicator light is switched off, the door may
be opened. To start the wash cycle from the point at which it
was interrupted, press the button again.
DOOR LOCKED indicator light: indicates that the
porthole door is locked. To open the door, pause the wash
cycle (see Running a wash cycle).
CHILD LOCK button with indicator light: to activate or
deactivate the control panel lock, press and hold the button
for approximately 2 seconds. when the indicator light is
illuminated, the control panel is locked. This means it is
possible to prevent wash cycles from being modified
accidentally, especially where there are children in the home.
ECO indicator light: the icon lights up when, after altering the
washing parameters, an energy saving of at least 10% is made.
Furthermore, before the machine enters Standby mode, the
icon will light up for a few seconds; when the machine is switched
off the estimated energy saving will be around the 80% mark.
CHANGE LANGUAGE
The first time the machine is switched on, the first language
will flash on the display. The " ", "OK" and "V" symbols will
appear on the display, in line with the 3 buttons on the right-
hand side. The languages change automatically every 3";
alternatively, they can be changed by pressing the buttons next
to the " " and "V" symbols. Use the "OK" button to confirm the
language, which will be set after 2". If no buttons are pressed,
the automatic language change will begin again after 30".
The language may only be changed while the machine is
switched off. Press and hold the temperature +spin
+delayed start buttons for 5''; a short beep sounds and
the set language flashes on the display. Press the buttons
next to the " " and "V" symbols to change the language. Use
the button next to the "OK" symbol to confirm the language,
which will be set after 2". If no buttons are pressed, the
language set previously will be displayed after 30".
Switch on the machine.
DETERGENT
button
SOFTENER
button
DETERGENT
DILUTION
button
EN
8
Introd ction
This washing machine is
equipped with two tanks: one
for liquid detergent (either
concentrated or diluted) with
a capacity of approx. 5.5 l
and another for liquid fabric
softener (either concentrated
or diluted) with a capacity of
approx. 3.5 l (see picture).
 Check the detergent/fabric
softener box to verify whether
it is diluted or concentrated
detergent. The automatic
dosing system intakes the
correct amount of detergent and fabric softener from the
tanks for each type of load and at the right time,
guaranteeing optimal washing results without wastage.
The amount of detergent/fabric softener can be modified
manually by pressing the DETERGENT and FABRIC
S FTENER buttons (refer to "Modifying pre-set
parameters"). If you prefer, the washing machine can
also be used in the "traditional" mode, i.e. by adding the
detergent in the dispenser; the machine will automatically
detect the detergent and will not use the tanks.
Detergent dispenser
"Traditional" mode.
Pull out the detergent dispenser drawer up to the first
stop point to add the detergent (either liquid or powder
detergent), bleach or other additives (e.g. whiteners) and
the pre-wash detergent for washing in the "traditional"
mode (refer to "Traditional mode).
"Auto Dose ystem mode.
In order to fill the detergent
and fabric softener tan s,
the detergent dispenser
drawer must be fully
extracted: open the dispenser
drawer up to the first stop
point then press the lever (A)
and open up to the second
stop point, ma ing sure that
it is fully extracted. Avoid
moving the dispenser
drawer during filling operations. nce the tanks have
been filled (refer to "Filling the tanks"), the machine can run
up to 60 cycles before the detergent finishes (*).
First-time se
Turn the washing machine on by pressing the N/ FF
button. The first wash cycle must be carried out without
laundry and by adding detergent in the detergent
dispenser (refer to "Traditional mode); set the
programme " " (Cotton 90°) without pre-wash and
without filling the tanks.
Filling the tanks:
pen the detergent dispenser drawer in the "Auto Dose
ystem" mode (refer to "Detergent dispenser").
Slowly pour the detergent (B) and fabric softener (C)
until the tanks are completely filled (see picture).
To avoid exceeding the maximum capacity, a buzzer (beep)
will sound with growing intensity to signal the level and 3
long beeps will sound once the tank is completely full.
Start the wash cycle immediately after filling the tanks to
ensure that the dispenser is properly cleaned.The
respective icons (for the detergent) and (for the
fabric softener) will light up gradually to signal the level.
The filling time depends on the density of the product.
Very dense products will take longer to fill.
Close the detergent dispenser drawer only once the
compartments are completely empty.
Select the density of the detergent added (either concentrated
or liquid) by pressing the appropriate button .
Concentrated
Diluted
The machine will store the selection.
If no option is selected, the detergent intake option will
be pre-set to "diluted".
Use button to set the amount of fabric softener that
will be automatically extracted by the machine:
1) If concentrated softener is used, we recommend
selecting the first level ( with one bar) and, if necessary,
stepping up by a single position ( with 2 bars) to
increase detergent intake.
2) If diluted softener is used, we recommend setting level
3 ( with 3 bars) and to then either increase/decrease
the amount of fabric softener to be extracted.
3) To exclude the use of fabric softener, press until the
bars disappear (also refer to "Modifying pre-set
parameters").
A
BC
A to Dose System
(*) with an average load of 4 kg, 40°C Cotton programme, "medium" water
hardness level and dirt level set to 3.
EN
9
Signals for s ccessive refilling:
nce, at the end of a cycle, the level of detergent/fabric
softener falls below the level required for a successive
wash cycle, the display will visualise the relative
messages "At end of cycle refill detergent" or "At end
of cycle refill softener" or "At end of cycle refill
tan s". If the tanks are not filled, the successive wash
cycles in Auto Dose ystem will be carried out without
any intake of detergent.
 We suggest adding detergent and fabric softener
ONLY after the machine's signal.
 NEVER mix two different detergents; always clean out
the tank before adding a new type of detergent (refer to
"Cleaning cycle set by the user").
Using the "A to Dose System"
If the compartments have been filled with detergent and
fabric softener, you may start using the machine (refer
to "Running a wash cycle").
Powder detergents for pre-washing and powder
additives may only be used in the traditional mode or
using the "Auto Dose ystem", by placing the additives
directly inside the drum, preferably in conjunction with
the "laundry ball".
Modifying pre-set parameters:
The machine automatically intakes detergent on the
basis of the selected programme, wash load and water
hardness. However, the amount of detergent/fabric
softener used may be modified.
button: press to increase, decrease and to exclude
detergent intake.
button: press to increase, decrease and to exclude
fabric softener intake.
The level of detergent/fabric softener suggested by the
machine is indicated by 3 bars.
Less than 3 bars indicates a lower level of detergent/
fabric softener compared to that suggested by the
machine, while more than 3 bars indicates a higher level
of detergent/fabric softener.
Cleaning the tanks:
Tank cleaning cycles can either be automatic or pre-set
by the user.
A tomatic cleaning:
The washing machine carries out an automatic cleaning cycle
during the rinse cycle if the level of detergent that remains is
insufficient for carrying out a successive wash cycle.
Cleaning cycle set by the ser:
Run the cleaning cycle (with empty drum) if you require
adding a different product to the previous one or if the
tanks have been incorrectly filled (e.g. fabric softener
has been erroneously poured into the detergent tank or
vice-versa). Press button and hold for 5 sec. to
activate cleaning of the detergent tank, button for
cleaning the fabric softener tank or button for
cleaning both tanks. Keep pressing for a further 3 sec.
(the countdown "4-3-2-1" will appear in the top right
corner) until "CLEAN-GO" pops up.
The cleaning cycle lasts about 40' if the tanks are initially
empty; if not, the cycle will last longer. The icons
indicating that the tanks are empty will appear on the
display.
"Traditional" mode
Pull out the detergent dispenser drawer up to the first
stop point (see picture) then pour the amount of
detergent and other additives (e.g. bleach) required for a
single wash cycle directly into the dispenser.
1. pre-wash compartment:
use powder detergent only.
2. main wash
compartment: use powder
or liquid detergent. If the
latter is used, we
recommend pouring it into
the dispenser immediately
before starting the washing
machine and without
running a pre-wash cycle.
3. ! Do not pour anything in this compartment.
Tablet detergent or the relative "laundry ball" must be
added directly inside the drum. In this event, deactivate
the "Auto Dose ystem" (by pressing the button until
the relative vertical bars disappear from the display).
Do not pour any fabric softener as the appropriate
quantity required for each wash cycle will be
automatically extracted.
To deactivate fabric softener intake, press the button
until the vertical bars disappear from the display.
For wool and silk garments, we recommend using a
special detergent which must be poured directly into the
detergent dispenser (compartment 2).
R nning the wash cycle:
Select the programme and the compatible options on
the basis of the required need and type of load.
3
1
2
EN
10
R nning a wash cycle
WARNING: before you use the washing machine for
the first time, run a wash cycle with detergent and no
laundry, using the 90° cottons cycle without pre-wash.
1. SWITCH THE MACHINE ON. Press the button.
All the indicator lights will illuminate for 1 second and
the text AQUALTIS will appear on the display; the
indicator light corresponding to the button will then
remain lit in a constant manner and the START/
PAUSE indicator light will flash.
2. SELECT THE PROGRAMME. Turn the PR GRAMME
KN B left or right, until the required programme has been
selected; the name of the programme will appear on the
display. A temperature and spin speed is set for each
programme; these may be adjusted. The cycle duration
will also appear on the display.
3. LOAD THE LAUNDRY. pen the porthole door.
Load the laundry, making sure you do not exceed the
maximum load value indicated in the table of wash
cycles on the following page.
4. MEASURE OUT THE DETERGENT. There is no
need to add detergent when the "Auto Dose ystem"
mode is used, as the machine automatically intakes
detergent on the basis of the selected programme,
type of load and water hardness. Refer to the
paragraph "Traditional mode for implementing the
traditional operation mode.
5. CLOSE THE PORTHOLE DOOR.
6. CUSTOMISE THE WASH CYCLE. Use the
relevant buttons on the control panel:
Modify the temperat re and/or spin speed.
The machine automatically displays the maximum
temperature and spin speed values set for the
selected cycle, or the most recently-used settings if
they are compatible with the selected cycle. The
temperature can be decreased by pressing the
button, until the cold wash  FF setting is reached.
The spin speed may be progressively reduced by
pressing the button, until it is completely excluded
 FF. If these buttons are pressed again, the
maximum values are restored.
 Exception: if the Cottons programme is selected, the
temperature can be increased up to a value of 90°C.
Set a DELAY TIMER.
To set a delayed start for the selected cycle, press the
corresponding button repeatedly until the required delay
period has been reached. During the setting procedure,
the delay period and the text "Starts in:" will be
displayed, along with the flashing symbol. After the
delayed start has been set, the symbol will remain
fixed on the display, which will also indicate the duration
of the selected cycle with the text "Ends in:" and the
cycle duration. Press the DELAY TIMER button just
once to display the delay time set previously.
After the countdown has begun, the display will show
the text "Starts in:" and the delay period. nce the set
delay time has elapsed, the machine will begin its cycle
and the display will show "Ends in:" and the time
remaining until the end of the cycle. To remove the
delayed start option, press the button until the display
shows the text FF; the symbol will disappear.
Modify the cycle settings.
 Press the button to activate the option; the name
of the option will then appear on the display and
the corresponding indicator light will illuminate.
 Press the button again to deactivate the option;
the name of the option will then appear on the
display followed by the text FF, and the
corresponding indicator light will switch off.
 If the selected option is not compatible with the
selected wash cycle, this incompatibility will be
signalled by the flashing of the indicator light and a
sound alert (3 beeps); the option will not be activated.
 If the selected option is not compatible with another
option that has been selected previously, the indicator
light corresponding to the first option selected will flash
and only the second option will be activated; the
indicator light corresponding to the button will remain
lit in a constant manner.
 The options may affect the recommended load value and/
or the duration of the cycle.
7. START THE PROGRAMME. Press the START/
PAUSE button. The corresponding indicator light
remains lit in a fixed manner and the porthole door
locks (the D R L CKED indicator light
illuminates). The icons corresponding to the wash
cycle phases will light up during the cycle to indicate
which phase is currently in progress. To change a
wash cycle once it has already started, pause the
washing machine by pressing the START/PAUSE
button; then select the desired cycle and press the
START/PAUSE button again. To open the door during
a wash cycle, press the START/PAUSE button; if the
D R L CKED indicator light is switched off you
may open the door. Press the START/PAUSE button
again to restart the wash cycle from the point at
which it was interrupted.
8. THE END OF THE WASH CYCLE. This is indicated
by the illuminated text END. The porthole door may be
opened immediately. If the START/PAUSE indicator light
is flashing, press the button to end the cycle. pen the
door, unload the laundry and switch off the machine.
 If you wish to cancel a cycle which has already begun,
press and hold the button until the cycle stops and
the machine switches off.
Bag for q ilts, c rtains and delicate garments
The Aqualtis washing machine makes it easier for you to
wash even the most valuable and delicate garments in
complete confidence thanks to the special bag which
protects the laundry (this is supplied with the machine).
We recommend that the bag is used every time you
wash quilts and padded items with an outer layer made
using synthetic material.