2www.howdens.com
Riskofdamageto
appliance:
Donotattemptto
movetheappliance
bythedoor.
NOTE:Donotleavethe
dishwasherdooropen.
Becarefulnottotrip
overopendoor.
Warning:
Be aware of the
instabilityofthe
appliancepriortobeing
ttedintoposition.
Riskofdamageto
property:
Takecareofsurrounding
areawhenmovingthe
appliancetoprevent
damagetoooring,wall
coverings,pipesetc..
Twopersonlift. Riskofinjury:
Bewareofsharpmetal
edges.Usegloveswhen
handling.
NOTE:Iftheelectricity
cableisdamagedit
mustbereplacedbya
competentperson.
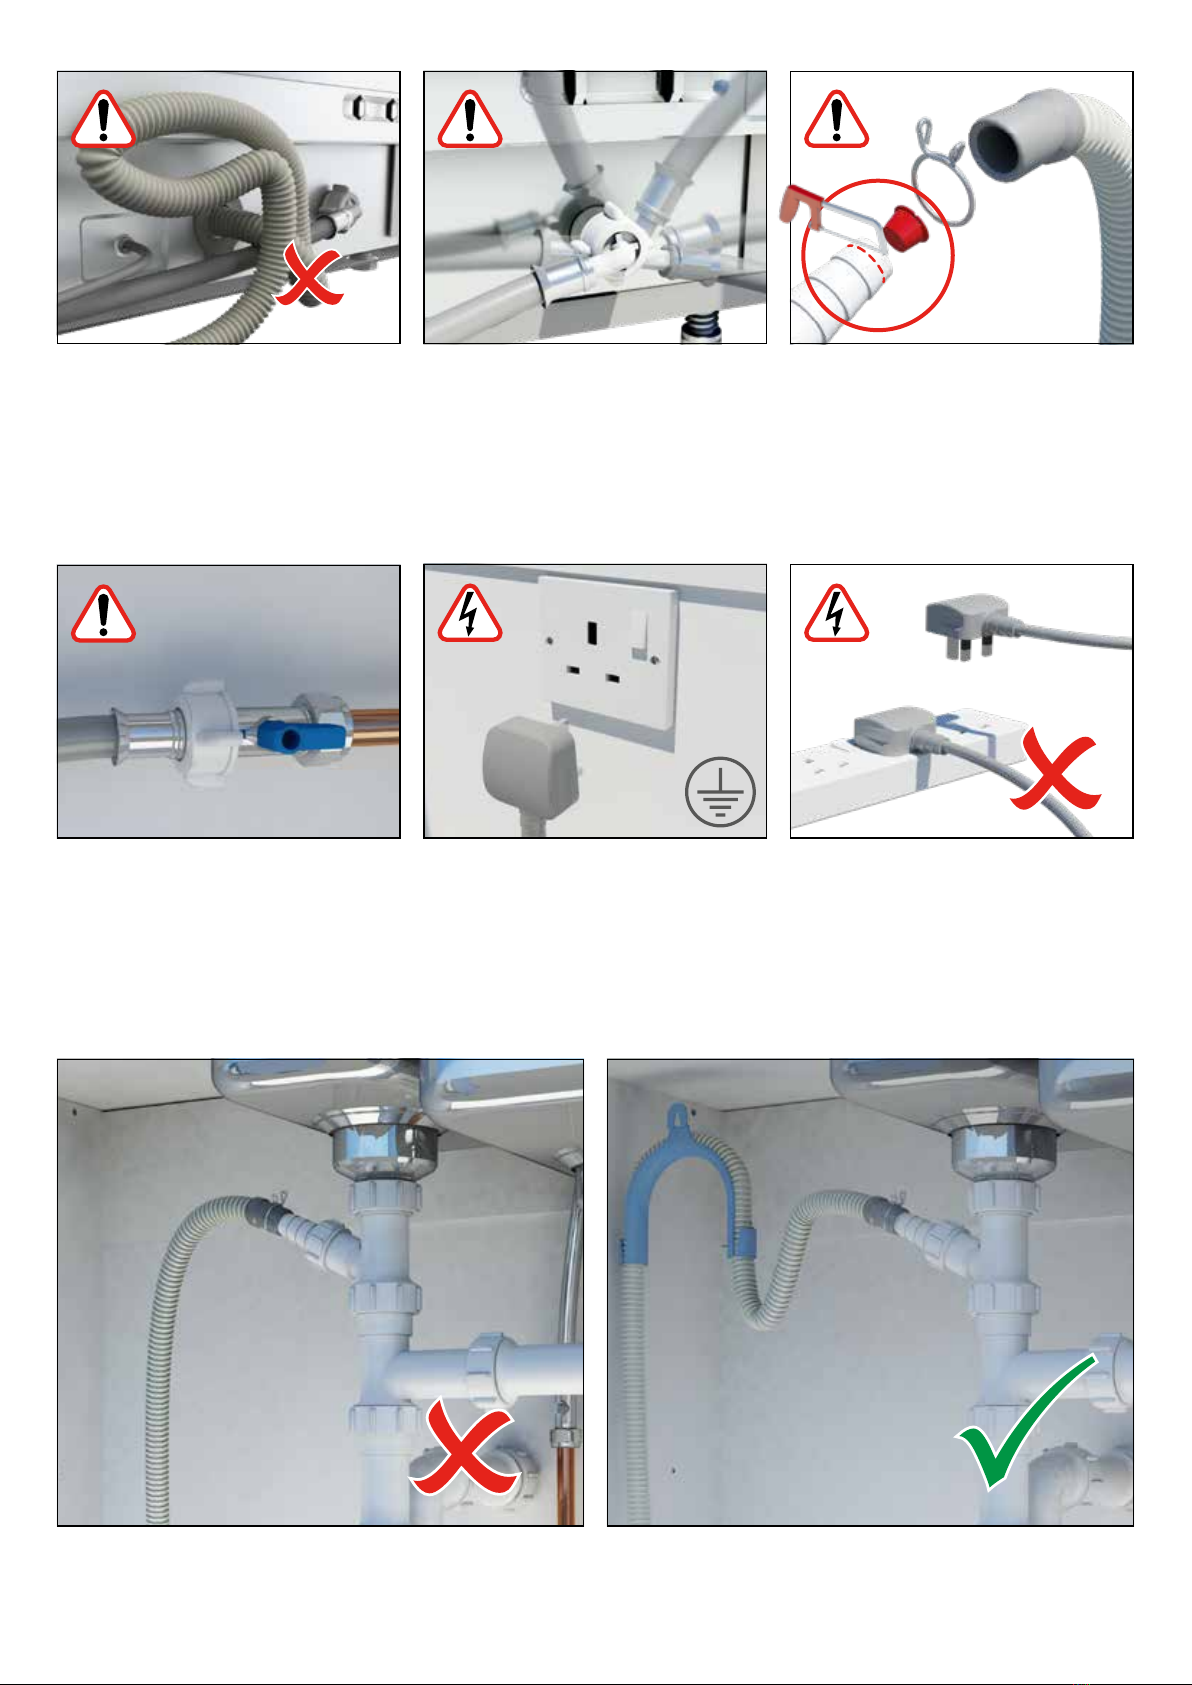
Dishwashermust
bexedsecurelyand
level.
Ensurethatallpacking
andtransitprotectors
havebeenremoved
fromtheappliance
beforepositioning.
Thisapplianceisnot
designedforstacking
withotherappliances.
Installation
Safety Information
Fitting guide
1. Dimensions......................................................p.4
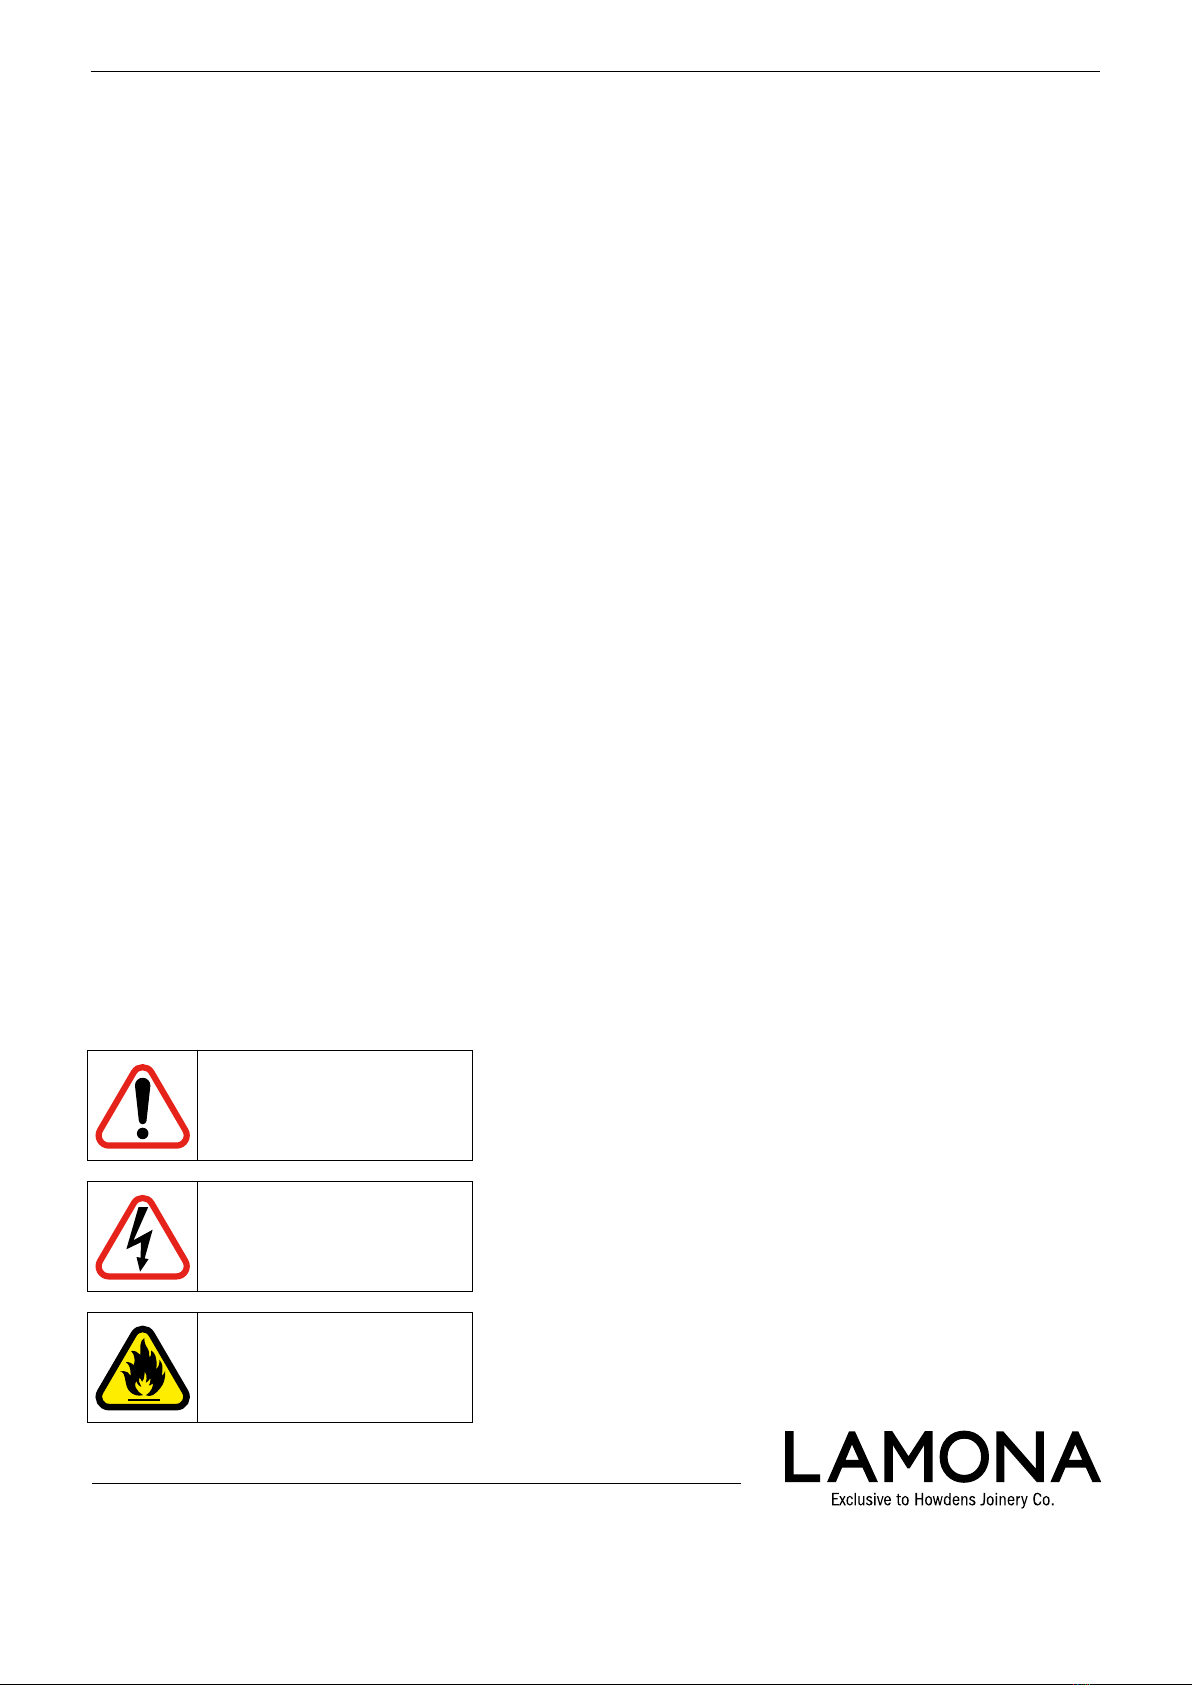
2. Dishwasherconnections....................................p.4
3. Fitfeetandraise10mmbelow
worktopheight.....................................................p.6
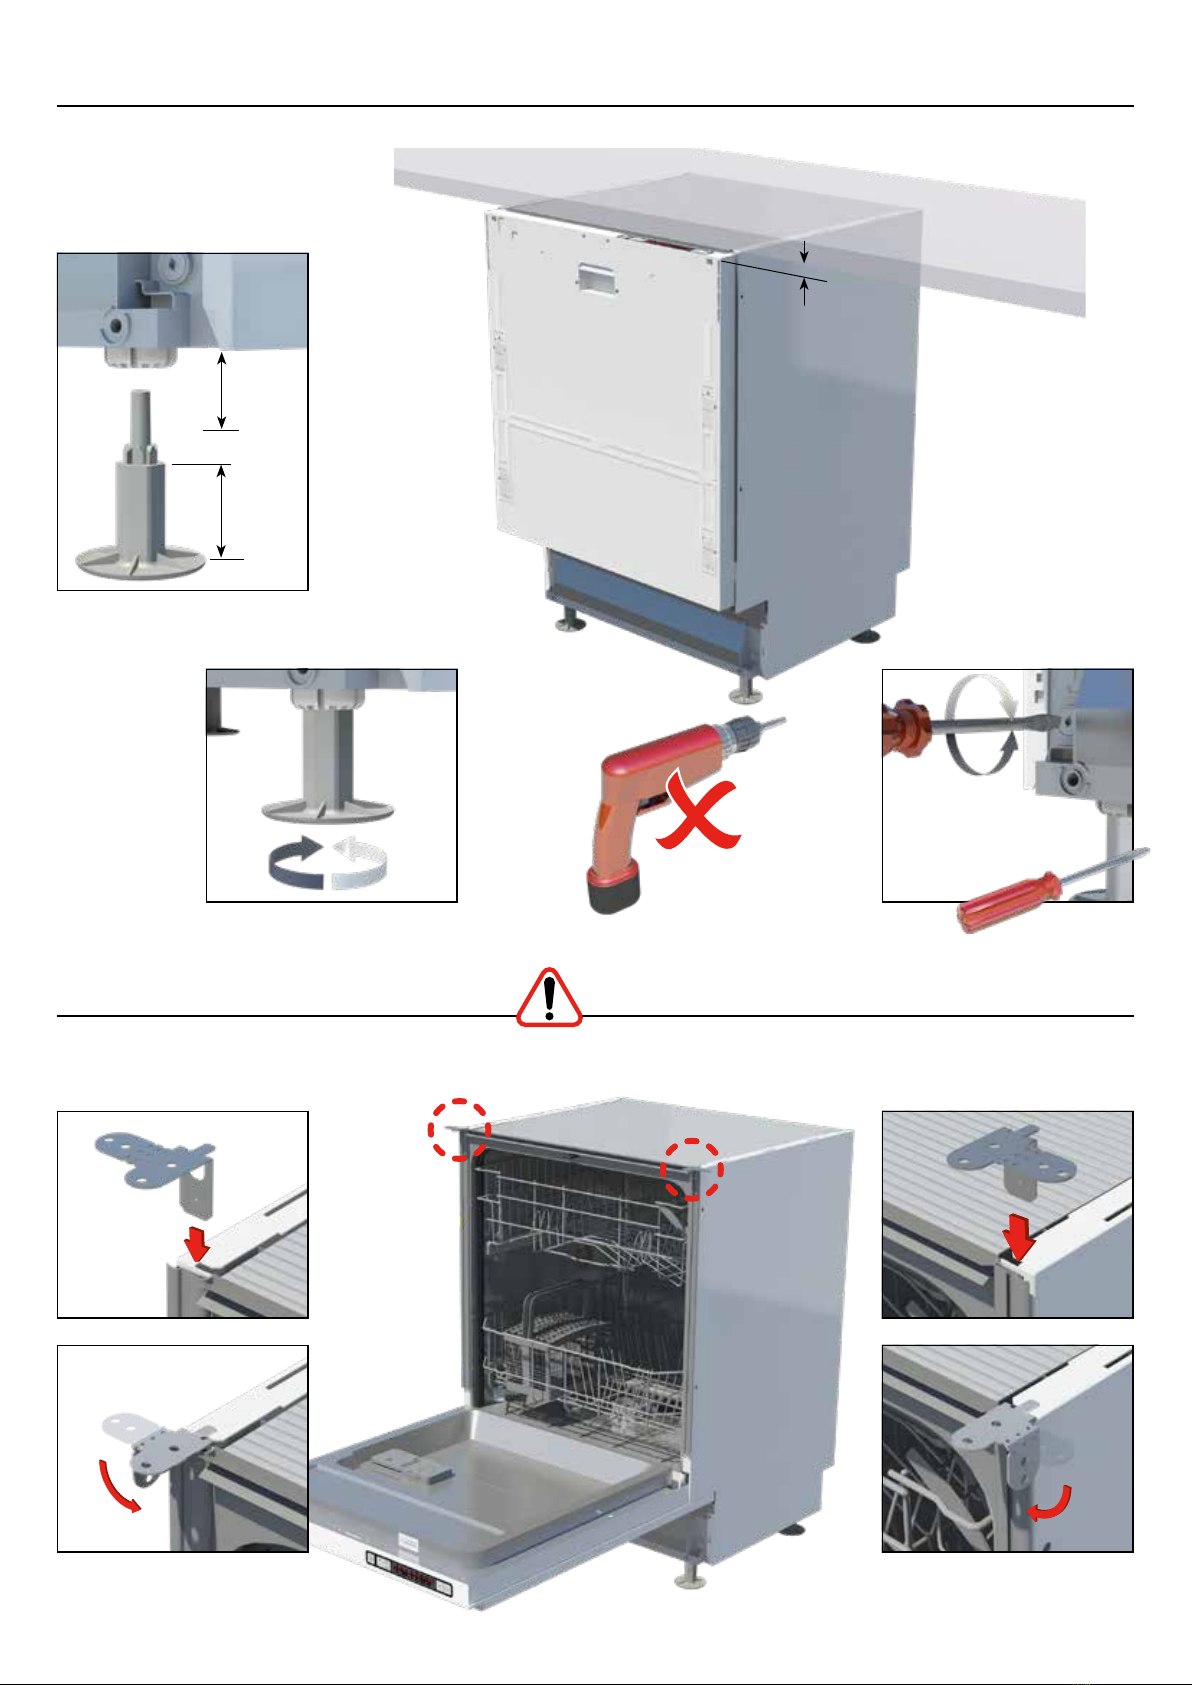
4. Locatesecuringbrackets...................................p.6
5. Protectionstripfortimberworktops..................p.7
6. Positioningthedishwasher.................................p.7
7. Adjust feet and raise dishwasher to
undersideofworktop(level)...............................p.8
8. Remove‘H’frame................................................p.8
9. Standarddecordoorpreparation......................p.9
10. Decordrawerfrontalspreparation....................p.9
11. Fit decor door / decor drawer frontals..............p.10
12.Finaladjustmentandsecuredishwasher.........p.11
13.Fitplinth................................................................p.12
14. Connectwater/plumbing/electric......................p.12