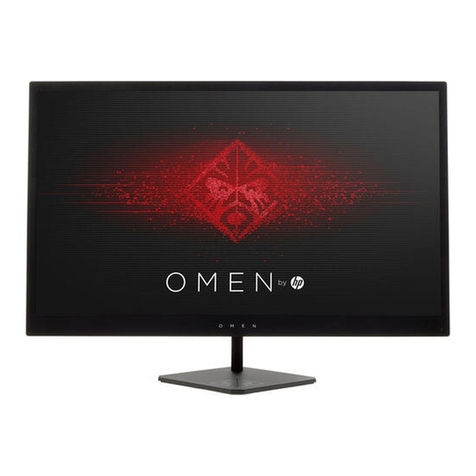
HP OMEN X 65 User manual

User Guide
HSD-0015-Q
OMEN X 65
Omen X Emperium 65 Display
OMEN X Emperium 65 with NVIDIA® G-SYNC® HDR
OMEN X Emperium 65 Big Format Gaming Display with NVIDIA® G-SYNC® HDR

© Copyright 2018 HP Development Company,
L.P.
HDMI, the HDMI Logo and High-Denition
Multimedia Interface are trademarks or
registered trademarks of HDMI Licensing LLC.
NVIDIA, the NVIDIA logo, SHIELD, GeForce, GTX,
and Tegra are trademarks and/or registered
trademarks of NVIDIA Corporation in the United
States and other countries. PLEX is a
trademark of Plex, Inc. Google, the Google
Logo, Google Assistant, Android, and
Chromecast are registered trademarks of
Google LLC. Windows is either a registered
trademark or trademark of Microsoft
Corporation in the United States and/or other
countries.
The information contained herein is subject to
change without notice. The only warranties for
HP products and services are set forth in the
express warranty statements accompanying
such products and services. Nothing herein
should be construed as constituting an
additional warranty. HP shall not be liable for
technical or editorial errors or omissions
contained herein.
Product notice
This guide describes features that are common
to most models. Some features may not be
available on your product. To access the latest
user guide, go to http://www.hp.com/support,
and follow the instructions to nd your
product. Then select User Guides.
First Edition: December 2018
Document Part Number: L38306-001

About This Guide
This guide provides information on monitor features, setting up the monitor, using the software and technical
specications.
WARNING! Indicates a hazardous situation that, if not avoided, could result in death or serious injury.
CAUTION: Indicates a hazardous situation that, if not avoided, could result in minor or moderate injury.
IMPORTANT: Indicates information considered important but not hazard-related (for example, messages
related to property damage). Warns the user that failure to follow a procedure exactly as described could
result in loss of data or in damage to hardware or software. Also contains essential information to explain a
concept or to complete a task.
NOTE: Contains additional information to emphasize or supplement important points of the main text.
TIP: Provides helpful hints for completing a task.
This product incorporates HDMI technology.
iii

iv About This Guide

Table of contents
1 Getting Started ............................................................................................................................................. 1
Important safety information ............................................................................................................................... 1
Product features and components ........................................................................................................................ 2
Product features .................................................................................................................................. 2
NVIDIA features ................................................................................................................................... 2
Rear components ................................................................................................................................ 3
Setting up the monitor .......................................................................................................................................... 4
Use caution when setting up the monitor ........................................................................................... 4
Attaching the monitor feet .................................................................................................................. 4
Routing the cables ............................................................................................................................... 4
Connecting the cables ......................................................................................................................... 5
Turning on the monitor ....................................................................................................................... 8
Mounting the monitor ......................................................................................................................... 8
Removing the monitor feet ............................................................................................... 9
Attaching the monitor head to a mounting device ........................................................... 9
2 Using the monitor ........................................................................................................................................ 10
Downloading the monitor driver ......................................................................................................................... 10
Using the optional remote control ...................................................................................................................... 10
Using the on-screen display (OSD) menu ............................................................................................................ 11
Selecting color presets ........................................................................................................................................ 11
Using RGB Gain Control ........................................................................................................................................ 12
Adjusting the ambient lighting ............................................................................................................................ 12
Using USB storage devices .................................................................................................................................. 12
Using replacement storage devices .................................................................................................. 13
Using supplemental storage devices ................................................................................................ 13
Powering USB devices .......................................................................................................................................... 14
Using universal remote controls ......................................................................................................................... 14
Using the Omen X Emperium 65 monitor with Smart Home Systems ............................................. 14
3 Support and troubleshooting ........................................................................................................................ 16
Solving common problems .................................................................................................................................. 16
Button lockouts ................................................................................................................................................... 17
Contacting support .............................................................................................................................................. 17
Preparing to call technical support ..................................................................................................................... 17
Locating the serial number and product number ............................................................................................... 17
v
4 Maintaining the monitor .............................................................................................................................. 18
Maintenance guidelines ....................................................................................................................................... 18
Cleaning the monitor ......................................................................................................................... 18
Shipping the monitor ......................................................................................................................... 18
Appendix A Technical specications ................................................................................................................. 19
Preset display resolutions ................................................................................................................................... 20
Energy saver feature ........................................................................................................................................... 21
Appendix B Accessibility ................................................................................................................................. 22
Accessibility ......................................................................................................................................................... 22
Finding the technology tools you need ............................................................................................ 22
Our commitment ............................................................................................................................... 22
International Association of Accessibility Professionals (IAAP) ....................................................... 22
Finding the best assistive technology .............................................................................................. 23
Assessing your needs ..................................................................................................... 23
Accessibility for HP products .......................................................................................... 23
Standards and legislation .................................................................................................................................... 24
Standards .......................................................................................................................................... 24
Mandate 376 – EN 301 549 ............................................................................................ 24
Web Content Accessibility Guidelines (WCAG) ................................................................ 24
Legislation and regulations .............................................................................................................. 24
United States ................................................................................................................... 25
21st Century Communications and Video Accessibility Act (CVAA) ............................... 25
Canada ............................................................................................................................. 25
Europe ............................................................................................................................. 26
United Kingdom .............................................................................................................. 26
Australia .......................................................................................................................... 26
Worldwide ....................................................................................................................... 26
Useful accessibility resources and links .............................................................................................................. 27
Organizations .................................................................................................................................... 27
Educational institutions .................................................................................................................... 27
Other disability resources ................................................................................................................. 27
HP links .............................................................................................................................................. 27
Contacting support .............................................................................................................................................. 28
vi

1 Getting Started
Important safety information
An AC power cord is included with the monitor. If another cord is used, use only a power source and
connection appropriate for this monitor. For information about the correct power cord set to use with the
monitor, see the Product Notices provided in your documentation kit.
WARNING! To reduce the risk of electric shock or damage to the equipment:
• Plug the power cord into an AC outlet that is easily accessible at all times.
• Disconnect power from the computer by unplugging the power cord from the AC outlet.
• If provided with a 3-pin attachment plug on the power cord, plug the cord into a grounded (earthed) 3-pin
outlet. Do not disable the power cord grounding pin, for example, by attaching a 2-pin adapter. The grounding
pin is an important safety feature.
For your safety, do not place anything on power cords or cables. Arrange them so that no one may
accidentally step on or trip over them. Do not pull on a cord or cable. When unplugging from the AC outlet,
grasp the cord by the plug.
To reduce the risk of serious injury, read the Safety & Comfort Guide (provided with your user guides). It
describes proper workstation setup and proper posture, health, and work habits for computer users. The
Safety & Comfort Guide also provides important electrical and mechanical safety information. The Safety &
Comfort Guide is also available on the Web at http://www.hp.com/ergo.
IMPORTANT: For the protection of the monitor, as well as the computer, connect all power cords for the
computer and its peripheral devices (such as a monitor, printer, scanner) to some form of surge protection
device such as a power strip or uninterruptible power supply (UPS). Not all power strips provide surge
protection; the power strips must be specically labeled as having this capability. Use a power strip whose
manufacturer oers a damage replacement policy so you can replace the equipment if surge protection fails.
Use the appropriate and correctly sized furniture designed to properly support your HP LCD monitor.
WARNING! LCD monitors that are inappropriately situated on dressers, bookcases, shelves, desks, speakers,
chests, or carts may fall over and cause personal injury.
Care should be taken to route all cords and cables connected to the LCD monitor so that they cannot be pulled,
grabbed, or tripped over.
Important safety information 1

Product features and components
Product features
The monitor features include the following:
●163.89 cm (64.5-inch) diagonal viewable area with 3840 × 2160 resolution, plus full-screen support for
lower resolutions; support for variable refresh rate maximum up to 144 Hz, includes custom scaling for
maximum image size while preserving original aspect ratio
●Panel with a direct-lit LED local dimming backlight solution
●Ambient lights on the back of the monitor are adjustable using the on-screen display (OSD) menu
●Frames-per-second indicator displayed on the monitor screen, adjustable using the OSD menu
●Message timer displayed on the monitor screen, adjustable using the OSD menu
●DisplayPort and HDMI video inputs
●HDMI Audio Return Channel (ARC) on the HDMI 3 input
●Analog audio line-out
●Two USB ports for SHIELD
●Two USB charging ports
●Sony/Philips Digital Interface (S/PDIF) optical audio port
●Cable routing clip
●Detachable feet for exible monitor head mounting solutions
●Plug and Play capability if supported by your operating system
●400 mm integrated VESA mounting
●On-screen display (OSD) adjustments in ten languages for easy setup and screen optimization
●High-Bandwidth Digital Content Protection (HDCP 2.2) copy protection on all digital inputs
●Windows® 10 support
NOTE: For safety and regulatory information, see the Product Notices provided in your documentation kit.
To access the latest user guide, go to http://www.hp.com/support, and follow the instructions to nd your
product. Then select User Guides.
NVIDIA features
●NVIDIA® G-SYNC® HDR for PC gaming via the DisplayPort input. Requires NVIDIA GeForce® GTX 1050 (or
higher - GTX 1070 or higher recommended)
●NVIDIA® SHIELD® powered by Android TV™ with 4K HDR streaming, built-in Chromecast™, and Google
Assistant™
●NVIDIA G-SYNC HDR on NVIDIA SHIELD for gaming and video content
●NVIDIA G-SYNC HDR features 1000-nit peak brightness, 384 zones full array local dimming, DCI-P3 color
gamut and tear-free, stutter-free gaming
NOTE: For detailed setup and use instructions, access the latest SHIELD user guide at
https://shield.nvidia.com/support.
2 Chapter 1 Getting Started

Rear components
Component Function
1 RJ-45 (network) jack Connects a network cable to SHIELD.
2 USB ports (2) Connect optional devices to SHIELD.
IMPORTANT: These USB ports connect directly to SHIELD and are used to connect
optional USB devices, such as ash drives for expandable storage, to SHIELD.
3 DisplayPort connector Connects a DisplayPort cable to the source device.
4 HDMI ports (2) Connect an HDMI cable to the source device.
5 HDMI (ARC) port Connects to an audio/video receiver with an HDMI cable.
NOTE: If supported by the receiver, the monitor will receive video and audio from the
receiver and also send audio from the monitor back to the receiver.
6 S/PDIF port Sends digital audio to an audio/video receiver.
7 Analog audio line-out Connects optional powered speakers, soundbar, headphones, or earbuds.
WARNING! To reduce the risk of personal injury, adjust the volume before using
headphones, earbuds, or a headset. For additional safety information, see the Product
Notices provided in your documentation kit.
8 Power connector Connects an AC power cord to the monitor.
9 Master power switch Turns o all power to the monitor.
NOTE: Setting the switch to the O position yields the lowest power state for the
monitor when it is not in use.
10 Power button Turns the monitor on or o.
11 OSD joystick Opens the OSD menu, selects an item from the menu, or closes the OSD menu.
12 USB charging ports (2) Provide power charging for USB interface devices.
Product features and components 3

Setting up the monitor
Use caution when setting up the monitor
To prevent damage to the monitor, do not touch the surface of the LCD panel. Pressure on the panel may
cause nonuniformity of color or disorientation of the liquid crystals. If this occurs, the screen will not recover
to its normal condition.
Attaching the monitor feet
CAUTION: The screen is fragile. Avoid touching or applying pressure to the screen; doing so can cause
damage.
1. Position the monitor head face up on a at surface covered by a clean, dry cloth.
2. Attach the feet to the bottom of the monitor head (1) using the eight screws and Allen wrench included
with the monitor (2).
Routing the cables
Locate the cable clip on the back of the monitor and then route the cables through the clip.
IMPORTANT: The cables should be routed through the cable clip before connecting the cables to the ports
on the back of the monitor.
The power connector location does not allow for the AC power cord to be routed through the cable clip.
4 Chapter 1 Getting Started

Connecting the cables
1. Place the monitor in a convenient, well-ventilated location near the computer.
2. Connect a video cable.
●Connect one end of a DisplayPort cable to the DisplayPort connector on the back of the monitor
and the other end to the DisplayPort connector on the source device.
IMPORTANT: To use G-SYNC, the NVIDIA graphics processing unit (GPU) must be connected to the
DisplayPort connector on the monitor.
●Connect one end of an HDMI cable to the HDMI port on the back of the monitor and the other end to
the source device.
Setting up the monitor 5

3. Connect one end of the network cable to the RJ-45 (network) jack on the back of the monitor and the
other end to the network.
NOTE: A wireless network connection can also be used to connect SHIELD to the network.
4. To pass audio through the monitor, or hear audio from SHIELD, connect one end of a 1/8-inch (3.5 mm)
stereo analog audio cable to the audio line-out connector on the monitor and connect the opposite end
to a soundbar or audio/video receiver.
OR
Connect one end of a ber optic cable to the S/PDIF connector on the monitor and connect the opposite
end to a soundbar, headphones, earbuds, or audio/video receiver.
NOTE: If your audio/video receiver supports ARC, connect one end of an HDMI cable to the HDMI 3
connector on the monitor and connect the opposite end to your audio/video receiver.
For details, see Rear components on page 3.
6 Chapter 1 Getting Started

5. Connect the power cord to the monitor. Then connect the power cord to the AC outlet.
WARNING! To reduce the risk of electric shock or damage to the equipment:
Do not disable the power cord grounding plug. The grounding plug is an important safety feature.
Plug the power cord into a grounded (earthed) AC outlet that is easily accessible at all times.
Disconnect power from the equipment by unplugging the power cord from the AC outlet.
For your safety, do not place anything on power cords or cables. Arrange them so that no one may
accidentally step on or trip over them. Do not pull on a cord or cable. When unplugging the power cord
from the AC outlet, grasp the cord by the plug.
Setting up the monitor 7

Turning on the monitor
1. Press the power button on the source device to turn it on.
2. Press the power button on the back of the monitor to turn it on.
IMPORTANT: Ensure that the master power switch is in the On position. The master power switch is
located next to the power cord connector on the back of the monitor. For details, see Rear components
on page 3.
NOTE: The monitor may also be turned on using the optional remote control. For detailed instructions,
see Using the optional remote control on page 10.
IMPORTANT: Burn-in damage may occur on monitors that display the same static image on screen for
twelve or more hours. To avoid burn-in damage, always activate a screen saver application or turn o the
monitor when it will be unused for a prolonged period. Image retention is a condition that may occur on all
LCD screens. A burned-in image on the monitor is not covered under the HP warranty.
NOTE: If pressing the power button has no eect, the Power Button Lockout feature may be enabled. To
disable this feature, press and hold the monitor power button for 10 seconds.
When the monitor is turned on, a monitor status message displays for ve seconds. The message shows
which input is the current active signal, the current preset display resolution, and the recommended preset
display resolution.
The monitor automatically scans the signal inputs for an active input and uses the rst found active input for
the monitor.
Mounting the monitor
The monitor head can be attached to a wall, swing arm, or other mounting xture.
NOTE: This apparatus is intended to be supported by a UL Listed or CSA Listed wall-mount bracket.
CAUTION: This monitor supports the VESA industry-standard 400 mm mounting holes. To attach a third-
party mounting solution to the monitor head, four 6 mm, 1.0 pitch, 10 mm-long screws are required. Longer
screws may damage the monitor. It is important to verify that the manufacturer’s mounting solution is
compliant with the VESA standard and is rated to support the weight of the monitor head. For best
performance, it is important to use the power and video cables provided with the monitor.
8 Chapter 1 Getting Started

Removing the monitor feet
CAUTION: Before beginning to disassemble the monitor, be sure that the monitor is turned o and all cables
are disconnected.
1. Disconnect and remove all cables from the monitor.
2. Position the monitor head face up on a at surface covered by a clean, dry cloth.
3. Remove the screws from the feet (1) and detach the feet from the monitor (2).
Attaching the monitor head to a mounting device
1. Remove the monitor feet. See Removing the monitor feet on page 9.
2. Locate the 400 mm x 400 mm VESA mounting holes on the back of the monitor. Then follow the
instructions included with your mounting device.
IMPORTANT: Follow the mounting device manufacturer’s instructions when mounting the monitor to a
wall or swing arm.
Setting up the monitor 9

2 Using the monitor
Downloading the monitor driver
You can download and install the INF (Information) le from http://www.hp.com/support.
To download the le:
1. Go to http://www.hp.com/support.
2. Select Software and Drivers.
3. Select your product type.
4. Enter Omen X 65 in the search eld.
For the latest NVIDIA GeForce drivers for your computer, go to https://www.geforce.com/drivers.
Using the optional remote control
You can use the optional remote control accessory to access the OSD menu, navigate through the OSD menu
choices, and make adjustments to settings.
Component Function
1 5-way directional pad (D-PAD) Opens the OSD menu, navigates the OSD menu and selects an item from the menu, or
closes the OSD menu.
2 Back If the OSD menu is open, closes the OSD menu or goes back to the previous OSD screen.
If the OSD menu is closed and you press the button for an extended period of time, opens
shortcut menu (input source selection/power o).
3 Home If the OSD menu is closed, opens the OSD menu.
4 Voice search button Press and release to use voice activation to search for items.
5 Touch bar Swipe up/down for volume up/down adjustments.
10 Chapter 2 Using the monitor

Component Function
Tap twice to mute.
Using the on-screen display (OSD) menu
Use the OSD menu to adjust the screen image based on your preferences. You can access and make
adjustments in the OSD menu by using the OSD joystick on the back of the monitor or the monitor’s optional
remote control. See Using the optional remote control on page 10 for detailed instructions.
To access the OSD menu and make adjustments:
1. If the monitor is not already on, press the power button to turn on the monitor.
2. To access the OSD menu, press the center of the OSD joystick.
3. Move the joystick up, down, left, or right to navigate, select, and adjust the menu choices.
The following table lists the menu selections in the OSD menu.
Main menu Description
Gaming Adjusts game-related settings including overclocking, gaming-assist crosshair, and ambient lighting
Picture Selects and adjusts picture-related settings including color preset, local dimming, and backlight mode
Input Selects the video input signal
Power Adjusts the power settings
Audio Adjusts the audio settings
Menu Adjusts the OSD menu controls
Management Returns all OSD menu settings to the default settings
Information Displays important information about the monitor
Exit Exits the OSD menu screen
Selecting color presets
Use the OSD menu to select from a variety of color presets that congure the monitor for a variety of dierent
viewing situations. To access the color presets:
1. In the OSD menu, select the Picture menu.
2. Select the Color menu, and then select a color preset. The following table describes the available color
presets.
NOTE: Each preset has both a standard dynamic range (SDR) and high dynamic range (HDR)
conguration.
Color preset Description
Standard Recommended for general computing use; this mode has an sRGB gamut in SDR and a DCI-P3 gamut in
HDR. Both modes have a D65 white point.
Using the on-screen display (OSD) menu 11

Color preset Description
Gaming Identical to the Standard preset, but also enables game-specic options including overdrive. In HDR, this
preset uses the 2084 PQ + clip response, as recommended by the HDR Gaming Interest Group, a
consortium of gaming developers and monitor manufacturers.
Cinema Recommended for watching lm and television content. For SDR content, the preset uses a Rec. 709
gamut, a BT.1886 EOTF, a D65 white point, and a brightness of 100 nits to match the conguration of
reference monitors used by broadcasters and studios. For HDR content, the preset uses a DCI-P3 gamut,
a 2084 PQ EOTF, and a D65 white point.
Vivid Identical to the Standard preset, but also provides a wide DCI-P3 gamut (with no additional chroma
boosting) for SDR content.
Warm Identical to the Cinema color preset, but provides a warmer D55 white point in both SDR and HDR. This
white point is close to that used by 35 mm projectors and may be preferred for watching black-and-
white lms because it more closely matches their original appearance.
Cool Identical to the Standard color preset, but provides a cooler, more blue look than the standard white
point. This preset uses a D75 white point.
Low Blue Light Identical to the Standard color preset, but reduces the amount of blue spectral energy emitted by the
monitor. This color preset has a very warm color temperature (4874K).
Using RGB Gain Control
RGB Gain Control can be used to adjust the color temperature of any color preset. RGB gain adjustments are
stored separately for each color preset. Each RGB gain adjustment supports both boost and cut adjustments.
Adjusting the ambient lighting
The color and brightness of the ambient lights on the back of the monitor can be adjusted using the OSD
menu or OMEN Command Center.
To adjust the ambient lighting:
1. Press the center of the OSD joystick to open the OSD menu. Select Gaming, and then select Ambient
Lighting.
2. Select a setting:
●O: Turns o the ambient lighting.
●Screen glow: Makes backlight color follow the screen average color for gaming and video.
●Static color: Sets ambient light color to red, green, blue, yellow, purple, orange, and cyan.
●Random color: Randomly cycles ambient light color through the static colors.
●LED brightness: Adjusts the ambient lighting brightness.
NOTE: Ambient lighting is set to On (Omen Red) by default.
Using USB storage devices
Your built-in SHIELD features 16 GB of internal storage. You can increase the storage space for applications
and media by setting up a USB drive to replace or increase internal storage.
12 Chapter 2 Using the monitor

Using replacement storage devices
You can increase the storage space for applications and media on your SHIELD by setting up a USB drive to
replace the existing internal storage. Primary uses include DVR and server storage for applications such as
the included PLEX application. You can connect external hard drives or ash drives using the two USB 3.0
downstream ports located on the back of the monitor. See Rear components on page 3 for the location of
these ports. These USB 3.0 downstream ports are compatible with all external hard drives and USB ash
drives.
NOTE: External drives must be adopted as internal storage to be used for application or game storage.
IMPORTANT: When you format a USB drive as internal storage, it replaces your current internal storage. You
will no longer be able to use storage space on your existing internal storage for installing large game les.
Make sure the new USB storage space is larger than your current internal storage (16 GB). Additionally, when
you format a USB drive as internal storage, all data on the drive is erased, it becomes encrypted to your
SHIELD, and can no longer be used interchangeably with other devices such as personal computers or
cameras.
To prepare a USB or external hard drive for use as internal storage, format the drive in one of the following
data formats.
●FAT32 (32GB or less): SHIELD supports the FAT32 data format. Most drives that are 32 GB or less are
already formatted as FAT32. If the storage drive is not formatted, format it to FAT32 using your
computer. When using a FAT32 drive, your SHIELD will not be able to process les that are larger than 4
GB.
●exFAT (64 GB or more): SHIELD supports the exFAT data format. Storage drives that are 64 GB and above
come pre-formatted as exFAT. This newer data format is able to process les that are larger than 4 GB.
To access the USB storage drive on your SHIELD:
1. Insert the USB drive into one of the two USB 3.0 downstream ports. See Rear components on page 3 for
the location of these ports.
2. Go to Settings. Then select Device.
3. Select Storage & reset. Then select USB Storage.
IMPORTANT: SHIELD does not support the NTFS le system.
Using supplemental storage devices
Alternatively, you can set up your USB drive as removable storage for sharing les. However, you cannot
install applications and games to removable storage. You will no longer be able to use this USB drive to share
content between SHIELD and your monitor without formatting.
Using USB storage devices 13

Powering USB devices
You can power USB devices, such as an amplier for an external antenna, by connecting them to the USB
ports on the back of the monitor. See Rear components on page 3 for the location of these ports.
Using universal remote controls
As an alternative to the oicial remote control, sold separately, universal remote controls can be used to
control multiple devices from a single remote. The Omen X Emperium 65 monitor infrared (IR) codes have
been loaded into the Logitech Harmony remote database allowing your monitor to be directly controlled by
any Harmony remote. To add your monitor to your Harmony remote, enter HP as the manufacturer and Omen
X 65 as the product name in the Harmony application or program.
The IR codes provided to Logitech include discrete Power Toggle, Input Menu, and Audio Mute commands. The
Harmony database also includes commands to directly access each monitor input to allow easy switching
between connected devices.
Using the Omen X Emperium 65 monitor with Smart Home Systems
To integrate the Omen X Emperium 65 monitor into a Smart Home System, you will need to enter the IR codes
directly into the control software. The following table lists the IR codes for the Omen X Emperium 65 monitor.
Function IR Code
Up 0x807E52AD
Down 0x807E53AC
Left 0x807E54AB
Right 0x807E55AA
OK 0x807E56A9
Back 0x807E57A8
Home 0x807E58A7
Input Menu 0x807E5BA4
Volume Up 0x807E50AF
14 Chapter 2 Using the monitor
This manual suits for next models
2
Table of contents
Other HP Monitor manuals

HP
HP Presario CQ1569 User manual

HP
HP 2009f User manual

HP
HP Invent LP2065 User manual

HP
HP M27fe Assembly instructions

HP
HP LP2065 - 20.1" LCD Monitor User manual

HP
HP V202b Installation instructions

HP
HP 70205A Installation and operation manual

HP
HP L2314 User manual

HP
HP ProDisplay P17A LED Backlit User manual

HP
HP LP1965 - Promo LCD Monitor User manual

HP
HP Z27s User instructions

HP
HP E243M Manual

HP
HP Compaq R201 Assembly instructions

HP
HP VH27 Installation instructions

HP
HP ElitePOS 10TW Installation instructions

HP
HP Compaq Presario User manual

HP
HP TFT5600 User manual

HP
HP D2826A User manual

HP
HP 22m Installation instructions

HP
HP Essential LE1901w User manual