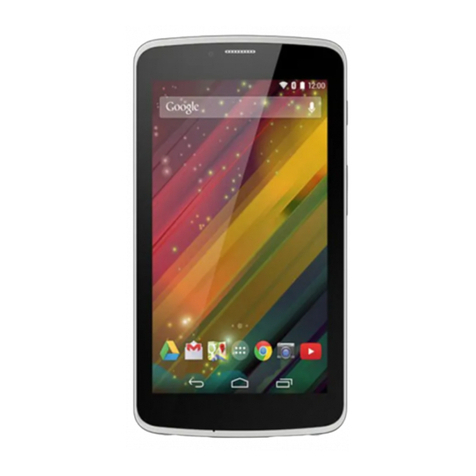
HP Pro 8 Manual

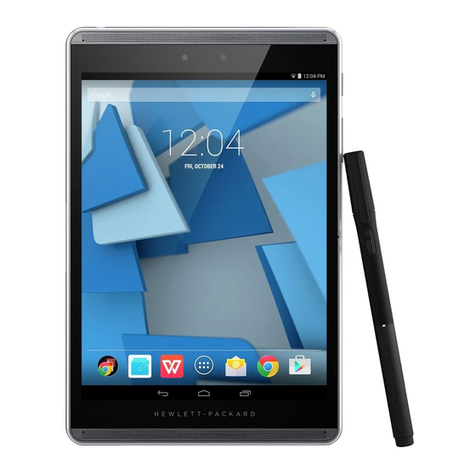
HP Pro 8 Tablet with Voice
Maintenance and Service Guide
IMPORTANT! This document is intended for HP
authorized service providers only.

© Copyright 2017 HP Development Company,
L.P.
© 2017 Google Inc. All rights reserved. Android
and Google are registered trademarks of
Google Inc. Bluetooth is a trademark owned by
its proprietor and used by HP Inc. under license.
SD Logo is a trademark of its proprietor.
The information contained herein is subject to
change without notice. The only warranties for
HP products and services are set forth in
the express warranty statements
accompanying such products and services.
Nothing herein should be construed as
constituting an additional warranty. HP shall
not be liable for technical or editorial errors or
omissions contained herein.
First Edition: April 2017
Document Part Number: 918956-001
Product notice
This guide describes features that are common
to most models. Some features may not be
available on your tablet.
Software terms
By installing, copying, downloading, or
otherwise using any software product
preinstalled on this tablet, you agree to be
bound by the terms of the HP End User License
Agreement (EULA). If you do not accept these
license terms, your sole remedy is to return the
entire unused product (hardware and software)
within 14 days for a refund subject to the
refund policy of your place of purchase.
For any further information or to request a full
refund of the tablet, please contact your local
point of sale (the seller).

Table of contents
1 Product description ....................................................................................................................................... 1
2 External component identication .................................................................................................................. 3
Identifying components ......................................................................................................................................... 3
Front .................................................................................................................................................... 3
Back ..................................................................................................................................................... 5
Locating product information ................................................................................................................................ 6
Locating system information ................................................................................................................................ 6
3 Illustrated parts catalog ................................................................................................................................ 7
Tablet major components ...................................................................................................................................... 7
Miscellaneous parts ............................................................................................................................................... 9
4 Removal and replacement preliminary requirements ..................................................................................... 10
Tools required ...................................................................................................................................................... 10
Service considerations ......................................................................................................................................... 10
Plastic parts ....................................................................................................................................... 10
Cables and connectors ...................................................................................................................... 10
Grounding guidelines ........................................................................................................................................... 10
Electrostatic discharge damage ........................................................................................................ 10
Packaging and transporting guidelines .......................................................................... 12
Workstation guidelines ................................................................................ 12
5 Removal and replacement procedures ........................................................................................................... 14
Tablet component replacement procedures ....................................................................................................... 14
Card tray ............................................................................................................................................................... 14
Back cover ............................................................................................................................................................ 15
Battery ................................................................................................................................................................. 16
Middle frame cover .............................................................................................................................................. 17
Rear-facing webcam ............................................................................................................................................ 18
Antenna board ..................................................................................................................................................... 20
Speaker ................................................................................................................................................................ 21
Volume and power button board ......................................................................................................................... 23
System board ....................................................................................................................................................... 24
Front-facing webcam ........................................................................................................................................... 26
Touchscreen display panel assembly .................................................................................................................. 27
iii

6 Specications .............................................................................................................................................. 28
7 Backing up and recovering your data ............................................................................................................. 29
Automatically updating apps .............................................................................................................................. 29
Manually updating apps, widgets, and the operating system ............................................................................ 29
Back up and reset ................................................................................................................................................ 29
Factory data reset ................................................................................................................................................ 30
Resetting with your tablet turned on ............................................................................................... 30
Resetting with your tablet without the operating system ............................................................... 30
Updating your tablet using an over-the-air (OTA) update .................................................................................. 31
Updating your tablet using a le-based update ................................................................................................. 32
8 Power adapter requirements ........................................................................................................................ 33
Requirements for all countries ............................................................................................................................ 33
Requirements for specic countries and regions ................................................................................................ 33
9 Recycling .................................................................................................................................................... 35
Index ............................................................................................................................................................. 36
iv

1 Product description
Category Description
Product Name HP Pro 8 Tablet with Voice
Processor MediaTek MT8735V/W
Panel 8 inch (21.07 cm), 800x1280, 16:10 aspect ratio, brightness: typical 500 nits (cd/m2)
10-nger capacitive multi-touch
Memory 2 GB LPDDR3, integrated onto system board
Storage 16 GB eMMC
Audio and video Support voice call via single 1.2 W internal speaker, wired or Bluetooth® headset, speaker and
receiver mode
Front-facing camera: 2 MP xed focus
Back camera: 5 MP auto focus with ash LED
One external microphone from audio-out (headphone)/audio-in (microphone) combo jack
Sensors Accelerometer
Ambient light sensor (ALS)
Proximity Sensor
Gyroscope
Wireless networking WPAN Bluetooth:
Bluetooth 4.0 LE
WLAN:
802.11 b/g/n, 2.4 GHz
Support for Miracast
GPS:
GPS, A-GPS, GLONASS, Geo Tagging
WWAN:
GSM 850/900/1800/1900, WCDMA B1 and B8, LTE (Band 3 and 40)
Single SIM card
External expansion ●MicroSD card slot expandable up to 64 GB, supports SD and SDHC
●On-The-Go (OTG) 2.0 extension cable to connect to USB devices. In addition to data transfer
it can connect to peripherals such as a mouse or keyboard, and connect to a USB stick or
external drive.
●USB to microUSB extension cable to connect to USB devices.
Ports ●Audio: 3.5 mm audio-out (headphone)/audio-in (microphone) combo jack for headset
●Micro Type-B USB connector
●Micro SIM card + microSD card slot supporting a single card tray
1

Category Description
●1 barrel charger
●POGO pin connector
Power requirements Battery:
Non-removable, 6000 mAh, 3.8 V Lithium-Ion Polymer battery
Adapter:
Barrel type charger
Operating system Preinstalled:
Android v6.0
Supports OTA update of Android v7.0.
Software Supports OTA updates for 3 years after purchase.
Serviceability End user replaceable parts:
●AC adapter
2 Chapter 1 Product description

2 External component identication
Identifying components
Front
Component Description
(1) Power connector Connects an AC adapter.
(2) Microphones Receive sound.
(3) Micro-B USB port Provides data transfer.
NOTE: A micro-B USB extension cable is included with your
voice tablet for connecting to USB devices.
(4) Audio-out (headphone)/Audio-in (microphone)
combo jack
Connects optional powered stereo speakers, headphones,
earbuds, a headset, or a television audio cable. Also connects an
optional headset microphone. This jack does not support
optional standalone microphones.
WARNING! To reduce the risk of personal injury, lower the
volume setting before putting on headphones, earbuds, or a
headset.
NOTE: When a device is connected to the jack, the speakers are
disabled.
Identifying components 3

Component Description
(5) Battery light When AC power is connected:
●White: The battery charge is greater than 99 percent.
●Amber: The battery charge is from 0 to 99 percent.
●O: The battery is not charging.
When AC power is disconnected (battery not charging):
●Blinking amber: The battery has reached a low battery
level. When the battery has reached a critical battery level,
the battery light begins blinking rapidly.
●O: The battery is not charging.
(6) Earpiece Produces sound for phone calls.
(7) Camera Records video and captures photographs.
(8) Volume button Press to increase or decrease sound.
(9) Power button ●When the voice tablet is o, press and hold the button for
about 2 seconds to turn on the voice tablet.
●When the voice tablet is on, press the button briey to
initiate Sleep.
●When the voice tablet is in the Sleep state, press the
button briey to exit Sleep.
CAUTION: Pressing and holding down the power button
without waiting for the Power o message can result in the loss
of unsaved information.
(10) Micro SIM card/MicroSD memory card tray Supports a micro subscriber identity module (SIM) card and a
microSD memory card in a dual-compartment tray.
NOTE: Your device has read/write support for microSD
memory cards up to 64 GB.
(11) Card tray access hole Insert a small straightened paper clip into the hole to release the
tray.
(12) Speaker Produces sound.
4 Chapter 2 External component identication

Back
IMPORTANT: Only HP service providers are authorized to open the back cover.
Component Description
(1) Accessory connector Allows you to connect accessories (purchased separately) that
support POGO pin connectors.
(2) WLAN antenna* Sends and receives wireless signals to communicate with
wireless local area networks (WLANs).
(3) Camera Records video and captures photographs.
(4) Camera ash Provides a camera ash. You can control the ash using camera
apps.
(5) WWAN antennas* Send and receive wireless signals to communicate with wireless
wide area networks (WWANs).
*The antennas are not visible from the outside of the voice tablet. For optimal transmission, keep the areas immediately around the
antennas free from obstructions.
For wireless regulatory notices, see the section of the Product Notices that applies to your country or region.
To access this guide:
▲On the Home screen, touch the All Apps icon , and then touch the HP Documentation app . Select the document.
Identifying components 5

Locating product information
The serial number (1) and product number (2) of your tablet are located on the back cover of the tablet. You
may need the information when you travel internationally or when you contact support.
Locating system information
System information is also available from two apps: Settings and HP Device Hub.
The About tablet option of the Settings app provides information about the serial number, product number,
and IMEI.
To access the About tablet setting:
1. On the Home screen, touch the All Apps icon .
2. Touch Settings, and then touch About tablet.
View the model number and version information.
3. To view IMEI and serial number information, touch Status.
The HP Device Hub app also provides access to system information, warranty information, support, operating
system updates.
To access the HP Device Hub app:
1. On the Home screen, touch the All Apps icon .
2. Touch the HP Device Hub icon .
6 Chapter 2 External component identication

3 Illustrated parts catalog
Tablet major components
NOTE: HP continually improves and changes product parts. For complete and current information on
supported parts for your tablet, go to http://partsurfer.hp.com, select your country or region, and then follow
the on-screen instructions.
Tablet major components 7

8 Chapter 3 Illustrated parts catalog

Item Component Spare part number
(1) Back cover (includes camera lens) 926157-001
Back cover with logo (includes camera lens) 937866-001
(2) Battery, 6000 mAh, 3.8 V Lithium-Ion Polymer 928848-001
(3) Middle frame cover(includes graphite heat sink, camera light guide, Wi-Fi antennas, GPS,
Bluetooth, and ngerprint reader sensor)
926158-001
(4) Antenna board 926160-001
(5) Speaker kit (includes speaker and cables) 926164-001
(6) Volume and power button board 926161-001
(7) Front-facing webcam (includes cable) 926165-001
(8) Rear-facing webcam (includes cable) 926166-001
(9) Micro SIM/microSD card tray 926162-001
(10) System board (includes motor, coaxial line, and ngerprint reader strobe light) 926568-001
(11) Touchscreen display panel assembly 926159-001
Miscellaneous parts
Component Spare part number
AC adapter 100-240 V input, 9 V/3 A output 922504-001
AC adapter 100-240 V input, 5 V/3 A output 928873-001
Cable micro-B USB to USB 931553-001
Cable micro-OTG 931553-001
Screw kit 926163-001
Miscellaneous parts 9

4 Removal and replacement preliminary
requirements
Tools required
You will need the following tools to complete the removal and replacement procedures:
●Magnetic Phillips 000 and 00 screwdrivers
●Plastic pry tool
Service considerations
The following sections include some of the considerations that you must keep in mind during disassembly
and assembly procedures.
NOTE: As you remove each subassembly from the tablet, place the subassembly (and all accompanying
screws) away from the work area to prevent damage.
Plastic parts
CAUTION: Using excessive force during disassembly and reassembly can damage plastic parts. Use care
when handling the plastic parts. Apply pressure only at the points designated in the maintenance
instructions.
Cables and connectors
CAUTION: When servicing the tablet, be sure that cables are placed in their proper locations during the
reassembly process. Improper cable placement can damage the tablet.
Cables must be handled with extreme care to avoid damage. Apply only the tension required to unseat or seat
the cables during removal and insertion. Handle cables by the connector whenever possible. In all cases, avoid
bending, twisting, or tearing cables. Be sure that cables are routed in such a way that they cannot be caught
or snagged by parts being removed or replaced. Handle ex cables with extreme care; these cables tear
easily.
Grounding guidelines
Electrostatic discharge damage
Electronic components are sensitive to electrostatic discharge (ESD). Circuitry design and structure determine
the degree of sensitivity. Networks built into many integrated circuits provide some protection, but in many
cases, ESD contains enough power to alter device parameters or melt silicon junctions.
A discharge of static electricity from a nger or other conductor can destroy static-sensitive devices or
microcircuitry. Even if the spark is neither felt nor heard, damage may have occurred.
10 Chapter 4 Removal and replacement preliminary requirements

An electronic device exposed to ESD may not be aected at all and can work perfectly throughout a normal
cycle. Or the device may function normally for a while, then degrade in the internal layers, reducing its life
expectancy.
CAUTION: To prevent damage to the tablet when you are removing or installing internal components,
observe these precautions:
Keep components in their electrostatic-safe containers until you are ready to install them.
Before touching an electronic component, discharge static electricity by using the guidelines described in this
section.
Avoid touching pins, leads, and circuitry. Handle electronic components as little as possible.
If you remove a component, place it in an electrostatic-safe container.
The following table shows how humidity aects the electrostatic voltage levels generated by
dierent activities.
CAUTION: A product can be degraded by as little as 700 V.
Typical electrostatic voltage levels
Relative humidity
Event 10% 40% 55%
Walking across carpet 35,000 V 15,000 V 7,500 V
Walking across vinyl oor 12,000 V 5,000 V 3,000 V
Motions of bench worker 6,000 V 800 V 400 V
Removing DIPS from plastic tube 2,000 V 700 V 400 V
Removing DIPS from vinyl tray 11,500 V 4,000 V 2,000 V
Removing DIPS from Styrofoam 14,500 V 5,000 V 3,500 V
Removing bubble pack from PCB 26,500 V 20,000 V 7,000 V
Packing PCBs in foam-lined box 21,000 V 11,000 V 5,000 V
Grounding guidelines 11

Packaging and transporting guidelines
Follow these grounding guidelines when packaging and transporting equipment:
●To avoid hand contact, transport products in static-safe tubes, bags, or boxes.
●Protect ESD-sensitive parts and assemblies with conductive or approved containers or packaging.
●Keep ESD-sensitive parts in their containers until the parts arrive at static-free workstations.
●Place items on a grounded surface before removing items from their containers.
●Always be properly grounded when touching a component or assembly.
●Store reusable ESD-sensitive parts from assemblies in protective packaging or nonconductive foam.
●Use transporters and conveyors made of antistatic belts and roller bushings. Be sure that mechanized
equipment used for moving materials is wired to ground and that proper materials are selected to avoid
static charging. When grounding is not possible, use an ionizer to dissipate electric charges.
Workstation guidelines
Follow these grounding workstation guidelines:
●Cover the workstation with approved static-shielding material.
●Use a wrist strap connected to a properly grounded work surface and use properly grounded tools and
equipment.
●Use conductive eld service tools, such as cutters, screw drivers, and vacuums.
●When xtures must directly contact dissipative surfaces, use xtures made only of static-safe materials.
●Keep the work area free of nonconductive materials, such as ordinary plastic assembly aids
and Styrofoam.
●Handle ESD-sensitive components, parts, and assemblies by the case or PCM laminate. Handle these
items only at static-free workstations.
●Avoid contact with pins, leads, or circuitry.
●Turn o power and input signals before inserting or removing connectors or test equipment.
12 Chapter 4 Removal and replacement preliminary requirements

Equipment guidelines
Grounding equipment must include either a wrist strap or a foot strap at a grounded workstation.
●When seated, wear a wrist strap connected to a grounded system. Wrist straps are exible straps with a
minimum of one megohm ±10% resistance in the ground cords. To provide proper ground, wear a strap
snugly against the skin at all times. On grounded mats with banana-plug connectors, use alligator clips
to connect a wrist strap.
●When standing, use foot straps and a grounded oor mat. Foot straps (heel, toe, or boot straps) can be
used at standing workstations and are compatible with most types of shoes or boots. On conductive
oors or dissipative oor mats, use foot straps on both feet with a minimum of one megohm resistance
between the operator and ground. To be eective, the conductive must be worn in contact with the skin.
The following grounding equipment is recommended to prevent electrostatic damage:
●Antistatic tape
●Antistatic smocks, aprons, and sleeve protectors
●Conductive bins and other assembly or soldering aids
●Nonconductive foam
●Conductive tabletop workstations with ground cords of one megohm resistance
●Static-dissipative tables or oor mats with hard ties to the ground
●Field service kits
●Static awareness labels
●Material-handling packages
●Nonconductive plastic bags, tubes, or boxes
●Metal tote boxes
●Electrostatic voltage levels and protective materials
The following table lists the shielding protection provided by antistatic bags and oor mats.
Material Use Voltage protection level
Antistatic plastics Bags 1,500 V
Carbon-loaded plastic Floor mats 7,500 V
Metallized laminate Floor mats 5,000 V
Grounding guidelines 13

5 Removal and replacement procedures
Tablet component replacement procedures
CAUTION: Tablet components described in this chapter should only be accessed by an authorized service
provider. Accessing these parts can damage the tablet and void the warranty.
NOTE: HP continually improves and changes product parts. For complete and current information on
supported parts for your tablet, go to http://partsurfer.hp.com, select your country or region, and then follow
the on-screen instructions.
This chapter provides removal and replacement procedures for authorized service provider only parts.
There are as many as 36 screws that must be removed, replaced, and/or loosened when servicing the tablet.
Make special note of each screw size and location during removal and replacement.
Card tray
CAUTION: To reduce the risk of loss of data or an unresponsive system, save your information and close all
programs associated with the microSD card.
Description Spare part number
Micro SIM/microSD card tray 926162-001
Remove the card tray:
CAUTION: To prevent damage to the card or the voice tablet, do not use force to remove or replace the tray.
CAUTION: Before turning the voice tablet screen facedown, be sure that the work surface is clear of tools,
screws, and any other foreign objects. Failure to follow this caution can result in damage to the screen.
1. Place the voice tablet screen facedown.
2. Insert a small straightened paper clip (1) into the card tray access hole.
3. Press in gently only until the card tray is ejected.
14 Chapter 5 Removal and replacement procedures

4. Remove the tray (2) from the voice tablet.
Reverse the steps to replace the tray.
NOTE: Be sure the card tray access hole is aligned with the access hole on the tablet before replacing the
tray.
Back cover
Description Spare part number
Back cover (includes camera lens) 926157-001
Back cover with logo (includes camera lens) 937866-001
Before removing the back cover, follow these steps:
1. Turn o the tablet. If you are unsure whether the tablet is o, turn the tablet on, and then shut it down
through the operating system.
2. Disconnect the power from the tablet by unplugging the power adapter cord from the tablet.
3. Disconnect all external devices from the tablet.
4. Remove the card tray (see Card tray on page 14).
Remove the back cover:
CAUTION: Before turning the voice tablet screen facedown, be sure that the work surface is clear of tools,
screws, and any other foreign objects. Failure to follow this caution can result in damage to the screen.
1. Place the tablet on a at surface, screen facedown.
2. Use a plastic pry tool (1) in the space between the back cover and screen, above the power on button.
3. Slide the tool (2) clockwise around the tablet to release the 18 plastics snaps securing the back cover to
the display panel assembly.
Back cover 15

4. Lift the cover (3), and then remove the back cover.
Reverse this procedure to install the back cover.
Battery
Description Spare part number
Battery, 6000 mAH 3.8 V Lithium-Ion Polymer 928848-001
Before removing the battery, follow these steps:
1. Turn o the tablet. If you are unsure whether the tablet is o, turn the tablet on, and then shut it down
through the operating system.
2. Disconnect the power from the tablet by unplugging the power adapter cord from the tablet.
3. Disconnect all external devices from the tablet.
4. Remove the card tray (see Card tray on page 14).
5. Remove the back cover (see Back cover on page 15).
WARNING! To reduce potential safety issues, use only the battery provided with the tablet, a replacement
battery provided by HP, or a compatible battery purchased from HP.
CAUTION: Removing a battery that is the sole power source for the tablet can cause loss of information. To
prevent loss of information, save your work or shut down the tablet through the operating system before
disconnecting and removing the battery.
Remove the battery:
1. Remove the 2 M00 x 5.0 Phillips screws (1) securing the battery.
NOTE: Be careful not to bend the battery as you lift it.
16 Chapter 5 Removal and replacement procedures
Table of contents
Other HP Tablet manuals

HP
HP Elite x2 1011 G1 User instructions

HP
HP TC1100 - Compaq Tablet PC Manual

HP
HP ELITE x2 1012 G1 Manual

HP
HP FB359UA#ABA User manual

HP
HP Compaq 8 1400 Manual

HP
HP ElitePad 1000 G2 User manual

HP
HP 7 Plus G2 Manual

HP
HP 11-be0 Series Manual

HP
HP Compaq Tablet PC TC1100 User guide

HP
HP ElitePad 900 User manual