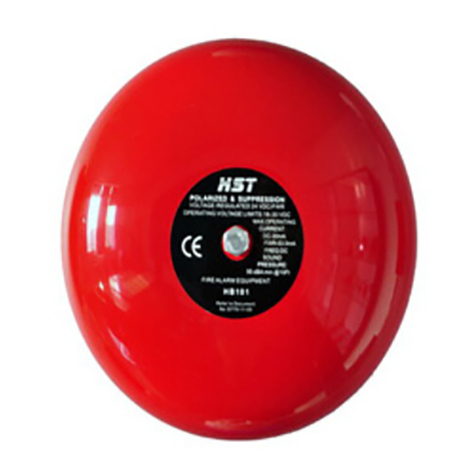
HST HD105B User manual

DC Powered
Gas Alarm for
Natural or Bottled (LPG)
Gas
With Relay Output
User’s Guide
MODEL HD105B (With Relay Output)
ATTENTION: Please take a few minutes to thoroughly read
this manual, which should be saved for future reference and
passed on to any subsequent owner.
IMPORTANT! READ ALL IN TRUCTION BEFORE
IN TALLATION AND KEEP THI MANUAL NEAR
THE ALARM FOR FUTURE REFERENCE.
CONTENT OF THI MANUAL
1 – DE CRIPTION
2 – FEATURE
3 -- TECHNICAL PECIFICATION
4 -- IN TALLATION IN TRUCTION
5 -- OPERATION AND TE TING
6 -- GA AFETY GUIDE
7 -- HOME AFETY GUIDE
8 -- ERVICE AND WARRANTY
1. DE CRIPTION
The gas alarm is designed for single station use. mall
and compact, the design and color makes it ideal for
use in the home, small commercial properties, and
recreational vehicles. It is intended to detect leakage of
natural gas (methane gas), town gas, and bottled gas
(propane gas). The unit is designed for DC wire-in
applications. The gas alarm can be mounted high (for
methane gas) or low (for propane (LPG) gas). It is
equipped with a sturdy metal mounting bracket for
quick, easy, and secure installation.
2. FEATURE
Detect all sorts of combustible gases, natural gas
(methane), bottled gas (propane), LPG (Liquefied
petroleum Gas), LNG (Liquefied natural gas), coal
gas, including town gas.
Easy to install, mounting bracket included.
Loud 85dB alarm and LED warning light.
High quality durable sensor.
elf diagnostic function by MCU intelligent
software.
Excellent reliability & High stability.
Ideal for all kitchens.
3. TECHNICAL PECIFICATION
Unit Dimensions: 103mm (D) x 55 mm (H)
Color: Ceiling White
Weight: 155g
Operating Temperature: -10 C to +50 C
Ambient Humidity: ≤95% RH
Alarm Horn: 85dB at 3m (10 feet)
Operating Voltage: DC9-28V
Power Consumption: <1.5W (Standby), <5W (Alarm)
For your convenience,
write down the following information.
If you call Us for Service, these are the first questions you
will be asked.
Gas Alarm Model Number (located on back of alarm):
Gas Alarm Assembly Number (Located on back of alarm):
Date of Purchase:
Where Purchased:
©

Value of Detection Threshold (Lower Explosive Limit):
Natural Gas: 5000ppm (10% LEL)
LPG: 2000PPM (10% LEL)
Coal Gas: 800PPM (2% LEL)
Method of Alarm: Flashing Red LED with 85dB alarm
Warm Up Time: approximately 60 Seconds
Alarm Output: Relay Output (Normal Open 2A@DC24V)
4. IN TALLATION IN TRUCTION
The Gas Alarm is intended to detect leakage of natural gas,
town gas and bottled gas. It is intended for installation in the
home, small commercial properties, and recreational
vehicles.
Installation shall only be undertaken by technicians
holding a certificate issued by an authorized distributor.
For detecting natural gas (lighter than air), the alarm
should be installed within 30 centimeters below the ceiling
and the maximum distance away from the furnace or gas
appliances is 8 meters.
For detecting LPG (heavier than air), the alarm should be
installed within 30 centimeters above the floor and the
maximum distance away from the furnace or gas
appliances is 4 meters.
The alarm should not be located close to any obstacles
preventing natural air circulation. It should also not be
located in a draft or close to a cooker (cooking smells and
other fumes can have a bad influence on gas detection).
The detector can be connected with ecurity alarm panel
as Figure1. Relay output signal can be changed from
Normal Close(NC) to Normal Open(NO) by Jump JP1 on
the PCB board.
The detector can be connected with conventional alarm
panel as Figure 2 or Figure3.
FIGURE1 Terminal Wiring with ecurity Alarm Panel
FIGURE2 Terminal Wiring with Fire Alarm Panel ( 3 Wires)
FIGURE3 Terminal Wiring with Fire Alarm Panel ( 4 Wires)
5. OPERATION AND TE TING
Check and test the gas alarm after installation. It
should be tested weekly and check after re-occupation
following a holiday.
After turn on the power, the LED is on, and then the
unit would take 30 to 300 seconds to warm up. In
the warm up time, the Yellow LED would flashes
until end of the warm up period.
Check that LED indication LED is on to ensure the
power supply is turn on.
Check that the LED flashes every 8 seconds to
ensure the unit is in operating mode.
Press and hold the test button for up to 1 to 3
seconds, and the alarm should sound and the LED
flash rapidly while buzzer is sounding, after 6
seconds later, the alarm exit the test mode and
return to normal operating mode. To ensure the gas
alarm is working, you should test it weekly.
E O L R e s i s t o r ( 6 . 8 K )
D C 2 4 V +
D C 2 4 V -
C o n v e n t i o n a l F i r e
A l a r m C o n t r o l P a n e l
Z O N E +
R e s i s t o r
( 4 7 0 o h m / 1 w )
Z O N E -
E O L R e s i s t o r ( 6 . 8 K )
Z O N E +
D C 2 4 V - ( 0 V )
C o n v e n t i o n a l F i r e
A l a r m C o n t r o l P a n e l
Z O N E -
R e s i s t o r
( 4 7 0 o h m / 1 w )
R e s i s t o r
( 4 7 0 o h m / 1 w )
e c u r i t y A l a r m P a n e l
D C 1 2 V +
D C 1 2 V -
D C P o w e r u p p l y
i s U n p o a r i z e d w i r e
A l a r m i g n a l
R e l a y O u t p u t - C O M
R e l a y O u t p u t - N C / N O
A l a r m i g n a l
R e l a y O u t p u t - C O M
R e l a y O u t p u t - N C / N O

While detecting the gas leaking, the Red Alarm LED
would turn on and the buzzer sound, and relay contacts
would be activated and output signals.
6. GA AFETY GUIDE
If you hear the gas alarm sound or suspect that there is a
gas leakage. You should open all windows and doors to
allow the gas to disperse.
FIGURE 4 FIGURE 5
Don’t switch on lighting, press door bell, exhausting fan or
any kind of electrical appliance to avoid explosion.
FIGURE 6 FIGURE 7
Check all the gas appliances. Extinguish any naked
flames and turn off the gas control off the gas supply.
Call the Fire department immediately outside your home
or premises/ apartment.
7. HOME AFETY GUIDE
If you are on holiday, turn off appliances switches & the
gas control valve.
Do not place the bed near gas pipes or gas meter.
Do not change the location of gas pipes by yourself.
In order to ensure your home safety, please employ
registered installers for regular safety inspection of all gas
installation & appliances.
Attention:
Keep these things, such as paints, chemicals, alcohol away
to make a false alarm.
8. ervice and Warranty.
Install and adjust according to this guide book.
Check the detector once a week; please keep
contact with the service provider immediately if you
get some problems.
Do not tear down or sling the detector randomly.
Do not use chemicals to clean the detector directly,
or wash with water.
The detector is designed with automatic detection,
if the gas sensor or unit in error, do not
disassemble the unit yourself, but get advice from
professional company or service provider.
The manufacturer guarantees to take the
responsibility for free repair and exchange for one
year from the date of purchase if there is quality
problem, and only charge for capital cost beyond
one year.
Other HST Security System manuals
Popular Security System manuals by other brands

Smartwares
Smartwares SC88 Instructions for use

brennenstuhl
brennenstuhl BrematicPRO THS 868 01 IP44 Instructions for use

Omron
Omron Sti F3SJ-A Series instruction sheet

Ei Electronics
Ei Electronics RadioLINK Ei262 Leaflet

Whelen Engineering Company
Whelen Engineering Company 1502M INSTALLATION WIRING GUIDE

Interlogix
Interlogix advisorone Quick operation guide