6
Before Use
Instructions
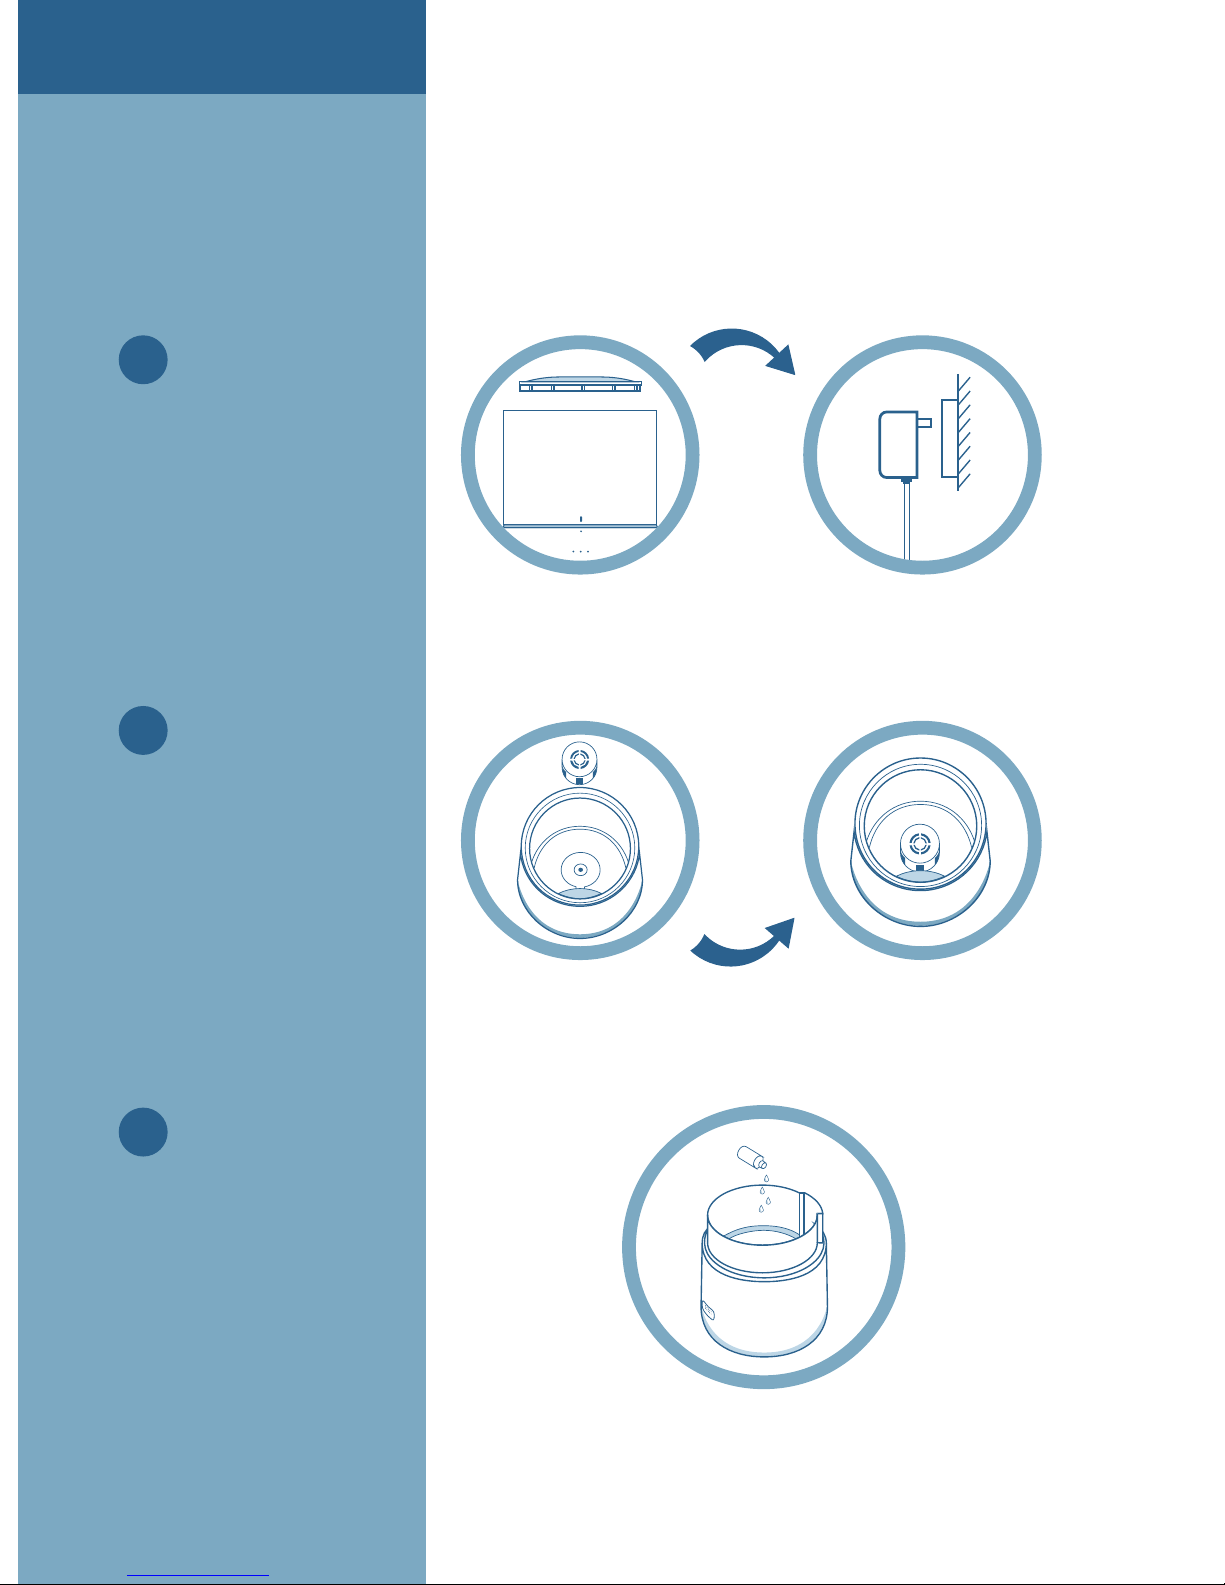
Open the package, install
the floater on the floater
bracket as shown.
Plug the power adapter
into the product connector
and push the wire into the
Wire Lock as shown.
Install the tank according
to the Calibration Points,
open the cover and fill the
tank with clean water. Pay
attention to not exceed the
maximum water level.
1
2
3
Max Water
Level Indicator
Calibration
Points
Wire Lock
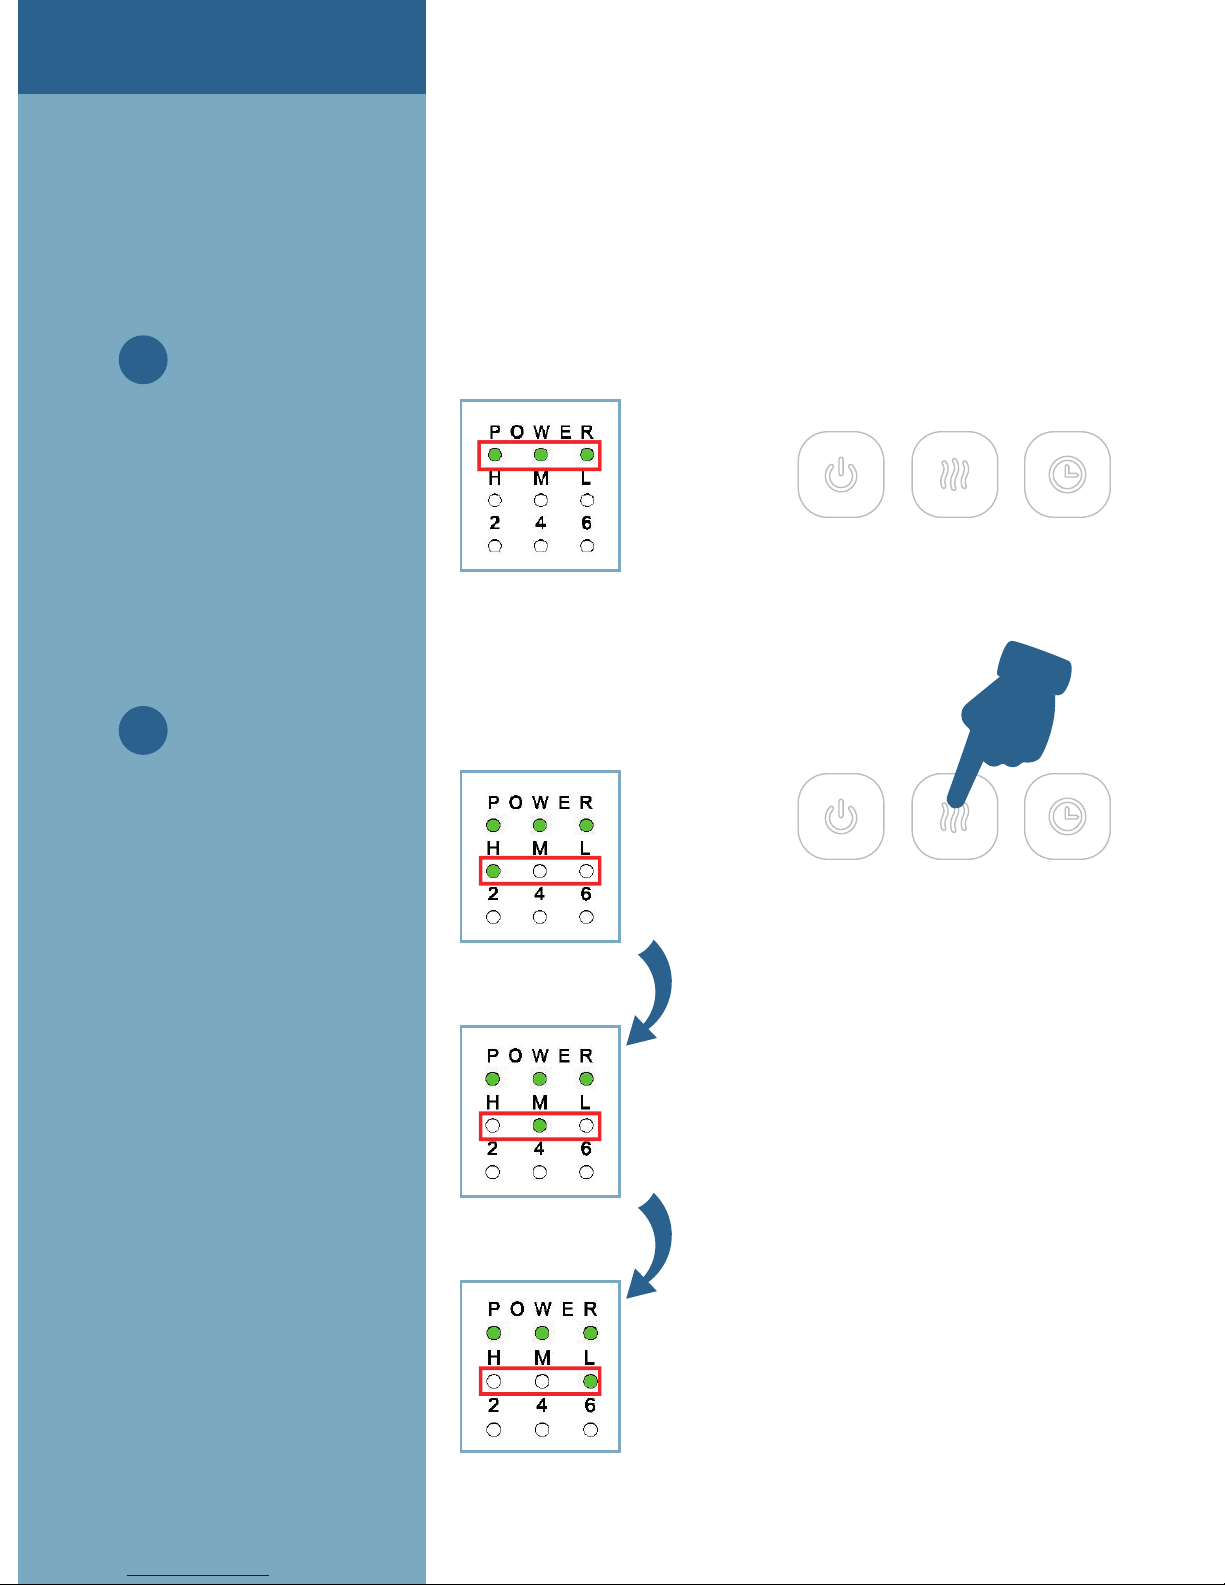
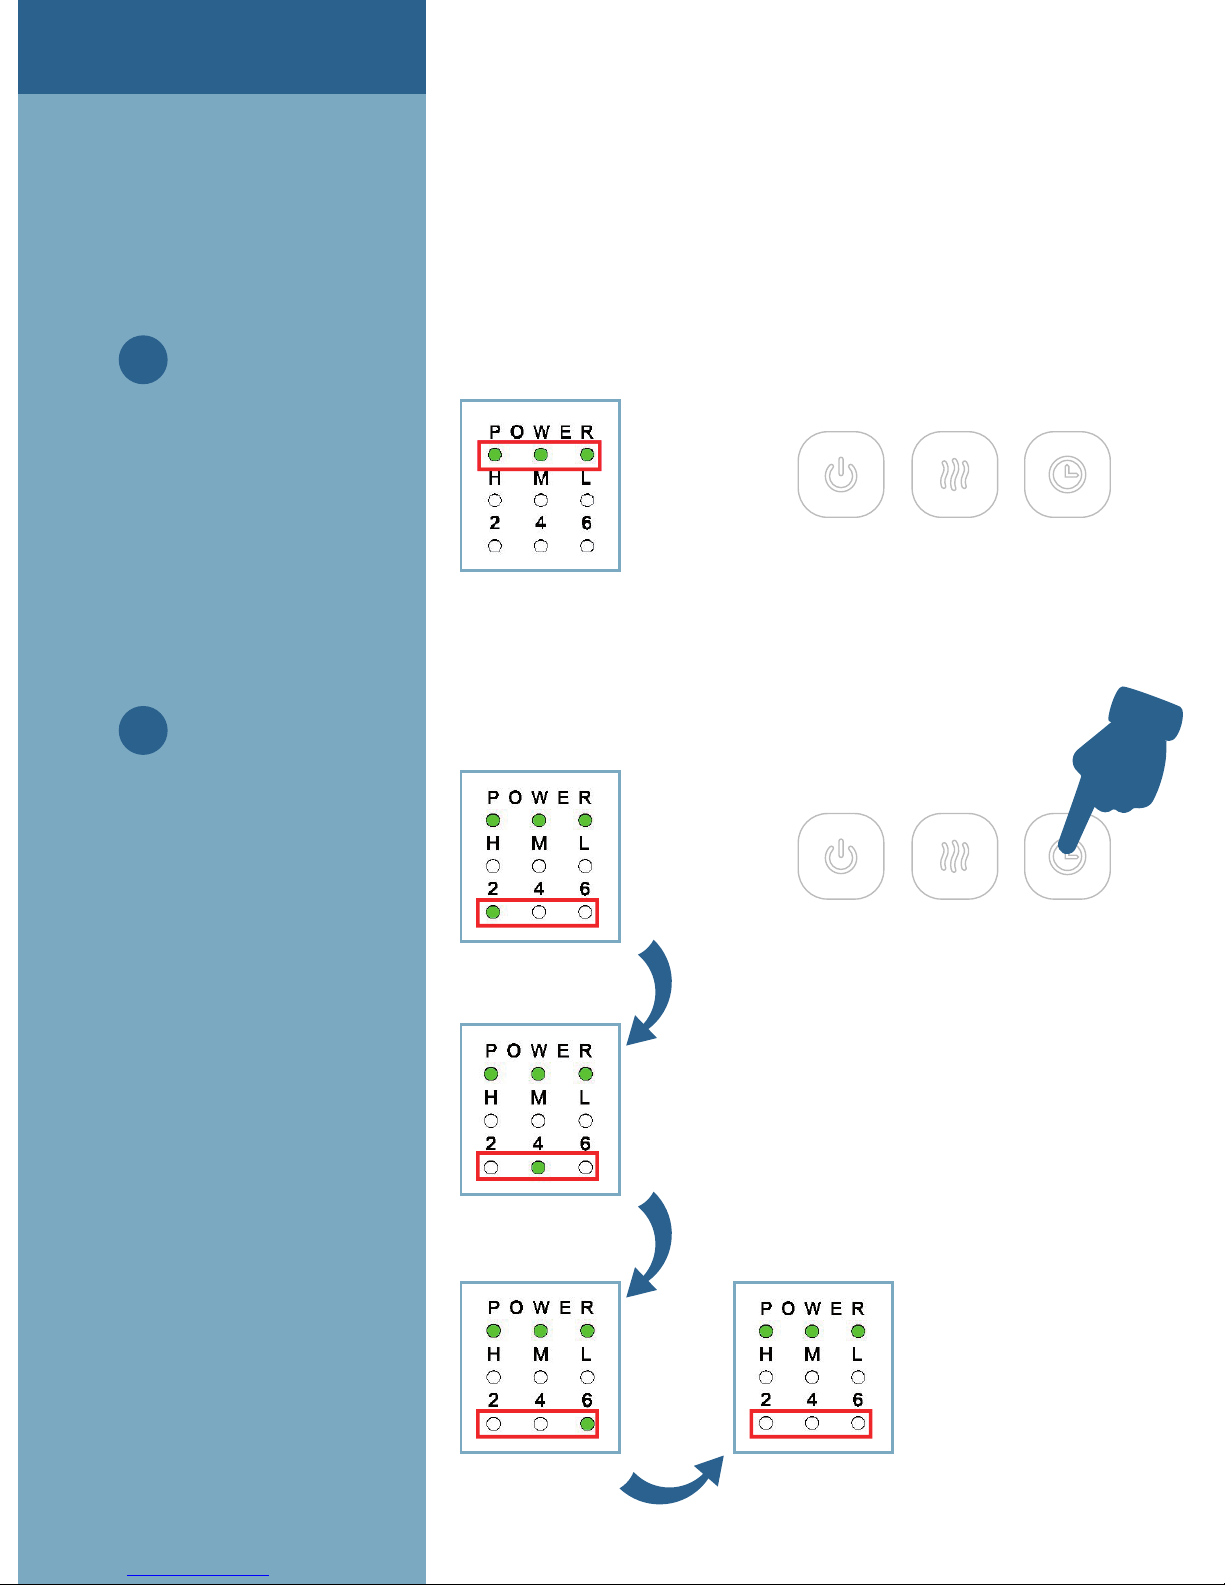
POWE R
HM L


 User manual")


