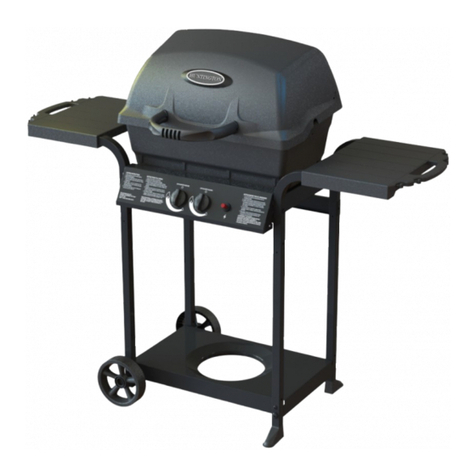
Huntington High Class GG201966 User manual

1
GG201966
Huntington
High Class
ASSEMBLY, USE
AND INSTRUCTION MANUAL EN
READ THE OPERATING INSTRUCTIONS
BEFORE USING THE APPLIANCE.
FOR OUTDOOR USE ONLY.
!
6+1

2
Warnings.................................................................... 3
Technical data ............................................................4
Gas category ...............................................................4
Exploded drawing ....................................................... 5
Parts list ................................................................... 6
Hardware ...................................................................7
Assembly instructions ...................................................8
Gas leak test ............................................................ 18
Connecting gas ...........................................................19
Lighting instructions ...................................................20
Before using the grill................................................... 22
Warnings ..................................................................23
Maintenance .............................................................24
Cleaning ...................................................................24
Troubleshooting ........................................................25
Contents

3
WARNINGS
!Failure to follow the instructions provided can imply a risk of
serious injury to personnel and xed installations.
!Some grill parts can be sharp, we recommend wearing gloves
when assembling and lifting. Sharp edges can cause injury.
!The grill is intended for outdoor use only in well-ventilated areas.
Never grill in enclosed spaces or under a roof, due to the danger of the
lack of oxygen.
!Accessible parts of the grill become very hot during use.
Keep children and others who need supervision at a safe distance.
!Do not move the grill while in use or connected to the gas bottle.
Shut off the gas on the regulator after use and disconnect from the
gas bottle.
! Modication of the grill can cause danger and will invalidate
the warranty.
!Never keep the gas bottle under the grill when in use. Gas leaks
can cause serious damage. Place the gas bottle by the side of the grill
during use.
! Do not place the grill cover or other ammable material in the
compartment under the grill when it is in use or hot.
!Do not use lava stones, charcoal or briquettes.
!Clean the grill regularly and thoroughly.
!

4
Technical data — Huntington 6+1
Gas information 0359-18
FOR USE IN
COUNTRIES VALVE SIZE GAS TYPE GAS CATEGORY
BE, CH, CY, CZ,
ES, FR, GB, GR,
IE, IT, LT, LU LV, PT,
SK, SI
0.9 mm Butan (28~30) mbar
Propan 37 mbar I3+(28-30/37)
BE, CY, CZ, DK,
EE, FI, FR, HU, IT,
LT, NL, NO, SE, SI,
SK, RO, HR, TR,
BG, IS, LU, MT
0.9 mm
G30(butan),G31(propan)
and mixture of these,
LPG 28~30 mbar
I3B/P(30)
PL 0.86 mm
G30(butan), G31(propan)
and mixture of these,
LPG 37mbar
I3B/P(37)
AT, CH, DE, SK 0.81 mm
G30 (butan),G31(propan)
and mixture of these,
LPG 50mbar
I3B/P(50)
Total effect: 24 kW
(main burner heat input 21 kW (1526 g/h,
side burner heat input: 3 kW (218g/h)
Total gas consumption: 1744 g/h.
Hose and regulator (not included):
Must be approved according to
EN standard.
Gas bottle (not included): Use standard
bottle approved for use in the Nordic
Region, 10/11 kg recommended. Even
though butane and propane gas can be
used, we recommend propane for use in
the Nordic Region. Approved hoses and
regulators are available from most outlets
selling gas equipment.
NB!
Gas hoses used for this product must
not exceed 120 cm in length.
This product is produced according to EUROPEAN GAS APPLIANCE
STANDARD EN498 AND EN484 and is CE certied.

5
Exploded drawing

6
Nr.
Appellation
Qty
1
Lid
1
2
Thermometer
1
3
Lid
handle
1
4
Warming
rack
1
5
Insert system basic grill
1
6
Cast iron
grid 295mm
1
7
Cast iron
grid 195mm
1
8
Big heat distribution
panel
8
9
Small heat distribution
panel
2
10
Grease
tray
1
11
Grease cup
1
12
Right side table
1
13
Rear low
panel
1
14
Leg-A
2
15
Side low
panel
2
16
Leg-B
2
17
Door magnet
1
2
18
Cart front
beam
1
19
Bottom panel
1
20
Bottom panel
ornament
1
21
Lockable caster
4
22
Cart attachment bracket
4
23
Door
2
24
Door handle
2
25
Control panel
assembly
1
26
Control panel
ornament
1
27
Main burner tube assembly
6
28
Firebox assembly
1
29
Side burner control knob
1
30
Main burner control knob
6
31
Side burner nozzle base
1
32
Table connection bars
4
33
Side burner assembly
1
34
Side burner cooking grid
1
35
Insert system round grill
1
Parts list
MGS*
*Multi Grill System

7
TOOLS FOR ASSEMBLING (NOT INCLUDED)
0102030405060708090 100 110 120 130 140 150
0123456
0102030405060708090 100 110 120 130 140 150
0123456
Medium size at blade or
Philips/cross-point screwdriver
Adjustable spanner or
metric spanner set
Ruler
01 02 03 04 05 06 07 08 09 0 100 110 120 130 140 150
01 23 45 6
WARNING!
Exercise caution when using electric tools –
their strength can damage the screws.
Hardware

8
Assembly instructions
Please follow these instructions step by step.
We recommend two people to assemble the
grill to avoid heavy lifting.
1

9
2
3

10
4
5

11
6
7

12
8
9

13
10
11

14
12
13

15
14
15

16
16
17

17
18
ASSEMBLY IS NOW COMPLETE.
ALL JOINTS AND CONNECTIONS MUST NOW BE LEAK TESTED BEFORE USING
THE GRILL. READ CAREFULLY CHAPTER ON LEAK TESTINING.

18
8
If there are still gas leaks after repeated attempts, contact your dealer.
7
IF BUBBLES APPEAR, SWITCH OFF THE GAS SUPPLY AND REPAIR THE
PROBLEM. PERFORM A NEW LEAK TEST. DO NOT USE THE GRILL BEFORE YOU
ARE SURE THAT THERE ARE NO LEAKS.
6Open the gas tap on the regulator and carefully check for bubbles
appearing anywherethe liquid has been applied.
1Make a mixed solution
(½ water and ½ liquid detergent / soap).
2
Ensure that there are no naked ames,
heat sources and cigarettes in the vicinity
when performing a leak test.
3
Check that all controls on the grill are in
the ”OFF” position.
4
Set the regulator to the ”OFF” position and connect it
to the gas bottle.
5Apply the liquid to all joints and connections on the gas bottle,
regulator, the entire hose and all valves on the grill.
ALL JOINTS AND CONNECTIONS MUST NOW BE
LEAK TESTED BEFORE USING THE GRILL.
Leak test annually, and whenever the gas bottle is removed or replaced.
Always perform a leak test in a well-ventilated area.
!WARNING!
NEVER USE AN OPEN
FLAME TO PERFORM
A GAS LEAK TEST
IMPORTANT! GAS LEAK TEST
!

19
ALWAYS perform a gas leak test before using the grill.
Connect the gas hose to the gas
rail inlet on the left hand side of the
barbecue. Do not overtighten.
Do not use any sealing tape, paste
or liquid on the connection.
Connect the regulator to the gas
bottle according to your regulator
and bottle dealer’s instructions.
Gas hoses used for this product
must not exceed 120 cm in length
Conrm all barbecue control knobs
are in the OFF position.
We recommend propane gas for
use in the Nordic Region, but butane
can also be used.Butane is not very
suitable for low temperatures.
Fit the regulator and the hose.
Follow the assembly instructions
supplied with the regulator set.
Check the gas hose regularly
for cracks, damage and de-
cay. Never use a damaged gas
hose.
Check that the movable
plastic collar on the regulator
is intact and that it has not
been damaged by hot grill
parts.
Check that the gas bottle
stands on a rm, at surface
and is lower than the
connector.
Use an approved gas
bottle that ts the regulator
supplied. Bottles of 10/11 kg
or above are recommended.
I3B/P(30): G30(Butane), G31(propane)
and mixture of these, LPG 28-30 mbar
The following gas types can be used
Hose Gas bottle
Regulator
Connecting the gas
WARNING
!Never store the gas bottle
under the grill when in use. If the
gas bottle is being stored under the
grill when not in use, disconnect
the regulator.
!Never move the grill while
it is in use, or connected
to the gas bottle.

20
Lighting instructions Huntington 6+1
MANUELL-MANUAL IGNITION
If the grill will not light using the
normal lighter, use the following
procedure for manual lighting.
Use a long match or lighter.
1. Follow step 1 and 2
(Lighting instruction).
2. Lift up the grate and place a
grillighter or a lit match close to
one burner.
3. Push and turn any knob anti-
clockwise to the high position,
taking care to protect yourself
from the ames.
4. When the burner is lit, light
the remaining burners. Conrm
that each burner is alight before
turning on the next burner.
5. If a burner fails to ignite,
contact your local dealer for
assistance.
6. Follow step 6.
WARNING: If the burner still does not light, turn the burner control knob to OFF and
wait 5 minutes to let the gas clear before lighting again.
1The lid must be open when lighting the burner. Do not
stand with your face directly over the gas grill when
lighting it. Your gas grill will have following method of
ignition: PILOT GAS CONTROL IGNITION:
2With all gas controls on the gas grill in the “OFF”
position, turn the gas cylinder valve to the ON position
at the regulator.
3To create a spark you must push the control knob in
(A) and hold in this position for 3-5 seconds to allow
gas ow and then turn anticlockwise to” HIGH” (B). It can
spark to the burner lighting tube (C). You will hear a “snap”
from the igniter and you will also see a 3”-5” orange ame
coming from the burner lighting tube at the left side of the
burner (D). Continue to hold the burner control knob in
for two seconds after the “snap”, this will allow gas to ow
completely down the burner tube (E) and insure ignition.
4When the burner is alight, adjacent burners will cross
light when their controls are turned to “HIGH”. At
“High” setting the burner ame should be approximately
12-20mm long with a minimum of orange ame. Turn the
gas control fully anticlockwise for minimum setting.
5Should you have any difculty lighting your gas grill
following the above steps, contact your dealer for
advice.
6
After completion of preheating, turn all burners to the
low position for best cooking results.
!
Table of contents
Other Huntington Grill manuals
Popular Grill manuals by other brands

BRABURA Griddle
BRABURA Griddle BGLD0001 instruction manual

Holland Grill
Holland Grill companion instruction manual

Philips
Philips HD4428/00 user manual

Proluxe
Proluxe Vantage SL Compact SL1266 Operation manual

Life Home
Life Home GSC3218JBN user manual

Nexgrill
Nexgrill 730-0371 Assembly & operating instructions