HuPro PRO-773 User manual

Warm & Cool Mist Humidification
ULTRASONIC HUMIDIFIER
MODEL: PRO-773

CONTENTS 2
Introducon….....................................................................................................................................................3
Applicaon of the device.................................................................................................................................4-5
Safety...............................................................................................................................................................6-8
User safety ps.............................................................................................................................................9-10
Humidifier parts................................................................................................................................................11
Instrucons for use.....................................................................................................................................12-13
Operang instrucons.................................................................................................................................14-15
Adding essenal oils to the aroma tray............................................................................................................16
Remote control................................................................................................................................................ 17
Remote control baery replacement...............................................................................................................18
Water filter.......................................................................................................................................................19
Care for the device...........................................................................................................................................20
Storage.............................................................................................................................................................21
Specificaons....................................................................................................................................................22
Troubleshoong...............................................................................................................................................23
Warranty...........................................................................................................................................................24

Dear buyer!
We thank you once again for choosing our brand HuPro. We sincerely hope that using our product will be a
sasfactory experience for you and you will consider becoming our regular customer.
The humidifier helps you restore the appropriate level of humidity and eliminate the discomfort associated
with dry air. We wish you many years of healthy indoor air with the help of this effecve product.
Please familiarize yourself with the instrucons which include valuable informaon about the product and
all its features in order to get the best experience while operang the ultrasonic humidifier. Use the item
only according to the following instrucons. In case of misuse, the device might malfuncon or possibly
cause a short circuit.
The manufacturer cannot be held responsible in cases where the device has been used for purposes other
than those menoned in the instrucons, misuse, noncompliance with safety rules, or in cases of unqualified
repairs.
We are always here to help you.
INTRODUCTION 3

The HuPro supersonic humidifier is an effecve soluon to insufficient air humidity. So purified air will
contribute to your beer sleep, relieve symptoms of colds, headaches, moisturize & improve elascity of the
skin, and boost the properes that protect the skin.
Ensures good
night sleep
Relieves cold and
flu symptoms
Reduces allergy
symptoms
Ensures long life
of wooden surfaces
and hardware floors
Prevents
headaches
Relieves
dry skin
Cares for
indoor plants
Low energy
consumpon
APPLICATIONS OF THE DEVICE 4

An intuively intelligible interface, stylish design, and automac safety system will provide a great experience
while operang the device. You’ll enjoy its quality and longevity from the very first minute.
Remote
control
Automac
control of
humidity level
%
Automac shut
off when out
of water
Anbacterial
anion funcon
Aroma
oil tray
APPLICATIONS OF THE DEVICE 5
5,5 L Capacity
& 40H
Humidifying
Boom
filling
design
Warm and Cool mist
with 3 speed levels
5,5 L

) This appliance can be used by children aged from 8 years and above and persons with reduced physical, 1
sensory or mental abilies or lack of experience and knowledge if they have been given supervision or
instrucon concerning use of the appliance in a safe way and understand the hazards involved. Children
shall not play with the appliance. Cleaning and user maintenance shall not be made by children without
supervision.
) Before using this appliance make sure that the voltage of your electricity supply is the same as that 2
indicated on the rang plate of the appliance.
) Always place the humidifier on a hard, flat surface. Avoid exposure to direct sunlight and always keep it 3
away from walls and heat sources such as stoves, radiators, etc. Warning: The appliance may not work
correctly if it is not placed on a flat surface.
) Do not insert or remove the electric plug with wet hands.4
SAFETY 6
ATTENTION! Please, follow below-menoned basic safety precauons when using this
electrical appliance.

7
6) If the mains cable is damaged, it must be replaced by the manufacturer, its service agent, or similarly
qualified persons.
7) To reduce the risk of electrical shock, do not remove screws. The unit does not contain any user-serviceable
parts. Please, leave all maintenance work to qualified personnel.
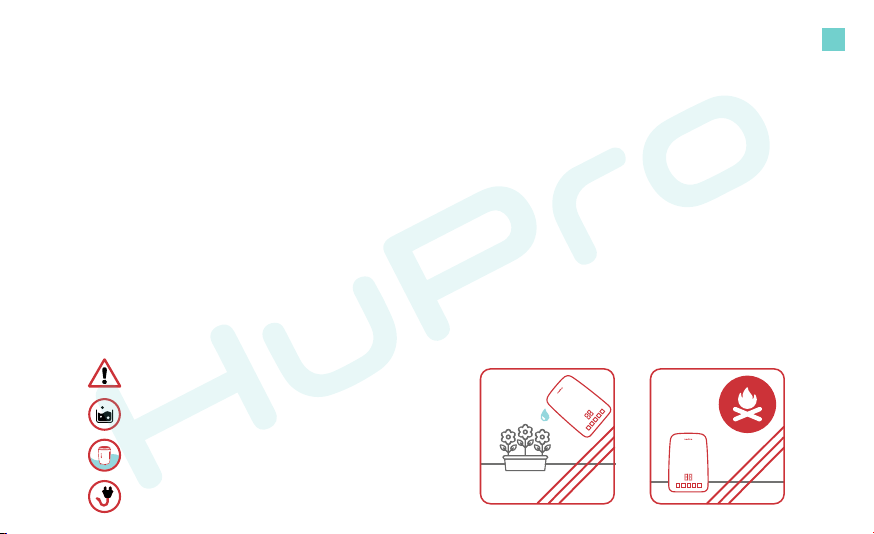
8) Fill the tank with fresh, dislled or demineralized water. Do not switch on the appliance when there is no
water in the tank.
9) Do not shake the appliance as the water might spill into the unit base. 10) Never touch the water or
components while the unit is in operaon.
11) If there is an unusual smell when the item is being used as described in the manual, switch the appliance
off, unplug it and have it examined by your dealer.
12) Do not pour hot water (over 100°F) into the tank.
13) Unplug the appliance before cleaning it or removing the tank.
14) Do not immerse the appliance, the mains cable or plug in water or other liquids.
15) Never scrape the mineral deposits with a hard tool. The humidifier must be cleaned regularly. To do this,
refer to the cleaning instrucons in this manual.
16) If you spill any liquid into the unit, it can cause serious damage. Switch it off immediately. Withdraw the
mains plug and consult your dealer.
17) Disconnect the unit from the power supply when not in use and before cleaning.
18) Ensure that the mains cable does not touch any hot surface and that it does not overhang a table edge.

19) Never use this appliance in a room where aerosol products (sprays) are used or in a room or where
oxygen is being administered.
20) Do not put items of clothing or towels on top of the appliance. If the nozzle is obstructed, this may cause
the appliance to malfuncon.
21) When moving the appliance, li it by the unit base and not by the water tank.
22) Do not use the humidifier if the air in the room is already sufficiently humid (relave humidity of at least 50%).
23) The ideal relave humidity level for human comfort is in fact between 45% and 60%. Excess humidity
shows up in the form of condensaon on cold surfaces or cold walls in the room. To measure the room’s
humidity correctly, use a hygrometer available online and in most stores.
24) The humidifier is designed for indoor use only.
8
ATTENTION! Before plugging the device in check if the voltage stated on the back panel of
the device corresponds to the voltage capacity in your outlet. Operate the device only at the
voltage stated on the underside of the device.
SAVE THESE INSTRUCTIONS

Do not direct the flow of humid air at furniture or electronic devices as it may lead to unwanted
condensaon.
Place and use the humidifier only on a dry flat horizontal surface. Keep the device on a glass, marble, or
plasc surface above floor level.
Do not put the device DIRECTLY on varnished, painted, or wooden surfaces that could be damaged
by moisture or water.
Do not place the humidifier on floors with underfloor heang.
Do not cover the device or put anything on it.
Make sure not to pour water into the air tube as it will immediately result in the device malfuncon.
Do not put the device on carpets or towels.
If you keep the humidifier on a wooden or table, put a 30''x30'' plasc mat or other substute under it to
avoid condensaon under the device.
USER SAFETY TIPS 9

Do not turn on the device while using smoke repellents, diffusing oily admixtures, scented candles, aroma
diffusers, or if any chemical vapour is present in the air.
Fill the reservoir only with cold water. Do not fill the humidifier with anything other than water.
Do not add any scented oils/substances or any aromatherapy oils to water.
Using tap water with high mineral content (hard water) with any humidifier causes white dust to be emied.
To avoid this, use dislled or demineralized water.
Always disconnect the plug from the electrical outlet before servicing, cleaning, or adding water.
If you do not use the humidifier for 2 or more days, pour all the water out of the reservoir and the humidifier
base. Clean the whole unit and make sure that its parts are completely dry.
To prevent bacteria growth in the water, do not leave the humidifier filled with water for a few days without
its usage. Store the device dry.
USER SAFETY TIPS 10
The device was designed for
120v supply only.
Do not pour any cleaning fluids
or chemicals into the water reservoir.
Do not put the device or the mains
plug in water or other fluids.
Disconnect the mains plug by holding
the plug. Do not pull the cable.

HUMIDIFIER PARTS 11
LED Display7.
Housing8.
Power Cord9.
13. Remote Control
10. Transducer
11.Heater
Aroma Box12.
1. Top Cover
Mist Outlet2.
Handle3.
Water Tank4.
Float 5.
Water Filter6.
1
23
4
5
6
7
8
9
13
COLD
10
11
12

12
INSTRUCTIONS FOR USE
1. Put the device on a flat surface.
2. Remove the top ), take the water tank out of the humidifier. (Pic 1
3. the water tank boom up ), unscrew the lid ) and fill it with water. Screw the lid gently on Put (Pic 2 (Pic 3
the water tank and put it back into the main base boom down. Make sure the water tank is placed correctly
in the humidifier base.
4. Put the top on the humidifier. Make sure the mist outlet nozzle and the top are well on the placed
water tank ). (Pic 4
Pic 1 Pic 2 Pic 3 Pic 4

13
INSTRUCTIONS FOR USE
5. Plug the mains plug into the socket. The device will produce a short buzzer sound, the display will turn on
and then turn off at once. Now the device is ready for use.
6. Touch the On/Off symbol on the device, the humidifier will begin to work in the second mist power level.
The device will independently define the current humidity in the room.
Pic 5 Pic 6 Pic 7
Use cold/warm (not over 100 °F) dislled or filtered water.
Pour water in the water tank ONLY (Pic 5)! Make sure not to pour water directly in the mist outlet that
is located on the top of the water reservoir (Pic 6). As this is a boom filling model, turn the water
tank boom up, unscrew the lid and pour water into it.
Do not fill the humidifier base with water (Pic 7). The humidifier base is automacally filled with
water through a water tank valve.

14
OPERATING INSTRUCTIONS - ON THE HUMIDIFIER
ON/OFF
Short press to turn the humidifier on/off. Once press the buon, LED display will switch on and the humidifier
will begin to work in the 2nd mist power level. The device will independently define the current humidity in
the room.
Press this buon again, the humidifier stops working and enters the Standby Mode.
Aer you turn off and then turn on the humidifier without unplugging the mains plug, the device will connue
to work in the mode as before. Aer you unplug and then plug the mains plug again, the device will start
working in the second mist power level automacally.
MIN/MAX
Short press the buon to amend the mist power output. 3 power levels are available. The chosen mist
power level will be shown on the display. The mist power symbol means the 1st mist power level,
is the 2nd mist power level and is the 3d mist power level.
HUMIDITY
Humidity level. To select the desired humidity level, press the buon one or several mes. The minimum
humidity level is 40%RH, the maximum - 80%RH.
Aer you select the humidity level that you want to reach, the humidifier will save it and show the current
humidity level on the display. The current humidity level will be shown on the display unl the humidifier
reaches the selected level.
Once the desired humidity level is reached, the device stops working and enters the Standby Mode.
If the humidity level is 5%RH lower than the desired humidity level, the device will automacally start
working again to keep the target humidity level.
If you set up the humidity level that is lower than the actual humidity in the room, the device
will keep working for 2 minutes and then will stop working automacally.

15
OPERATING INSTRUCTIONS - ON THE HUMIDIFIER
ANION
Press once to acvate the ionizaon mode. The Anion Funcon symbol will appear on the display. The
device produces 240 million cleansing ions per min to purify the air. Press the same buon again to stop
the anion mode.
AUTO MODE
Press once to acvate the Auto Mode. The Auto Funcon symbol will appear on the display.
In the Auto Mode, the humidifier maintains the relave humidity at 55%~68%. The device will choose the
best humidity level and mist power level automacally according to the current room temperature and
humidity. If the humidity level is >68RH, the device will work for 5 minutes, then it will stop working
automacally and enter the Standby Mode. To disable this funcon, press the same buon again.
TIMER
Press the buon to select the auto shut off mer. Choose between 1 to 10 hours. The humidifier will stop
working aer the number of hours you selected. To disable the Timer funcon, press the same buon again
unl the special symbol appears on the display.
SLEEP MODE
Press to acvate the Sleep mode. The Sleep Mode symbol will appear on the display. The display and
backlight will turn off shortly aer that and the humidifier will enter the Sleep Mode. Press any other
buon to turn off the Sleep Mode and switch on the display and backlight.
WATER SHORTAGE
If there is not enough water in the water tank, the device will automacally stop working and enter into
a Standby Mode. A Water Shortage symbol will appear on the display and 3 warning beeps will sound at
once. Refill the water tank and switch the device on. Now it is ready for use.

1. Take the aroma tray near the base of the humidifier.
2. Apply 2-3 drops of essenal oil on the specially designed sponge.
3. Place the aroma tray back in the humidifier base.
4. The Aroma Funcon will be acvated automacally when the device . is on
5. To disable the Aroma Funcon take the sponge out the aroma tray and clean it with water.,
Use only natural essenal oils. Synthec
oils may lead to damaging the aroma box.
Add oils and fragrances only to the aroma
box to avoid damaging the device.
All aroma oils are different in concentraon
and smell intensity. Therefore, regulate the
number of drops according to your preferences.
Start with 3 drops and add more if you wish to
enhance the smell.
ADDING ESSENTIAL OILS TO THE AROMA TRAY 16

17
1. ON/OFF
Short press to turn the humidifier on/off.
2. AUTO MODE
Press once t ate the Auto Mode.
3. TIMER
Choose between 1 to 10 hours t ate the automa
.
4. WARM MIST
Press once to select the Warm Mist mode. Press again
to stop the warm mis
5. MIN/MAX
Mist output lev vailable from 1 to 3.
6. HUMIDITY
Press to select the humidity level. The minimum humidity
level is 40%RH, the maximum - 80%RH.
7. SLEEP MODE
Press to enter the Sleep Mode. Press again to turn the Sleep Mode off.
8. ANION
Press t ate the Anion Mode. Press again to turn it off.
1
3
5
7
2
4
6
8

18
REMOTE CONTROL BATTERY REPLACEMENT
1
2
1. Press the buon 1 in the direcon of the arrow. Then press the buon 2 in
the direcon of the arrow. Remove the baery container.
2. Replace the baery and put the baery container back in the remote.
HOW TO CHANGE THE BATTERY IN THE REMOTE:

1. The water is filtered through acid ion exchange resin.
2. Acid ion exchange resin has a chemical reacon with
calcium and magnesium ions that soens and
demineralizes water.
How to maintain the water filter:
1. To clean the water fіltеr, simply soak it in saline
water for 24 hours and dry it cool.
2. There is no need to replace the water filter as long
as its structure is not compromised.
WATER FILTER 19

CARE FOR THE DEVICE 20
If the water is hard, which means it contains too much calcium and magnesium, it can cause a “ white powder”
problem and leave limescale on the surface of the water basin, transducer and inner surface of the water
tank. Scale on the transducer surface will interfere with the unit operaon.
We recommend:
1) Use cold boiled water or dislled water.
2) Clean the transducer, water tank and basin every week.
3) Change water in the tank oen to keep it fresh.
4) Make sure there is no water in the water tank and humidifier base before storing the unit.
5) Clean the whole unit and make sure that all parts of the unit are completely dry before storing the unit.
How to clean the transducer:
1) Put 5-10 drops of cleaning agent / vinegar on the surface of the transducer, wait
for 2-5 minutes.
2) Brush off the scale from the surface.
3) Rinse the transducer with clean water.
How to clean the humidifier base:
1) Clean the water basin with a so cloth and cleaning agent / vinegar if there is
scale in it.
2) If there are deposits on the security switch, apply the cleaning agent / vinegar
on the scale and clean it out with a brush.
3) Rinse the water basin with clean water.
Table of contents
Other HuPro Humidifier manuals
Popular Humidifier manuals by other brands

EUROM
EUROM 374964 instruction manual

Vitek
Vitek VT-1761 Manual instruction

Air-O-Swiss
Air-O-Swiss AOS U650 Quick setup guide

GeneralAire
GeneralAire 1042 Series installation instructions

Skuttle Indoor Air Quality Products
Skuttle Indoor Air Quality Products 2100 owner's manual

Nordmann
Nordmann AT 3000 series operating instructions