HVTest GM-20kV User manual

1
Dear Client
Thank you for Purchasing our GM-20kV Megohmmeter.
Please read the manual in detail prior to first use, which will help
you use the equipment skillfully.
Our aim is to improve and perfect the
company's products continually, so there may be
slight differences between your purchase equipment
and its instruction manual. You can find the changes
in the appendix. Sorry for the inconvenience. If you have further
questions, welcome to contact with our service department.
The input/output terminals and the test column
may bring voltage, when you plug/draw the test wire or
power outlet, they will cause electric spark. PLEASE
CAUTION RISK OF ELECTRICAL SHOCK!
Company Address:
T4,No. 41, High-tech 2 Road,East Lake High-tech Development Zone,
Wuhan
Sales Hotline: 86-27- 87457960
After Service Hotline:86-27- 87459656
Fax: 86-27- 87803129
E-mail: [email protected]
Website: www.hvtest.cc

2
SERIOUS COMMITMENT
All products of our company carry one year limited warranty
from the date of shipment. If any such product proves defective
during this warranty period we will maintain it for free. Meanwhile
we implement lifetime service. Except otherwise agreed by
contract.
SAFETY REQUIREMENTS
Please read the following safety precautions carefully to avoid
personal injury and to prevent the product or any other attached
products being damaged. In order to avoid possible danger, this
product can only be used within the scope of the provision.
Only qualified technician can carry out maintenance or repair
work.
--To avoid fire hazard or personal injury:
Use Proper Power Cord
Only use the power wire supplied by the product or meet the
specifications of this product.
Connect and Disconnect Correctly
When the test wire is connected to the charged terminal,
please do not connect or disconnect the test wire at will.
Grounding
The product is grounded through the power cord; besides, the
ground pole of the shell must be grounded. To prevent electric

3
shock, the grounding conductor must be connected to earth ground.
Before making connections to the input or output terminals of the
product, please do check that the product is properly grounded.
Pay Attention to the Ratings of All Terminals
To prevent the fire hazard or electric shock, please be care of
all ratings and labels/marks of this product. Before connecting,
please read the instruction manual to acquire information about the
ratings.
Do Not Operate without Covers
Do not operate this product when covers or panels removed.
Use Proper Fuse
Only use the fuse with type and rating specified for the product.
Avoid Touching Bare Wire and Charged Conductor
Do not touch the bare connection points and parts of energized
equipment.
Do Not Operate with Suspicious Faults
If you encounter operating faults/suspect there is damage to
this product, do not continue. Please contact with our maintenance
staff.
Do Not Operate in Wet/Damp Conditions.
Do Not Operate in Explosive Atmospheres.
Ensure Product Surfaces Clean and Dry.

4
-Security Terms
Warning: indicates that death or severe personal injury may result if
proper precautions are not taken
Caution: indicates that property damage may result if proper
precautions are not taken.

5
Contents
Safety precautions before the experiment..............................6
I. Overview........................................................................................7
II. Features........................................................................................7
III. Main Technique Performance............................................... 8
IV. Working Principle.....................................................................9
V. Panel layout.............................................................................. 10
VI. Operation Instructions..........................................................12
VII. Problems and Solutions......................................................14
VIII. Packing List...........................................................................15
IX. Attached drawing................................................................... 16

6
Safety precautions before the experiment
1. For safety, before use the instrument must be well earthed. That’s
because the measured target connects to high voltage power, and exists
power frequency leakage.
2. Once high voltage has started, do not use manual discharge method to
check the instrument. After test, please wait the instrument completes
automatic discharge and automatically returns to zero, then manual discharge
can be operated. That is because electrical pulse caused by short-circuit
discharge will damage the insulation life of the measured object; if the pulse
fleeing into the instrument, will also damage the integrated circuit inside the
instrument.

7
I. Overview
With the rapid development of China power industry, electrical preventive
experiment is an important aspect of electrical power system safe operation a
nd maintenance work. Insulation diagnosis is an important tool to detect the in
sulation or fault of electrical equipment
Currently, electrical equipment (such as transformers, generators, etc.)
toward the trend of large capacity, high voltage, structural diversification and
sealing, this requires insulation resistance tester with advantages of large
capacity, strong anti-interference ability, easy to carry and so on. So we
designed and developed the series meter especially for strong interference
field test for large high voltage transformers, electrical appliances, remote
power cables or laying cables and other electrical insulation resistance
properties for high-voltage substations, power plants and others.
The instrument system combines analog circuits, digital circuits,
mechanically operated advantages, achieved a leading position at the output
voltage, output current, measuring range, measurement accuracy,
anti-interference ability.
II. Features
1. With strong anti-electric field interference ability up to 2mA (50Hz), it is
suitable for 500kV substation without dismantling wire to test insulation
resistance of 500kV large-scale transformer.
2. The short-circuit current is 10mA, be suitable for testing high capacity
and high inductance.
3. Wide resistance range: 0.01MΩ ~ 1999GΩ. With high-resolution,
having accurate readings.
4. Wide output voltage range: 0.5kV, 1kV, 2.5kV, 5kV, 10kV, 20kV
adjustable, you can smoothly adjust voltage from 0V to the desired value.
8
5. With timing function, remind users to record, and analyze absorptance
and polarization index of measured target.
6. High quality: The key parts are all imported components, to ensure
accuracy and accurate.
7. Easy to use: one-piece chassis, small size, light weight, easy to carry.
8. Look beautiful: rugged and strong grinding material, the instrument's
overall texture and longer life.
III. Main Technique Performance
1. Measurement voltage range: 0.5kV, 1kV, 2.5kV, 5kV, 10 kV, 20kV.
2. Measurement voltage accuracy: ±(5%+10V).
3. Short circuit current: 10mA.
4. Measurement range and accuracy
Measurement range
Resistance measurement
range
Accuracy
20MΩ
0.01~19.99MΩ
±(5%+3d)
200MΩ
5.0~199.9MΩ
±(5%+3d)
2000MΩ
50~1999MΩ
±(5%+3d)
20GΩ
0.5~19.99GΩ
±(5%+3d)
200GΩ
5.0~199.9GΩ
±(10%+3d)
2000GΩ
50~1999GΩ
±(20%+10d)
Note:
(1) Calibration voltage of MΩ range is 0.5kV, GΩ range is 2.5kV.
(2) Ensure the accuracy of resistance measurement test voltage range:
more than 20% of the nominal value of the voltage range.
(3) When the test voltage is higher than 8kV, for the accurate
measurement of higher 20GΩ resistance, high voltage electrode conductor
exposed to the air shield should be added to avoid the impact of air ionization.
(4) 2000 GΩ range is the reference range, its application environment:
relative humidity< 70%.
5. Anti-electric field interference ability: 2mA (50/60Hz).

9
6. Timing and alarm functions: maximum value of stopwatch is 19 minutes
and 59 seconds. 20 minutes for a cycle. The stopwatch will tell the time at
these time points: 15 seconds, 60 seconds and every 60 seconds. When
telling time, resistance readings hold for 3 seconds. If the measured resistance
is below the lower limit of range, the reading is invalid and the instrument will
continuously sound to give an alarm.
7. Display: three and a half bits LCD digital meter (three), respectively
show test voltage, test resistance, test time.
8. Power supply
DC: rechargeable lithium battery, DC15V power supply. With AC (50 /
60Hz) special adapter access port to charge the battery.
9. Operating Conditions:
Temperature: -20℃~﹢40℃.
Relative humidity: 20~90%.
10. Dimensions:315×240×180mm.
11. Weight:5.5kg.
IV. Working Principle
It features dual division integral digital voltmeter ohm - digital conversion,
this technology has a very high anti-interference ability, ohms reading
unchanged when test voltage fluctuation significantly under low frequency
interference.
0 ~ 15kV test voltage is excited with the feedback it generates a DC
voltage converter circuit. Test voltage is high, with a strong ability to adjust
automatically, so that the instrument also has the capability of non-interference
is generally similar instruments is reached.

10
V. Panel layout
1. +: HV output 2.Guard: protection
3/4. -: earth 5. "Resistance gear" indication
6. Timing switch 7.low battery
8. “charger input” 9. “ON”
10. Power 11. Resistance range
12. “Voltage adjust” 13. Voltage range
14. “Push to test” 15 . “kV” meter
16. “MΩ/GΩ” meter 17.”time”meter
Note :
1. "+" HV output terminal: it is also called a line terminal; it uses
2. high-voltage cable to connect measured target such as the transformer,
motor windings and cable cores.
2. "Guard" protection terminal: when using “three-electrode method”
measure the volume resistance of insulation material and cables, "G" should
be connected to three-electrode guard ring. Guard ring is used to eliminate the

11
surface resistance of measured object and the leakage interference of
measured circuit.
3/4. “- "ground terminal: it is the terminal that the instrument safely
connects the ground and measured target. Water pipe can be used as earth
terminal. Metal shell, transformer core and cable shield of motor are measured
zero terminal. Earth terminal of manual discharge is also connected to this
terminal.
5. "Resistance gear" indication: when switching the resistance range, the
corresponding M Ω / GΩ resistance range gear will be displayed
6. "Timing switch": when the measured value is stable, press it to start
timing. Display the test time in minutes and seconds, the maximum value is 19
minutes and 59 seconds, and then cycle.
7. low battery: When the working voltage is lower than 12V, the indicator
light is red, and the indicator light goes out gradually with the increase of
battery voltage.
8. “Charger input: When the working voltage is lower than 12V, the
indicator light is red, and the indicator light goes out gradually with the increase
of battery voltage.
9. “ON”: The indicator light is red when the working power is on.
10. Power: the power switch of the instrument.
11. Resistance range: Adjust the rotary knob to select resistance range;
range value is also the upper limit of range.
12. Voltage Adjust: Adjust the rotary knob; test voltage will smoothly rise
from 0V to the desired value.
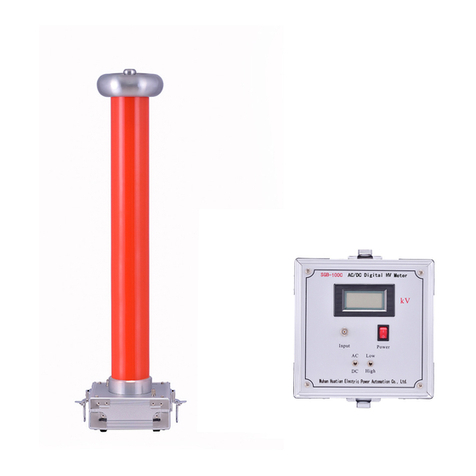
13.Voltage range: It is used to select test power value.
14. Push to test: Control the voltage measurement output. When pressed,
the high voltage is output from the "+" end.
15. “KV “meter: Display the voltage value of test power between + ~-.
16. MΩ / GΩ display screen: Display insulation resistance value. The unit
of insulation resistance value decided by resistance range switch.

12
17. "Time" table: it shows the test duration and is also used to calculate
the polarization index / absorption ratio
VI. Operation Instructions
The instrument should be charged before use (full charge time is 8 hours,
its indicator light change from red to green), in order to avoid power-off during
test. In addition, please use reference resistance and attachment apparatus to
check whether the instrument work properly and accurately.
Operation method as follows:
1. Preparation
Before wiring, make sure power switch is in “off” position, HV control knob
is in “exit” state. Measured target has disconnected power; all measured
terminals should be grounded via manual discharging rod. All these are safe,
you can connect wire.
For some measured targets suffering strong interference due to power
leakage such as substations, power plants, before wiring please complete and
carefully confirm above four operations, in order to avoid the risk of electric
shock. You can remove the manual discharging rod after completed
connecting wire.
2. Connect wire
Connect the two “-” terminal of the instrument to ground terminal/zero
terminals of measured target and the earth.
Connect “+” terminal to measured target such as transformer winding and
cable core.
Connect “Guard” terminal to protection ring of measured circuit in order to
eliminate the impact of surface resistance leakage.
3. Preselect test power
Counter-clockwise rotate “HV Preselect knob” to the desired value,
display value will increase from 0V to the maximum value.

13
4. Turn power supply on
Turn power supply on, the indicator light above it will glow, “kV” voltage
meter display 0.00kV.
5. Test start
Press the "high voltage control" button, and the high voltage will be output
from the + terminal. The "kV" meter will display the voltage value between + -.
Press the "timing switch" and the "timing" meter will start timing.
6. Test power adjustment
Adjust the "high voltage adjustment" knob to smoothly adjust the voltage
to the specified value
7. Resistance range selection
Adjust the range switch to select the desired range. If the meter
continuously give an alarm indicating the measured resistance is too low,
please adjust to low range for measuring.
8. Reading resistance value
Read the resistance value through the "MΩ / GΩ" meter. After the
resistance value is stable, press the "timing switch" stopwatch to report the
time in 15 seconds, 60 seconds and every 60 seconds after the high-voltage
output for the convenience of the operator to record.The formula of
absorptance and polarization index as follows:
absorptance = R60S/R15S-- resistance reading of the 60th seconds ÷
resistance reading of the 15th seconds.
Polarization Index = R10min/R1min-- resistance reading of the 10th
minutes ÷ resistance readings of the 1st second.
9. Exit test power
Press “push to test” to exit test power, at this time “KV” display will slowly
return to zero and the stopwatch will display exit.
10. End
When the “kV” display screen shows 0.00kV, then the measured target
has completed discharge via the manual discharging rod, you can turn power

14
off and remove the wire.
VII. Problems and Solutions
1. Instrument problems and solutions
No.
Problem
Reason
Solution
1
Power light is off work
The battery voltage is less
than 12V
Please charge timely
2
Shell discharge
The instrument has not be
grounded
Safe ground!
3
Charge time is more
than 8 hours, but the
indicator light has not
turned green.
Battery damage
Remove the battery,
renew a set of batteries.
4
No HV output
Due to overload the dynatron
is burned out
Replace power dynatron
BU406 and its prepositive
dynatron C2482
5
Output voltage is high,
and you cannot adjust.
Amplifier damage
Replace CA3140 op amp
on high-voltage circuit
board.
6
Resistance displays a
fixed value -1 or other
fixed value.
Amplifier damage
Replace double integral
AD conversion Manifold
7
Resistance readings
swings or
out-of-tolerance
Most are caused by strong
interference, such as strong
discharge, measured cable
swinging or insulating
property error
Use reference resistance
to check.
2. The battery charging circuit of the instrument is charged according to
the constant voltage and current limiting charging method. It takes about 6-8
hours to fully charge each time. The fully charged battery can supply the
instrument for 6-8 hours of continuous operation. In order to ensure the battery
life, the storage period of the instrument shall be charged once every three
months.

15
VIII. Packing List
1. Instrument Host
1
2. HV Cable
1
3. Connect Line
4. Ground wire
5. Power Cord
6. Reference Resistance (1GΩ)
2
1
1
1
7. The instruction manual
1
8. Inspection report
1
9.Certificate
1

16
IX. Attached drawing
Insulation resistance measurement wiring diagrams for substation
transformer and cable:
500KV power transformer LV winding insulation test wiring diagram
500KV power transformer HV winding insulation test wiring diagram
Shielded cable insulation test wiring diagram
500KV down lead
200KV down lead
Table of contents
Other HVTest Measuring Instrument manuals

HVTest
HVTest GM-10kV User manual

HVTest
HVTest HTYWS-H User manual

HVTest
HVTest SGB-C Series User manual

HVTest
HVTest HTHL-200A User manual

HVTest
HVTest HT-TC User manual

HVTest
HVTest GM-5kV User manual

HVTest
HVTest SMG2000B User manual

HVTest
HVTest HTHL-100B User manual

HVTest
HVTest SMG3000 User manual

HVTest
HVTest GM-15kV User manual
Popular Measuring Instrument manuals by other brands

Ultraflux
Ultraflux Minisonic_600-2 user manual

socomec
socomec COUNTIS AT operating instructions

Scout
Scout MT-700 Series Operation manual

Beijing Dianotech Sci-Tech
Beijing Dianotech Sci-Tech FIC-Q100N Instructions for operation

Konica Minolta
Konica Minolta CA-410 Series instruction manual

Tecfluid
Tecfluid FLOMID Series instruction manual