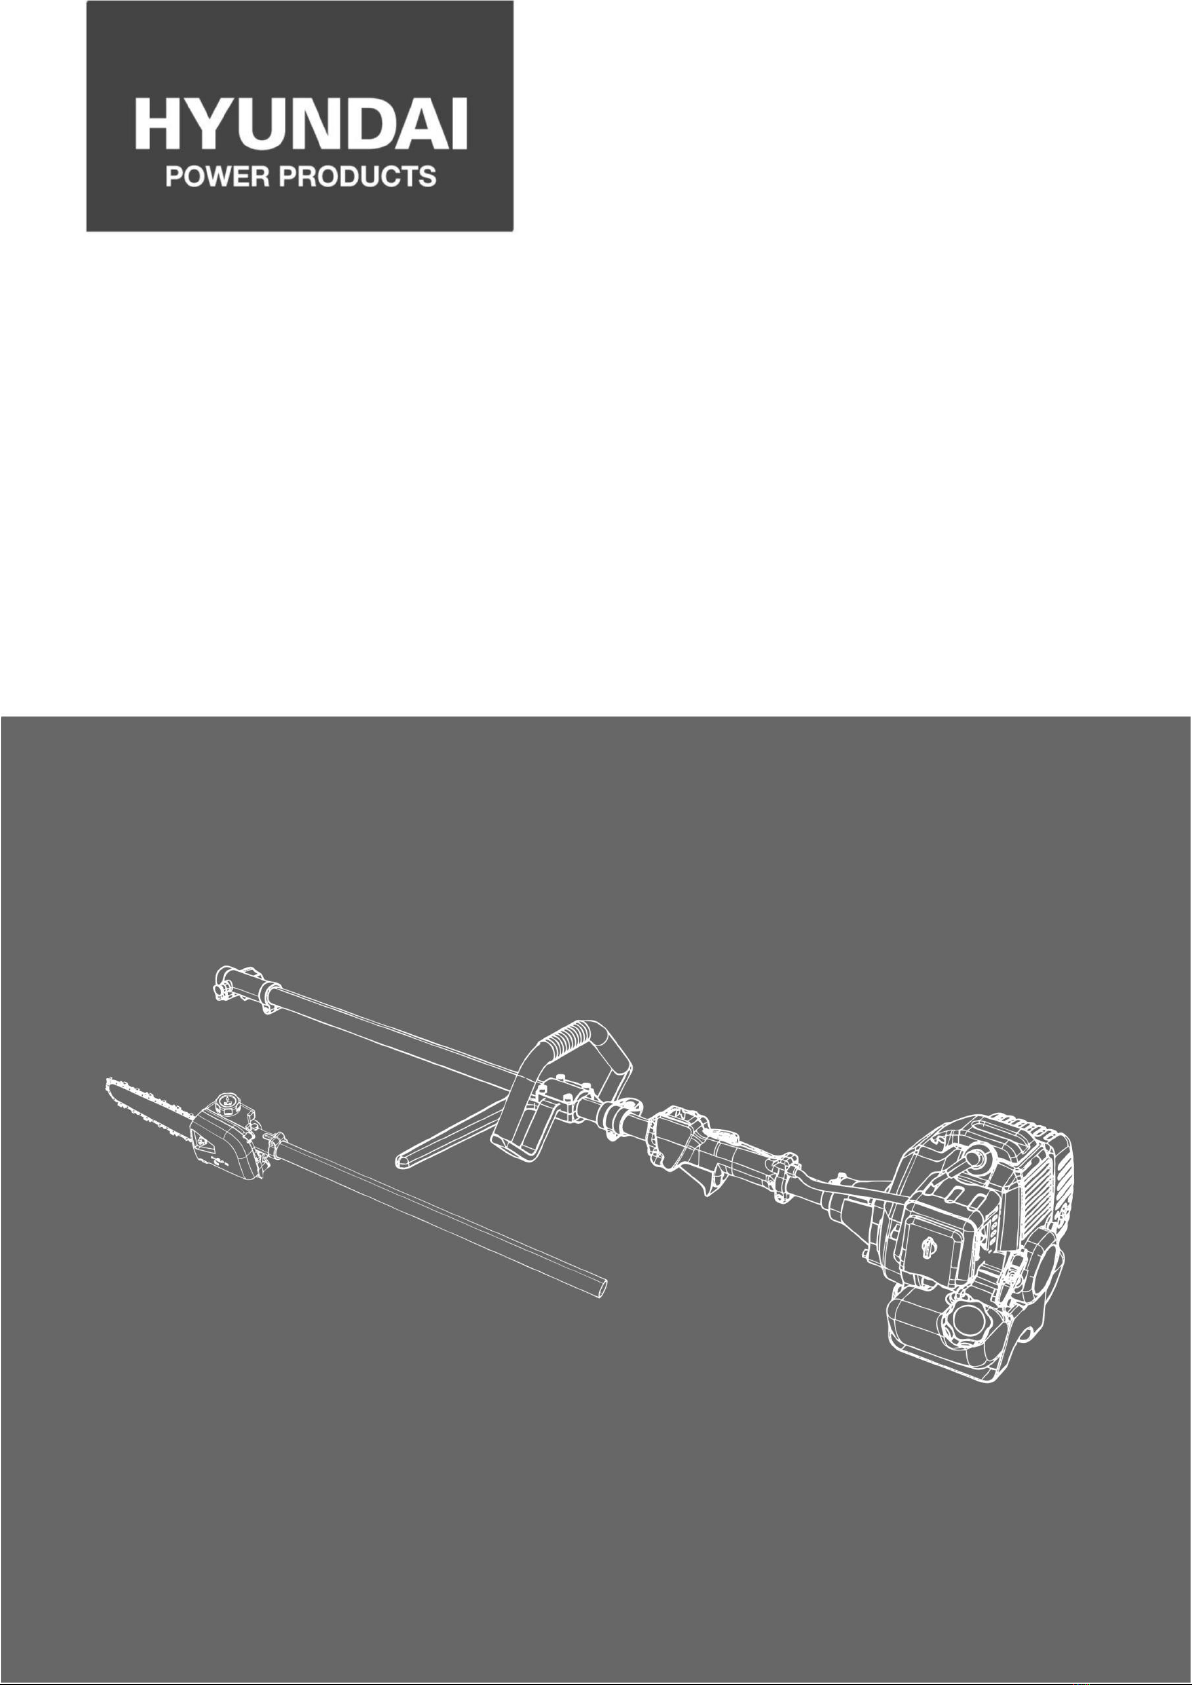
Hyundai power products HPS52-1 User manual

1
TELESCOPIC PRUNING CHAINSAW
HPS52-1
ORIGINAL INSTRUCTIONS

2
WARNING: To reduce the risk of injury, the user must read and understand this manual
before operating the tool.
CONTENTS
1. INTENDED USE 3
2. GENERAL SAFETY INSTRUCTIONS 3
3. THE TOOL 10
4. ASSEMBLY 11
5. FUEL TANK 14
6. UTILISATION 15
7. CARE AND MAINTENANCE 20
8. TRANSPORT AND STORAGE 22
9. TECNIQUE INFORMATION 22
10. TROUBLE SHOOTING 23
11. EC DECLARATION OF CONFORMITY 24
12. WA R R A N T Y 25
13. P R O D U C T FA I L U R E 26
14. WA R R A N T Y E X C L U S I O N S 27

3
1. INTENDED USE
We do everything in our power to ensure continuous improvement of our products.
This is why the technical data and the data can be modified.
Pole pruner
Intended use / improper use
The pole pruner is exclusively intended for pruning trees and/or cutting small wood from
the ground. Any other use is considered improper and will damage the tool.
The correct use also includes reading and observing the instructions for use at each use
as well as observing the warnings fixed on the machine. Before and during use, it is
imperative to check the blade to ensure that there is no mechanical damage. In case of
necessary repairs, please contact your specialist dealer.
Only the use of spare parts approved by the manufacturer or original spare parts is
permitted. If unauthorized or non-original spare parts are used, the user is liable for
consequential injury to persons or property resulting in the manufacturer being deprived
of all liability.
Residual risks
A certain residual risk that cannot be totally excluded still exists even if the tool is used in
conformity. The type and design of the tool may represent the following potential hazards
depending on the use made of it:
- Contact with sawdust
- Inhalation of sawdust particles
- Inhalation of exhaust gases
- Skin contact with oil / gasoline
- Inhalation of gasoline / oil vapors
- Contact with projected chain links
- Cutting of the fingers at the cutting chain
- Burning of fingers in contact with hot surfaces (exhaust etc.).
2. SAFETY INSTRUCTIONS
General safety instructions
If you feel an unpleasant sensation in the hands or if you see a coloring of the skin of your
hands while using the machine, stop the work immediately. Have enough breaks when
working. Failure to observe sufficient work breaks may result in hand and arm vibration
syndrome.
It is thus necessary to assess this impact according to the work carried out or the use of the
machine and to take breaks accordingly. This greatly reduces the impact on the user during
the entire working period. Minimize your risk of vibration. Maintain this machine in accordance
with the instructions in the operating instructions.
If the machine is used frequently or more regularly, we recommend that you contact your
specialist dealer for anti-vibration accessories (handles) if necessary.
Avoid using the machine at temperatures of t = 10 ° C or lower. Develop a load plan to limit
the impact of vibration on the user.
Read this manual carefully before operating the machine for the first time. In case of doubt
about the connections or its use, please contact the manufacturer (specialist dealer).
In order to guarantee a high level of safety, the following instructions must be strictly adhered
to. Warning!

4
To ensure safety at work with this pole pruner, it is essential to strictly follow the instructions
and to take into account the safety, assembly and use information contained in this manual.
Anyone using or performing maintenance work on the machine must be familiar with and
familiar with these instructions in order to be aware of all possible risks. Prevent children, sick
or impaired people from accessing the machine. As you stand in the work area, be aware of
the presence of children. Observe local or regional safety precautions in your area. This also
applies to all provisions relating to safety at the workplace and to health prevention in the
workplace.
The manufacturer must not be held liable if the machine has been modified in an
unauthorized manner or in such a way as to constitute ultimately damage.
Warning!
It is essential to observe the safety instructions required when using the machine.
Observe the instructions and notes in the enclosed safety instructions.
1. Consider the nature of the area where the work is performed. After starting the machine,
it produces toxic exhaust gases. These gases are invisible and odorless. Therefore, it is
imperative never to use the machine in closed or poorly ventilated spaces. When cutting,
make sure you have good lighting. Ensure stability when working on slopes or on uneven
surfaces in the presence of moisture, snow or thaw.
2. Do not allow unauthorized persons to approach the machine. Visitors and spectators,
mainly children, the sick or impaired, must not be allowed access to the work area.
Prevent other people from touching the tool.
3. Take precautions when storing the tool. When the machine is not in use, it must be stored
in a dry place, if possible raised or protected, in order to prevent access.
4. Always use the right tool for the jobs you want to perform. In this context, it is advisable,
for example, to avoid using a tool or a small accessory for work requiring the use of a
heavy tool. Use the tool only for the purpose for which it was designed.
5. Be sure to wear suitable clothing. Clothing should be appropriate and not hinder you in
your work. Wear protective clothing that protects against cuts.
6. Use personal protective equipment. Wear safety shoes with steel tines and soles or other
solid material.
7. Wear safety goggles. Objects can be thrown into the eyes.
8. Wear ear protectors. Wear personal protective equipment to protect your ears, such as
hearing protectors.
9. Protective gloves. Wear strong gloves. Leather gloves offer good protection.
10. Use of brushcutter. Never work with an unsecured cutting tool. There is a risk of injury
from projected objects.
11. Remove keys and tools required for assembly. Before starting the brush cutter, remove
all the keys and so on.
12. Stay alert at all times. Be attentive to what you are doing. Make use of your common
sense. Do not use the brushcutter when you are tired. Never use the brushcutter under
the influence of alcohol, drugs or drugs that alter or decrease concentration.
13. Filling the fuel tank. Before filling the fuel tank, always turn the engine off. Open the tank
cover carefully, so as to be able to remove any excess pressure and prevent fuel from
spurting out of the tank. During use of the brush cutter, high temperatures develop at the
machine housing. Therefore, it is imperative to leave the machine cool before filling the
fuel tank. Otherwise, the fuel may ignite spontaneously, which can cause burns. Filling
the fuel tank means not filling the tank above the permitted limit. If fuel drops from the
tank, it must be removed immediately before re-using the machine. After filling the tank,
check that the screw connections are tight so that they do not come loose during work
due to vibration.
14. Hours of work and breaks. After using the motorized machine for an extended period, you
may be subject to circulation problems in your hands. While you have the possibility to
extend the duration of use by wearing suitable gloves and taking breaks regularly. Please
note that the operating time of the motorized machine is shortened due to discomfort of
the user due to poor circulation, too low outside temperature or excessive driving power
of the machine during the works.

5
15. Be alert to damaged components. Check the machine before using it. Are any
components damaged? When you detect minor damage to the machine, ask yourself
seriously whether the machine can still be used properly and safely. Ensure that the
orientation and adjustment of the moving components are correct. Are the different
components properly adjusted relative to each other? Are any of the components
damaged? Everything has been installed according to the rules of the art? Are all other
conditions met in order to be able to work correctly at the indicated location? Unless
otherwise stated and explicitly stated in these operating instructions, safety accessories,
etc. Damaged, must be repaired or replaced as soon as possible by authorized persons.
Defective switches must be replaced by an authorized dealer. Do not use the machine
when it cannot be switched off or on by means of a switch. When repairs are required,
please contact your nearest dealer.
16. Before carrying out any adjustments or maintenance operations, it is essential that the
motor is always switched off. This also applies to all work performed at the cutting head.
Remove the spark plug from the engine.
17. Use only approved components. Only use spare parts identical to those you are replacing
during maintenance or repair work. Please do not hesitate to ask your authorized dealer
for advice. Do not use metal multi-piece swivel chains and flail blades.
18. When transporting and storing the tool, make sure that it is secure; Put the protective
device on the blade and tool when it is being transported, stored, cleaned and maintained.
19. To avoid fuel leakage, damage and injury, be careful when handling and transporting the
tool. Do not forget to put the protective device every time.
20. Do not use the appliance when you are tired, sick under the influence of alcohol or drugs.
21. Use only accessories and protections recommended by the manufacturer. It is
recommended that your dealer remove a list of recommended accessories if necessary.
Use of parts not recommended by the manufacturer may result in injuries, accidents and
malfunction of the tool.
22. Maintain a good balance and balance when operating the tool. Stay firm feet on the
ground so as not to fall. Do not lean excessively, do not put yourself in positions that may
unbalance you and hurt you. Use the harness supplied with the tool.
23. Regularly check if the cutting elements stop when the machine is idling.
24. National regulation can restrict the use of the pruner.
25. Do not use the tool near electrics power lines. There is a risk a danger and serious
accidents.
26. Always have a correct working posture, stay stand, foot firmly on the floor. Hold firmly the
tool.
27. Do not use the tool in dangerous operating positions; do not stand on a ladder.
28. The tool could be strapped, blocked or meet some dysfunction during operation. When a
hazard is encountered, stop to use the machine. Observe the problem; clear the blockage
if you are able to or ask for help. When removing a blockage, wear protective equipment.
29. We recommend to remove branches in sections
30. There is risk of being struck by falling branches or branches that having hit the ground or
having rebounding.
31. Keep firm footing and balance during operation
32. Always the use the harness provided;
Warning! The use of another cutting head or other accessories and extensions, even when
explicitly advised, may constitute a risk of personal injury or property damage.
The machine must not be used for purposes other than intended. Any use deviating from
these purposes must therefore be considered as unauthorized use. The user is solely
responsible, thus releasing the manufacturer systematically from any liability, in case of bodily
or material damage resulting from such unauthorized use.
The manufacturer's warranty is void if the machine it has been designed has been
transformed or used in an unauthorized manner and such situation results in damage

6
Warning!
Even if the machine is used professionally, it is impossible to completely eliminate some
residual risk. The type and design of the machine make it possible to establish the
following potential risks:
- Contact with uncovered cutting head (cut wounds)
- Contact with the brushcutter in operation (injuries by cuts)
- Hearing impairment in the absence of proper hearing protection. Development of
toxic dusts / fumes when used in confined spaces (vomiting / nausea)
When using the pruner, it is imperative to use the pole
In general, the machine has been designed for use in agriculture and forestry, gardening and
landscaping, work in the forest or in a garden.
The manufacturer cannot be held liable for damage resulting from non-observance of the
general instructions and the instructions contained in these operating instructions.
Emergency measures
Provide first aid based on the injury and seek medical attention as soon as possible.
Protect the injured person from other hazards and keep him calm.
Symbols on the machine
Wear a protective helmet,
and ear and eyes
protection.
Maximal rotation of speed of the spindle
Wear protective gloves
Allowed maximal rotation speed. This
symbol indicates the orientation of the
cutting teethes when the assembly
Wear protective non-skid
shoes
Pay attention to the risk associated with
carbon monoxide
Read instructions
manual
Warning! be careful of hot surfaces :
risk of burning
The fuel is highly flammable,
do not place it near a flame or
a fire
Keep hands and feet away from sharp
accessories!
Sound power level: LWA : 114dB

7
Do not use the pruner near cables, power lines or telephone lines. When
using the pruner, keep a safe distance of 10 meters from overhead
power lines
Residual risks and preventive measures
Mechanical risks
Risk
Description
Preventive measures
Residual risks
Cutting, cutting
injuries
The sharp filament and cutting
blades can cause serious injury.
Ensure that no people or animals
are in the work area.
Ensure that no people
or animals are in the
working area
Hanging
Cables and filaments can be
caught by the cutting blade or
the filament reel, which can
damage the machine and
cause injury. Remove all
foreign objects from the area
you want to mow before
starting work
Remove all foreign
objects from the area
you want to mow
before starting work.
Danger
Shocks
Strong feedback shocks can
occur when using the unit in
dense bushes. When the knife
remains blocked, violent shocks
can be felt through the pole.
Do not penetrate too
deep into dense bushes.
Take your time and avoid
the knife jamming.
Negligence
Risk
Description
Preventive
measures
Residual risks
Negligence in the
use of personal
protective equipment
Negligence in the use of
personal protective
equipment may result in
serious personal injury
Use the
necessary
protective
equipment
Individual /
Incorrect
Behaviour
Be totally focused on
your work
Residual risks
cannot be
completely
Residual risks from heat
Risk
Description
Preventive measures
Residual risks
Burns, frostbite
Contact with exhaust
can cause burns
Allow the exhaust to cool after
using

8
Residual risk from noise
Risk
Description
Preventive measures
Residual risks
Loss of
hearing
Regular / prolonged use of
the brush cutter without the
use of hearing protectors
can cause loss of auditory
acuity.
Always wear ear
protectors.
Residual risks from others materials and substances
Risk
Description
Preventive measures
Residual risks
Contact
aspiration
Exhaust gas may have a
harmful effect
Only use the machine
outdoors and in accordance
with its intended purpose
Fire or
explosion
The mix of fuel is
flammable
Do not smoke and manipulate
fire near the tool and fuel
Risks from vibration
Others risks
Risk
Description
Preventive measures
Residual risks
Projected
objects
Stones and pieces of
wood projected in the
vicinity are likely to injure
people or animals.
Ensure that no persons or
animals are in the hazardous
area and wear suitable
protective clothing, hearing
protection and a visor.
Sliding,
stumbling
and falling
On uneven floors,
damage can be caused
by stumbling
Be sure to always be on your
support and wear non-slip
shoes
Disposal / Recycling
Disposal instructions are indicated in the form of pictograms attached to the machine or
packaging. The meaning of the various symbols is given in the chapter "Symbols attached to
the machine".
Requirements to the user
Before using the machine, the user must read the instruction manual carefully
Qualification
The machine must be operated by a qualified person who has had special training with a specialist.
Minimum Age Required
Use of the machine is only permitted for persons aged 16 or older. This point does not apply to the use
by young people in training, when they work with the machine as part of their vocational training with
the aim of acquiring this know-how under the supervision of a trainer.
Risk
Description
Preventive measures
Residual risks
Vibration of
the body
A prolonged use of the
tool could have a
negative effect on
human health
Do some rests

9
Special requirements to the user
- Before using the machine, the user must read the instruction manual carefully.
- The tool must be used by a qualified person who had training provided by a specialist.
- Use of the machine is only permitted for persons aged at least 16 years. This point does
not apply to the use by young people in training when they work with the machine as part
of their vocational training with the aim of acquiring this know-how under the supervision
of a trainer.
Safe operating practices
Training
Be familiar with the owner’s manual before attempting to operate the equipment.
Preparation
a) THIS HEDGE TRIMMER CAN CAUSE SERIOUS INJURIES. Read the instructions
carefully for the correct handling, preparation, maintenance, starting and stopping of the
hedge trimmer. Become familiar with all controls and the proper use of the hedge trimmer.
b) Never allow children to use the hedge trimmer.
c) Beware of overhead power lines.
d) Avoid operating while people, especially children, are nearby.
e) Dress properly! Do not wear loose clothing or jewellery, which can be caught in moving
parts. Use of sturdy gloves, non-skid footwear and safety glasses is recommended.
f) Use extra care when handling fuels. They are flammable and the vapours are explosive.
The following points should be observed:
-Use only an approved container.
-Never remove the fuel cap or add fuel with the power source running. Allow engine
and exhaust components to cool down before refuelling.
-Do not smoke.
-Never refuel indoors.
-Never store the hedge trimmer or fuel container inside where there is an open flame,
such as near a water heater.
-If fuel is spilled, do not attempt to start the power source, but move the hedge trimmer
away from the spillage before starting.
-Always replace and securely tighten the fuel cap after refuelling.
-If the fuel tank is drained, this should be done outdoors.
g) If the cutting mechanism strikes any foreign object or the hedge trimmer starts making
any unusual noise or vibration, shut off the power source and allow the hedge trimmer to
stop. Disconnect the spark plug wire from the spark plug and take the following steps:
-inspect for damage;
-check for, and tighten, any loose parts;
-have any damaged parts replaced or repaired with parts having equivalent specifications
h) Warn of the need for ear protection.
i) Warn of the need for eye protection.
j) Instruct in how to stop the hedge trimmer in an emergency.
Operation
a) Stop the engine before
-cleaning or when clearing a blockage,
-checking, carrying out maintenance or working on the hedge trimmer,
-adjusting the working position of the cutting device,
-Leaving the hedge trimmer unattended.
b) Ensure that the hedge trimmer is correctly located in a designated working position before
starting the engine.
c) While operating the hedge trimmer, always ensure that the operating position is safe and
secure, especially when using steps or a ladder.
d) Do not operate the hedge trimmer with a damaged or excessively worn cutting device.
e) To reduce fire hazards, keep the engine and silencer free of debris, leaves and excessive
lubricant.

10
f) Always ensure that all handles and guards are fitted when using the hedge trimmer.
Never attempt to use an incomplete hedge trimmer or one fitted with an unauthorized
modification.
g) Always use two hands to operate a hedge trimmer fitted with two handles.
h) Always be aware of your surroundings and stay alert for possible hazards of which you
may not be aware due to the noise of the hedge trimmer.
Maintenance and storage
a) When the hedge trimmer is stopped for servicing, inspection or storage, shut off the
power source, disconnect the spark plug and make sure all moving parts have come to a
stop. Allow the hedge trimmer to cool before making any inspections, adjustments, etc.
b) Store the hedge trimmer where the fuel vapour will not reach an open flame or spark.
Always allow the hedge trimmer to cool down before storing.
c) When transporting or storing the hedge trimmer, always fit the cutting device transport
guard
3. The tool
Main unit

11
1. Device for installing the shoulder strap
2. Engine
3. Bottle for the oil mixture
4. Protection of the blade (pruner)
5. Assembly tools (wrenches and screwdrivers)
6. Pruner
7. Strap
8. Handle
9. Power Switch
10. Fuel tank
11. Exhaust of gas
12. Choke control
13. Starter
14. Tank cap
Pole mounted pruner
1- Tube
2- Oil tank for lubrication
3- Cutting head
4. ASSEMBLY
NOTE: This model comes with a stretch tube. This tube must be installed on the fixing tube of
the machine then the accessories will be installed on this extensible tube.
A) Main unit
Install the front handle as shown in the picture below. Be sure to orient the stem toward the hole. Do
not fasten the screws until you have set the most comfortable working position with the straps. The
front handle must be oriented as shown in the picture for "the motor and drive unit".

12
Accessories setting
-Loosen the clamping knob
-Connect the cutting blade to the machine tube (Make sure the lock is securely engaged in the
mounting hole.
-Tighten the knob. Make sure the connection is secure.
Assembly of the chain guide and the cutting chain:
Remove the safety screw and remove the guard.
Place the chain guide so that the safety pin on the chain engages in the chain's teeth. Make sure that the
direction of movement of the cutting chain is correct. Install the chain guard and tighten the fastening
screw.

13
60°max.
Adjusting the chain tension
The chain must not have too much clearance, but it
must be possible to lift the chain a few millimeters from
the guide rail.
Loosen the fixing screw (1).
Slightly lift the end of the chain guide
Check the cutting chain for ease of operation by
turning it manually.
Adjust the tension of the chain by means of the screw for adjusting the tension of the
chain (4) so that the chain can be lifted a few millimeters from the center of the guide rail.
Secure the safety screw (1).
Use of the pole pruner
Never use the tool at an angle of more than 60 °. The correct operation of the pruner is not
impaired at angles greater than 60 °, but the risk of injury increases due to sudden drops of
branches. Pay attention to the floor in front of you when using the appliance. This allows you
to avoid tripping over branches on the ground. Never use the saw without oil. Use a
biodegradable chain oil. The pruning machine uses a low rebound chain. In addition, special
attention has been paid to the construction of the device to prevent the smallest possible
rebounds given the technical conditions given. Nevertheless, a slight rebound can not be
ruled out by using the upper cutting blade. Expect a rebound when using this side of the blade
or when the top of the blade comes into contact with another branch. The device should
always be used with both hands. The thin branches can be cut at once. To prevent a branch
from splitting or bending, it is advisable to slice it end to end. When slitting longer branches,
the branch should be cut from the bottom. First
cut the branch from below at a point away from
where you want to saw the branch. The notch
must have a depth between one third and one
half the thickness of the branch. This prevents
the branch from breaking when you cut it from
the top a little further away from the trunk. To
finish, saw the stump by making a straight cut.
If you wish, you can seal the cut using a
suitable product.
Installation of the harness
The shoulder strap is equipped with an
emergency release mechanism. To detach the
machine from the shoulder strap in emergency
situations, follow the instructions described below.
WARNING
Check the emergency release mechanism BEFORE operating the machine.
Be sure to hold the machine when operating the emergency release mechanism.
When holding the machine firmly with your right hand, press both sides of the belt
buckle.

14
5. FILLING TANK
Warning: Gasoline is highly flammable. Keep the fuel in specially designed cans.
Only fill the tank outside and do not smoke during the operation.
Fill the tank before starting the engine. Never remove the fuel tank cap, add fuel while the
engine is still running, or while the engine is still warm.
Avoid overfilling the tank: When excess fuel has escaped, do not attempt to start the
engine, but move the machine away and avoid any sources of ignition in the vicinity until
the fuel vapors Have dissipated.
Fully tighten all fuel filler caps and cans.
Fill the tank on the floor.
The engine must be started at a distance of at least 3 meters from where the fuel tank
has been filled.
Switch off the engine before adding fuel. Shake the mixture thoroughly before filling the
tank.
Store gasoline in tanks specially designed for this purpose.
Fill the fuel tank of your appliance outdoors and avoid smoking during work.
Fill the tank before starting the engine. Never open the fuel tank cap or fill fuel tank while
the engine is running or the engine is still hot.
Avoid spilling gasoline: When gasoline is spilled, do not start the machine and move it
away from where the gasoline has spilled to avoid possible sources of fire.
Screw all caps and tank cover carefully
Gasoline is highly flammable. Do not smoke and avoid sparks or open flames near the fuel.
Turn the engine off and allow it to cool before filling the fuel tank. Filling must be done
externally, ideally on the bare ground. Leave at least 3 meters from where you filled the tank
to start the engine.
The engine requires oil specially adapted for two-stroke engines with an air cooling system.
Use quality oil enriched with corrosion-inhibiting products explicitly provided for two-stroke
engines with an air cooling system (JASO FC or ISOEGC).
Do not use BIA or TCW OIL (suitable for 2-stroke engines equipped with a water cooling
system).
SUGGESTED PROPORTIONS: GASOLINE 40: OIL1
Exhaust emissions are regulated by the basic technical characteristics of the engine and its
components (carburation, adjustment of spark plugs, control of exhaust opening and closing
times) in the absence of accessories or a catalyst during combustion.
- These motors are designed for use with unleaded gasoline.
- Always use gasoline with a minimum octane rating of 90RON.
- Using gasoline with a lower octane rating may cause an increase in engine
temperature, causing problems with the engine, including seizure.
- Using unleaded gasoline prevents unnecessary pollution in the interests of your
health and the protection of the environment.
- Using gasoline or oil of lesser quality can damage seal rings, ducts or fuel tank.
-Prepare the mixture
IMPORTANT
MIX THE MIXTURE CAREFULLY.
a. Measure the fuel and oil needed for the fuel mixture.
b. Pour a little gasoline into a clean container provided for this purpose.
c. Add all the oil before stirring the can.
d. Add remaining gasoline and shake the can for at least 1 minute. Certain oils mix with
difficulty because of the substances they contain. Sufficient agitation of the mixture is
essential to ensure proper operation over the life and power of the engine. If your fuel

15
mixture is not stirred sufficiently, the poor and inadequate mixture may increase the risk
of seizure.
e. Identify the can by locating it with a distinctive emblem in order to always know what is
there.
f. Indicate the substances contained and the proportions of the mixture.
-Filling the tank
a. Unscrew the tank cap. Place the tank cap in a clean, dust-free place.
b. Fill the tank to 80% of its capacity.
c. Screw the fuel cap back on. Clean the fuel tank cap and the area around after filling
the fuel tank. Eliminate overfill of fuel mixture by rubbing.
NOTE
When filling, avoid:
-OIL-FREE FUEL (PURE FUEL) - This can quickly cause serious damage to the
interior of the engine components.
-GASOHOL - may cause deformation of rubber or plastic parts and cause engine
lubrication to stop.
-OIL FOR 4-TIME ENGINES - causes clogging of the spark plug, clogs the exhaust
channel or leads to seizure.
Fuel mixtures stored for more than one month may, if used, clog the carburetor and cause the
engine to malfunction.
If the unit is to be stored for an extended period of time, the tank must be cleaned after being
emptied. Leave the engine running to remove the remaining fuel from the carburetor.
Observe local regulations when disposing of used containers.
6. UTILISATION
Do not start the appropriate module of the machine until all components have been connected
correctly! Attach the cutting blade of the brush cutter with a torque of 20 Nm and the cutting
head of the mower with a tightening torque of 15Nm.
WARNING Fill the fuel tank before tightening the fuel tank cover.
Put the machine on a level, solid floor. Keep the cutting head away from the ground and away
from surrounding objects (Fig.5).
3. Press the priming bulb 5 to 8 times until fuel flows through the clear hose.
4. Position the choke in the closed position.

16
5. Set the STOP switch to position "I". Make sure the cutting head is clear. Store the
machine on a level, solid floor.
6. Keep the machine on the ground safely and then pull the starter until the engine starts
WARNING
The machine is equipped with a centrifugal clutch system.
When starting the engine, place the machine on a level, clean floor and hold it
firmly to prevent the sharp components or the throttle lever from coming into
contact with any objects when the engine is started.
IMPORTANT
Avoid pulling the starter to the end or return the cable by suddenly releasing its
handle. This can cause the engine to fail.
Position the choke in the "open" position and restart the engine.
Let the engine warm up a few minutes before starting work.
NOTE
When restarting the engine directly after stopping it, keep the choke switch in the
"open" position.
Overheating complicates engine starting due to overfilling of fuel. If the engine does
not start after several attempts, open the starter and press the starter several times,
or remove and dry the spark plug.
B) Stop the engine
Release the throttle lever and let the engine run for about 30 seconds.
Set the stop switch to the STOP position.
IMPORTANT
•Except in case of emergency, do not switch off the engine by pulling on the choke lever.
•If the engine does not stop by pressing the stop switch, move the choke to the closed
position.
Disassembly of the cutting element
-Align the hole in the dust cover (fig.1) and the notch under the blade holder; insert the Allen key to
4 to secure the assembly.
-Remove the cutting blade safety screw using the supplied spark plug wrench (fig 2).
Important: Caution, risk of injury to the left hand!

17
-Remove the cover plate and the support plate.
-The cutting blade can then be removed.
The installation is done by following the steps in the reverse procedure. Note that the back plate recess
should point toward the cutting blade.
Spark plug replacement
Remove the spark plug cover, unscrew the spark plug with the spark plug wrench and replace it.
2
1
.
C) Safety instructions of use
Instruction manual for cutting edges and brush cutters
To switch the machine off, the switch must be set to "STOP".
-When mowing the grass, it is important to follow the specific national or local guidelines.
-Do not use the appliance during statutory rest periods.
-All solid objects - stones, metal parts etc. - must be removed. These objects can be
thrown and cause injury or property damage.
When the machine is used in undergrowth or high bushes, the working height must be at least
15 cm so as not to expose animals, such as hedgehogs, to a risk.
Cutting power during cutting
Hold the machine on top of the grass while it is running and tap the cutting head several times
on the floor, which extends the sharp filament.
The knife in the baffle cuts the sharp filament to the correct length.
Warning! Otherwise, the remaining portion of the sharp wire could be ejected and cause injury.
When the machine vibrates, clean the machine or, if necessary, remove the stuck grass from
the cutting head and deflector.
The lawnmower should always be held firmly with both hands.
Only cut grass or weeds, small bushes should be cut with a sturdy knife if possible.
Use the machine with caution to avoid putting others at risk during the cutting operation. Work
calmly with care!
Use the machine only if there are sufficient visibility and brightness!

18
Never replace the plastic sharp wire with a wire - danger of injury and serious property
damage!
Never use the appliance when standing on a ladder!
Always work on a hard and stable floor!
Only use the machine after reading the operating instructions carefully.
Observe all safety instructions in this manual.
Act responsibly towards others.
1 Keep an eye on the cutting head!
2 Never mow or cut with arms raised!
3 Never replace the plastic sharp wire with a wire - danger of injury and serious property
damage!
4 Never use the appliance when standing on a ladder!
Always work on a stable area!
Only use the machine after reading the instructions carefully.
Observe all safety instructions in this manual.
Act responsibly towards others.
The machine is equipped with a deflector (cutting tool). This deflector is to be used when
the machine is in edge or brush cutting mode.
Thus, a change of the deflector is not necessary.
The edge cutter / brush cutter should only be used when the protective shield (cutting tool)
is installed.
Instructions for use
Avoid bouncing. Rebounds can cause serious injury. The pruning machine should not be
used when standing on a ladder or if someone else is assisting you is not stable on its
support. You may lose control of the saw and experience severe injuries. If circumstances
require the use of heavier / larger machines, ask a specialist for assistance.
Caution:
1. Pay attention to falling branches.
2. The boom must be installed
FUEL
WARNING
Gasoline is highly flammable. Do not smoke and be careful to avoid sparks or open flames
near fuel. Turn the engine off and allow it to cool before refueling. Filling must be done
externally, ideally on the bare ground. Leave at least 3 meters from where you filled the tank
to start the engine.
The engine needs oil specially adapted for two-stroke engines with an air cooling system. Use
quality oil enriched with corrosion-inhibiting products explicitly provided for two-stroke engines
with an air cooling system (JASO FC or ISOEGC).
Do not use BIA or TCW OIL (suitable for 2-stroke engines equipped with a water cooling
system)
SUGGESTED PROPORTIONS: GASOLINE 40: OIL1
-Exhaust emissions are regulated by the basic technical characteristics of the engine and
its components (carburization, spark plug adjustment, exhaust opening and closing
control) in the absence of accessories or A catalyst during combustion
-These motors are designed to operate with unleaded gasoline.
-Always use petrol with a minimum octane rating of 90RON.
-Using gasoline with a lower octane rating may result in an increase in engine temperature,

19
causing problems with the engine, including seizure.
-Using unleaded gasoline prevents unnecessary pollution in the interests of your health
and the protection of the environment.
-Using gasoline or oil of lesser quality can damage seal rings, ducts or fuel tank.
HOW TO PREPARE YOUR OIL-FUEL MIXTURE
IMPORTANT
SHAKE CAREFULLY THE PREPARED MIXTURE
1. Measure the fuel and oil required for the fuel mixture
2. Pour a little gasoline into a clean container provided for this purpose.
3. Add all the oil before stirring the can.
4. Add remaining gasoline and shake the can for at least 1 minute. Certain oils mix only with
difficulty because of the substances they contain. Stirring the mixture sufficiently is
essential to ensure proper operation over the life and power of the engine. If your fuel
mixture is not stirred sufficiently, the poor and inadequate mixture may increase the risk
of seizure.
5. Identify the can by locating it with a distinctive emblem to always know what is in it
6. Indicate the substances contained and the proportions of the mixture.
FILLING THE DISCONNECT TANK
1. Unscrew the tank cap. Place the fuel cap in a clean, dust-free place.
2. Fill the tank to 80% of its capacity.
3. Screw the fuel cap back on. Clean the fuel tank cap and area around after filling the fuel
tank. Eliminate overfill of fuel mixture by rubbing.
WARNING
1. Fill the tank on the floor.
2. The engine must be started at a distance of at least 3 meters from where the fuel tank has
been filled.
3. Switch off the engine before adding fuel. Shake the mixture thoroughly before filling the
tank.
Warning: Gasoline is highly flammable. Therefore, it is imperative to take the following
precautions:
1) Store gasoline in tanks specially designed for this purpose.
2) Fill the fuel tank of your appliance outdoors and avoid smoking during work.
3) Fill the tank before starting the engine. Never open the fuel tank cap or fill fuel while the
engine is running or the engine is still hot.
Avoid spilling gasoline: When gasoline is spilled, it is important not to start the machine and
move it away from the place where the gasoline has spilled to avoid possible sources of fire.
Screw all caps and tank cover carefully
IN THE INTEREST OF YOUR ENGINE, AVOID:
1. OIL-FREE FUEL (PURE FUEL) - This can quickly cause serious damage to the interior of
the engine components.
2. GASOHOL - may cause deformation of rubber or plastic parts and cause engine lubrication
to stop.
3. OIL FOR 4-TIME ENGINES - causes clogging of the spark plug, clogs the exhaust channel
or leads to seizure.
4. Fuel mixtures stored for more than one month may, if used, clog the carburetor and cause
the engine to malfunction.
5. If the unit is to be stored for a long period of time, the tank must be cleaned after being
emptied. Leave the engine running to remove the remaining fuel from the carburetor.
6. Observe local regulations when disposing of used containers.

20
7.CARE AND MAINTENANCE
Warning! The following instructions refer to normal operating conditions. In the
presence of more difficult working conditions or when the work is carried out for a
prolonged period, it is necessary to reduce the indicated intervals.
After work, it is essential to always check the entire machine and clean it.
Regular checks and maintenance:
-Check the air filter (to be cleaned if necessary)
-Check spark plugs (replace if necessary)
-The correct operation and quantity of the cutting wire.
Always switch the drive unit off when performing any maintenance or repair work.
A) Safety and Maintenance Instructions
The machine may only be used if it is serviced and maintained regularly. Insufficient
maintenance or maintenance can lead to emergencies and unforeseen accidents.
Repairs should only be carried out by authorized specialists with the necessary technical
knowledge. Interventions by non-specialists may damage the machine or be hazardous to
safety.
Follow the instructions below:
-Ensure that all nuts, bolts and screws are tightened to ensure that the machine meets all
safety conditions
-Never store the machine with fuel remaining in the tank in a building where gasoline
vapors may come in contact with flames or sparks.
-Allow the engine to cool before storing it in an enclosed area.
-To reduce the risk of fire, remove grease, grease and grease from the engine, muffler,
battery and gasoline storage area.
-Replace worn or damaged components.
-When the fuel tank is to be emptied, do so outdoors.
-Do not attempt to repair the machine unless authorized to do so.
-Use only spare parts and accessories recommended by the manufacturer.
B) Maintenance plan
To carry out the regular maintenance operations, please refer to the following table
Stop the engine systematically before performing any maintenance on the machine.
When all parts have stopped rotating, remove the cable from the spark plug so that
maintenance can begin.
Never repair the cutting attachments by welding, grinding or modifying their shape. This
can cause serious injury.
Never attempt to perform maintenance operations not listed in this manual. All repairs
must be carried out by an authorized specialist.
Table of contents
Other Hyundai power products Chainsaw manuals

Hyundai power products
Hyundai power products SC-5802B User manual

Hyundai power products
Hyundai power products HTRT3835-2C-1 User manual

Hyundai power products
Hyundai power products HTRT45H40 User manual

Hyundai power products
Hyundai power products HTRT5850 User manual

Hyundai power products
Hyundai power products HYC1600E User manual

Hyundai power products
Hyundai power products HEL2525PRO User manual

Hyundai power products
Hyundai power products HTRT42-1 User manual

Hyundai power products
Hyundai power products HEL30-3-2 User manual

Hyundai power products
Hyundai power products HTRT65 User manual