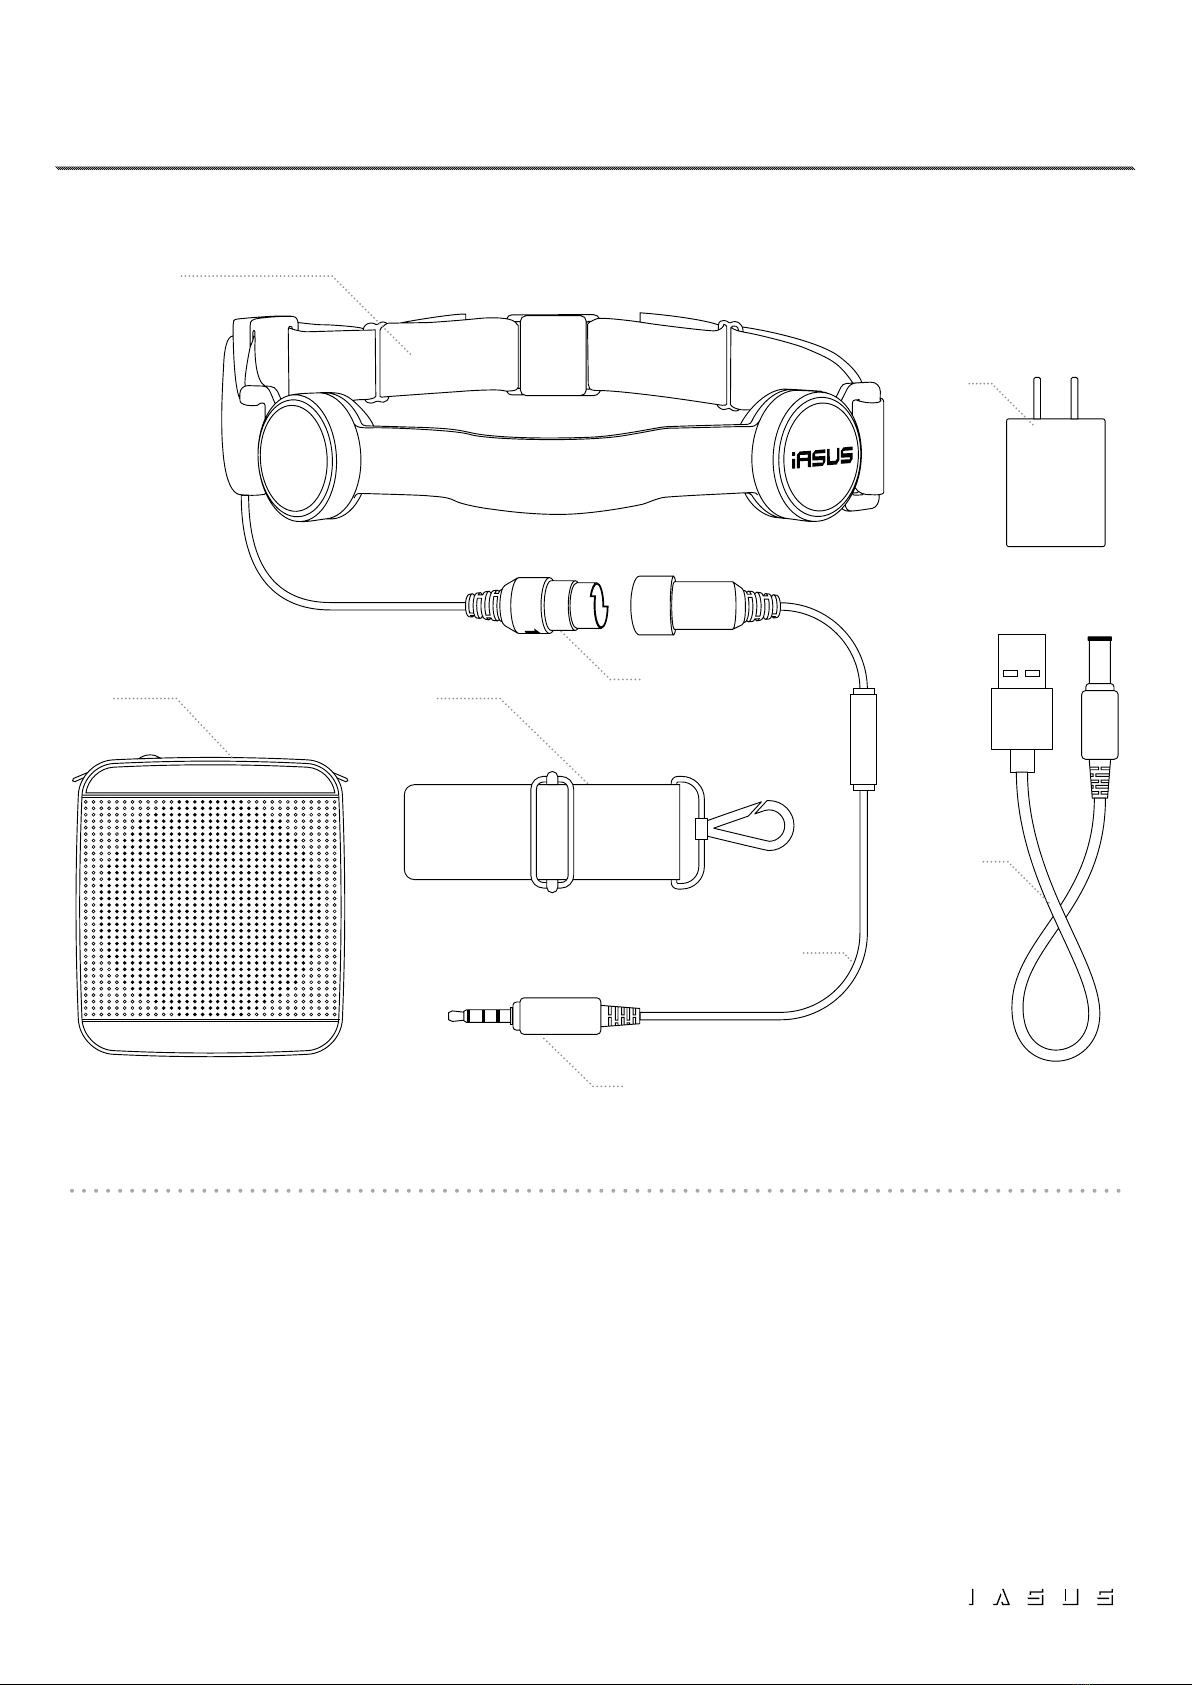
IASUS_TEN4_INSTRUCTION MANUAL_2021 8
For the best transmission quality when using the GP3-R, place
the Gen 3.0 Transponder Microphon (A) about 0.5 - 1 inch on
either side of your larynx / voice box. The optimal transponder
position on the neck will vary between individuals.
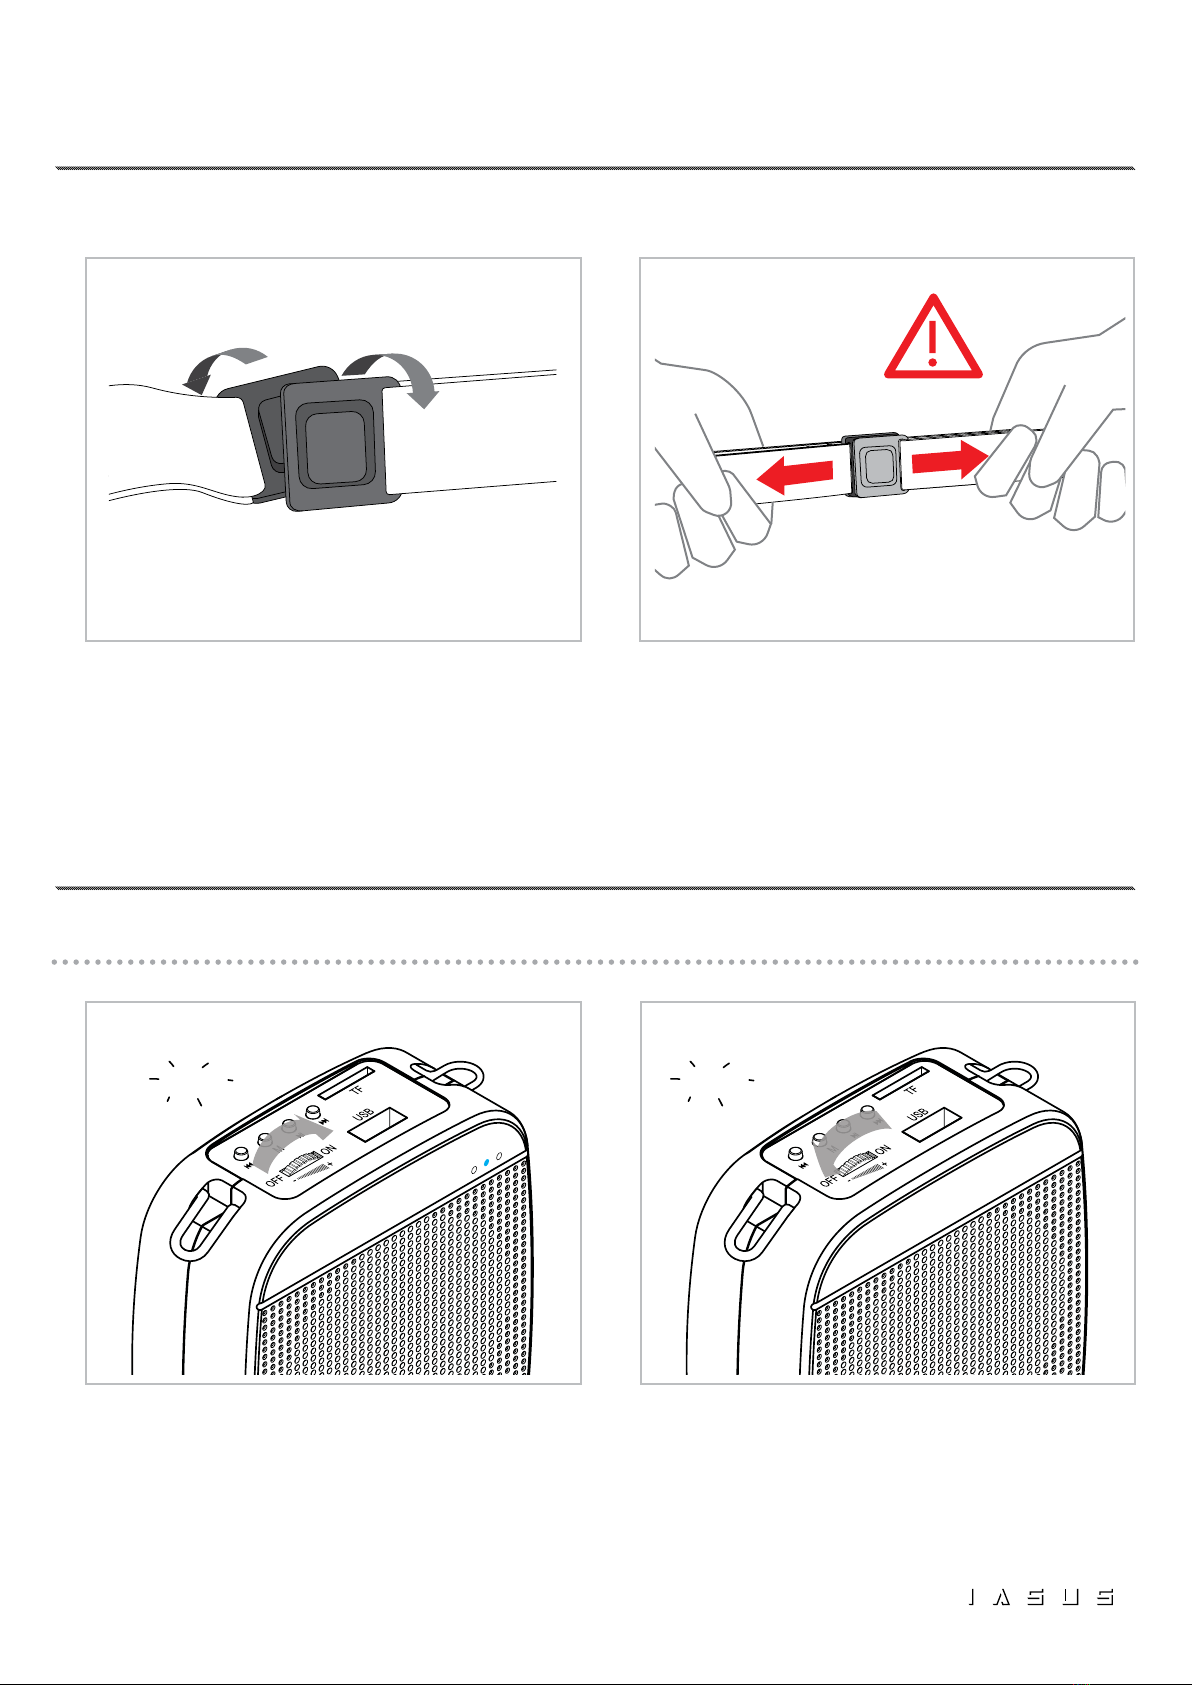
The GP3-R’s neck strap is adjustable. To increase or decrease
the diameter, length or shorten the neck strap by using the neck
strap adjusters (E).
NOTE: The transponder should rest comfortably on the neck and be
contacting your neck at all times - it should not be too tight.
The adjustable strap is stretchable to offer exibility in order for the
throat mic to stay in position. Do not over tighten the straps.
A soiled neck strap can be removed from the GP3-R and washed
with mild soap and water, then hung dry. Do not submerge the
GP3-R throat mic with the adjustable neck strap in water or put
into a washing machine.
Speak in a calmly, clearly, and softly, as the Gen 3.0 Transponder
microphone is very sensitive. Failing to do so will result in mufed
and distorted audio on the receiving end. This is caused by the
voice overpowering the microphone, and in turn, clipping the
input audio.
IMPORTANT: While the GP3-R is rated IP65 and
protected from water splashes, it is not waterproof. Do
not submerge the throat mic in water.
0.5 to 1 in.
WEARING THE THROAT MIC:
SPEAKING WITH THE THROAT MIC:
CLEANING THE THROAT MIC:
✓
✗
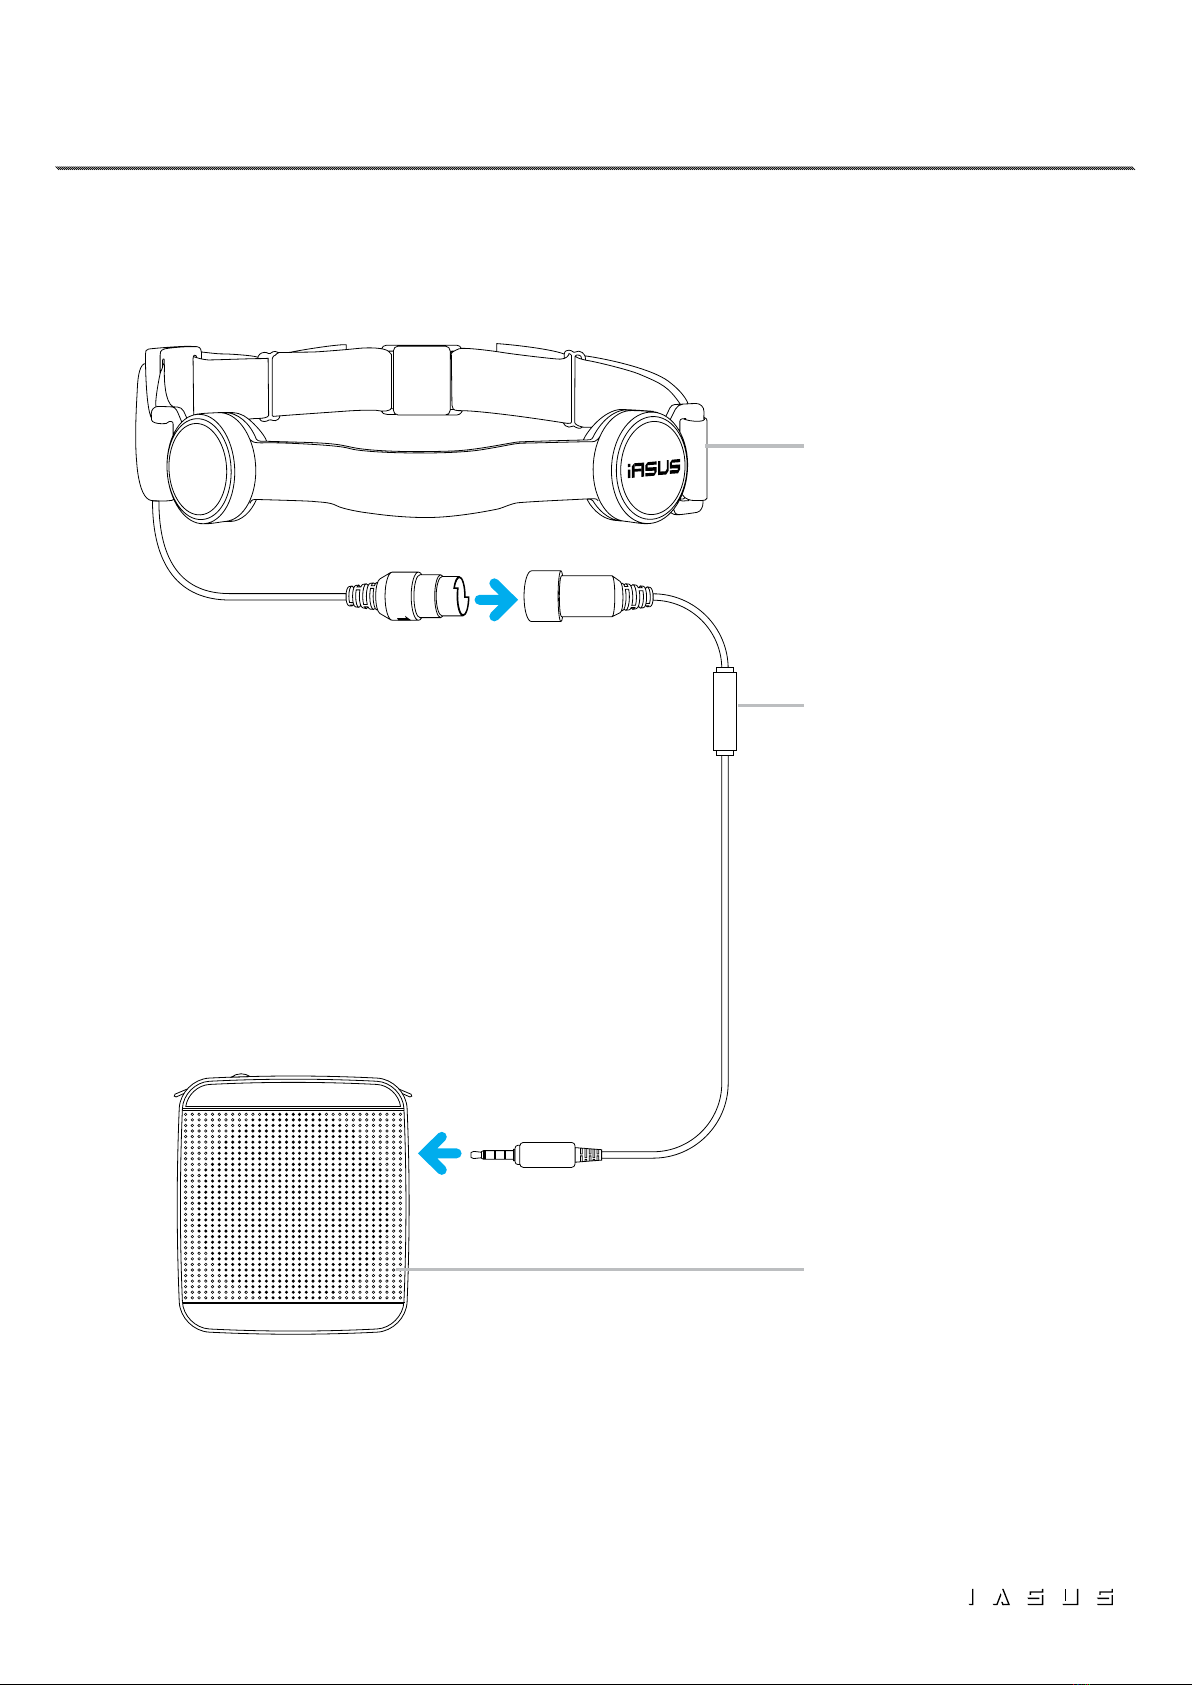
USE AND CARE OF THE GP3-R THROAT MIC