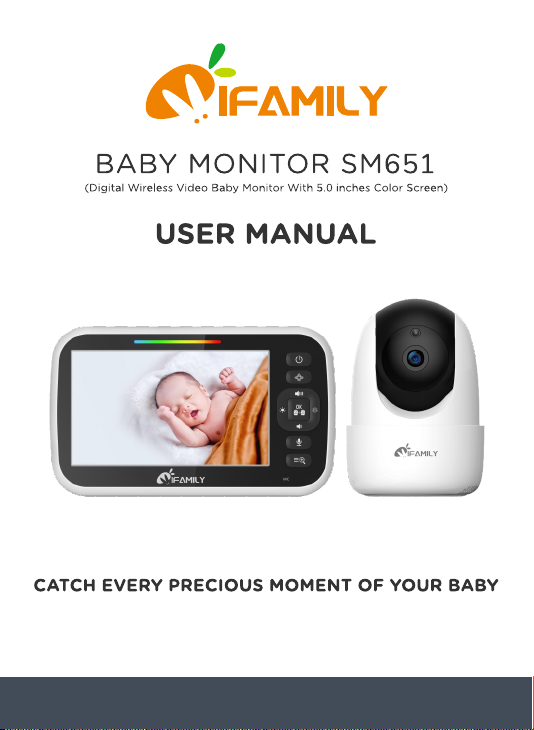
iFAMILY SM651 User manual

size: 128.5x94 mm

service@ifamily.vip
service@ifamily.vip
service@ifamily.vip

1. SAFETY INSTRUCTIONS 1-2
2. PRODUCT OVERVIEW 3
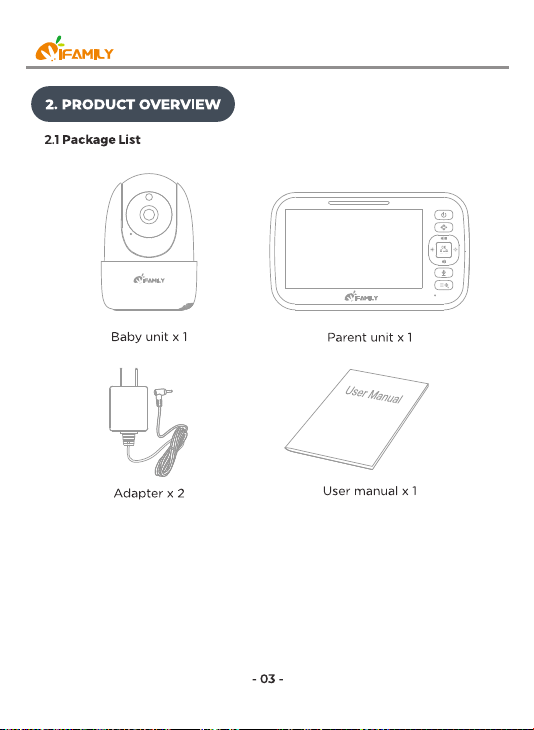
2.1 Package list 3
2.2 Parent unit(monitor) 4-5
2.3 Baby unit(camera) 6
2.4 Icon overview 6
3. USING THE BABY MONITOR 7-10
4. FUNCTION OVERVIEW 11
4.1 Pairing the camera and monitor 11
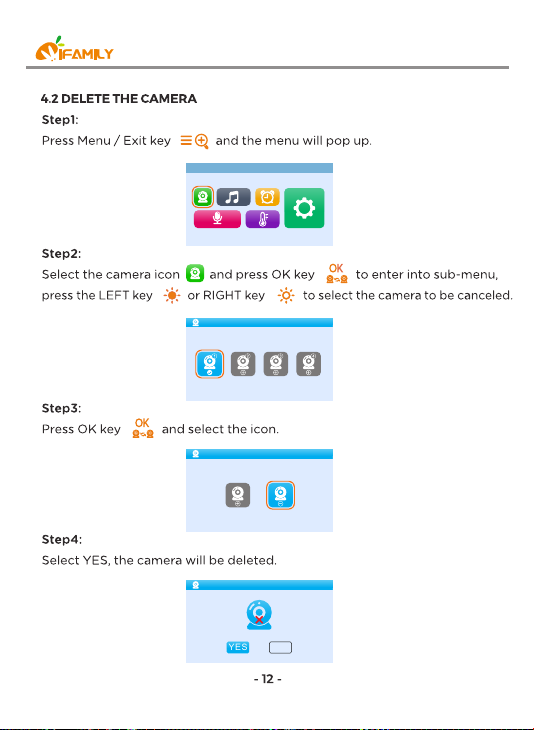
4.2 Delete the camera 12
4.3 Lullaby setting 13
4.4 Feeding timer setting 14-15
4.5 Vox setting 16-17
4.6 Temperature settings 18
4.6.1 Temperature alarm setting 18
4.6.2 Temperature Hi/Lo alert limits 19
4.7 Setting 20
4.7.1 Language setting 20
4.7.2 Frequecy setting 21
4.7.3 Reset setting 22
5. TECHNICAL DATA 23
5.1 System general 23
6. TROUBLE SHOOTING 24-25
FCC STATEMENTS 26
CONTENT
service@ifamily.vip

service@ifamily.vip
service@ifamily.vip
service@ifamily.vip

Power key:
Long press to turn on/o the monitor; short press to screen on/o.
Pan/Tilt
Press the key to enter into the pan/Tilt mode.
Volume + / Up key:
Press Volume+ to increase the volume/ To up the camera in the
Pan/Tilt mode.
Brightness + / Right key:
Press the Brightness+ to increase the brightness/ To right the camera
in the Pan/Tilt mode.
OK:
Press the OK key to view/scan camera or to conrm.
Volume - / Down key:
Press Volume- to decrease the volume/ To down the camera in the
Pan/Tilt mode.
Brightness - / Left key:
Press the Brightness- to decrease the brightness/ To left the camera
in the Pan/Tilt mode.
Talk to baby:
*To talk, press and hold the talk key on the front of the monitor;
release to turn it o.
1
3
2
5
4
6
7
8
service@ifamily.vip
1
3
5
2
4
6
7
8
9

*Bear in mind that you can't listen to your baby while you're talking
to them; to listen to it, you will have to stop pressing this button.
Menu/Exit:
Press short Menu/Exit key the menu will pop up, and press again
to EXit.
Press and hold the Menu/Exit key around 2 seconds to operate Zoom
in/out.
MIC:
When talking to the baby, collect the voices of the parents.
Power&Charging Indicator LED:
*The LED shows red when charging under the display is turn o state.
*The LED displays shows orange when charging under the turn on state.
*The LED displays shows green after the battery is fully charged.
Volume LED:
When the baby unit detects the voice, the indicator light will be on,
The louder the detected sound, the more lights will light up.
LCD screen:
Display the baby's picture and the adjustment of each button function.
Speaker:
Hear the sound from the baby.
Stand:
Monitor placement stand.
Reset key (under the stand):
Long press the reset button with a pin to reset the display.
DC-jack:
Charge the monitor by connecting the Power Adapter to the monitor
and a socket.
Note:
If you want to adjust the Volume/Brightness, you have to exit the
Pan/Tilt mode before you operate it.
9
service@ifamily.vip

VOX
Light sensor Speaker
infrared LEDs Pair key
CMOS sensor DC-Jack
Power LED Temperature sensor
MIC Antenna
1
8
3
9
2
5
4
6
7
1
3
2
5
4
8
8
9
6
7
80
service@ifamily.vip
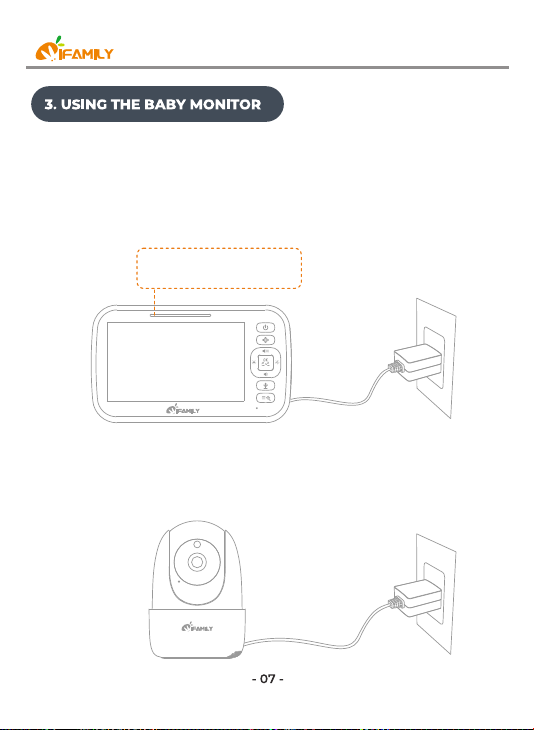
3.1 CHARGING AND POWERING THE MONITOR UNIT
Step1:
Charge the monitor by connecting the A/C adapter included in this
package to the monitor and a socket. (It takes about 4 hours for the
monitor to be fully charged).
Step2:
Use the provided AC adapter included in this package to connect the
wall outlet with the baby unit.
Charging: Red/orange
Fully charged: Green
service@ifamily.vip

Note:
*Place the camera at least 3ft / 1m away from your baby. Gently press
and hold the Power Button for 3s to turn on the monitor, then you can
see the live view.
*Follow your needs to adjust the sound, brightness, and reasonable
placement of the camera.
Tips:
To use the baby monitor, you must be able to establish a radio link
between the monitor and camera, and the range will be aected by
environmental conditions:
*Any large metal object, like a refrigerator, a mirror, a ling cabinet,
metallic doors or reinforced concrete between the baby and parent
unit may block the radio signal.
*The signal strength may also be reduced by other solid structures,
like walls, or by radio or electrical equipment, such as TV, computers,
cordless or mobile phones, uorescent lights or dimmer switches.
*When using the other 2.4GHz product, such as wireless networks
(Wi-Fi routers), Bluetooth systems, or microwave ovens, may cause
interference with this product, so keep the baby monitor away at least
5ft(1.5m) from these types of products.
service@ifamily.vip

service@ifamily.vip
Step1. Press and hold the Menu/Exit key arond 2 seconds enter
Zoom mode.
Step2. At the Zoom mode, press the Pan/Tilt key to adjust the
direction of the camera/image.
Step3. Press the LEFT key to pan left; Press RIGHT key to
pan right; Press UP key to tilt up; Press Down key to tilt
down.
Step4. Press and hold the Menu/Exit key again around 2 seconds to
operate Zoom out. During digital zoom mode, the zoom icon will be
displayed on the top of screen.
Warm reminder: If you want to adjust the Volume/Brightness, you
have to exit the Pan/Tilt(press Pan/Tilt key) mode before you operate
it.

service@ifamily.vip

4.FUNCTION OVERVIEW
4.1 PAIRING THE CAMERA AND MONITOR
Step1:
Press Menu / Exit key and the menu will pop up.
Step2:
Select the camera icon and press OK key to enter into sub-menu,
press the LEFT key or RIGHT key to select the camera to be paired.
Step3:
Press OK key to start the pairing. While the screen shows pairing then
press the PAIR button on the back of camera.
Step4:
Once paired, then the screen will display the image from the camera.
Step5:
If unsuccessful, please repeat above steps.
VOX
MENU
Camera
7
Pairing
service@ifamily.vip
7
VOX
MENU
Camera
Pairing
Unpair
NOYES
service@ifamily.vip
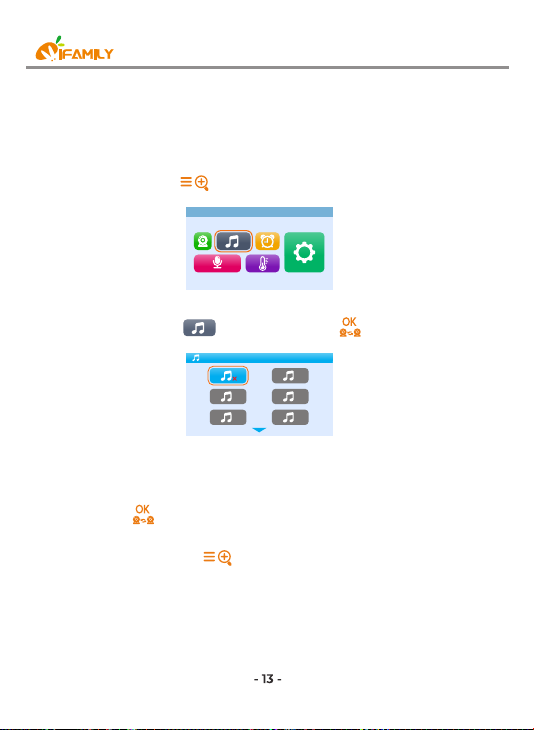
4.3 LULLABY SETTING
You can soothe the baby to sleep by playing a gentle lullaby from the
baby unit.
Step1:
Press Menu / Exit key and the menu will pop up.
Step2:
Select the lullaby icon and press OK key to enter into sub-menu.
Step3:
Press the NAVIGATION key to select the lullaby you need.
Step4:
Press OK key to conrm.
Step5:
Press the Menu / Exit key to Exit.
Lullaby
1
3
54
2
VOX
MENU
service@ifamily.vip
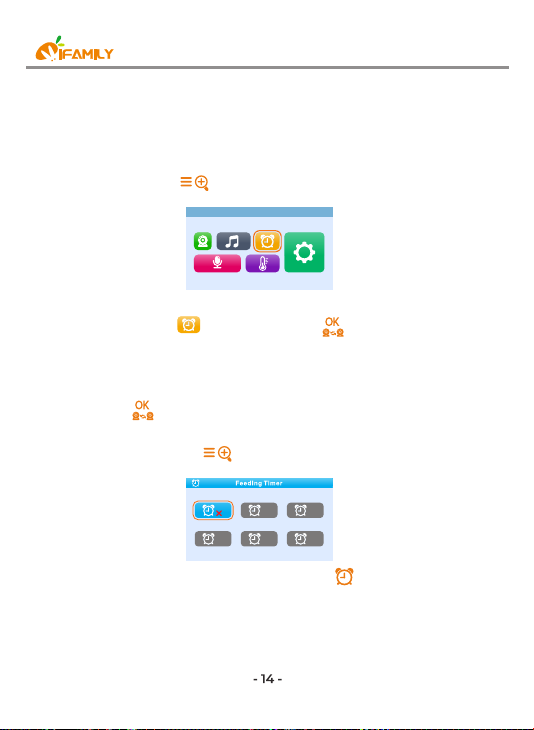
4.4 FEEDING TIMER SETTING
You can use the alarm to remind yourself to feed baby/change diapers/
sleep,etc
Step1:
Press Menu / Exit key and the menu will pop up.
Step2:
Select the alarm icon and press OK key to enter into sub-menu.
Step3:
Press the NAVIGATION key to select desired alert time.
Step4:
Press OK key to conrm.
Step5:
Press the Menu / Exit key to Exit.
Note1: Once the alarm is turned on, alarm icon will displayed on the
Screen.
Note2: The alarm default setting is OFF.
Note3: When the alarm is ringing, press any key on the parent unit to turn the
1h
3h 4 h
2h
6h
VOX
MENU
service@ifamily.vip

alarm o.
Note4: If you don’t turn o the alarm, the alarm will ring for 1 minute. After 3
minutes the alarm will ring again for 1 minute. The alarm will ring for 3 times
in total, after this the alarm goes o.
service@ifamily.vip
Table of contents


