iGenix IG9706 User manual
Please read these instructions carefully before use and retain for future reference
Before switching on your appliance,
always check for any damage which may have been caused in transit
IG9706
Batch code:
5 Litre Air Cooler
USER MANUAL

2
CONTENTS
Important Safety Instructions...............................................3-5
Appliance Overview.................................................................. 6
Operating Instructions.........................................................6-10
Cleaning and Maintenance ............................................... 10-11
Trouble Shooting Guide.......................................................... 12
Disposal Information.............................................................. 13
Fuse Replacement.................................................................... 13
Terms and Conditions and Warranty Information...... 14-15

3
SAFETY INSTRUCTIONS
Carefully read the instructions before operating the unit.
Please retain this manual for future reference.
1. If the supply cord is damaged, it must be replaced by the
manufacturer, a service agent or a similarly qualied person to
avoid a hazard.
2. Household and indoor use only.
3. This appliance can be used by children aged from 8 years and
above and persons with reduced physical, sensory or mental
capabilities or lack of experience and knowledge if they have
been given supervision or instruction concerning use of the
appliance in a safe way and understand the hazards involved.
Children shall not play with the appliance. Cleaning and user
maintenance shall not be made by children without supervision.
4. Unplug the appliance during lling and cleaning.
5. Prior to cleaning or other maintenance, the appliance must be
disconnected from the supply mains.
6. Correct Disposal of this product
This marking indicates that this product should not be
disposed with other household wastes throughout the
UK/EU.To prevent possible harm to the environment or
human health from uncontrolled waste disposal, recycle it
responsibly to promote the sustainable reuse of material
resources.To return your used device, please use the return
and collection systems or contact the retailer where the
product was purchased.They can take this product for
environmental safe recycling.The packaging material is
recyclable. Dispose of the packaging in an environmentally
friendly manner and make it available for the recyclable
material collection-service.
7. Non-specialized personnel or unauthorized repair personnel
shall not repair or modify the machine.
8. Under no circumstances can the appliance be used with wet

4
hands.This is to avoid electric shock.
9. If the unit is not in use for a long time, unplug the power cord.
10. To prevent accidental injury or damage to the unit, please do not
insert any foreign matter into the air inlet and outlet, because the
unit incorporates a high-speed wind rotor.
11. It is prohibited to use this unit in environments with ammable
and explosive gases and direct sunlight for a long period shall be
avoided.
12. Do not place this unit on an incline or uneven ooring. It must be
on level ooring to work properly.
13. This machine has a safety switch. If the honeycomb lter support
has not been installed well, the unit will not work as usual; when
the machine is working, do not remove the honeycomb lter
frame.
14. At any time the water level in the tank shall not exceed “MAX”
(maximum) scale, and during humidication, the total water level
in the tank shall be controlled, and shall not be below “MIN”
(minimum) scale.
15. After the water tank is lled with water, do not tilt or collide
with the unit when placing or moving it.To move the unit body,
please move it slowly from the side to prevent water overow.
16. When in use make sure the unit is stable to prevent it from
falling over. If the unit topples over accidentally, and it contains
water, unplug the power cord immediately and take it to a
qualied service engineer.
17. Do not place items on the unit or cover the unit in any way with
cloth or similar materials.
18. When washing the outer panels of the unit, only use a damp
cloth. Do not use solvents or corrosive cleaning agents.
19. Do not have the air inlet and outlet of the unit close to walls,
curtains and other objects, as they may block the airow and
affect air supply.
20. When in use make sure not to knock or hit the unit as this could
lead to the appliance automatically shutting down. If this happens

5
the unit will need to be manually restarted.
21. Ensure the water is changed regularly, particularly in warmer
temperatures to prevent the water stagnating and creating
odours. If the indoor temperature is below zero, it is best to use
warm water for humidication.
22. Do not place the unit directly below the power outlet.
23. Do not use the unit around the tub, sprinkler or swimming pool.
24. Product repair must be carried out by a qualied service
engineer.
25. To protect against the risk of electrical shock, do not immerse
the unit, cord or plug in water or other liquid.
26. If a damp cloth has been used to wipe the unit, ensure it is dried
again with a dry cloth.
27. Please note that high levels of humidity in a room can lead to
build up of mould. Humidity levels should always be controlled
inside the home wherever possible to prevent this from
happening.
28. Do not permit the area around the humidier to become damp
or wet. If dampness occurs, turn the output of the humidier
down. If the humidier output volume cannot be turned down,
use the humidier intermittently. Do not allow absorbent
materials, such as carpeting, curtains, drapes, or tablecloths, to
become damp.
RULES FOR SAFE OPERATION
1. Never insert ngers, pencils, or any other object through the
grille when air cooler is running.
2. Disconnect air cooler when moving from one location to
another.
3. Be sure air cooler is on a stable surface when operating to avoid
overturning.
4. DO NOT use air cooler by a window, as rain may create
electrical hazard.
5. Household use only.

6
APPLIANCE OVERVIEW
OPERATING INSTRUCTIONS
Guidance on lling with water, disassembling and washing of the water tank
NOTE:
• Ensure that the water tank is regularly emptied and cleaned when the air cooler is left unused for a
prolonged period of time.
• Always remove the power plug when lling with water and cleaning.
• Always make sure that the water pump module is xed securely in place before turning on the air
cooler. If the water pump module is not securely fastened it can affect the performance of the unit
when the Cool Wind function is in use.
• To ll:
Separate water pump module, and fully pull out the water tank, to feed water or clean the water tank.
NOTE: Pictures in the manual are for reference only.
Control panel
Water tank
locking mechanism
Honeycomb lter
Ice box
Water tank
7
Water pump module
Locking mechanism
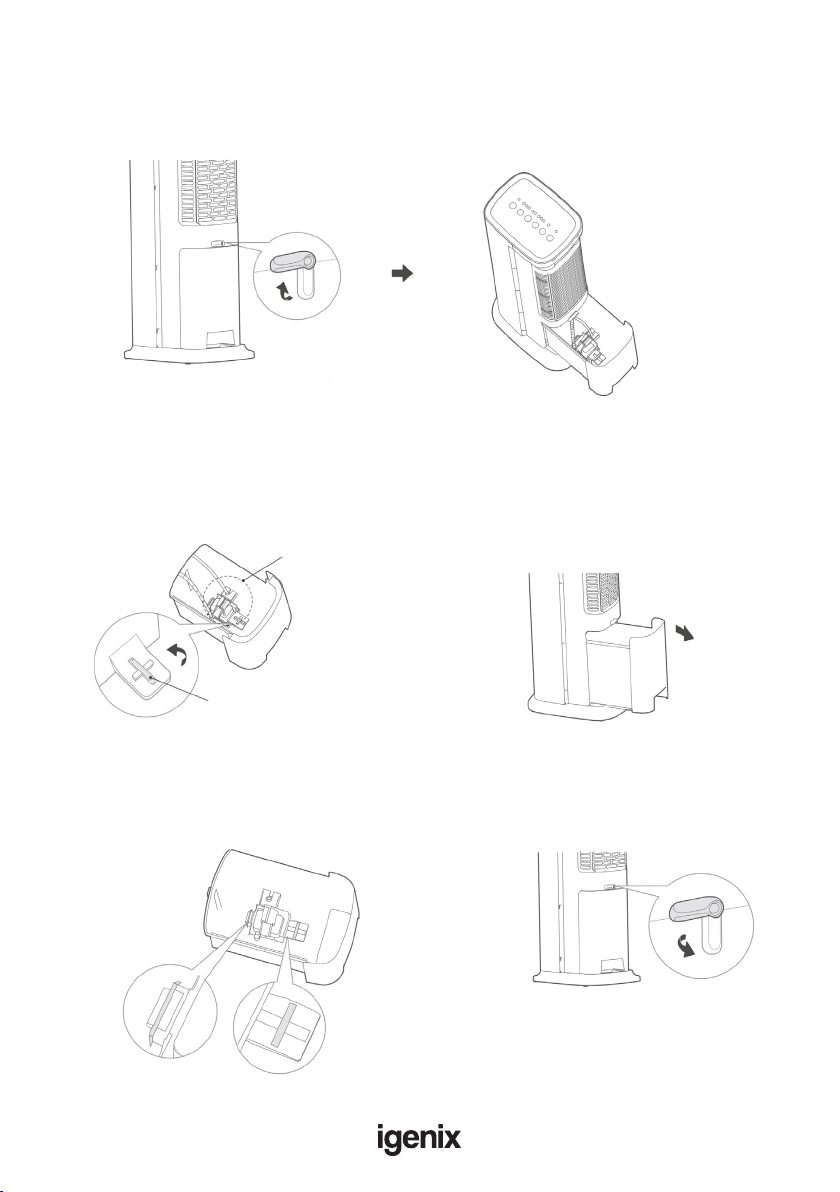
Filling the water tank
1. Unlock the water tank by rotating
the locking mechanism 90 degrees.
2. Pull out the water tank and ll with water (making
sure not to go over the maximum ll line), then
once lled push the tank back into position and lock
securely.
Removing and cleaning the water tank
1. Rotate the locking mechanism 90 degrees
anticlockwise to release the water pump module
from the water tank (including the water pipe).
2. Once the water pump module has been
detached, carefully remove the water tank from
the unit so that it can be fully emptied of any
stagnant water and cleaned thoroughly.
3. After cleaning the water tank, reinsert the water
pump module back into the water tank. Insert
front hook into the slot of the water tank, and then
rotate locking mechanism clockwise 90°, and close it
as shown below.
4. Push the water tank inside slowly, and
rotate the locking mechanism to secure
back in place

8
Usage of the ice box
NOTE:
1. The ice box can be frozen repeatedly and reused.You can also choose not to use it based on the
temperature.
2. Please keep the ice box closed to prevent damage and liquid leakage.
3. The ice box is made of eco-friendly and toxic-free materials, and can be frozen safely.
4. When using the frozen ice box in the water tank, the temperature at the air outlet will drop after
operating Cool Wind function.
5. Ice blocks can be used to replace the frozen ice box, to create the same cooling effect.
6. Ensure that the water level in the water tank doesn’t exceed the “MAX” (maximum) line on the front
of the water tank, and if the water level is showing as lower than the “MIN” (minimum) please rell
the tank before using the ‘Cool Wind’ function.
1. Pull the water tank out halfway from the air
cooler unit.
2. Take the ice box out of the package and place it
inside a freezer to freeze for more than 3 hours.
Put the frozen ice box in the water tank, and ll
with water, ensuring it stays below the ‘max’ ll line.
Scale of the water tank

9
Control Panel
Active Function Display Function Control Buttons
Buttons Function description
Startup/Standby
Press to turn the product on or off.
Oscillation
Vertical louvres will oscillate if the unit is in operation.
Wind Speed
Choose wind speed from LOW , MEDIUM , and HIGH .
Wind Type
Select from these three types of wind: Normal wind (the wind speed indicator
light is on), sleep wind (sleep wind the indicator light is on), natural wind
(natural wind the indicator light is on).
Delay Timer
Set a delay timer for the air cooler to automatically shut down after a selected
period of time. Press the button repeatedly to cycle through delay shutdown
time options ranging from 1 - 7 hours (the time chosen will be shown by the
sum of the lights that are illuminated on the Active Function Display next to the
Delay Timer button)
Cool Wind
Activating the Cool Wind function will mean the air cooler is adding moisture to
the air from the water drawn out of the tank to help increase the cooling effect
of the unit. If indicator light ashes, rell the water tank before starting this
function.
10
CLEANING & MAINTENANCE
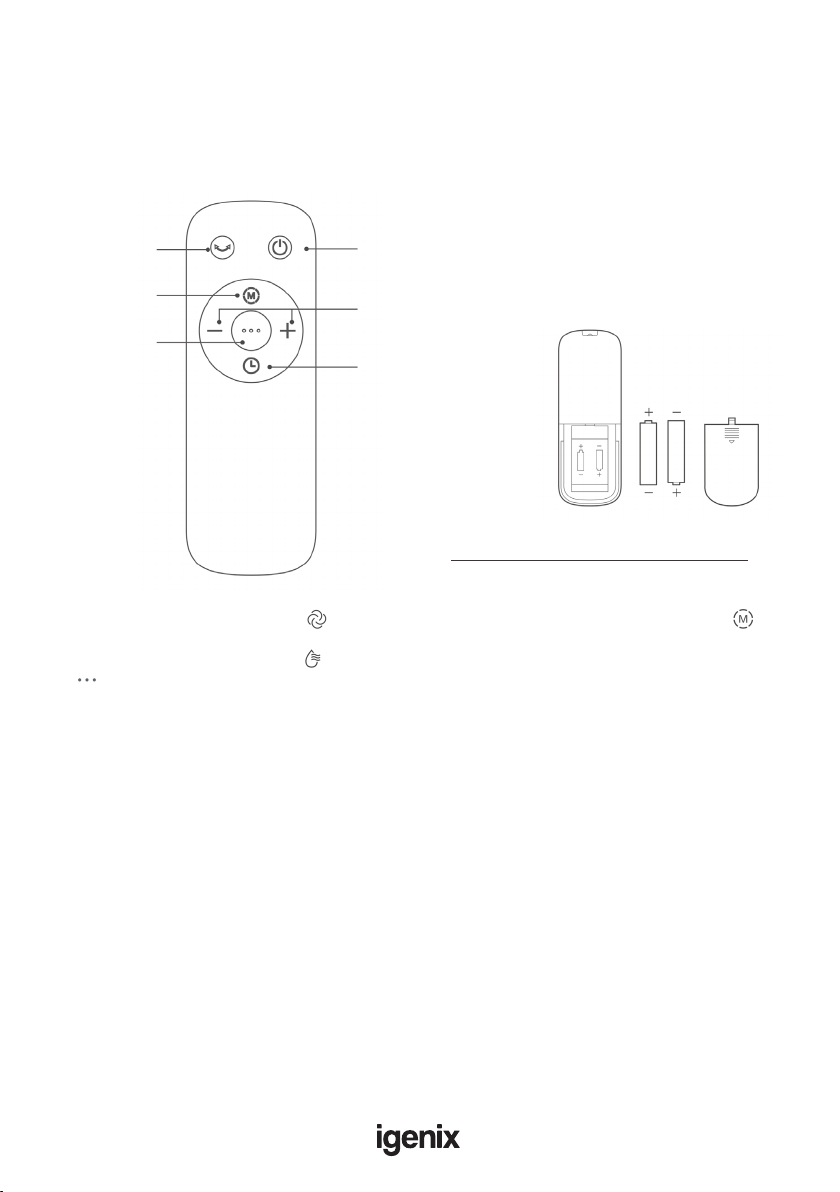
Remote control button description
NOTE:
• The remote control should be normally used within 5 metres of the front of the product and 30
degrees of the deviation angle.
• Battery acid can be harmful, so please always recycle waste batteries safely and separately.
Oscillation
Set Wind Type
Cool Wind
Startup/Standby
“+” increase Wind Speed
“-” decrease Wind Speed
Delay Timer
AAA Battery, 1.5 V
Use manganese or alkaline batteries of type
“AAA”. Do not use rechargeable batteries.
NOTE: On the unit control panel, shows Wind Type selection. On the remote it is shown by
NOTE: On the unit control panel, selects Cool Wind. On the remote, this same function is shown
by .
NOTE:
• Disconnect the power before cleaning the product. Clean after the product is shut down for two
minutes.
• Prevent from using any abrasive tools and solvents that may damage the surface to clean up the
product. Detergent can be used for cleaning, and then wiped clean with a dry cloth afterwards.
Prevent from washing the machine body with water directly, and wash disassemble parts (honeycomb
lter parts) with a soft brush.
• Only replace internal parts once they are fully dry.
• Do not take apart or modify any of the internal pieces. It is recommended that this product should be
checked and cleaned regularly in order to extend its service life.

11
Guidance on the disassembly and installation of honeycomb lter parts
1. Remove the honeycomb lter support. 2. Rotate the bottom locking mechanism 90
degrees anticlockwise, and then remove the
honeycomb lter.
3. Take out the honeycomb lter for cleaning.
With a mild detergent and a soft brush, scrub
the honeycomb lter with clean water and
then leave to dry fully before placing back into
the lter support.
4. Re-install the honeycomb lter support
once all pieces are clean and dry.
Replace water
After the Cool Wind function has stopped for 2 minutes, you
can then remove the water tank to rell it, as the water will have
returned to the water tank after being circulated through the unit. Stop the Cool
Wind function
for 2 minutes.

12
TROUBLE SHOOTING GUIDE
If you are having problems with your appliance, please use our troubleshooting guide below. If you are
unable to resolve the issue using this guide please ring our Customer Service Department on
0844 848 5861. Please have the model code and purchase information available.
Faults Fault description
The unit will not switch on
Check Trip Switch / Fuse
Check if the plug is connected to mains socket correctly
Check batteries in the remote control
Runs for a short while and then
switches off
Check if air outlet is blocked, if so remove obstacle
Check if Delay Timer function has been activated
The unit has been running for a long
period and then switches off
The overheat protection has been activated to protect the
motor – turn unit off for a least 10 minutes and then switch
back on
Runs without cooling in Cool Wind
mode and Empty Tank Indicator
blinking
The water tank is empty and needs to be re-lled
Check if the air lter is dirty – if so, clean
Check if air outlets or inlets are blocked
Water is leaking from unit when
moving
Check that the tank has not been lled above the MAX line.
If it has been lled too high then carefully remove some of
the water until it falls below the MAX line.
Ensure unit is located on a at and even surface
The honeycomb lter is blocked with
dust. Pull down the honeycomb lter and clean it.
The air inlet is blocked with dust Remove the foreign matter
Maintenance Instruction
The fan requires little maintenance. Do not try to x it by yourself. Refer it to qualied service personnel
if service is needed.
1. Before cleaning and assembling, appliance must be unplugged.
2. To ensure adequate air circulation to the motor, keep vents at the rear of the motor free of dust. Do
not disassemble the appliance to remove dust.
3. Please wipe the exterior parts with a soft cloth soaking a mild detergent.
4. Do not use any abrasive detergent or solvents to avoid scratching the surface. Do not use any of the
following as a cleaner: gasoline, thinner.
5. Do not allow water or any other liquid into the motor housing or interior parts.
Cleaning
1. Be sure to unplug from the electrical supply source before cleaning.
2. Plastic parts should be cleaned with a soft cloth moisten with mild soap. Thoroughly remove soap lm
with dry cloth.
13
DISPOSAL INFORMATION
The European Directive 2012/19/EU on Waste Electrical and
Electronic Equipment (WEEE), requires that old household
electrical appliances must not be disposed of in normal unsorted
municipal waste.
Old appliances must be collected separately in order to optimise
the recovery and recycling of the materials they contain and reduce the impact
on human health and the environment.
The crossed out “wheeled bin” symbol on the product reminds you of your
obligation, that when you dispose of the appliance it must be separately collected.
Consumers should contact their local authority or retailer for information
concerning the correct disposal of their old appliance.
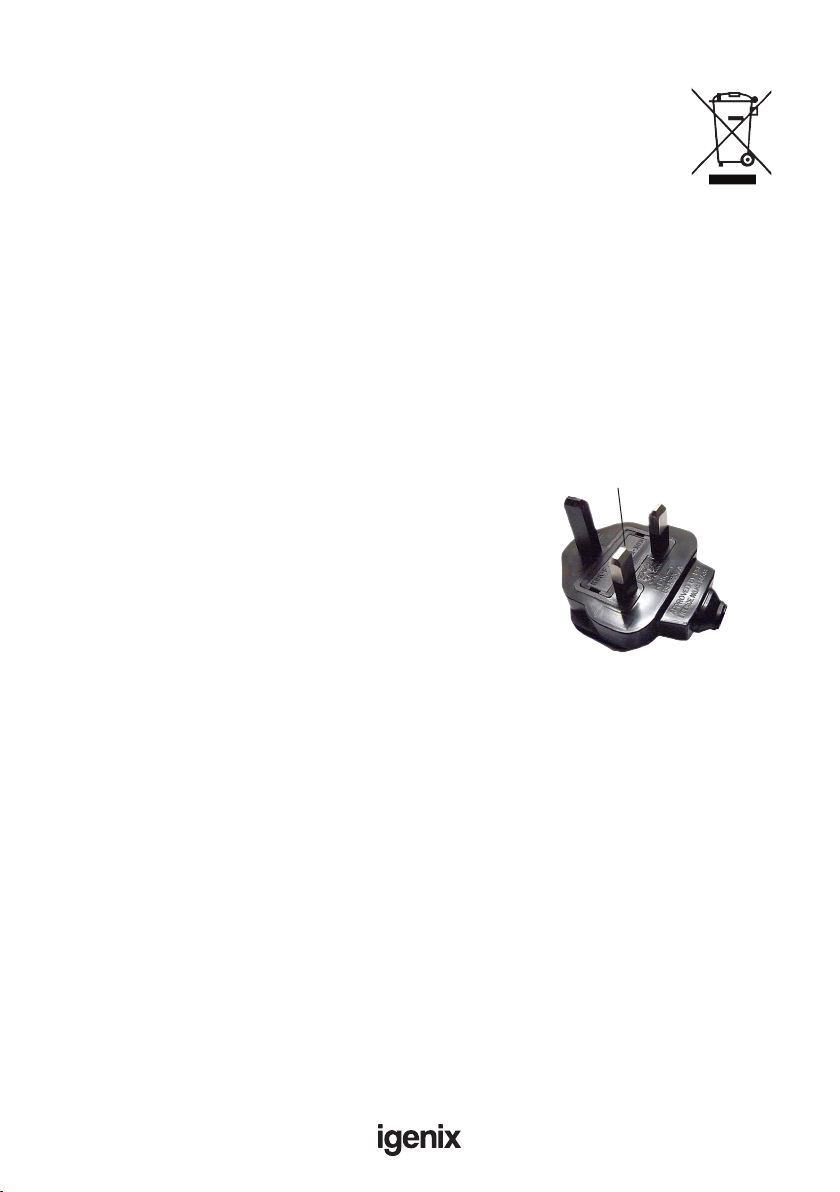
Fuse Replacement (Class II)
Remove the fuse cover with a small at head screw driver.
Take out the fuse and replace with a new fuse of the same
Amp. Replace the fuse cover and push back into place.
Fuse Cover
MAINS PLUG FUSE REPLACEMENT

14
Igenix Warranty Terms & Conditions
This product is guaranteed for a period of 12 months as standard from the date of purchase
against mechanical and electrical defects.You can extend your warranty for a further 12 months by
registering your product.
Upon registration we will cover your product for a period of 24 months from the original purchase
date against any mechanical or electrical defects.
To qualify for the warranty, the product must be used for domestic household use only and in
accordance with the instructions in the user manual.Any misuse of the product will result in the
warranty being void.
The warranty does not cover accidental damage, misuse, neglect, tampering or incorrect adjustment
or installation.
The warranty will be rendered invalid if the product is resold, has had its serial number removed
(or has an invalid serial number), or if an unauthorised person has carried out any repairs or
alterations.
The warranty does not cover accessories or consumable parts that require replacement under
normal use. This includes shelving, dials, lters, belts and trays etc.
In the unlikely event of a breakdown please refer to the Troubleshooting guide in your user manual
and check all plugs, fuses and the electricity supply.
If you still require assistance please contact our Customer Service department on
01473 271 272 or write to us at the following address:
Customer Service Department
38 Bluestem Road, Ransomes Europark
Ipswich, IP3 9RR
Please quote the Product Code which begins ‘IG’ or ‘DF’ and the PO Number on the front of the
manual, and give details of the exact fault.We will then decide whether to repair or replace the
item.
Before we arrange the repair or replacement you will be required to return a copy of your proof
of purchase. Please retain your original.
If an item is replaced within the agreed warranty period, the warranty for the replacement item will
be calculated from the purchase date of the original.
In the event that the product is inspected and no fault is found or the product is not within the
warranty period you will be charged for the repair and any carriage costs.

15
Thank you for choosing lgenix
As a valued customer we would like to offer you a FREE 2 year warranty to cover your product
against any electrical or mechanical defects.
This means that in the unlikely event you develop a fault or problem with your product we will
happily repair or replace the item free of charge.
To qualify for the 2 year warranty you must register your product within 30 days of purchase.The
full Terms & Conditions of our warranty policy are shown on the opposite page.They are also
available on our website. www.igenix.co.uk

38 Bluestem Road, Ransomes Europark, Ipswich, IP3 9RR
Tel. 01473 271 272
Disclaimer: Igenix operate a policy of continual improvement and development.
We therefore reserve the right to change/alter the specication and appearance of our appliances without prior notice.
All diagrams and images shown in this manual are for illustration purposes only.
Table of contents
Other iGenix Air Conditioner manuals

iGenix
iGenix IG9703 User manual

iGenix
iGenix IG9901 User manual

iGenix
iGenix IG9919 User manual

iGenix
iGenix IG9911 User manual

iGenix
iGenix IG9902 User manual

iGenix
iGenix IGFD7010WIFI User manual

iGenix
iGenix IG9909WIFI User manual

iGenix
iGenix IG9750 User manual

iGenix
iGenix IG9907 User manual

iGenix
iGenix IG9900 User manual


Popular Air Conditioner manuals by other brands


Bryant
Bryant Evolution Extreme 186CNV installation instructions

Panasonic
Panasonic CU-2S18NBU-1 Service manual

Carrier
Carrier 38BA Installation, Start-Up and Service Instructions

Panasonic
Panasonic CS-KE12NB41 installation instructions

Hitachi
Hitachi RAK-18PSPA installation manual

Hitachi
Hitachi RA-13JF1 Operation and installation manual


