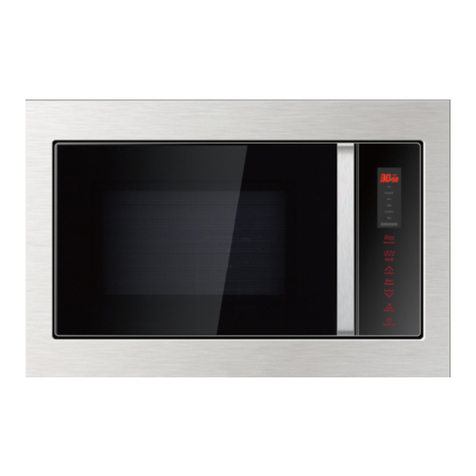
iGenix IG3095 User manual

Please read these instructions carefully before use and retain for future reference
Before switching on your appliance,
always check for any damage which may have been caused in transit
Batch code:
USER MANUAL
IG3095
30 Litre 1000W Digital
Combination Microwave
Stainless Steel
315mm
TURNTABLE
HOME FRY
FUNCTION
CRISPY GRILL
FUNCTION
OVEN STYLE PULL
DOWN DOOR
GRILL PAN & RACK
ACCESSORIES
OVEN COOKING
FUNCTION
MAXIMUM OVEN
TEMPERATURE 230°C

2
CONTENTS
Safety Instructions...................................................................3-6
Specications................................................................................6
Suitable Container Advice.........................................................7
Appliance Overview...................................................................8
Installation of the Appliance......................................................9
Control Panel............................................................................ 10
Operating Instructions...................................................... 11-19
Cleaning...................................................................................... 19
Trouble Shooting...................................................................... 20
Fuse Replacement.................................................................... 21
Disposal of the Appliance....................................................... 21

3
IMPORTANT SAFETY INSTRUCTIONS
WARNING: To reduce the risk of re, electric shock, injury to persons
or exposure to excessive microwave energy when using your appliance,
follow basic precautions, including the following:
• The appliance must not be installed behind a decorative door as this
can cause overheating.
• The microwave shall not be placed in a cabinet.
• The microwave is intended for heating food and beverages only.
• Metallic containers for food and beverages are not permitted for
microwave cooking.
• The appliance is intended to be used freestanding.
• Do not use with an extension cord.
• Warning: Liquids and other foods must not be heated in sealed
containers since they are liable to explode.
• Warning: It is hazardous for anyone other than a qualied person to
carry out any service or repair operation that involves the removal of
a cover which gives protection against exposure to microwave energy.
• Do not allow children or inrm persons to operate the appliance
without supervision.
• The appliance is not intended for use by persons (including children)
with reduced physical, sensory or mental impairment, or lack of
experience and knowledge, unless they have been given supervision or
instruction concerning use of the appliance by a person responsible for
their safety.
• Keep the appliance cord out of reach of children.
• Only use containers suitable for use in microwaves.
• The microwave should be cleaned regularly and any food deposits
should be removed.
• Read and follow the specic: ”PRECAUTIONS TO AVOID POSSIBLE
EXPOSURE TO EXCESSIVE MICROWAVE ENERGY”.
• When heating food in plastic or paper containers, keep an eye on the
microwave due to the possibility of ignition.
• If smoke is emitted, disconnect the appliance immediately and keep the
door closed in order to stie any ames.

4
• Do not overcook food.
• Do not use the microwave cavity for storage purposes. Do not store
items, such as bread, cookies, etc. inside the oven.
• Remove wire twist-ties and metal handles from paper or plastic
containers/bags before placing them in the microwave.
• Install or locate this microwave only in accordance with the installation
instructions provided.
• Eggs in the shell and whole hard-boiled eggs should not be heated in
microwaves since they may explode, even after microwave heating has
ended.
• This appliance is intended to be used in household and similar
applications such as:
– staff kitchen areas in shops, ofces and other working environments;
– by clients in hotels, motels and other residential type environments;
– farm houses;
– bed and breakfast type environments.
• If the supply cord is damaged, it must be replaced by the manufacturer,
its service agent or similarly qualied persons in order to avoid a
hazard.
• Do not store or use this appliance outdoors.
• Do not use this microwave near water, in a wet basement or near a
swimming pool.
• The temperature of accessible surfaces may be high when the
appliance is operating.
• The surfaces are liable to get hot during use. Keep cord away from
heated surface, and do not cover any vents on the microwave.
• Do not let the cord hang over the edge of the table or counter.
• Failure to maintain the microwave in a clean condition could lead to
deterioration of the surface that could adversely affect the life of the
appliance and possibly result in a hazardous situation.
• The contents of feeding bottles and baby food jars shall be stirred or
shaken and the temperature checked before consumption, in order to
avoid burns.
• Microwave heating of beverages can result in delayed eruptive boiling,
therefore care must be taken when handling the container.
• Children should be supervised to ensure that they do not play with
the appliance.

5
• The appliances are not intended to be operated by means of an
external timer or separate remote-control system.
• Only use the temperature probe recommended for temperature-
sensing this microwave.
WARNING: The appliance and its accessible parts become hot
during use. Extreme care should be taken to avoid touching heating
elements. Children should be kept away
• Surface of a storage cabinet can become hot. Great care should be
taken to avoid touching when it is being used.
WARNING: Microwave must not be operated without food
inside. Operating the microwave when empty could cause damage.
• READ CAREFULLY AND KEEP FOR FUTURE REFERENCE
To Reduce the Risk of Injury to Persons
Grounding Installation
Electric Shock Hazard: Touching some of the internal
components can cause serious personal injury or death. Do not
disassemble this appliance.
WARNING
Electric Shock Hazard: Improper use of the earthing can
result in electric shock. Do not plug into an outlet until appliance is
properly installed and earthed.
This appliance must be earthed. In the event of an electrical short circuit,
earthing reduces the risk of electric shock by providing an escape wire for
the electric current.
This appliance is equipped with a cord having a earth wire with a earthing
plug.The plug must be plugged into an outlet that is properly installed and
earthed.
Consult a qualied electrician or serviceman if the earthing instructions
are not completely understood or if doubt exists as to whether the
appliance is properly earthed.

6
PRECAUTIONS TO AVOID POSSIBLE EXPOSURE
TO EXCESSIVE MICROWAVE ENERGY
(a) Do not attempt to operate this microwave with the door open since this
can result in harmful exposure to microwave energy. It is important not to
break or tamper with the safety interlocks.
(b) Do not place any object between the microwave front face and the door or
allow soil or cleaner residue to accumulate on sealing surfaces.
(c) WARNING: If the door or door seals are damaged, the microwave must not
be operated until it has been repaired by a qualied electrican.
Addendum
If the apparatus is not maintained in a good state of cleanliness, its surface could
be degraded and affect the lifespan of the apparatus and lead to a dangerous
situation.
SPECIFICATIONS
Model: IG3095
Voltage/Frequency: 230-240V~50Hz
Rated Input Power (Microwave): 1550W
Rated Output Power (Microwave): 1000W
Rated Input Power (Grill): 2400W
Rated Input Power (Convection): 2400W
Oven Capacity: 30L
Turntable Diameter: 315mm
External Dimensions (mm): 327 x 520 x 520
Net Weight: 19.8kg

7
SUITABLE CONTAINER ADVICE
Heat Resistant Glass - Heat-resistant ovenproof glassware only. Make sure
there is no metallic trim. Do not use cracked or chipped dishes.
Heat Resistant Ceramics - Heat Resistant ovenproof ceramics only. Make
sure there is no metallic trim. Do not use cracked or chipped dishes.
Ready Meal Containers - Microwave-safe and ovenproof only. If only
suitable for microwaving then use on microwave function only. If suitable
for microwave and oven cooking then may be used for microwave only and
convection only functions.
Cling Film - Microwave-safe only. Use to cover food during cooking to retain
moisture. Do not allow plastic wrap to touch food.
Grill Pan - Only use the grill pan supplied - No other grill pan may be used.
For use with the Grill Only, Home Fry and Crispy Grill functions and only to be
used in conjunction with the grill rack.
Grill Rack - Only use the grill rack supplied - No other grill rack may be used.
For use with the Grill Only, Combination, Home Fry and Crispy Grill functions
and only to be used in conjunction with the grill pan.
Paper Towels - Use to cover food for reheating and absorbing fat. Use with
supervision for a short-term microwave cooking only, not for use with any other
function.
Oven Cooking Bags - Follow manufacturer’s instructions. Do not close with
metal tie. Make slits to allow steam to escape.
Cookware Microwave Grill Convection Combination Home Fry Crispy Grill
Heat Resistant Glass
3
3
3
3
7
7
Heat Resistant Ceramics
3
3
3
3
7
7
Ready Meal Containers
3
7
3
7
7
7
Cling Film
3
7
7
7
7
7
Grill Pan
7
3
7
7
3
3
Grill Rack
7
3
7
3
3
3
Paper Towels
3
7
7
7
7
7
Oven Cooking Bags
7
7
3
7
7
7

8
Turntable installation
Hub (underside)
Glass tray
Turntable shaft
Turntable ring assembly
APPLIANCE OVERVIEW
Your microwave comes with the following accessories:
Glass tray x1
Turntable ring assembly x1
Instruction Manual x1
A) Control panel
B) Turntable
C) Observation window
D) Door assembly
E) Door catch
X2 Grill Rack (Cannot
be used in microwave
function and must be
placed on the glass tray)
Grill tray (Cannot be
used in microwave
function and must be
placed on the grill rack)

9
COUNTERTOP INSTALLATION
Remove all packing material and accessories. Examine the microwave for any
damage such as dents or a broken door. Do not install if microwave is damaged.
Cabinet: Remove any protective lm found on the microwave cabinet surface.
Do not remove the light brown Mica cover that is attached to the microwave
cavity to protect the magnetron.
INSTALLATION
1. Select a level surface that provides enough open space for the intake and/or
outlet vents.
(1) The minimum installation height is 85cm.
(2) The rear surface of the appliance should be placed against a wall. Leave a
minimum clearance of 30cm above the microwave, a minimum clearance of
20cm is required between the microwave and any adjacent walls.
(3) Do not remove the legs from the bottom of the microwave.
(4) Blocking the intake and/or outlet openings can damage the microwave.
(5) Place the microwave as far away from radios and TV as possible.
Operation of the microwave may cause interference to your radio or TV
reception.
2. Plug your microwave into a standard household outlet. Be sure the voltage and
the frequency is the same as the voltage and the frequency on the rating label.
WARNING: Do not install microwave over a range cooktop or other heat-
producing appliances. If installed near or over a heat source, the microwave could
be damaged and the warranty would be void.
The accessible surface may be hot during operation.

10
CONTROL PANEL
Indicates microwave cooking is taking place
Indicates grill cooking is taking place
Indicates convection cooking is taking place
Indicates microwave and grill combi cooking is taking place
Indicates microwave and convection combi cooking is taking place
Indicates grill and grill convection cooking is taking place
Indicates microwave, grill and convection combi
cooking is taking place
Indicates the auto menu function has been selected
Indicates the safety lock is engaged
Indicates the weight is being set
Indicates the temperature
Indicates defrosting is taking place
Indicates the Home Fry function has been selected
Indicates the Crispy Grill function has been selected.

11
OPERATING INSTRUCTIONS
This microwave oven uses modern electronic control to adjust cooking
parameters to meet your needs for better cooking.
1. Clock Setting
When the microwave oven is turned on, the oven will display “00:00” and the
Buzzer will ring once.
1) Press “Kitchen Assistant” once, the screen displays “AS-1”.
2) Press “Conrm/+30s/Start” to enter Clock setting mode, “00:00” will
display and the hour gure will ash.
3) Turn “Dial” to adjust the hour gures, the input time should be within
0--23(24-hour).
4) Press “Kitchen Assistant”, the minute gures will ash.
5) Turn “Dial” to adjust the minute gures, the input time should be within
0--59.
6) Press “Kitchen Assistant” to nish clock setting.
Note: After step 5, if “Kitchen Assistant” is not pressed within 5 minutes of
setting the time then the display will revert to previous display shown.
2. Kitchen Timer
1) Press “Kitchen Assistant” twice, the screen displays “AS-2”.
2) Press “Conrm/+30s/Start” to enter Kitchen timer setting mode, “00:00”
will display.
2) Turn “Dial” to set the kitchen timer (The maximum cooking time is
95 minutes).
3) Press “Conrm/+30s/Start” to conrm setting.
4) When the kitchen time is reached, the buzzer will ring 5 times.
Note: If the clock has been set, then once the timer is complete the display will
revert to show the current time.
3. Microwave Cooking
This option uses the microwave function only; there are 5 power levels for users
to choose from when cooking.
1) Press “Optional Function” once and “P100” will ash on the display.
2) Press “Conrm/+30s/Start” to conrm the function, “P100” will display.
3) Press “Optional Function” repeatedly or turn “Dial” to change microwave
power levels from “P100” through to “P10”.

12
4) Press “Conrm/+30s/Start” to conrm power setting.
5) Turn “Dial” to adjust the cooking time (The maximum cooking time is
95 minutes).
6) Press “Conrm/+30s/Start” to start cooking.
Note: The adjustment intervals on the dial vary according to the time set, as
per below table.
Microwave Power Chart
Level High M. High Med M. Low Low
Power P100 P80 P50 P30 P10
Time Set Adjustment interval
0-1 min 5 seconds
1-5 min 10 seconds
5-10 min 30 seconds
10-30 min 1 minute
30-95 min 5 minutes
4. Grill Cooking
The grill function works similar to the traditional grill in an oven, only the
top heating element will work and it can be used to grill food such as meat,
vegetables or cheese on toast.
1) Press “Optional Function” twice and “G-1” will ash on the screen.
2) Press “Conrm/+30s/Start” to conrm the function and “G-1” will display.
3) Turn “Dial” to adjust the cooking time (The maximum setting time is
95 minutes).
4) Press “Conrm/+30s/Start” to start cooking.
Note: If half the grill time passes, the oven sounds twice to alert you to turn
the food over. In order to achieve the best results you should: open the door,
turn the food over, close the door, and press “Conrm/+30s/Start” to continue
cooking. If the door is not opened then the oven will continue cooking.
5. Convection Cooking (With pre-heat function)
With convection cooking you can cook the food as you would in a traditional
oven.

13
It is recommended that you should pre-heat the oven to the appropriate
temperature before placing the food in the oven.
1) Press “Optional Function” 3 times, “140” ashes.
2) Press “Conrm/+30s/Start” to conrm the function. “140” will display.
3) Press “Optional Function” repeatedly or turn “Dial” to select the
convection temperature.
Note: The temperature can be chosen from 140°C to 230°C.
4) Press “Conrm/+30s/Start” to conrm the temperature.
5) Press “Conrm/+30s/Start” to start pre-heating. When the preheating
temperature arrives, the buzzer will sound twice to remind you to put the
food into the oven. The pre-heated temperature is displayed and ashes.
6) Put the food into the oven and close the door. Turn “Dial” to adjust the
cooking time.
7) Press “Conrm/+30s/Start” to start cooking.
6. Convection Cooking (Without pre-heat function)
This option is for when preheating is not needed before using the convection
cooking function.
1) Press “Optional Function” 3 times, “140” ashes.
2) Press “Conrm/+30s/Start” to conrm the function. “140” will display.
3) Press “Optional Function” repeatedly or turn “Dial” to select the
convection temperature.
Note: The temperature can be chosen from 140°C to 230°C.
4) Press “Conrm/+30s/Start” to conrm the temperature.
5) Turn “Dial” to adjust the cooking time.
6) Press “Conrm/+30s/Start” to start cooking.
7. Combi. Cooking
There are 4 combi cooking functions from C-1 to C-4.This offers different
combination settings of microwave, grill and convection functions and can give
users various cooking options for different foods.
1) Press “Optional Function” 4 times, “C-1” will ash on the screen.
2) Press “Conrm/+30s/Start” to conrm the function. “C-1” will display.
3) Press “Optional Function” repeatedly or turn “Dial” to select combination
mode from C-1 to C-4.
4) Press “Conrm/+30s/Start” to conrm the selection.
5) Turn “Dial” to adjust the cooking time (The maximum cooking time is 95
minutes).
6) Press “Conrm/+30s/Start” to start the cooking.
Note: Combination instructions

14
8. Defrost by W.T.
1) Press “Pro Defrost” once, the screen displays “dEF1”.
2) Turn “Dial” to select the weight of food. The weight should be 100g-2000g.
3) Press “Conrm/+30s/Start” key to start defrosting.
9. Defrost by Time
1) Press “Pro Defrost” twice, the screen displays “dEF2”.
2) Turn “Dial” to adjust cooking time.
3) Press “Conrm/+30s/Start” key to start defrosting.
10. Multi-Stage Cooking
Two stages can be set at one time. If one stage is defrosting, it should be put in as
the rst stage. The buzzer will ring once after each stage and the next stage will
begin.
Note: Auto menu and pre-heating cannot be set as one of the multi-stages.
Example: if you want to defrost the food for 5 minutes, then cook with 80%
microwave power for 7 minutes.The steps are as following:
1) Press “Pro Defrost” twice, the screen will display “dEF2”;
2) Turn “Dial” to adjust the defrost time of 5 minutes;
3) Press “Optional Function” once, “P100” will display;
4) Press “Conrm/+30s/Start” to conrm the function. “P100”will display.
5) Turn “Dial” to choose 80% microwave power until “P80” displays;
6) Press “Conrm/+30s/Start” to conrm;
7) Turn “Dial” to adjust the cooking time of 7 minutes;
8) Press “Conrm/+30s/Start” to start cooking.
11. Home Fry
This function combines a grill with hot air circulation and uses the grill pan. It can
be used to cook fries, onion rings, etc. Food is cooked crispy inside and out using
only a drop of oil.
1) Press “Home Fry” once, “H1” will ash.
Instructions Display Microwave Grill Convection
1 C-1 • •
2 C-2 • •
3 C-3 • •
4 C-4 • • •

15
2) Press “Home Fry” repeatedly or turn “Dial” to select home fry menu from
H1 to H9.
3) Press “Conrm/+30s/Start” to start cooking.
No. Menu Weight (g)
H1 Frozen French fries 300
H2 Frozen potato croquettes 350
H3 Frozen squid 250
H4 Frozen onion rings 225
H5 Frozen chicken nuggets 350
H6 Escalope 270
H7 Shrimps 250
H8 Vegetables 200
H9 Spring rolls 250
12. Low Temp Control
1) Press the “Low Temp Control” once, “L1” will ash.
2) Press “Low Temp Control” repeatedly or turn “Dial” to select crispy grill
menu from L1 to L5.
3) Press “Conrm/+30s/Start” to conrm.
4) Turn “Dial” to select the temperature.
5) Press “Conrm/+30s/Start” to conrm.
6) Turn “Dial” to adjust the cooking time.
7) Press “Conrm/+30s/Start” to start cooking.
Display 40 °C 50 °C 60 °C 70 °C 80 °C 90 °C 100 °C 110 °C Cooking
time (Max)
L1 (Slow cook)
3
3
12hrs
L2 (Keep warm)
3
3
3
95mins
L3 (Food dry)
3
3
3
3
3
3
12hrs
L4 (Yoghurt)
3
12hrs
L5 (Warming box)
3
3
3
3
3
3
3
95mins

16
13. Auto Menu
For the auto menu function, user can directly choose the menu for cooking
specic foods such as pasta and pizza. It makes cooking much easier and save
users’ time on checking the menu and doing research.
1) Turn “Dial” left to choose the menu, and “A1” and “A10” will be display.
2) Press “Conrm/+30s/Start” to conrm the menu you need.
3) Turn “Dial” to choose the weight menu, and “g” indicator will light.
4) Press “Conrm/+30s/Start” to start cooking.
Note: When you choose Cake, please do not put the cake into the oven at the
beginning. The oven needs to be pre-heated to 140°C rst. After several minutes,
the buzzer sounds twice to remind you to put the cake into the oven.After
putting the cake in the oven, please press “Conrm/+30s/Start” again. The timer
will count down, and the cake will be cooked perfectly.
Menu Weight Display Power
A1 AUTO REHEAT 150g 150 100%
250g 250
350g 350
450g 450
600g 600
A2 POTATO 1 (about 230g) 1 100%
2 (about 460g) 2
3 (about 690g) 3
A3 MEAT 150g 150 100%
300g 300
450g 450
600g 600
A4 VEGETABLE 150g 150 100%
350g 350
500g 500
A5 FISH 150g 150 80%
250g 250
350g 650
450g 450
650g 650

17
Menu Weight Display Power
A6 PASTA 50g (with 450ml cold water) 50 100%
100g (with 800g cold water) 100
150g (1200g cold water) 150
A7 SOUP 200g 200 100%
400g 400
600g 600
A8 CAKE 475g 475 Preheat to 140°C
A9 PIZZA 200g 200 C-4
300g 300
400g 400
A10 CHICKEN 500g 500 C-4
750g 750
1000g 1000
1200g 1200
14. Quick Microwave Cooking
1) Press “Conrm/+30s/Start” to start cooking with 100% power for 30
seconds. Each added press will increase 30 seconds cooking time up to
95 minutes.
2) Turn “Dial” right to choose cooking time directly then press
“Conrm/+30s/Start” key to cook with 100% microwave power.
15. Deodorisation
1) Press “Kitchen Assistant” 3 times, the screen displays “AS-3”.
2) Press “Conrm/+30s/Start” to start deodorising (100% microwave power
for 5 minutes).
16. Steam Clean Function
1) Press “Kitchen Assistant” 5 times, the screen displays “AS-5”.
2) Press “Conrm/+30s/Start” to start steam cleaning (100% microwave
power for 5 minutes).

18
17. Crispy Grill
This function is similar to Home Fry and uses the grill pan. It can make food
crispy outside and moist and juicy inside. It can be used to cook chicken wings;
sh and other food which you could like to have a crispy surface and juicy inside
effect.
1) Press the “Crispy Grill” once, “C1” will ash.
2) Press “Crispy Grill” repeatedly or turn “Dial” to select crispy grill menu
from C1 to C4.
3) Press “Conrm/+30s/Start” to conrm.
4) Turn “Dial” to choose the weight of food.
5) Press “Conrm/+30s/Start” to start cooking.
Note: All the food should be placed on the grill tray, and the grill tray must be
placed on grill rack.
Crispy Grill Weight (g) Power Initial Temp.
C1 Cordon Bleu 300 C-4 Room Temp.
(Fresh Mini Pizza) 600
900
C2 (Lasagne) 200 C-4 Refrigerated Temp.
300
400
500
C3 (Bread) 100 Conv. 230°C Freezing Temp.
(without preheating)
C4 (Pie/Tart) 300 Conv. 220°C Refrigerated Temp.
(with preheating)
18. Child Lock
Lock: Press “Eco/Child Lock” for 3 seconds, there will be a long “beep” which
denotes entering into the children-lock state and the lock indicator will light.The
screen will display current time or 0:00.
Unlock: Press “Eco/Child Lock” for 3 seconds, there will be a long “beep” which
denotes that the lock is released, and the lock indicator will disappear.
19. Mute Function
Press “Kitchen Assistant” 4 times, the screen displays “AS-4”. Then press
“Conrm/+30s/Start” to enter mute mode. Any operation will not make the
buzzer sound.

19
CLEANING
Be sure to unplug the appliance from the power supply.
1. Clean the cavity of the microwave after using with a slightly damp cloth.
2. Clean the accessories in the usual way in soapy water.
3. The door frame and seal and neighbouring parts must be cleaned carefully
with a damp cloth when they are dirty.
4. Do not use harsh abrasive cleaners or sharp metal scrapers to clean the
microwave door glass since they can scratch the surface, which may result in
shattering of the glass.
5. Cleaning Tip---For easier cleaning of the cavity walls that the food cooked
can touch: Place half of a lemon in a bowl, add 300ml (1/2 pint) water and
heat on 100% microwave power for 10 minutes. Wipe the microwave clean
using a soft, dry cloth.
Press “Kitchen Assistant” 4 times, the screen displays “AS-4”. Then press
“Conrm/+30s/Start” to exit mute mode.
20. ECO Function
Press “Eco/Child Lock” once, the screen goes off. Press any button to light the
screen again.
21. Inquiring Function
1) Whilst microwaving or grilling, if the clock has been set, press “Kitchen
Assistant” to check the current time.
2) Whilst microwaving or grilling, press “Optional Function” and the current
power will be displayed for 3 seconds.
22. Turntable Reset Function
When cooking has nished and the turntable is not at the initial position, it will
enter the turntable reset function. The screen will display “[INSERT SYMBOL]”
and the lamp, fan and turntable will continue functioning. The oven stops when
the reset is complete.
Note:
1) This function only works for one complete cooking cycle. If the cycle is
paused or the door is opened during it, it cannot use the reset function.
2) During the reset status, opening the door or pressing “Stop/Clear” will
stop the function.

20
Fault Possible Cause Remedy
Microwave can
not be started.
1. Power cord not plugged in
properly.
Unplug. Then plug in again rmly
after 10 seconds.
(2) Fuse blown or circuit breaker
has tripped.
Consult a qualied electrician to replace fuse
or circuitbreaker.
(3) Trouble with outlet. Test outlet with other electrical appliances.
Microwave does
not heat.
Door not closed properly Close door properly.
Glass turntable makes
noise when microwave
oven operates.
Dirty roller rest and oven
bottom.
Refer to “Maintenance of Microwave” to clean
dirty parts.
TROUBLE SHOOTING GUIDE
If you experience difculties with the appliance, please check the suggestions below
before contacting customer services on 01473 271272:
To test microwave is working before cooking food – DO NOT operate empty, instead
place one cup of water (approx.150ml) in a glass in the microwave and close the door
securely. Microwave lamp should go off if the door is closed properly. Let the microwave
work on full power for 1 min.
Normal
Microwave interferring
with TV reception.
Radio and TV reception may be interferred with when microwave is
operating. It is similar to the interference of small electrical appliances,
like mixers, vacuum cleaners and electric fans. This is normal.
Dim oven light. In low power microwave cooking oven light may become dim.
This is normal.
Steam accumulating on
door, hot air out of vents.
In cooking, steam may come out of the food. Most will get out of the
vents. But some may accumulate on a cool place, like the oven door.
This is normal.
Table of contents
Other iGenix Microwave Oven manuals
iGenix
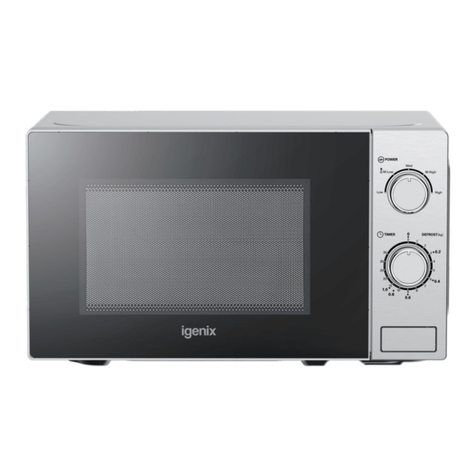
iGenix IGM0820SS User manual

iGenix
iGenix IG2070 User manual

iGenix
iGenix IG2800 User manual
iGenix
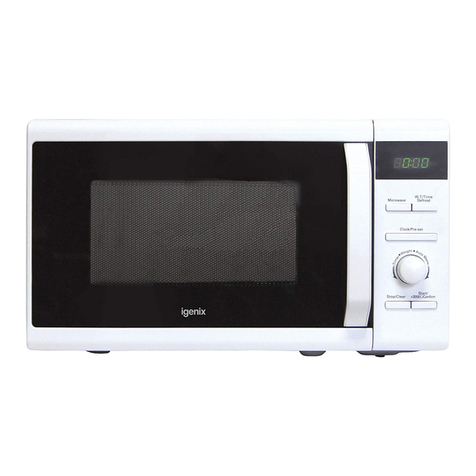
iGenix IG2096 User manual

iGenix
iGenix IG3091 User manual

iGenix
iGenix IG2084 User manual
iGenix
iGenix IG1703 User manual
iGenix
iGenix IG2940 User manual

iGenix
iGenix IGM0821SS User manual
iGenix
iGenix IG2590 User manual

