IGF 4800 Instruction manual

MANUALE d’USO
e
MANUTENZIONE
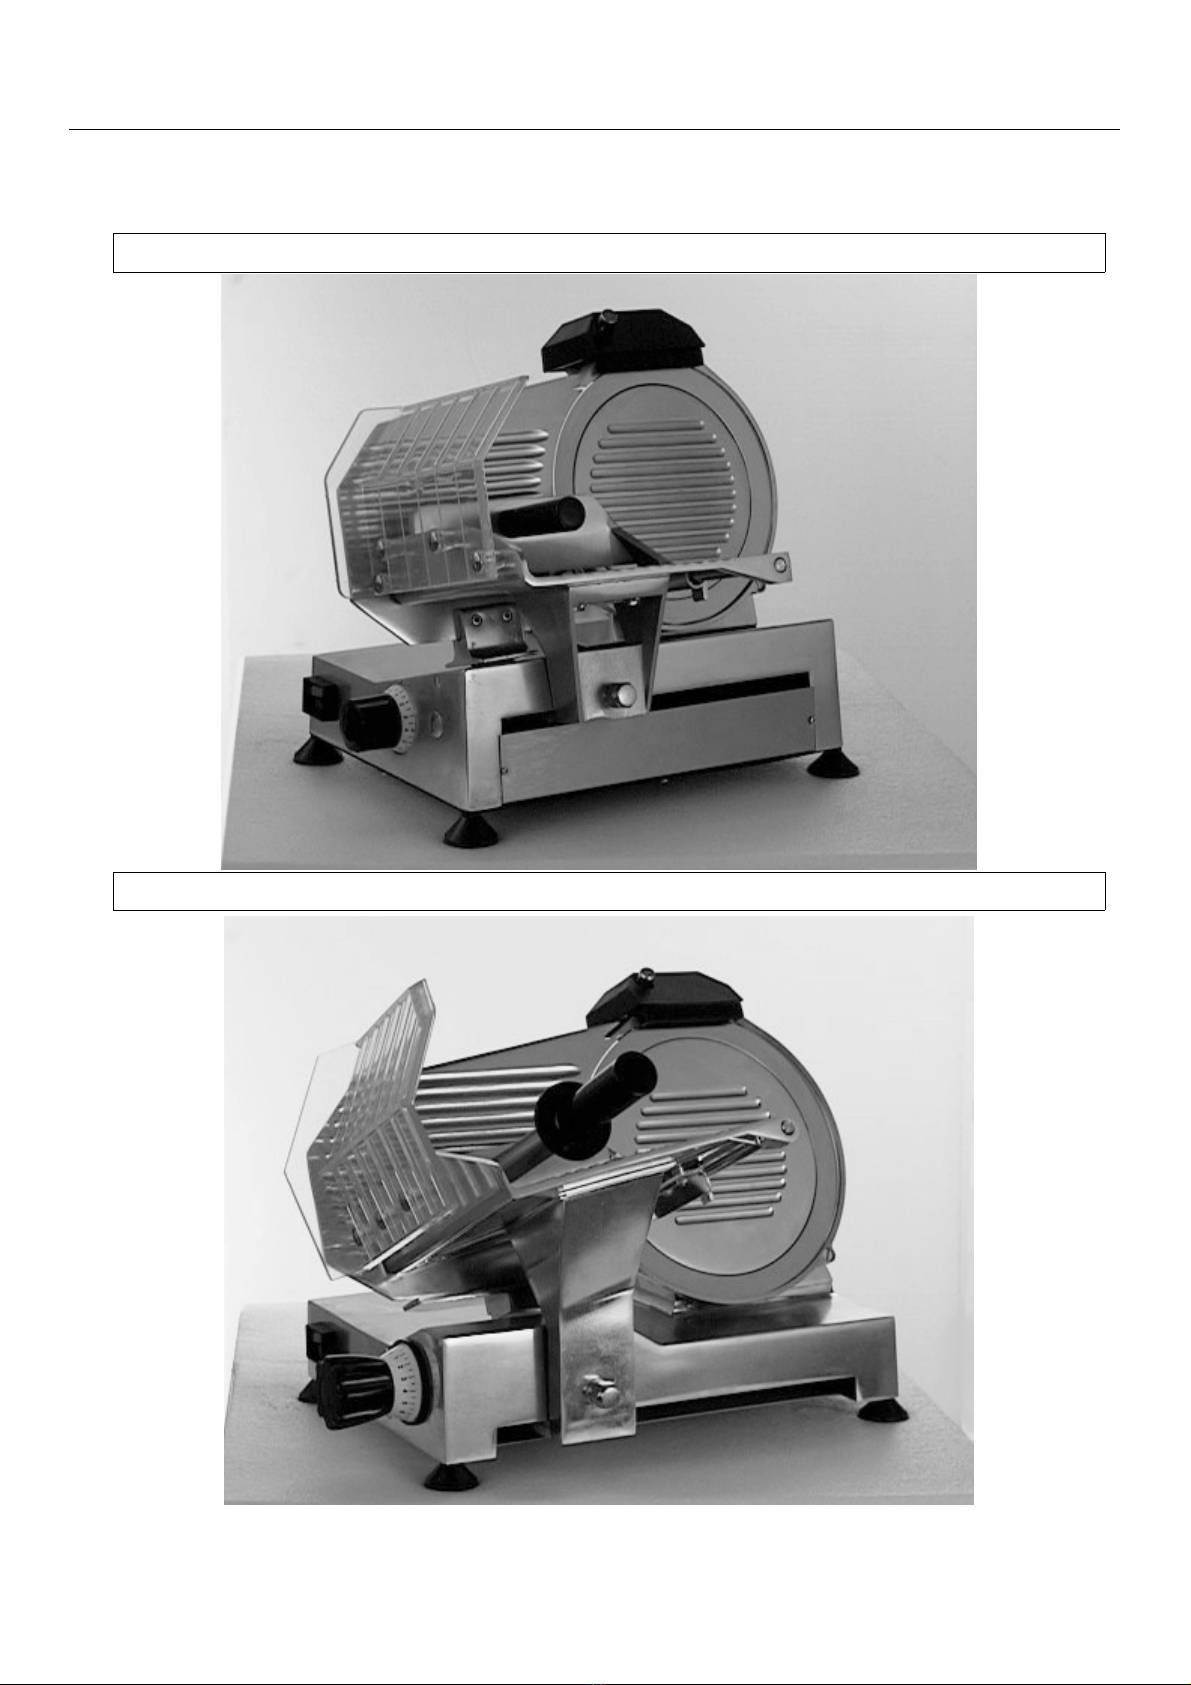
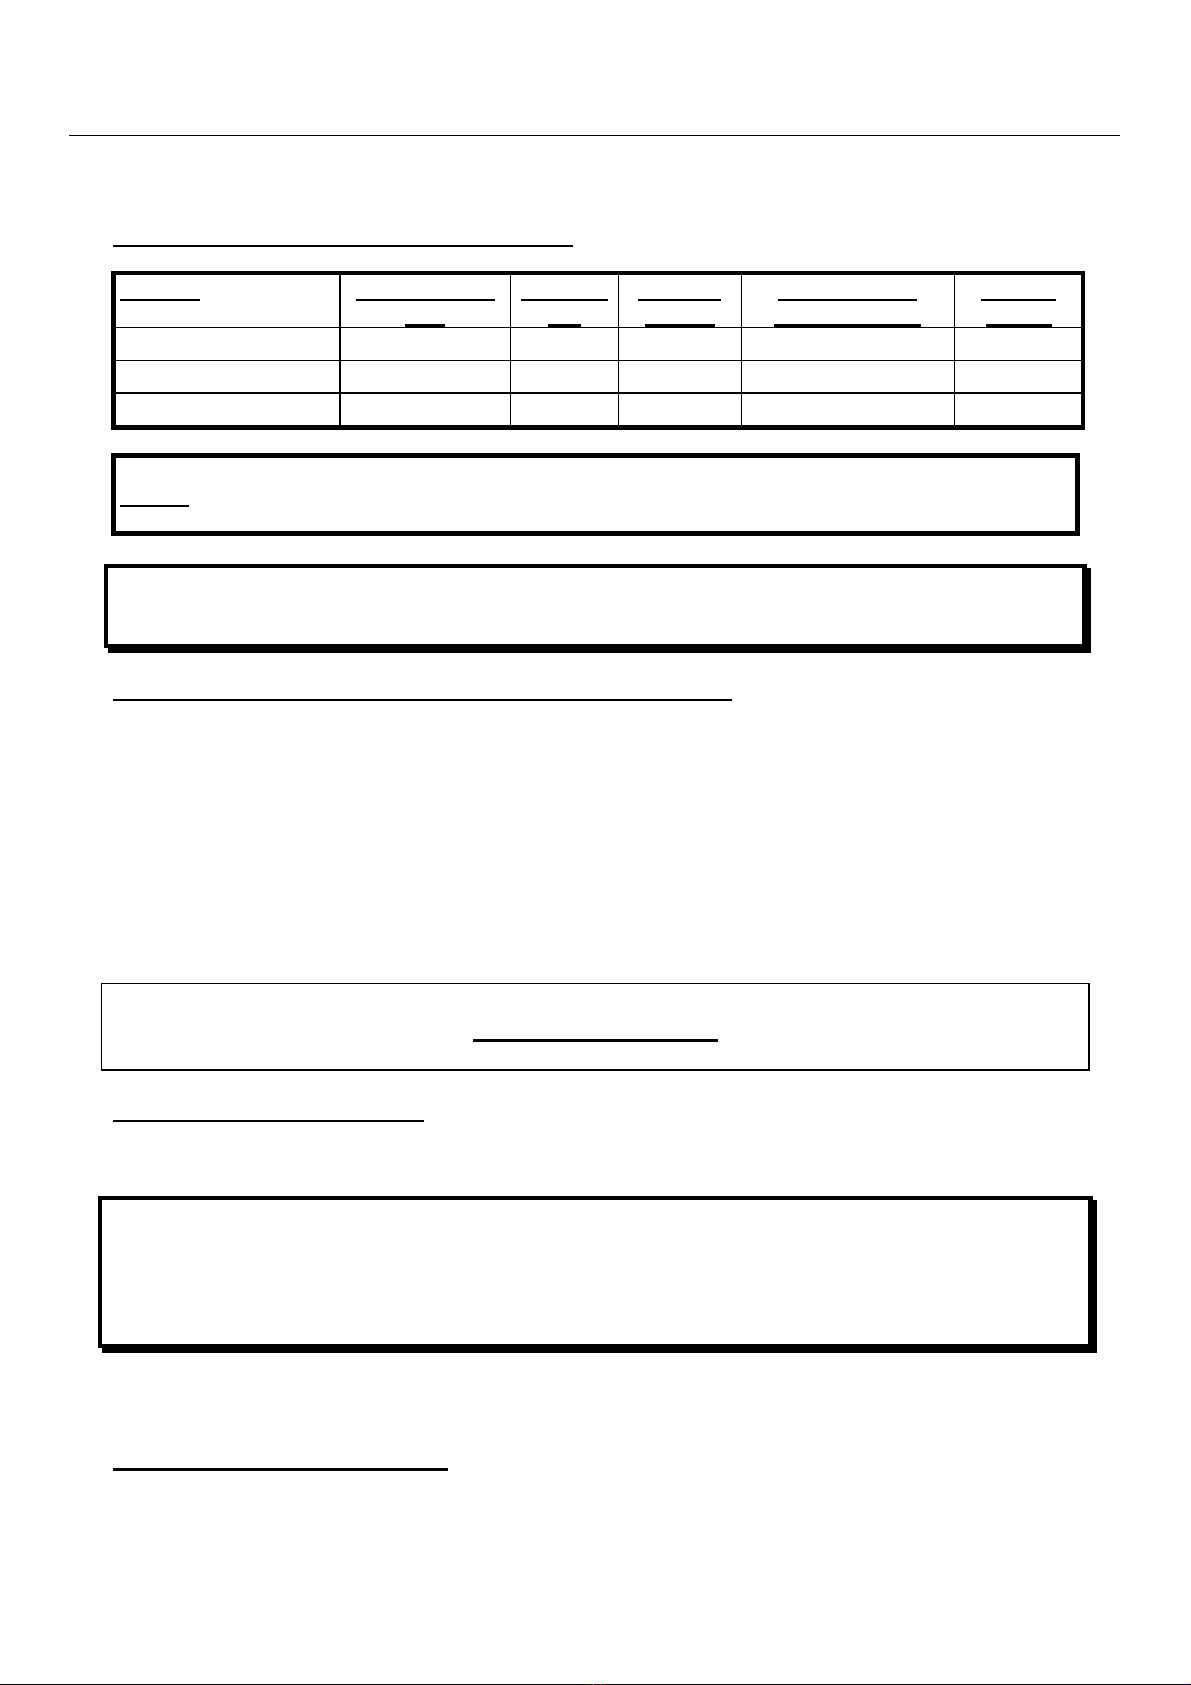
AFFETTATRICI
ART. 4800
ITALIANO 7
ENGLISH 14
DEUTSCH 21
FRANCAIS 28
ESPAÑOL 35

I.G.F. Italstampi
MANUALE d’USO e MANUTENZIONE
MANUAL for USE and MAINTENANCE
GEBRAUCHSANWEISUNG und WARTUNG
MODE d’EMPLOI et d’ENTRETIEN
MANUAL de USO y MANUTENCION
Prodotto:
Product • Produkt • Produit • Producto
AFFETTATRICI
SLICER
AUTSCHNITTMASCHINE
MACHINE A TRANCHER
CORTADORA
Articolo:
Article • Artikel • Article • Artículo 4800
Configurazione:
Configuration • Typenbeschreibung • Configuration • Configuración
4800/220 4800/250
Modelli
Models • Modell • Modéles •Modelo: 4800/300
Monofase
Monophase • Einphasig • Monofase • Monophasé: 230 V
50 Hz
Costruttore:
Manifacturer • Herstellerl • Constructeur • Constructor
I.G.F. Italstampi di Fabbri Giancarlo & C. S.n.c.
Sede legale:
Registered Office • Rechtssitz • Siége Legal • Sede Legal
Via Casale, 362 – 47827 Villa Verucchio (RN)
Uffici e stabilimento:
Offices & Factory • Büro und Werk • Bureaux et Usine • Oficinas y Establecimiento
Via Leontina — 61010 Pietracuta di San Leo (PS)

I.G.F. Italstampi
DICHIARAZIONE DI CONFORMITÀ
DECLARATION OF CONFORMITY
BESTÄTIGUNG DER GESETZMÄSIGKEIT
DECLARATION DE CONFORMITE
DECLARACION DE CONFORMIDAD
Costruttore • Manifacturer • Herstellerl • Constructeur • Constructor
IGF Italstampi di Fabbri Giancarlo & C. S.n.c.
Sede Legale • Registered Office • Rechtssitz • Siége Legal • Sede Legal
Via Casale, 362 - 47827 Villa Verucchio (RN)
Uffici e Stabilimento • Offices & Factory • Büro und Werk • Bureaux et Usine • Oficinas y Establecimiento
Via Leontina - 61010 Pietracuta di San Leo (PS)
DICHIARA il prodotto di nuova fabbricazione, in tutte le sue opzioni di prodotto, descritto in appresso:
DECLARES that the product is newly manufactured as regards all its optionals described below:
HIERMIT erklären wir, daß das unten beschriebene Produkt neuer Herstellung in verschiedenen Modellen:
DECLARE que le produit est de nouvelle fabrication dans toutes ses parties, tel qu’il est décrit de suite:
DECLARA el producto de nueva fabricación, en todas sus opciones de producto, aquí descrito:
Prodotto • Product: • Produkt • Produit • Producto
Art. 4800
Versione • Version • Version • Modèle • Versión
_________________________________________
Anno • Year of Manufacturing • Herstellungsjahr • Année de Construction • Año de construcción
_________________________________________
Matricola • Serial Number • Seriennummer • Code • Matrícula
_________________________________________
./.

I.G.F. Italstampi
CONFORME, per quanto ad esso applicabile, ai requisiti minimi di sicurezza ed alle disposizioni delle Di-
rettive:
CONFORMS, as far as it is necessary, to the minimum safety requirements and to the provisions of the In-
structions:
DEN folgenden Mindestsicherheitsanforderungen und gesetzlichen Vorschriften entspricht:
CONFORME, aux termes de la loi en vigueur, aux conditions minimales de sécurité et aux dispositions des
Directives suivantes:
CONFORME, por cuanto a ello aplicable, a los requisitos mínimos de seguridad y a las disposiciones de
las Directivas:
Riferimenti CEE
EC References
EG-Referenz
Références CEE
Referencias CEE
Principali Norme di Riferimento
Principal Reference Rules
Hauptreferenzbestimmun
Principales Normes de Référence
Principales normas de referencias
Ordinamento Italiano
1998/37/CEE EN 292-1
EN 292-2
D.P.R. n. 459/96
73/23/CEE
93/68/CEE
EN 60204-1 L. 791/77
D.L. 626/96
89/336/CEE
93/68/CEE
EN 50081-1
EN 50082-1
D.L. 476/92
D.L. 615/96
89/109/CEE D.L. 108/92
Pietracuta di San Leo ____ / ____ / _____
Fabbri Giancarlo
I.G.F. Italstampi
Art 4800 / 220
Art 4800 / 250
I.G.F. Italstampi
Art 4800 / 300
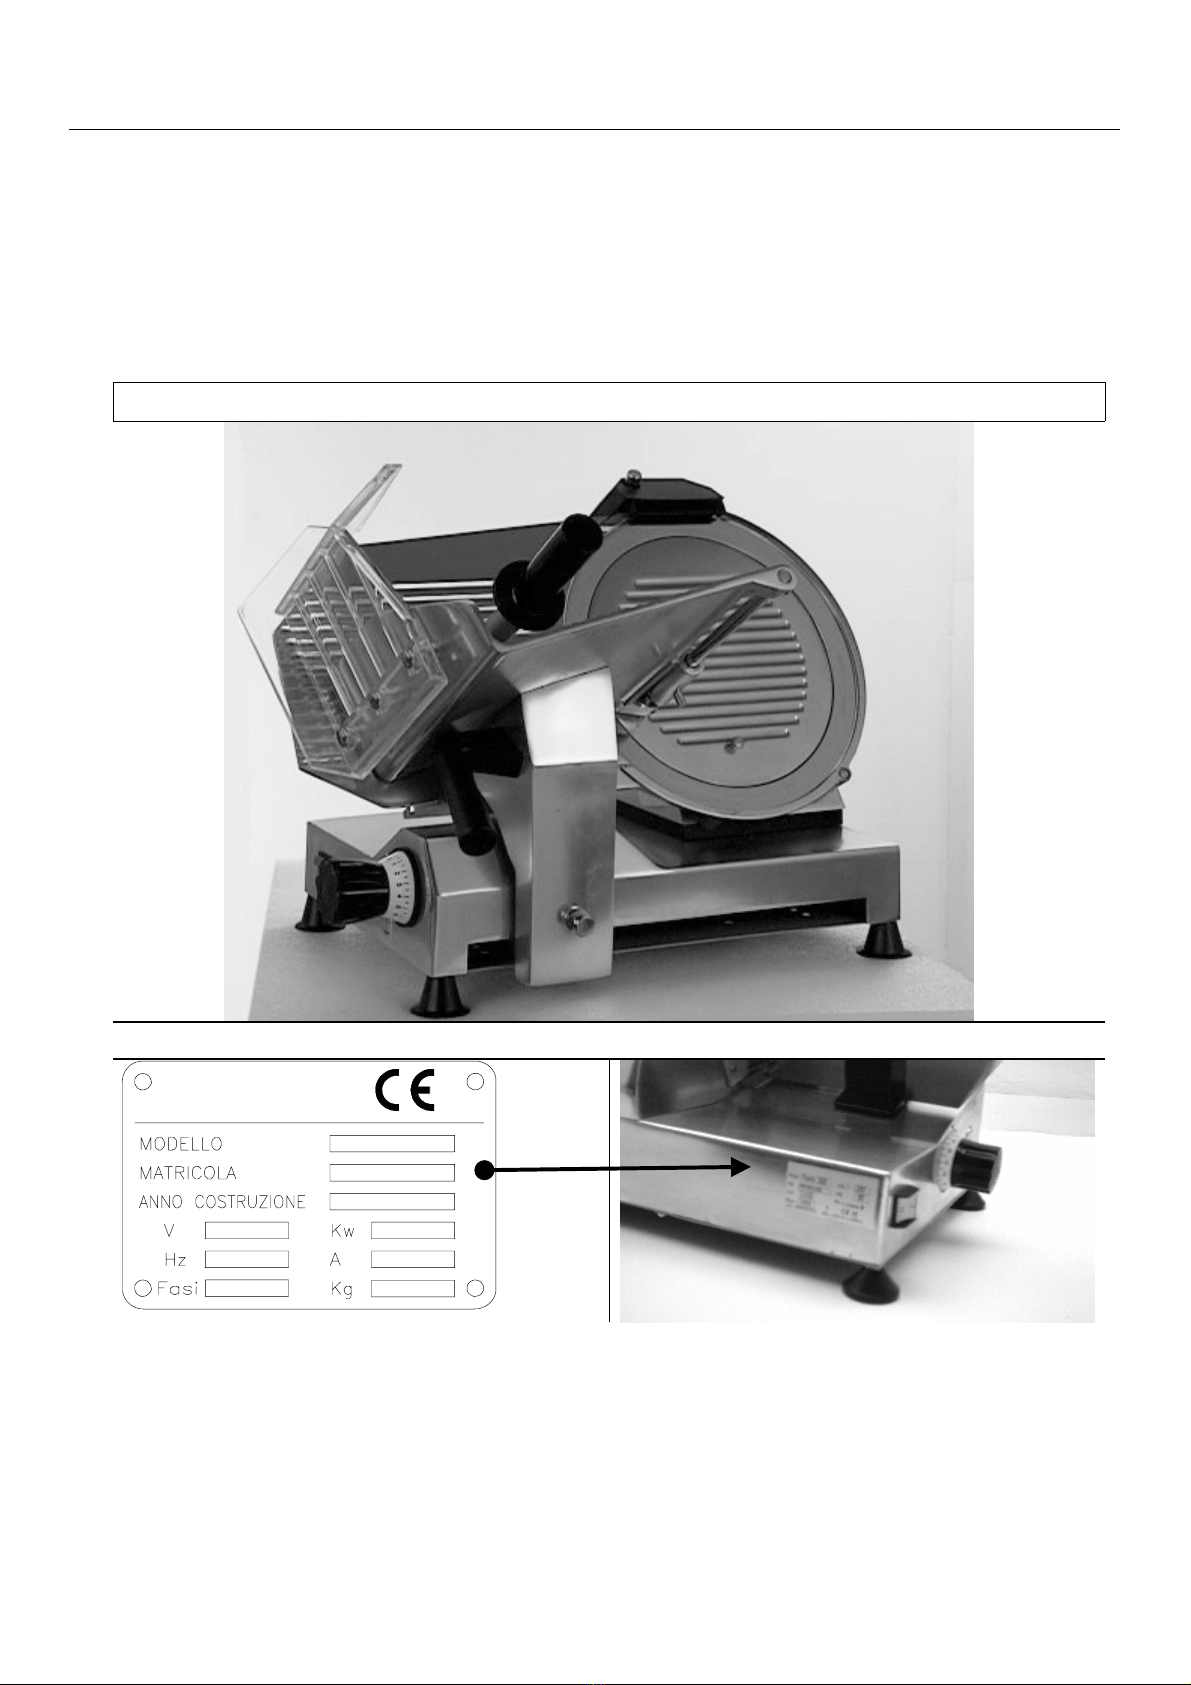
TARGHETTA DATI TECNICI • MOTOR DATA PLATE • MOTORANGABENSCHILDCHEN

I.G.F. Italstampi PAGINA: 7
LINGUA: ITALIANO
AFFETTATRICE
Il Costruttore, con il presente Manuale d’Uso, intende fornire gli elementi tecnici per una corretta
installazione ed un corretto funzionamento delle proprie Apparecchiature. L’utilizzatore ha il dovere
e la responsabilità di seguirle.
Insieme alla descrizione delle caratteristiche, del funzionamento, dell’installazione e della manu-
tenzione della Macchina, vengono evidenziati, in particolare, gli aspetti legati alla salvaguardia del-
la sicurezza e dell’ambiente.
Prima dell’utilizzo del prodotto, ed ogniqualvolta necessiti la sua consultazione, è importante leg-
gere il presente Manuale. Attenersi attentamente alle istruzioni tecniche contenute e seguire scru-
polosamente tutte le indicazioni riportate. Per la sicurezza dell’operatore i dispositivi della macchi-
na devono essere tenuti sempre efficienti.
Il presente Manuale, parte integrante della fornitura della Macchina, deve essere conservato in
luogo accessibile e noto a tutti gli operatori, e reso disponibile al personale addetto alle eventuali
operazioni di manutenzione e riparazione.
GARANZIA
Tutte le parti componenti le apparecchiature, escluse le parti elettriche, godono di una garanzia di
12 mesi, sempre che i difetti siano dovuti alla costruzione. La spedizione dei pezzi in oggetto av-
verrà in porto assegnato. I pezzi sostituiti in garanzia saranno comunque fatturati; al ricevimento
dei pezzi (rispediti in porto franco), di cui è stata richiesta la sostituzione, si provvederà con nota di
credito. La garanzia non contempla la sostituzione dell’ apparecchiatura. La garanzia non contem-
pla le spese di manodopera per la sostituzione dei ricambi e qualsiasi altra spesa accessoria.
SPEDIZIONI
La merce viaggia a rischio e pericolo del Cliente. Eventuali contestazioni sullo stato difettoso del
materiale dovranno essere evidenziate al trasportatore al momento dell’accettazione della merce.
Vi preghiamo di tenere nella dovuta considerazione quanto oggetto della responsabilità del vettore
e della inderogabilità della evidenziazione di eventuali danni al momento dell’accettazione della
merce. Sottolineiamo che la nostra Ditta non risponde di danni non evidenziati al vettore al mo-
mento del ritiro della merce, anche se la stessa è stata inoltrata in porto franco con addebito in fat-
tura.
FORO COMPETENTE
Il foro competente è il Tribunale di Rimini

I.G.F. Italstampi PAGINA: 8
INDICE DEL CONTENUTO
PAG.
1. INFORMAZIONI SULLE SICUREZZE 9
1.1
AVVERTENZE GENERALI 9
1.2
SICUREZZE MECCANICHE 9
1.3
SICUREZZE ELETTRICHE 9
2. CARATTERISTICHE TECNICHE 9
2.1
DATI TECNICI -RUMOROSITÀ 10
2.2
STATO DI FORNITURA E SMALTIMENTO IMBALLAGGI 10
3. INSTALLAZIONE 10
3.1
COLLOCAMENTO DELLA MACCHINA 10
3.2
ALLACCIAMENTO ELETTRICO 11
3.3
MISURE DI SICUREZZA ED ADDESTRAMENTO UTENTE 11
4. USO DELL' APPARECCHIO 11
4.1
COMANDI 11
4.2
POSIZIONAMENTO MERCE SUL PIATTO 11
5. PULIZIA E MANUTENZIONE 12
5.1
GENERALITA'E PRODOTTI DA UTILIZZARE PER LA PULIZIA 12
5.2
RIMOZIONE DEL CARRELLO PORTAMERCE 12
5.3
RIMOZIONE DEL COPRILAMA 12
5.4
PULIZIA DELLA LAMA E DELL’ANELLO PROTEGGI LAMA 12
5.5
RIMOZIONE CAPOTTINA –AFFILATOIO E PULIZIA 12
5.6
RIASSEMBLAGGIO DELLA MACCHINA 12
6. AFFILATURA E LUBRIFICAZIONE 13
6.1
AFFILATURA 13
6.2
LUBRIFICAZIONE 13
6.3
PROLUNGATA INTERRUZIONE D’USO DELLA MACCHINA 13
7. ALLEGATI 42
IMMAGINI 43
SCHEMA ELETTRICO 47
ESPLOSO ART.4800/220 48
ESPLOSO ART.4800/250 51
ESPLOSO ART.4800/300 54

I.G.F. Italstampi PAGINA: 9
1) INFORMAZIONI SULLE SICUREZZE
1.1 AVVERTENZE
•L’affettatrice deve essere utilizzata da personale adulto che deve conoscere le norme per l'uso
e di sicurezza contenute nel manuale.
•Nell’ avvicendamento del personale, provvedere all’addestramento
•Anche se la macchina è munita di varie protezioni di sicurezza è necessario evitare di avvicinare le
mani alla lama ed alle parti in movimento.
•È importante prima di iniziare la pulizia e qualsiasi tipo di manutenzione, scollegare la macchina dalla
rete di alimentazione elettrica mediante cavo + spina oppure agendo sull’interruttore generale I-O in-
serito nell’alimentazione.
•Controllare periodicamente lo stato dei cavi e delle parti elettriche
•Non usare l’affettatrice con prodotti surgelati oppure con carni o pesci con osso e prodotti non alimen-
tari.
•Se la lama dopo varie affilature è diminuita più di 10 mm rivolgetevi all’assistenza per la sostituzione.
•Non effettuare personalmente riparazioni, ma rivolgersi a personale specializzato.
1.2 SICUREZZE MECCANICHE
Le affettatrici di nostra costruzione descritte in questo manuale rispondono, per quanto riguarda le sicurez-
ze contro i rischi di natura meccanica, ai requisiti essenziali di sicurezza prescritti dalla direttiva macchine
89/392/CEE - 91/368/CEE - 93/44/CEE - 93/68/CEE; per la conformita’ igienica alla direttiva 89/109/CEE
Le sicurezze sono ottenute con:
•Applicazione di anello fisso copri lama
•Piatto portamerce fisso
•Varie protezioni sul piatto portamerce
Fondo di chiusura per impedire l’ accesso delle mani nelle parti elettriche o in movimento.
1.3 SICUREZZE ELETTRICHE
Le affettatrici elettriche sono costruite conformemente ai requisiti essenziali di sicurezza previsti dalla diretti-
va bassa tensione 73/23/CEE, tutte le prove sono state eseguite con la norma EI EN60335-2-64
Tutte le affettatrici sono dotate di rele’ (minicontattore) che richiede l' operazione volontaria di riavvio (riarmo)
dell' apparecchio in caso di temporanea interruzione dell’alimentazione. Il motore è protetto da dispositivo
termico. Dato il perfetto isolamento di tutte le parti elettriche e l' ottima resistenza di tutti i materiali impiegati,
le macchine da noi prodotte possono essere tranquillamente installate e lavorate in ambienti umidi.
ATTENZIONE: PER LA PULIZIA NON DEVE MAI ESSERE SPRUZZATA ACQUA CON GETTI IN
PRESSIONE, MA DEVE ESSERE PULITA SOLO CON PANNO UMIDO.
ATTENZIONE: IN CONFORMITA' AL PUNTO 1.7.2 "AVVERTENZE IN MERITO AI RISCHI RESIDUI"
DELLE DIRETTIVE CEE 89/392 E 91/368, SI SEGNALA CHE LE PROTEZIONI APPLICATE NON
ELIMINANDO TOTALMENTE IL RISCHIO DI TAGLIO PUR RIDUCENDO SIA LA POSSIBILITA' CHE
L’ENTITA’ DEL DANNO. LE PROTEZIONI E LE SICUREZZE SONO REALIZZATE IN STRETTA
CONFORMITA’ ALLA NORMATIVA.
2) CARATTERISTICHE TECNICHE
La serie affettatrice “ART. 4800” e' stata realizzata con queste caratteristiche:

I.G.F. Italstampi PAGINA: 10
•Possibilità di lavoro intermittente.
•Sicurezza e facilita’ nell' uso, pulizia, manutenzione.
•Massima igiene garantita da una particolare progettazione e realizzazione di tutti i particolari senza
spigoli per una facile pulizia, con acciaio inox e lega di alluminio anodizzato.
2.1 DATI TECNICI
MODELLO DIMENSIONI
CM.
PESO
KG
POTENZA
WATT.
ALLACCIAMENTO
ELETTRICO
N. GIRI
LAMA
ART. 4800/220 36X46X35 12,5 132 220/1/50 290
ART. 4800/250 42X54X35 15 147 220/1/50 290
ART. 4800/300 45X56X40 23 220 220/1/50 290
RUMOROSITA’ : 62 DB (A) PER TUTTI I MODELLI
ATTENZIONE: LE CARATTERISTICHE ELETTRICHE DI OGNI APPARECCHIO SONO INDICATE
SULLA TARGHETTA DATI TECNICI – PRIMA DELL' ISTALLAZIONE VEDERE ALLACCIAMENTO
ELETTRICO.
2.2 STATO DI FORNITURA E SMALTIMENTO IMBALLAGGI
Tutte le affettatrici sono imballate in una robusta scatola di cartone con interni sagomati per garantire la per-
fetta integrità della macchina durante il trasporto e vengono forniti con:
•dichiarazione Conformità CEE
•istruzioni per l' uso e manutenzione
•certificato di garanzia
I componenti dell' imballaggio (cartone – schiuma – reggia ecc.) Sono prodotti assimilabili ai rifiuti solidi ur-
bani e possono essere smaltiti senza difficolta'. Nel caso la macchina venga installata in paesi in cui esisto-
no norme particolari, smaltire gli imballi secondo la normativa vigente.
3) INSTALLAZIONE
3.1 COLLOCAZIONE DELLA MACCHINA ED ALLACCIAMENTO ELETTRICO
L'allacciamento, la messa in funzione degli apparecchi deve essere effettuata da personale idoneo.
ATTENZIONE: L' IMPIANTO ED IL LOCALE DOVE DEVE ESSERE POSIZIONATO L' APPARECCHIO
DEVE RISPONDERE ALLE NORME PREVENZIONE INFORTUNI D.L. 626 ED ALLE NORME ELET-
TRICHE CEI 64.8
LA DITTA COSTRUTTRICE DECLINA OGNI RESPONSABILITA' PER EVENTUALI DANNI DIRETTI O
INDIRETTI QUALORA NON SIANO STATE RISPETTATE DETTE NORME.

I.G.F. Italstampi PAGINA: 11
Posizionare l' apparecchio su un piano di appoggio sufficientemente ampio, ben livellato, asciutto e stabile
possibilmente lontano da fonti di calore e da rubinetti di acqua ad un altezza di circa 80 cm. e, possibilmen-
te, vicino alla presa di alimentazione
3.2 ALLACCIAMENTO ELETTRICO
L' apparecchio è munito di cavo elettrico da collegare ad un interruttore generale provvisto di magnetotermi-
co (interruttore generale 0-I onnipolare con distanza fra i contatti d ≥3mm) che preserva l' operatore da e-
ventuali contatti accidentali o dovuti a manomissione (ALL. 1, FIG. 1).
E' obbligatorio realizzare un buon collegamento di terra secondo la normativa vigente (CEI 64.8)
La società costruttrice declina ogni responsabilità per eventuali danni diretti o indiretti nel caso non
fossero state rispettate tali norme.
ATTENZIONE: DOPO AVER COLLEGATO LA MACCHINA ALLA LINEA DI ALIMENTAZIONE CON-
TROLLARE IL SENSO DI ROTAZIONE DELLA LAMA.
DATE UN IMPULSO AL PULSANTE VERDE START SUBITO SEGUITO DA UN IMPULSO AL PULSANTE
ROSSO STOP (ALL. 1, FIG. 2)
3.3 MISURE DI SICUREZZA ED ADDESTRAMENTO UTENTE
Il personale specializzato che esegue l'installazione ed il collegamento elettrico, è tenuto ad addestrare ade-
guatamente l'utente per il corretto funzionamento della macchina. Questi dovrà essere messo anche al cor-
rente delle eventuali misure di sicurezza da rispettare ed inoltre dovrà essergli rilasciato il presente manuale
d'istruzione.
4) USO DELL' APPARECCHIO
4.1 COMANDI
I comandi e la spia di funzionamento sono raggruppati sul basamento ponendo la macchina di fronte all'ope-
ratore (ALL. 1, FIG. 3).
1. Pulsante verde avviamento
2. Pulsante rosso stop
3. Manopola regolazione spessore fette
4. Oliatore
4.2 POSIZIONAMENTO DELLA MERCE SUL PIATTO DELL’AFFETTATRICE (ALL. 1, FIG. 4,
FIG. 5)
1. La merce deve essere posizionata sul piatto quando la manopola regolazione spessore è posizionata
sullo zero e con il motore spento per evitare di danneggiare la lama con eventuali urti.
2. La merce posizionata sul carrello deve essere bloccata con il pressamerce
3. Appoggiare la mano sul pressamerce ed iniziate il movimento di taglio.
4. Quando il materiale sara’ quasi tutto affettato, utilizzate la parte anteriore del pressamerce per mante-
nere il pezzo contro la lama.
5. Alla fine del taglio, spegnere il motore e chiudere lo spessore fetta sulla posizione zero; togliere il pez-
zo dal piatto.

I.G.F. Italstampi PAGINA: 12
5) PULIZIA E MANUTENZIONE
5.1 GENERALITÀ E PRODOTTI DA USARE PER LA PULIZIA
PRIMA DI OGNI MANUTENZIONE O PULIZIA, ASSICURARSI CHE L' INTERRUTTORE GENERALE SIA
DISINSERITO E LA SPINA DI ALIMENTAZIONE SCOLLEGATA DALLA RETE.
Una accurata pulizia quotidiana dell'apparecchio è necessaria per un corretto funzionamento e per mantene-
re integra la macchina nel tempo.
Malgrado le varie sicurezze è necessario prestare molta attenzione ed evitare pericoli di taglio derivanti dalla
manipolazione della lama.
La macchina puo’ essere pulita con normali detersivi neutri non contenenti soda oppure con alcool.
Non è possibile il lavaggio delle parti staccabili in lavastoviglie perché si danneggerebbe l’anodizzazione.
5.2 RIMOZIONE DEL CARRELLO PORTAMERCE (ALL. 1, FIG. 6, FIG. 7)
1. Posizionare la manopola regolazione spessore fette sulla posizione 0.
2. Posizionare il carrello dal lato opposto alla lama come indicato nella figura.
3. Ruotare il pomolo dispositivo blocco.
4. Svitare la manopola fissaggio carrello e rimuovere il carrello.
Il carrello puo’ essere lavato sotto getto d’acqua. Ripetere tutte le operazioni in senso inverso per rimontare
il carrello
5.3 RIMOZIONE DEL COPRILAMA (ALL. 1, FIG. 8, FIG. 9)
1. Svitare il pomolo montato dalla parte opposta della lama.
2. Spingere il pomolo verso la lama in modo da sganciare il coprilama dalla sede.
Togliere il coprilama dall’affettatrice.
Il coprilama può essere lavato sotto getto acqua.
5.4 PULIZIA DELLA LAMA E DELL’ ANELLO PROTEGGI LAMA (ALL. 1, FIG. 10, FIG. 11,
FIG. 12)
La pulizia della lama e’ una operazione da effettuarsi con la massima attenzione in quanto esiste un
pericolo di taglio
Si può effettuare utilizzando un panno umido con eventualmente del detersivo per sgrassare bene la parte.
E’ importante un buon risciacquo (non con getto d’acqua) sempre utilizzando un panno umido ed una buona
asciugatura.
E' MOLTO IMPORTANTE CHE I PRODOTTI UTILIZZATI POSSANO GARANTIRE LA MASSIMA IGIENE
ED ASSOLUTA NON TOSSICITÀ.
E’ necessario che il filo della lama e l’ interno dell’ anello sia ben pulito.
1. Far passare un panno umido oppure del panno carta nello spazio fra la lama e l’ anello.
2. Strofinare per tutto l’anello ruotando manualmente la lama.
5.5 RIMOZIONE CAPOTTINA – AFFILATOIO E PULIZIA (ALL. 1, FIG. 13, FIG. 14)
Svitando il pomolo come indicato nella figura sollevare la capottina con il gruppo affilatoio.
Ruotandola di 180° ed alzandola verso l’alto tutto il gruppo si può estrarre per la pulizia
5.6 RIASSEMBLAGGIO DELLA MACCHINA
Per rimontare la macchina e’ necessario ripetere tutte le operazioni di smontaggio in ordine inverso.

I.G.F. Italstampi PAGINA: 13
6) AFFILATURA E LUBRIFICAZIONE
6.1 AFFILATURA
L’affilatura è un’operazione molto importante nell’utilizzo dell’affettatrice.
Si deve effettuare ogni volta che il taglio non risulta netto oppure quando la fetta tende ad essere trascinata
dalla lama.
La periodicità di questa operazione dipende dall’uso e dal tipo di prodotti che vengono affettati.
PRIMA DI PROCEDERE ALL’AFFILATURA È NECESSARIO UNA BUONA PULIZIA DI TUTTA LA
MACCHINA ED UNA BUONA SGRASSATURA DELLA LAMA.
Facendo riferimento a ALL. 1, FIG. 13, FIG. 14, FIG. 15, FIG. 16:
1. Inserire la presa di corrente e svitare il pomolo di fissaggio
2. Sollevare l’ affilatoio e ruotarlo di 180° in modo che la lama stia fra i due smerigli.
3. Premere il pulsante “B” per almeno 5-10 secondi per effettuare la smerigliatura.
4. Premere il pulsante “A” per qualche secondo per togliere l’eventuale bava.
5. Spegnere la macchina e riportare l’affilatoio in posizione iniziale.
ATTENZIONE: IL PULSANTE “B” E’ IL PULSANTE CHE ESEGUE L’AFFILATURA, IL PULSANTE “A”
TOGLIE UNICAMENTE LA BAVA SUL FILO DI TAGLIO.
DURANTE L’OPERAZIONE DI AFFILATURA E’ NECESSARIO MANTENERE IL DISEGNO ORIGINALE
DELL’UNGHIA DELLA LAMA.
QUANDO LA DISTANZA FRA L’ANELLO E LA LAMA SUPERA I 6 MM E’ NECESSARIO SOSTITUIRE LA
LAMA
6.2 LUBRIFICAZIONE
E’ importante periodicamente lubrificare le parti scorrevoli con olio di vaselina bianco.
NON UTILIZZARE MAI OLIO DI SEMI O DI OLIVA si rischia di compromettere tutto il funzionamento dell’
affettatrice.
Lubrificare le parti negli appositi due oliatori (ALL. 1, FIG. 17, FIG. 18).
6.3 PROLUNGATA INTERRUZIONE D' USO DELLA MACCHINA.
Dovendo lasciare inattivo l' apparecchio e' necessario disinserire l' interruttore generale a muro ed effettuare
una pulizia completa di tutta la macchina ed i vari accessori.
È consigliabile proteggere tutte le parti della macchina con olio di vaselina bianco oppure con prodotti idonei
in commercio. É consigliabile poi proteggere la macchina da polvere con telo di nylon o altro materiale.

I.G.F. Italstampi PAGE: 14
LANGUAGE: ENGLISH
SLICER
With the help of this manual, the Manufacturer provides all the technical elements necessary for a
correct installation and working of the appliances. The user is responsible for following these in-
structions.
The aspects concerning the protection of safety and the environment are also pointed out together
with the characteristics, workings, installation and maintenance of the machine.
It is important to read this manual carefully before using the product, and whenever the need
arises to consult it. Adhere to the technical instructions provided and follow all the indications scru-
pulously. For the safety of the operator, the devices of the machine should always be kept in good
working order.
This manual, an integral part of the machine, must be kept in an accessible place known to all op-
erators, and made available to the authorized personnel for any eventual maintenance and repairs.
GUARANTEE
All equipment parts, except for the electric devices, are covered by a one-year guarantee, provided
that faults are due to manufacturing. The delivery of the above mentioned parts is to be paid by the
receiver. An invoice will be issued for any replacement of parts covered by the manufacturer’s
guarantee; on receiving the equipment parts for which replacement was required (carriage-free
goods),customers will be given a credit note. Replacement of the entire equipment is not covered
by guarantee, nor are manufacturing costs necessary to replace parts or any other additional ex-
penses.
SHIPMENT
Goods are shipped at Buyer’s risk. Any complaint about the faulty condition of cargo must be made
to the carrier immediately after delivery. Please check that goods were not damaged during ship-
ment and if so inform the carrier immediately after delivery. We are not liable for damage which
was not reported to the carrier shortly after receiving the shipment, even if it was forwarded free of
charge and with invoice.
COMPETENT FORUM
The competent forum is Rimini Court

I.G.F. Italstampi PAGE: 15
INDEX
PAGE
1. INFORMATION ON SAFETIES 16
1.1
GENERAL PRECAUTIONS 16
1.2
MECHANICAL SAFETIES 16
1.3
ELECTRICAL SAFETIES 16
2. TECHNICAL FEATURES 16
2.1
TABLE OF WEIGHTS AND MEASURES -NOISE 17
2.2
SUPPLY CONDITIONS AND DISPOSAL OF PACKINGS 17
3. INSTALLATION 17
3.1
SETTING THE MACHINE 17
3.2
ELECTRIC CONNECTIONS 17
3.3
SAFETY MEASURES AND TRAINING THE FINAL USER 18
4. USE OF THE EQUIPMENT 18
4.1
CONTROLS 18
4.2
SETTING THE GOODS ON THE SLICER SADDLE 18
5. CLEANING AND MAINTENANCE 18
5.1
GENERALITIES AND PRODUCTS FOR CLEANING 18
5.2
REMOVING THE FOOD-SADDLE 19
5.3
REMOVING THE BLADE COVER 19
5.4
CLEANING THE BLADE AND RING 19
5.5
REMOVING AND CLEANING THE SHARPENER HEAD 19
5.6
MACHINE REASSEMBLY 19
6. SHARPENING AND LUBRICATION 19
6.1
SHARPENING 19
6.2
LUBRICATION 20
6.3
MACHINE IDLE FOR A LONG TIME 20
7. ENCLOSURES 42
FIGURE 43
ELECTRIC DIAGRAM 47
SPARE PART DRAWING ART.4800/220 48
SPARE PART DRAWING ART.4800/250 51
SPARE PART DRAWING ART.4800/300 54

I.G.F. Italstampi PAGE: 16
1) INFORMATION ON SAFETIES
1.1. GENERAL PRECAUTIONS
•The slicer must be managed by skilled personnel, familiar with the instructions for use and
safety contained in this manual.
•In the case of rotation of the personnel, vocational training is necessary.
•Even if the machine comes with several safety systems, avoid setting the hands near the blade and
moving parts.
•Before the cleaning and maintenance operations, check to make sure the machine is disconnected
from the mains.
•Periodicaly check cable and electric elements conditions.
•Never use the slicer for cutting freezed food, meat and fish with bones, or for non-food products.
•Whenever the blade diameter is reduced of more than 10 mms., Apply to the assistance service for
replacement.
•Never carry out repearing operations personnally, but apply always to skilled personnel.
1.2. MECHANICAL SAFETIES
The slicers we produce and which are described in this manual meet, as far as safeties are concerned, the
prescriptions on the risks of mechanical type issued by EEC. (as 89/392 - 91/368 - 93/44 - 93/68 - 89/336).
For the sanitary regulations they comply with the rule 89/109/EEC.
1.3. ELECTRICAL SAFETIES
The safeties against electrical risks comply with the rule 73/23/EEC and regulations CENELEC EN335/2 /64
All our slicers include a relay for restarting the machine whenever a fortuitous lack of current occurs.
Due to the perfect insulation of all the electric elements and the remarkable resistance of all the materials
used, our machines can be installed to work inside moist premises.
ATTENTION: DO NOT USE WATER TO CLEAN THE SLICER, ONLY A HUMID CLOTH
WARNING: IN CONFORMITY WITH POINT 1.7.2. "INSTRUCTIONS ON FURTHER RISKS"
CONTAINED IN THE E.E.C. REGULATIONS 80/392 AND 91/368, THES PROTECTIONS AND SAFETIES
STRICTLY COMPLY WITH THESE REGULATIONS.
WE POINT OUT HOWEVER THAT THE ABOVE MENTIONED PROTECTIONS, EVEN IF THEY SENSIBLY
REDUCE BOTH THE POSSIBILITY AND EXTENT OF THE DAMAGE, DO NOT ELIMINATE FULLY THE
RISK OF CUTTING.
2) TECHNICAL FEATURES
Technical features of the series of slicers "ART. 4800":
•Possibility of intermittent work
•Their use, cleaning and maintenance is quite safe
•Thanks to their design and to the realization of all parts in stainless steel and anodized aluminium al-
loy without edges for easy cleaning operations, these slicers fully comply with the most strict sanitary
regulations.
I.G.F. Italstampi PAGE: 17
2.1. TABLE OF WEIGHTS AND MEASURES
MODEL DIMENSIONS
CM.
WEIGHT
KG
POWER
WATT.
ELECTRICAL
CONNECTION
BLADE
REVS.
ART. 4800/220 36X46X35 12,5 132 220/1/50 290
ART. 4800/250 42X54X35 15 147 220/1/50 290
ART. 4800/300 45X56X40 23 220 220/1/50 290
NOISE: 62 DB FOR ALL MODELS
WARNING: THE ELECTRICAL FEATURES OF EACH EQUIPMENT ARE PRINTED ON THE
MOTOR DATA PLATE. A CHECK OF THE ELECTRIC CONNECTION IS NECESSARY BEFORE
INSTALLING THE EQUIPMENT.
2.2. SUPPLY CONDITIONS AND DISPOSAL OF PACKINGS
All the slicers are packed in a sturdy cardboard box with internal shaped edges which guarantee the perfect
integrity of the machine during transport.
Each equipment include:
•Declaration of conformity EEC.
•Instructions for use and maintenance
•Certificate of guarantee
All the packing components (carton, foam, straps, and so on) can easily be disposed of as household rub-
bish.
Whenever the machine is installed in countries having special regulations on packing disposal, the final user
must comply with the regulations in force.
3) INSTALLATION
3.1. SETTING THE MACHINE
The machine connection and the setting at work must be made by skilled personnel.
WARNING: BOTH THE SYSTEM AND LOCATION WHERE THE EQUIPMENT HAS TO BE SET
MUST COMPLY WITH THE REGULATIONS FOR THE ACCIDENT PREVENTION AND ELECTRICAL
REGULATIONS "CEI" IN FORCE.
THE MANUFACTURER DECLINES ANY AND ALL RESPONSIBILITY FOR DIRECT OR INDIRECT
DAMAGES WHICH MAY ENSUE FOR NON-COMPLIANCE WITH THE ABOVE MENTIONED
REGULATIONS IN FORCE.
Set the equipment on a wide, levelled, dry and fixed face, far from heat sources and water sprays, and with
80 cm. ground clearance.
3.2. ELECTRIC CONNECTIONS
The equipment is supplied with an electric cable to be connected to a magneto-thermic main switch which
stops. the machine when the operator comes in fortuitous contact with the rotating elements (ALL:1, FIG. 1).
It is imperative that the equipment is well grounded according to the regulations in force.

I.G.F. Italstampi PAGE: 18
THE MANUFACTURER DECLINES ANY AND ALL RESPONSIBILITY FOR DIRECT AND INDIRECT
DAMAGES WHICH MAY ENSUE FOR NON COMPLIANCE WITH THE REGULATIONS IN FORCE.
WARNING: ATER CONNECTING THE EQUIPMENT TO THE ELECTRIC POWER SUPPLY,
CHECK THE DIRECTION OF ROTATION OF THE BLADE.
PRESS ONCE THE START GREEN BUTTON AND THEN THE STOP RED BUTTON (ALL. 1, FIG. 2).
3.3. SAFETY MEASURES AND TRAINING THE FINAL USER
The skilled personnel in charge of the installation and electric connections is responsible of the training of
the final user, which must also be informed on the safety measures to comply with.
This instruction manual comes with each equipment.
4) USE OF THE EQUIPMENT
4.1. CONTROLS
The controls and pilot light are set on the right side of the base when the machine is placed in front of the
operator (ALL1, FIG. 3).
•Green button for starting the equipment
•Red button for stopping the equipment
•Knob for adjusting slice thickness
•Lubricator
4.2. SETTING THE FOOD ON THE SLICER SADDLE (ALL. 1, FIG. 4, FIG. 5)
1. Set the food on the saddle when the thickness adjusting knobis set to zero and with motor off to
avoid damaging the equipment.
2. Set the food on the saddle and block it with the food-press.
3. Set a hand on the food-press and start the cutting.
4. When the food is fully sliced use the front part of the food-press to keep the food against the blade.
5. When the cutting is over, put off the motor and stop the slice thickness on zero position, then re-
move the food from the saddle.
5) CLEANING AND MAINTENANCE OPERATIONS
5.1 GENERALITIES AND PRODUCTS FOR CLEANING
Before carrying out any cleaning or maintenance operations, check to make sure that the mains switch be off
and the supply plug disconnected from the mains.
Accurately clean the equipment every day for a correct operation and life of the equipment.
Despite the several safeties, take great care to avoid cutting risks when using the blade.
Clean the equipment with the usual neutral detergents which must not contain soda or alcohol. When clean-
ing removed elements, do not use a dish-washer for not damaging anodized parts.

I.G.F. Italstampi PAGE: 19
5.2 REMOVAL OF THE FOOD SADDLE (ALL. 1, FIG. 6, FIG. 7)
1. Set the knob on "0" position for slice thickness adjustment
2. Set the saddle opposite to the blade as shown in figure
3. Turn the knob of the unblocking device
4. Loosen the knob fixing the saddle and remove the saddle.
5. Clean the saddle with a water jet. Reverse these operations for reassembling the saddle.
5.3 REMOVAL OF THE BLADE-COVER (ALL. 1, FIG. 8, FIG. 9)
1. Loosen the knob opposite to the blade
2. Push the knob towards the blade and release the blade- cover from its housing.
3. Remove the blade-cover from the slicer and clean it with a water jet.
5.4 CLEANING THE BLADE AND RING (ALL. 1, FIG. 10, FIG. 11, FIG. 12)
Cleaning the blade and ring is a dangerous operation, hence, take great care to prevent any possibil-
ity of cutting.
For their cleaning never use a water jet, but use a damp cloth and detergents, then rinse and dry with a
cloth. For the cleaning, use non-toxic products which guarantee the perfect hygiene. Clean carefully the
blade edge and the inside of the ring.
1. Use a damp cloth to clean the opening between the blade and ring.
2. Rotate manually the blade and clean using the damp cloth.
5.5 REMOVING AND CLEANING THE SHARPENER HEAD (ALL. 1, FIG. 13, FIG. 14)
Loosen the knob as shown in figure, lift the head and the sharpener unit, and revove these units by lifting
and turning by 180°.
5.6 REASSEMBLING THE MACHINE
For the machine reassembly, reverse all the above mentioned operations.
6) SHARPENING AND LUBRICATION
6.1 SHARPENING
This a very important operation to carry out every time the cutting is not clean, or when the blade drags the
slice.
The use and the type of products that have been sliced determine the periodicity of this operation.
Before sharpening the blade, clean the machine and degrease the blade accurately.
Refers to ALL. 1, FIG. 13, FIG. 14, FIG. 15, FIG. 16:
1. Plug the machine
2. Lift the sharpener and turn it by 180° to take the blade between the two grinding wheels.
3. Keep button "B" pressed for 5/10 seconds to sharpen.
4. Keep button "A" pressed for a few seconds to deburr.
5. Stop the machine and return the shrpener in its initial position.

I.G.F. Italstampi PAGE: 20
WARNING: USE BUTTON "B" TO SHARPEN, AND BUTTON "A" TO DEBURR THE CUTTING
EDGE.
DURING THE SHARPENING PROCESS, KEEP TO THE ORIGINAL DRAWING OF THE BLADE BEVEL.
REPLACE THE BLADE WHEN THE CLEARANCE BETWEEN THE RING AND BLADE EXCEEDS 6 MMS.
6.2. LUBRICATION
Periodically lubricate the sliding elements with white vaseline oil.
For not damaging the slicer, NEVER USE SEED OIL OR OLIVE-OIL.
Lubricate all elements using the oilers as shown in ALL. 1, FIG. 17, FIG. 18.
6.3. MACHINE IDLE FOR A LONG TIME
Should the machine be idle for a long time, disconnect the wall main switch and clean the machine and its
accessories accurately.
Use white vaseline oil (or similar products) to protect all the machine elements. We advise covering the ma-
chine with a nylon (or similar) cloth.
This manual suits for next models
3
Table of contents
Languages:
Other IGF Kitchen Appliance manuals


