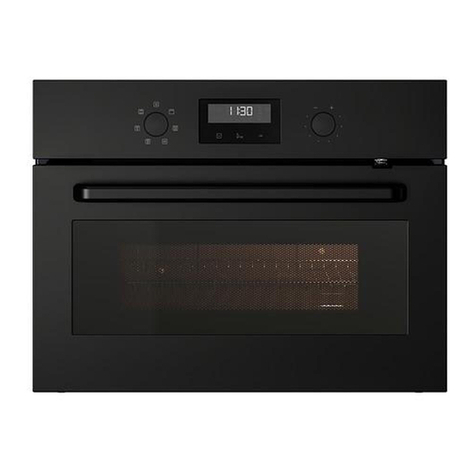
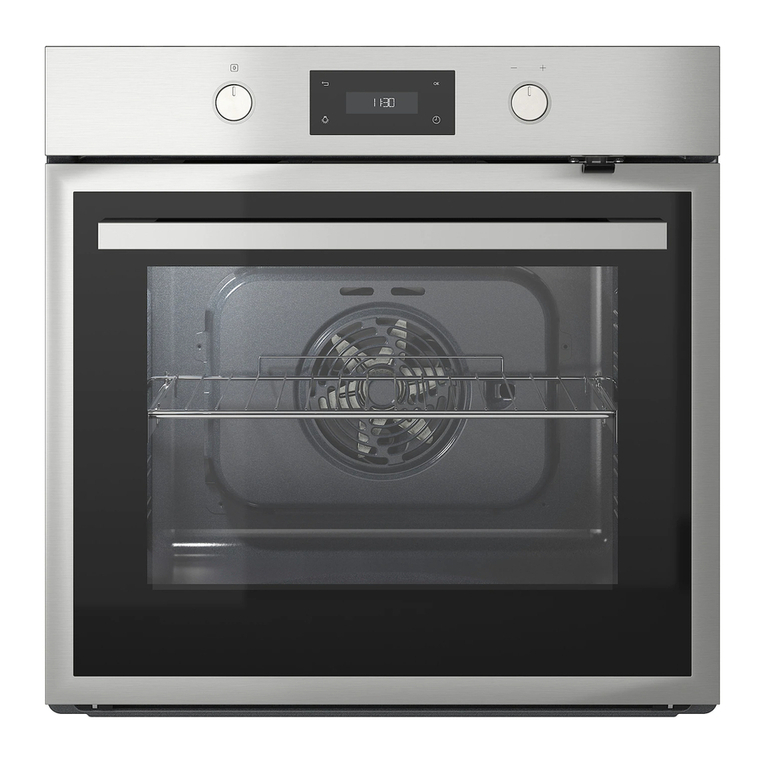
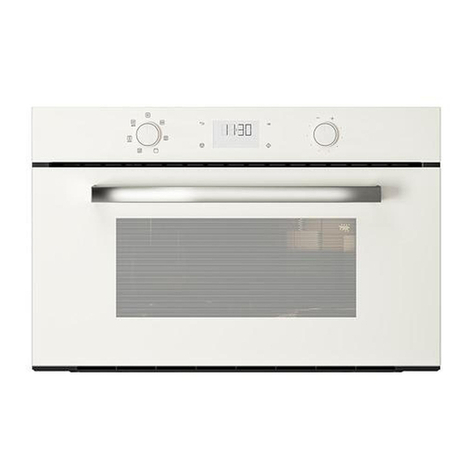
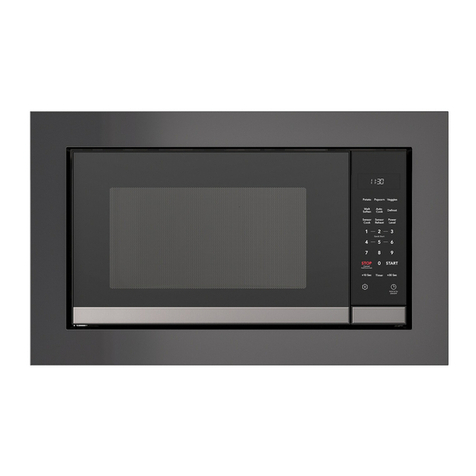
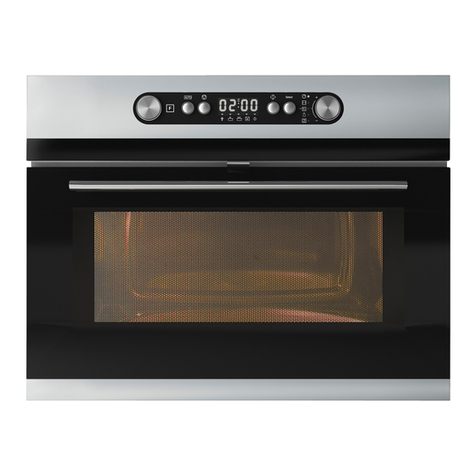
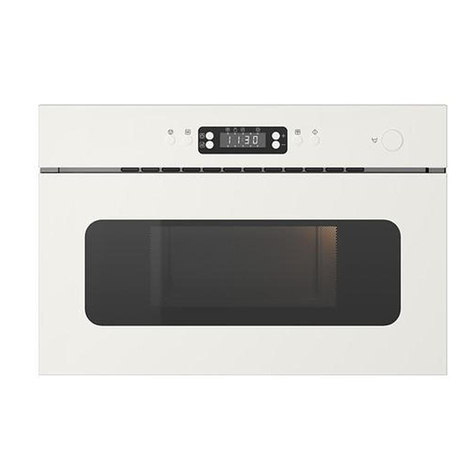
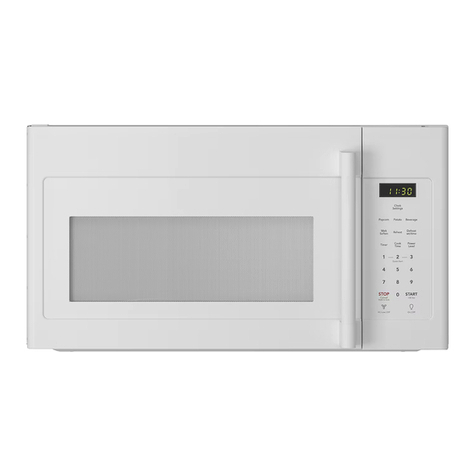
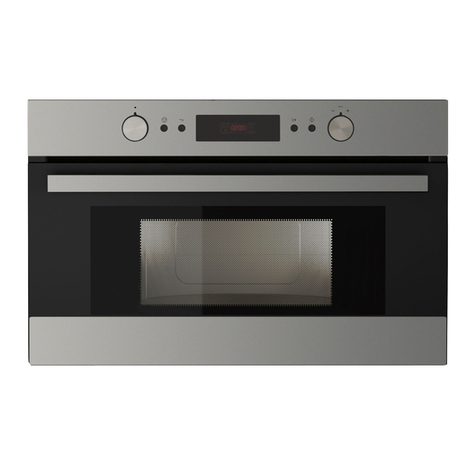
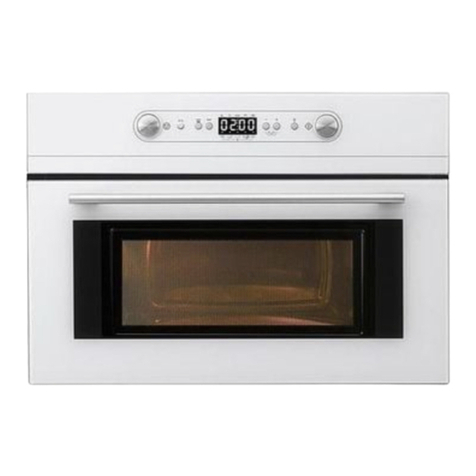
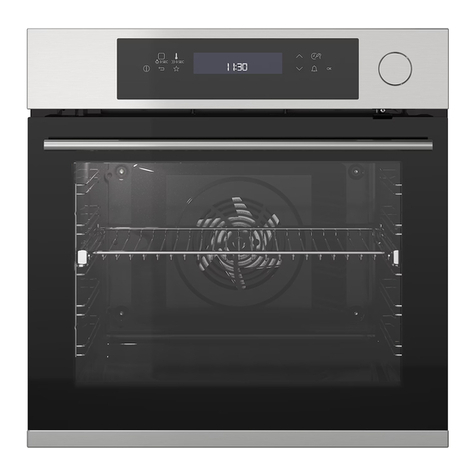
IKEA HUVUDSAKLIG 493.872.03 User manual

HUVUDSAKLIG ES
FR
EN

EN
WELCOME & CONGRATULATIONS
Please record your model and serial numbers below for
reference.
Veuillez enregistrer vos numéros de modèle et de série ci-
dessous pour référence.
Purchase Date / Fecha de compra / Date d’achat
Model Number / Número de modelo / Numéro de modèle
Serial Number / Número de serie / Numéro de série
Please refer to the last page of this manual for the
full list of IKEA appointed After Sales Service Pro-
vider and relative national phone numbers.
Veuillez vous reporter à la dernière page de ce man-
de services après-vente désignés par IKEA et les
numéros de téléphone nationaux correspondants.
Consulte la última página de este manual para ver
la lista completa de proveedores de servicios pos-
venta designados por IKEA y los números de telé-
fono nacionales correspondientes.
NOTE
Please attach sales receipt here for future
reference.
Veuillez joindre le reçu de vente ici pour référence
future.
Registre su modelo y número de serie a continuación
para referencia.
Registre su modelo y número de serie a continuación
para referencia.
English 3
10
uel pour obtenir la liste complète des fournisseurs
Français 17
Español

EN
(a) Do not attempt to operate this oven with the door open since open-door operation can result in harmful
exposure to microwave energy. It is important not to defeat or tamper with the safety interlocks.
(b) Do not place any object between the oven front face and the door or allow soil or cleaner residue to
accumulate on sealing surfaces.
(c) Do not operate the oven if it is damaged. It is particularly important that the oven door close properly
and that there is no damage to the: (1) door (bent), (2) hinges and latches (broken or loosened), (3)
door seals and sealing surfaces.
(d) The oven should not be adjusted or repaired by anyone except properly qualied service personnel.
PRECAUTIONS TO AVOID POSSIBLE EXPOSURE
TO EXCESSIVE MICROWAVE ENERGY
3
Important Safety Information. . . . . . . . . . . . . . . . . . . . . . . .4
ASSEMBLY INSTRUCTIONS . . . . . . . . . . . . . . . . . . . . . . . . . 5
IKEA LIMITED GUARANTEE . . . . . . . . . . . . . . . . . . . . . . . . . 8
CONTENTS

• IMPORTANT – Save these instructions for local
inspector's use.
• IMPORTANT – Observe all governing codes and
ordinaces.
• Note to Installer – Be sure to leave these
instructions with the Consumer.
• Note to Consumer – Keep these instructions for
future reference.
• Skill level - Installation of this appliance requires
basic mechanical and electrical skills.
Read these instructions completely and carefully.
• Properinstallationistheresponsibilityofthe
installer.
• Productfailureduetoimproperinstallationisnot
coveredundertheWarranty.
• Unplugthemicrowaveovenbeforeattempting
installation of this kit.
• Becausethekitincludesmetalparts,cautionshould
be used in handling and installation to avoid the
possibilityofinjury.
• Donotremovepermanentlyafxedlabels,warnings,
orplatesfromtheproduct.Thismayvoidthe
warranty.
WARNING–Beforebeginningtheinstallation,
switch power off at service panel and lock out to
preventbeingswitchedonaccidentally.
Whentheservicecannotbelocked,securelyfasten
aprominentwarningdevice,suchasatag,tothe
service panel.
Before installing the exhaust duct, conrm the
oor is level.
level guide lines.
THIS BUILT-IN KIT IS DESIGNED FOR USE
BEFORE YOU BEGIN
FOR YOUR SAFETY:
IMPORTANT:
IMPORTANT - PLEASE READ
AND FOLLOW
EN
Disconnect from power supply before service.
Service Call:(833) 337-4006
READ CAREFULLY.
KEEP THESE INSTRUCTIONS.
QUESTIONS?
4
ONLY WITH IKEA HUVUDSAKLIG MICROWAVE
The level bubble should be equal distance from
OVENS SPECIFYING BUILT-IN KIT

PARTS INCLUDED IN THE KIT
1.FrontFrameAssembly-QTY1
2.ExhaustDuct-QTY1
BottomMountingRail–QTY2
3.ScrewA-QTY11+3extra
4.ScrewB-QTY4+2extra
CHOOSING A LOCATION FOR YOUR
MICROWAVE OVEN IF BUILT-IN
Built-In Trim Kit allows for the installation of microwaves
listedbelowtobebuiltintoacabinetorwallbyitselfor
over an electric wall oven*.
Microwave Models:
See Illustration 1 for proper location and when building
Kitinstructions.Ifbuildingoverawalloven,besure
the clearance between the wall oven and the microwave
oven is a minimum of 3 inches.See illustration 2.
*NOTE: TrimKitandmicrowavecanonlybebuilt-
in over an electric self-clean or non self-
cleansinglecavitywalloven.
CABINET OR WALL CUTOUT
Cutout Dimensions( See illustration 3)
Height (A)
Minimum 16 3/4" (42.5 cm)
Maximum 17"(43.2cm)
Width (B)
Minimum 24 3/4" (62.9 cm)
Maximum 25"(63.5cm)
Depth (C)
Minimum 20" (50.8 cm)
Illustration 1
Illustration 2
Trim Kit Overall Dimensions
Height 18" (458mm)
Width 30" (762mm)
Depth 1 1/2" (38.9cm)
Before installing the exhaust duct, conrm the
oor is level.
The level bubble should be equal distance from
level guide lines.
IMPORTANT:
EN
104.621.61 104.660.03
inaboveawalloven.Carefullyfollowboththewall
904.621.62 904.660.04
ASSEMBLY INSTRUCTIONS
5
oven assembly instructions and ’s Built-in
IKEA

Illustration 3
ELECTRICAL OUTLET LOCATION
Outlet should NOT be in the shaded area as indicated on
Illustration 3
NOTE 1:
Theooroftheopeningshouldbeconstructedof
plywoodstrongenoughtosupporttheweightofthe
ovenandoorload(approximately100pounds).The
oorshouldbelevelforproperoperationoftheoven.
Besuretocheckthelocalbuildingcodeasitmay
requirethattheopeningbeenclosedwithside,ceiling
and rear partition. The proper functioning of the oven
does not require the enclosure.
Illustration 4
Screw A
Center Line
EXHAUST DUCT ASSEMBLY
1.DrawaCentralLineonoor.PlacetheExhaustDuct
intheopening,WhentheExhaustDuctAssemblyisin
theopeningcorrectly,theCenterLineisinthemiddle
oftheExhaustDuctAssembly.
2.SecuretheExhaustDuctAssemblywiththethree
screws A.
IMPORTANT: Secure screws in outer hole. 3 pcs are
neededforexhaustductassembly
Bottom Mounting Rail
Turnmicrowaveupsidedownsoyouarelookingatoven
bottom. Secure the bottom Mounting Rail on oven with
four SCREWS A. See Illustration 5.
NOTE: Please make sure to align the holes(marked with
“36”) 6 of bottom mounting rail and the holes (marked
with “36”) of microwave oven's bottom plate.
Illustration 5
Before installing the exhaust duct, conrm the
oor is level.
The level bubble should be equal distance from
level guide lines.
IMPORTANT:
EN
ASSEMBLY INSTRUCTIONS
6
See Illustration .4

OVEN INSTALLATION
1.Placetheovenadjacenttothewallorcabinet
opening. Plug the power cord into the electrical
outlet.
2.Carefullyguidetheassembledovenintotheprepared
opening.SlidetheovenontheExhaustDuct
Assembly.
3.SecuretheExhaustDuctAssemblywiththefour
screws A.
Illustration 6
FRAME INSTALLATION
1.PositiontheFRAMEASSEMBLYtobesquarewiththe
oven.CarefullyplacetheFRAMEASSEMBLYonthe
oven. See Illustration 7.
2. Check that it is level and then secure with two
SCREWS B. Secure the bottom portion of the FRAME
ASSEMBLYwiththetworemainingSCREWSB.See
Illustration 8.
Illustration 7
Illustration 8
EN ASSEMBLY INSTRUCTIONS
7
See Illustration 6

EN
IKEA LIMITED GUARANTEE
How long is the IKEA guarantee valid?
This guarantee is valid for five (5) years from the original date of purchase of Your appliance at IKEA, unless the
appliance is named LAGAN or TILLREDA in which case two (2) years of guarantee apply. The original sales receipt is
required as proof of purchase. If service work is carried out under guarantee, this will not extend the guarantee
period for the appliance.
Who will execute the service?
IKEA “Service Provider” will provide the service through its own service operations or authorized service partner
network.
What does this guarantee cover?
The guarantee covers faults of the appliance which have been caused by faulty construction or material faults from
the date of purchase from IKEA. This guarantee applies to domestic use only. Some exceptions not guaranteed are
specified under the headline “What is not covered under this guarantee?” Within the guarantee period, the costs to
remedy the fault (e.g., repairs, parts, labour and travel) will be covered, provided that the appliance is accessible for
repair without special expenditure. On these conditions the local regulations are applicable. Replaced parts become
the property of IKEA.
What will IKEA do to correct the problem?
IKEA appointed Service Provider will examine the product and decide, at its sole discretion, if it is covered under this
guarantee. If considered covered, IKEA Service Provider or its authorized service partner through its own service
operations, will then, at its sole discretion, either repair the defective product or replace it with the same or a
comparable product.
What is not covered under this guarantee?
• Normal wear and tear.
• Deliberate or negligent damage, damage caused by failure to observe operating instructions, incorrect
installation or by connection to the wrong voltage, damage caused by chemical or electrochemical reaction, rust,
corrosion or water damage including but not limited to damage caused by excessive lime in the water supply,
damage caused by abnormal environmental conditions.
• Consumable parts including batteries and lamps.
• Non-functional and decorative parts which do not affect normal use of the appliance, including any scratches and
possible colour differences.
• Accidental damage caused by foreign objects or substances and cleaning or unblocking of filters, drainage
systems or soap drawers.
• Damage to the following parts: ceramic glass, accessories, crockery and cutlery baskets, feed and drainage pipes,
seals, lamps and lamp covers, screens, knobs, casings and parts of casings. Unless such damages can be proved to
have been caused by production faults.
• Cases where no fault could be found during a technician’s visit.
• Repairs not carried out by our appointed service providers and/or an authorized service contractual partner or
where non-original parts have been used.
• Repairs caused by installation which is faulty or not according to specification.
• The use of the appliance in a non-domestic environment i.e. professional use.
• Transportation damages. If a customer transports the product to his home or another address, IKEA is not liable
for any damage that may occur during transport. However, if IKEA delivers the product to the customer’s delivery
address, then damage to the product that occurs during this delivery will be covered by IKEA.
• Cost for carrying out the initial installation of the IKEA appliance. However, if an IKEA appointed Service Provider
or its authorized service partner repairs or replaces the appliance under the terms of this guarantee, the appointed
Service Provider or its authorized service partner will reinstall the repaired appliance or install the replacement, if
necessary.
8

EN IKEA LIMITED GUARANTEE
The dedicated AFTER SALES for IKEA appliances
Please don’t hesitate to contact IKEA appointed After Sales Service Provider to:
• make a service request under this guarantee;
• ask for clarifications on installation of the IKEA appliance in the dedicated IKEA kitchen furniture;
• ask for clarification on functions of IKEA appliances.
To ensure that we provide you with the best assistance, please read carefully the Assembly Instructions and/or the
User Manual before contacting us.
How to reach us if you need our service
In order to provide you a quicker service, we recommend to use the specific phone
numbers listed on this manual. Always refer to the numbers listed in the booklet of the specific appliance you need
an assistance for.
Please also always refer to the IKEA article number (8 digit code) placed on the rating plate of your appliance.
SAVE THE SALES RECEIPT!
It is your proof of purchase and required for the guarantee to apply. The sales receipt also reports the IKEA name
and article number (8 digit code) for each of the appliances you have purchased.
Do you need extra help?
For any additional questions not related to After Sales of your appliances please contact your nearest IKEA store call
centre. We recommend you read the appliancedocumentation carefully before contacting us.
Phone number:
(833) 337-4006
Opening hours:
Monday - Friday
8:30 am - 8:00 pm EST
How country law applies
The IKEA guarantee gives you specific legal rights, and you may also have other rights which vary from
state to state or jurisdiction to jurisdiction. However these conditions do not limit in any way consumer
rights described in the local legislation.
Area of validity
For appliances which are purchased in United States or Canada, or moved to one of the mentioned coun-
tries, the services will be provided in the framework of the guarantee conditions normal in the specified
country.
An obligation to carry out services in the framework of the guarantee exists only if the appliance complies
and is installed in accordance with:
- the technical specifications of the country in which the guarantee claim is made;
- the Assembly Instructions and User Manual Safety Information.
9

ES
(a) No intente operar este horno con la puerta abierta, ya que el funcionamiento de la puerta abierta puede
provocar daños exposición a la energía de microondas. Es importante no vencer ni alterar los
enclavamientos de seguridad.
(b) No coloque ningún objeto entre la cara frontal del horno y la puerta, ni permita que se acumule suciedad
o residuos de limpiadores se acumulan en las superficies de sellado.
(c) No opere el horno si está dañado. Es particularmente importante que la puerta del horno se cierre
correctamente y que no hay daños en: (1) puerta (doblada), (2) bisagras y pestillos (rotos o flojos),
(3) sellos de puertas y superficies de sellado.
(D) El horno no debe ser ajustado o reparado por nadie, excepto personal de servicio debidamente calificado.
PRECAUCIONES PARA EVITAR LA POSIBLE EXPOSICIÓN
A LA ENERGÍA DE MICROONDAS EXCESIVA
10
INSTRUCCIONES DE SEGURIDAD IMPORTANTES. . . . . . . . . . 11
INSTRUCCIONES DE MONTAJE . . . . . . . . . . . . . . . . . . . . . . 12
GARANTÍA LIMITADA IKEA . . . . . . . . . . . . . . . . . . . . . . . . . 15
CONTENIDO

• IMPORTANTE – Guarde estas instrucciones en
caso inspecciones locales.
• IMPORTANTE–Cumplacontodosloscódigosy
ordenanzas locales.
• Observación para el instalador – Asegúrese de
dejarestasinstruccionesalConsumidor.
• Observación para el consumidor – Guarde estas
instrucciones para consultas futuras.
• Capacitación para la instalación - La instalación
de este aparato requiere de una capacitación
mecánicayeléctricabásica.
Lea estas instrucciones completamente y con
atención.
• Lainstalaciónadecuadadeesteaparatoes
responsabilidad del instalador.
• LaGarantíanocubrelasfallasqueseproduzcan
debido a una instalación inadecuada del producto.
• Desenchufeelhornomicroondasantesdeinstalar
el marco.
• Lamanipulacióneinstalacióndeesteproducto
debe realizarse con cuidado para evitar posibles
lesionesdebidoalaexistenciadepartesmetálicas.
• Noretirelosrótulos,advertenciasoplacas
adheridosalproducto.Silohacepodríaanularla
garantía.
ADVERTENCIA–Antesdeiniciarlainstalación,
cortelaelectricidaddesdeelpaneldeservicioy
bloquéeloparaevitarunencendidoaccidental.
Cuandonoseaposiblebloquearelpanel,coloque
yasegureundispositivodeadvertenciallamativo,
comoporejemplouncartel,paraevitarquesea
utilizado mientras realiza la instalación.
Antes de instalar el conducto de escape,
conrme que el piso esté nivelado. La burbuja
de nivel debe estar a la misma distancia de las
líneas de guía de nivel.
ESTE MARCO EMPOTRADO FUE DISEÑADO PARA
SER USADO SÓLO CON HORNOS MICROONDAS
ANTES DE COMENZAR
PARA SU SEGURIDAD:
ES IMPORTANTE QUE LEA Y
CUMPLA CON LO SIGUIENTE
ES
llamada de servicio:(833) 337-4006
LEA CON ATENCIÓN.
CONSERVE ESTAS INSTRUCCIONES.
EN CASO DE CONSULTAS
11
IKEA HUVUDSAKLIG HECHOS PARA SER
EMPOTRADOS.

PIEZAS INCLUIDAS
1.Montajedemarcodelantero-CANT1
2. Ducto de ventilación - CANT 1
Carrildemontajeinferior-CANT2
3.TornilloA-CANT11+3extra
4.TornilloB-CANT4+2extra
ELECCIÓN DEL LUGAR PARA SU
HORNO MICROONDAS EMPOTRADO
El marco decorativo (Trim Kit) empotrado permite la
instalacióndelosmicroondaslistadosacontinuación,
los cuales deben ser empotrados en un gabinete o pared
osobreunhornodeparedeléctrico*.
Modelos de microondas:
Consulte la Ilustración 1 para obtener una ubicación
sobreunhornodepared,asegúresedequeelespacio
entreesteúltimoyelhornomicroondasseadeal
menos 3 pulgadas. Consulte Ilustración 2.
*OBSERVACIÓN:
Elmarcodecoratico(TrimKit)yelmicroondassólo
puedenserempotradossobreunhornoeléctrico
depared,autolimpiableono,deunacavidad.
GABINETE O APERTURA DE LA PARED
Dimensiones de la apertura (consulte ilustración 3)
Altura (A)
Mínimo 163/4"(42.5cm)
Máximo 17"(43.2cm)
Ancho (B)
Mínimo 243/4"(62.9cm)
Máximo 25"(63.5cm)
Profundidad (C)
Máximo 20" (50.8 cm)
Ilustración 1
Ilustración 2
Dimensiones totales del marco decorativo (Trim Kit)
Altura 18" (458mm)
Ancho 30" (762mm)
Profundid ad 1 1/2" (38.9cm)
Antes de instalar el conducto de escape,
conrme que el piso esté nivelado. La burbuja
de nivel debe estar a la misma distancia de las
líneas de guía de nivel.
ES IMPORTANTE QUE LEA Y
ES
104.621.61 104.660.03
adecuadaycuandoseanecesarioempotrarsobreun
904.621.62 904.660.04
horno de pared. Siga con atención las Instrucciones de
montaje tanto del horno de pared como las del marco
INSTRUCCIONES DE MONTAJE
12
decorativoempotradode .Sivaaempotrar
IKEA

Ilustración 3
UBICACIÓN DE LA TOMA DE
CORRIENTE
La toma de corriente NO debe estar ubicada en la zona
sombreada que se indica en la Ilustración 3.
OBSERVACIÓN 1:
El piso de la apertura debe estar hecho de madera
contrachapadalosucientementeresistentepara
soportarelpesodelhornoyelsuelodecarga
(aproximadamente100libras[45kilogramos]).Elpiso
debe estar nivelado para un funcionamiento adecuado
del horno. Asegúrese de revisar los códigos de
construcciónlocales,puespodríasernecesarioquela
aperturaconstedeparticiónlateral,superiorytrasera.
El funcionamiento adecuado del horno no requiere de
connamiento.
Ilustración 4
Líneacentral
MONTAJE DE DUCTO DE ESCAPE
1.Dibujeunalíneacentralsobreelpiso.Coloqueel
ductodeescapeenlaapertura,cuandoelmontaje
delmismoestéenlaaperturacorrecta,lalínea
centralestaráalamitaddelmontaje.Consultela
Ilustración 4.
2.Asegureelmontajedelductodeescapeconlostres
tornillos tipo A.
IMPORTANTE: Asegurelostornillosenelagujero
externo.
Senecesitan3piezasparaelmontajedelductode
escape.
Riel de montaje inferior
De Vuelta el horno microondas para tener acceso a la
partedeabajodelmismo.Asegureelrieldemontaje
inferior en el horno con los cuatro tornillos tipo A.
Consulte la Ilustración 5.
OBSERVACIÓN:Asegúresedealinearlosagujeros
marcadosconelnúmero"36”delrieldemontaje
inferiorylosagujerosdelaplacainferiordelhorno,
tambiénmarcadosconelnúmero“36”.
Ilustración 5
Antes de instalar el conducto de escape,
conrme que el piso esté nivelado. La burbuja
de nivel debe estar a la misma distancia de las
líneas de guía de nivel.
ES IMPORTANTE QUE LEA Y
ES INSTRUCCIONES DE MONTAJE
13

OVEN INSTALLATION
1.Coloqueelhornoadyacentealaparedoaperturadel
gabinete. Conecte el cable de alimentación a la toma
de corriente.
2. Inserte cuidadosamente el horno en la apertura
preparada.Desliceelhornosobreelmontajedel
ducto de escape. Consulte la Ilustración 6.
3.Asegureelmontajedelductodeescapeconlos
cuatro tornillos tipo A.
Illustration 6
INSTALACIÓN DEL MARCO
1. Coloque el MONTAJE DEL MARCO para que cuadre con
el horno. Coloque el marco cuidadosamente sobre el
mismo. Consulte la Ilustración 7.
2.Revisequeesténiveladoyluegoasegúreloconlos
TORNILLOS tipo B. Asegure la parte inferior del
MONTAJE DEL MARCO con los dos TORNILLOS tipo B
restantes. Consulte la Ilustración 8.
Ilustración 7
Ilustración 8
ES
INSTRUCCIONES DE MONTAJE
14

ES GARANTÍA LIMITADA IKEA
¿Cuánto tiempo es válida la garantía de IKEA?
Esta garantía es válida durante cinco (5) años contados a partir de la fecha de compra original de su
electrodoméstico en IKEA, salvo que el electrodoméstico sea de la marca LAGAN o TILLREDA en cuyo caso, se
aplicarán una garantía de dos (2) años. El recibo de compra original es necesario para probar la compra
correspondiente. Si el trabajo de servicio se efectuase en virtud de la garantía, dicho trabajo no ampliará el periodo
de la garantía del electrodoméstico.
¿Quién prestará el servicio?
El "Proveedor de servicios" de IKEA prestará el servicio a través de sus propios centros de servicio o una red
autorizada de asociados dedicada a la prestación de servicios.
¿Qué cubre esta garantía? La garantía cubre las fallas del electrodoméstico que hubiesen sido causadas por defectos
de la construcción o los materiales, a partir de la fecha de compra realizada a IKEA. Esta garantía solose aplica al
uso doméstico. Algunas excepciones no garantizadas se especifican bajo el encabezado "¿Que no está cubierto en
virtud de esta garantía?" Dentro del periodo de la garantía, se cubrirán los gastos en que se incurra para remediar
las fallas (por ejemplo, reparaciones, piezas, trabajo y viajes), siempre y cuando el electrodoméstico sea accesible
para llevar a cabo la reparación sin tener que realizar gastos especiales. En estas condiciones, se aplican las
reglamentaciones locales. Las piezas reemplazadas pasarán a ser propiedad de IKEA.
¿Qué hará IKEA para corregir el problema?
El Prestador de servicios designado por IKEA examinará el producto y decidirá, por su propia discreción, si está
cubierto en virtud de esta garantía. Si se considera cubierto, el Prestador de servicios de IKEA o su asociado
autorizado a través de sus propios centros de servicio, a su propia discreción, reparará el producto defectuoso o lo
sustituirá con el mismo producto o un producto comparable.
¿Qué no está cubierto en virtud de esta garantía?
• Desgaste por uso normal.
• Daños premeditados o por negligencia, daños causados por la inobservancia de las instrucciones de uso,
instalación incorrecta, conexión al voltaje inapropiado, daños causados por reacciones químicas o
electromecánicas, óxido, corrosión o daños por humedad, incluidos sin ninguna limitación, los daños causados por
el exceso de cal en el suministro de agua y los daños causados por condiciones ambientales anómalas.
• Piezas consumibles incluidas las baterías y lámparas.
• Partes no funcionales y decorativas que no afectan el uso normal del electrodoméstico, incluidos raspones y
posibles diferencias de color.
• Daños accidentales causados por objetos o sustancias extrañas y limpieza o desbloqueo de filtros, sistemas de
drenaje o gavetas de jabón.
• Daños a las siguientes partes: vitrocerámica, accesorios, canastas para loza y cubiertos, tubos de alimentación y
drenaje, juntas, lámparas y cubiertas de lámparas, pantallas, perillas, carcasas y piezas de las carcasas. Salvo que
se pueda probar que dichos daños hubiesen sido causados por fallas del proceso de producción.
• Casos en los que no se pudo encontrar ninguna falla durante la visita de un técnico.
• Reparaciones no efectuadas por nuestros prestadores de servicios designados y/o asociados contractuales de
servicios autorizados o cuando no se han utilizado piezas originales.
• Reparaciones causadas por instalaciones defectuosas o que no cumplen con las especificaciones.
• El uso del electrodoméstico en entornos no domésticos, es decir, uso profesional.
• Daños causados durante el transporte. Si un cliente transporta el producto a su hogar u otra dirección, IKEA no
será responsable por los daños que puedan ocurrir durante el transporte. Sin embargo, si IKEA entrega el producto
en la dirección de entrega del cliente, el daño al producto que ocurra durante esta entrega, será cubierto por IKEA.
• El costo por efectuar la instalación inicial del electrodoméstico IKEA. Sin embargo, si un Prestador de servicios
designado por IKEA o su asociado autorizado para la prestación de servicios, repara o reemplaza el
electrodoméstico en virtud de los términos de esta garantía, el Prestador de servicios designado o su asociado
autorizado para la prestación de servicios, reinstalará el electrodoméstico reparado o instalará el reemplazo, si fuese
necesario.
15

ES
GARANTÍA LIMITADA IKEA
El equipo especializado de POSVENTA para los electrodomésticos IKEA
No dude en contactar al Prestador de servicios de posventa designado por IKEA para:
• realizar una solicitud de servicio en virtud de esta garantía;
• aclarar dudas sobre la instalación del electrodoméstico IKEA en los muebles especiales de cocina de IKEA;
• aclarar dudas sobre las funciones de los electrodomésticos IKEA. Para poder garantizarle el mejor servicio de
asistencia posible, lea atentamente las Instrucciones de montaje y/o el Manual del usuario antes de contactarnos.
¿Cómo contactarnos cuando necesite nuestros servicios?
Para poder proporcionarle un servicio más ágil, recomendamos usar los números de teléfono específicos que se
indican en este manual. Remítase siempre a los números indicados en el folleto del electrodoméstico para el que
necesite asistencia.
También remítase siempre al código del artículo de IKEA (código de 8 dígitos) que aparece en la placa que contiene
las especificaciones de su electrodoméstico.
¡CONSERVE EL RECIBO DE COMPRA!
Este recibo es la prueba de su compra y se necesita para poder aplicar la garantía. El recibo de compra también
informa la descripción y la referencia del artículo (código de 8 dígitos) de cada uno de los electrodomésticos que ha
adquirido.
¿Necesita más ayuda?
Para aclarar dudas adicionales no relacionadas con el proceso de posventa de sus electrodomésticos, póngase en
contacto con su centro de atención de llamadas del almacén IKEA más cercano. Le recomendamos leer atentamente
la documentación del electrodoméstico antes de contactarnos.
(833) 337-4006
8:30 am - 8:00 pm EST
l unes - v iernes
Número de teléfono:
Horario de apertura:
16
¿Cómo se aplica la legislación del país?
La garantía de IKEA le proporciona derechos legales específi cos y también puede tener otros derechos que varían
según el estado o la jurisdicción. No obstante estas condiciones no limitan de ninguna manera los derechos del
consumidor que se describen en la legislación local.
Zona de validez
En el caso de los electrodomésticos que se adquieran en los Estados Unidos o Canadá, o se trasladen a uno de los
países mencionados, los servicios en cuestión se prestarán dentro del esquema de las condiciones de la garantía que
son normales en el país especifi cado.
Una obligación de prestar los servicios en el esquema de la garantía solo existe si el electrodoméstico cumple y ha
sido instalado de acuerdo con:
• las especifi caciones técnicas del país en el que se realiza el reclamo en virtud de la garantía;
• las Instrucciones de montaje y la Información de seguridad del manual del usuario.

ffffFR
(a) N'essayez pas de faire fonctionner ce four avec la porte ouverte car le fonctionnement de la porte ouverte
peut exposition à l'énergie micro-ondes. Il est important de ne pas annuler ou altérer les verrouillages de
sécurité.
(b) Ne placez aucun objet entre la face avant du four et la porte et ne laissez pas de saleté ou de résidus de
s'accumulent sur les surfaces d'étanchéité.
(c) N'utilisez pas le four s'il est endommagé. Il est particulièrement important que la porte du four se ferme
correctement et qu'il n'y a aucun dommage aux éléments suivants: (1) porte (pliée), (2) charnières et
loquets (cassés ou desserrés), (3) joints de porte et surfaces d'étanchéité.
(D) Le four ne doit pas être réglé ou réparé par quiconque, sauf par un personnel de service qualifié.
PRÉCAUTIONS POUR ÉVITER L'EXPOSITION POSSIBLE
À UNE ÉNERGIE MICRO-ONDES EXCESSIVE
17
Important Mesures de Sécurité. . . . . . . . . . . . . . . . . . . . . . .11
INSTRUCTIONS DE MONTAGE . . . . . . . . . . . . . . . . . . . . . . . 19
GARANTIE LIMITÉE IKEA. . . . . . . . . . . . . . . . . . . . . . . . . . . 22
CONTENU

• IMPORTANT – Conservez ces instructions pour
l'usage de l'inspecteur local.
• IMPORTANT – Observez tous les codes et les
ordonnances en vigueur.
• Remarque à l'attention de l'installateur
– Assurez-vous de laisser ces instructions au
consommateur.
• Remarque à l'attention du consommateur –
Conservezcesinstructionspourréférencefuture.
• Niveau de compétence - L'installation de cet
appareilnécessitedescompétencesmécaniqueset
électriquesdebase.
Lisez toutes les instructions suivantes
attentivement.
• Uneinstallationcorrecteestdelaresponsabilitéde
l'installateur.
• Unedéfaillanceduproduitdueàunemauvaise
installation n'est pas couverte par la garantie.
• Débranchezlefouràmicro-ondesavantd'essayer
d'installer ce kit.
• Étantdonnéquelekitcomprenddespièces
métalliques,ilfautfairepreuvedeprudencelorsde
lamanipulationetdel'installationand'évitertout
risque de blessure.
• Neretirezpaslesétiquettes,lesavertissements
oulesplaquesapposésdefaçonpermanentesurle
produit. Cela peut annuler la garantie.
AVERTISSEMENT – Avant de commencer
l'installation,éteignezlepanneaudeservice
etverrouillez-lepouréviterd'êtreallumé
accidentellement.
Lorsqueleservicenepeutpasêtreverrouillé,xez
solidementundispositifd'avertissementproéminent,
telqu'uneétiquette,surlepanneaudeservice.
Avant d'installer le conduit d'évacuation,
vériez que le sol est de niveau. La bulle de
niveau doit être à égale distance des lignes de
niveau.
CE KIT INTÉGRÉ EST CONÇU POUR ÊTRE UTILISÉ
UNIQUEMENT AVEC LES FOURS À MICRO-ONDES
AVANT DE COMMENCER
POUR VOTRE SÉCURITÉ:
IMPORTANT
IMPORTANT-VEUILLEZ LIRE
ET SUIVRE
FR
Appel de service:(833) 337-4006
LIRE ATTENTIVEMENT.
CONSERVEZ CES INSTRUCTIONS.
DES QUESTIONS?
18
IKEA HUVUDSAKLIG SPÉCIFIANT LE KIT INTÉGRÉ

PIÈCES INCLUSES DANS LE KIT
1.Assemblageducadreavant-QTE1
2.Conduitd’echappement-QTE1
Raildemontageinférieur-QTE2
3.VisA-QTE11+3extra
4.VisB-QTE4+2extra
CHOISIR UN EMPLACEMENT POUR
VOTRE FOUR À MICROONDES SI
INTÉGRÉ
Lekitdenitionintégréepermetd'installerlesmicro-
ondesénuméréesci-dessousdansunearmoireouun
mur,seulouau-dessusd'unfourmuralélectrique*.
Modèles à micro-ondes:
Voirl'illustration1pourl'emplacementappropriéet
pour la construction au-dessus d'un four mural. Suivez
vousconstruisezsurunfourmural,assurez-vousquele
dégagemententrelefourmuraletlefouràmicro-ondes
est d'au moins 3 pouces. Voir l'illustration 2.
*REMARQUE:
Lekitdegarnitureetlefouràmicro-ondesne
peuventêtreintégrésquesurunmuràcavité
uniqueautonettoyantounonauto-nettoyant.
A RMOIRE OU MOULAGE MUR
Dimensions de découpe (Voir illustration 3)
Hauteur (A)
Minimum 16 3/4" (42.5 cm)
Minimum 17" (43.2 cm)
Hauteur (B)
Minimum 24 3/4" (62.9 cm)
Minimum 25" ( 63.5 cm)
Minimum
Minimum 2 " (50.8 cm)
Illustration 1
Illustratio 2
Dimensionsdukitdenition
Hauteur 18" (458mm)
Largeur 30" (762mm)
Profondeur 1 1/2" (38.9cm)
Avant d'installer le conduit d'évacuation,
vériez que le sol est de niveau. La bulle de
niveau doit être à égale distance des lignes de
niveau.
IMPORTANT
FR
104.621.61 104.660.03
904.621.62 904.660.04
attentivement les instructions de montage du four
INSTRUCTIONS DE MONTAGE
19
muraletlesinstructionsdukitintégréd' .Si
IKEA
0

Illustration 3
SORTIE ÉLECTRIQUE
LasortienedoitPASêtredanslazoneombréecomme
indiquésurl'illustration3
NOTE 1:
Leplancherd’ouverturedevraitêtreconstruiten
contreplaquéassezsolidepoursupporterlepoidsdu
four et la charge au sol (environ 100 livres). Le sol doit
êtreàniveaupourlebonfonctionnementdufour.
Assurez-vousdevérierlecodedubâtimentlocal,
carilpeutêtrenécessaired'entourerl'ouverturede
cloisonlatérale,deplafondetarrière.Pourunbon
fonctionnementdufour,l'enceinten’estpasnecessaire.
Illustration 4
Tornillo A
Ligne centrale
ENSEMBLE DE CONDUIT
D'ÉCHAPPEMENT
1. Dessinez une ligne centrale sur le sol. Placez le
conduitd'évacuationdansl'ouverture.Lorsque
l'assemblageduconduitd'évacuationestplace
correctementdansl'ouverture,lalignecentraleest
aumilieudel'assemblageduconduitd'évacuation.
Voir l'illustration 4.
2.Fixezl'assemblageduconduitd'évacuationavecles
trois vis A.
IMPORTANT: Sixezlesvisdansletrouextérieur.
3piècessontnécessairespourl'assemblagedu
conduitd'échappement.
Rail de montage inférieur
Retournez le micro-ondes pour que voir le fond du
four.Fixezleraildemontageinférieursurlefourà
l'aidedequatreVISA.Reportez-vousàl'illustration5.
REMARQUE:Assurez-vousd'alignerlestrous(indiqués
par«36»duraildemontageinférieuretlestrous
(marqués«36»)delaplaqueinférieuredufouràmicro-
ondes.
Illustration 5
Avant d'installer le conduit d'évacuation,
vériez que le sol est de niveau. La bulle de
niveau doit être à égale distance des lignes de
niveau.
IMPORTANT
FR
INSTRUCTIONS DE MONTAGE
20
This manual suits for next models
1
Table of contents
Languages:
Other IKEA Microwave Oven manuals
Popular Microwave Oven manuals by other brands

GE
GE JNM3163 installation instructions

Panasonic
Panasonic NN-SG616B owner's manual

Siemens
Siemens HF25M6L2B instruction manual

Metos
Metos MEGA P180M30 Installation and operation manual

Samsung
Samsung CE287AST Owner's instructions and cooking guide

Hotpoint Ariston
Hotpoint Ariston MWK 434.1 X/HA Instructions for use