ENGLISH 4
Your safety and that of others are very
important
This manual and the appliance itself provide
important safety warnings, to be read and
observed at all times.
This is the danger symbol, pertaining to
safety, which alerts users to potential
risks to themselves and others.
All safety warnings are preceded by the
danger symbol and the following terms:
DANGER! Indicates a hazardous
situation which, if not avoided, will
cause serious injury.
WARNING! Indicates a hazardous
situation which, if not avoided, could
cause serious injury.
All safety warnings give specic details of
the potential risk present and indicate how
to reduce risk of injury, damage and electric
shock resulting from improper use of the
appliance. Carefully observe the following
instructions:
- The appliance must be disconnected
from the power supply before carrying
out any installation work.
- Electrical installation and maintenance
must be carried out by a qualied
technician, in compliance with the
manufacturer’s instructions and local
safety regulations. Do not repair or
replace any part of the appliance unless
specically stated in the user manual.
- Regulations require that the appliance is
earthed.
- The power cable must be long enough
for connecting the appliance, once
tted in its housing, to the power supply
socket.
- For installation to comply with current
safety regulations, an all-pole
disconnect switch with minimum contact
gap of 3 mm must be utilized.
- Do not use multiple plug adapters or
extension leads.
- Do not pull the power supply cable in
order to unplug the appliance.
- The electrical components must not be
accessible to the user after installation.
- Do not touch the appliance with any wet
part of the body and do not operate it
when barefoot.
- This appliance is designed solely
for use as a domestic appliance for
cooking food. No other type of use is
permitted (e.g.: heating rooms). The
Manufacturer declines all responsibility
for inappropriate use or incorrect setting
of the controls.
- The appliance is not intended for use
by persons (including children) with any
physical, sensory or mental impairment,
or without experience and knowledge
of the appliance, unless supervised or
previously instructed in its use by those
responsible for their safety.
- The accessible parts of the appliance
may become very hot during use. Young
children should be kept away from the
appliance and supervised to ensure that
they do not play with it.
Safetyinformation 4
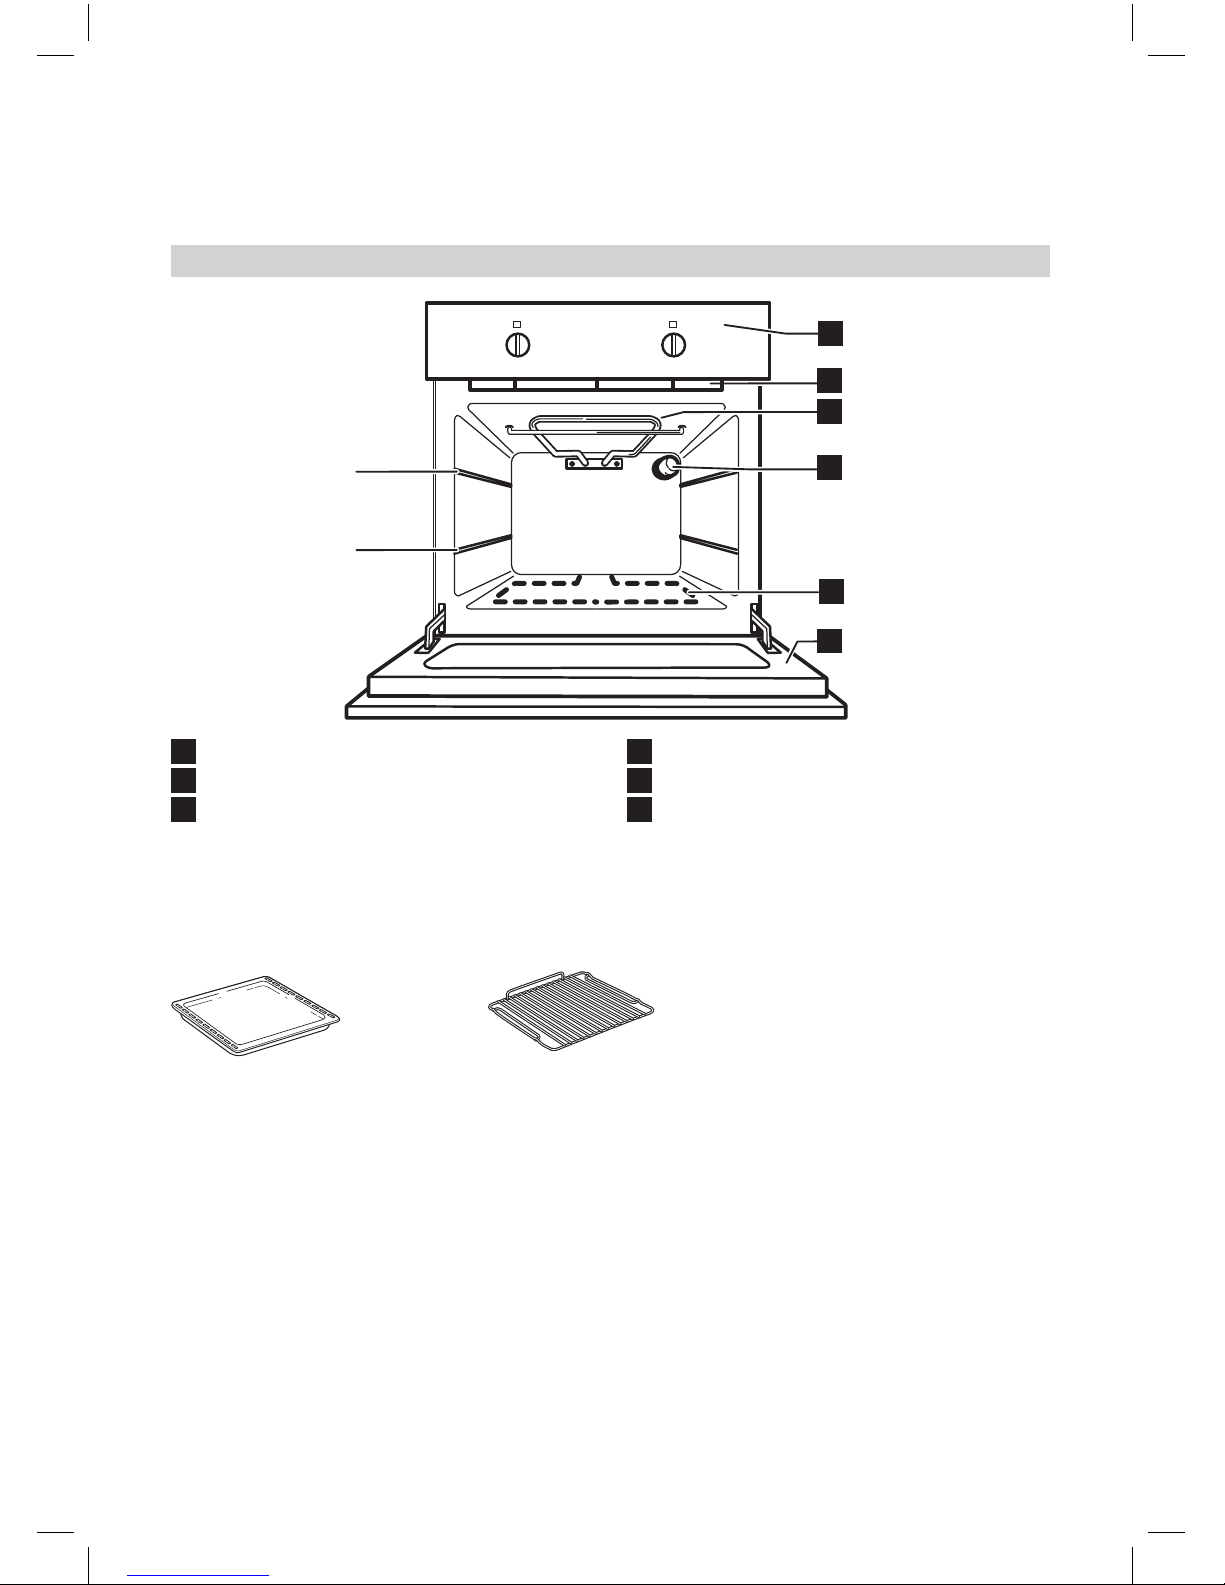
Productdescription 6
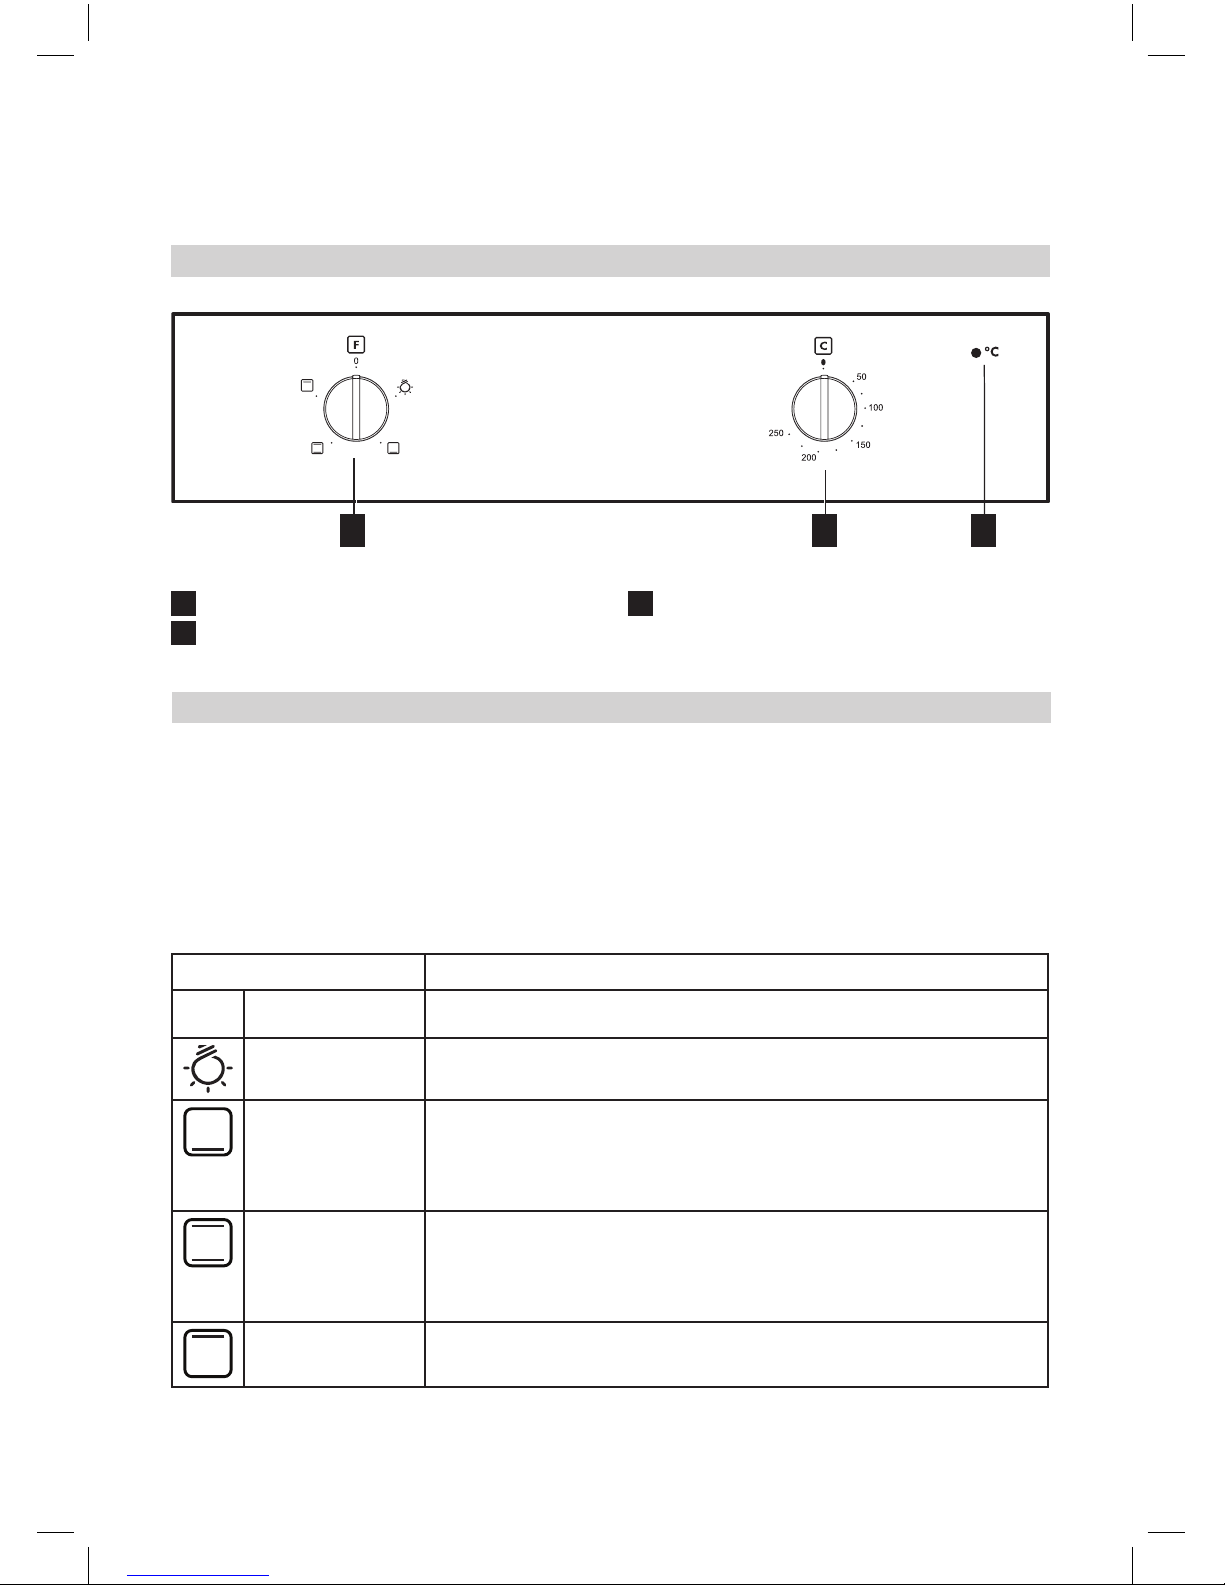
Controlpanel 7
Dailyuse 7
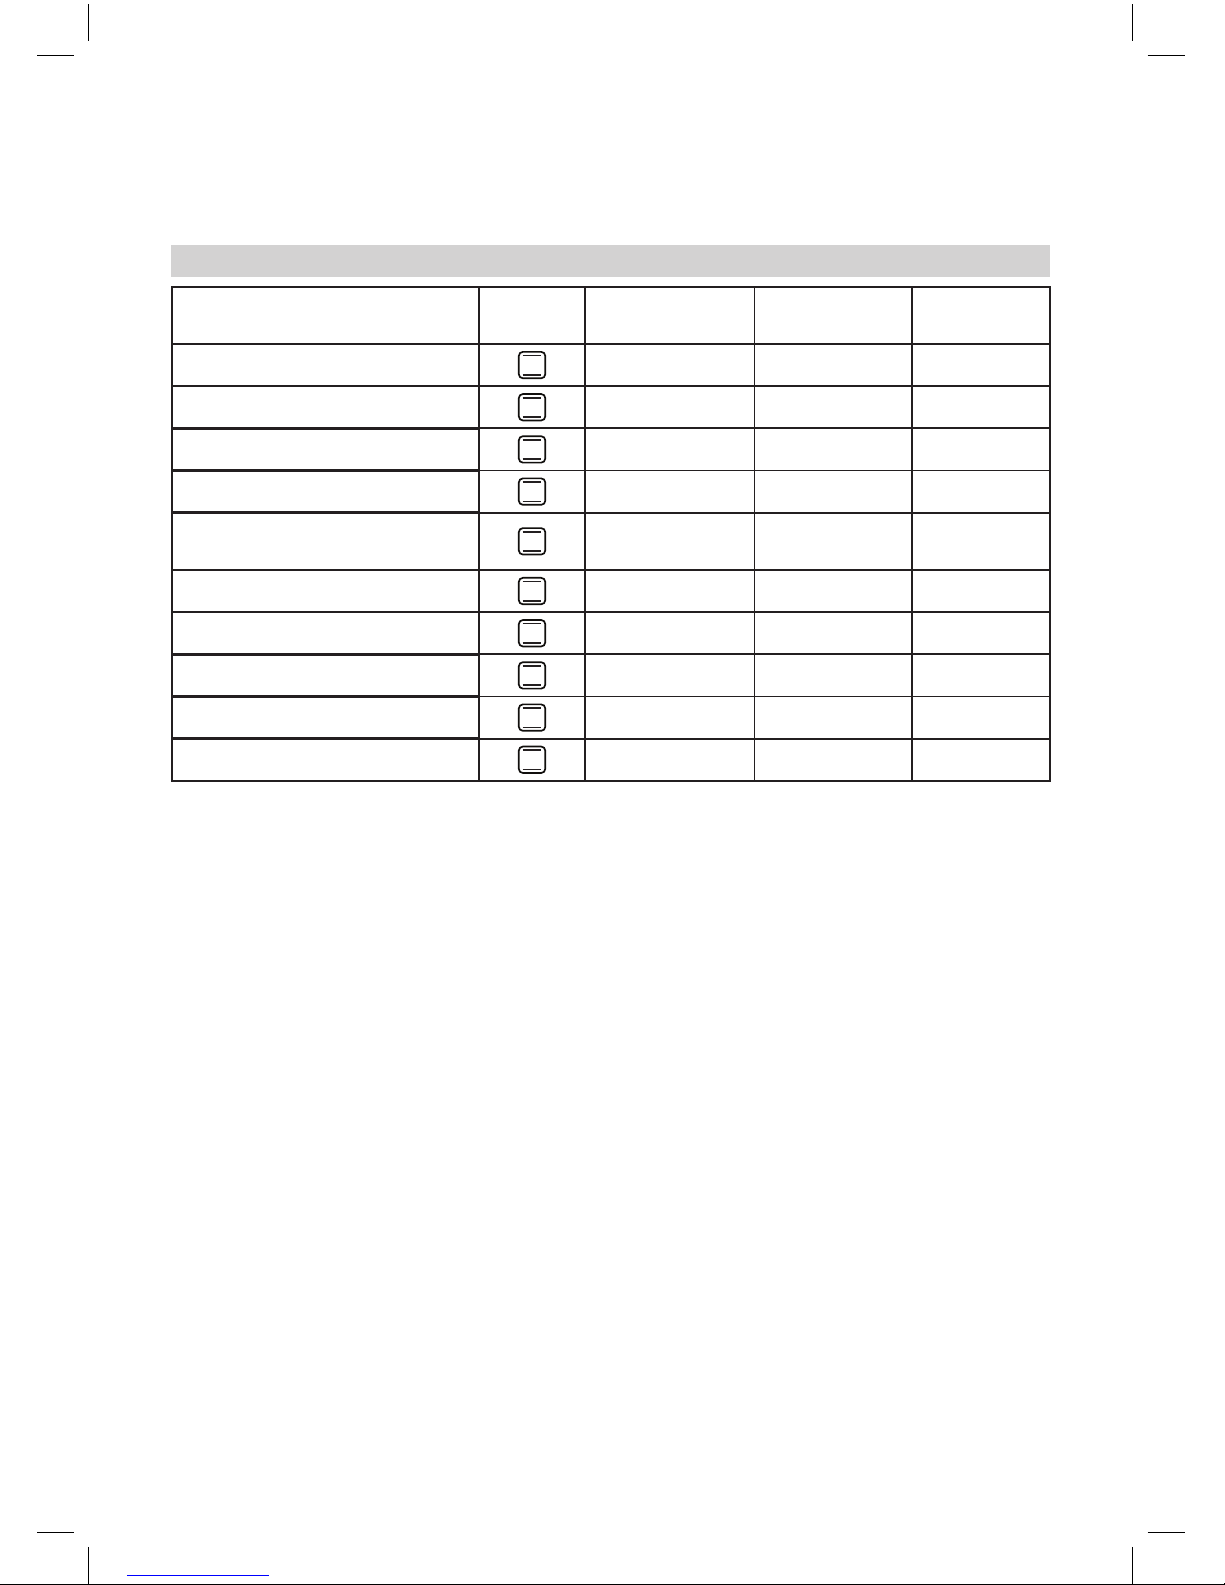
Cookingtables 8
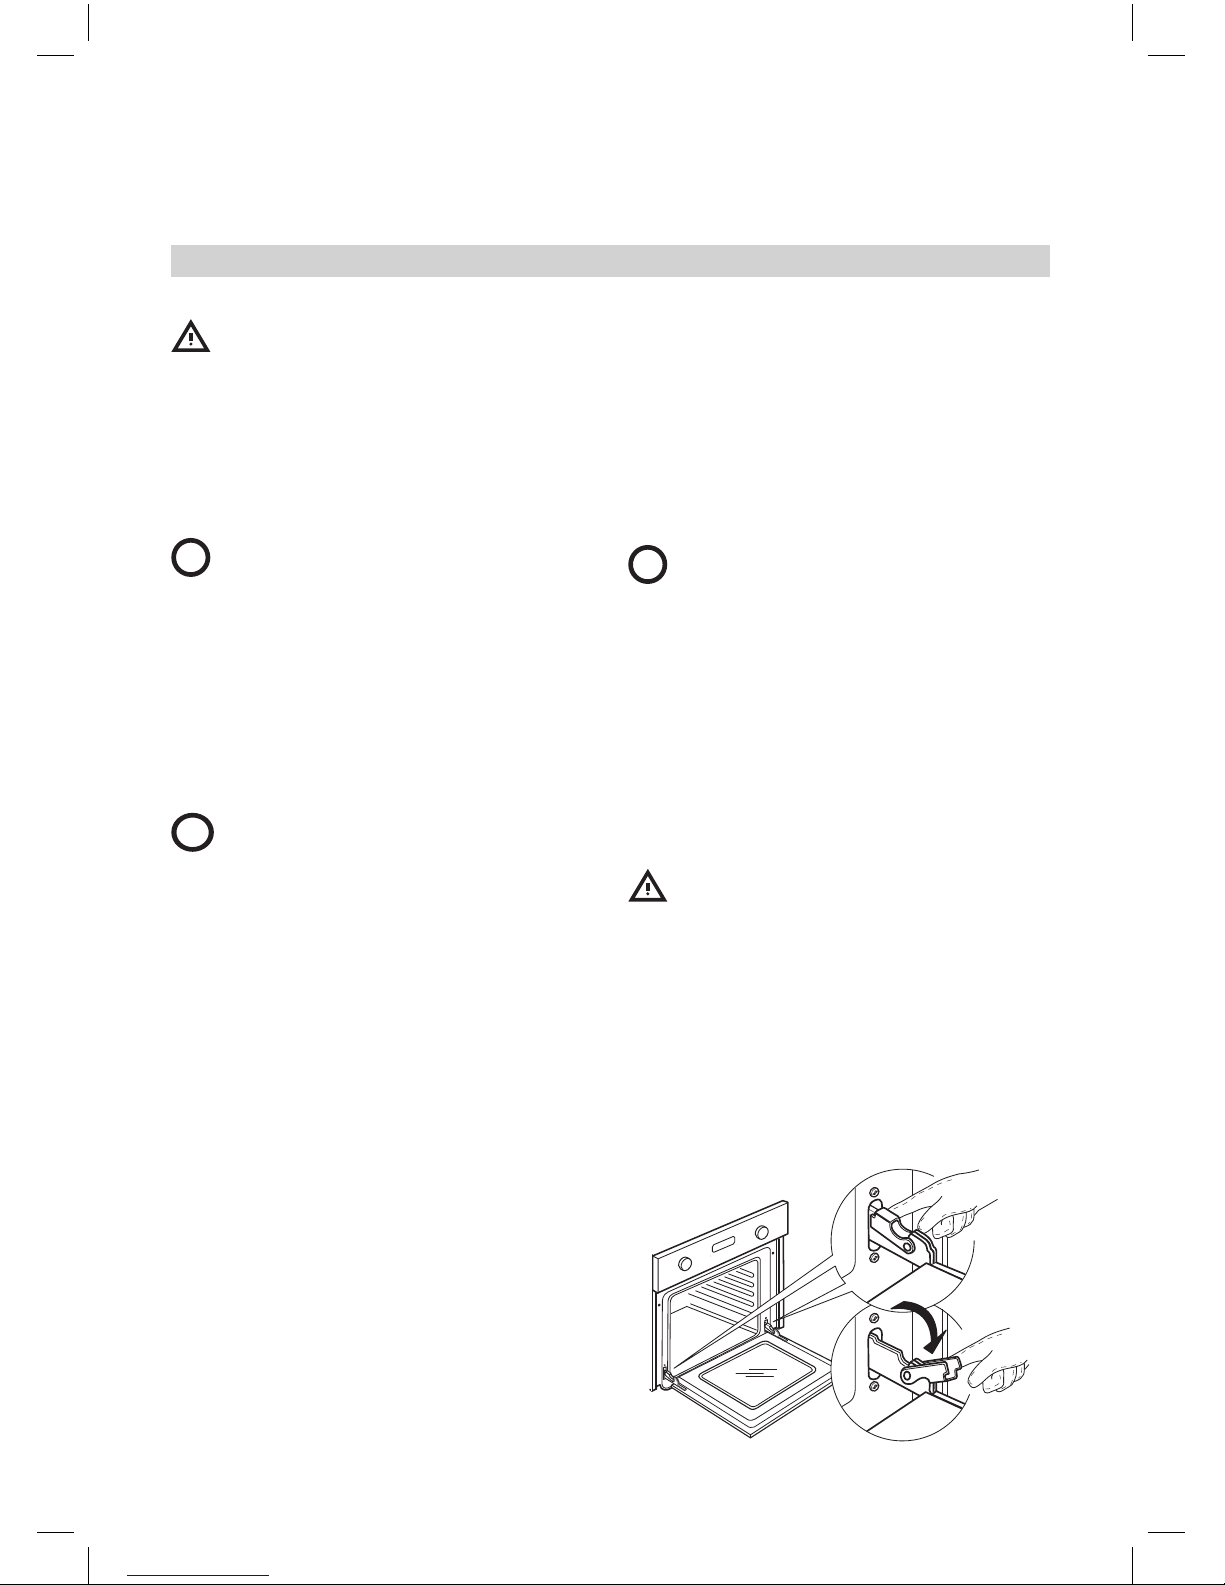
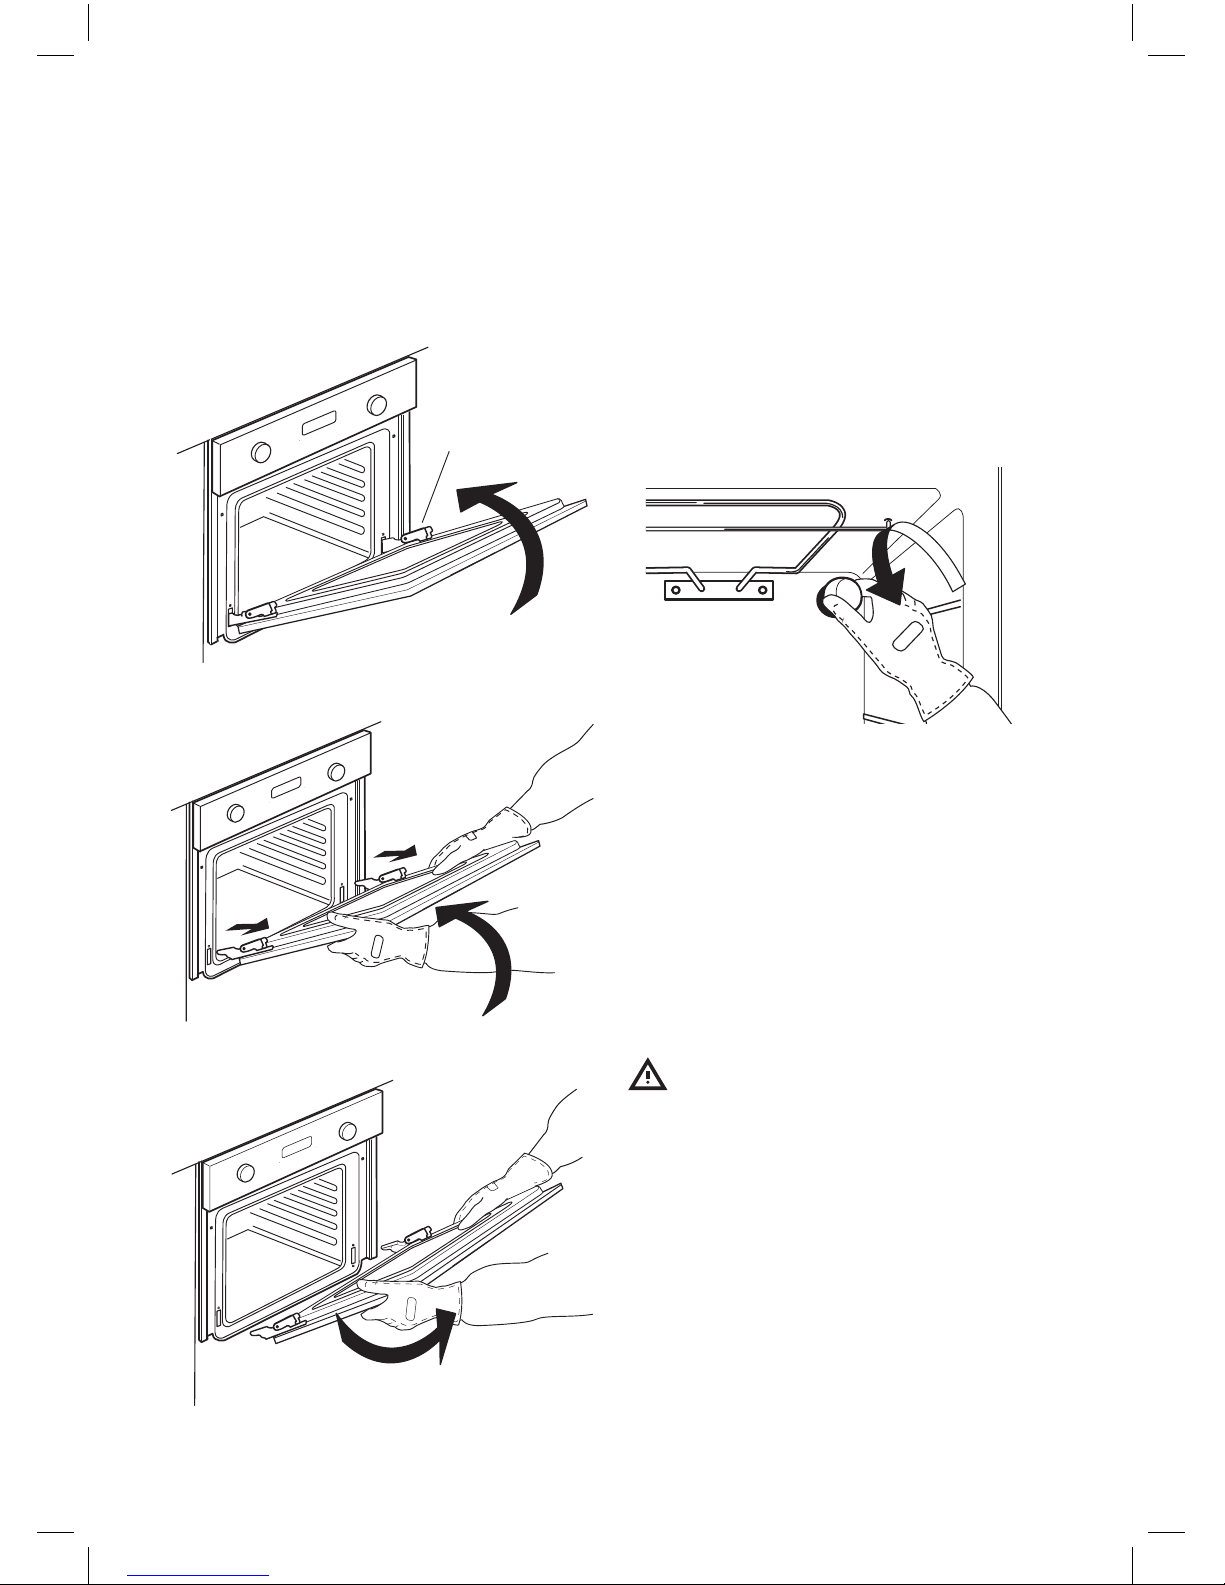
Cleaningandmaintenance 9
Whattodoif... 12
Technicaldata 13
Installation 14
Electricalconnection 16
Environmentalconcerns 16
IKEAGUARANTEE 17
SafetyInformation
Tableofcontents