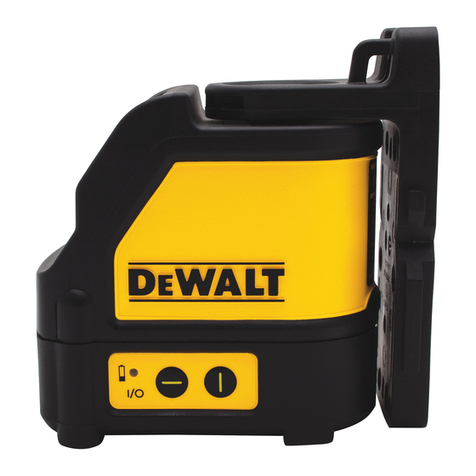
iKOVWUK B1-12 User manual

LASER LEVEL
OFF
B1-12
INSTRUCTIONS
WWW.IKOVWUK.COM

10
9
8
1 3 2
4
5
5
5
6
OFF
7
1- Horizontal Line
2- Vertical Line
3- Manual Mode Button
4- Pulse Mode Indicator
5- Emission Port for Laser Beam
6- ON/OFF Switch
7- Charging Port
8- Battery Pack
9- Battery Compartment Cover
10- Holder Mounting Hole

OFF
1212
ON OFF
Fig.A1 Fig.A2
Fig.B1 .B2
Fig
Fig.C1 Fig.C2
Fig.C3 Fig.D
OFF
OFF
OFF
OFF
1

a
Fig.E1 Fig.E2
Fig.E3 Fig.E4
Fig.E5 Fig.F1
Fig.F2 Fig.F3
2

OPERATION INSTRUTIONS
NOTE: Before using the tool, read the
instruction book carefully.
INTENDED USE
The laser level is intended for determining and checking
horizontal and vertical lines.
ASSEMBLY
1. INSERTING/REPLACING THE BATTERIES
(SEE FIG. A1, A2)
NOTE: Protect the tool against moisture.
To insert, open the battery compartment cover and
insert the battery pack into the battery compartment.
To remove, open the battery compartment cover
and take the battery pack out from the battery
compartment.
BEFORE PUTTING INTO
OPERATION
1. CHARGING THE BATTERY PACK
WARNING: The charger and battery pack are
specifically designed to work together so do
not attempt to use any other devices.
NOTE: Your battery pack is only partially charged before
shipment and you must fully charge once before use.
Charging procedure (SEE FIG. B1, B2)
1) Plug charger plug into a suitable power outlet. The light
will illuminate green.
2) Open the soft rubber cover to expose the battery
charging socket. Plug the charger to the laser level (battery
pack should be installed in). The light will turn to red to
indicated the charging process has started.
3) When charging is completed, the light will turn to green.
Unplug the charger from the power outlet and then unplug
from the laser level.
Charging Indicator
CHARGER INDICATOR STATUS
Red on Charging
Green on Fully Charged
WARNING! Recharge is not recommended for
more than 24 hours after each use.
WARNING! Do not charge at extremely high
or low temperatures. Do not charge at a
temperature below 0°, otherwise the battery life
will be reduced. The tool and power adapter will
heat slightly when charging.
CAUTION! Please charge and discharge the
battery periodically to extend the service life
of battery when it has not been used for long time.
CAUTION! The battery equipped has been
tested by our strict internal quality control
process and inspection standards. Do not
disassemble the battery or replace with other
brands, so as to avoid possible dangers such as
electric shock, explosion and burn. The battery
equipped enjoys the quality assurance. Any repair
or disassemble required on battery should be
performed only by authorized service personnel or
after-sales department.
CAUTION! Some attenuation will happen
normally in the Li-ion battery after long time
working such as two years. Any questions, please
contact local qualified service center or after-sales
department timely.
OPERATION
WARNING: Protect the measuring tool against
moisture and direct sun light.
WARNING: Do not subject the measuring tool
to extreme temperatures or variations in
temperature. As an example, do not leave it in
vehicles for long time. In case of large variations in
temperature, allow the measuring tool to adjust to
the ambient temperature before putting it into
operation. In case of extreme temperatures or
variations in temperature, the accuracy of the
measuring tool can be impaired.
WARNING: Avoid heavy impact or falling of the
measuring tool. After heavy exterior impact
on the measuring tool, an accuracy check should
always be carried out before continuing to work.
WARNING: Switch the measuring tool off
during transport.
WARNING: Do not leave the switched on tool
unattended. Switch the tool off after each
use.
1. SWITCHING ON AND OFF
1) Auto-leveling mode (See Fig. C1, C2)
NOTE: In auto-leveling mode, the auto-leveling mode
switch (6) is used as on/off switch, while the on/off
button (3) cannot be used to switch on or off the tool.
slide the auto-leveling
mode switch to its right side (the front emission port is
pointing away from you), to turn on the laser level. The
laser level enters into auto-leveling mode immediately.
3

To switch off, slide the auto-leveling mode switch to its
left side (the front emission port is pointing away from
you) to turn off the laser level.
2) Manual mode (See Fig. C3)
Press the manual mode button and hold it for about
3 seconds to turn on the laser level. The laser level
enters into manual mode immediately.(Only works
when the level is OFF)
To switch off, press the manual mode button again
and hold it for about 3 seconds to turn the level off.
NOTE: You can change from manual mode to auto-
leveling mode easily. Just slide the auto-leveling mode
switch to its Right side (the front emission port is pointing
away from you), and the laser level will enter into auto-
leveling mode immediately. You should then slide the
auto-leveling mode switch to its left side (the front
emission port is pointing away from you) to turn off the
laser level afterwards. The on/off switch cannot be used
to switch on or off the tool in auto-leveling mode.
NOTE: In auto-leveling mode, the manual mode button
can be used to adjust the luminous intensity of the
laser beam.
Details refer to ADJUSTING LASER INTENSITY.
2. AUTO-LEVELING MODE (SEE FIG. D)
Follow the switching on steps in Auto-leveling mode
part in SWITCHING ON AND OFF section, the laser level
enters into auto-leveling mode. 4 green horizontal laser
beams will be sent out from the emission port of laser
beam (Top) afterwards. The indicator light will illuminate
green and keep on lighting to indicate the laser level is
now in auto-leveling mode.
After switching on, the auto-leveling function
automatically compensates irregularities within the self-
leveling range of ±3°. i. e. if the surface where place
the level is not smooth and the inclined angle is more
than 3°, then an alarm will be triggered. The indicator
light will flash red, and the sending green laser beam
will flash also. At the same time, the laser level will
sound “bleep” continuously. You should adjust the tool
to a level position as soon as the alarm is triggered. The
sound and the light will not stop until the tool is in a level
position.
3. MANUAL MODE (SEE FIG. C3)
Follow the switching on steps in Manual mode part in
SWITCHING ON AND OFF section, the laser level enters
into manual mode. 4 green horizontal laser beams
will send out from the emission port of laser beam
(Top) afterwards. The indicator light will flash green to
indicate the laser level is now in manual mode.
In manual mode, you can hold the laser level freely in
your hand or place it on an inclined surface. You can use
the tool to send out inclined line. The laser beam does
not need to run vertical to each other.
WARNING: In manual mode, the laser beam
could not be used as horizontal or vertical
reference.
NOTE: You can change from manual mode to auto-leveling
mode easily. Just slide the auto-leveling mode switch to
its right side (the front emission port is pointing away from
you), and the laser level will enter into auto-leveling mode
immediately.
4. OPERATING MODE
The laser level has 5 operation modes with different line
patterns. Totally 12 laser beams will be sent out from 3
emission ports (Top, Front and Side). Each emission port
will send 4 laser beams which can make up a square.
You can choose the required mode accordingly.
1) 4 lines (making up 1 horizontal square) (See Fig.
E1)
After switching on, 4 green horizontal laser beams will
be sent out from the emission port (Top) and make up a
horizontal square.
2) 4 lines (making up 1 vertical square facing
forward) (See Fig. E2)
Press the operating mode button (“H/V” key) once each,
the emission port (Top) will light off, and 4 green laser
beams will be sent out from the emission port (Front)
and make up a vertical square facing frontward.
3) 4 lines (making up 1 vertical square facing to the
side) (See Fig. E3)
Press the operating mode button (“V” key) once again,
the emission port (Front) will light off, and 4 green laser
beams will be sent out from the emission port (Side) and
make up a vertical square facing to the side.
4) 8 lines (making up 2 vertical squares crossed
each other) (See Fig. E4)
Press the operating mode button ("H" key),
the vertical square facing to the side will keep on
illuminating, also 4 green laser beams will be sent out
from the emission port (Front) and make up a vertical
square facing frontward. The 2 vertical squares will
cross each other.
5) 12 lines (making up 1 horizontal square + 2
vertical squares crossed each other) (See Fig. E5)
Press the operating mode button ("H" key) again,
the 2 crossed vertical squares will keep on illuminating,
and 4 green horizontal laser beams will also
4

PRODUCT SAFETY
WARNING: This product can expose you to
chemicals including lead and Di(2-ethylhexyl)
phthalate (DEHP) which are known to the State of
California to cause cancer and birth defects or other
reproductive harm. For more information go to www.
P65Warnings.ca.gov.
SAFETY WARNING FOR YOUR
LASER
WARNING FOR CLASS II LASER
CAUTION--Laser radiation when open. DO NOT STARE
INTO BEAM
CAUTION--Laser radiation when open and interlock
defeated. DO NOT STARE INTO BEAM
LASER RADIATION--DO NOT STARE INTO BEAM
ADDITIONAL SAFETY WARNING
Do not stare directly at the laser beam. A hazard may exist
if you deliberately stare into the beam, please observe all
safety rules as follows:
1. The laser shall be used and maintained in accordance
with the manufacturer’s instructions.
2. Never aim the beam at any person or an object other than
the work piece.
3. Always ensure the laser beam is aimed at a sturdy work
piece without reflective surfaces, e.g. wood or rough-
coated surfaces are acceptable. Bright shiny reflective
sheet steel or similar is not suitable for laser applications
as the reflective surface may direct the laser beam back at
the operator.
4. Do not change the laser device with a different type. The
manufacturer or an authorized agent must carry out repairs.
5. CAUTION: Use of controls or adjustments other than
those specified herein may result in hazardous radiation
exposure.
6. CAUTION--The use of optical instruments with this
product will increase eye hazard.
SAVE THESE INSTRUCTIONS
SAFETY WARNINGS FOR
BATTERY PACK
a) Do not dismantle, open or shred battery pack.
b) Do not expose battery pack to heat or fire. Avoid
storage in direct sunlight.
be sent out from the emission port (Top) and make up
a horizontal square. Totally 12 lines are launching from
the 3 emission ports and make up 3 crossed squares (1
horizontal and 2 vertical squares).
All the laser beams run and cross at to each other a 90°
angle.
5. L-SHAPED HOLDER (SEE FIG. F1-F3)
This laser level is provided with an L-shaped holder
which offers a stable, height-adjustable support. The
two magnets on the holder can help to position the laser
level to vertical magnetic surface.
To install the L-shaped holder to the tool, first align the
screw of the lock knob (a) on the holder to the holder
mounting hole at the bottom of the tool. Then fasten the
holder to the tool by turning the lock knob (a) clockwise.
Directly place the L-shaped holder with the tool to the
vertical magnetic surface. You can change the height
at will.
6. LASER TARGET BOARD
The laser target board provided with the tool can
increase the visibility of the laser beam under
unfavorable conditions (e.g. outdoors with bright
sunlight) or at large distances.
The reflective part of the laser target board improves the
visibility of laser lines. The transparent part of the laser
target board helps for the visibility of the laser lines even
from the back of the laser target board.
7. ADJUSTING LASER INTENSITY
9. LOW BATTERY ALARM
An alarm will be triggered when the laser level is in a
low battery condition. The indicator light will turn to
red to indicate that you should charge the battery pack.
After that, the laser level will turn off automatically.
8.PULSE MODE
5
When you choose the weaker beam, it is in Pulse
mode. The indicator light will flash continuously in
Self-leveling Mode. The laser level does not have any
indication in Manual Mode, but the detector can still
work with line laser tools. The laser level is compatible
with most detectors.
When in Self-leveling mode, press the Manual mode
button once, the laser beam will become weaker.
Press the button once again, the laser beam will be
stronger again. You can choose to be weaker or
stronger accordingly. You can also use laser target
board as required.

c) Do not short-circuit a battery pack. Do not store
battery packs haphazardly in a box or drawer
where they may short-circuit each other or be
short-circuited by other metal objects. When
battery pack is not in use, keep it away from other
metal objects, like paper clips, coins, keys, nails,
screws or other small metal objects, that can make a
connection from one terminal to another. Shorting the
battery terminalstogether may cause burns or fire.
d) Do not remove battery pack from its original
packaging until required for use.
e) Do not subject battery pack to mechanical shock.
f) In the event of battery leaking, do not allow the
liquid to come in contact with the skin or eyes. If
contact has been made, wash the affected area
with copious amounts of water and seek medical
advice.
g) Observe the plus (+) and minus (–) marks on the
battery back and equipment and ensure correct
use.
h) Do not use any battery pack which is not designed
for use with the equipment.
i) Keep battery pack out of the reach of children.
j) Seek medical advice immediately if a cell or
battery has been swallowed.
k) Always purchase the battery pack recommended
by the device manufacturer for the equipment.
l) Keep battery pack clean and dry.
m) Wipe the battery pack terminals with a clean dry
cloth if they become dirty.
n) Battery pack needs to be charged before use.
Always use the correct charger and refer to the
manufacturer’s instructions or equipment manual
for proper charging instructions.
o) Do not leave battery pack on prolonged charge
when not in use.
p) After extended periods of storage, it may
be necessary to charge and discharge the
battery pack several times to obtain maximum
performance.
q) Battery pack gives its best performance when it
is operated at normal room temperature (20 °C ±
5 °C).
r) When disposing of battery packs, keep battery
packs of different electrochemical systems
separate from each other.
s) Recharge only with the charger specified by
iKOVWUK. Do not use any charger other than that
specifically provided for use with the equipment.
A charger that is suitable for one type of battery pack
may create a risk of fire when used with another battery
pack.
t) Retain the original product literature for future
reference.
u) Use only the battery pack in the application for
which it was intended.
v) Remove the battery pack from the equipment
when not in use.
w) Dispose of properly.
SAFETY WARNINGS FOR
BATTERY CHARGER
Information for radiated emission
This device complies with Part 15 of the FCC Rules.
Operation is subject to the following two conditions:
(1) This device may not cause harmful interference, and
(2) This device must accept any interference received,
including interference that may cause undesired operation.
Warning: Changes or modifications to this unit not
expressly approved by the party responsible for compliance
could void the user’s authority to operate the equipment.
- NOTE: This equipment has been tested and found to
comply with the limits for a Class B digital device, pursuant
to Part 15 of the FCC Rules.
These limits are designed to provide reasonable protection
against harmful interference in a residential installation. This
equipment generates, uses and can radiate radio frequency
energy and, if not installed and used in accordance with
the instructions, may cause harmful interference to radio
communications.
However, there is no guarantee that interference will not
occur in a particular installation. If this equipment does
cause harmful interference to radio or television reception,
which can be determined by turning the equipment off and
on, the user is encouraged to try to correct the interference
by one or more of the following measures:
•Reorient or relocate the receiving antenna.
•Increase the separation between the equipment and
receiver.
•Connect the equipment into an outlet on a circuit different
from that to which the receiver is connected.
•Consult the dealer or an experienced radio/TV technician
for help.
6

PACKAGE LIST
12 Lines Laser Level
Battery Pack
Battery Charger
Protective Bag
User Manual
Iron Sheet
Laser Target Board
Goggle
L - Shaped Holder
1
1
1
1
1
1
1
1
1
TECHNICAL DATA
Type B1-12
Nominal voltage 3.7V
Leveling accuracy ±1/8 inch at 33 feet
Wave length (nm) 520nm
Automatic leveling range ±3°
Working time 6.5 hours (12 line fully brights)
Laser type LD green/12-Line
Working range Radius 32.8 feet (indoor)
Laser class CLASS ll, <1mW
Operating temperature -10°C-45°C
Storage temperature -10°C-45°C
Protection class Class III
Battery capacity Li-ion 3.7V 5200mAh
Protection class for charger /II
Charger input 100-240V~50/60Hz, 0.2A
Charger output 5 V 1.5A
Charging time 3 hours
Weight 1.36 lbs
7

SYMBOLS
To reduce the risk of injury, user must
read instruction manual
Warning
Li-I on
Li-Ion battery, battery must be recycled
Do not burn
Batteries may enter water cycle if
disposed improperly, which can be
hazardous for ecosystem. Do not
dispose of waste batteries as unsorted
municipal waste.
MAINTENANCE
1. Store and transport the tool only in the supplied
protective case.
2. Keep the tool clean at all times.
3. Do not immerse the tool into water or other fluids.
4. Wipe off debris using a moist and soft cloth. Do not use
any cleaning agents or solvents.
5. Regularly clean the surfaces at the exit opening of the
laser in particular, and pay attention to any fluff of fibers.
6. If the tool should fail despite the care taken in
manufacturing and testing procedures, repair should be
carried out by an authorized after-sales service center.
7. While the product has not been used for long time, do
regular inspection on the battery. Please charge and
discharge the battery to extend the service life. When
the battery is low in capacity, charge it as soon as
possible.
8. Any debugging or repair required on this product should
be performed only by authorized service personnel.
9. Use only replacement parts and accessories
recommended by the manufacturer.
10. When the appliance is not in use, store it in a place out
of reach of children.
FCC PART 15
Supplier’s Declaration of Conformity
Product Description: Battery charger
Model Number: XH0500-1500WU
This device complies with part 15 of the FCC Rules.
Operation is subject to the following two conditions:
(1) This device may not cause harmful interference, and
(2) This device must accept any interference received,
including interference that may cause undesired
operation.
8

Table of contents

