of the meat while the fan moves
this heat around the oven.
Fan grilling eliminates the need
to turn food over during the
grilling process; however,
turning is optional depending on
the degree of browning desired.
When using this function make
sure that food is elevated to allow
the hot air to circulate around
the food. Food can be placed
on grill grid inside a grill tray
alternatively; meat can be placed
on a wire oven rack positioned
over an oven pan to make sure
any drips are caught.
ILVE TIP
■The oven door should always
be closed during hot air grilling.
■The temperature should be
set from 175 – 180º, this
range in temperature helps
prevent food from burning and
avoids splatter, minimising the
need for cleaning.
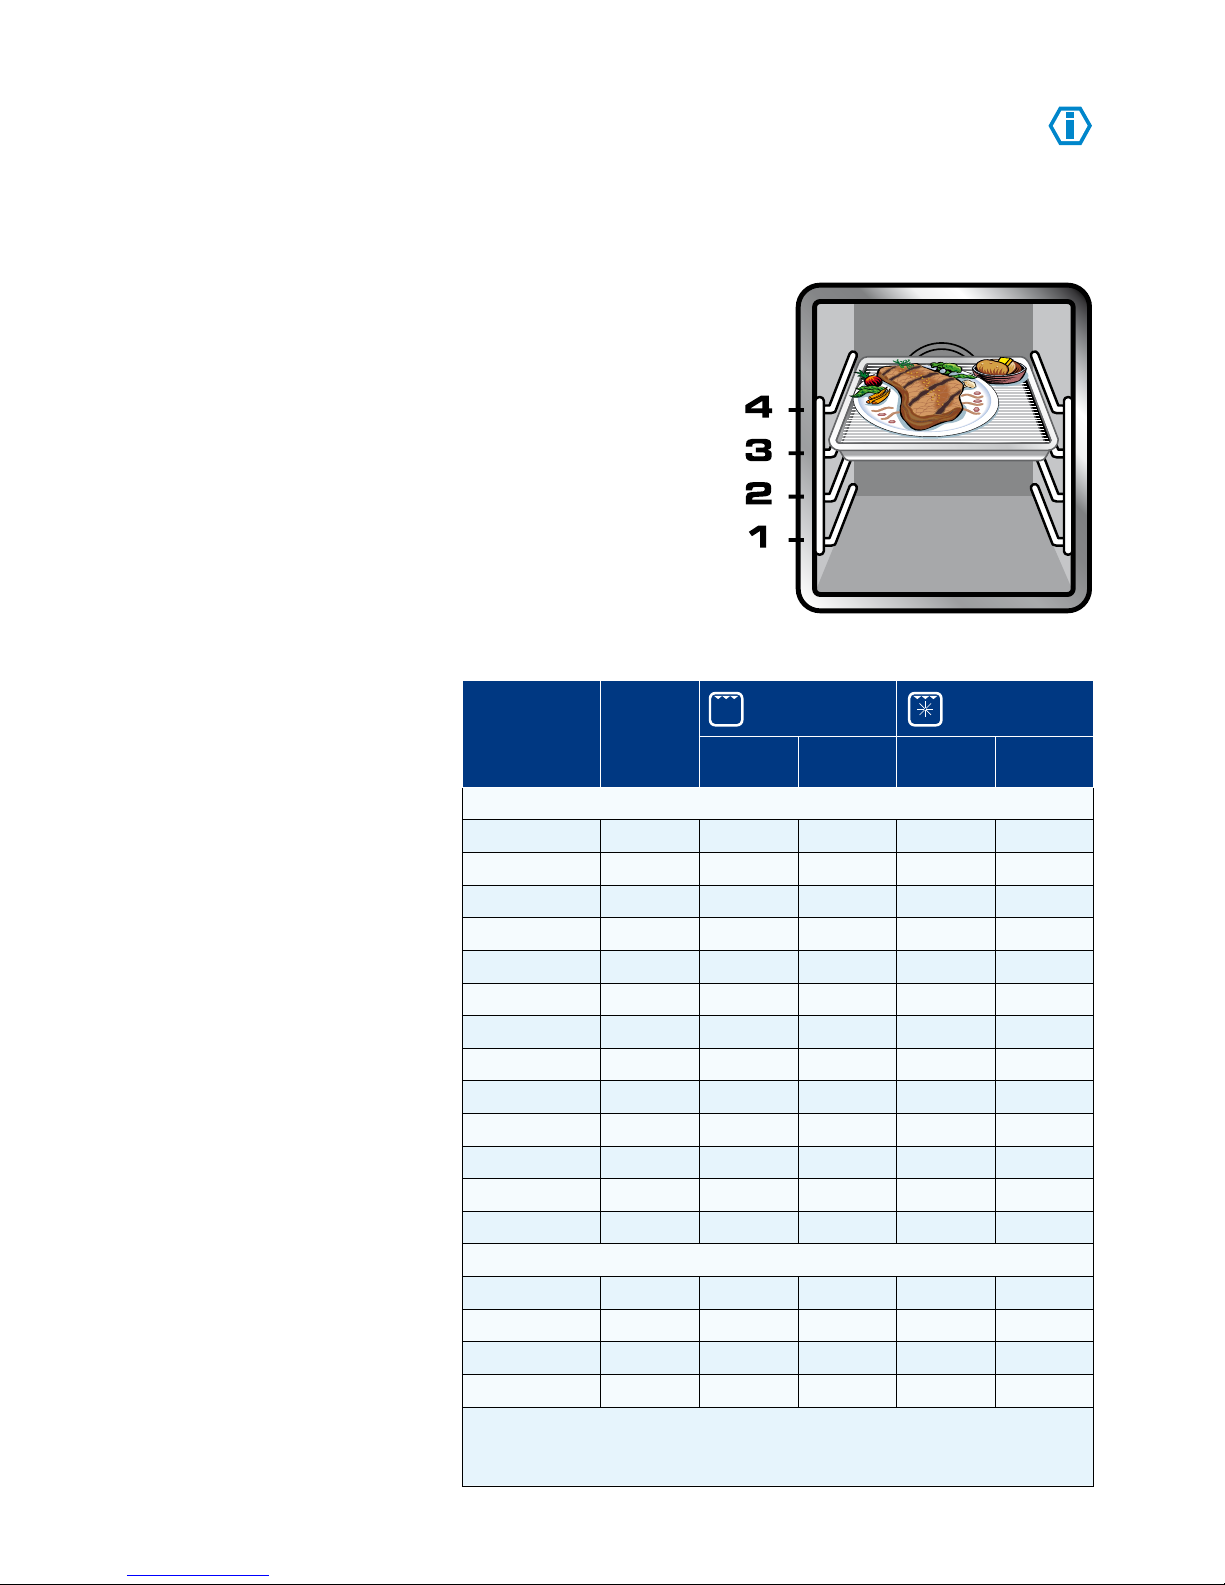
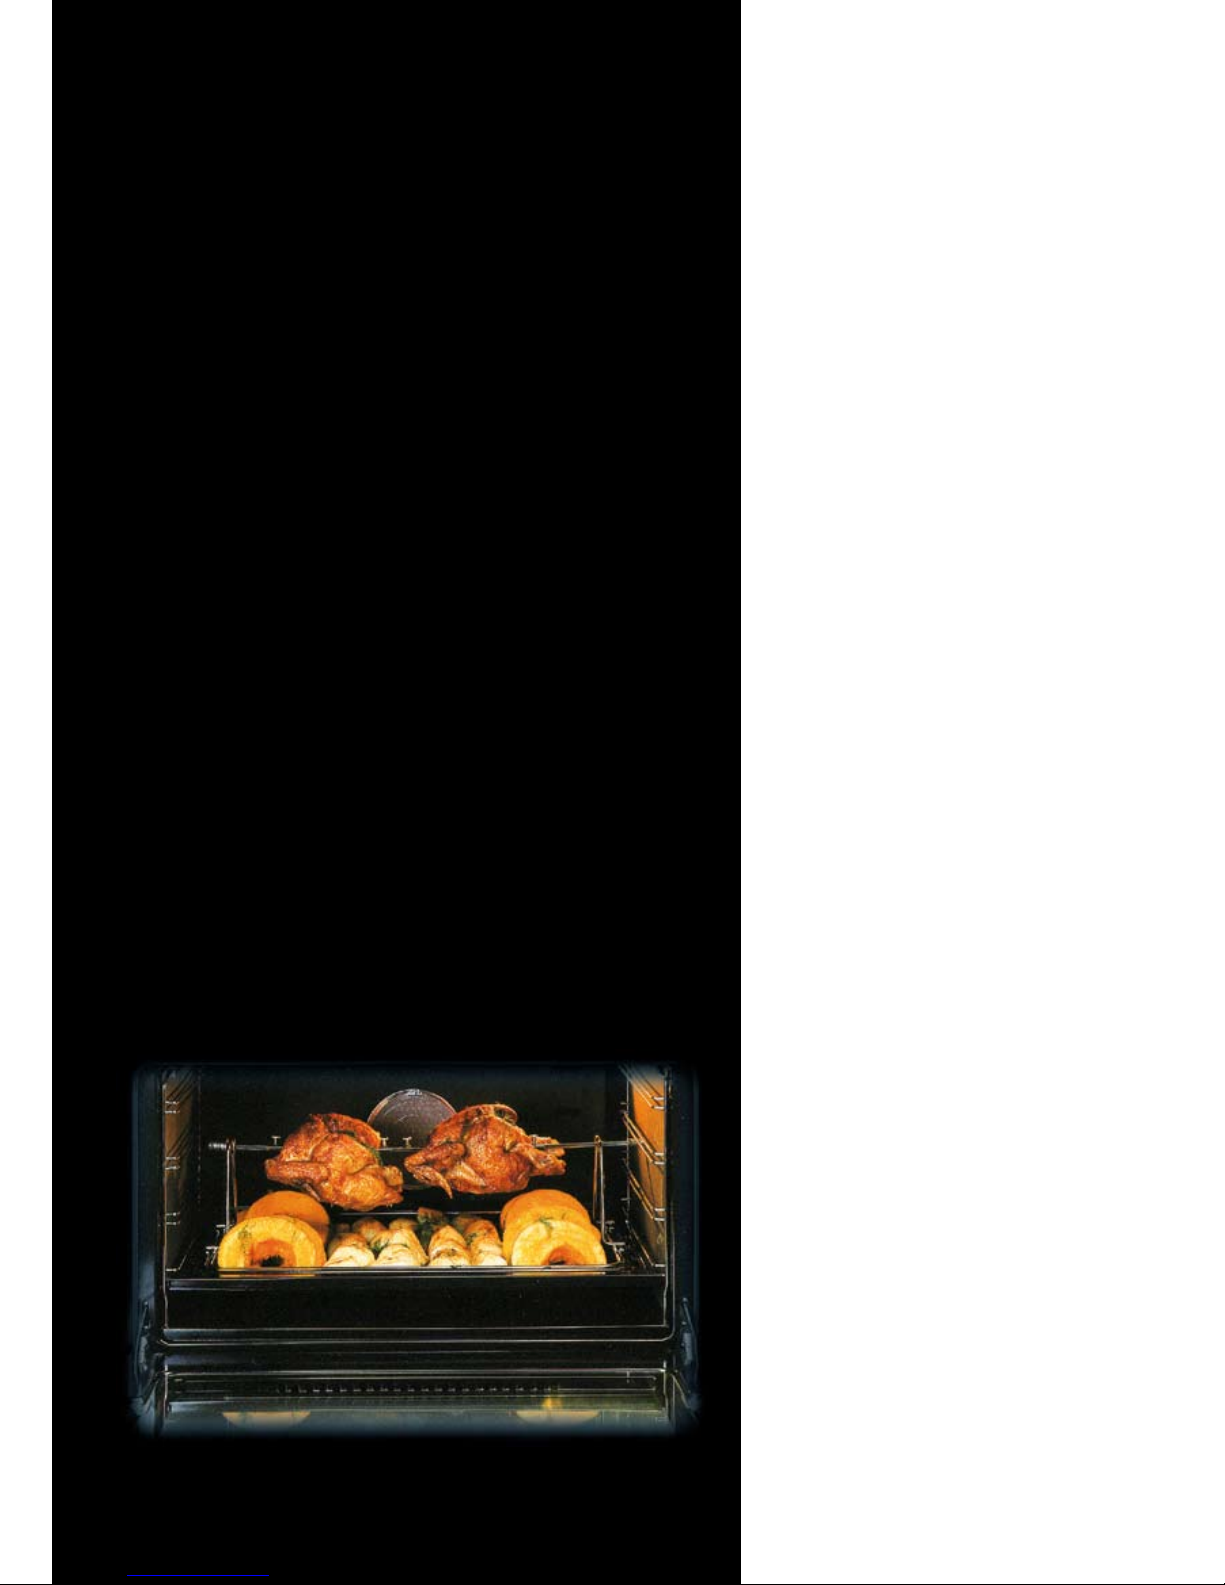
■The shelves are numbered
4 to 1 from top to bottom
(See diagram above).
■ILVE’s fan grill system can
be used to cook on multiple
shelves, for example grilling
meat on top shelf, lasagna on
middle shelf, garlic bread on
bottom shelf, while warming
plates on the bottom of the
oven.
Controlling smoke
and splatter while
grilling
When grilling items such as
sausages or fatty meats it is
advisable to add 1 cup of water
to the grill pan to control, drips,
splatter and smoke.
7
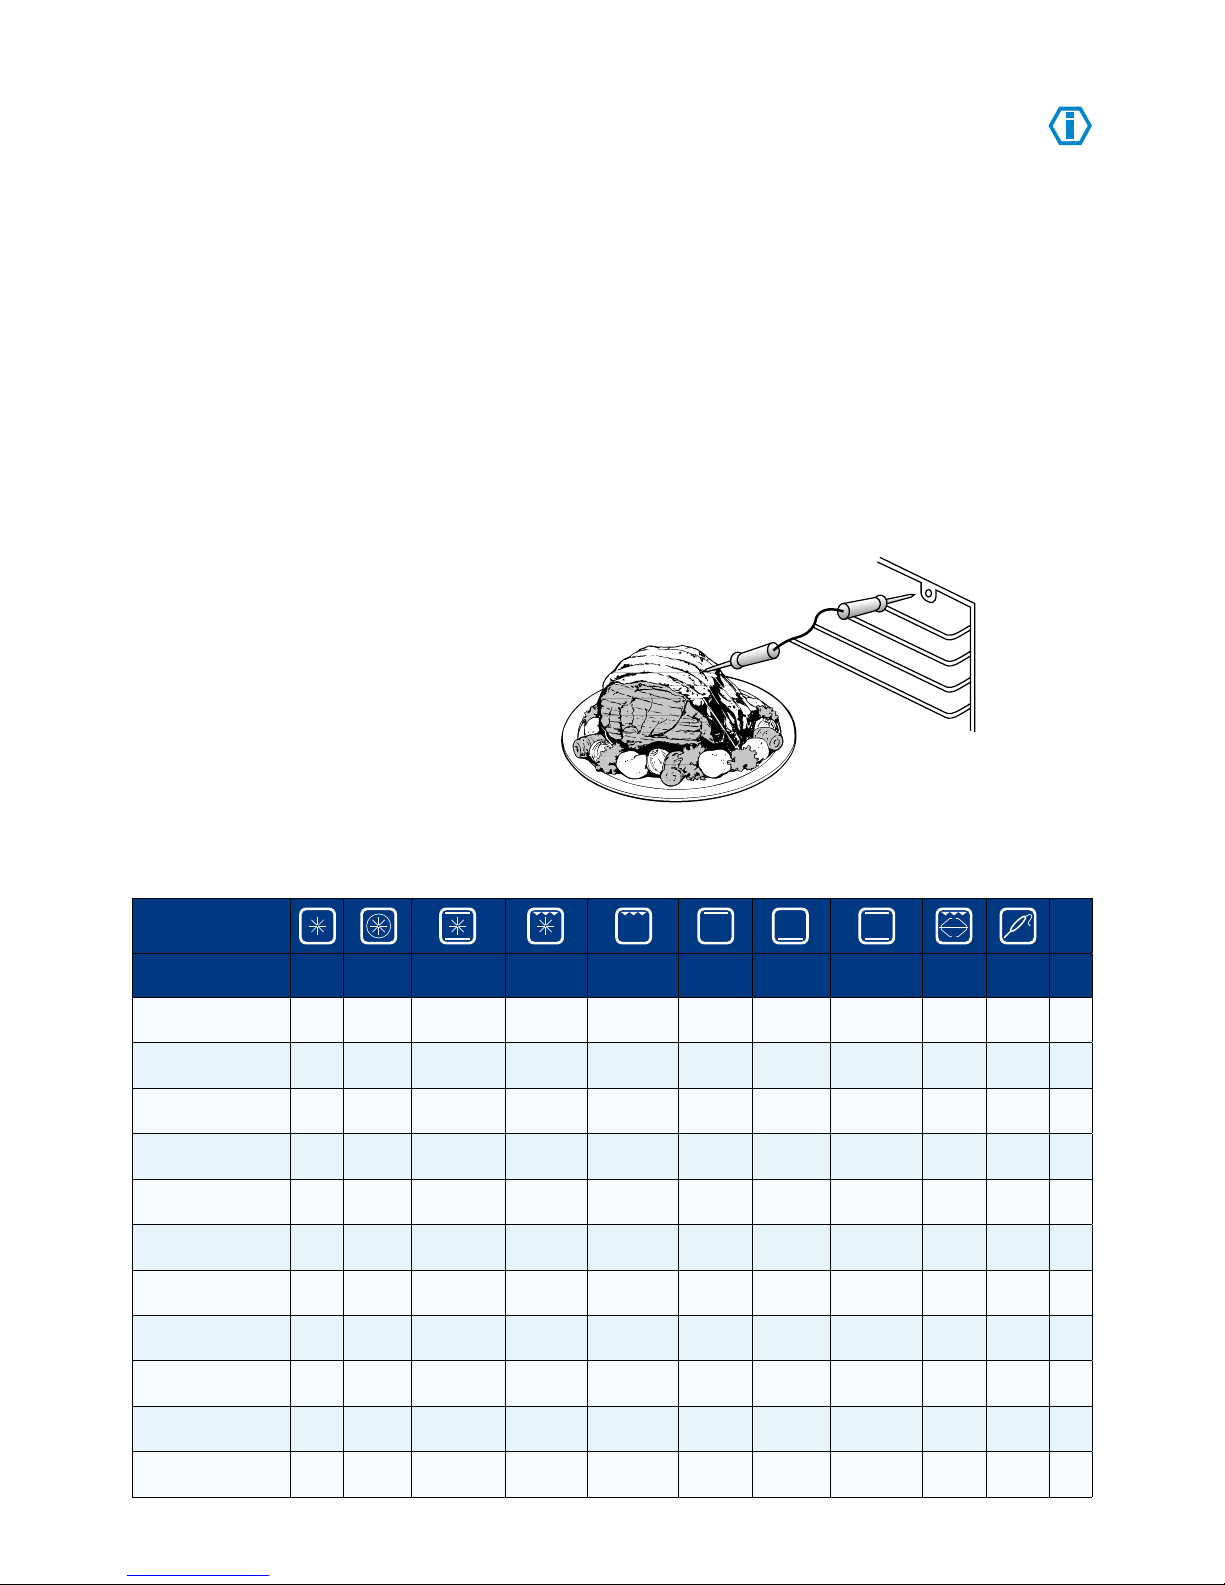
FOOD TO BE
GRILLED
RECOM-
MENDED
SHELF
POSITION
TRADITIONAL GRILLING FAN GRILLING
OVEN
TEMP
GRILLING
TIME 2
OVEN
TEMP
GRILLING
TIME 2
THIN CUTS
Steaks 3 - 4 180ºC 10 - 16 mins 180ºC 10 - 16 mins
Kebabs 3 180ºC 25 - 30 mins 180ºC 25 - 30 mins
Chicken Kebabs 3 180ºC 20 - 25 mins 170ºC-180ºC 20 - 25 mins
Cutlets / Schnitzel 3 - 4 180ºC 12 - 18 mins 180ºC 18 - 20 mins
Liver 3 - 4 180ºC 8 - 12 mins 180ºC 10 - 14 mins
Burgers 3 - 4 180ºC 14 - 20 mins 180ºC 16 - 20 mins
Sausages 3 - 4 180ºC 10 - 15 mins 180ºC 8 - 12 mins
Fish Fillets 3 - 4 180ºC 12 - 16 mins 180ºC 12 - 16 mins
Trout 3 - 4 180ºC 16 - 20 mins 180ºC 20 - 25 mins
Toast 3 - 4 180ºC 2 - 4 mins 180ºC 3 - 5 mins
Cheese Toast 3 - 4 180ºC 7 - 9 mins 180ºC 4 - 6 mins
Tomatoes 3 - 4 180ºC 6 - 8 mins 180ºC 6 - 8 mins
Peaches 3 180ºC 6 - 8 mins 180ºC 7 - 10 mins
THICKER CUTS
Chicken (1kg) 2 – – 170ºC-180ºC 50 - 60 mins
Rolled Meat (1kg) 1 – – 180ºC 75 - 85 mins
Pork (1kg) 1 – – 180ºC 100 - 120 mins
Sirloin (1kg) 1 – – 200ºC 25 - 35 mins
1) Select the appropriate shelf level for the thickness of the food.
2) Turn food over half way through the grilling time.
Note: The information given in this chart is intended as a guide only.
Grilling Guide
Gas
Rotisserie Mode
1. Insert rotisserie skewer into
small opening on right side
of oven wall cavity.
2. Leave oven door slightly
ajar.
3. Turn grill function knob to
temperature variance of
your choice (1 – 12).
• Refer to page 21 for
cooking methods in
your gas oven.
Shelf Positions