IMG Stage Line SCAN-20LED User manual
BEDIENUNGSANLEITUNG • INSTRUCTION MANUAL
MODE D’EMPLOI • ISTRUZIONI PER L’USO • GEBRUIKSAANWIJZING
MANUAL DE INSTRUCCIONES • INSTRUKCJA OBSŁUGI
SIKKERHEDSOPLYSNINGER • SÄKERHETSFÖRESKRIFTER • TURVALLISUUDESTA
SCANNER-LICHTEFFEKTGERÄT
LIGHT EFFECT UNIT SCANNER
JEU DE LUMIÈRE SCANNER
UNITA PER EFFETTI LUCE SCANNER
SCAN-20LED Best.-Nr. 38.3730

2
3
12
DMX
OUTPUT
DMX
INPUT
ONLY FOR
REMOTE
CONTROL
POWER
MIN MAX
SENSITIVITY
ENTERMENU
SLAVE
SOUND
DMX
MASTER
Function Display
ENTERMENU
SLAVE
SOUND
DMX
MASTER
17
18
19
1
2
10 11 12 13 14 15 16
7
2
8
3
4
5
6
9
3
wwwwww..iimmggssttaaggeelliinnee..ccoomm
Bevor Sie einschalten …
Wir wünschen Ihnen viel Spaß mit Ihrem neuen
Gerät von „img Stage Line“. Bitte lesen Sie diese
Bedienungsanleitung vor dem Betrieb gründlich
durch. Nur so lernen Sie alle Funktionsmöglich-
keiten kennen, vermeiden Fehlbedienungen und
schützen sich und Ihr Gerät vor eventuellen Schä-
den durch unsachgemäßen Gebrauch. Heben
Sie die Anleitung für ein späteres Nachlesen auf.
Der deutsche Text beginnt auf der Seite 4.
Before switching on …
We wish you much pleasure with your new “img
Stage Line” unit. Please read these operating
instructions carefully prior to operating the unit.
Thus, you will get to know all functions of the unit,
operating errors will be prevented, and yourself
and the unit will be protected against any damage
caused by improper use. Please keep the operat-
ing instructions for later use.
The English text starts on page 10.
Avant toute installation …
Nous vous souhaitons beaucoup de plaisir à uti-
liser cet appareil “img Stage Line”. Lisez ce mode
dʼemploi entièrement avant toute utilisation. Uni-
quement ainsi, vous pourrez apprendre lʼensem-
ble des possibilités de fonctionnement de lʼappa-
reil, éviter toute manipulation erronée et vous
protéger, ainsi que lʼappareil, de dommages
éventuels engendrés par une utilisation inadap-
tée. Conservez la notice pour pouvoir vous y
reporter ultérieurement.
La version française se trouve page 16.
Prima di accendere …
Vi auguriamo buon divertimento con il vostro
nuovo apparecchio di “img Stage Line”. Leggete
attentamente le istruzioni prima di mettere in fun-
zione lʼapparecchio. Solo così potete conoscere
tutte le funzionalità, evitare comandi sbagliati e
proteggere voi stessi e lʼapparecchio da even-
tuali danni in seguito ad un uso improprio. Con-
servate le istruzioni per poterle consultare anche
in futuro.
Il testo italiano inizia a pagina 22.
D
A
CH
GB
Antes de la utilización …
Le deseamos una buena utilización para su nue-
vo aparato “img Stage Line”. Por favor, lea estas
instrucciones de uso atentamente antes de hacer
funcionar el aparato. De esta manera conocerá
todas las funciones de la unidad, se prevendrán
errores de operación, usted y el aparato estarán
protegidos en contra de todo daño causado por
un uso inadecuado. Por favor, guarde las instruc-
ciones para una futura utilización.
La versión española comienza en la página 34.
Voor u inschakelt …
Wij wensen u veel plezier met uw nieuwe appa-
raat van “img Stage Line”. Lees deze gebruikers-
handleiding grondig door, alvorens het apparaat
in gebruik te nemen. Alleen zo leert u alle functies
kennen, vermijdt u foutieve bediening en behoedt
u zichzelf en het apparaat voor eventuele schade
door ondeskundig gebruik. Bewaar de handlei-
ding voor latere raadpleging.
De Nederlandstalige tekst vindt u op pagina 28.
Przed uruchomieniem …
Życzymy zadowolenia z nowego produktu “img
Stage Line”. Dzięki tej instrukcji obsługi będą
państwo w stanie poznać wszystkie funkcje tego
urządzenia. Stosując się do instrukcji unikną
państwo błędów i ewentualnego uszkodzenia
urządzenia na skutek nieprawidłowego użytko-
wania. Prosimy zachować instrukcję.
Tekst polski zaczyna się na stronie 40.
Før du tænder …
Tillykke med dit nye “img Stage Line” produkt.
Læs sikkerhedsanvisningerne nøje før ibrugtag-
ning, for at beskytte Dem og enheden mod ska-
der, der skyldes forkert brug. Gem manualen til
senere brug.
Sikkerhedsanvisningerne findes på side 46.
Innan du slår på enheten …
Vi önskar dig mycket glädje med din nya “img
Stage Line” produkt. Läs igenom säkerhetsföre-
skrifterna innan enheten tas i bruk för att undvika
skador till följd av felaktig hantering. Behåll
instruktionerna för framtida bruk.
Säkerhetsföreskrifterna återfinns på sidan 46.
Ennen kytkemistä …
Toivomme Sinulle paljon miellyttäviä hetkiä
uuden “img Stage Line” laitteen kanssa. Ennen
laitteen käyttöä pyydämme Sinua huolellisesti
tutustumaan turvallisuusohjeisiin. Näin vältyt
vahingoilta, joita virheellinen laitteen käyttö saat-
taa aiheuttaa. Ole hyvä ja säilytä käyttöohjeet
myöhempää tarvetta varten.
Turvallisuusohjeet löytyvät sivulta 47.
F
B
CH
I
E
PL DK
SFIN
NL
B
4
D
A
CH
Auf der Seite 2 finden Sie alle beschriebenen
Bedienelemente und Anschlüsse.
1 Übersicht der Bedienelemente
und Anschlüsse
1.1 SCAN-20LED
1Montagebügel
2Feststellschrauben für den Montagebügel (1)
3Regler SENSITIVITY für die Ansprechempfindlich-
keit bei Musiksteuerung über das interne Mikrofon
4Anschlussbuchse für die Fernbedienung LC-3
5DMX-Signal-Eingang (3-pol. XLR) zum Anschluss
eines Lichtsteuergerätes;
Pin 1 = Masse, 2 = DMX
-
, 3 = DMX+
6DMX-Signal-Ausgang (3-pol. XLR) zum Anschluss
an den DMX-Eingang eines weiteren DMX-Lichtef-
fektgerätes;
Pin 1 = Masse, 2 = DMX
-
, 3 = DMX+
7Display
8Netzbuchse zum Anschluss an eine Steckdose
(230 V~/50Hz) über das beiliegende Netzkabel
9Halterung für die Netzsicherung
Eine geschmolzene Sicherung nur durch eine glei-
chen Typs ersetzen.
10 LED MASTER leuchtet im Master-Modus
(Betrieb ohne DMX-Steuergerät oder mit der Fern-
bedienung LC-3)
11 LED DMX leuchtet, wenn am Eingang DMX INPUT
(5) DMX-Steuersignale anliegen
12 Taste MENU zum Aufrufen des Einstellmenüs und
zum Anwählen der Menüpunkte
13 Tasten und zum Ändern einer Einstellung im
Menü
14 Taste ENTER zum Aktivieren eines Menüpunktes
und zum Speichern einer Einstellung
15 LED SLAVE leuchtet im Slave-Modus
(Steuerung durch ein weiteres SCAN-20LED)
16 LED SOUND leuchtet kurz auf bei der Musiksteue-
rung über das interne Mikrofon
1.2 Fernbedienung LC-3
Die Fernbedienung ist als Zubehör erhältlich und
gehört nicht zum Lieferumfang des SCAN-20LED.
17 Taste STAND BY zum Ausschalten des Licht-
strahls, gleichzeitig fährt der Spiegel in die Aus-
gangsposition
18 Taste FUNCTION zur Auswahl verschiedener Funk-
tionen in Abhängigkeit von dem mit der Taste MODE
(19) gewählten Betriebsmodus (Kap. 6.2)
19 Taste MODE zum Wechseln zwischen:
–Stroboskop-Modus
Die LED neben der Taste MODE leuchtet nicht.
–Auswahl der Lichtstrahlfarbe und des Lichtmus-
ters mit der Taste FUNCTION
Die LED der Taste MODE leuchtet.
Hinweis: Zur Steuerung über die Fernbedienung darf am
Eingang DMX INPUT (5) kein DMX-Signal anliegen.
2 Hinweise für den sicheren Gebrauch
Das Gerät entspricht allen erforderlichen Richtlinien
der EU und ist deshalb mit gekennzeichnet.
Beachten Sie auch unbedingt die folgenden Punkte:
GVerwenden Sie das Gerät nur im Innenbereich und
schützen Sie es vor Tropf- und Spritzwasser, hoher
Luftfeuchtigkeit und Hitze (zulässiger Einsatztempe-
raturbereich 0 – 40 °C).
GNehmen Sie das Gerät nicht in Betrieb oder ziehen
Sie sofort den Netzstecker aus der Steckdose,
1. wenn sichtbare Schäden am Gerät oder an der
Netzanschlussleitung vorhanden sind,
2. wenn nach einem Sturz oder Ähnlichem der Ver-
dacht auf einen Defekt besteht,
3. wenn Funktionsstörungen auftreten.
Geben Sie das Gerät in jedem Fall zur Reparatur in
eine Fachwerkstatt.
GZiehen Sie den Netzstecker nie am Kabel aus der
Steckdose, fassen Sie immer am Stecker an.
GVerwenden Sie für die Reinigung nur ein trockenes,
weiches Tuch, niemals Wasser oder Chemikalien.
GWird das Gerät zweckentfremdet, nicht sicher mon-
tiert, falsch bedient oder nicht fachgerecht repariert,
kann keine Haftung für daraus resultierende Sach-
oder Personenschäden und keine Garantie für das
Gerät übernommen werden.
Soll das Gerät endgültig aus dem Betrieb
genommen werden, übergeben Sie es zur
umweltgerechten Entsorgung einem örtli-
chen Recyclingbetrieb.
WARNUNG Das Gerät wird mit lebensgefährlicher
Netzspannung (230 V~) versorgt. Neh-
men Sie deshalb niemals selbst Ein-
griffe am Gerät vor und stecken Sie
nichts durch die Lüftungsöffnungen! Es
besteht die Gefahr eines elektrischen
Schlages.

5
D
A
CH
3 Einsatzmöglichkeiten
Das Lichteffektgerät SCAN-20LED ist besonders für
den Einsatz auf der Bühne und in Diskotheken geeig-
net. Es projiziert verschiedene, farbige Lichtmuster.
Als Lichtquelle ist eine superhelle weiße LED (10 Watt)
eingesetzt. Diese hat einen geringen Stromverbrauch
und eine lange Lebensdauer.
Die Steuerung der Farben, der Muster und der
Bewegung des Spiegels erfolgt über das integrierte
Mikrofon, über die Fernbedienung LC-3 (separat als
Zubehör erhältlich) oder mit einem DMX-Lichtsteuer-
gerät über sechs DMX-Steuerkanäle.
4 Montage
GPlatzieren Sie das Gerät immer so, dass im Betrieb
eine ausreichende Luftzirkulation gewährleistet ist.
Die Lüftungsöffnungen am Gehäuse dürfen auf kei-
nen Fall abgedeckt werden (z. B. durch Vorhänge).
GDer Abstand zum angestrahlten Objekt sollte min-
destens 10 cm betragen.
1) Das Lichteffektgerät mit dem Montagebügel (1) an
geeigneter Stelle festschrauben, z. B. an einer Tra-
verse oder einem Leuchtenstativ.
2) Zum Ausrichten des Gerätes die Feststellschrau-
ben (2) lösen. Die gewünschte Neigung des Gerä-
tes einstellen und die Schrauben wieder fest anzie-
hen.
5 Inbetriebnahme
Das beiliegende Netzkabel zuerst in die Netzbuchse (8)
stecken und dann in eine Steckdose (230 V~/50 Hz).
Während der Startphase signalisiert das Display (7)
. Danach ist das Gerät betriebsbereit und lässt sich
über ein DMX-Lichtsteuergerät bedienen (Kap. 7)
oder wechselt im Master-Modus automatisch das Licht-
strahlmuster (Kap. 6). Zum Ausschalten den Netz-
stecker aus der Steckdose ziehen.
Um einen besseren Bedienkomfort zu erhalten, ist
es empfehlenswert, das Gerät an eine Steckdose an-
zuschließen, die sich über einen Lichtschalter ein- und
ausschalten lässt.
Vorsicht: Das Gerät darf nicht über einen Dimmer an
die Netzspannung angeschlossen werden!
5.1 Grundeinstellungen
Durch Drehen des Objektivs das Lichtmuster scharf
stellen.
Mit Hilfe des Displays (7) und der Bedientasten
(12 – 14) lassen sich die folgenden Grundeinstellungen
durchführen. Dazu die Taste MENU (12) so oft drücken,
bis die gewünschte Funktion im Display angezeigt wird.
Dann die Taste ENTER (14) drücken. Mit dem Drücken
der nächsten Taste nie länger als 8 Sekunden warten,
sonst wird der Einstellvorgang beendet. Die Menü-
struktur ist auf der Seite 9 dargestellt.
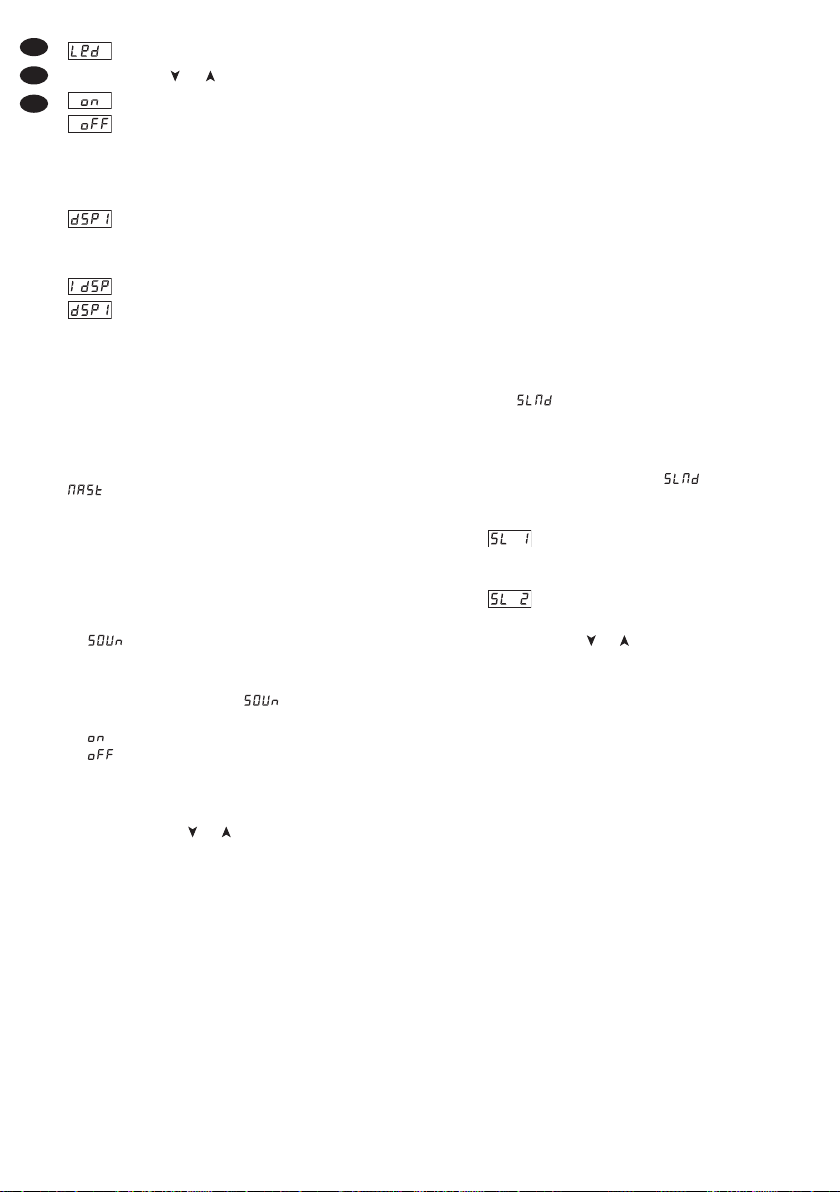
Blackout-Modus aus oder ein
Mit der Taste oder (13) wählen:
Der Lichtstrahl ist immer eingeschaltet. Diese
Einstellung muss bei der Bedienung ohne
DMX-Steuergerät gewählt werden.
Der Lichtstrahl ist nur eingeschaltet, wenn ein
DMX-Steuersignal an der Buchse DMX INPUT
(5) anliegt. Mit dem Ausschalten des DMX-
Steuergerätes wird der Lichtstrahl abgeschal-
tet.
Zum Speichern die Taste ENTER (14) drücken.
Spiegeldrehung (Pan) normal
oder entgegengesetzt
Mit der Taste oder (13) wählen:
Die Spiegeldrehung erfolgt normal.
Die Spiegeldrehung erfolgt entgegengesetzt.
Bei der Bedienung von zwei SCAN-20LED über
die gleiche DMX-Adresse können die Spiegel-
bewegungen der Geräte spiegelsymmetrisch
erfolgen, wenn die Drehung bei einem Gerät
auf normal und bei dem anderen Gerät auf ent-
gegengesetzt gestellt wird.
Zum Speichern die Taste ENTER (14) drücken.
Steuerung der Spiegelneigung (Tilt) normal
oder entgegengesetzt
Mit der Taste oder (13) wählen:
Die Steuerung der Spiegelneigung erfolgt nor-
mal.
Die Steuerung erfolgt entgegengesetzt. Bei der
Bedienung von zwei SCAN-20LED über die
gleiche DMX-Adresse können die Spiegelbe-
wegungen der Geräte spiegelsymmetrisch er-
folgen, wenn die Steuerung der Spiegelneiung
bei einem Gerät auf normal und bei dem ande-
ren Gerät auf entgegengesetzt gestellt wird.
Zum Speichern die Taste ENTER (14) drücken.
WARNUNG Blicken Sie nicht direkt in den Lichtstrahl,
das kann zu Augenschäden führen.
Beachten Sie, dass sehr schnelle Licht-
wechsel bei fotosensiblen Menschen
und Epileptikern epileptische Anfälle
auslösen können!
WARNUNG Das Gerät muss fachgerecht und
sicher montiert werden. Wird es an
einer Stelle installiert, unter der sich
Personen aufhalten können, muss
es zusätzlich gesichert werden (z. B.
durch ein Fangseil; das Fangseil so
befestigen, dass der Fallweg des
Gerätes nicht mehr als 20 cm betra-
gen kann).
6
D
A
CH
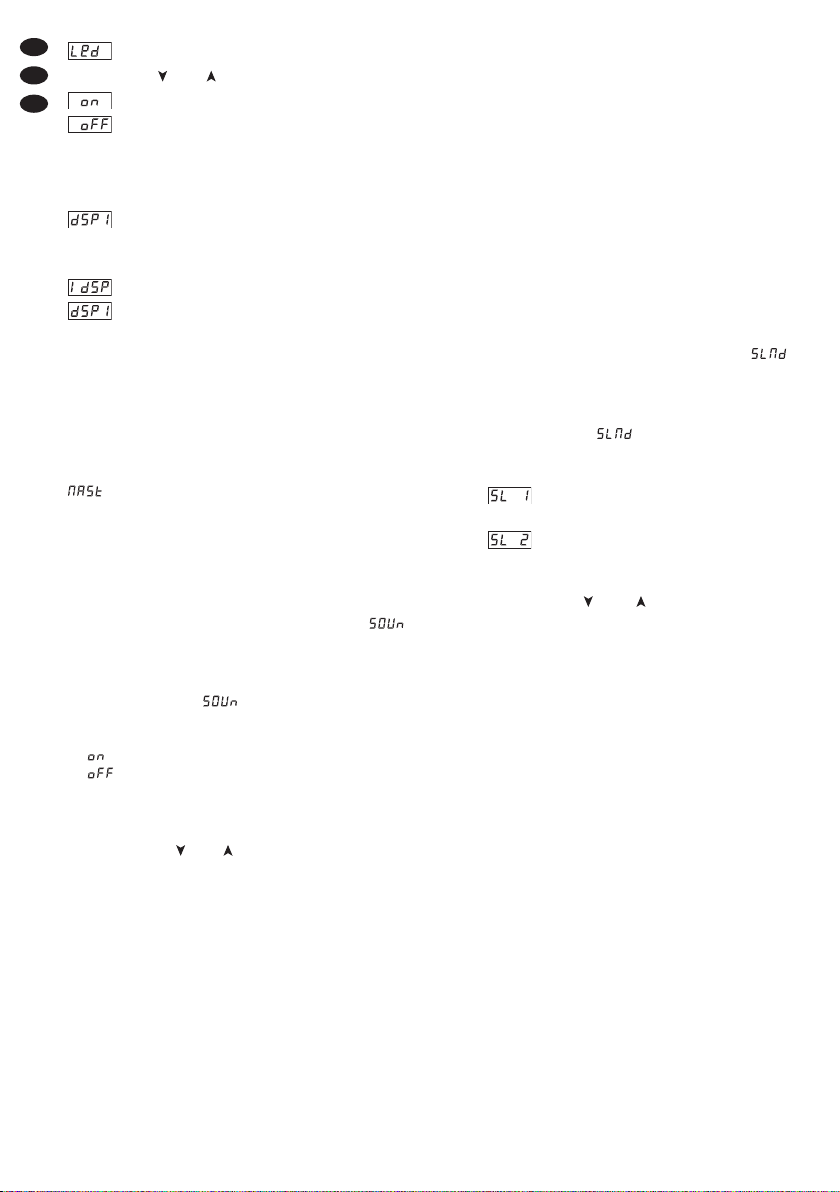
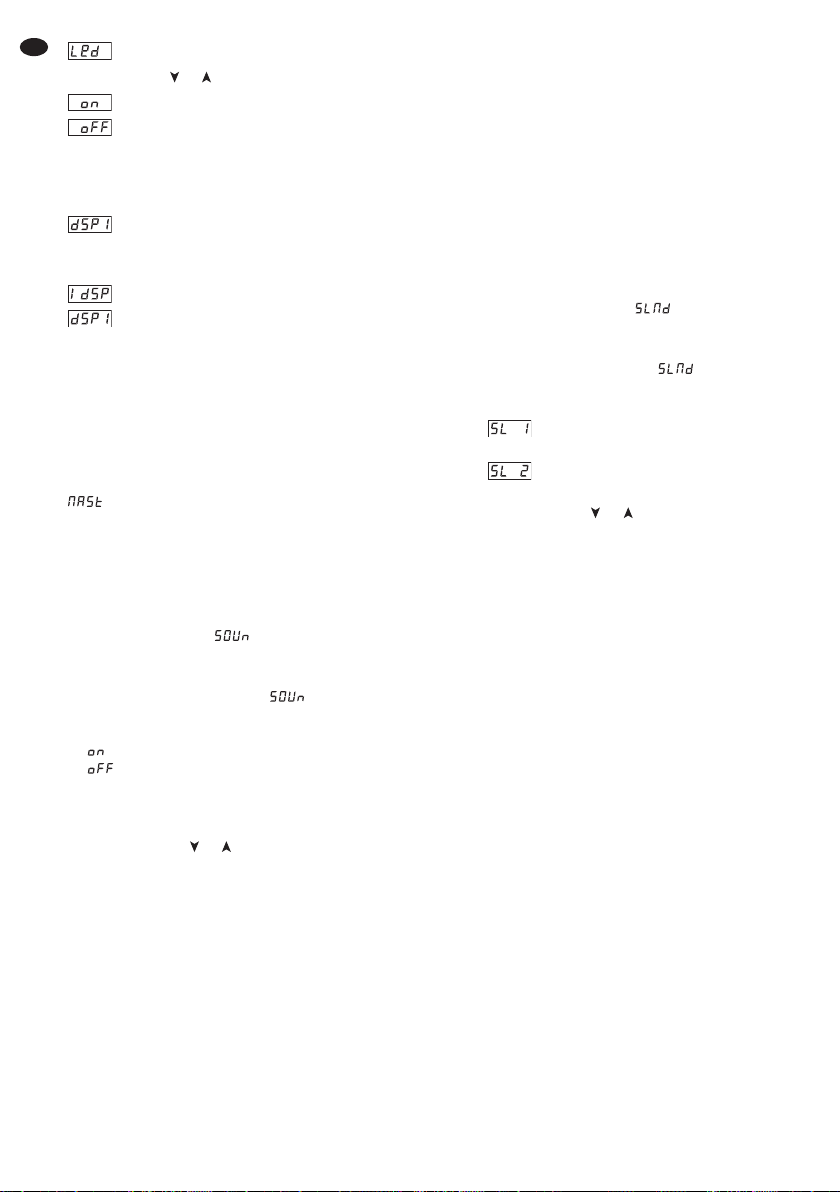
Display ein oder aus
Mit der Taste oder (13) wählen:
Das Display (7) ist immer eingeschaltet.
Das Display schaltet sich ca. 60 s nach dem
letzten Drücken einer Taste aus. Beim nächsten
Tastendruck schaltet es sich wieder ein.
Zum Speichern die Taste ENTER (14) drücken.
Display-Darstellung
Mit der Taste ENTER (14) wählen und gleichzeitig
speichern:
normale Darstellung
Darstellung um 180° gedreht
Etwa 8 Sekunden nach dem letzten Drücken einer
Taste wird das Einstellmenü automatisch verlassen.
6 Betrieb ohne DMX-Steuergerät
Liegt kein DMX-Steuersignal an der Buchse DMX
INPUT (5) an, leuchtet die gelbe LED MASTER (10),
das Display (7) zeigt den Master-Modus an (Anzeige
) und das Gerät wechselt eigenständig die Licht-
muster. Voraussetzung dafür ist, dass der Blackout-
Modus ausgeschaltet ist, Kap. 5.1.
Soll der Wechsel der Muster und der Lichtstrahl-
farbe sowie die Bewegung des Lichtstrahls im Rhyth-
mus der Musik erfolgen, die Musiksteuerung einschal-
ten:
1) Die Taste MENU (12) so oft drücken, bis im
Display (7) angezeigt wird. Mit dem Drücken der
nächsten Taste nicht länger als 8 Sekunden warten,
sonst wird der Einstellvorgang beendet.
2) Den Menüpunkt mit der Taste ENTER (14)
aktivieren. Das Display zeigt den Betriebszustand
an:
= Musiksteuerung eingeschaltet
= Musiksteuerung ausgeschaltet:
Das Gerät steuert den Wechsel der Muster
und Farbe sowie die Bewegungen des Licht-
stahls eigenständig.
3) Mit der Taste oder (13) die Musiksteuerung ein-
oder ausschalten und mit der Taste ENTER bestä-
tigen.
4) Zur Musiksteuerung den Regler SENSITIVITY (3)
für die Mikrofonempfindlichkeit so einstellen, dass
der Lichtstrahl optimal durch die Musik gesteuert
wird. Bei jedem Steuersignal, das durch den vom
Mikrofon aufgenommenen Schall erzeugt wird,
leuchtet kurz die grüne LED SOUND (16) auf.
Hinweise
1. Beim Ändern der Lautstärke an der Musikanlage muss
auch die Mikrofonempfindlichkeit mit dem Drehregler
entsprechend angepasst werden.
2. Bei zu geringer Lautstärke, oder wenn der Regler SEN-
SITIVITY ganz nach links gedreht ist, wechselt das
Gerät automatisch das Lichtmuster.
6.1 Zusammenschalten mehrerer SCAN-20LED
Es lassen sich mehrere Geräte des Modells SCAN-
20LED zusammenschalten. Das Hauptgerät (Master)
kann dann alle Nebengeräte (Slave) synchron steuern.
1) Den Anschluss DMX OUTPUT (6) des Hauptgerä-
tes über ein 3-poliges XLR-Kabel (z. B. Serie
MEC-... oder MECN-... aus dem Sortiment von „img
Stage Line“) mit dem Anschluss DMX INPUT (5)
des ersten Nebengerätes verbinden.
2) Den Anschluss DMX OUTPUT des ersten Neben-
gerätes mit dem Anschluss DMX INPUT des zwei-
ten Nebengerätes verbinden usw., bis alle Geräte in
einer Kette angeschlossen sind.
3) Die Nebengeräte auf einen der Slave-Modi einstel-
len:
a) Die Taste MENU (12) so oft drücken, bis im
Display (7) angezeigt wird. Mit dem Drücken der
nächsten Taste nicht länger als 8 Sekunden war-
ten, sonst wird der Einstellvorgang beendet.
b) Den Menüpunkt mit der Taste ENTER (14)
aktivieren. Das Display zeigt den eingestellten
Slave-Modus an:
Slave-Modus 1: Das Nebengerät wird
vom Hauptgerät synchron gesteuert.
Slave-Modus 2: Das Nebengerät wird
vom Hauptgerät entgegengesetzt ge-
steuert.
c) Mit der Taste oder (13) den gewünschten
Slave-Modus wählen und mit der Taste ENTER
bestätigen.
Sobald an den Nebengeräten die Steuersignale
vom Hauptgerät anliegen, leuchtet bei ihnen die
rote LED SLAVE (15) auf.
6.2 Fernbedienung mit der LC-3
Über die als Zubehör erhältliche Fernbedienung LC-3
können verschiedene Funktionen gesteuert werden.
1) Die Fernbedienung an die Buchse ONLY FOR
REMOTE CONTROL (4) anschließen.
2) Am Eingang DMX INPUT (5) darf kein DMX-Signal
anliegen.
3) Über den Ausgang DMX OUTPUT (6) können wei-
tere SCAN-20LED angeschlossen werden (Kapi-
tel 6.1), um diese über die Fernbedienung gemein-
sam mit dem Hauptgerät zu steuern.
4) Mit der Taste STAND BY (17) lässt sich der Licht-
strahl ein- und ausschalten. Gleichzeitig fährt der
Spiegel in die Ausgangsposition. Bei ausgeschalte-
tem Lichtstrahl leuchtet zur Kontrolle die LED
neben der Taste STAND BY.
5) Mit der Taste MODE (19) den Betriebsmodus wählen:
a) Leuchtet die LED der Taste MODE nicht, ist
der Stroboskop-Modus eingeschaltet. Durch

7
D
A
CH
Gedrückthalten der Taste FUNCTION (18) lässt
sich eine der drei Stroboskop-Funktionen akti-
vieren:
1. Dauer-Stroboskop
2. Stroboskop, das durch einen Musikimpuls
eingeschaltet und durch den nächsten Musik-
impuls wieder ausgeschaltet wird* usw.
3. Musikgesteuerte Stroboskop-Salven*
*Die Musiksteuerung muss eingeschaltet sein
(Kap. 6, Bedienschritt 2).
Beim erneuten Gedrückthalten der Taste FUNC-
TION ist jeweils die nächste Stroboskop-Funk-
tion aktiviert.
b) Leuchtet die LED der Taste MODE, lässt sich mit
der Taste FUNCTION die Lichtstrahlfarbe und
das Lichtmuster wählen. Zum Wählen der Farbe
die Taste nur kurz drücken und zum Wählen des
Musters die Taste so lange gedrückt halten, bis
das nächste Muster erscheint. Das Gerät steuert
in diesem Modus die Bewegung des Lichtstrahls
eigenständig, d. h. unabhängig von der Musik.
7 Bedienung über ein Lichtsteuergerät
Zur Bedienung über ein Lichtsteuergerät mit DMX512-
Protokoll (z. B. DMX-1440 oder DMX-510USB von
„img Stage Line“) verfügt das SCAN-20LED über
sechs DMX-Steuerkanäle. Die Funktionen der Kanäle
und die DMX-Werte finden Sie im Kapitel 10.1.
7.1 Anschluss
Als DMX-Schnittstelle besitzt das Gerät 3-polige XLR-
Anschlüsse mit folgender Kontaktbelegung:
Pin 1 = Masse, 2 = DMX
-
, 3 = DMX+
Zum Anschluss sollten spezielle Kabel für hohen
Datenfluss verwendet werden. Normale abgeschirmte
Mikrofonkabel mit einem Leitungsquerschnitt von min-
destens 2 × 0,22 mm2und möglichst geringer Kapazität
sind nur bei einer Gesamtkabellänge bis 100 m zu emp-
fehlen. Bei Leitungslängen ab 150 m wird grundsätzlich
das Zwischenschalten eines DMX-Aufholverstärkers
empfohlen (z. B. SR-103DMX von „img Stage Line“).
1) Den DMX-Eingang (5) mit dem DMX-Ausgang des
Lichtsteuergerätes verbinden.
2) Den DMX-Ausgang (6) mit dem DMX-Eingang des
nächsten Lichteffektgerätes verbinden. Dessen
Ausgang wieder mit dem Eingang des nachfolgen-
den Gerätes verbinden usw., bis alle Lichteffektge-
räte in einer Kette angeschlossen sind.
3) Den DMX-Ausgang des letzten DMX-Gerätes der
Kette mit einem 120-Ω-Widerstand (> 0,3 W) ab-
schließen: An die Pins 2 und 3 eines XLR-Steckers
den Widerstand anlöten und den Stecker in den
DMX-Ausgang stecken oder einen entsprechenden
Abschlussstecker (z. B. DLT-123 von „img Stage
Line“) verwenden.
7.2 Startadresse einstellen
Um das SCAN-20LED mit einem Lichtsteuergerät
bedienen zu können, muss die DMX-Startadresse für
den ersten DMX-Kanal eingestellt werden. Ist z. B. am
Steuergerät die Adresse 17 für die Drehung des Spie-
gels vorgesehen, am SCAN-20LED die Startadresse
17 einstellen.
Die anderen Funktionen des SCAN-20LED sind
dann automatisch den folgenden Adressen (in diesem
Beispiel 18 – 22) zugeordnet. Als nächstmögliche
Startadresse für das folgende DMX-gesteuerte Gerät
könnte dann bei diesem Beispiel die Adresse 23 ver-
wendet werden.
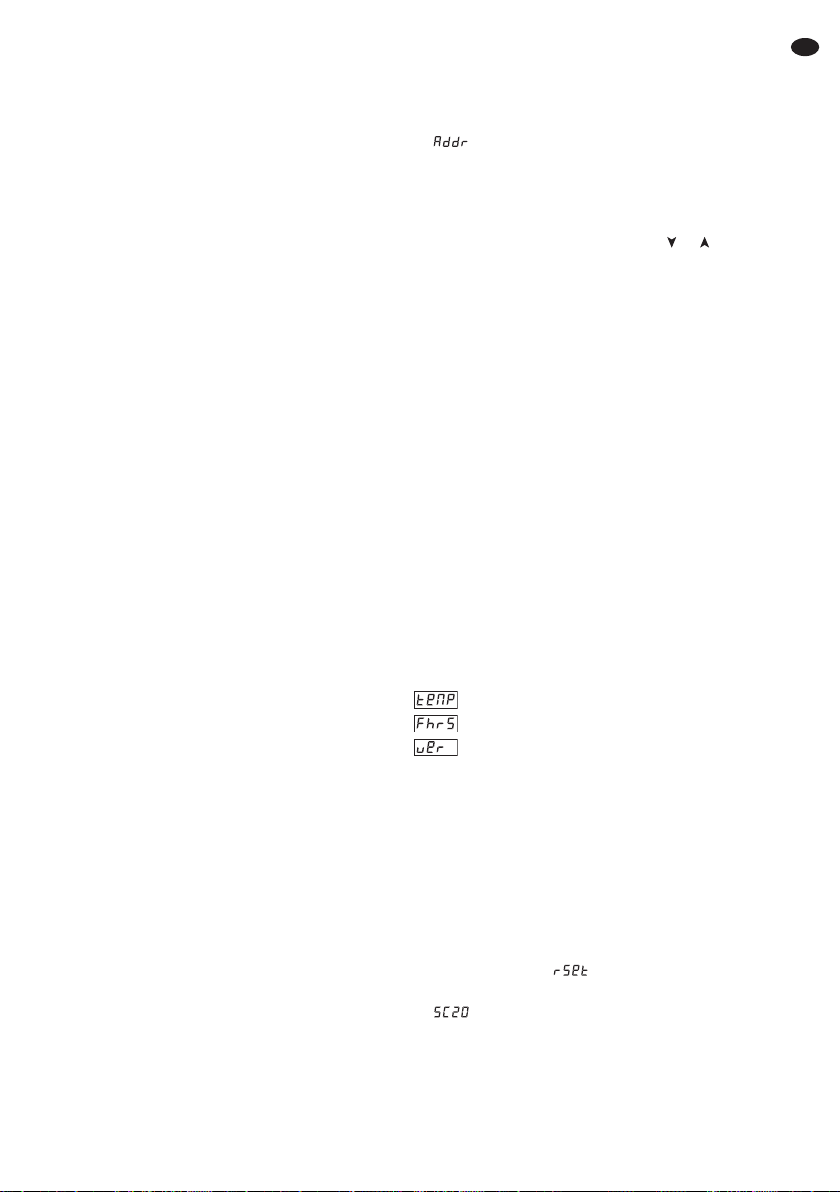
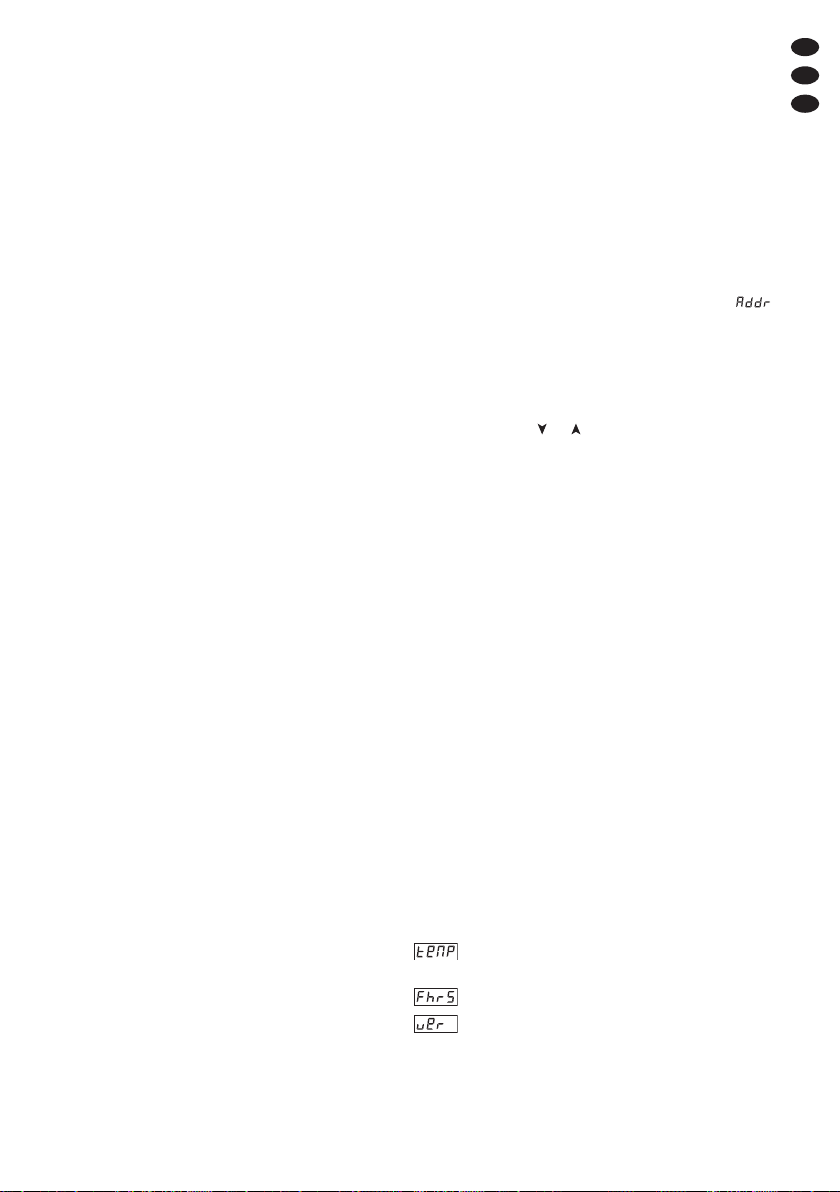
1) Zum Einstellen der DMX-Startadresse die Taste
MENU (12) einmal drücken, sodass im Display (7)
erscheint. Mit dem Drücken der nächsten
Taste nie länger als 8 Sekunden warten, sonst wird
der Einstellvorgang beendet.
2) Die Taste ENTER (14) drücken. Die momentane
Adresse wird angezeigt.
3) Mit der Taste oder (13) die gewünschteAdresse
einstellen und mit der Taste ENTER speichern.
4) Zum Ausblenden des Menüs die Taste MENU
gedrückt halten, bis das Display auf die Start-
adresse oder auf die Anzeige des gewählten Be-
triebsmodus zurückschaltet oder ca. 8 s warten.
5) Sobald die Steuersignale des DMX-Steuergerätes
empfangen werden, leuchtet die rote LED DMX (11)
und das Display zeigt die Startadresse an. Das
SCAN-20LED kann nun mit dem DMX-Steuergerät
bedient werden.
Damit der Lichtstrahl einschaltet, den DMX-
Kanal 6 für den Dimmer auf hell stellen und den
DMX-Kanal 3 für die Stroboskop-Funktionen auf
einen DMX-Wert größer als 7.
8 Weitere Funktionen
8.1 Anzeige der Betriebsstunden, Temperatur
und Firmware-Version
Die Taste MENU (12) so oft drücken, bis im Display (7)
der entsprechende Menüpunkt angezeigt wird:
zur Anzeige der Temperatur (°C)
im Geräteinneren
zur Anzeige der Betriebsstunden
zur Anzeige der Firmware-Version
(Betriebssystem des Gerätes)
Die Auswahl mit der Taste ENTER (14) bestätigen und
das Display zeigt die gewünschte Information an.
Nach 8 Sekunden schaltet das Gerät auf den vorheri-
gen Betriebsmodus zurück.

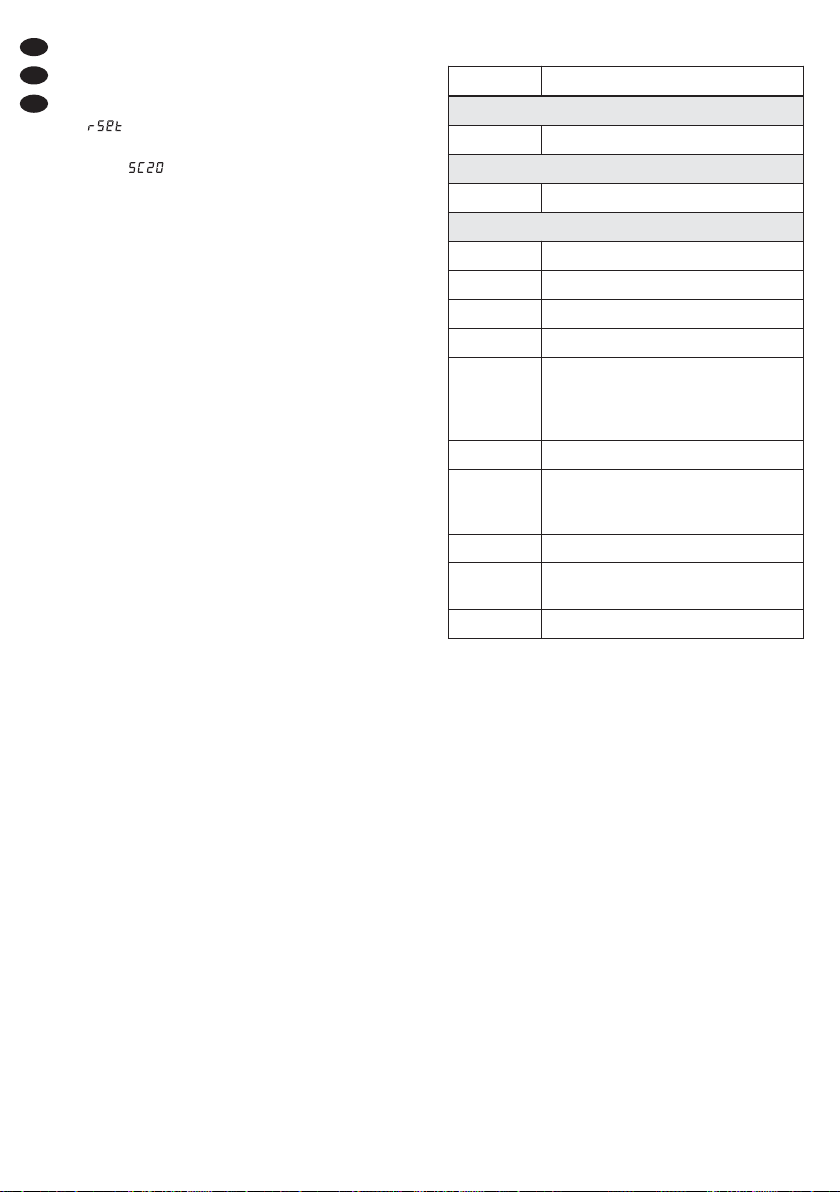
8.2 Reset
Sollten Funktionsstörungen auftreten, kann eventuell
durch ein Reset (Zurücksetzen des Gerätes) Abhilfe
geschaffen werden:
1) Die Taste MENU (12) so oft drücken, bis im Display
(7) (reset) erscheint.
2) Die Taste ENTER (14) drücken. Das Display signa-
lisiert während des Resets . Danach schaltet
das Gerät auf den vorherigen Betriebsmodus
zurück.
9 Reinigung des Gerätes
Der Spiegel, die Linsen und die Farbscheibe sollte in
regelmäßigen Abständen, je nach Verschmutzung
durch Staub, Rauch oder andere Schmutzpartikel
gereinigt werden. Nur dann kann das Licht in maxima-
ler Helligkeit abgestrahlt werden. Vor dem Öffnen des
Gerätes den Netzstecker aus der Steckdose zie-
hen. Nur ein weiches, sauberes Tuch und ein Glasrei-
nigungsmittel verwenden. Anschließend die Teile vor-
sichtig trocken wischen.
Zum Reinigen der anderen Gehäuseteile nur ein
weiches, sauberes Tuch benutzen. Auf keinen Fall
eine Flüssigkeit verwenden, die könnte in das Gerät
laufen und es beschädigen.
10 Technische Daten
Stromversorgung: . . . . . 230 V~/50 Hz
Leistungsaufnahme: . . . 80 VA
Leuchtmittel: . . . . . . . . . 1 superhelle weiße LED,
10 W
Einsatztemperatur: . . . . 0 – 40 °C
Abmessungen: . . . . . . . 195 × 180 × 400 mm
Gewicht: . . . . . . . . . . . . 4 kg
Änderungen vorbehalten.
10.1 DMX-Kanäle
*abhängig von der Einstellung des Kanals 6 (Dimmer)
DMX-Wert Funktion
Kanal 1: Drehung des Spiegels (Pan)
0 – 255 ca.
-
90° bis +90°
Kanal 2: Neigung des Spiegels (Tilt)
0 – 255 ca. 10° bis 85°
Kanal 3: Stroboskop
0–7 Lichtstrahl aus
8–15 Lichtstrahl konstant eingeschaltet
16 – 131 Stroboskop: langsam →schnell
132 – 139 Lichtstrahl konstant eingeschaltet
140 – 181
Der Lichtstrahl wird langsam heller
und schaltet sich nach dem Erreichen
der max. Helligkeit* aus.
Ablauftempo: langsam →schnell
182 – 189 Lichtstrahl konstant eingeschaltet
190 – 231
Der Lichtstrahl wird langsam dunkel
und schaltet dann auf hell* zurück.
Ablauftempo: langsam →schnell
232 – 239 Lichtstrahl konstant eingeschaltet
240 – 247 Stroboskop mit zufälliger Blitzfolge
248 – 255 Lichtstrahl konstant eingeschaltet
8
D
A
CH
Diese Bedienungsanleitung ist urheberrechtlich für MONACOR
®
INTERNATIONAL GmbH & Co. KG geschützt.
Eine Reproduktion für eigene kommerzielle Zwecke – auch auszugsweise – ist untersagt.
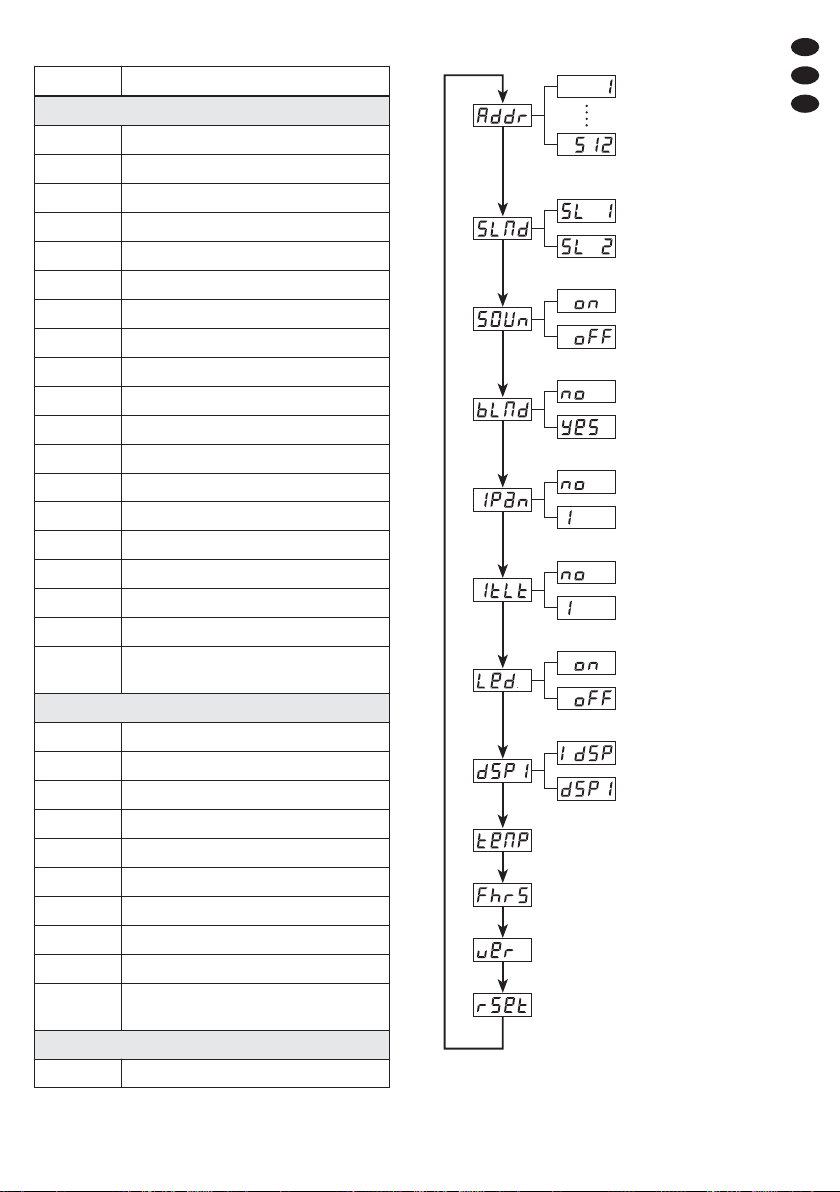
10.2 Menüstruktur
9
D
A
CH
DMX-Startadresse
Slave-Modus
SLAVE 1
SLAVE 2
Musiksteuerung
ein
aus
Blackout-Modus
aus
ein
Spiegeldrehung (Pan)
normal
entgegengesetzt
Firmware-Version
Spiegelneigung (Tilt)
normal
entgegengesetzt
Reset
Temperatur im Geräteinneren
Betriebsstunden
Display
normale Ansicht
180° gedreht
Display
ein
aus
DMX-Wert Funktion
Kanal 4: Lichtmuster (Gobo)
0–7 kein Gobo
8–14 Gobo 1
15 – 21 Gobo 2
22 – 28 Gobo 3
29 – 36 Gobo 4
37 – 43 Gobo 5
44 – 50 Gobo 6
51–57 Gobo 7
58 – 63 Gobo 8
64 – 71 Wackeleffekt ohne Gobo
72 – 78 Wackeleffekt mit Gobo 1
79 – 85 Wackeleffekt mit Gobo 2
86 – 92 Wackeleffekt mit Gobo 3
93 – 100 Wackeleffekt mit Gobo 4
101 – 107 Wackeleffekt mit Gobo 5
108 – 114 Wackeleffekt mit Gobo 6
115 – 121 Wackeleffekt mit Gobo 7
122 – 127 Wackeleffekt mit Gobo 8
128 – 255
ständiger Gobowechsel:
langsam →schnell
Kanal 5: Farbe
0–14 Weiß
15 – 29 Hellgrün
30 – 44 Gelb
45 – 59 Violett
60 – 74 Orange
75 – 89 Hellblau
90 – 104 Dunkelgrün
105 – 119 warmes Gelb
120 – 127 Dunkelblau
128 – 255
ständiger Farbwechsel:
langsam →schnell
Kanal 6: Dimmer
0 – 255 dunkel →hell
All operating elements and connections described
can be found on page 2.
1 Operating Elements and Connections
1.1 SCAN-20LED
1Mounting bracket
2Locking screws for the mounting bracket (1)
3SENSITIVITY control for music control via the inter-
nal microphone
4Connection jack for the remote control LC-3
5DMX signal input (3-pole XLR) for connecting a
light controller;
Pin 1 = ground, 2 = DMX
-
, 3 = DMX+
6DMX signal output (3-pole XLR) for connection to
the DMX input of another light effect unit;
Pin 1 = ground, 2 = DMX
-
, 3 = DMX+
7Display
8Mains jack for connection to a socket (230 V~/
50 Hz) via the mains cable provided
9Support for the mains fuse
Always replace a fuse that has blown by one of the
same type.
10 LED MASTER; will light up in the master mode
(operation without DMX controller or with the
remote control LC-3)
11 LED DMX; will light up when there are DMX control
signals at the DMX INPUT (5)
12 Button MENU to call the adjusting menu and to
select the menu items
13 Buttons and to change an adjustment in the
menu
14 Button ENTER to activate a menu item and to
memorize an adjustment
15 LED SLAVE; will light up in the slave mode
(control via another SCAN-20LED unit)
16 LED SOUND; will shortly light up in case of music
control via the internal microphone
1.2 Remote control LC-3
The remote control LC-3 is available as an accessory
and not supplied with the SCAN-20LED.
17 Button STAND BY for deactivating the light beam;
at the same time, the mirror will go to the starting
position
18 Button FUNCTION for various functions depending
on the operating mode selected with the button
MODE (19) [chapter 6.2]
19 Button MODE for switching over between
–Stroboscope mode
The LED next to the button MODE will be off.
–Selection of the colour of the light beam and of
the light pattern with the button FUNCTION
The LED of the button MODE will be on.
Note: For control via the remote control, there must be no
DMX signal at the DMX INPUT (5).
2 Safety Notes
The unit corresponds to all required directives of the
EU and is therefore marked with .
Please observe the following items in any case:
GThe unit is suitable for indoor use only. Protect it
against dripping water and splash water, high air
humidity, and heat (admissible ambient temperature
range 0 – 40 °C).
GDo not operate the unit or immediately disconnect
the mains plug from the mains socket
1. if the unit or the mains cable is visibly damaged,
2. if a defect might have occurred after the unit was
dropped or suffered a similar accident,
3. if malfunctions occur.
In any case the unit must be repaired by skilled per-
sonnel.
GNever pull the mains cable for disconnecting the
mains plug from the mains socket, always seize the
plug.
GFor cleaning only use a dry, soft cloth, never use
chemicals or water.
GNo guarantee claims for the unit and no liability for
any resulting personal damage or material damage
will be accepted if the unit is used for other purposes
than originally intended, if it is not safely mounted or
correctly operated, or if it is not repaired in an expert
way.
GImportant for U. K. Customers!
The wires in this mains lead are coloured in accord-
ance with the following code:
green/yellow = earth
blue = neutral
brown = live
As the colours of the wires in the mains lead of this
appliance may not correspond with the coloured
markings identifying the terminals in your plug, pro-
ceed as follows:
1. The wire which is coloured green and yellow must
be connected to the terminal in the plug which is
marked with the letter E or by the earth symbol ,
or coloured green or green and yellow.
2. The wire which is coloured blue must be con-
nected to the terminal which is marked with the
letter N or coloured black.
WARNING The unit uses dangerous mains voltage
(230 V~). Leave servicing to skilled per-
sonnel only and do not insert anything
into the air vents; inexpert handling may
result in electric shock.
10
GB

3. The wire which is coloured brown must be con-
nected to the terminal which is marked with the
letter L or coloured red.
Warning – This appliance must be earthed.
3 Applications
The light effect unit SCAN-20LED is ideally suited for
applications on stage and in discotheques. It will pro-
ject various coloured patterns. As a light source, it has
a super bright white LED (10 W) with a low power con-
sumption and a long life.
The colours, the patterns and the movement of the
mirror will be controlled via the integrated microphone,
via the remote control LC-3 (available as an accessory)
or with a DMX controller via 6 DMX control channels.
4 Mounting
GAlways place the unit in such a way that a sufficient
air circulation will be ensured during operation.
Never cover the air vents on the housing (e. g. by
curtains).
GThe minimum distance to the illuminated object
should be 10 cm.
1) Screw the light effect unit with the mounting bracket
(1) to a suitable place, e. g. on a cross bar or a light-
ing stand.
2) To align the unit, release the locking screws (2).
Adjust the desired inclination of the unit, then
retighten the screws.
5 Setting the Unit into Operation
Connect the mains cable provided to the mains jack (8)
first, then connect it to a socket (230 V~/50 Hz). During
the starting phase, the display (7) will indicate .
Then the unit will be ready for operation and can be
controlled via a DMX controller (chapter 7) or will
automatically change the pattern of the light beam in
the master mode (chapter 6). To switch off the unit,
disconnect the mains plug.
For a more convenient operation, it is recom-
mended to connect the unit to a mains socket which is
switched on and off via a light switch.
Caution: Do not connect the unit to the mains voltage
via a dimmer!
5.1 Basic adjustments
Turn the lens to adjust the focus of the light pattern.
The following basic adjustments can be made via
the display (7) and the control buttons (12 – 14). For
this purpose, press the button MENU (12) so many
times until the desired function is displayed. Then
press the button ENTER (14). Make sure that the next
button is pressed within 8 seconds, otherwise the
adjusting process will end automatically. The menu
structure can be found on page 15.
Blackout mode off or on
Use the button or (13) to select:
The light beam will be permanently activated.
This adjustment must be selected when the
unit is operated without a DMX controller.
The light beam will only be activated when
there is a DMX control signal at the jack
DMX INPUT (5). When the DMX controller is
switched off, the light beam will be deactivated.
To memorize, press the button ENTER (14).
Pan of mirror normal or inverted
Use the button or (13) to select:
Normal pan of mirror.
Inverted pan of mirror. When two SCAN-20LED
units are controlled via the same DMX address,
the mirror movements of the units can be mir-
ror-inverted when the pan is set to normal on
one unit and to inverted on the other unit.
To memorize, press the button ENTER (14).
Tilt of mirror normal or inverted
Use the button or (13) to select:
Normal tilt of mirror.
Inverted tilt of mirror. When two SCAN-20LED
units are controlled via the same DMX address,
the mirror movements of the units can be mir-
ror-inverted when the tilt is set to normal on one
unit and to inverted on the other unit.
To memorize, press the button ENTER (14).
WARNING Never look directly into the light beam;
this may cause eye damage.
Please note that fast changes in light-
ing, e. g. flashing light, may trigger
epileptic seizures with photosensitive
persons or persons with epilepsy!
WARNING Mount the unit safely and expertly. If
it is installed at a place where people
may walk or sit under it, additionally
secure it (e. g. by a safety rope; fas-
ten the safety rope in such a way
that, even in the event of a fall, the
maximum falling distance of the unit
will not exceed 20 cm).
If the unit is to be put out of operation defini-
tively, take it to a local recycling plant for a
disposal which is not harmful to the environ-
ment.
11
GB
Display on or off
Use the button or (13) to select:
The display (7) will always be on.
The display will be switched off approx. 60 s
after pressing the last button. It will be switched
on again the next time a button is pressed.
To memorize, press the button ENTER (14).
Display representation
Use the button ENTER (14) to select and memorize at
the same time:
normal representation
representation turned by 180°
Approx. 8 s after pressing the last button, the adjusting
menu will be exited automatically.
6 Operation without DMX Controller
When there is no DMX control signal at the jack DMX
INPUT (5), the yellow LED MASTER (10) will light up,
the display (7) will show the master mode (indication
) and the unit will automatically change the light
patterns. For this purpose, the Blackout mode must be
deactivated, chapter 5.1.
For changing the patterns, the colour of the light
beam and the movement of the light beam according
to the beat of the music, activate the music control:
1) Press the button MENU (12) so many times until the
display (7) shows . Make sure that the next
button is pressed within 8 seconds, otherwise the
adjusting process will end automatically.
2) Activate the menu item with the button
ENTER (14). The display will indicate the operating
status:
= music control activated
= music control deactivated
The unit will automatically control the change
of patterns and colour and the movements of
the light beam.
3) Use the button or (13) to activate or deactivate
the music control and press the button ENTER to
confirm.
4) For music control, adjust the SENSITIVITY control
(3) for the microphone in such a way that the light
beam will be optimally controlled by the music. The
green LED SOUND (16) will shortly light up with
each control signal created by the sound picked up
with the microphone.
Notes
1. When the volume at the music system is modified, the
microphone sensitivity must be adapted accordingly with
the rotary control.
2. When the volume is too low or when the SENSITIVITY
control is set to the left stop, the unit will automatically
change the light pattern.
6.1 Interconnecting several SCAN-20LED units
Several SCAN-20LED units may be interconnected in
order to control all slave units in sync with the master
unit.
1) Connect the DMX OUTPUT (6) of the master unit
via a 3-pole XLR cable (e. g. series MEC-… or
MECN-… from the product range of “img Stage
Line”) to the DMX INPUT (5) of the first slave unit.
2) Connect the DMX OUTPUT of the first slave unit to
the DMX INPUT of the second slave unit, etc. until
all units have been connected in a chain.
3) Set the slave units to one of the slave modes:
a) Press the button MENU (12) so many times until
the display (7) shows . Make sure that the
next button is pressed within 8 seconds, other-
wise the adjusting process will end automatically.
b) Activate the menu item with the button
ENTER (14). The display will indicate the slave
mode adjusted:
Slave mode 1: The slave unit will be con-
trolled in sync with the master unit.
Slave mode 2: The slave unit will be con-
trolled opposite to the master unit.
c) Use the button or (13) to select the desired
slave mode and press the button ENTER to con-
firm.
Once the control signals from the master unit are
applied to the slave units, the red LED SLAVE (15)
will light up on the slave units.
6.2 Remote control LC-3
The remote control LC-3 available as an accessory
allows to control various functions.
1) Connect the remote control to the jack ONLY FOR
REMOTE CONTROL (4).
2) There must be no DMX signal at the DMX INPUT (5).
3) Via the DMX OUTPUT (6), further SCAN-20LED
units may be connected (chapter 6.1) in order to
control them together with the master unit via the
remote control.
4) With the button STAND BY (17), the light beam can
be activated or deactivated. At the same time, the
mirror will go to the starting position. When the light
beam is deactivated, the LED next to the button
STAND BY will light up as a check.
5) Select the operating mode with the button MODE
(19):
a) When the LED of the button MODE is off, the
stroboscope mode will be activated. By keeping
the button FUNCTION (18) pressed, one of the
three stroboscope functions can be activated:
1. permanent stroboscope
2. stroboscope activated by a music pulse and
deactivated by the next music pulse* etc.
12
GB
3. music-controlled stroboscope salvos*
*The music control must be activated
(chapter 6, step 2).
When the button FUNCTION is kept pressed
again, the next stroboscope function respec-
tively will be activated.
b) When the LED of the button MODE is on, the
colour of the light beam and the light pattern can
be selected with the button FUNCTION. To
select the colour, only press the button shortly; to
select the pattern, keep the button pressed until
the next pattern appears. In this mode, the unit
will automatically control the movement of the
light beam, i. e. independently of the music.
7 Operation via a Light Controller
For operation via a light controller with DMX512 proto-
col (e. g. DMX-1440 or DMX-510USB by “img Stage
Line”), the SCAN-20LED is equipped with 6 DMX con-
trol channels. The functions of the channels and the
DMX values can be found in chapter 10.1.
7.1 Connection
As a DMX interface, the unit is provided with 3-pole
XLR jacks of the following pin configuration:
Pin 1 = ground, 2 = DMX
-
, 3 = DMX+
For connection, special cables for high data flow
should be used. Standard microphone cables with
screening and a minimum cross section of 2 × 0.22 mm2
and with a capacity as low as possible can only be
recommended for a total cable length of up to 100 m.
For cable lengths exceeding 150 m it is recommended
to insert a DMX level matching amplifier (e. g. SR-
103DMX by “img Stage Line”).
1) Connect the DMX INPUT (5) to the DMX output of
the light controller.
2) Connect the DMX OUTPUT (6) to the DMX input of
the following light effect unit; connect its output
again to the input of the following unit, etc. until all
light effect units have been connected in a chain.
3) Terminate the DMX output of the last DMX unit in
the chain with a 120 Ω resistor (> 0.3 W): Solder the
resistor to the pins 2 and 3 of an XLR plug and con-
nect the plug to the DMX output or use a corre-
sponding terminating plug (e. g. DLT-123 by “img
Stage Line”).
7.2 Adjusting the start address
For operating the SCAN-20LED with a light controller,
adjust the DMX start address for the first DMX chan-
nel. If e. g. address 17 on the controller is provided for
panning the mirror, adjust the start address 17 on the
SCAN-20LED.
The other functions of the SCAN-20LED will then
automatically be assigned to the following addresses
(in this example 18 – 22). As the next possible start
address for the following DMX-controlled unit, address
23 could be used in this example.
1) To adjust the DMX start address, press the button
MENU (12) once so that the display (7) will show
. Make sure that the next button is pressed
within 8 seconds, otherwise the adjusting process
will end automatically.
2) Press the button ENTER (14). The current address
will be displayed.
3) Adjust the address with the button or (13) and
memorize with the button ENTER.
4) To deactivate the menu, keep the button MENU
pressed until the start address or the operating
mode selected is displayed again or wait for approx.
8s.
5) Once the control signals from the DMX controller
are received, the red LED DMX (11) will light up and
the start address will be displayed. It will now be
possible to operate the SCAN-20LED with the DMX
controller.
To activate the light beam, set the DMX channel 6
for the dimmer to bright and the DMX channel 3 for
the stroboscope functions to a DMX value greater
than 7.
8 Additional Functions
8.1 Indication of operating hours, temperature
and firmware version
Press the button MENU (12) so many times until the
display (7) shows the corresponding menu item:
to indicate the temperature (°C) inside the unit
to indicate the operating hours
to indicate the firmware version (operating sys-
tem of the unit)
Press the button ENTER (14) to confirm the selection;
the display will indicate the desired information. After
8 seconds, the unit will return to the previous operating
mode.
8.2 Reset
In case of malfunction, a reset of the unit may eliminate
the problem:
1) Press the button MENU (12) so many times until the
display (7) shows (reset).
2) Press the button ENTER (14). During the reset,
will be displayed. Then the unit will return to
the previous operating mode.
13
GB

9 Cleaning of the Unit
The mirror, the lenses and the colour wheel should be
cleaned at regular intervals, depending on impurities
caused by dirt, smoke or other particles. Only this will
ensure that the light is radiated at maximum bright-
ness. Prior to opening the unit, disconnect the
mains plug from the socket. Only use a soft, clean
cloth and a glass cleaner. Then carefully wipe the parts
dry.
For cleaning the other parts of the housing, only use
a soft, clean cloth. Never use any fluid; it may leak into
the unit and cause damage.
10 Specifications
Power supply: . . . . . . . . 230 V~/50 Hz
Power consumption: . . . 80 VA
Light source: . . . . . . . . . 1 super bright white LED,
10 W
Ambient temperature: . . 0 – 40 °C
Dimensions. . . . . . . . . . 195 × 180 × 400 mm
Weight: . . . . . . . . . . . . . 4 kg
Subject to technical modification.
10.1 DMX channels
*depending on the adjustment of channel 6 (dimmer)
DMX value Function
Channel 1: pan of mirror
0 – 255 approx.
-
90° to +90°
Channel 2: tilt of mirror
0 – 255 approx. 10° to 85°
Channel 3: stroboscope
0–7 light beam deactivated
8–15 light beam constantly activated
16 – 131 stroboscope: slow →fast
132 – 139 light beam constantly activated
140 – 181
The light beam will gradually become
brighter and will be deactivated after
reaching its maximum brightness*.
execution speed: slow →fast
182 – 189 light beam constantly activated
190 – 231
The light beam will gradually become
darker and will then switch back to
bright*.
execution speed: slow →fast
232 – 239 light beam constantly activated
240 – 247 stroboscope with random flash
sequence
248 – 255 light beam constantly activated
14
GB
All rights reserved by MONACOR
®
INTERNATIONAL GmbH & Co. KG. No part of this instruction manual may
be reproduced in any form or by any means for any commercial use.

15
GB
10.2 Menu structure
DMX start address
Slave mode
SLAVE 1
SLAVE 2
Music control
on
off
Blackout mode
off
on
Pan of mirror
normal
inverted
Firmware version
Tilt of mirror
normal
inverted
Reset
Temperature inside the unit
Operating hours
Display
normal representation
turned by 180°
Display
on
off
DMX value Function
Channel 4: gobo
0–7 no gobo
8–14 gobo 1
15 – 21 gobo 2
22 – 28 gobo 3
29 – 36 gobo 4
37 – 43 gobo 5
44 – 50 gobo 6
51–57 gobo 7
58 – 63 gobo 8
64 – 71 shaking effect without gobo
72 – 78 shaking effect with gobo 1
79 – 85 shaking effect with gobo 2
86 – 92 shaking effect with gobo 3
93 – 100 shaking effect with gobo 4
101 – 107 shaking effect with gobo 5
108 – 114 shaking effect with gobo 6
115 – 121 shaking effect with gobo 7
122 – 127 shaking effect with gobo 8
128 – 255
constant change of gobo:
slow →fast
Channel 5: colour
0–14 white
15 – 29 light green
30 – 44 yellow
45 – 59 purple
60 – 74 orange
75 – 89 light blue
90 – 104 dark green
105 – 119 warm yellow
120 – 127 dark blue
128 – 255
constant change of colour:
slow →fast
Channel 6: dimmer
0 – 255 dark →bright

Vous trouverez page 2 lʼensemble des éléments et
branchements décrits.
1 Eléments et branchements
1.1 SCAN-20LED
1Etrier de montage
2Vis de réglage pour lʼétrier de montage (1)
3Potentiomètre SENSITIVITY de réglage de la sen-
sibilité pour la gestion par la musique via le micro-
phone interne
4Prise de branchement de la télécommande LC-3
5Entrée signal DMX (XLR 3 pôles) pour brancher un
contrôleur
Pin 1 = masse, 2 = DMX
-
, 3 = DMX+
6Sortie signal DMX (XLR 3 pôles) pour brancher à
lʼentrée DMX dʼun autre jeu de lumière
Pin 1 = masse, 2 = DMX
-
, 3 = DMX+
7Affichage
8Prise secteur pour brancher lʼappareil via le cordon
secteur livré à une prise 230 V~/50 Hz
9Porte-fusible : tout fusible fondu doit être remplacé
impérativement par un fusible de même type.
10 LED MASTER brille en mode Master
(fonctionnement sans contrôleur DMX ou avec la
télécommande LC-3)
11 LED DMX, brille lorsque des signaux de com-
mande DMX sont présents à lʼentrée DMX INPUT
(5)
12 Touche MENU pour appeler le menu de réglage et
sélectionner les points du menu
13 Touches et pour modifier un réglage dans le
menu
14 Touche ENTER pour activer un point du menu et
mémoriser un réglage
15 LED SLAVE : brille en mode Slave
(gestion via un autre SCAN-20LED)
16 LED SOUND : brille brièvement lors de la gestion
par la musique via le microphone interne
1.2 Télécommande LC-3
La télécommande est disponible en option mais nʼest
pas livrée avec le SCAN-20LED.
17 Touche STAND BY pour éteindre le faisceau lumi-
neux, simultanément, le miroir va sur la position de
départ.
18 Touche FUNCTION pour sélectionner les diffé-
rentes fonctions selon le mode de fonctionnement
choisi avec la touche MODE (19) [chapitre 6.2]
19 Touche MODE pour commuter entre :
–mode Stroboscope :
la LED à côté de la touche ne brille pas
–sélection de la couleur du faisceau lumineux et
du modèle avec la touche FUNCTION :
la LED de la touche MODE brille
Conseil : Pour une gestion via la télécommande, aucun si-
gnal DMX ne doit pas être présent à lʼentrée DMX INPUT (5).
2 Conseils dʼutilisation et de sécurité
Lʼappareil répond à toutes les directives nécessaires
de lʼUnion européenne et porte donc le symbole .
Respectez scrupuleusement les points suivants :
GLʼappareil nʼest conçu que pour une utilisation en
intérieur. Protégez-le de tout type de projections
dʼeau, des éclaboussures, dʼune humidité élevée de
lʼair et de la chaleur (plage de température de fonc-
tionnement autorisée : 0 – 40 °C).
GNe faites pas fonctionner lʼappareil ou débranchez-
le immédiatement du secteur lorsque :
1. des dommages visibles apparaissent sur lʼappa-
reil ou sur le cordon secteur,
2. après une chute ou un cas similaire, vous avez un
doute sur lʼétat de lʼappareil,
3. des dysfonctionnements apparaissent.
Dans tous les cas, les dommages doivent être répa-
rés par un technicien spécialisé.
GNe débranchez jamais lʼappareil en tirant sur le cor-
don secteur ; retirez toujours le cordon secteur en
tirant la fiche.
GPour le nettoyage, utilisez seulement un chiffon sec
et doux, en aucun cas, de produits chimiques ou
dʼeau.
GNous déclinons toute responsabilité en cas de dom-
mages matériels ou corporels résultants si lʼappareil
est utilisé dans un but autre que celui pour lequel il a
été conçu, sʼil nʼest pas correctement monté, utilisé
ou nʼest pas réparé par une personne habilitée, en
outre, la garantie deviendrait caduque.
Lorsque lʼappareil est définitivement retiré du
service, vous devez le déposer dans une
usine de recyclage adaptée pour contribuer à
son élimination non polluante.
AVERTISSEMENT Lʼappareil est alimenté par une
tension dangereuse 230 V~. Ne
touchez jamais lʼintérieur de
lʼappareil et ne faites rien tomber
dans les ouïes de ventilation !
Risque de décharge électrique.
16
F
B
CH

3 Possibilités dʼutilisation
Le jeu de lumière SCAN-20LED est conçu pour une
utilisation sur scène et en discothèque. Il projète diffé-
rents modèles de couleurs. Une LED blanche très
claire de 10 W est la source de lumière, elle a une fai-
ble consommation et une longue durée de vie.
La gestion des couleurs, modèles et du mouvement
du miroir sʼeffectue via le microphone intégré, via la
télécommande LC-3 (disponible en option) ou avec un
contrôleur DMX via six canaux de contrôle DMX.
4 Montage
GPlacez toujours lʼappareil de telle sorte quʼune cir-
culation dʼair suffisante soit assurée pendant le
fonctionnement. En aucun cas, les ouïes de venti-
lation sur le boîtier ne doivent être obturées (par
exemple par des rideaux).
GLa distance avec lʼobjet à éclairer devrait être de
10 cm au moins.
1) Vissez le jeu de lumière avec lʼétrier de montage (1)
à lʼendroit voulu, par exemple sur une traverse ou
un pied de lumière.
2) Pour orienter lʼappareil, desserrez les vis de régla-
ge (2), réglez lʼinclinaison voulue de lʼappareil puis
revissez les vis.
5 Mise en service
Reliez le cordon secteur livré à la prise secteur (8) et
lʼautre extrémité à une prise 230 V~/50 Hz. Pendant la
phase de démarrage, lʼaffichage (7) indique ,
lʼappareil est ensuite prêt à fonctionner et peut être uti-
lisé via un contrôleur DMX (chapitre 7) ou il change
automatiquement, en mode Master, le modèle du fais-
ceau lumineux (chapitre 6). Pour lʼéteindre, dé-
branchez le cordon secteur.
Pour un meilleur confort dʼutilisation, il est recom-
mandé de relier lʼappareil à une prise secteur pouvant
être allumée et éteinte via un interrupteur.
Attention ! Lʼappareil ne doit pas être relié à la tension
secteur via un dimmer !
5.1 Réglages de base
Tournez lʼobjectif pour régler la netteté du modèle.
Avec lʼaffichage (7) et les touches de commande
(12 à 14), on peut effectuer les réglages de base sui-
vants. Appuyez sur la touche MENU (12) jusquʼà ce
que la fonction voulue soit affichée. Appuyez ensuite
sur la touche ENTER (14). Nʼattendez pas plus de
8 secondes avant dʼappuyer sur la touche suivante
sinon le processus de réglage est quitté. La structure
du menu est présentée sur la page 21.
Activation/Désactivation
du mode Blackout
Avec la touche ou (13), sélectionnez :
Le faisceau est toujours allumé. Ce réglage
doit être sélectionné pour une utilisation sans
contrôleur DMX.
Le faisceau nʼest allumé que lorsquʼun signal
de commande DMX est présent à la prise DMX
INPUT (5). Dès que le contrôleur DMX est
éteint, le faisceau sʼéteint.
Pour mémoriser, appuyez sur la touche ENTER (14).
Rotation miroir (Pan) normale ou inversée
Avec la touche ou (13), sélectionnez :
La rotation du miroir est normale.
La rotation du miroir est inversée. Si vous utili-
sez deux SCAN-20LED via la même adresse
DMX, les mouvements des miroirs des appa-
reils peuvent être symétriques en miroir si la
rotation est réglée sur normal sur un des appa-
reils et sur inverse sur lʼautre appareil.
Pour mémoriser, appuyez sur la touche ENTER (14).
Gestion de lʼinclinaison du miroir (Tilt)
normale ou inversée
Avec la touche ou (13), sélectionnez :
La gestion de lʼinclinaison du miroir est nor-
male.
La gestion est inversée. Si vous utilisez deux
SCAN-20LED via la même adresse DMX, les
mouvements des miroirs des appareils peuvent
être symétriques en miroir si la gestion de lʼin-
clinaison du miroir est réglée sur normal sur un
des appareils et sur inverse sur lʼautre appareil.
Pour mémoriser, appuyez sur la touche ENTER (14).
AVERTISSEMENT Ne regardez jamais directement
le faisceau lumineux, cela peut
générer des troubles de la vue.
Nʼoubliez pas que des change-
ments très rapides de lumière
peuvent déclencher des crises
dʼépilepsie chez les personnes
photosensibles et épileptiques.
AVERTISSEMENT Lʼappareil doit être monté de
manière professionnelle et
sûre. Si lʼappareil doit être
suspendu au-dessus de per-
sonnes, il doit être en plus
assuré (par exemple avec
une corde de sécurité. Fixez
la corde de telle sorte que la
distance de chute de lʼappa-
reil ne puisse pas être supé-
rieure à 20 cm).
17
F
B
CH
Activation/Désactivation affichage
Avec la touche ou (13), sélectionnez :
Lʼaffichage (7) est toujours allumé.
Lʼaffichage sʼéteint 60 secondes environ après
la dernière pression sur une touche. Il se ral-
lume dès la prochaine activation dʼune touche.
Pour mémoriser, appuyez sur la touche ENTER (14).
Visualisation affichage
Sélectionnez avec la touche ENTER (14) et simulta-
nément mémorisez :
visualisation normale
visualisation tournée de 180°
8 secondes environ après la dernière pression sur une
touche, le menu de réglage est automatiquement quitté.
6 Fonctionnement sans contrôleur DMX
Si aucun signal de commande DMX nʼest présent à la
prise DMX INPUT (5), la LED MASTER (10) jaune
brille, lʼaffichage (7) indique le mode Master (affichage
) et lʼappareil change tout seul les modèles. Il est
impératif, dans ce cas, que le mode Blackout soit dés-
activé, chapitre 5.1.
Si le changement des modèles, de la couleur du
faisceau lumineux et le mouvement du faisceau lumi-
neux doivent se faire au rythme de la musique, activez
la gestion par la musique :
1) Appuyez sur la touche MENU (12) jusquʼà ce que
soit visible sur lʼaffichage (7). Nʼattendez pas
plus de 8 secondes pour appuyer sur une autre
touche sinon vous quittez le processus de réglage.
2) Activez le point de menu avec la touche ENTER
(14). Lʼaffichage indique lʼétat de fonctionnement :
= gestion par la musique activée
= gestion par la musique désactivée
Lʼappareil gère le changement de modèles et
de couleur ainsi que les mouvements du fais-
ceau lumineux tout seul.
3) Avec la touche ou (13), activez ou désactivez la
gestion par la musique et confirmez avec la touche
ENTER.
4) Pour une gestion par la musique, réglez le réglage
SENSITIVITY (3) pour la sensibilité du microphone
de telle sorte que le faisceau lumineux soit géré de
manière optimale par la musique. A chaque signal
de commande produit par le son enregistré par le
microphone, la LED SOUND verte (16) sʼallume
brièvement.
Remarque
1. Si le volume est modifié sur lʼinstallation de musique, la
sensibilité du microphone doit être adaptée en consé-
quence avec le potentiomètre.
2. Si le volume est trop faible, ou si le réglage SENSITI-
VITY est tourné entièrement à gauche, lʼappareil change
automatiquement le modèle.
6.1 Fonctionnement combiné de plusieurs
SCAN-20LED
Il est possible de faire fonctionner ensemble plusieurs
appareils du modèle SCAN-20LED. Lʼappareil princi-
pal (Master) peut gérer tous les appareils auxiliaires
(Slave) de manière synchrone.
1) Reliez la connexion DMX OUTPUT (6) de lʼappareil
principal via un cordon XLR 3 pôles (par exemple
MEC-… ou MECN-… de la gamme “img Stage
Line”) à lʼentrée DMX INPUT (5) du premier appa-
reil auxiliaire.
2) Reliez la sortie DMX OUTPUT du premier appareil
auxiliaire à lʼentrée DMX INPUT du deuxième appa-
reil auxiliaire et ainsi de suite jusquʼà ce que tous
les appareils soient reliés en une chaîne.
3) Réglez les appareils auxiliaires sur un des modes
Slave :
a) Appuyez sur la touche MENU (12) jusquʼà ce
que soit visible sur lʼaffichage (7). Nʼatten-
dez pas plus de 8 secondes avant dʼappuyer sur
une autre touche sinon vous quittez le proces-
sus de réglage.
b) Activez le point de menu avec la touche
ENTER (14), lʼaffichage indique le mode Slave
réglé :
Mode Slave 1 : Lʼappareil auxiliaire est
géré de manière synchrone par lʼappa-
reil principal.
Mode Slave 2 : Lʼappareil auxiliaire est
géré à lʼinverse de lʼappareil principal.
c) Avec la touche ou (13), sélectionnez le mode
Slave souhaité et confirmez avec la touche
ENTER.
Dès que les signaux de commande de lʼappareil
principal sont présents sur les appareils auxiliaires,
la LED rouge SLAVE (15) sur les appareils auxi-
liaires brille.
6.2 Télécommande LC-3
Via la télécommande LC-3 disponible en option,
diverses fonctions peuvent être gérées.
1) Reliez la télécommande à la prise ONLY FOR
REMOTE CONTROL (4).
2) Aucun signal DMX ne doit être présent à lʼentrée
DMX INPUT (5).
3) Via la sortie DMX OUTPUT (6), on peut brancher
dʼautres SCAN-20LED (chapitre 6.1) pour les
gérer via la télécommande, avec lʼappareil principal.
4) Avec la touche STAND BY (17), on peut allumer et
éteindre le faisceau lumineux. Simultanément, le
miroir va en position de départ. Lorsque le faisceau
est éteint, la LED à côté de la touche STAND BY
brille et sert de témoin de contrôle.
5) Avec la touche MODE (19), sélectionnez le mode
de fonctionnement :
18
F
B
CH
a) Si la LED de la touche MODE ne brille pas, le
mode stroboscope est activé. En maintenant la
touche FUNCTION (18) enfoncée, on peut acti-
ver une des trois fonctions stroboscope :
1. Stroboscope continu
2. Stroboscope allumé par une impulsion de
musique, éteint par lʼimpulsion suivante* et
ainsi de suite
3. Rafales de stroboscope gérées par la musique*
*la gestion par la musique doit être activée
(chapitre 6, point 2)
Si vous maintenez la touche FUNCTION enfon-
cée une nouvelle fois, la prochaine fonction stro-
boscope est respectivement activée.
b) Si la LED de la touche MODE brille, on peut
sélectionner avec la touche FUNCTION, la cou-
leur du faisceau lumineux et le modèle. Pour
sélectionner la couleur, appuyez brièvement sur
la touche et pour sélectionner le modèle, main-
tenez la touche enfoncée jusquʼà ce que le
modèle suivant apparaisse. Avec ce mode de
fonctionnement, lʼappareil gère le mouvement
du faisceau lumineux de manière autonome,
cʼest-à-dire indépendamment de la musique.
7 Utilisation via un contrôleur
Pour une utilisation via un contrôleur avec protocole
DMX512 (par exemple DMX-1440 ou DMX-510USB
de “img Stage Line”), le SCAN-20LED dispose de six
canaux de commande. Les fonctions des canaux et les
valeurs DMX sont décrites sur le chapitre 10.1.
7.1 Branchement
Lʼappareil possède des prises XLR 3 pôles avec la
configuration suivante pour lʼinterface DMX :
pin 1 = masse, 2 = DMX
-
, 3 = DMX+
Pour le branchement, il est recommandé dʼutiliser des
câbles spécifiques pour des flots importants de don-
nées. Lʼemploi de câbles micro usuels avec blindage
et une section de 2 × 0,22 mm2au moins et la capacité
la plus faible possible ne nʼest recommandé que pour
des longueurs de câble de 100 m maximum. Pour des
longueurs de liaison à partir de 150 m, il est recom-
mandé dʼinsérer un amplificateur DMX de signal (par
exemple SR-103DMX de “img Stage Line”).
1) Reliez lʼentrée DMX (5) à la sortie DMX du contrôleur.
2) Reliez la sortie DMX (6) à lʼentrée DMX du jeu de
lumière suivant. Reliez sa sortie à lʼentrée du pro-
chain appareil et ainsi de suite jusquʼà ce que tous
les jeux de lumière soient reliés dans une chaîne.
3) Terminez la sortie DMX du dernier appareil DMX de
la chaîne avec une résistance 120 Ω (> 0,3 W) :
soudez aux pins 2 et 3 dʼune fiche XLR la résis-
tance et branchez la fiche dans la sortie DMX ou uti-
lisez un bouchon correspondant (par exemple DLT-
123 de “img Stage Line”).
7.2 Réglage de lʼadresse de démarrage
Pour pouvoir utiliser le SCAN-20LED avec un contrô-
leur, lʼadresse de démarrage DMX doit être réglée pour
le premier canal DMX. Si par exemple sur le contrôleur,
lʼadresse 17 est utilisée pour la rotation du miroir,
réglez lʼadresse de démarrage 17 sur le SCAN-20LED.
Les autres fonctions du SCAN-20LED sont auto-
matiquement attribuées aux adresses suivantes (dans
cet exemple 18 à 22). Comme adresse de démarrage
immédiatement suivante pour lʼappareil à gestion
DMX suivant, on pourrait, dans cet exemple, utiliser
lʼadresse 23.
1) Pour régler lʼadresse de démarrage DMX, appuyez
une fois sur la touche MENU (12) pour que
soit visible sur lʼaffichage (7). Nʼattendez pas plus
de 8 secondes avant dʼappuyer sur une autre tou-
che, sinon vous quittez le processus de réglage.
2) Appuyez sur la touche ENTER (14), lʼadresse en
cours est affichée.
3) Avec la touche ou (13), réglez lʼadresse voulue
et mémorisez-la avec la touche ENTER.
4) Pour quitter le menu, maintenez la touche MENU
enfoncée jusquʼà ce que lʼaffichage revienne à
lʼadresse de démarrage ou à lʼaffichage du mode
de fonctionnement sélectionné ou attendez 8 se-
condes environ.
5) Dès que les signaux de commande du contrôleur
DMX sont reçus, la LED rouge DMX (11) brille, lʼaf-
fichage indique lʼadresse de démarrage. Le SCAN-
20LED peut maintenant être utilisé avec le contrô-
leur DMX.
Pour que le faisceau lumineux sʼallume, réglez
le canal DMX 6 pour le dimmer sur clair et le canal
DMX 3 pour les fonctions stroboscopes sur une
valeur DMX supérieure à 7.
8 Autres fonctions
8.1 Affichage des heures de fonctionnement,
de la température et de la version Firmware
Appuyez sur la touche MENU (12) jusquʼà ce que sur
lʼaffichage (7) le point de menu correspondant soit affi-
ché :
pour indiquer la température (°C) à lʼintérieur
de lʼappareil
pour indiquer les heures de fonctionnement
pour indiquer la version Firmware
(système dʼexploitation de lʼappareil)
Confirmez la sélection avec la touche ENTER (14),
lʼaffichage indique lʼinformation voulue. Après 8 se-
condes, lʼappareil revient sur le mode de fonctionne-
ment précédent.
19
F
B
CH
8.2 Réinitialisation
En cas de dysfonctionnements, on peut éventuelle-
ment les éliminer par une réinitialisation de lʼappareil :
1) Appuyez sur la touche MENU (12) jusquʼà ce que
(reset) soit visible sur lʼaffichage (7).
2) Appuyez sur la touche ENTER (14). Lʼaffichage in-
dique pendant la réinitialisation. Ensuite, lʼap-
pareil revient au mode de fonctionnement précé-
dent.
9 Nettoyage de lʼappareil
Le miroir, les lentilles et la roue de couleurs doivent
être nettoyés régulièrement de toute poussière, fumée
ou autres particules de salissure. Cʼest à cette condi-
tion que la lumière sera émise avec une luminosité
maximale. Avant dʼouvrir lʼappareil, débranchez la
fiche secteur du secteur. Utilisez uniquement un
tissu propre et doux et un produit de nettoyage pour
verres. Essuyez puis séchez les éléments.
Pour nettoyer les autres éléments du boîtier, utilisez
exclusivement un tissu doux et propre. Nʼutilisez en
aucun cas de liquide, il pourrait couler dans lʼappareil
et créer des dégâts.
10 Caractéristiques techniques
Alimentation : . . . . . . . . 230 V~/50 Hz
Consommation : . . . . . . 80 VA
Lampe : . . . . . . . . . . . . 1 LED blanche très claire,
10 W
Température fonc. : . . . 0 – 40 °C
Dimensions : . . . . . . . . 195 × 180 × 400 mm
Poids : . . . . . . . . . . . . . 4 kg
Tout droit de modification réservé.
10.1 Canaux DMX
*fonction du réglage du canal 6 (dimmer)
Valeur DMX Fonction
Canal 1 : rotation du miroir (Pan)
0 – 255 environ
-
90° à +90°
Canal 2 : inclinaison du miroir (Tilt)
0 – 255 environ 10° à 85°
Canal 3 : stroboscope
0–7 faisceau éteint
8–15 faisceau constamment allumé
16 – 131 stroboscope: lent →rapide
132 – 139 faisceau constamment allumé
140 – 181
Le faisceau devient lentement plus
clair et se coupe lorsquʼil a atteint la
luminosité maximale*.
vitesse de défilement: lent →rapide
182 – 189 faisceau constamment allumé
190 – 231
Le faisceau devient lentement plus
sombre puis revient sur clair*.
vitesse de défilement: lent →rapide
232 – 239 faisceau constamment allumé
240 – 247 stroboscope avec suite aléatoire
dʼéclairs
248 – 255 faisceau constamment allumé
20
F
B
CH
Notice dʼutilisation protégée par le copyright de MONACOR
®
INTERNATIONAL GmbH & Co. KG. Toute repro-
duction même partielle à des fins commerciales est interdite.
Table of contents
Languages:
Popular Lighting Equipment manuals by other brands

SWS
SWS 26 Series Installation and operating instructions

Blizzard Lighting
Blizzard Lighting MAX L manual

E2S
E2S BExCBG05-05D-P instruction manual

American DJ
American DJ REVO RAVE User instructions

Philips
Philips Ecomoods 16902/**/16 user manual

Federal Signal Corporation
Federal Signal Corporation 121X Series Installation and service instructions


Eaton
Eaton CEAG 3503.1 SL CG-S Mounting and operating instructions

DS Produkte
DS Produkte MY-84019 instructions

ADJ
ADJ 3 SIXTY 2R User instructions

Vision X
Vision X XIL-OP110 Installation instructions & user manual

Honeywell
Honeywell ExiLED 290142 quick start guide

OWIM
OWIM Melinera 288593 Operation and safety notes