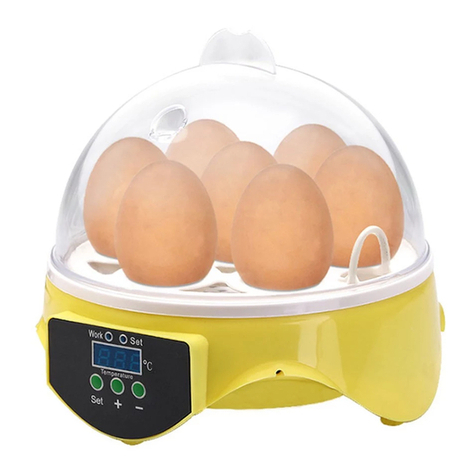
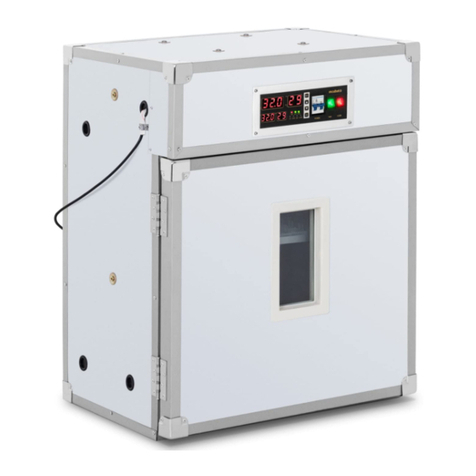
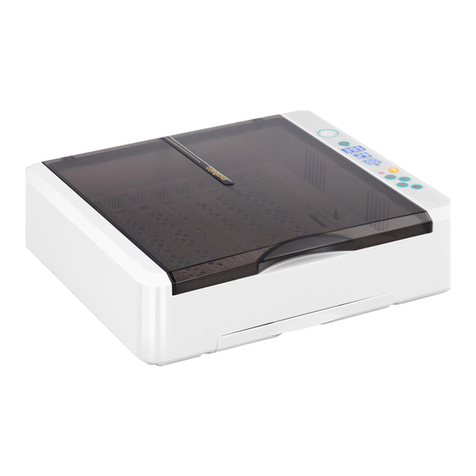
incubato IN-7DDI User manual

IN-7DDI
IN-48DDI
IN-56DDI
IN-96DDI
IN-88DDI
IN-32DDI
IN-112DDI
Bedienungsanleitung
User manual
Instrukcja obsługi
Návod k použit
Manuel d´utilisation
Istruzioni per l‘uso
Manual de instrucciones
EGG INCUBATOR
expondo.de

Das Produkt erfüllt die geltenden
Sicherheitsnormen.
Gebrauchsanweisung beachten.
Recyclingprodukt.
ACHTUNG!, WARNUNG! oder HINWEIS!, um auf
bestimmte Umstände aufmerksam zu machen
(allgemeines Warnzeichen).
ACHTUNG! Warnung vor elektrischer Spannung!
Gerät der Schutzklasse II mit Doppelisolierung.
DE 3
3
10
16
23
29
36
43
DEUTSCH
ENGLISH
POLSKI
ČESKY
FRANÇAIS
ITALIANO
ESPAÑOL
BEDIENUNGSANLEITUNG
PRODUKTNAME EIER INKUBATOR
PRODUCT NAME EGG INCUBATOR
NAZWA PRODUKTU INKUBATOR DO JAJ
NÁZEV VÝROBKU INKUBÁTOR NA VEJCE
NOM DU PRODUIT COUVEUSE À OEUF
NOME DEL PRODOTTO INCUBATRICE PER UOVA
NOMBRE DEL PRODUCTO INCUBADORA DE HUEVOS
MODELL
IN-7DDI
IN-48DDI
IN-56DDI
IN-96DDI
IN-88DDI
IN-32DDI
IN-112DDI
PRODUCT MODEL
MODEL PRODUKTU
MODEL VÝROBKU
MODÈLE
MODELLO
MODELO
IMPORTEUR
EXPONDO POLSKA SP. Z O.O. SP. K.
IMPORTER
IMPORTER
DOVOZCE
IMPORTATEUR
IMPORTATORE
IMPORTADOR
ADRESSE VON IMPORTEUR
UL. NOWY KISIELIN – INNOWACYJNA 7, 66-002 ZIELONA GÓRA | POLAND, EU
IMPORTER ADDRESS
ADRES IMPORTERA
ADRESA DOVOZCE
ADRESSE DE L'IMPORTATEUR
INDIRIZZO DELL'IMPORTATORE
DIRECCIÓN DEL IMPORTADOR
INHALT | CONTENT | TREŚĆ | OBSAH | CONTENU | CONTENUTO | CONTENIDO
Parameter –
Beschreibung
Parameter – Wert
Produktname Eier Inkubator
Modell IN-
7DDI
IN-
48DDI
IN-
56DDI
IN-
96DDI
Nennspannung
[V~]/Frequenz
[Hz]
230/50
Nennleistung
[W]
30 80
Schutzklasse II
Schutzart IP IPX4
Beladung
(Hühnereier)
[Stück]
7 48 56 96
Automatische
Eier-Rotations-
funktion
--- Ja
Alarmfunktion --- Ja
Ventilator Ja
Schierlampe Stromversor-
gungszubehör
– Batterien
1xAA (Die Bat-
terie ist nicht
beigefügt)
Einbau Stromver-
sorgungs-
zubehör
– Batterien
1xAA (Die
Batterie
ist nicht
beigefügt)
Maße [mm] 165
x165
x155
495
x471
x230
485
x460
x210
495
x477
x380
Gewicht [kg] 0,4 3,1 3,5 5,5
Produktname Eier Inkubator
Modell IN-
88DDI
IN-
32DDI
IN-
112DDI
Nennspannung
[V~]/Frequenz
[Hz]
230/50
Nennleistung
[W]
80
Schutzklasse II
Schutzart IP IPX4
Beladung
(Hühnereier)
[Stück]
88 32 112
Automatische
Eier-Rotations-
funktion
--- Ja
TECHNISCHE DATEN Alarmfunktion -- Ja
Ventilator Ja
Schierlampe Stromver-
sorgungs-
zubehör
– Batterien
1xAA (Die
Batterie
ist nicht
beigefügt)
Einbau Stromver-
sorgungszu-
behör
– Batterien
1xAA
(Die Batterie
ist nicht
beigefügt)
Maße [mm] 490x490
x180
350x460
x195
495x470
x385
Gewicht [kg] 1,4 2,75 5,6
Für einen langen und zuverlässigen Betrieb des Geräts muss
auf die richtige Handhabung und Wartung entsprechend
den in dieser Anleitung angeführten Vorgaben geachtet
werden. Die in dieser Anleitung angegebenen technischen
Daten und die Spezikation sind aktuell. Der Hersteller
behält sich das Recht vor, im Rahmen der Verbesserung der
Qualität Änderungen vorzunehmen. Unter Berücksichtigung
des technischen Fortschritts und der Geräuschreduzierung
wurde das Gerät so entworfen und produziert, dass das
infolge der Geräuschemission entstehende Risiko auf dem
niedrigsten Niveau gehalten wird.
ERLÄUTERUNG DER SYMBOLE
1. ALLGEMEINE BESCHREIBUNG
Diese Anleitung ist als Hilfe für eine sichere und zuverlässige
Nutzung gedacht. Das Produkt wurde strikt nach den
technischen Vorgaben und unter Verwendung modernster
Technologien und Komponenten sowie unter Wahrung der
höchsten Qualitätsstandards entworfen und angefertigt.
VOR INBETRIEBNAHME MUSS DIE ANLEITUNG
GENAU DURCHGELESEN UND VERSTANDEN
WERDEN.
HINWEIS! In der vorliegenden Anleitung sind
Beispielbilder vorhanden, die von dem tatsächlichen
Aussehen der Maschine abweichen können.
Die originale Anweisung ist die deutschsprachige Fassung.
Sonstige Sprachfassungen sind Übersetzungen aus der
deutschen Sprache.
27.06.2019 27.06.2019

DE DE
4 5
Modell IN-56DDI, IN-32DDI
Modell IN-96DDI, IN-112DDI
Zusammensetzen:
1
4
3
2
1
4
2
3
2
1
4
3
Modell IN-48DDI
ACHTUNG! Lesen Sie alle Sicherheitshinweise und
alle Anweisungen durch. Die Nichtbeachtung der
Warnungen und Anweisungen kann zu elektrischen
Schlägen, Feuer und/oder schweren Verletzungen bis
hin zum Tod führen.
2. NUTZUNGSSICHERHEIT
Die Begrie „Gerät“ oder „Produkt“ in den Warnungen
und Beschreibung des Handbuchs beziehen sich auf <
Eier Inkubator >. Benutzen Sie das Gerät nicht in Räumen
mit sehr hoher Luftfeuchtigkeit oder in unmittelbarer
Nähe von Wasserbehältern! Lassen Sie das Gerät nicht
nass werden. Gefahr eines elektrischen Schlags! Die
Ventilationsönungen dürfen nicht verdeckt werden!
2.1. ELEKTRISCHE SICHERHEIT
a) Der Gerätestecker muss mit der Steckdose
kompatibel sein. Ändern Sie den Stecker in keiner
Weise. Originalstecker und passende Steckdosen
vermindern das Risiko eines elektrischen Schlags.
b) Vermeiden Sie das Berühren von geerdeten
Bauteilen wie Rohrleitungen, Heizkörpern, Öfen und
Kühlschränken. Es besteht das erhöhte Risiko eines
elektrischen Schlags, wenn Ihr Körper durch nasse
Oberächen und in feuchter Umgebung geerdet ist.
Wasser, das in das Gerät eintritt, erhöht das Risiko
von Beschädigungen und elektrischen Schlägen.
c) Berühren Sie das Gerät nicht mit nassen oder
feuchten Händen.
d) Verwenden Sie das Kabel nicht in unsachgemäßer
Weise. Verwenden Sie es niemals zum Tragen
des Geräts oder zum Herausziehen des Steckers.
Halten Sie das Kabel von Hitze, Öl, scharfen
Kanten oder beweglichen Teilen fern. Beschädigte
oder geschweißte Kabel erhöhen das Risiko eines
elektrischen Schlags.
e) Wenn sich die Verwendung des Geräts in feuchter
Umgebung nicht verhindern lässt, verwenden Sie
einen Fehlerstromschutzschalter (RCD). Mit einem
RCD verringert sich das Risiko eines elektrischen
Schlags.
f) Es ist verboten, das Gerät zu verwenden, wenn
das Netzkabel beschädigt ist oder oensichtliche
Gebrauchsspuren aufweist. Ein beschädigtes
Netzkabel sollte von einem qualizierten Elektriker
oder vom Kundendienst des Herstellers ersetzt
werden.
g) ACHTUNG LEBENSGEFAHR! Tauchen und Halten Sie
das Gerät während des Reinigens oder des Betriebes
nie in Wasser oder andere Flüssigkeiten.
2.2. SICHERHEIT AM ARBEITSPLATZ
a) a) Halten Sie Ihren Arbeitsplatz sauber und
gut beleuchtet. Unordnung oder schlechte
Beleuchtung kann zu Unfällen führen. Handeln Sie
vorausschauend, beobachten Sie, was getan wird,
und nutzen Sie Ihren gesunden Menschenverstand
bei der Verwendung des Gerätes.
b) BenutzenSiedasGerätnichtinexplosionsgefährdeten
Bereichen, zum Beispiel in Gegenwart von
brennbaren Flüssigkeiten, Gasen oder Staub. Geräte
können unter Umständen Funken erzeugen, welche
Staub oder Dämpfe entzünden können.
c) Im Falle eines Schadens oder einer Störung sollte
das Gerät sofort ausgeschaltet und dies einer
autorisierten Person gemeldet werden.
d) Wenn Sie nicht sicher sind, ob das Gerät
ordnungsgemäß funktioniert, wenden Sie sich an
den Service des Herstellers.
e) Reparaturen dürfen nur vom Service des Herstellers
durchgeführt werden. Führen Sie keine Reparaturen
auf eigene Faust durch!
f) Zum Löschen des Gerätes bei Brand oder Feuer, nur
Pulverfeuerlöscher oder Kohlendioxidlöscher (CO2)
verwenden.
g) Bewahren Sie die Gebrauchsanleitung für
den weiteren Gebrauch auf. Sollte das Gerät
an Dritte weitergegeben werden, muss die
Gebrauchsanleitung mit ausgehändigt werden.
h) Verpackungselemente und kleine Montageteile
außerhalb der Reichweite von Kindern aufbewahren.
i) Halten Sie das Gerät von Kindern und Tieren fern.
HINWEIS! Kinder und Unbeteiligte müssen bei der
Arbeit mit diesem Gerät gesichert werden
2.3. PERSÖNLICHE SICHERHEIT
a) Es ist nicht gestattet, das Gerät im Zustand der
Ermüdung, Krankheit, unter Einuss von Alkohol,
Drogen oder Medikamenten zu betreiben, wenn das
die Fähigkeit das Gerät zu bedienen, einschränkt.
b) Das Gerät darf nur von körperlich geeigneten
Personen bedient werden, die zu ihrem Benutzen
fähig und entsprechend geschult sind und die
diese Bedienungsanleitung gelesen und verstanden
haben und im Rahmen der Sicherheit und des
Gesundheitsschutzes am Arbeitsplatz geschult
wurden.
c) Vergewissern Sie sich vor dem Anschließen des
Geräts an eine Stromquelle, dass der Schalter
ausgeschaltet ist.
d) Das Gerät ist kein Spielzeug. Kinder sollten in der
Nähe des Geräts unter Aufsicht stehen, um Unfälle
zu vermeiden.
2.4. SICHERE ANWENDUNG DES GERÄTS
a) Benutzen Sie das Gerät nicht, wenn der EIN-/AUS-
Schalter nicht ordnungsgemäß funktioniert. Geräte,
die nicht über den Schalter gesteuert werden können,
sind gefährlich und müssen repariert werden.
b) Trennen Sie das Gerät von der Stromversorgung,
bevor Sie mit der Einstellung, Reinigung und Wartung
beginnen. Eine solche vorbeugende Maßnahme
verringert das Risiko einer versehentlichen
Aktivierung des Geräts.
c) Nicht verwendete Werkzeuge sind außerhalb
der Reichweite von Kindern sowie von Personen
aufzubewahren, welche weder das Gerät noch die
Anleitung kennen. In den Händen unerfahrener
Personen können diese Geräte eine Gefahr darstellen.
d) Halten Sie das Gerät stets in einem einwandfreien
Zustand. Prüfen Sie vor jeder Inbetriebnahme, ob am
Gerät und seinen beweglichen Teilen Schäden vorliegen
(defekte Komponenten oder andere Faktoren, die
den sicheren Betrieb der Maschine beeinträchtigen
könnten). Im Falle eines Schadens muss das Gerät vor
Gebrauch in Reparatur gegeben werden.
e) Halten Sie das Gerät außerhalb der Reichweite von
Kindern.
f) Reparatur und Wartung von Geräten dürfen
nur von qualiziertem Fachpersonal und mit
Originalersatzteilen durchgeführt werden. Nur
so wird die Sicherheit während der Nutzung
gewährleistet.
3. NUTZUNGSBEDINGUNGEN
Der Eier-Inkubator ist ein Gerät zur Inkubation von
embryonierten Vogeleiern. Die Aufgabe des Eier-Inkubator
besteht darin, die für die ordnungsgemäße Entwicklung
des Embryos erforderliche Temperatur und Luftfeuchtigkeit
bis zum Schlüpfen aufrechtzuerhalten.
Für alle Schäden bei nicht sachgemäßer Verwendung
haftet allein der Betreiber.
2
3
1
4
g) Um die Funktionsfähigkeit des Gerätes zu
gewährleisten, dürfen die werksmäßig montierten
Abdeckungen oder Schrauben nicht entfernt werden.
h) Berühren Sie keine beweglichen Teile oder
Zubehörteile, es sei denn, das Gerät wurde vom Netz
getrennt.
i) Es ist verboten, das Gerät während des Betriebs zu
schieben, umzustellen oder zu drehen.
j) Das Gerät muss regelmäßig gereinigt werden, damit
sich nicht dauerhaft Schmutz festsetzt.
k) Das Gerät ist kein Spielzeug. Reinigung und Wartung
dürfen nicht von Kindern ohne Aufsicht durch eine
erwachsene Person durchgeführt werden.
l) Es ist untersagt, in den Aufbau des Geräts
einzugreifen, um seine Parameter oder Konstruktion
zu ändern.
m) Geräte von Feuer – und Wärmequellen fernhalten.
n) Vor der ersten Inbetriebnahme immer überprüfen,
ob die Ausrüstung vollständig ist und ob alle
beweglichen Teile, die die Sicherheit der Bruteier
oder Küken beeinträchtigen können, wie z.B.
Windmotoren, durch Schilde geschützt sind.
o) Decken Sie den Eier-Inkubator niemals während des
laufenden Betriebs ab.
p) VORSICHT! Brandgefahr.
q) Einige Teile dieses Gerätes können sehr warm
werden. Um Verletzungen zu vermeiden, seien Sie
beim Berühren dieser Flächen vorsichtig.
r) Überprüfen Sie regelmäßig den Wasserstand im
Eier-Inkubator. Es wird empfohlen, warmes Wasser
einzugießen, falls der Wasserstand zu gering ist.
s) Es wird empfohlen, Wasser mit dem Spender
einzugießen.
t) Trennen Sie den Eier-Inkubator immer vom
Stromnetz, wenn Sie Wasser hinzufügen oder wenn
der Inkubator nicht benutzt wird.
u) Befolgen Sie die für eine korrekte Inkubation der Eier
allgemein anerkannten Zuchtempfehlungen.
ACHTUNG! Obwohl das Gerät in Hinblick
auf Sicherheit entworfen wurde und über
Schutzmechanismen sowie zusätzlicher
Sicherheitselemente verfügt, besteht bei
der Bedienung eine geringe Unfall- oder
Verletzungsgefahr. Es wird empfohlen, bei der
Nutzung Vorsicht und Vernunft walten zu lassen.
3.1. GERÄTEBESCHREIBUNG
Modell IN-7DDI
27.06.2019 27.06.2019

DE
6DE 7
Modell IN-88DDI
1. Abdeckung
2. Eierablage
3. Gehäuse
4. Bedienfeld
Die Eier-Inkubatoren IN-7DDI, IN-48DDI, IN-96DDI, IN-
112DDI und IN-88DDI verfügen über eine Eierablage als
zusätzliches Zubehör im Set. Das Modell IN-56DDI und IN-
32DDI hat einen eingebauten Plattenbelichter.
Bedienfeld Modell IN-7DDI, IN-88DDI
1. Temperaturwertanzeige
2. LED „Work”
3. LED „Set”
4. Wert erhöhen
5. Wert reduzieren
6. Taste „Set”
7. Ein/Aus-Schalter (Gilt nur für das Modell IN-88DDI)
Modell IN-48DDI, IN-96DDI, IN-112DDI
1. Feuchtigkeitsanzeige
2. Temperaturwertanzeige
3. Taste „Set”
4. Wert erhöhen
5. Ein/Aus-Schalter
6. Wert reduzieren
7. Taste „Reset”
8. Zeitanzeiger für die nächste Schaukelbewegung der
Eier
9. Anzeige für die Anzahl der Inkubationstage
Modell IN-56DDI, IN-32DDI
1. Display
2. Taste „Set”
3. Wert erhöhen
4. Ein/Aus-Schalter
5. Wert reduzieren
6. Schalter der Schierlampe
7. Taste „Reset”
Display:
1. Zeitzähler für die nächste Rotationsbewegung
der Eier.
2. Temperaturwert
3. Feuchtigkeitsgrad
4. Ventilator
5. Alarm für zu niedrige Luftfeuchtigkeit
6. Heizung eingeschaltet
7. Eingeschaltete Schierlampe
8. Anzahl der Inkubationstage
1. Ein/Aus-Schalter
Schierlampe
4
1
3
2
3
7
654
1
1 2
89 7 6
5
3 4
1
1
7
6
2
3
5
4Modell IN-
7
DDI
IN-
48
DDI
IN-
56
DDI
IN-
96
DDI
IN-
88
DDI
IN-
32
DDI
IN-
112
DDI
Max. An-
zahl von
Hühner-
eiern
748 56 96 88 32 112
Max. An-
zahl von
Tauben-
und Wach-
teleiern
748 56 96 132 32 112
Max.
Anzahl
von Trut-
hahn- und
Enteneiern
424 28 48 44 16 56
Max. An-
zahl von
Gänsee-
iern
-16 18 32 29 10 38
Modell IN-
7
DDI
IN-
48
DDI
IN-
56
DDI
IN-
96
DDI
IN-
88
DDI
IN-
32
DDI
IN-
112
DDI
Art der
Vertei-
lung von
Hühner-,
Tauben-,
und Wach-
teleiern
Ein Ei in jeder Vertiefung der Eierplatte.
Art der
Verteilung
von Trut-
hahn- und
Enteneiern
Zwischen den Eiern ist ein leerer Platz
(Vertiefung) in der Platte freizulassen.
Art der
Verteilung
von Gän-
seeiern
- Die Eierplatte herausnehmen und
die Gänseeier auf das Netz legen.
3.2. VORBEREITUNG ZUR VERWENDUNG
ARBEITSPLATZ DES GERÄTES
Verwenden SiedasGerätnichtbeiUmgebungstemperaturen
über 40°C sein und einer relativen Luftfeuchtigkeit
über 85%. Stellen Sie das Gerät so auf, dass eine gute
Luftzirkulation gewährleistet ist. Es ist auf allen Seiten ein
Abstand von mindestens 10 cm einzuhalten. Halten Sie
das Gerät von heißen Flächen fern. Das Gerät sollte immer
auf einer ebenen, stabilen, sauberen, feuerfesten und
trockenen Oberäche und außerhalb der Reichweite von
Kindern und Personen mit eingeschränkten geistigen,
sensorischen und psychischen Fähigkeiten verwendet
werden. Stellen Sie sicher, dass der Netzstecker jederzeit
zugänglich und nicht verdeckt ist. Achten Sie darauf, dass
die Stromversorgung des Gerätes den Angaben auf dem
Produktschild entspricht!
3.3. ARBEIT MIT DEM GERÄT
In den nachfolgenden Tabellen bendet sich eine
Zusammenstellung, wie viele Eier des jeweiligen Typs auf
einmal in dem Gerät ausgebrütet werden können und wie
sie zu verteilen sind.
3. Setzen Sie die Abdeckung auf.
4. Schließen Sie das Gerät an die Stromversorgung an.
5. Stellen Sie die bevorzugte Temperatur ein: Drücken
Sie die Taste "SET" (6). Die LED "Set" (3) leuchtet
auf, um anzuzeigen, dass sich das Gerät im
Einstellungsmodus bendet. Stellen Sie mit den
Tasten "+" (5) und "-" (4) den Temperaturwert ein.
Bestätigen Sie mit der Taste "SET" (6). Die LED "Work"
(2) leuchtet auf.
6. Warten Sie, bis sich das Gerät aufgewärmt hat (ca.
10 – 20 Minuten).
7. Legen Sie die Eier vorsichtig auf die Ablage.
8. Kontrollieren Sie regelmäßig den Wasserstand im
Inkubator.
Modell IN-48DDI, IN-96DDI, IN-112DDI
1. Heben Sie den Deckel an und gießen Sie Wasser
in den Eier-Inkubator. Achten Sie darauf, dass kein
Wasser in das Laufwerk gegossen wird. Schließen Sie
anschließend den Deckel.
2. Schließen Sie das Gerät an die Stromversorgung an.
3. Schalten Sie das Gerät mit der Ein – / Aus-Taste (5) ein.
4. Es ertönt ein akustisches Signal, das durch Drücken
einer der Tasten auf dem Bedienfeld ausgeschaltet
werden sollte.
5. Der Eier-Inkubator schaukelt die Eier automatisch
alle 2 Stunden. Die Eier werden 10 Sekunden lang in
einem Winkel von 45° nach links und rechts bewegt.
Während des Schaukelvorgangs der Eier den Deckel
nicht anheben. Bitte seien Sie vorsichtig, wenn Sie
den Inkubator zum ersten Mal benutzen.
6. Einfaches Drücken der Reset-Taste (7) bewirkt, dass
das Schaukeln von Eiern manuell eingeschaltet wird
und setzt den Countdown-Timer für das nächste
Schaukeln von Eiern auf Null zurück (setzt ihn auf
1:59 zurück).
7. Um den Zähler für die Eierinkubationstage
zurückzusetzen, halten Sie die Tasten (3) und
(4) gedrückt, trennen Sie anschließend das
Gerät von der Stromversorgung und schließen
Sie es wieder an, ohne die Tasten loszulassen.
Die Fabrikationseinstellungen im Gerät werden
wiederhersgestellt.
8. Einstellen der Temperatur:
• Der Eier-Inkubator ist werkmäßig auf eine
Heiztemperatur von 38 ° C eingestellt.
• Drücken Sie die Taste „Set“ (3).
• Stellen Sie mit den Tasten (4) und (6) die
Heiztemperatur ein.
• Bestätigen Sie die Einstellungen durch Drücken der
Taste „Set“ (3).
Modell IN-7DDI
1. Entfernen Sie den Deckel und heben Sie die
Eierablage an.
2. Gießen Sie Wasser in die Vertiefung um das weiße
Gitter (wie in der folgenden Abbildung dargestellt).
ACHTUNG: Gießen Sie kein Wasser in das weiße
Gitter. Dies kann das Gerät beschädigen!
1 2
83
7 6 5 4
27.06.2019 27.06.2019

• Um die Einstellungen des ausgewählten Parameters
einzugeben, drücken Sie die Taste "Set" (3).
• Stellen Sie die Alarmwerte mit den Tasten (4) und
(6) ein. Warten Sie, bis das Gerät automatisch zum
Hauptmenü zurückkehrt.
• Der Alarm gibt ein Tonsignal. Der Alarm wird durch
Drücken einer der Tasten auf dem Bedienfeld
ausgeschaltet.
10. Warten Sie, bis sich das Gerät aufgewärmt hat (ca.
10 – 20 Minuten).
11. Legen Sie die Eier vorsichtig auf die Ablage.
12. Kontrollieren Sie regelmäßig den Wasserstand im
Inkubator.
Modell IN-56DDI, IN-32DDI
1. Entfernen Sie den Deckel und heben Sie die
Eierablage an. Wasser vorsichtig in die Vertiefung
gießen. Schließen Sie den Deckel.
2. Schließen Sie das Gerät an die Stromversorgung an.
3. Schalten Sie das Gerät mit der Ein – / Aus-Taste (4) ein.
4. Es ertönt ein Alarmsignal, das durch Drücken einer
beliebigen Taste auf dem Bedienfeld ausgeschaltet
werden sollte.
5. Einstellen der Temperatur:
• Der Eier-Inkubator ist werkmäßig auf eine
Heiztemperatur von 38 ° C eingestellt.
• Drücken Sie die „Set“ – Taste (2)
• Stellen Sie mit den Tasten „+“ (3) und „-“ (5) die
Heiztemperatur ein.
• Bestätigen Sie die Einstellungen mit der Taste „Set“ (2).
6. Alarmwerte und Kalibrierung einstellen – Punkt 10
Wartungsmodelle IN-48DDI, IN-96DDI einhalten.
7. Einfaches Drücken der Reset-Taste (7) bewirkt, dass
das Schaukeln von Eiern manuell eingeschaltet wird
und setzt den Countdown-Timer für das nächste
Schaukeln von Eiern auf Null zurück (setzt ihn auf
1:59 zurück).
8. Um den Zähler für die Eierinkubationstage
zurückzusetzen, halten Sie die Reset-Taste (7)
gedrückt, trennen Sie anschließend das Gerät
von der Stromversorgung und schließen Sie
es wieder an, ohne die Tasten loszulassen. Die
Fabrikationseinstellungen im Gerät werden
wiederhersgestellt.
9. Warten Sie, bis sich das Gerät aufgewärmt hat (ca.
10 – 20 Minuten)
10. Legen Sie die Eier vorsichtig auf die Ablage.
11. Kontrollieren Sie regelmäßig den Wasserstand im
Inkubator.
12. Knopf (6) aktiviert das Licht der Schierlampe, durch
die Sie den Entwicklungsstand des Embryos im Ei
überprüfen können.
Modell IN-88DDI
1. Entfernen Sie die Abdeckung. Gießen Sie Wasser ein
und schließen Sie den Deckel wieder.
2. Schließen Sie das Gerät an die Stromversorgung an.
3. Schalten Sie das Gerät mit der Ein – / Aus-Taste (7)
ein.
4. Stellen Sie die bevorzugte Temperatur ein:
Drücken Sie die Taste „SET“ (6). Die LED „Set“ (3)
leuchtet auf und zeigt an, dass sich das Gerät im
Einstellungsmodus bendet. Stellen Sie mit den
Tasten „+“ (5) und „-“ (4) den Temperaturwert ein.
Bestätigen Sie mit der Taste „SET“ (6). Die LED „Work“
(2) leuchtet auf.
5. Warten Sie, bis sich das Gerät aufgewärmt hat (ca.
10 – 20 Minuten).
6. Legen Sie die Eier vorsichtig auf die Ablage.
7. Kontrolliere
Richtlinien für Bruteier:
• Überprüfen Sie vor dem Brüten der Eier immer
die technische Leistung des Brutkastens und die
korrekte Funktion des Gerätes.
• Für beste Ergebnisse ist es besser, Eier mittlerer oder
kleiner Größe zum Brüten zu wählen. Befruchtete
Eier, die zum Brüten bestimmt sind, sollten frisch und
frei von Verunreinigungen auf der Schale sein.
• Die richtige Methode, Eier zum Brüten zu legen,
besteht darin, sie mit der breiteren Seite nach oben
und der schmaleren Seite nach unten zu legen, wie
in der folgenden Abbildung dargestellt.
Parameter Bedeutung der
Parameter
Werkseinstellung
AL Einstellung – Nieder-
temperaturalarm.
1°C
AH Einstellung – Hoch-
temperaturalarm.
1°C
AS Luftfeuchtigkeitsa-
larm (bei niedrigen
Werten).
45%
CA Kalibrierung
des Thermometers.
0°C
HS Einstellen der oberen
Temperaturgrenze.
39.5°C
LS Einstellung der
unteren
Temperaturgrenze
30°C
9. Einstellung der Alarmwerte und Kalibrierung:
• Um die Einstellungen einzugeben, drücken Sie die
Taste „Set“ (3). Halten Sie diese für 3 Sekunden
gedrückt.
• Mit den Tasten (4) und (6) zwischen den in der
folgenden Tabelle gezeigten Parametern wechseln.
• Wenn die Außentemperatur unter 20°C sinkt, wird
es geraten den Inkubator in einer Isolierelement
z.B. Styropor, Isolierschaum u.ä. zu platzieren. Wenn
das Abstellen in einer Isolierung nicht möglich ist,
es wird geraten den Inkubator zu einem geheizten
Raum bringen und ihm mit einem dicken Material
umhüllen z.B. einer Decke.
• Nach 19 Tagen des Brütens, wenn die Eierschalen zu
zerbrechen beginnen, wird empfohlen, die Eier von
der Ablage zu nehmen und sie auf das weiße Gitter
zu legen, damit die Küken schlüpfen können (gilt
nicht für das Modell IN-7DDI).
• Es kommt oft vor, dass einige Eier nach 19 Tagen
nicht vollständig ausgebrütet werden, dann ist es
notwendig, weitere 2-3 Tage zu warten
• Wenn das Küken in der Schale stecken bleibt,
besprühen Sie es mit warmen Wasser und helfen Sie
ihm, indem Sie die Eierschale vorsichtig entfernen.
• Nach dem Ausbrüten sollten die Küken an einem
warmen Ort aufbewahrt und mit geeignetem Futter
und Wasser versorgt werden
3.4. REINIGUNG UND WARTUNG
a) Bevor Sie anfangen zu reinigen, trennen Sie das
Gerät von der Stromversorgung.
b) Verwenden Sie zur Reinigung der Oberäche
ausschließlich Mittel ohne ätzende Inhaltsstoe.
c) Lassen Sie nach jeder Reinigung alle Teile gut
trocknen, bevor das Gerät erneut verwendet wird.
d) Bewahren Sie das Gerät an einem trockenen, kühlen,
vor Feuchtigkeit und direkter Sonneneinstrahlung
geschütztem Ort auf.
e) Es ist verboten, das Gerät mit einem Wasserstrahl zu
besprühen oder in Wasser zu tauchen.
f) Es darf kein Wasser über die Belüftungsönungen
am Gehäuse ins Innere des Geräts gelangen.
g) Die Belüftungsönungen sind mit Pinsel und
Druckluft zu reinigen.
h) In Hinblick auf technische Ezienz und zur
Vorbeugung vor Schäden sollte das Gerät regelmäßig
überprüft werden.
i) Benutzen Sie einen weichen Lappen zur Reinigung.
j) Entfernen Sie die Batterie aus dem Gerät, wenn es
über einen längeren Zeitraum nicht genutzt wird.
k) Desinzieren Sie das Gerät nach jedem Gebrauch.
ANWEISUNGEN ZUM SICHEREN ENTFERNEN VON
BATTERIEN UND AKKUS
In der mit dem Eier-Inkubator mitgelieferten Schierlampe
ist eine AA 1,5 V-Batterie installiert. Bevor Sie mit der
Demontage beginnen, schalten Sie das Display durch
Drücken der Ein / Aus-Taste aus. Schrauben Sie die
Rückseite des Gehäuses ab und entfernen Sie die Batterien.
Übergeben Sie die Batterien zur Entsorgung an eine für
dementsprechende Materialien zuständige Einrichtung.
ENTSORGUNG GEBRAUCHTER GERÄTE
Dieses Produkt darf nicht über den normalen Hausmüll
entsorgt werden. Geben Sie das Gerät bei entsprechenden
Sammel- und Recyclinghöfen für Elektro- und
Elektronikgeräte ab. Überprüfen Sie das Symbol auf dem
Produkt, der Bedienungsanleitung und der Verpackung.
Die bei der Konstruktion des Gerätes verwendeten
Kunststoe können entsprechend ihrer Kennzeichnung
recycelt werden. Mit der Entscheidung für das Recycling
DE
8DE 9
• Um die Eier mit dem Deckel zu nicht beschädigen,
legen Sie große Eier in die Mitte der Schale und
kleinere Eier an den Seiten der Schale. Überprüfen Sie
immer, ob das Ei nicht zu groß ist, um versehentliche
Beschädigungen zu vermeiden.
• Falls die Eier zu groß sind, um auf die Ablage
gelegt zu werden, wird empfohlen, die Ablagen zu
entfernen und die befruchteten Eier direkt auf das
weiße Gitter zu legen (gilt nicht für das Modell IN-
7DDI).
• Der Wasserstand im Brutkasten sollte ständig
überwacht werden, um eine ausreichende
Feuchtigkeit zum Brüten von Eiern zu gewährleisten.
leisten Sie einen wesentlichen Beitrag zum Schutz unserer
Umwelt. Wenden Sie sich an die örtlichen Behörden,
um Informationen über Ihre lokale Recyclinganlagen zu
erhalten.
27.06.2019 27.06.2019

The product satises the relevant safety
standards.
Read instructions before use.
The product must be recycled.
WARNING! or CAUTION! or REMEMBER!
Applicable to the given situation (general
warning sign).
ATTENTION! Electric shock warning!
Class II protection device with double insulation.
EN USER MANUAL EN
Parameter
description
Parameter value
Product name Egg incubator
Model IN-
7DDI
IN-
48DDI
IN-
56DDI
IN-
96DDI
Rated voltage
[V~]/Frequency
[Hz]
230/50
Rated power
[W]
30 80
Protection
class
II
Protection
rating IP
IPX4
Capacity (hens‘
eggs) [pcs]
7 48 56 96
Automatic egg
rotation
Function
--- Yes
Alarm function --- Yes
Fan Yes
Egg candler Accessory
powered by
1xAA battery
(Battery is not
included)
Built-in Accessory
powered
by 1xAA
battery
(Battery
is not
included)
Dimensions
[mm]
165
x165
x155
495
x471
x230
485
x460
x210
495
x477
x380
Weight [kg] 0.4 3.1 3.5 5.5
Product name Egg incubator
Model IN-
88DDI
IN-
32DDI
IN-
112DDI
Rated voltage
[V~]/Frequency
[Hz]
230/50
Rated power
[W]
80
Protection
class
II
Protection
rating IP
IPX4
Capacity (hens‘
eggs) [pcs]
88 32 112
Automatic egg
rotation
Function
--- Yes
Alarm function -- Yes
Fan Yes
Egg candler Accessory
powered
by 1xAA
battery
(Battery
is not
included)
Built-in Accessory
powered by
1xAA battery
(Battery is
not included)
Dimensions
[mm]
490x490
x180
350x460
x195
495x470
x385
Weight [kg] 1.4 2.75 5.6
TECHNICAL DATA
1. GENERAL DESCRIPTION
The user manual is designed to assist in the safe and
trouble-free use of the device. The product is designed
and manufactured in accordance with strict technical
guidelines, using state-of-the-art technologies and
components. Additionally, it is produced in compliance
with the most stringent quality standards.
DO NOT USE THE DEVICE UNLESS YOU HAVE
THOROUGHLY READ AND UNDERSTOOD THIS
USER MANUAL.
To increase the product life of the device and to ensure
trouble-free operation, use it in accordance with this user
manual and regularly perform maintenance tasks. The
technical data and specications in this user manual are
up to date. The manufacturer reserves the right to make
changes associated with quality improvement. The device
is designed to reduce noise emission risks to a minimum,
taking into account technological progress and noise
reduction opportunities.
LEGEND
PLEASE NOTE! Drawings in this manual are for
illustration purposes only and in some details may
dier from the actual product.
The original operation manual is in German. Other
language versions are translations from German.
2. USAGE SAFETY
ATTENTION! Read all safety warnings and all
instructions. Failure to follow the warnings and
instructions may result in an electric shock, re and/
or serious injury or even death.
The terms „device“ or „product“ are used in the warnings
and instructions to refer to <egg incubator>. Do not use in
very humid environments or in the direct vicinity of water
tanks. Prevent the device from getting wet. Risk of electric
shock! Do not cover the ventilation openings!
2.1. ELECTRICAL SAFETY
a) The plug must t the socket. Do not modify the
plug in any way. Using original plugs and matching
sockets reduces the risk of electric shock.
b) Avoid touching earthed elements such as pipes,
heaters, boilers and refrigerators. There is an
increased risk of electric shock if the earthed device
is exposed to rain, comes into direct contact with a
wet surface or is operating in a damp environment.
Water getting into the device increases the risk of
damage to the device and of electric shock.
c) Do not touch the device with wet or damp hands.
d) Use the cable only for its designated use. Never use it
to carry the device or to pull the plug out of a socket.
Keep the cable away from heat sources, oil, sharp
edges or moving parts. Damaged or tangled cables
increase the risk of electric shock.
e) If using the device in a damp environment cannot
be avoided, a residual current device (RCD) should
be applied. The use of an RCD reduces the risk of
electric shock.
f) Do not use the device if the power cord is damaged
or shows obvious signs of wear. A damaged power
cord should be replaced by a qualied electrician or
the manufacturer‘s service centre.
g) ATTENTION! DANGER TO LIFE! While cleaning, never
immerse the device in water or other liquids.
2.2. SAFETY IN THE WORKPLACE
a) Make sure the workplace is clean and well lit. A
messy or poorly lit workplace may lead to accidents.
Try to think ahead, observe what is going on and use
common sense when working with the device.
b) Do not use the device in a potentially explosive
environment, for example in the presence of
ammable liquids, gases or dust. The device
generates sparks which may ignite dust or fumes.
c) If you discover damage or irregular operation,
immediately switch the device o and report it to a
supervisor without delay.
d) If there are any doubts as to the correct operation
of the device, contact the manufacturer‘s support
service.
e) Only the manufacturer‘s service point may repair the
device. Do not attempt any repairs independently!
f) In case of re, use a powder or carbon dioxide
(CO2) re extinguisher (one intended for use on live
electrical devices) to put it out.
g) Please keep this manual available for future
reference. If this device is passed on to a third party,
the manual must be passed on with it.
h) Keep packaging elements and small assembly parts
in a place not available to children.
i) Keep the device away from children and animals.
REMEMBER! When using the device, protect children
and other bystanders.
2.3. PERSONAL SAFETY
a) Do not use the device when tired, ill or under the
inuence of alcohol, narcotics or medication which
can signicantly impair the ability to operate the
device.
b) The device can be handled only by physically t
persons who are capable of handling it, properly
trained, familiar with this manual and trained within
the scope of occupational health and safety.
c) To prevent the device from accidentally switching on,
make sure the switch is on the OFF position before
connecting to a power source.
d) The device is not a toy. Children must be supervised
to ensure that they do not play with the device.
2.4. SAFE DEVICE USE
a) Do not use the device if the ON/OFF switch does not
function properly (does not switch the device on and
o). Devices which cannot be switched on and o
using the ON/OFF switch are hazardous, should not
be operated and must be repaired.
b) Disconnect the device from the power supply
before commencement of adjustment, cleaning and
maintenance. Such a preventive measure reduces
the risk of accidental activation.
c) When not in use, store in a safe place, away from
children and people not familiar with the device who
have not read the user manual. The device may pose
a hazard in the hands of inexperienced users.
d) Keep the device in perfect technical condition.
Before each use check for general damage and
especially check for cracked parts or elements and
for any other conditions which may impact the safe
operation of the device. If damage is discovered,
hand over the device for repair before use.
e) Keep the device out of the reach of children.
f) Device repair or maintenance should be carried out
by qualied persons, only using original spare parts.
This will ensure safe use.
g) To ensure the operational integrity of the device, do
not remove factory-tted guards and do not loosen
any screws.
h) Do not touch articulated parts or accessories unless
the device has been disconnected from the power
source.
i) Do not move, adjust or rotate the device in the
course of work.
j) Clean the device regularly to prevent stubborn grime
from accumulating.
k) The device is not a toy. Cleaning and maintenance
may not be carried out by children without
supervision by an adult person.
l) It is forbidden to interfere with the structure of
the device in order to change its parameters or
construction.
m) Keep the device away from sources of re and heat.
n) Before the rst use, always verify that the device is
complete and that all movable elements that may
aect the safety of embryonated eggs or chicks, e.g.
the fans, are protected by covers.
o) Do not cover the device when in use.
p) Warning: Risk of re.
q) Some parts of this appliance can get very hot. To
avoid injury, be careful when touching these surfaces.
r) Inspect the water level in the egg incubator regularly.
Fill with warm water.
10 11
27.06.2019 27.06.2019

4
1
3
Control panel IN-7DDI, IN-88DDI models 1. Time countdown until next egg rocking.
2. Temperature
3. Humidity
4. Fan
5. Low humidity alarm
6. Heating on
7. Egg candler light on
8. Number of incubation days
1. ON/OFF switch
Egg candler
1
EN
1. Temperature display
2. „Work“ diode
3. „Set“ diode
4. Decrease value button
5. Increase value button
6. „Set“ button
7. ON/OFF switch (Applies to model IN-88DDI only)
IN-48DDI, IN-96DDI, IN-112DDI models
1. Humidity display
2. Temperature display
3. „Set“ button
4. Increase value button
5. ON/OFF switch
6. Decrease value button
7. „Reset“ button
8. Display showing time left until next egg rocking
9. Number of incubation days display
IN-56DDI, IN-32DDI models
1. Display
2. „Set“ button
3. Increase value button
4. ON/OFF switch
5. Decrease value button
6. Egg candler switch
7. „Reset“ button
Display description:
1 2
89 7 6
5
3 4
1
7
6
2
3
5
4
3.3. DEVICE USE
The following tables present the summary of how many
eggs of a particular type can be incubated simultaneously
in the device and how they should be spaced.
EN
s) Use a measuring cup when lling with water.
t) Always disconnect the egg incubator from power
when topping up with water and when not in use.
u) In order to improve incubation observe generally
accepted breeding principles.
ATTENTION! Despite the safe design of the device
and its protective features, and despite the use of
additional elements protecting the operator, there is
still a slight risk of accident or injury when using the
device. Stay alert and use common sense when using
the device.
3. USE GUIDELINES
The egg incubator is designed for incubating fertile
avian eggs. The incubator keeps the eggs at the correct
temperature and humidity required for the embryo to
develop and hatch.
The user is liable for any damage resulting from non-
intended use of the device!
3.1. DEVICE DESCRIPTION
IN-7DDI model
IN-56DDI, IN-32DDI models
2
3
1
4
1
4
3
2
1
4
2
3
IN-48DDI model
IN-96DDI, IN-112DDI models
2
1
4
3
Assembly:
IN-88DDI model
1. Cover
2. Egg tray
3. Housing
4. Control panel
IN-7DDI, IN-48DDI, IN-96DDI, IN-112DDI and IN-88DDI
egg incubators include an egg candler as an additional
accessory. The IN-56DDI and IN-32DDI features a built-in
egg candler.
3.2. PREPARING FOR USE
APPLIANCE LOCATION
The temperature of environment must not be higher than
40°C and the relative humidity should be less than 85%.
Ensure good ventilation in the room in which the device
is being used. There should be at least 10 cm distance
between each side of the device and the wall or other
objects. The device should always be used when positioned
on an even, stable, clean, reproof and dry surface, and
be out of the reach of children and persons with limited
mental and sensory functions. Position the device such that
you always have access to the power plug. The power cord
connected to the appliance must be properly grounded
and correspond to the technical details on the product
label!
Model IN-
7
DDI
IN-
48
DDI
IN-
56
DDI
IN-
96
DDI
IN-
88
DDI
IN-
32
DDI
IN-
112
DDI
The
maximum
number of
hen eggs.
748 56 96 88 32 112
The
maximum
number
of pigeon
and quail
eggs.
748 56 96 132 32 112
The
maximum
number
of turkey
and duck
eggs.
424 28 48 44 16 56
The
maximum
number
of goose
eggs.
-16 18 32 29 10 38
12 13
2
3
7
654
1
1 2
83
7 6 5 4
27.06.2019 27.06.2019

• When a chick gets stuck in the shell, spray the shell
with warm water and help by gently pulling o the
egg shell.
• After hatching, the chicks should be kept in a warm
place and supplied with proper food and water.
3.4. CLEANING AND MAINTENANCE
a) Always unplug the device before cleaning it.
b) Use only non-corrosive cleaners to clean the surface.
c) After cleaning the device, all parts should be dried
completely before using it again.
d) Store the unit in a dry, cool place, free from moisture
and direct exposure to sunlight.
e) Do not spray the device with a water jet or submerge
it in water.
f) Do not allow water to get inside the device through
vents in the housing of the device.
g) Clean the vents with a brush and compressed air.
h) The device must be regularly inspected to check its
technical eciency and spot any damage.
i) Use a soft cloth for cleaning.
j) Do not leave the battery in the device if it will not be
used for a longer period of time.
k) Disinfect the device after each use.
SAFE REMOVAL OF BATTERIES AND RECHARGEABLE
BATTERIES
An AA 1.5V battery is installed in the egg candler. Use the
On/O button to turn the candler o before attempting to
remove the battery. Unscrew the back of the housing and
remove the battery. Recycle batteries.
DISPOSING OF USED DEVICES
Do not dispose of this device in municipal waste systems.
Hand it over to an electric and electrical device recycling
and collection point. Check the symbol on the product,
instruction manual and packaging. The plastics used to
construct the device can be recycled in accordance with
their markings. By choosing to recycle you are making
a signicant contribution to the protection of our
environment.
Contact local authorities for information on your local
recycling facility.
Model IN-
7
DDI
IN-
48
DDI
IN-
56
DDI
IN-
96
DDI
IN-
88
DDI
IN-
32
DDI
IN-
112
DDI
How
should
hen and
pigeon
eggs be
spaced.
One egg in each egg tray hole.
How
should
turkey and
duck eggs
be spaced.
Leave one empty space (hole) between
the eggs on the tray.
How
should
goose
eggs be
spaced
- Remove the egg tray and place the
eggs on the net. Parameter Parameter meaning Factory setting
AL Setting the low
temperature alarm.
1°C
AH Setting the high
temperature alarm.
1°C
AS Setting the low humidity
alarm.
45%
CA Thermometer calibration. 0°C
HS Setting the upper
temperature limit.
39.5°C
LS Setting the lower
temperature limit.
30°C
IN-7DDI model
1. Remove cover and lift egg tray.
2. Pour water into the groove around the white mesh as
(shown in the picture below).
ATTENTION: Do not pour water into the white mesh
as that may damage the device!
3. Attach cover.
4. Connect the device to a power source.
5. Select the required temperature: press the „SET“ (6)
button. The „set“ (3) diode will illuminate, indicating
that the device is in settings mode. Use „+“ (5) and
„-“ (4) buttons to select the temperature. Use the
„SET“ (6) button to conrm. The „Work“ (2) diode will
come on.
6. Wait for the device to warm up (approx. 10-20 min.).
7. Gently arrange the eggs on the tray.
8. Inspect the water level in the egg incubator regularly.
IN-48DDI, IN-96DDI, IN-112DDI models
1. Lift the cover, pour water into the egg incubator.
Make sure the drive mechanism does remains dry.
Close the cover.
2. Connect the device to a power source.
3. Use the On/O (5) switch to turn the device on.
4. An alarm will sound. Disable the alarm by pressing
a button on the control panel.
5. The device will automatically rock the eggs every
2 hours. The eggs are rocked to the left and right,
up to 45 degrees for 10 seconds. Do not lift the
cover during automatic egg turning. Pay particular
attention when using the incubator for the rst time.
6. Pressing the „reset“ button (7) once makes the eggs
rock and resets the timer which counts down to the
next egg rocking (sets it back to 1:59).
7. In order to reset the incubation days counter, press
and hold buttons (3) and (4), then disconnect and
connect the device to the power supply without
releasing the buttons. Device’s factory settings will
be restored.
8. Setting the temperature:
• The egg incubator‘s temperature factory setting is
38°C.
• Press the „Set“ (3) button
• Use buttons (4) and (6) to set the heating
temperature.
• Press the „Set“ (3) button to conrm the selection.
9. Setting alarm values and calibration:
• To enter settings mode press and hold the „Set“ (3)
button for three seconds.
• Use buttons (4) and (6) to switch between the
parameters shown in the table below.
• To enter settings of the selected parameter, press
and hold the „Set“ (3) button
• Use buttons (4) and (6) to set alarm values. Wait for
the device to automatically return to the main menu.
• The alarm emits a sound signal. To disable the alarm,
press a button on the control panel.
10. Wait for the device to warm up (approx. 10-20 min.).
11. Gently arrange the eggs on the tray.
12. Inspect the water level in the egg incubator regularly.
IN-56DDI, IN-32DDI models
1. Remove cover and lift egg tray. Carefully pour water
into the groove. Close the cover.
2. Connect the device to a power source.
3. Use the On/O (4) switch to turn the device on.
4. An alarm will sound. Disable the alarm by pressing
a button on the control panel.
5. Setting the temperature:
• The egg incubator‘s temperature factory setting is
38°C.
• Press the „Set“ (2) button
• Use buttons „+“ (3) and „-“ (5) to set the heating
temperature.
• Press the „Set“ (2) button to conrm the selection.
6. Setting alarm values and calibration – in accordance
with operating instructions point 10 for IN-48DDI
and IN-96DDI models
7. Pressing the „reset“ button (7) once makes the eggs
rock and resets the timer which counts down to the
next egg rocking (sets it back to 1:59).
8. In order to reset the incubation days counter, press
and hold the „reset“ button (7), then disconnect and
connect the device to the power supply without
releasing the button. Device’s factory settings will be
restored.
9. Wait for the device to warm up (approx. 10-20 min.).
10. Gently arrange the eggs on the tray.
11. Inspect the water level in the egg incubator regularly.
12. Use button (6) to activate the egg candler and check
embryo development inside the egg.
IN-88DDI model
1. Remove cover. Fill with water. Close the cover.
2. Connect the device to a power source.
3. Use the On/O (7) switch to turn the device on.
4. Select the required temperature: press the „SET“ (6)
button. The „set“ (3) diode will illuminate, indicating
that the device is in settings mode. Use „+“ (5) and
„-“ (4) buttons to select the temperature. Use the
„SET“ (6) button to conrm. The „Work“ (2) diode will
come on.
5. Wait for the device to warm up (approx. 10-20 min.).
6. Gently arrange the eggs on the tray.
7. Inspect the water level in the egg incubator regularly
Tips for incubating eggs:
• Before incubating eggs, always check that the
incubator is in operational condition and its
functions are working correctly.
• For best results, it‘s better to choose medium- or
small-sized eggs for hatching. Fertilized eggs for
incubation should be fresh and cleaned of impurities
on the shell.
• The proper method of placing eggs for hatching is
to arrange them with the wider end upwards and
the narrower end downwards, as shown in the gure
below.
• To avoid hitting the egg with the lid, place large eggs
in the middle of the tray and smaller ones on the
sides. Always check that the egg is not too large to
avoid accidental damage.
• If the eggs are too large to place on the tray, it is
recommended to remove the trays and arrange
the fertilised eggs directly on the white grid (not
applicable for the IN-7DDI model).
• The water level in the incubator should be constantly
monitored to ensure adequate humidity for hatching
eggs.
• If the ambient temperature drops below 20 °C, we
recommend placing the incubator in a unit made of
insulating material, e.g. polystyrene foam, etc. If such
insulation is not possible, it is recommended to place
the incubator in a heated room or surround it with
thick material such as blankets.
• After 19 days of incubation, when the egg shells start
to crack, it is recommended to remove the eggs from
the egg tray and place them on a white grid to hatch
the chicks (does not apply to the IN-7DDI model).
• It often happens that some eggs do not completely
hatch after 19 days, then you should wait another
2-3 days.
EN EN
14 15
27.06.2019 27.06.2019

Produkt spełnia wymagania odpowiednich norm
bezpieczeństwa.
Przed użyciem należy zapoznać się z instrukcją.
Produkt podlegający recyklingowi.
UWAGA! lub OSTRZEŻENIE! lub PAMIĘTAJ!
opisująca daną sytuację (ogólny znak
ostrzegawczy).
UWAGA! Ostrzeżenie przed porażeniem prądem
elektrycznym!
Urządzenia II klasy ochronności z izolacją
podwójną.
Opis parametru Wartość parametru
Nazwa
produktu
Inkubator do jaj
Model IN-
7DDI
IN-
48DDI
IN-
56DDI
IN-
96DDI
Napięcie [V~]/
Częstotliwość
[Hz]
230/50
Moc
znamionowa [W]
30 80
Klasa
ochronności
II
Stopień
ochrony IP
IPX4
Pojemność
(kurze jaja) [szt.]
7 48 56 96
Funkcja
automatycznej
rotacji jaj
--- tak
Funkcja alarmu --- tak
Wentylator tak
Prześwietlarka
do jaj
Akcesorium
zasilane
bateriami
1xAA (Bateria
nie jest
załączona)
wbu-
dowa-
na
Akcesorium
zasilane
bateriami
1xAA
(Bateria
nie jest
załączona)
Wymiary [mm] 165
x165
x155
495
x471
x230
485
x460
x210
495
x477
x380
Ciężar [kg] 0,4 3,1 3,5 5,5
Nazwa
produktu
Inkubator do jaj
Model IN-
88DDI
IN-
32DDI
IN-
112DDI
Napięcie [V~]/
Częstotliwość
[Hz]
230/50
Moc
znamionowa [W]
80
Klasa
ochronności
II
Stopień
ochrony IP
IPX4
Pojemność
(kurze jaja) [szt.]
88 32 112
Funkcja
automatycznej
rotacji jaj
--- tak
DANE TECHNICZNE Funkcja alarmu -- tak
Wentylator tak
Prześwietlarka
do jaj
Akcesorium
zasilane
bateriami
1xAA
(Bateria
nie jest
załączona)
wbudo-
wana
Akcesorium
zasilane
bateriami
1xAA
(Bateria nie
jest
załączona)
Wymiary [mm] 490x490
x180
350x460
x195
495x470
x385
Ciężar [kg] 1,4 2,75 5,6
Dla zapewnienia długiej i niezawodnej pracy urządzenia
należy dbać o jego prawidłową obsługę oraz konserwację
zgodnie ze wskazówkami zawartymi w tej instrukcji. Dane
techniczne i specykacje zawarte w tej instrukcji obsługi są
aktualne. Producent zastrzega sobie prawo dokonywania
zmian związanych z podwyższeniem jakości. Uwzględniając
postęp techniczny i możliwość ograniczenia hałasu,
urządzenie zaprojektowano i zbudowano tak, aby ryzyko
jakie wynika z emisji hałasu ograniczyć do najniższego
poziomu.
OBJAŚNIENIE SYMBOLI
1. OGÓLNY OPIS
Instrukcja przeznaczona jest do pomocy w bezpiecznym
i niezawodnym użytkowaniu. Produkt jest zaprojektowany
i wykonany ściśle według wskazań technicznych przy
użyciu najnowszych technologii i komponentów oraz przy
zachowaniu najwyższych standardów jakości.
PRZED PRZYSTĄPIENIEM DO PRACY NALEŻY
DOKŁADNIE PRZECZYTAĆ I ZROZUMIEĆ
NINIEJSZĄ INSTRUKCJĘ.
UWAGA! Ilustracje w niniejszej instrukcji obsługi
mają charakter poglądowy i w niektórych szczegółach
mogą różnić się od rzeczywistego wyglądu produktu.
Instrukcją oryginalną jest niemiecka wersja instrukcji.
Pozostałe wersje językowe są tłumaczeniami z języka
niemieckiego.
UWAGA! Przeczytaj wszystkie ostrzeżenia
dotyczące bezpieczeństwa oraz wszystkie instrukcje.
Niezastosowanie się do ostrzeżeń i instrukcji może
spowodować porażenie prądem, pożar i/lub ciężkie
obrażenia ciała lub śmierć.
2. BEZPIECZEŃSTWO UŻYTKOWANIA
Termin „urządzenie” lub „produkt” w ostrzeżeniach i w
opisie instrukcji odnosi się do <inkubatora do jaj>. Nie
należy używać urządzenia w pomieszczeniach o bardzo
dużej wilgotności / w bezpośrednim pobliżu zbiorników z
wodą! Nie wolno dopuszczać do zamoczenia urządzenia.
Ryzyko porażenia prądem! Nie wolno zasłaniać otworów
wentylacyjnych urządzenia!
2.1. BEZPIECZEŃSTWO ELEKTRYCZNE
a) Wtyczka urządzenia musi pasować do gniazda.
Nie modykować wtyczki w jakikolwiek sposób.
Oryginalne wtyczki i pasujące gniazda zmniejszają
ryzyko porażenia prądem.
b) Unikać dotykania uziemionych elementów, takich jak
rury, grzejniki, piece i lodówki. Istnieje zwiększone
ryzyko porażenia prądem, jeśli ciało jest uziemione
i dotyka urządzenia narażonego na bezpośrednie
działanie deszczu, mokrej nawierzchni i pracy w
wilgotnym otoczeniu. Przedostanie się wody do
urządzenia zwiększa ryzyko jego uszkodzenia oraz
porażenia prądem.
c) Nie wolno dotykać urządzenia mokrymi lub
wilgotnymi rękoma.
d) Nie należy używać przewodu w sposób niewłaściwy.
Nigdy nie używać go do przenoszenia urządzenia lub
do wyciągania wtyczki z gniazda. Trzymać przewód
z dala od źródeł ciepła, oleju, ostrych krawędzi
lub ruchomych części. Uszkodzone lub poplątane
przewody zwiększają ryzyko porażenia prądem.
e) Jeśli nie można uniknąć używania urządzenia w
środowisku wilgotnym, należy stosować wyłącznik
różnicowo-prądowy (RCD). Używanie RCD zmniejsza
ryzyko porażenia prądem.
f) Zabrania się używania urządzenia, jeśli przewód
zasilający jest uszkodzony lub nosi wyraźne oznaki
zużycia. Uszkodzony przewód zasilający powinien
być wymieniony przez wykwalikowanego elektryka
lub serwis producenta
g) UWAGA – ZAGROŻENIE ŻYCIA! Podczas czyszczenia
lub użytkowania urządzenia nigdy nie wolno
zanurzać go w wodzie lub innych cieczach.
2.2. BEZPIECZEŃSTWO W MIEJSCU PRACY
a) Utrzymywać porządek w miejscu pracy i dobre
oświetlenie. Nieporządek lub złe oświetlenie może
prowadzić do wypadków. Należy być przewidującym,
obserwować co się robi i zachowywać rozsądek
podczas używania urządzenia.
b) Nie używać urządzenia w stree zagrożenia
wybuchem, na przykład w obecności łatwopalnych
cieczy, gazów lub pyłów. Urządzenie wytwarzają
iskry, mogące zapalić pył lub opary.
c) W razie stwierdzenia uszkodzenia lub
nieprawidłowości w pracy urządzenia należy je
bezzwłocznie wyłączyć i zgłosić to do osoby
uprawnionej.
d) W razie wątpliwości czy urządzenia działa poprawnie,
należy skontaktować się z serwisem producenta.
e) Naprawy urządzenia może wykonać wyłącznie
serwis producenta. Nie wolno dokonywać napraw
samodzielnie!
f) W przypadku zaprószenia ognia lub pożaru, do
gaszenia urządzenia pod napięciem należy używać
wyłącznie gaśnic proszkowych lub śniegowych (CO2).
g) Zachować instrukcję użytkowania w celu jej
późniejszego użycia. W razie, gdyby urządzenie miało
zostać przekazane osobom trzecim, to wraz z nim
należy przekazać również instrukcję użytkowania.
h) Elementy opakowania oraz drobne elementy
montażowe należy przechowywać w miejscu
niedostępnym dla dzieci.
i) Urządzenie trzymać z dala od dzieci i zwierząt.
PAMIĘTAJ! Należy chronić dzieci i inne osoby
postronne podczas pracy urządzeniem.
2.3. BEZPIECZEŃSTWO OSOBISTE
a) Niedozwolone jest obsługiwanie urządzenia w
stanie zmęczenia, choroby, pod wpływem alkoholu,
narkotyków lub leków, które ograniczają w istotnym
stopniu zdolności obsługi urządzenia.
b) Urządzenie mogą obsługiwać osoby sprawne
zycznie, zdolne do jego obsługi i odpowiednio
wyszkolone, które zapoznały się z niniejszą instrukcją
oraz zostały przeszkolone w zakresie bezpieczeństwa
i higieny pracy.
c) Aby zapobiegać przypadkowemu uruchomieniu
upewnij się, że przełącznik jest w pozycji wyłączonej
przed podłączeniem do źródła zasilania.
d) Urządzenie nie jest zabawką. Dzieci powinny być
pilnowane, aby nie bawiły się urządzeniem.
2.4. BEZPIECZNE STOSOWANIE URZĄDZENIA
a) Nie należy używać urządzenia, jeśli przełącznik ON/
OFF nie działa sprawnie (nie załącza i nie wyłącza
się). Urządzenia, które nie mogą być kontrolowane
za pomocą przełącznika są niebezpieczne, nie mogą
pracować i muszą zostać naprawione.
b) Przed przystąpieniem do regulacji, czyszczenia i
konserwacji urządzenie należy odłączyć od zasilania.
Taki środek zapobiegawczy zmniejsza ryzyko
przypadkowego uruchomienia.
c) Nieużywane urządzenia należy przechowywać
w miejscu niedostępnym dla dzieci oraz osób
nieznających urządzenia lub tej instrukcji
obsługi. Urządzenia są niebezpieczne w rękach
niedoświadczonych użytkowników.
d) Utrzymywać urządzenie w dobrym stanie
technicznym. Sprawdzać przed każdą pracą czy
nie posiada uszkodzeń ogólnych lub związanych
z elementami ruchomymi (pęknięcia części i
elementów lub wszelkie inne warunki, które mogą
mieć wpływ na bezpieczne działanie urządzenia).
W przypadku uszkodzenia, oddać urządzenie do
naprawy przed użyciem.
e) Urządzenie należy chronić przed dziećmi.
f) Naprawa oraz konserwacja urządzeń powinna być
wykonywana przez wykwalikowane osoby przy
użyciu wyłącznie oryginalnych części zamiennych.
Zapewni to bezpieczeństwo użytkowania.
g) Aby zapewnić zaprojektowaną integralność
operacyjną urządzenia, nie należy usuwać
zainstalowanych fabrycznie osłon lub odkręcać śrub.
h) Nie wolno dotykać części lub akcesoriów ruchomych,
chyba że urządzenie zostało odłączone od zasilania.
PL INSTRUKCJA OBSŁUGI PL
16 17
27.06.2019 27.06.2019

3. ZASADY UŻYTKOWANIA
Inkubator do jaj jest urządzeniem przeznaczonym do
inkubacji zalęgniętych jaj ptasich. Zadaniem inkubatora jest
utrzymywanie odpowiedniej temperatury oraz wilgotności
niezbędnych do prawidłowego rozwoju zarodka do czasu
wyklucia.
Odpowiedzialność za wszelkie szkody powstałe
w wyniku użytkowania niezgodnego z przeznaczeniem
ponosi użytkownik.
3.1. OPIS URZĄDZENIA
Model IN-7DDI
Model IN-96DDI, IN-112DDI
Składanie:
2
3
1
4
1
4
3
2
1
4
2
3
2
1
4
3
Model IN-48DDI
Model IN-56DDI, IN-32DDI
i) Zabrania się przesuwania, przestawiania i obracania
urządzenia będącego w trakcie pracy.
j) Należy regularnie czyścić urządzenie, aby nie
dopuścić do trwałego osadzenia się zanieczyszczeń.
k) Urządzenie nie jest zabawką. Czyszczenie i
konserwacja nie mogą być wykonywane przez dzieci
bez nadzoru osoby dorosłej.
l) Zabrania się ingerowania w konstrukcję urządzenia
celem zmiany jego parametrów lub budowy.
m) Trzymać urządzenia z dala od źródeł ognia i ciepła.
n) Przed pierwszym uruchomieniem zawsze należy
zwerykować, czy urządzenie jest kompletne oraz
czy wszystkie elementy ruchome mogące wpłynąć
na bezpieczeństwo zalęgniętych jaj lub piskląt np.
wiatraki są zabezpieczone osłonami.
o) Nigdy nie przykrywać urządzenia w trakcie pracy.
p) Uwaga: Ryzyko pożaru.
q) Niektóre elementy urządzenia mogą się bardzo
nagrzewać. W celu uniknięcia obrażeń należy
zachować ostrożność podczas dotykania tych
powierzchni.
r) Regularnie kontrolować poziom wody w inkubatorze.
Zaleca się wlewanie ciepłej wody.
s) Zaleca się wlewanie wody za pomocą dozownika.
t) Zawsze odłączać inkubator od zasilania podczas
dolewania wody i gdy nie jest używany.
u) W celu poprawnej inkubacji jaj stosować się do
ogólnie przyjętych zaleceń hodowlanych.
UWAGA! Pomimo iż urządzenie zostało
zaprojektowane tak aby było bezpieczne, posiadało
odpowiednie środki ochrony oraz pomimo użycia
dodatkowych elementów zabezpieczających
użytkownika, nadal istnieje niewielkie ryzyko
wypadku lub odniesienia obrażeń w trakcie pracy
z urządzeniem. Zaleca się zachowanie ostrożności
i rozsądku podczas jego użytkowania.
Model IN-88DDI
1. Pokrywa
2. Taca na jaja
3. Obudowa
4. Panel sterowania
4
1
3
Inkubatory do jaj IN-7DDI, IN-48DDI, IN-96DDI, IN-88DDI
i IN-112DDI posiadają w zestawie prześwietlarkę do jaj
jako dodatkowe akcesorium. Model IN-56DDI i IN-32DDI
posiada wbudowaną prześwietlarkę.
Panel sterowania Model IN-7DDI, IN-88DDI
1. Wyświetlacz wartości temperatury
2. Dioda „work”
3. Dioda „set”
4. Przycisk zmniejszania wartości
5. Przycisk zwiększania wartości
6. Przycisk „set”
7. Włącznik On/O (tylko dla modelu IN-88DDI)
Model IN-48DDI, IN-96DDI, IN-112DDI
1. Wyświetlacz wartości wilgotności
2. Wyświetlacz wartości temperatury
3. Przycisk „set”
4. Przycisk zwiększania wartości
5. Włącznik On/O
6. Przycisk zmniejszania wartości
7. Przycisk „reset”
8. Wyświetlacz licznika czasu do kolejnego kołysania
jaj
9. Wyświetlacz ilości dni inkubacji
1 2
89 7 6
5
3 4
Model IN-56DDI, IN-32DDI
1. Wyświetlacz
2. Przycisk „set”
3. Przycisk zwiększania wartości
4. Włącznik On/O
5. Przycisk zmniejszania wartości
6. Włącznik prześwietlarki do jaj
7. Przycisk „reset”
Opis wyświetlacza:
1. Odliczanie czasu do kolejnego ruchu
kołysania jaj.
2. Wartość temperatury
3. Wartość wilgotności
4. Wentylator
5. Alarm zbyt niskiej wilgotności
6. Włączone grzanie
7. Włączone światło prześwietlarki do jaj
8. Ilość dni inkubacji
1. Włącznik On /O
Prześwietlarka do jaj
1
7
6
2
3
5
4
3.2. PRZYGOTOWANIE DO PRACY
UMIEJSCOWIENIE URZĄDZENIA
Temperatura otoczenia nie może przekraczać 40°C a
wilgotność względna nie powinna przekraczać 85%.
Urządzenie należy ustawić w sposób zapewniający dobrą
cyrkulację powietrza. Należy utrzymać minimalny odstęp 10
cm od każdej ściany urządzenia. Urządzenie należy trzymać
z dala od wszelkich gorących powierzchni. Urządzenie
należy zawsze użytkować na równej, stabilnej, czystej,
ognioodpornej i suchej powierzchni i poza zasięgiem
dzieci oraz osób ograniczonych funkcjach psychicznych,
sensorycznych i umysłowych. Urządzenie należy
umiejscowić w taki sposób, by w dowolnej chwili można
się było dostać do wtyczki sieciowej. Należy pamiętać o
tym, by zasilanie urządzenia energią odpowiadało danym
podanym na tabliczce znamionowej!
3.3. PRACA Z URZĄDZENIEM
W poniższych tabelach znajduje się zestawienie ile jaj
danego typu można jednorazowo inkubować w urządzeniu
oraz w jaki sposób należy je rozmieścić.
PL PL
18 19
2
3
7
654
1
1 2
83
7 6 5 4
1
27.06.2019 27.06.2019

Model IN-
7
DDI
IN-
48
DDI
IN-
56
DDI
IN-
96
DDI
IN-
88
DDI
IN-
32
DDI
IN-
112
DDI
Maks. ilość
jaj kurzych
748 56 96 88 32 112
Maks.
ilość jaj
gołębich,
oraz prze-
piórczych
748 56 96 132 32 112
Maks.
Ilość jaj
indyczych
oraz
kaczych
424 28 48 44 16 56
Maks. Ilość
jaj gęsich
-16 18 32 29 10 38
Model IN-
7
DDI
IN-
48
DDI
IN-
56
DDI
IN-
96
DDI
IN-
88
DDI
IN-
32
DDI
IN-
112
DDI
Sposób
rozłożenia
jaj
kurzych,
gołębich,
oraz prze-
piórczych
Jedno jajko w każdym wgłębieniu tacy
na jaja.
Sposób
rozłożenia
jaj
indyczych
oraz
kaczych
Pomiędzy jajami należy zachować jedno
puste miejsce (wgłębienie) na tacy.
Sposób
rozłożenia
jaj gęsich
-Wyjąć tacę na jaja i ułożyć gęsie
jaja na siatce.
Parametr Opis Nastawa fabryczna
AL Ustawienie alarmu
zbyt niskiej
temperatury.
1°C
AH Ustawienie alarmu
zbyt wysokiej
temperatury.
1°C
AS Ustawienie alarmu
zbyt niskiej
wilgotności.
45%
CA Kalibracja
termometru
0°C
HS Ustawienie górnego
limitu temperatury.
39.5°C
LS Ustawienie dolnego
limitu temperatury.
30°C
Model IN-7DDI
1. Zdjąć pokrywę i podnieść tacę na jaja.
2. Nalać wody w rowek dookoła białej kratki (jak
pokazano na poniższym rysunku).
UWAGA: Zabrania się wlewania wody w białą kratkę,
grozi to uszkodzeniem urządzenia!
3. Nałożyć pokrywę.
4. Podłączyć urządzenie do zasilania.
5. Ustawić preferowaną temperaturę: wcisnąć przycisk
„SET” (6). Zaświeci się dioda „set” (3) informująca
o tym, że urządzenie znajduje się w trybie regulacji.
Za pomocą przycisków „+” (5) i „-” (4) ustawić
wartość temperatury. Zatwierdzić przyciśnięciem
przycisku „SET”(6). Zaświeci się dioda „Work” (2).
6. Odczekać, aż urządzenie nagrzeje się (ok. 10 – 20
min).
7. Delikatnie ułożyć jaja na tacy.
8. Regularnie kontrolować poziom wody w inkubatorze.
Model IN-48DDI, IN-96DDI, IN-112DDI
1. Podnieść pokrywę, nalać wody do inkubatora
uważając, aby nie zalać nią napędu. Zamknąć
pokrywę.
2. Podłączyć urządzenie do zasilania.
3. Włączyć urządzenie przyciskiem On/O (5)
4. Włączy się alarm dźwiękowy, który należy wyłączyć
poprzez przyciśnięcie jednego z przycisków na
panelu sterowania.
5. Urządzenie co 2 godziny automatycznie kołysze
jaja. Jaja są kołysane w lewo i w prawo pod kątem
45 stopni przez 10 s. Nie podnosić pokrywy podczas
automatycznego obracania jaj. Proszę zachować
ostrożność podczas pierwszego użycia inkubatora.
6. Pojedyncze przyciśnięcie przycisku „reset” (7)
powoduje ręczne włączenie kołysania jaj i powoduje
wyzerowanie licznika czasu odliczającego do
kolejnego kołysania jaj (ustawia go z powrotem do
wartości 1:59).”
7. W celu zresetowania licznika ilości dni inkubacji jaj
należy wcisnąć i przytrzymywać przyciski (3) i (4),
a następnie odłączyć i podłączyć urządzenie do
zasilania nie zwalniając przycisków. W urządzeniu
zostaną przywrócone ustawienia fabryczne.
8. Ustawianie temperatury:
• Fabrycznie inkubator ustawiony jest na temperaturę
grzania 38°C.
• Nacisnąć przycisk „Set” (3)
• Przyciskami (4) i (6) ustawić temperaturę grzania.
• Zatwierdzić ustawienia naciskając przycisk „Set”(3).
9. Ustawianie wartości alarmów oraz kalibracja:
• Aby wejść w ustawienia nacisnąć przycisk „Set” (3)
i przytrzymać przez 3s.
• Przełączać pomiędzy parametrami przedstawionymi
w poniższej tabeli za pomocą przycisków (4) i (6)
• Aby wejść w ustawienia wybranego parametru
nacisnąć przycisk „Set” (3)
• Wartości alarmów ustawiać za pomocą przycisków
(4) i (6). Odczekać, aż urządzenie samoczynnie
powróci do głównego menu.
• Alarm wydaje sygnał dźwiękowy. Alarm wyłącza
się poprzez przyciśnięcie jednego z przycisków na
panelu sterowania.
10. Odczekać, aż urządzenie nagrzeje się (ok. 10 – 20
min).
11. Delikatnie ułożyć jaja na tacy.
12. Regularnie kontrolować poziom wody w inkubatorze.
Model IN-56DDI, IN-32DDI
1. Zdjąć pokrywę i podnieść tacę na jaja. Nalać
ostrożnie wody w rowek. Zamknąć pokrywę.
2. Podłączyć urządzenie do zasilania.
3. Włączyć urządzenie przyciskiem On/O(4)
4. Włączy się alarm, który należy wyłączyć poprzez
przyciśnięcie jakiegokolwiek przycisku na panelu
sterowania.
5. Ustawianie temperatury:
• Fabrycznie inkubator ustawiony jest na temperaturę
grzania 38°C.
• Nacisnąć przycisk „Set”(2)
• Przyciskami „+” (3) i „-” (5) ustawić temperaturę
grzania.
• Zatwierdzić ustawienia naciskając przycisk „Set”(2).
6. Ustawianie wartości alarmów oraz kalibracja
– stosować się do pkt. 10 obsługi modeli IN-48DDI,
IN-96DDI.
7. Przyciśnięcie przycisku „reset” (7) powoduje
wyzerowanie licznika czasu odliczającego do
kolejnego kołysania jaj (ustawia go z powrotem do
wartości 1:59).
8. W celu zresetowania licznika ilości dni inkubacji jaj
należy wcisnąć i przytrzymywać przycisk „reset” (7)
a następnie odłączyć i podłączyć urządzenie do
zasilania nie zwalniając przycisku. W urządzeniu
zostaną przywrócone ustawienia fabryczne.
9. Odczekać, aż urządzenie nagrzeje się (ok. 10 – 20
min).
10. Delikatnie ułożyć jaja na tacy.
11. Regularnie kontrolować poziom wody w inkubatorze.
12. Przyciskiem (6) uruchamia się światło prześwietlarki
dzięki której można sprawdzić stan rozwoju zarodka
w jaju.
Model IN-88DDI
1. Zdjąć pokrywę. Nalać wody. Zamknąć pokrywę.
2. Podłączyć urządzenie do zasilania.
3. Włączyć urządzenie przyciskiem On/O (7).
4. Ustawić preferowaną temperaturę: wcisnąć przycisk
„SET” (6). Zaświeci się dioda „set”(3) informująca
o tym, że urządzenie znajduje się w trybie regulacji.
Za pomocą przycisków „+”(5) i „-” (4) ustawić wartość
temperatury. Zatwierdzić przyciśnięciem przycisku
„SET”(6). Zapali się dioda „Work”(2).
5. Odczekać, aż urządzenie nagrzeje się (ok. 10 – 20
min).
6. Delikatnie ułożyć jaja w inkubatorze.
7. Regularnie kontrolować poziom wody w inkubatorze.
Wskazówki dotyczące wylęgania jaj:
• Zawsze należy zwerykować sprawność techniczną
inkubatora oraz poprawność działania funkcji
urządzenia przed przystąpieniem do wylęgania jaj.
• Dla uzyskania najlepszych efektów lepiej
wybierać do wylęgania jaja średniej lub małej
wielkości. Zapłodnione jaja przeznaczone do
wylęgania powinny być świeże oraz oczyszczone z
zanieczyszczeń na skorupce.
• Właściwą metodą umieszczania jaj do wykluwania
jest układanie ich szerszą stroną ku górze, a węższą
ku dołowi tak, jak pokazuje to poniższy rysunek.
• Aby uniknąć uderzenia jaja pokrywą, należy
umieszczać duże jaja w środkowej części tacy, a
mniejsze po jej bokach. Zawsze należy zwerykować,
czy jajo nie jest zbyt duże, aby uniknąć jego
przypadkowego uszkodzenia.
• W przypadku gdy jaja są zbyt duże, aby umieścić
je na tacy, zaleca się wyjęcie tac na jaja i ułożenie
zapłodnionych jaj bezpośrednio na białej siatce ( nie
dotyczy modelu IN-7DDI).
• Należy stale kontrolować poziom wody w
inkubatorze, aby zapewnić odpowiednią wilgotność
do wylęgu jaj.
• Kiedy temperatura otoczenia spadnie poniżej
20°C sugeruje się umieścić inkubator w elemencie
wykonanym z substancji izolującej np. styropianu,
pianki itp. Jeśli umieszczenie w izolacji nie jest
możliwe, zaleca się przenieść inkubator do
ogrzewanego pomieszczenia lub otoczyć go grubym
materiałem np. kocami.
• Po 19 dniach wylęgania, kiedy skorupki jaj zaczną
pękać zaleca się wyjąć jaja z tacy na jaja i umieścić
je na białej siatce, aby wykluć pisklęta ( nie dotyczy
modelu IN-7DDI).
• Często zdarza się, że niektóre jaja nie wykluwają się
całkowicie po czasie 19dni, należy wtedy poczekać
jeszcze około 2-3 dni.
• Gdy pisklę utknie w skorupce, należy spryskać ją
ciepłą wodą i pomóc, delikatnie ściągając skorupę
jaja.
• Po wykluciu, pisklęta należy trzymać w ciepłym
miejscu oraz odżywiać za pomocą odpowiedniego
pokarmu i wody.
3.4. CZYSZCZENIE I KONSERWACJA
a) Przed każdym czyszczeniem, a także jeżeli urządzenie
nie jest używane, należy wyciągnąć wtyczkę sieciową.
b) Do czyszczenia powierzchni należy stosować
wyłącznie środki niezawierające substancji żrących.
c) Po każdym czyszczeniu wszystkie elementy należy
dobrze wysuszyć, zanim urządzenie zostanie
ponownie użyte.
d) Urządzenie należy przechowywać w suchym i
chłodnym miejscu chronionym przed wilgocią i
bezpośrednim promieniowaniem słonecznym.
e) Zabrania się spryskiwania urządzenia strumieniem
wody lub zanurzania urządzenia w wodzie.
f) Należy pamiętać, aby przez otwory wentylacyjne
znajdujące się w obudowie nie dostała się woda.
PL PL
20 21
27.06.2019 27.06.2019

Výrobek splňuje požadavky příslušných
bezpečnostních norem.
Před použitím výrobku se seznamte s návodem.
Recyklovatelný výrobek.
UPOZORNĚNÍ! nebo VAROVÁNÍ! nebo
PAMATUJTE! popisující danou situaci (všeobecná
výstražná značka).
VAROVÁNÍ! Nebezpečí úrazu elektrickým
proudem!
Zařízení s druhou třídou ochrany a dvojitou
izolací.
g) Otwory wentylacyjne należy czyścić pędzelkiem i
sprężonym powietrzem.
h) Należy wykonywać regularne przeglądy urządzenia
pod kątem jego sprawności technicznej oraz
wszelkich uszkodzeń. i
) Do czyszczenia należy używać miękkiej ściereczki.
j) Nie pozostawiać baterii w urządzeniu, gdy nie będzie
ono używane przez dłuższy czas.
k) Po każdym użyciu dezynfekować urządzenie.
INSTRUKCJA BEZPIECZNEGO USUNIĘCIA
AKUMULATORÓW I BATERII
W prześwietlarce do jaj dołączanej do inkubatorów
zamontowana jest bateria AA 1,5V. Przed przystąpieniem
do demontażu należy wyłączyć prześwietlarkę przyciskiem
On/O. Odkręcić tylną część obudowy i wyjąć baterie.
Baterie przekazać komórce odpowiedzialnej za utylizację
tych materiałów.
USUWANIE ZUŻYTYCH URZĄDZEŃ.
Po zakończeniu okresu użytkowania nie wolno usuwać
niniejszegoproduktupoprzeznormalneodpadykomunalne,
lecz należy go oddać do punktu zbiórki i recyklingu
urządzeń elektrycznych i elektronicznych. Informuje o tym
symbol, umieszczony na produkcie, instrukcji obsługi lub
opakowaniu. Zastosowane w urządzeniu tworzywa nadają
się do powtórnego użycia zgodnie z ich oznaczeniem.
Dzięki powtórnemu użyciu, wykorzystaniu materiałów lub
innym formom wykorzystania zużytych urządzeń wnoszą
Państwo istotny wkład w ochronę naszego środowiska.
Informacji o właściwym punkcie usuwania zużytych
urządzeń udzieli Państwu lokalna administracja.
Popis
parametru
Hodnota parametru
Název výrobku Inkubátor na vejce
Model IN-
7DDI
IN-
48DDI
IN-
56DDI
IN-
96DDI
Jmenovité
napětí
napájení [V~]/
Frekvence [Hz]
230/50
Jmenovitý
výkon [W]
30 80
Třída ochrany II
Stupeň
ochrany IP
IPX4
Objem (slepičí
vejce) [ks]
7 48 56 96
Funkce
automatického
otáčení vajec
--- ano
Funkce alarmu --- ano
Ventilátor ano
Prosvětlovačka
vajec
Příslušenství
napájené ba-
teriemi 1xAA
(Baterie není
přiložená)
Zabu-
dova-
ná
Příslu-
šenství
napájené
bateriemi
1xAA(Ba-
terie není
přiložená)
Rozměry [mm] 165
x165
x155
495
x471
x230
485
x460
x210
495
x477
x380
Hmotnost [kg] 0,4 3,1 3,5 5,5
Název výrobku Inkubátor na vejce
Model IN-
88DDI
IN-
32DDI
IN-
112DDI
Jmenovité
napětí
napájení [V~]/
Frekvence [Hz]
230/50
Jmenovitý
výkon [W]
80
Třída ochrany II
Stupeň
ochrany IP
IPX4
Objem (slepičí
vejce) [ks]
88 32 112
Funkce
automatického
otáčení vajec
--- ano
Funkce alarmu -- ano
Ventilátor ano
Prosvětlovačka
vajec
Příslu-
šenství
napájené
bateriemi
1xAA (Ba-
terie není
přiložená)
Zabu-
dovaná
Příslušenství
napájené
bateriemi
1xAA
(Baterie není
přiložená)
Rozměry [mm] 490x490
x180
350x460
x195
495x470
x385
Hmotnost [kg] 1,4 2,75 5,6
TECHNICKÉ ÚDAJE
1. VŠEOBECNÝ POPIS
Návod slouží jako nápověda pro bezpečné a spolehlivé
používání výrobku. Výrobek je navržen a vyroben přesně
podle technických údajů za použití nejnovějších technologií
a komponentů a za dodržení nejvyšších jakostních norem.
PŘED ZAHÁJENÍM PRÁCE SI DŮKLADNĚ PŘEČTĚTE
TENTO NÁVOD A UJISTĚTE SE, ŽE JSTE POCHOPILI
VŠECHNY POKYNY.
Pro zajištění dlouhého a spolehlivého fungování zařízení
pravidelně provádějte revize a údržbu v souladu s pokyny
uvedenými v tomto návodu. Technické údaje a specikace
uvedené v návodu jsou aktuální. Výrobce si vyhrazuje právo
provádět změny za účelem zvýšení kvality. Vzhledem k
technickému pokroku a možnosti omezení hluku bylo
zařízení navrženo a vyrobeno tak, aby nebezpečí vyplývající
z emise hluku bylo omezeno na nejnižší úroveň.
VYSVĚTLENÍ SYMBOLŮ
POZOR! Obrázky v tomto návodu jsou ilustrační.
V některých detailech se od skutečného vzhledu
stroje mohou lišit.
Originálním návodem je německá verze návodu. Ostatní
jazykové verze jsou překladem z německého jazyka.
2. BEZPEČNOST POUŽÍVÁNÍ
POZNÁMKA! Přečtěte si tento návod včetně všech
bezpečnostních pokynů. Nedodržování návodu a
pokynů může vést k úrazu elektrickým proudem,
požáru anebo těžkému úrazu či smrti.
PL CZ
NÁVOD K OBSLUZE
22 23
27.06.2019 27.06.2019

Model IN-56DDI, IN-32DDI
Model IN-96DDI, IN-112DDI
Vkládání:
2
3
1
4
1
4
3
2
1
4
2
3
2
1
4
3
Model IN-48DDI
3. ZÁSADY POUŽÍVÁNÍ
Inkubátorna vejce je zařízení určené pro inkubaci snesených
ptačích vajec. Úkolem inkubátoru je udržování vhodné
teploty a vlhkosti nezbytných pro správný rozvoj zárodku
do doby vylíhnutí.
Odpovědnost za veškeré škody vzniklé v důsledku
použití zařízení v rozporu s určením nese uživatel.
3.1. POPIS ZAŘÍZENÍ
Model IN-7DDI
Model IN-88DDI
1. Kryt
2. Tác na vejce
3. Schránka
4. Ovládací panel
4
1
3
Inkubátory na vejce IN-7DDI, IN-48DDI, IN-96DDI, IN-
112DDI a IN-88DDI mají v sadě prosvětlovačku vajec jako
dodatečné příslušenství. Model IN-56DDI a IN-32DDI má
zabudovanou prosvětlovačku.
Pojem „zařízení“ nebo „výrobek“ v bezpečnostních
pokynech a návodu se vztahuje na < Inkubátor na vejce >.
Zařízení nepoužívejte v prostředí s velmi vysokou vlhkostí /
v přímé blízkosti nádrží s vodou! Zařízení nenořte do vody.
Hrozí nebezpečí úrazu elektrickým proudem! Nezakrývejte
větrací otvory!
2.1. ELEKTRICKÁ BEZPEČNOST
a) Daná zásuvka musí být se zástrčkou zařízení
kompatibilní. Zástrčku žádným způsobem
neupravujte. Originální zástrčky a příslušné zásuvky
snižují nebezpečí úrazu elektrickým proudem.
b) Nedotýkejte se uzemněných předmětů jako jsou
trubky, topidla, kamna a chladničky. Pokud je
zařízení uzemněno, existuje zvýšené nebezpečí
úrazu elektrickým proudem v následku působení
deště, mokrého povrchu a práce se zařízením ve
vlhkém prostředí. Proniknutí vody do zařízení zvyšuje
nebezpečí jeho poškození a úrazu elektrickým
proudem.
c) Zařízení se nedotýkejte mokrýma nebo vlhkýma
rukama.
d) Napájecí kabel nepoužívejte na jiné účely, než na
které je určen. Nikdy jej nepoužívejte k přenášení
zařízení nebo k vytahování zástrčky ze síťové zásuvky.
Držte jej mimo dosah tepla, oleje, ostrých hran nebo
rotujících dílů. Poškozené nebo zamotané elektrické
napájecí kabely zvyšují nebezpečí úrazu elektrickým
proudem.
e) Pokud není možné vyhnout se práci se zařízením
ve vlhkém prostředí, používejte při tom proudový
chránič (RCD). Používání RCD snižuje nebezpečí
úrazu elektrickým proudem.
f) Je zakázáno používat zařízení, pokud je napájecí
kabel poškozený nebo má zjevné známky
opotřebení. Poškozený napájecí kabel musí být
vyměněn kvalikovaným elektrikářem nebo v
servisním středisku výrobce.
g) POZOR – OHROŽENÍ ŽIVOTA! Během čistění nebo
používání zařízení nikdy nesmí být ponořováno ve
vodě nebo jiných kapalinách.
2.2. BEZPEČNOST NA PRACOVIŠTI
a) Na pracovišti udržujte pořádek a mějte dobré
osvětlení. Nepořádek nebo špatné osvětlení mohou
vést k úrazům. Buďte předvídaví a sledujte, co se
během práce kolem vás děje. Při práci se zařízením
vždy zachovávejte zdravý rozum.
b) Se zařízením nepracujte ve výbušném prostředí,
například v přítomnosti hořlavých kapalin, plynů
nebo prachu. Zařízení vytváří jiskření, skrze které
může dojít ke vznícení prachu nebo výparů.
c) Pokud zjistíte, že zařízení nepracuje správně, nebo
je poškozeno, ihned jej vypněte a poruchu nahlaste
autorizované osobě.
d) Pokud máte pochybnosti o tom, zda zařízení funguje
správně, kontaktujte servis výrobce.
e) Opravy zařízení může provádět pouze servis výrobce.
Opravy neprovádějte sami!
f) V případě vzniku požáru k hašení zařízení pod
napětím používejte pouze práškové nebo sněhové
hasicí přístroje (CO2).
g) Návod k obsluze uschovejte za účelem jeho
pozdějšího použití. V případě předánání zařízení
třetím osobám musí být spolu se zařízením předán
rovněž návod k obsluze.
h) Obalový materiál a drobné montážní prvky
uchovávejte na místě nedostupném pro děti.
i) Zařízení mějte v dostatečné vzdálenosti od dětí a
zvířat
PAMATUJTE! Při práci se zařízením chraňte děti
a jiné nepovolané osoby.
2.3. OSOBNÍ BEZPEČNOST
a) Zařízení nepoužívejte, jste-li unaveni nebo pod
vlivem drog, alkoholu nebo léků, které významně
snižují schopnost zařízení ovládat.
b) S výrobkem mohou pracovat pouze fyzicky zdravé
osoby, které jsou schopné ho obsluhovat. Musejí být
náležitě proškolené z hlediska bezpečnosti a ochrany
zdraví při práci a seznámené s tímto návodem.
c) Zabraňte náhodnému spuštění. Ujistěte se, že je
spínač ve vypnuté poloze před připojením zařízení k
napájecímu zdroji.
d) Zařízení není hračka. Dohlížejte na děti, aby si
nehrály se zařízením.
2.4. BEZPEČNÉ POUŽÍVÁNÍ ZAŘÍZENÍ
a) Zařízení nepoužívejte, pokud spínač pro zapnutí a
vypnutí zařízení nefunguje správně. Zařízení, které
nelze ovládat spínačem, je nebezpečné a musí být
opraveno.
b) Před každým seřízením, čištěním a údržbou odpojte
zařízení od napájení. Toto bezpečnostní opatření
snižuje nebezpečí náhodného zapnutí.
c) Nepoužívaná zařízení uchovávejte mimo dosah dětí
a osob, které nejsou seznámeny se zařízením nebo
návodem k obsluze. Zařízení jsou nebezpečná v
rukou nezkušených uživatelů.
d) Zařízení udržujte v dobrém technickém stavu.
Kontrolujte před každou prací jeho celkový stav i
jednotlivé díly a ujistěte se, že je vše v dobrém stavu,
a uživateli tak při práci se zařízením nehrozí žádné
nebezpečí. V případě, že zjistíte poškození, nechte
zařízení opravit.
e) Udržujte zařízení mimo dosah dětí.
f) Opravu a údržbu zařízení by měly provádět
pouze kvalikované osoby za výhradního použití
originálních náhradních dílů. Zajistí to bezpečné
používání zařízení.
g) Pro zachování navržené mechanické integrity
zařízení neodstraňujte předem namontované kryty
nebo neuvolňujte šrouby.
h) Pokud zařízení nebylo odpojeno od napájení,
nedotýkejte se rotujících dílů ani součástí.
i) Nepřesouvejte, nepřenášejte a neotáčejte zařízení v
provozu.
j) Pravidelně čistěte zařízení, aby nedošlo k trvalému
usazovaní nečistot.
k) Zařízení není hračka. Čištění a údržbu nesmí provádět
děti bez dohledu dospělé osoby.
l) Nezasahujte do zařízení s cílem změnit jeho
parametry nebo konstrukci.
m) Udržujte zařízení mimo zdroje ohně a tepla.
n) Před prvním uvedením zařízení do provozu vždy
ověřte, zda je kompletní a že všechny pohyblivé
prvky, které mohou ovlivnit bezpečnost embryí nebo
kuřat, např. ventilátor, jsou chráněny kryty.
o) Nikdy nezakrývejte zařízení během provozu.
p) Upozornění: Nebezpečí požáru.
q) Některé prvky zařízení se silně zahřívají. Aby se
zabránilo zranění, buďte opatrní při dotyku těchto
povrchů.
r) Pravidelně kontrolujte hladinu vody v inkubátoru.
V případě nízké hladiny vody je doporučeno dolévat
teplou vodu.
s) Vodu dolévejte pomocí dávkovače.
t) Umělou líheň vždy odpojte od sítě, když doplňujete
vodu nebo když líheň právě nepoužíváte
u) Dodržujte obecné pokyty a doporučení co se týče
správné inkubace vajec
POZNÁMKA! I když zařízení bylo navrženo tak, aby
bylo bezpečné, tedy má vhodné bezpečnostní prvky,
tak i přes použití dodatečné ochrany uživatelem při
práci se zařízením nadále existuje malé riziko úrazu
nebo poranění. Doporučuje se zachovat opatrnost a
zdravý rozum při jeho používání.
CZ CZ
24 25
27.06.2019 27.06.2019

Model IN-7DDI
1. Sejměte víko a zvedněte tác na vejce.
2. Nalijte vodu do žlábku kolem bílé mřížky (jak je
znázorněno na obrázku níže).
UPOZORNĚNÍ: Nelijte vodu na bílou mřížku, zařízení
se může poškodit!
3. Nasaďte víko.
4. Zařízení připojte k elektrickému napájení.
5. Nastavte požadovanou teplotu: stiskněte tlačítko
„SET“ (6). Rozsvítí se kontrolka „Set“ (3) indikující,
že zařízení je v režimu nastavení. Pomocí tlačítek
„+“ (5) a „−“ (4) nastavte hodnotu teploty. Potvrďte
stisknutím tlačítka „SET“(6). Rozsvítí se kontrolka
„Work“ (2).
6. Počkejte, až se zařízení zahřeje (asi 10–20 min).
7. Opatrně položte vejce na tác.
8. Pravidelně kontrolujte hladinu vody v inkubátoru.
Model IN-48DDI, IN-96DDI, IN-112DDI
1. Zvedněte víko, nalijte vodu do inkubátoru a dávejte
pozor, abyste ji nenalili na pohon. Zavřete víko.
2. Zařízení připojte k elektrickému napájení.
3. Zařízení zapněte tlačítkem ON/OFF (5).
4. Spustí se zvukový alarm, který můžete vypnout
stisknutím jednoho z tlačítek na ovládacím panelu.
5. Zařízení každé 2 hodiny automaticky naklání vejce.
Vejce se naklánějí vlevo a vpravo pod úhlem 45
stupňů po dobu 10 vteřin. Nezvedejte víko při
automatickém otáčení vajec. Buďte opatrní při
prvním použití inkubátoru.
6. Jedno stisknutí tlačítka „reset“ (7) aktivuje manuální
zapnutí houpání vajíček a způsobí vynulování
odpočítávání času do spuštění dalšího houpání (nastaví
ho zpět na 1:59).
Parameter Význam parametru Tovární nastavení
AL Nastavení alarmu
příliš nízké teploty.
1°C
AH Nastavení alarmu
příliš vysoké teploty.
1°C
AS Nastavení alarmu
příliš nízké vlhkosti.
45%
CA Kalibrace teploměru. 0°C
HS Nastavení horní meze
teploty.
39.5°C
LS Nastavení spodní
meze teploty.
30°C
• Pokud chcete vstoupit do nastavení vybraného
parametru, stiskněte tlačítko „Set“ (3).
• Hodnoty alarmů nastavujte pomocí tlačítek (4) a (6).
Počkejte, až se zařízení automaticky vrátí do hlavního
menu.
• Alarm vydá zvukový signál. Alarm můžete vypnout
stisknutím jednoho z tlačítek na ovládacím panelu.
10. Počkejte než se zařízení zahřeje (asi 10–20 min).
11. Opatrně položte vejce na tác.
12. Pravidelně kontrolujte hladinu vody v inkubátoru.
Model IN-56DDI, IN-32DDI
1. Sejměte víko a zvedněte tác na vejce. Opatrně nalijte
vodu do žlábku. Zavřete víko.
2. Zařízení připojte k elektrickému napájení.
3. Zařízení zapněte tlačítkem On/O(4)
4. Zapne se alarm, který vypnete stisknutím jakéhokoli
tlačítka na ovládacím panelu.
5. Nastavení teploty:
• Inkubátor je továrně nastaven na teplotu zahřívání
38 °C.
• Stiskněte tlačítko „Set“ (2).
• Tlačítky „+“ (3) a „−“ (5) nastavte teplotu zahřívání.
• Nastavení potvrďte stisknutím tlačítka „Set“ (2).
6. Nastavení hodnot alarmů a kalibrace – dodržujte
bod 10 obsluhy modelů IN-48DDI, IN-96DDI.
7. Jedno stisknutí tlačítka „reset“ (7) aktivuje manuální
zapnutí houpání vajíček a způsobí vynulování
odpočítávání času do spuštění dalšího houpání
(nastaví ho zpět na 1:59).
8. Pro zresetování počítadla počtu dnů inkubace vajec
stiskněte a podržte tlačítko „reset“ (7) a poté odpojte
a připojte napájení zařízení bez uvolnění tlačítka.
Obnoví se tak současně tovární nastavení zařízení.
9. Počkejte, až se zařízení zahřeje (asi 10–20 min).
7. Pro zresetování počitadla inkubačních dnů vajec
stiskněte a podržte tlačítka (3) a (4), pak odpojte
a připojte napájení zařízení bez uvolnění tlačítek.
Obnoví se tak současně tovární nastavení zařízení.
8. Nastavení teploty:
• Inkubátor je továrně nastaven na teplotu zahřívání 38 °C.
• Stiskněte tlačítko „Set“ (3).
• Tlačítky (4) a (6) nastavte teplotu zahřívání.
• Nastavení potvrďte stisknutím tlačítka „Set“ (3).
9. Nastavení hodnot alarmů a kalibrace:
• Pokud chcete vstoupit do nastavení, stiskněte
tlačítko „Set“ (3) a přidržte jej na 3 vteřin.
• Můžete přepínat mezi parametry představenými
v níže uvedené tabulce pomocí tlačítek (4) a (6).
Ovládací panel Model IN-7DDI, IN-88DDI
1. Displej teploty
2. Kontrolka „work“
3. Kontrolka „set“
4. Tlačítko snížení hodnoty
5. Tlačítko zvýšení hodnoty
6. Tlačítko „set“
7. Spínač On/O ((Týká se pouze modelu IN-88DDI)
Model IN-48DDI, IN-96DDI, IN-112DDI
1. Ukazatel vlhkosti
2. Displej teploty
3. Tlačítko „set“
4. Tlačítko zvýšení hodnoty
5. Spínač On/O
6. Tlačítko snížení hodnoty
7. Tlačítko „reset“
8. Ukazatel počitadla času do dalšího naklánění vajec
9. Ukazatel počtů dnů inkubace
Model IN-56DDI, IN-32DDI
1. Displej
2. Tlačítko „set“
3. Tlačítko zvýšení hodnoty
4. Spínač On/O
5. Tlačítko snížení hodnoty
6. Spínač prosvětlovačky vajec
7. Tlačítko „reset“
1 2
89 7 6
5
3 4
1
7
6
2
3
5
4
Popis displeje:
1. Spínač On/O
Prosvětlovačka vajec
1
1. Odpočítávání času do dalšího naklánění vajec
2. Hodnota teploty
3. Hodnota vlhkosti
4. Ventilátor
5. Alarm příliš nízké vlhkosti
6. Topení zapnuto
7. Zapnuté světlo prosvětlovačky vajec
8. Počet dnů inkubace
3.2. PŘÍPRAVA K PRÁCI
UMÍSTĚNÍ ZAŘÍZENÍ
Teplota okolí nesmí být vyšší než 40 °C a relativní
vlhkost nesmí být vyšší než 85 %. Zařízení postavte
takovým způsobem, aby byla zajištěna dobrá cirkulace
vzduchu. Vzdálenost zařízení od stěny by neměla být
menší než 10 cm. Zařízení se musí nacházet daleko od
jakéhokoli horkého povrchu. Zařízení vždy používejte na
rovnoměrném, stabilním, čistém a ohnivzdorném povrchu,
mimo dosah dětí a osob s omezenými psychickými,
smyslovými a duševními funkcemi. Zařízení umístěte
takovým způsobem, abyste v každém okamžiku měli ničím
nezatarasený přístup k elektrické zásuvce. Ujistěte se, aby
hodnoty proudu, kterým je zařízení napájeno, byly shodné
s údaji uvedenými na technickém štítku zařízení!
3.3. PRÁCE SE ZAŘÍZENÍM
V tabulkách níže najdete přehled o tom, kolik vajec daného
typu lze inkubovat v zařízení a jakým způsobem je rozmístit.
Model IN-
7
DDI
IN-
48
DDI
IN-
56
DDI
IN-
96
DDI
IN-
88
DDI
IN-
32
DDI
IN-
112
DDI
Max.
počet
kuřecích
vajec
748 56 96 88 32 112
Max.
počet
holubích a
křepelčích
vajec
748 56 96 132 32 112
Max.
počet
krůtích a
kachních
vajec
424 28 48 44 16 56
Max.
počet
husích
vajec
-16 18 32 29 10 38
Model IN-
7
DDI
IN-
48
DDI
IN-
56
DDI
IN-
96
DDI
IN-
88
DDI
IN-
32
DDI
IN-
112
DDI
Způsob
rozmístění
kuřecích,
holubích a
křepelčích
vajec.
Jedno vejce v každé prohlubni v tácu na
vejce.
Způsob
rozmístění
krůtích a
kachních
vajec.
Mezi vejci nechte na tácu jedno místo
(prohlubeň) prázdné.
Způsob
rozmístění
husích
vajec.
-Vyjměte tác na vajíčka a umístěte
husí vejce na síťce.
CZ CZ
26 27
2
3
7
654
1
1 2
83
7 6 5 4
27.06.2019 27.06.2019

Le produit est conforme aux normes de sécurité
en vigueur.
Respectez les consignes du manuel.
Collecte séparée.
ATTENTION ! , AVERTISSEMENT ! et REMARQUE
attirent l‘attention sur des circonstances
spéciques (symboles d‘avertissement généraux).
ATTENTION ! Mise en garde liée à la tension
électrique !
Appareil de la classe de protection II possédant
une isolation renforcée.
10. Opatrně položte vejce na tác.
11. Pravidelně kontrolujte hladinu vody v inkubátoru.
12. Tlačítkem (6) zapnete světlo prosvětlovačky, jejíž
pomocí můžete zkontrolovat stav vývoje zárodku ve
vejci.
Model IN-88DDI
1. Sejměte víko. Nalijte vodu. Zavřete víko.
2. Zařízení připojte k elektrickému napájení.
3. Zařízení zapněte tlačítkem On/O(7)
4. Nastavte požadovanou teplotu: stiskněte tlačítko
„SET“ (6). Rozsvítí se kontrolka „set“ (3) indikující,
že zařízení se nachází v režimu nastavení. Pomocí
tlačítek „+“ (5) a „−“ (4) nastavte hodnotu teploty.
Potvrďte stisknutím tlačítka „SET“ (6). Rozsvítí se
kontrolka „Work“ (2).
5. Počkejte, až se zařízení zahřeje (asi 10–20 min).
6. Opatrně položte vejce na tác.
7. Pravidelně kontrolujte hladinu vody v inkubátoru.
Tipy pro inkubaci vajec:
• Před inkubací vajec vždy zkontrolujte technickou
účinnost inkubátoru a správnost funkcí zařízení.
• Pro dosažení nejlepších výsledků je lepší zvolit
násadová vejce střední nebo malé velikosti.
Oplodněná vejce určená pro inkubaci by měla být
čerstvá a bez nečistot na skořápkách.
• Násadová vejce vkládejte do inkubátoru širší stranou
nahoru a špičkou dolů, jak je znázorněno na obrázku
níže.
CZ FR
MANUEL D‘UTILISATION
3.4. ČIŠTĚNÍ A ÚDRŽBA
a) Před každým čištěním a také tehdy, když zařízení
nepoužíváte, vytáhněte síťovou zástrčku že zásuvku.
b) K čištění povrchu zařízení používejte výhradně
prostředky neobsahující žíravé látky.
b) K čištění povrchu zařízení používejte výhradně
prostředky neobsahující žíravé látky.
c) Po každém čištění je nutno všechny prvky dobře
osušit, než bude zařízení opět použito.
d) Zařízení skladujte na suchém a chladném místě,
chráněném proti vlhkosti a přímému slunečnímu
svitu.
e) Je zakázáno zařízení polévat vodou nebo je do vody
ponořovat.
f) Dávejte pozor, aby se ventilačními otvory
nacházejícími se na krytu zařízení nedostala dovnitř
voda.
g) Ventilační otvory čistěte pomocí štětečku a
stlačeného vzduchu.
h) Pravidelně provádějte revize zařízení a kontrolujte,
zda je technicky způsobilé a není poškozeno.
i) K čištění používejte měkký hadřík.
j) Pokud zařízení nebudete používat delší dobu,
vytáhněte z něj akumulátor/baterii.
k) Zařízení po každém použití vydezinkujte.
NÁVOD K BEZPEČNÉMU VYJMUTÍ AKUMULÁTORŮ
A BATERIÍ
V prosvětlovačce vajec přiložené k inkubátoru je
namontována baterie AA 1,5V. Před jejím vytažením
vypněte prosvětlovačku tlačítkem ON/OFF. Vyšroubujte
zadní část krytu a vyjměte baterie. Baterie odevzdejte do
sběrny elektrického odpadu.
LIKVIDACE OPOTŘEBENÝCH ZAŘÍZENÍ
Po ukončení doby používání nevyhazujte tento výrobek
společně s komunálním odpadem, ale odevzdejte jej k
recyklaci do sběrny elektrických a elektronických zařízení.
O tom informuje symbol umístěný na zařízení, v návodě
k obsluze nebo na obalu. Komponenty použité v zařízení
jsou vhodné pro zužitkování v souladu s jejich označením.
Díky zužitkování, recyklaci nebo jiným způsobům využití
opotřebených zařízení významně přispíváte k ochraně
životního prostředí. Informace o příslušné sběrně
opotřebených zařízení poskytne místní obecný nebo
městský úřad.
• Aby nedošlo ke kontaktu vajec s víkem, umístěte
větší vejce do střední části zásobníku a menší vejce
po stranách. Vždy zkontrolujte, zda vejce není příliš
velké, aby nedošlo k náhodnému poškození.
• Pokud jsou vejce příliš velká na to, aby mohla být
umístěna na podnos, doporučuje se vyjmout
zásobníky na vejce a uspořádat oplodněná vajíčka
přímo na bílou mřížku (neplatí pro model IN-7DDI).
• Hladina vody v inkubátoru by měla být neustále
kontrolována, aby byla pro násadová vejce zajištěna
odpovídající vlhkost.
• Klesne-li okolní teplota pod 20°C, doporučujeme
inkubátor umístit do izolačního materiálu, jako
např. polystyrenu nebo izolační pěny. Pokud není
umístění do takového izolačního materiálu možné,
doporučujeme jej přemístit do vyhřáté místnosti
nebo jej zabalit do silného materiálu jako např. deky.
• Po 19 dnech inkubace, kdy začnou praskat vaječné
skořápky, se doporučuje vyjmout vejce z podnosu na
vejce a umístit je na bílou síťku, aby se kuřátka vylíhla
(neplatí pro model IN-7DDI).
• Často se stává, že se některá vejce po 19 dnech úplně
nevylíhnou, v tom případě počkejte ještě 2-3 dny.
• Když kuřátko uvízne ve skořápce, postříkejte ho
teplou vodou a pomozte mu jemně stahováním
skořápky.
• Po vylíhnutí by kuřata měla být uchovávána na teplém
místě a vyživována vhodnou potravou a vodou.
Description des
paramètres
Valeur des paramètres
Nom du
produit
Incubateur à oeufs
Modèle IN-
7DDI
IN-
48DDI
IN-
56DDI
IN-
96DDI
Tension
nominale [V~]/
Fréquence [Hz]
230/50
Puissance
nominale [W]
30 80
Classe de
protection
II
Classe de
protection IP
IPX4
Capacité
(oeufs de
poule) [pièce]
7 48 56 96
Fonction
de rotation
automatique
des oeufs
--- oui
Fonction
d’alarme
sonore
--- oui
Ventilateur oui
Lampe UV Accessoire
d’alimentation
– Pile 1xAA (La
batterie n’est
pas incluse)
Intégré Accessoire
d’alimen-
tation –
Pile 1xAA
(La batterie
n’est pas
incluse)
Dimensions
[mm]
165
x165
x155
495
x471
x230
485
x460
x210
495
x477
x380
Poids [kg] 0,4 3,1 3,5 5,5
Nom du
produit
Incubateur à oeufs
Modèle IN-
88DDI
IN-
32DDI
IN-
112DDI
Tension
nominale [V~]/
Fréquence [Hz]
230/50
Puissance
nominale [W]
80
Classe de
protection
II
Classe de
protection IP
IPX4
Capacité
(oeufs de
poule) [pièce]
88 32 112
Fonction
de rotation
automatique
des oeufs
--- oui
Fonction
d’alarme
sonore
-- oui
Ventilateur oui
Lampe UV Accessoire
d’alimenta-
tion – Pile
1xAA (La
batterie
n’est pas
incluse)
Intégré Accessoire
d’alimenta-
tion
– Pile 1xAA
(La
batterie n’est
pas incluse)
Dimensions
[mm]
490x490
x180
350x460
x195
495x470
x385
Poids [kg] 1,4 2,75 5,6
DÉTAILS TECHNIQUES
1. DESCRIPTION GÉNÉRALE
L‘objectif du présent manuel est de favoriser une utilisation
sécuritaire et able de l‘appareil. Le produit a été conçu
et fabriqué en respectant étroitement les directives
techniques applicables et en utilisant les technologies et
composants les plus modernes. Il est conforme aux normes
de qualité les plus élevées.
LISEZ ATTENTIVEMENT LE PRÉSENT MANUEL ET
ASSUREZ-VOUS DE BIEN LE COMPRENDRE AVANT
LA PREMIÈRE UTILISATION.
An de garantir le fonctionnement able et durable de
l‘appareil, il est nécessaire d‘utiliser et d‘entretenir ce
dernier conformément aux consignes gurant dans le
présent manuel. Les caractéristiques et les spécications
contenues dans ce document sont à jour. Le fabricant se
réserve le droit de procéder à des modications à des ns
d’amélioration du produit. L‘appareil a été mis au point et
fabriqué en tenant compte des progrès techniques et de la
réduction de bruit an de réduire au maximum les risques
liés aux émissions sonores.
SYMBOLES
28 29
27.06.2019 27.06.2019

2
3
1
4
3. CONDITIONS D’UTILISATION
L‘incubateur à œufs a été conçu pour incuber des œufs
embryonnés d‘oiseaux. Le fonctionnement de l‘appareil
consiste à fournir la température et l‘humidité requises
pour le développement de l‘œuf jusqu‘à son éclosion.
Tout dommage ou incidents liés à une mauvaise
utilisation de l‘appareil incombe à l‘utilisateur.
Modèle IN-96DDI, IN-112DDI
Assemblage:
1
4
3
2
1
4
2
3
2
1
4
3
Modèle IN-48DDI
Modèle IN-56DDI, IN-32DDI
FR
3.1. DESCRIPTION DE L‘APPAREIL
Modèle IN-7DDI
FR
REMARQUE! Les illustrations contenues dans le
présent manuel sont fournies à titre explicatif. Votre
appareil peut ne pas être identique.
La version originale de ce manuel a été rédigée en
allemand. Toutes les autres versions sont des traductions
de l‘allemand.
2. CONSIGNES DE SÉCURITÉ
ATTENTION! Veuillez lire attentivement toutes les
consignes de sécurité et toutes les instructions. Le
non-respect des avertissements et des consignes
de sécurité peut entraîner des chocs électriques, un
incendie, des blessures graves ou la mort.
Les notions d'« appareil », de « machine » et de « produit
» gurant dans les descriptions et les consignes du manuel
se rapportent à/au < Incubateur à oeufs >. N'utilisez pas
l'appareil dans des pièces où le taux d'humidité est très
élevé, ni à proximité immédiate de récipients d'eau ! Ne
mouillez pas l'appareil. Risque de chocs électriques ! Ne
couvrez pas les orices de ventilation !
2.1. SÉCURITÉ ÉLECTRIQUE
a) La che de l’appareil doit être compatible avec la
prise électrique. Ne modiez d‘aucune façon la che
électrique. L‘utilisation de la che originale et d‘une
prise électrique adaptée diminue les risques de
chocs électriques.
b) Évitez de toucher aux composants mis à la terre
comme les tuyaux, les radiateurs, les fours et
les réfrigérateurs. Le risque de chocs électriques
augmente lorsque votre corps est mis à la terre par
le biais de surfaces trempées et d‘un environnement
humide. La pénétration d‘eau dans l‘appareil accroît
le risque de dommages et de chocs électriques.
c) Ne touchez pas l‘appareil lorsque vos mains sont
humides ou mouillées.
d) N‘utilisez pas le câble d‘une manière diérant de son
usage prévu. Ne vous en servez jamais pour porter
l‘appareil. Ne tirez pas sur le câble pour débrancher
l‘appareil. Tenez le câble à l‘écart de la chaleur, de
l‘huile, des arêtes vives et des pièces mobiles. Les
câbles endommagés ou soudés augmentent le
risque de chocs électriques.
e) Si vous n‘avez d‘autre choix que de vous servir de
l’appareil dans un environnement humide, utilisez
un dispositif diérentiel à courant résiduel (DDR). Un
DDR réduit le risque de chocs électriques.
f) Il est interdit d‘utiliser l‘appareil si le câble
d‘alimentation est endommagé ou s‘il présente
des signes visibles d‘usure. Le câble d‘alimentation
endommagé doit être remplacé par un électricien
qualié ou le centre de service du fabricant.
g) ATTENTION DANGER DE MORT ! Ne trempez et
n’immergez jamais l’appareil dans l’eau ou dans
d’autres liquides pendant le nettoyage ou le
fonctionnement.
2.2. SÉCURITÉ AU POSTE DE TRAVAIL
a) Veillez à ce que votre poste de travail soit toujours
propre et bien éclairé. Le désordre ou un éclairage
insusant peuvent entraîner des accidents. Soyez
prévoyant, observez les opérations et faites preuve
de bon sens lorsque vous utilisez l’appareil.
b) N‘utilisez pas l‘appareil dans les zones à risque
d‘explosion, par exemple à proximité de liquides, de
gaz ou de poussières inammables.
Certains appareils peuvent produire des étincelles
susceptibles d’enammer la poussière et les vapeurs.
c) En cas de dommages ou de mauvais fonctionnement,
l’appareil doit être mis hors tension immédiatement
et la situation doit être rapportée à une personne
compétente.
d) En cas d’incertitude quant au fonctionnement correct
de l’appareil, contactez le service client du fabricant.
e) Seul le service du fabricant peut eectuer des
réparations. Ne tentez aucune réparation par vous-
même !
f) En cas de feu ou d’incendie, utilisez uniquement des
extincteurs à poudre ou au dioxyde de carbone (CO2)
pour étouer les ammes sur l’appareil.
g) Conservez le manuel d’utilisation an de pouvoir
le consulter ultérieurement. En cas de cession de
l’appareil à un tiers, l’appareil doit impérativement
être accompagné du manuel d’utilisation.
h) Tenez les éléments d’emballage et les pièces de
xation de petit format hors de portée des enfants.
i) Tenez l’appareil hors de portée des enfants et des
animaux.
REMARQUE! Veillez à ce que les enfants et les
personnes qui n‘utilisent pas l‘appareil soient en
sécurité durant le travail.
2.3. SÉCURITÉ DES PERSONNES
a) N'utilisez pas l'appareil lorsque vous êtes fatigué,
malade, sous l'eet de drogues ou de médicaments
et que cela pourrait altérer votre capacité à utiliser
l'appareil.
b) Seules des personnes aptes physiquement à se servir
de l'appareil, qui ont suivi une formation appropriée
et ont lu ce manuel d'utilisation peuvent utiliser le
produit. En outre, ces personnes doivent connaître
les exigences liées à la santé et à la sécurité au travail.
c) An de prévenir la mise en marche accidentelle de
l'appareil, assurez-vous que celui-ci est éteint et que
l'interrupteur se trouve sur arrêt avant de procéder
au branchement.
d) Cet appareil n'est pas un jouet. Les enfants doivent
demeurer sous la supervision d’un adulte an qu’ils
ne jouent pas avec l’appareil.
2.4. UTILISATION SÉCURITAIRE DE L'APPAREIL
a) N’utilisez pas l’appareil si l’interrupteur MARCHE/
ARRÊT ne fonctionne pas correctement. Les appareils
qui ne peuvent pas être contrôlés à l'aide d'un
interrupteur sont dangereux et doivent être réparés.
b) Avant de procéder au nettoyage et à l’entretien
de l’appareil, débranchez-le. Une telle mesure
préventive réduit le risque de mise en marche
accidentelle de l’appareil.
c) Les outils qui ne sont pas en cours d'utilisation
doivent être mis hors de portée des enfants et des
personnes qui ne connaissent ni l'appareil, ni le
manuel d'utilisation s'y rapportant. Entre les mains
de personnes inexpérimentées, ce genre d'appareils
peut représenter un danger.
d) Maintenez l'appareil en parfait état de marche. Avant
chaque utilisation, vériez l’absence de dommages
en général et au niveau des pièces mobiles (assurez-
vous qu’aucune pièce ni composant n’est cassé et
vériez que rien ne compromet le fonctionnement
sécuritaire de l’appareil). En cas de dommages,
l’appareil doit impérativement être envoyé en
réparation avant d’être utilisé de nouveau.
e) Tenez l'appareil hors de portée des enfants.
f) La réparation et l'entretien des appareils doivent être
eectués uniquement par un personnel qualié, à
l'aide de pièces de rechange d'origine. Cela garantit
la sécurité d’utilisation.
g) Pour garantir l'intégrité opérationnelle de l'appareil,
les couvercles et les vis posés à l'usine ne doivent pas
être retirés.
h) Ne touchez ni les pièces mobiles, ni les accessoires
à moins que l’appareil n'ait été préalablement
débranché.
i) Il est défendu de pousser, de déplacer ou de tourner
l’appareil pendant son fonctionnement.
j) Nettoyez régulièrement l‘appareil pour en prévenir
l’encrassement.
k) Cet appareil n‘est pas un jouet. Le nettoyage et
l’entretien ne doivent pas être eectués par des
enfants, à moins qu’ils se trouvent sous la supervision
d’un adulte responsable.
l) Il est défendu de modier l’appareil pour en changer
les paramètres ou la construction.
m) Gardez le produit à l’écart des sources de feu et de
chaleur.
n) Avant la première mise en service, vériez toujours
que le dispositif est complet et que toutes les pièces
mobiles susceptibles d’aecter la sécurité des œufs
embryonnés ou des poussins, par exemple des
ventilateurs, sont protégées par des capots.
o) Ne jamais couvrir l‘incubateur pendant son
fonctionnement.
p) Attention! Risque d‘incendie.
q) Certains éléments de l‘appareil peuvent devenir très
chauds au cours de l‘utilisation. Pour éviter de vous
blesser, soyez très prudent lorsque vous touchez
cette surface.
r) Vériez régulièrement le niveau d‘eau dans
l‘incubateur. Il est recommandé de verser de l‘eau
chaude si le niveau d‘eau est trop bas.
s) Il est recommandé de verser de l‘eau avec le
distributeur.
t) Débranchez toujours la couveuse à œufs avant d‘y
ajouter de l‘eau et quand vous la laissez inutilisée.
u) Pour incuber correctement vos oeufs, veuillez suivre
les indications générales d’élevage et d’incubation
indiquées.
ATTENTION! Bien que l‘appareil ait été conçu en
accordant une attention spéciale à la sécurité et qu‘il
comporte des dispositifs de protection, ainsi que des
caractéristiques de sécurité supplémentaires, il n’est
pas possible d’exclure entièrement tout risque de
blessure lors de son utilisation. Nous recommandons
de faire preuve de prudence et de bon sens lorsque
vous utilisez l’appareil.
30 31
27.06.2019 27.06.2019

Modèle IN-7DDI
1. Retirez le couvercle et relevez le support pour œufs.
2. Versez de l‘eau dans le renfoncement autour de
la grille blanche (comme indiqué sur la gure ci-
dessous).
ATTENTION: Ne versez pas d‘eau à travers la grille
blanche Cela pourrait endommager l‘appareil.
3. Replacez le couvercle dessus.
4. Branchez le câble d‘alimentation de l‘appareil au
secteur.
5. Paramétrez la température souhaitée: appuyez sur la
touche « Set » (6). La DEL « set » (3) s‘illumine pour
indiquer que l‘appareil est en mode paramétrage.
Réglez la température avec les touches „+“ (5) et „-“
(4). Conrmez avec la touche „SET“ (6). La DEL „Work“
(2) s‘illumine alors.
6. Attendez que l‘appareil préchaue (env. 10-20
minutes)
7. Placez avec précautions les œufs dans le support
pour œufs.
8. Contrôlez régulièrement le niveau d‘eau dans
l‘incubateur.
Modèle IN-48DDI, IN-96DDI, IN-112DDI
1. Retirez le couvercle et versez de l‘eau dans
l‘incubateur. Faites attention à ce que de l‘eau ne
soit pas versée dans le circuit électrique de l‘appareil.
Replacez le couvercle.
2. Branchez le câble d‘alimentation de l‘appareil au
secteur.
3. Allumez l‘appareil avec l‘interrupteur Marche/Arrêt.
4. Un signal sonore retentit et doit être désactivé
en appuyant sur l‘une des touches du tableau de
commande.
5. L’incubateur retourne les œufs automatiquement
toutes les deux heures œufs. Les œufs vont être
inclinés de 45° pendant 10 secondes à gauche puis
à droite. Pendant le processus de retournement des
œufs, ne pas relever le couvercle. Soyez prudent
lorsque vous utilisez l’incubateur pour la première
fois.
6. Une simple pression sur le bouton“ reset „(7)
provoque l‘activation manuelle du balancement
des œufs et réinitialise le compteur à rebours au
prochain basculement (le remet à 1:59).”
7. Pour réinitialiser le compteur du nombre de jours
d‘incubation d‘œufs, maintenez les boutons (3)
et (4) enfoncés, puis débranchez et branchez
l‘appareil à l‘alimentation sans relâcher les boutons..
Les paramètres de fonctionnement seront ainsi
réinitialisés.
8. Paramétrage de la température:
• De base, l‘incubateur est paramétré à une
température de 38 °C.
• Appuyez sur la touche „Set“ (3).
• Réglez la température avec les touches (4) et (6).
• Conrmez vos réglages en appuyant sur la touche
„Set“ (3).
Les incubateurs IN-7DDI, IN-48DDI, IN-96DDI, IN-112DDI
et IN-88DDI disposent d‘un socle pour œufs comme
accessoire supplémentaire. Le modèle IN-56DDI et IN-
32DDI a une lumière intégrée pour plaque.
Tableau de commande Modèle IN-7DDI, IN-88DDI
1. Indicateur de la température
2. Témoin lumineux „Work”
3. Témoin lumineux „Set”
4. Augmenter valeur
5. Réduire valeur
6. Touche „Set”
7. Interrupteur Marche/Arrêt (seulement
pour le modèle IN-88DDI)
Modèle IN-48DDI, IN-96DDI, IN-112DDI
1. Indicateur d‘humidité
2. Indicateur de la température
3. Touche „Set”
4. Augmenter valeur
Modèle IN-56DDI, IN-32DDI
1 2
89 7 6
5
3 4
Modèle IN-88DDI
1. Couvercle
2. Support pour œufs
3. Boîtier
4. Tableau de commande
4
1
3
1
7
6
2
3
5
4
5. Interrupteur Marche/Arrêt
6. Réduire valeur
7. Touche „Reset”
8. Indicateur de temps pour le prochain retournement
des œufs
9. Écran d‘achage du nombre de phase d‘incubation
1. Écran
2. Touche „Set”
3. Augmenter valeur
4. Interrupteur Marche/Arrêt
5. Réduire valeur
6. Interrupteur pour la lampe
7. Touche „Reset”
Écran:
1. Indicateur de temps pour le prochain
retournement des oeufs
2. Température
3. Degré d‘humidité
4. Ventilateur
5. Alarme pour humidité trop basse
6. Le chauage est allumé
7. Lampe activée
8. Nombre de phase d‘incubation
1. Interrupteur Marche/Arrêt
Lampe UV
1
3.3. UTILISATION DE L‘APPAREIL
Les tableaux suivants fournissent les informations sur le
nombre d'œufs d'un type donné pouvant être incubés
en même temps dans l'appareil et de la manière dont ils
doivent être disposés.
3.2. PRÉPARATION À L'UTILISATION
CHOIX DE L’EMPLACEMENT DE L’APPAREIL
La température ambiante ne doit pas dépasser 40°C et le
taux d'humidité relative ne doit pas être de plus de 85 %.
Positionnez l’appareil de sorte qu’une bonne circulation
d’air soit assurée. Vériez qu’un espace d'au moins 10 cm
est libre de chaque côté de l’appareil. Tenez l’appareil à
l’écart des surfaces chaudes.
Utilisé toujours l’appareil sur une surface plane, stable,
propre, ininammable et sèche, hors de portée des enfants
et des personnes présentant des capacités physiques,
sensorielles ou mentales diminuées. Placez l’appareil de
sorte que la che soit accessible en permanence et non
couverte. Assurez-vous que l’alimentation électrique
correspond aux indications gurant sur la plaque
signalétique du produit !
Modèle IN-
7
DDI
IN-
48
DDI
IN-
56
DDI
IN-
96
DDI
IN-
88
DDI
IN-
32
DDI
IN-
112
DDI
Nombre
maximum
d‘œufs de
poule
748 56 96 88 32 112
Nombre
maximum
d‘œufs de
colombe,
et de
caille
748 56 96 132 32 112
Nombre
Maximum
d'œufs de
dinde et
de canard
424 28 48 44 16 56
Nombre
maximum
d‘œufs
d‘oie
-16 18 32 29 10 38
Modèle IN-
7
DDI
IN-
48
DDI
IN-
56
DDI
IN-
96
DDI
IN-
88
DDI
IN-
32
DDI
IN-
112
DDI
Méthode
de
disposition
d’œufs de
poule, de
pigeon et
de caille
Un œuf dans chaque emplacement de la
barquette à œufs.
Méthode
de
disposition
d’œufs de
dinde et
de canard
Laissez un espace vide (emplacement) sur
la barquette entre les œufs.
Méthode
de
disposition
d’œufs
d’oie
- Retirez la barquette à œufs et
placez les œufs d’oie sur le let.
FR FR
32 33
2
3
7
654
1
1 2
83
7 6 5 4
27.06.2019 27.06.2019

9. Attendez que l‘appareil préchaue (env. 10-20
minutes)
10. Placez avec précautions les œufs dans le support
pour œufs.
11. Contrôlez régulièrement le niveau d‘eau dans
l‘incubateur.
12. La touche (6) active la lampe à UV, celle-ci vous
permet de vérier l‘évolution de l‘embryon.
Modèle IN-88DDI
1. Retirez le couvercle, versez de l‘eau et replacez le
couvercle.
2. Branchez le câble d‘alimentation de l‘appareil au
secteur.
3. Allumez l‘appareil avec l‘interrupteur Marche/Arrêt (7).
4. Paramétrez la température souhaitée: appuyez sur la
touche « Set » (6). La DEL « set » (3) s‘illumine pour
indiquer que l‘appareil est en mode paramétrage.
Réglez la température avec les touches „+“ (5) et „-“
(4). Conrmez avec la touche „SET“ (6). La DEL „Work“
(2) s‘illumine alors.
5. Attendez que l‘appareil préchaue (env. 10-20
minutes)
6. Placez avec précautions les œufs dans le support
pour œufs.
7. Contrôlez régulièrement le niveau d‘eau dans
l‘incubateur.
Conseils pour incuber les œufs:
• Vériez toujours l‘ecacité technique de l‘incubateur
et le fonctionnement correct de l‘appareil avant de
faire incuber les œufs.
• Pour de meilleurs résultats, il est préférable de choisir
des œufs à couver de moyenne ou petite taille. Les
œufs fécondés pour l‘incubation doivent être frais et
nettoyés des impuretés sur la coquille.
• La méthode appropriée pour placer les œufs à
couver est de les disposer avec le côté le plus large
dirigé vers le haut et le plus étroit vers le bas, comme
indiqué dans la gure ci-dessous.
9. Paramétrage de l‘alarme et calibrage:
• Pour entrer dans le mode de paramétrage, appuyez
sur la touche „Set“ (3). Maintenez-la pendant 3
secondes.
• Sélectionnez les paramètres indiqués dans le tableau
suivant avec les touches (4) et (6).
Paramètre Signication Valeur de
réglage
de base
AL Paramétrage – Alarme de la
température basse.
1°C
AH Paramétrage – Alarme de la
température haute.
1°C
AS Alarme de l'humidité
(lorsque trop basse).
45%
CA Calibrage du thermomètre. 0°C
HS Paramétrage de la limite
haute de température.
39.5°C
LS Paramétrage de la limite
basse de température.
30°C
• Pour conrmer les paramètres sélectionnés, appuyez
sur la touche „Set“ (3).
• Paramétrez l‘alarme avec les touches (4) et (6).
Attendez que l‘appareil retourne automatiquement
dans le menu principal.
• L‘alarme émet un signal sonore. L‘alarme s‘éteint
en appuyant sur l‘une des touches du tableau de
commande.
10. Attendez que l‘appareil préchaue (env. 10-20 minutes)
11. Placez avec précautions les œufs dans le support
pour œufs.
12. Contrôlez régulièrement le niveau d‘eau dans
l‘incubateur.
Modèle IN-56DDI, IN-32DDI
1. Retirez le couvercle, versez de l‘eau avec précaution
dans le renfoncement. Replacez le couvercle.
2. Branchez le câble d‘alimentation de l‘appareil au
secteur.
3. Allumez l‘appareil avec l‘interrupteur Marche/Arrêt (4).
4. Un signal sonore retentit et doit être désactivé
en appuyant sur l‘une des touches du tableau de
commande.
5. Paramétrage de la température:
• De base, l‘incubateur est paramétré à une
température de 38 °C.
• Appuyez sur la touche „Set“ (2).
• Réglez la température avec les touches (3) et (5).
• Conrmez vos réglages en appuyant sur la touche
„Set“ (2).
6. Réglage de l‘alarme et calibrage. Respecter le point
10 d‘entretien des modèles IN-48DDI et IN-96DDI.
7. Une simple pression sur le bouton“ reset „(7)
provoque l‘activation manuelle du balancement
des œufs et réinitialise le compteur à rebours au
prochain basculement (le remet à 1:59).
8. Pour réinitialiser le compteur du nombre de
jours d‘incubation d‘œufs, maintenez le bouton
„reset“ (7) enfoncés, puis débranchez et branchez
l‘appareil à l‘alimentation sans relâcher le bouton.
Les paramètres de fonctionnement seront ainsi
réinitialisés.
• Pour éviter de frapper l'œuf avec le couvercle, placez
les gros œufs au centre du plateau et les plus petits
sur les côtés. Vériez toujours que l'œuf n'est pas
trop gros pour éviter tout dommage accidentel.
• Si les œufs sont trop gros pour être placés sur le
plateau, il est recommandé de retirer les plateaux
et de disposer les œufs fécondés directement sur la
grille blanche (non applicable au modèle IN-7DDI).
• Le niveau de l'eau dans l'incubateur doit être
surveillé en permanence pour assurer une humidité
adéquate pour les œufs à couver.
• Lorsque la température extérieure passe sous la barre
des 20 °C, il est conseillé de placer la couveuse dans
un élément isolant, p. ex. dans de la styromousse,
de la mousse d‘isolation ou toute autre matière
similaire. S‘il n‘est pas possible d‘isoler la couveuse
de cette façon, il est préférable de la placer dans une
pièce chauée ou de l‘envelopper dans un textile
épais comme une couverture.
• Après le 19 jours d‘incubation, quand les coquilles
d‘œufs commencent à se ssurer, il est recommandé
de retirer les œufs du plateau et de les placer sur
une grille blanche pour faire éclore les poussins (non
applicable au modèle IN-7DDI).
• Il arrive souvent que certains œufs ne éclosent pas
complètement après 19 jours. Vous devez alors
attendre encore 2-3 jours.
• Lorsque le poussin se coince dans la coquille, il faut la
pulvériser avec de l‘eau tiède et aidez-le doucement
en retirant la coquille de l‘œuf.
• Après l'éclosion, les poussins doivent être gardés
dans un endroit chaud et nourris avec de la
nourriture approprié et de l'eau.
3.4. NETTOYAGE ET ENTRETIEN
a) Avant de commencer le nettoyage, débranchez
l‘appareil de l‘alimentation électrique.
b) Pour nettoyer les diérentes surfaces, n‘utilisez que
des produits sans agents corrosifs.
c) Laissez bien sécher tous les composants après
chaque nettoyage avant de réutiliser l’appareil.
d) Conservez l‘appareil dans un endroit propre, frais et
sec, à l‘abri de l‘humidité et des rayons directs du
soleil.
e) Il est interdit d’asperger l‘appareil d‘eau ou de
l‘immerger dans l‘eau.
f) Évitez que de l’eau ne pénètre à l’intérieur de
l’appareil par l’intermédiaire des orices de
ventilation du boîtier.
g) Nettoyez les orices de ventilation à l‘aide d‘un
pinceau et d‘air comprimé.
h) Contrôlez régulièrement l‘appareil pour vous assurer
qu‘il fonctionne correctement et ne présente aucun
dommage.
i) Utilisez un chion doux lors du nettoyage.
j) Ne laissez pas de piles dans l’appareil lorsque vous
ne comptez pas l‘utiliser pendant une période
prolongée.
k) Désinfectez l‘appareil après chaque utilisation.
INFORMATIONS DU TRAITEMENT DES PILES ET
BATTERIES
La lampe UV, fournie avec l‘incubateur, contient une pile
AA 1,5 V. Avant le démontage, éteignez l‘écran en appuyant
sur la touche Marche/Arrêt. Dévissez la partie arrière du
boitier de la lampe et retirez la pile. Jetez la pile dans un
conteneur à pile correspondant.
MISE AU REBUT DES APPAREILS USAGÉS
À la n de sa vie, ce produit ne doit pas être jeté dans les
ordures ménagères ; il doit impérativement être remis
dans un point de collecte et de recyclage pour appareils
électroniques et électroménagers. Un symbole à cet
eet gure sur le produit, l‘emballage ou dans le manuel
d‘utilisation. Les matériaux utilisés lors de la fabrication
de l‘appareil sont recyclables conformément à leur
désignation. En recyclant ces matériaux, en les réutilisant ou
en utilisant les appareils usagés d’une autre manière, vous
contribuez grandement à protéger notre environnement.
Pour obtenir de plus amples informations sur les points de
collecte appropriés, adressez-vous à vos autorités locales.
FR FR
34 35
27.06.2019 27.06.2019

Il prodotto soddisfa le attuali norme di
sicurezza.
Leggere attentamente le istruzioni.
Prodotto riciclabile.
ATTENZIONE o AVVERTENZA! o NOTA!
per richiamare l‘attenzione su determinate
circostanze (indicazioni generali di avvertenza).
Il prodotto soddisfa le attuali norme di
sicurezza.
Dispositivo con classe di protezione II con
doppio isolamento.
IT ISTRUZIONI PER L’USO IT
Parametri -
Descrizione
Parametri - Valore
Nome del
prodotto
Incubatrice per uova
Modello IN-
7DDI
IN-
48DDI
IN-
56DDI
IN-
96DDI
Tensione
nominale [V~]/
Frequenza [Hz]
230/50
Potenza
nominale [W]
30 80
Classe di
protezione
II
Classe di
protezione IP
IPX4
Carico (uova di
gallina) [pezzi]
7 48 56 96
Funzione
automatica
di rotazione
delle uova
--- Sì
Funzione
di allarme
--- Sì
Ventola oui
Lampada Accessori di
alimentazio-
ne – Batterie
1xAA (La
batteria non è
inclusa)
Instal-
lazione
Accessori
di alimen-
tazione
– Batterie
1xAA (La
batteria
non è
inclusa)
Dimensioni
[mm]
165
x165
x155
495
x471
x230
485
x460
x210
495
x477
x380
Peso [kg] 0,4 3,1 3,5 5,5
Nome del
prodotto
Incubatrice per uova
Modello IN-
88DDI
IN-
32DDI
IN-
112DDI
Tensione
nominale [V~]/
Frequenza [Hz]
230/50
Potenza
nominale [W]
80
Classe di
protezione
II
Classe di
protezione IP
IPX4
Carico (uova di
gallina) [pezzi]
88 32 112
Funzione
automatica
di rotazione
delle uova
--- Sì
Funzione
di allarme
-- Sì
Ventola Sì
Lampada Accessori
di alimen-
tazione
– Batterie
1xAA (La
batteria
non è
inclusa)
Installa-
zione
Accessori di
alimenta-
zione
– Batterie
1xAA
(La batteria
non è
inclusa)
Dimensioni
[mm]
490x490
x180
350x460
x195
495x470
x385
Peso [kg] 1,4 2,75 5,6
DATI TECNICI
1. DESCRIZIONE GENERALE
Queste istruzioni sono intese come ausilio per un uso
sicuro e adabile. Il prodotto è stato rigorosamente
progettato e realizzato secondo le direttive tecniche e
l‘utilizzo delle tecnologie e componenti più moderne e
seguendo gli standard di qualità più elevati.
PRIMA DELLA MESSA IN FUNZIONE È NECESSARIO
AVER LETTO E COMPRESO LE ISTRUZIONI D‘USO.
Per un funzionamento duraturo e adabile del dispositivo
assicurarsi di maneggiarlo e curarne la manutenzione
secondo le disposizioni presentate in questo manuale.
I dati e le speciche tecniche indicati in questo manuale
sono attuali. Il fornitore si riserva il diritto di apportare
delle migliorie nel contesto del miglioramento dei
propri prodotti. L‘apparecchiatura è stata progettata e
realizzata tenendo in considerazione il progresso tecnico
e la riduzione di rumore, in maniera tale da mantenere al
minimo i possibili rischi derivanti dalle emissioni di rumore.
SPIEGAZIONE DEI SIMBOLI
AVVERTENZA! Le immagini contenute in questo
manuale sono puramente indicative e potrebbero
dierire dal prodotto.
Il manuale originale è stato scritto in tedesco. Le versioni in
altre lingue sono traduzioni dalla lingua tedesca.
2. SICUREZZA NELL‘IMPIEGO
ATTENZIONE! Leggere le istruzioni d‘uso e di
sicurezza. Non prestare attenzione alle avvertenze
e alle istruzioni può condurre a shock elettrici,
incendi, gravi lesioni o addirittura al decesso.
Il termine „apparecchio“ o „prodotto“ nelle avvertenze
e descrizioni contenute nel manuale si riferisce alla/al <
Incubatrice per uova >. Non utilizzare l‘apparecchio in
ambienti con umidità molto elevata / nelle immediate
vicinanze di contenitori d‘acqua! Non bagnare il dispositivo.
Rischio di scossa elettrica! Le aperture di ventilazione non
devono essere coperte!
2.1. SICUREZZA ELETTRICA
a) La spina del dispositivo deve essere compatibile con
la presa. Non cambiare la spina per alcun motivo. Le
spine e le prese originali riducono il rischio di scosse
elettriche.
b) Evitare che il dispositivo tocchi componenti collegati
a terra come tubi, radiatori, forni e frigoriferi. Il
rischio di scosse elettriche aumenta se il corpo viene
messo a terra su superci umide o in un ambiente
umido. L‘acqua che entra nel dispositivo aumenta il
rischio di danni e scosse elettriche.
c) Non toccare l‘apparecchio con mani umide o
bagnate.
d) Non utilizzare il cavo in modo improprio. Non
utilizzarlo mai per trasportare l‘apparecchio o
rimuovere la spina. Tenere il cavo lontano da fonti di
calore, oli, bordi appuntiti e da parti in movimento.
I cavi danneggiati o saldati aumentano il rischio di
scosse elettriche.
e) Se non è possibile evitare che il dispositivo venga
utilizzato in un ambiente umido, utilizzare un
interruttore dierenziale. Un interruttore dierenziale
riduce il rischio di scosse elettriche.
f) Si sconsiglia l‘uso dell‘ apparecchio qualora il cavo
di alimentazione sia danneggiato o presenti segni
di usura. Il cavo di alimentazione danneggiato deve
essere sostituito da un elettricista qualicato o dal
servizio di assistenza del fabbricante.
g) ATTENZIONE: PERICOLO DI MORTE! Non immergere
il dispositivo in acqua o altri liquidi durante la pulizia
o la messa in funzione.
2.2. Sicurezza sul lavoro
a) Mantenere il posto di lavoro pulito e ben illuminato.
Il disordine o una scarsa illuminazione possono
portare a incidenti. Essere sempre prudenti,
osservare che cosa si sta facendo e utilizzare il buon
senso quando si adopera il dispositivo.
b) Non usare il dispositivo all‘interno di luoghi
altamente combustibili, per esempio in presenza di
liquidi, gas o polveri inammabili. Il dispositivo può
produrre scintille in presenza di polvere o vapore
inammabili.
c) In presenza di un danno o un difetto, il dispositivo
deve subito essere spento e bisogna avvisare una
persona autorizzata.
d) Se non si è sicuri del corretto funzionamento del
dispositivo, rivolgersi al servizio assistenza del
fornitore.
e) Le riparazioni devono essere eseguite esclusivamente
dal servizio assistenza del produttore. Non eseguire
le riparazioni da soli!
f) In caso di incendio, utilizzare solo estintori a polvere
o ad anidride carbonica (CO2).
g) Conservare le istruzioni d‘uso per uso futuro. Nel
caso in cui il dispositivo venisse adato a terzi,
consegnare anche queste istruzioni.
h) Tenere gli elementi di imballaggio e le piccole parti
di assemblaggio fuori dalla portata dei bambini.
i) Tenere il dispositivo fuori dalla portata dei bambini e
degli animali.
AVVERTENZA! Quando si lavora con questo
dispositivo, i bambini e le persone non coinvolte
devono essere protetti.
2.3. SICUREZZA PERSONALE
a) Non è consentito l'uso del dispositivo in uno stato
di aaticamento, malattia, sotto l'inuenza di alcol,
droghe o farmaci, se questi limitano la capacità di
utilizzare il dispositivo.
b) Il dispositivo può essere usato solo da persone
con capacità siche adeguate che sono state
adeguatamente istruite e che hanno letto queste
istruzioni, le hanno capite e hanno appreso le norme
di sicurezza e di protezione sul posto di lavoro.
c) Per evitare avviamenti accidentali, prima di collegare
il dispositivo a una fonte di alimentazione assicurarsi
che questo sia spento.
d) Questo dispositivo non è un giocattolo. I bambini
devono essere sorvegliati anché non giochino con
il prodotto.
2.4. USO SICURO DEL DISPOSITIVO
a) Non utilizzare il dispositivo se l'interruttore ON/
OFF non funziona correttamente (non accendere o
spegnere il dispositivo). I dispositivi con interruttore
difettoso sono pericolosi quindi devono essere
riparati.
b) Scollegare l‘unità dall‘alimentazione prima di iniziare
l‘impostazione, la pulizia e la manutenzione. Tale
misura preventiva riduce il rischio di attivazione
accidentale del dispositivo.
c) Gli strumenti inutilizzati devono essere tenuti fuori
dalla portata dei bambini e delle persone che non
hanno familiarità con il dispositivo e le istruzioni
d’uso. Nelle mani di persone inesperte, questo
dispositivo può rappresentare un pericolo.
d) Mantenere il dispositivo in perfette condizioni.
Prima di ogni utilizzo, vericare che non vi siano
danni generali o danni alle parti mobili (frattura
di parti e componenti o altre condizioni che
potrebbero compromettere il funzionamento sicuro
del prodotto). In caso di danni, l'unità deve essere
riparata prima dell'uso.
e) Tenere il dispositivo fuori dalla portata dei bambini.
f) La riparazione e la manutenzione dell'attrezzatura
devono essere eseguite esclusivamente da personale
specializzato qualicato e con pezzi di ricambio
originali. Ciò garantisce la sicurezza durante l'uso.
g) Per garantire l'integrità di funzionamento
dell'apparecchio, i coperchi o le viti installati in
fabbrica non devono essere rimossi.
36 37
27.06.2019 27.06.2019

Modello IN-88DDI
1. Coperchio
2. Porta uova
3. Alloggiamento
4. Pannello di controllo
Le incubatrici di uova IN-7DDI, IN-48DDI, IN-96DDI, IN-
112DDI e IN-88DDI dispongono di un ripiano per le uova
come accessorio aggiuntivo nel set. Il modello IN-56DDI e
IN-32DDI è dotato di piastra incorporata.
Pannello di controllo modello IN-7DDI, IN-88DDI
1. Indicazione del valore di temperatura
2. LED „Work”
3. LED „Set”
4. Aumentare il valore
5. Diminuire il valore
6. Tasto „Set”
7. Interruttore On/O (solo per il modello IN-88DDI)
Modello IN-48DDI, IN-96DDI, IN-112DDI
1. Indicazione dell‘umidità
2. Indicazione del valore di temperatura
3. Tasto „Set”
4. Aumentare il valore
5. Interruttore ON/OFF
6. Diminuire il valore
7. Tasto „Reset”
8. Indicatore del tempo per il prossimo movimento
a dondolo delle uova
9. Visualizzazione del numero di giorni di incubazione
Modello IN-56DDI, IN-32DDI
1. Schermo
2. Tasto „Set”
3. Aumentare il valore
4. Interruttore ON/OFF
5. Diminuire il valore
6. Interruttore della lampada
7. Tasto „Reset”
Schermo:
1. Contatore del tempo per il prossimo movimento
a dondolo delle uova.
2. Valore della temperatura
3. Grado di umidità
4. Ventilatore
5. Allarme per umidità troppo bassa
6. Riscaldamento acceso
7. Lampada accesa
8. Numero dei giorni di incubazione
1. Interruttore ON/OFF
Lampada
4
1
3
1 2
89 7 6
5
3 4
1
7
6
2
3
5
4
1
IT IT
h) Non toccare parti mobili o accessori senza aver
scollegato il dispositivo dall'alimentazione.
i) È vietato spostare o ruotare il dispositivo durante il
funzionamento.
j) Pulire regolarmente l'apparecchio in modo da
evitare l'accumulo di sporcizia.
k) Questo apparecchio non è un giocattolo! La pulizia
e la manutenzione non devono essere eseguite da
bambini a meno che non siano sotto la supervisione
di un adulto.
l) È vietato intervenire sulla costruzione del dispositivo
per modicare i suoi parametri o la sua costruzione.
m) Tenere dispositivi lontano da fonti di fuoco e calore.
n) Prima del primo avvio, vericare sempre che il
dispositivo sia completo e che tutti gli elementi
mobili che possono inuire sulla sicurezza delle uova
o dei pulcini, ad esempio i ventilatori, siano protetti
dalle coperture.
o) Non coprire mai l‘incubatore d‘uova durante il
funzionamento.
p) Attenzione! Pericolo d’incendio.
q) Alcune parti di questo dispositivo possono diventare
molto calde. Per evitare lesioni, assicurarsi di toccare
con cautela le superci.
r) Controllare regolarmente il livello dell‘acqua
nell‘incubatrice. Si consiglia di versare acqua calda se
il livello dell‘acqua è troppo basso.
s) Si consiglia di versare l‘acqua con l‘erogatore.
t) Staccare la spina dell‘incubatore mentre viene
aggiunta acqua o quando l‘incubatore non è in uso.
u) Seguire le raccomandazioni generalmente
riconosciute per una corretta incubazione delle uova.
ATTENZIONE! Anche se l‘apparecchiatura è
stata progettata per essere sicura, sono presenti
degli ulteriori meccanismi di sicurezza. Malgrado
l‘applicazione di queste misure supplementari di
sicurezza sussiste comunque il rischio di ferirsi. Si
raccomanda inoltre di usare cautela e buon senso.
3. CONDIZIONI D‘USO
L‘incubatrice per uova è un dispositivo per l‘incubazione di
uova embrionali di uccelli. L‘incubatore d‘uova ha il compito
di mantenere la temperatura e l‘umidità necessarie per il
corretto sviluppo dell‘embrione no alla schiusa.
L‘operatore è responsabile di tutti i danni derivanti da
un uso improprio.
3.1. DESCRIZIONE DEL DISPOSITIVO
Modello IN-7DDI
2
3
1
4
Modello IN-96DDI, IN-112DDI
Montaggio:
1
4
3
2
1
4
2
3
2
1
4
3
Modello IN-48DDI
Modello IN-56DDI, IN-32DDI
3.2. PREPARAZIONE AL FUNZIONAMENTO
Posizionamento del dispositivo
La temperatura ambiente non deve superare i 40°C e
l‘umidità relativa non deve superare l‘85%. Posizionare
l‘apparecchio in modo da garantire una buona circolazione
dell‘aria. Garantire una distanza di almeno 10 cm tra il
dispositivo e altri apparecchi o strutture circostanti. Tenere
il dispositivo lontano da fonti di calore. Il dispositivo va
sempre utilizzato su una supercie piana, stabile, pulita,
ignifuga e asciutta, lontano dalla portata dei bambini
e di persone con capacità psichiche, sensoriali e mentali
ridotte. Posizionare il dispositivo in modo che la spina sia
facilmente accessibile e non risulti ostruita. Assicurarsi che
l‘alimentazione corrisponda a quella indicata sul quadro
tecnico del prodotto!
3.3. LAVORARE CON IL DISPOSITIVO
Nelle tabelle seguenti è presente l’elenco riguardante
la quantità delle uova di un dato tipo da incubare nel
dispositivo contemporaneamente e le modalità di
disposizione delle uova.
38 39
2
3
7
654
1
1 2
83
7 6 5 4
27.06.2019 27.06.2019
Other manuals for IN-7DDI
2
This manual suits for next models
6
Table of contents
Languages:
Other incubato Accessories manuals
