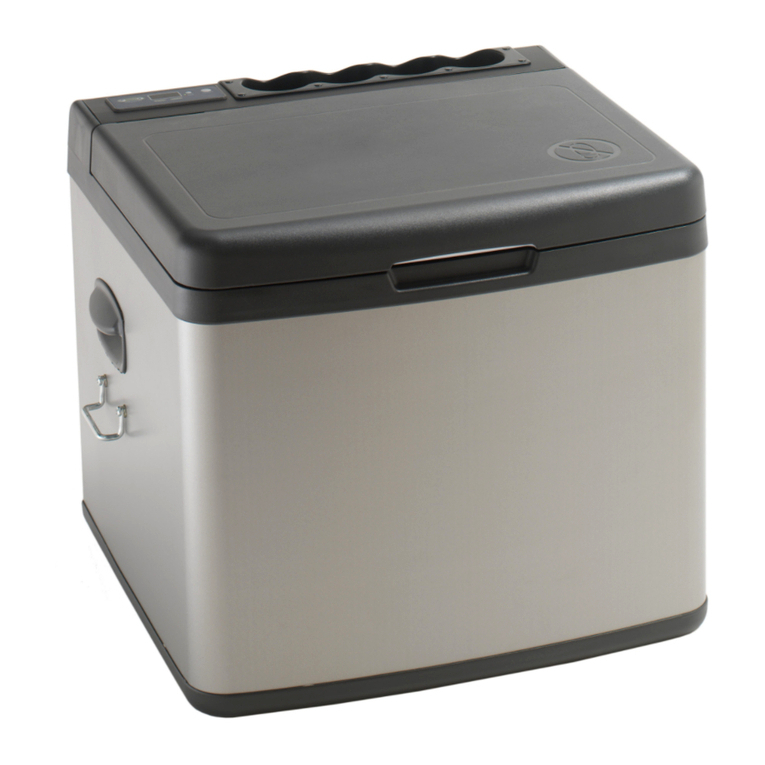
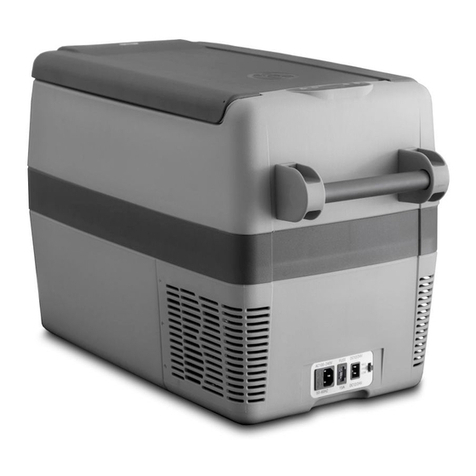
Indel B TB 31 User manual

istruzioni per l’uso
instructions for use
instrucciones de uso
instructions d’utilisation
bedienungsanleitung
manual de instruções
TB 31 - 41
TB31-41_28-01-2019


1
TB 31-41
ITALIANO
ENGLISH
ESPAÑOL
FRANÇAIS
DEUTSCH
PORTUGUÊS
3 - 9
10 - 16
17 - 23
24 - 30
31 - 37
38 - 44
TB31-41_28-01-2019


3
ITALIANO
Leggere attentamente queste istruzioni e la sezione di sicurezza prima di usare il
frigorifero.
TB31
TB41
585 mm
350 mm
380 mm
585 mm
350 mm
445 mm
DATI TECNICI
MODELLO DIMENSIONI
HXLXP MM
PESO
NETTO
CLASSE DI
PRODOTTO
ALIMENTA
ZIONE
GAS
REFRIGERANTE E CARICA
TB31
380 x 350 x 585 11,6 Kg 30 L DC 12/24V R134a 0,035 kg
CFC Free (CO2eq. 0,050 t)
TB41
445 x 350 x 585 12,6 Kg 40 L DC 12/24V R134a 0,035 kg
CFC Free (CO2eq. 0,050 t)
Questa apparecchiatura contiene gas fluorurato ad effetto serra R134a all'interno di un sistema sigillato
ermeticamente il cui funzionamento dipende dalla presenza di tale gas.
189A1183
CAVO DI COLLEGAMENTO
IN DC

TB 31-41
TB31-41_28-01-2019
4
INSTALLAZIONE
- Porre il frigorifero su una superficie asciutta, protetta e lontana da spigoli. Non usare il frigorifero in zone
scoperte, all’aperto o esposto ad agenti atmosferici.
- Il frigorifero necessita di una buona ventilazione. Lasciare uno spazio di almeno 15 cm su tutti i lati.
- Evitare di porre il frigorifero vicino a una fonte di calore quale ad esempio un fornello, un radiatore o
sotto la luce diretta del sole.
- Se l’apparecchio viene lasciato per periodi prolungati sotto il sole in auto o in altri mezzi mobili, si
consiglia di proteggerlo per evitare che la plastica del coperchio si danneggi o deformi.
- Per un'installazione fissa all'interno del veicolo e per evitare danneggiamenti dell'apparecchio durante il
trasporto si consiglia di ancorare il frigorifero tramite le staffe metalliche poste sui lati.
- Evitare l’introduzione di ghiaccio o liquidi non protetti da contenitori chiusi.
- Evitare l’introduzione di prodotti caldi.
- Evitare l'utilizzo del frigorifero sotto la pioggia, o in presenza di acqua.
ALLACCIAMENTO DEL FRIGORIFERO IN UN VEICOLO
- Collegare il cavo di alimentazione ad una fonte di energia in DC.
- Verificare che la polarità sia corretta.
- La linea di alimentazione è protetta con un fusibile da 15 A posto sul bauletto.
- Se collegato a un accendisigari esistente, controllare attentamente che la potenza sia sufficiente.
- Nel caso che non si utilizzi il cavo di alimentazione in dotazione, seguire le seguenti informazioni,
riportate in tabella, relative alla sezione dei cavi:
SEZIONE CAVI
LUNGH. MAX. CAVI METRI
12V 24V
2,5 AWG 13
2,5 (8 FT) 5 (16FT)
4 AWG 11
4 (13 FT) 8 (26 FT)
6 AWG 9
6 (20 FT) 12 (40 FT)

5
ITALIANO
IMPIANTO ELETTRICO
Il frigorifero portatile dispone di un dispositivo di controllo automatico della batteria a più livelli che
protegge la batteria del veicolo da uno scaricamento eccessivo durante il collegamento alla rete
di bordo della corrente continua.
Se il frigorifero portatile viene azionato a motore spento all'interno del veicolo, esso si spegne
automaticamente non appena la tensione di alimentazione scende al disotto di un valore
impostato. Il compressore riparte automaticamente quando la tensione risale ai valori normali.
N.B.: Tali valori si intendono misurati all'ingresso della centralina e/o sulla presa
DC.
AVVISO!
La batteria, al momento della disattivazione tramite il dispositivo di controllo automatico, non
possiede più la sua piena capacità di carica. Evitare l’accensione ripetuta o l’utilizzo di utenze senza
fasi di carica lunghe. Fare in modo che la batteria venga ricaricata.
LIVELLO DI PROTEZIONE DELLA BATTERIA
È possibile impostare tre differenti livelli di soglia di protezione della batteria:
PROTE
ZIONE
BATTERIA
VISUALIZZA
ZIONE DISPLAY
TENSIONE DI
INTERRU
ZIONE A 12 V
CUTOUT
TENSIONE DI
RIPRISTINO
A 12 V
CUTIN
TENSIONE DI
INTERRU
ZIONE A 24 V
CUTOUT
TENSIONE DI
RIPRISTINO
A 24 V
CUTIN
MIN.
1 Barra 9.6 10.9 21.3 22.6
MED.
2 Barre 11.1 12.4 22.3 23.6
MAX.
3 Barre 11.8 13.1 24.3 25.6
Il dispositivo è preimpostato con un livello di protezione della batteria medio.
Per entrare all’interno del menù, accendere il frigorifero premendo il pulsante ON/OFF.
Premere contemporaneamente i tasti SET + ON/OFF per alcuni secondi, per accedere
all'impostazione del livello di protezione della batteria. Il parametro attualmente in memoria inizia
a lampeggiare sul display.
Premere più volte il tasto SET per scorrere in successione le tre differenti impostazioni:
1 Barra
2 Barre
3 Barre
Senza premere alcun tasto di conferma, il display esce automaticamente dalla programmazione e
l'impostazione scelta viene memorizzata.
NOTA
Se il frigorifero è alimentato dalla batteria di avviamento del veicolo, selezionare la modalità del
dispositivo di controllo automatico della batteria “HIGH”. Se il frigorifero è collegato ad una batteria
di alimentazione, è sufficiente selezionare la modalità del dispositivo di controllo automatico della
batteria “LOW”.

TB 31-41
TB31-41_28-01-2019
6
INSTALLAZIONE MANIGLIA (OPTIONAL)
KIT MANIGLIA
Il kit installazione maniglia è composto da:
1 - rosetta n°4 pz
2 - rosetta elastica spaccata n°4 pz
3 - componente tubolare tondo n°1 pz
4 - supporto n°2 pz
1
2
3
4
MONTAGGIO KIT
Montare i supporti (4) sul componente circolare (3).
INSTALLAZIONE MANIGLIA
Svitare le viti (5) dal bauletto.
Inserire la rosetta (1) sull'estremità della maniglia (4).
Inserire la vite (5) sulla maniglia (4) e alla sua estremità inserire la rosetta elastica spaccata (2).
Avvitare le viti (5 ) al bauletto.
4
3
4
4
2
1
5

7
ITALIANO
USO DEL PANNELLO DI CONTROLLO
- Collegare l’alimentazione in DC. Tenere premuto il pulsante ON/OFF per avviare il frigorifero. Il
LED del pannello di controllo si accende e viene visualizzata la temperatura interna.
- Premere il pulsante e per regolare la temperatura. Premere il pulsante per aumentare
la temperatura e il pulsante per diminuirla. La pressione contemporanea di entrambi i
pulsanti commuta la visualizzazione da °C a °F e viceversa.
VALORE DI OFF-SET
È il dato che serve per allineare la temperatura visualizzata sul display, con la temperatura reale
interna del vano refrigerato. La regolazione per ogni Off-set può variare entro un intervallo che va
da -10 / +10. Dopo alcune ore di funzionamento del sistema refrigerante, inserire un termometro
digitale (non fornito) all’interno del vano nella posizione in cui si vuole avere una temperatura
più precisa, e controllare che la temperatura indicata sul display coincida con la temperatura
letta sul termometro digitale. In caso in cui la temperatura non coincida, è necessario intervenire
sugli Off-set inerenti alla temperatura Tche si vuole raggiungere all’interno del vano, affinché la
temperatura letta sul display coincida con la temperatura indicata dal termometro digitale.
La seguente tabella riporta il settaggio di Off-set del Costruttore per ogni intervallo di temperatura,
e l'intervallo di regolazione per variare i suddetti settaggi.
OFFSET INTERVALLO
TEMPERATURE
SETTAGGIO DI
FABBRICA
INTERVALLO DI
REGOLAZIONE
F1
T≥ -6°C -3°C +10°C ÷ -10°C
F2
-12°C ≤ T≤ -6°C -5°C +10°C ÷ -10°C
F3
T≤ -13°C -7°C +10°C ÷ -10°C
A frigorifero spento premere contemporaneamente i tasti SET + + per per alcuni secondi,
per accedere alla regolazione del valore di OFF-SET. Premere più volte il tasto SET per
scorrere in successione le tre funzioni (F1-F2-F3), una volta scelta la funzione che si desidera
modificare, premere i tasti e per variare il settaggio di fabbrica, rimanendo comunque
all'interno dell'intervallo di +10°C ÷ -10°C. Senza premere alcun tasto di conferma, il display esce
automaticamente dalla programmazione e l'impostazione scelta viene memorizzata.
RIEMPIMENTO
Evitare l’introduzione nel frigo di cibi caldi. Posizionare i prodotti in modo da evitare sbattimento o
rottura durante il movimento del veicolo.
Assicurarsi che il coperchio sia sempre ben chiuso e ridurre al minimo il tempo di apertura.
SBRINAMENTO
Lo sbrinamento è necessario quando lo strato di brina supera lo spessore di 4 mm. Tale operazione
si esegue spegnendo il frigorifero. Non togliere lo strato di brina e ghiaccio con utensili appuntiti o
taglienti. Aspettare fino al completo scongelamento e quindi riaccendere.
TEMPERATURE ON/OFF
189A1142
SET

TB 31-41
TB31-41_28-01-2019
8
AVVERTENZE
ATTENZIONE!
Mantenere prive di ostruzioni le aperture di ventilazione dell’apparecchiatura o della struttura che
la incorpora.
ATTENZIONE!
Non usare dispositivi meccanici o altri mezzi per accelerare il processo di scongelamento, che non
siano quelli consigliati dal produttore.
ATTENZIONE!
Non danneggiare il circuito del refrigerante.
ATTENZIONE!
Non usare dispositivi elettrici all’interno dei vani per la conservazione dei cibi dell’apparecchiatura,
a meno che non siano dei tipo consigliato dal produttore.
ATTENZIONE!
Non conservare in questa apparecchiatura sostanze esplosive quali lattine spray con un propellente
infiammabile.
ATTENZIONE!
Rischio di incendio o di scossa elettrica.
ATTENZIONE!
Non lasciare che oggetti caldi tocchino le parti in plastica dell’apparecchiatura.
ATTENZIONE!
Non conservare gas e liquidi infiammabili all’interno dell’apparecchiatura.
ATTENZIONE!
Non porre prodotti o oggetti infiammabili, né prodotti che contengono liquido infiammabile,
all’interno, vicino o sopra l’apparecchiatura.
ATTENZIONE!
Non toccare il compressore o il condensatore. Scottano!
ATTENZIONE!
• Il frigorifero è adatto per il raffreddamento e il congelamento degli alimenti.
• Usare il travel box solo per il raffreddamento e la conservazione di bevande e snack chiusi.
• Nel travel box non conservare alimenti deperibili.
• Gli alimenti possono essere conservati nella loro confezione originale o in contenitori idonei.
• Il travel box non è previsto per entrare a contatto con i cibi.
• Il travel box non è previsto per la corretta conservazione di farmaci. Per tali prodotti vedere le
istruzioni del foglietto illustrativo.

9
ITALIANO
MANUTENZIONE
Prima di effettuare qualsiasi intervento di manutenzione sul frigorifero, staccare il cavo di
alimentazione dalla relativa presa.
PULIZIA
• Pulire regolarmente l’interno e l’esterno del frigorifero utilizzando esclusivamente acqua tiepida
e detersivo neutro.
• Dopo il lavaggio risciacquare con acqua pulita e asciugare accuratamente con un panno
morbido.
• Non utilizzare: prodotti specifici per vetri e specchi; detergenti liquidi; in polvere, o spray;
solventi; alcool; ammoniaca o prodotti abrasivi.
• In caso di non utilizzo si consiglia di asciugare bene l’interno e di lasciare la porta semiaperta
per aerare l’interno.
CONSIGLI UTILI
In caso di mancato o anomalo funzionamento prima di rivolgersi ad un nostro centro di assistenza
tecnica assicurarsi che:
a) non manchi tensione di alimentazione.
b) la tensione sia corrispondente a quella indicata nella targhetta.
c) i collegamenti e le polarità siano corrette.
d) le griglie di aerazione non siamo ostruite.
e) il gruppo frigo non sia posto vicino ad una fonte di calore.
f) il fusibile della linea di alimentazione non sia interrotto.
Il cavo di alimentazione deve essere sostituito esclusivamente da personale tecnico
qualificato e comunque da un servizio di assistenza autorizzato dal Costruttore.
Indel B declina ogni responsabilità qualora non vengano scrupolosamente rispettate
tutte le disposizioni contenute nel presente manuale.
ERRORI
CODICE
ERRORE TIPO DI ERRORE
E1
Arresto per protezione batteria
(La tensione di alimentazione si trova al di fuori del valore di stacco impostato).
E2
Arresto del ventilatore per sovracorrente
(Il ventilatore assorbe dall’unità elettronica di controllo una corrente superiore a 1 App).
E3
Errore nell’avviamento del motore
(Il rotore è bloccato o la pressione dierenziale nel sistema di refrigerazione è troppo alta (>5 bar)).
E4
Velocità del motore troppo bassa
(Se il sistema di refrigerazione viene sottoposto ad un carico eccessivo, il motore non è in grado di
mantenere la velocità minima di 1.850 rotazioni/min).
E5
Arresto termico dell’unità elettronica
(Se il sistema di refrigerazione è stato sottoposto a carico eccessivo o se la temperatura ambiente
è troppo elevata, l’unità di controllo si surriscalderà).
E6
Sonda di temperatura difettosa, oppure non connesso correttamente sulla centralina

10
TB 31-41
TB31-41_28-01-2019
Please read these instructions and the Safety section carefully before using your refrigerator.
DC CONNECTION CABLE
MODEL
TECHNICAL FEATURES
DIMENSIONS
HXLXP
NET
WEIGHT
PRODUCT
CLASS VOLTAGE REFRIGERANT
GAS AND CHARGE
TB31
380 x 350 x 585 (mm)
14,96 x 13,78 x 23,03 (in) 11,6 Kg
25,57 lbs
30 L
1,059 ft3
31,7 Quarts DC 12/24V R134a 0,035 kg
CFC Free (CO2eq. 0,050 t)
TB41
445 x 350 x 585 (mm)
14,96 x 13,78 x 23,03 (in) 12,6 Kg
27,77 lbs
40 L
1,413 ft3
42,3 Quarts DC 12/24V R134a 0,035 kg
CFC Free (CO2eq. 0,050 t)
This appliance contains fluorinated greenhouse gas R134a within an hermetically sealed system and its
operations depends on the presence of this gas.
TB31
TB41
585 mm
350 mm
380 mm
585 mm
350 mm
445 mm
189A1183

11
ENGLISH
INSTALLATION
- Place the refrigerator on a dry, sheltered, flat surface and away from any edges. The
refrigerator must not be used unsheltered, in the open air or exposed to splashing or rain.
- Your refrigerator requires good ventilation, especially around the back of the refrigerator, allow
a gap of at least 15 cm around the sides, back and top. Never use your refrigerator in the boot
of a car or against.
- Do not install the refrigerator near heat sources, sunlight.
- Should you need to leave the device under the sun for long periods, eg. in a car or in other
vehicles, make sure you protect it, to prevent the cover plastic materials from getting damaged
or warped.
- To fix it inside the car and to avoid damages during transport, we suggest to secure the fridge
trough metal brackets placed on the sides.
- Avoid introducing liquids or ice not inserted in containers.
- Do not put hot food items into the refrigerator.
- Avoid using the refrigerator under the rain or in presence of water.
USING THE REFRIGERATOR IN A VEHICLE
- Connect the feeding cable to a direct current 12 or 24 V DC power source.
- Make sure the polarity is right.
- The supply line is protected by a 15 A fuse located on the box.
- If connected to an existing cigarette plug, carefully check up that power supply is sufficient.
- If the supplied power cable is not used, see the table containing the information related to the
cable section:
CABLE AREA MAX CABLE LENGHT METRES FT
12V 24V
2,5 AWG 13
2,5 (8 FT) 5 (16FT)
4 AWG 11
4 (13 FT) 8 (26 FT)
6 AWG 9
6 (20 FT) 12 (40 FT)

12
TB 31-41
TB31-41_28-01-2019
ELECTRONIC CONTROL
The device is equipped with a multi-level battery monitor that protects your vehicle battery against excessive
discharging when the device is connected to the on-board DC supply.
If the cooler is operated when the vehicle ignition is switched off, the cooler switches off automatically as
soon as the supply voltage falls below a set level. The cooler will switch back on once the battery has been
recharged to the restart voltage level. The compressor will start up again automatically when the voltage
goes back to normal values.
Note: these values are measured at control unit input and/or on the DC socket.
NOTICE! DANGER OF DAMAGE!
When switched off by the battery monitor, the battery will no longer be fully charged. Avoid starting
repeatedly or operating current consumers without longer charging phases. Ensure that the battery is
recharged.
BATTERY PROTECTION LEVEL
It is possible to set three different battery protection threshold levels:
BATTERY
PROTEC
TION
LEVEL
DISPLAY
SWITCHOFF
VOLTAGE AT 12
V CUTOUT
RESTART
VOLTAGE AT 12
V CUTIN
SWITCHOFF
VOLTAGE AT
24 V CUT
OUT
RESTARTVOL
TAGE AT 24 V
CUTIN
LOW
1 Bar 9.6 10.9 21.3 22.6
MED
2 Bars 11.1 12.4 22.3 23.6
HIGH
3 Bars 11.8 13.1 24.3 25.6
The device is preset with a medium battery protection level.
To enter the menu, switch the refrigerator on by pressing the ON/OFF button.
Press and hold the SET + ON/OFF buttons at the same time for several seconds to access the battery
protection level setting. The current setting will start to flash on the display.
Press the SET button a number of times to scroll through the three different settings:
1 Bar
2 Bars
3 Bars
Without having to press any other button to confirm, the display will automatically save the setting and exit
programming mode.
NOTE
When the cooler is supplied by the starter battery, select the battery monitor mode “HIGH”. If the cooler is
connected to a supply battery, the battery monitor mode “LOW” will suffice.

13
ENGLISH
HANDLE INSTALLATION (OPTIONAL)
HANDLE KIT
The handle installation kit consists of:
1 - washer No. 4 pcs
2 - split spring washer No. 4 pcs
3 - round tubular component No. 1 pc
4 - stand No. 2 pcs
KIT MOUNTING
Mount the stands (4) on the circular component (3).
HANDLE INSTALLATION
Remove the screws (5) from the trunk.
Fit washer (1) to the end of the handle (4).
Insert the screw (5) on the handle (4) and at its end insert the split spring washer (2).
Tighten the screws (5) to the trunk.
1
2
3
4
4
3
4
4
2
1
5

14
TB 31-41
TB31-41_28-01-2019
CONTROL PANEL USE
- Connect the DC power supply. Press and hold the button ON/OFF to start the refrigerator. The LED
display on the control panel would be lighted and the interior temperature would be displayed.
- Press the button and to adjust the temperature. Press the button to increase while the button
to decrease the temperature. When press the above two buttons at the same time, it would switch the
display between °C and °F.
OFF-SET VALUE
This is the information needed to align the temperature shown on the display with the actual temperature
inside the refrigerated compartment. Each off-set can be adjusted within a range of from -10 to +10.
After running the refrigeration system for a few hours, place a digital thermometer (not supplied) inside the
compartment, in a location where a more accurate temperature is required, and check that the temperature
shown on the display coincides with the temperature shown on the digital thermometer. If the temperature
is not the same, the off-sets must be adjusted in relation to the temperature Tyou want the inside of
the compartment to reach, so that the temperature reading on the display coincides with the temperature
indicated by the thermometer.
The following table shows the factory off-set setting for each temperature range and the adjustment range
for changing these settings.
OFFSET TEMPERATURE RANGE FACTORY SETTING ADJUSTMENT RANGE
F1
T≥ -6°C -3°C +10°C ÷ -10°C
F2
-12°C ≤ T≤ -6°C -5°C +10°C ÷ -10°C
F3
T≤ -13°C -7°C +10°C ÷ -10°C
With the refrigerator switched off, press and hold the SET + + buttons at the same time for a few
seconds to access the OFF-SET value adjustment.
Press the SET button a number of times to scroll through the three functions (F1-F2-F3). Once the function
you want to change is selected, press the and buttons to vary the factory setting, while remaining
within the +10°C to -10°C range. Without having to press any other button to confirm, the display will
automatically save the setting and exit programming mode.
FILLING
Do not put hot food items into the refrigerator. Place the products in such a way as to avoid them hitting
against each other or breaking because of the movement of the vehicle.
Make sure that the lid is always well closed and open it for as short a time as possible.
DEFROSTING
Defrosting is needed when the layer of frost is thicker than 4 mm. To carry out this operation, turn off
the refrigerator. Do not use sharp or cutting tools to remove the layer of frost or ice. Wait until complete
unfreezing and then turn on again.
TEMPERATURE ON/OFF
189A1142
SET

15
ENGLISH
INSTRUCTIONS
WARNING!
Keep ventilation openings, in the appliance enclosure or in the built-in structure, clear of
obstruction.
WARNING!
Do not use mechanical devices or other means to accelerate the defrosting process, other
than those recommended by the manufacturer.
WARNING!
Do not damage the refrigerant circuit.
WARNING!
Do not use electrical appliances inside the food storage compartments of the appliance,
unless they are of the type recommended by the manufacturer.
WARNING!
Do not store explosive substances such as aerosol cans with a flammable propellant in
this appliance.
WARNING!
Risk of fire and electrical shock or fire.
WARNING!
Do not let hot items to touch the plastic parts of the appliance.
WARNING!
Do not store flammable gas and liquid in the appliance.
WARNING!
Do not put flammable products or items that are wet with flammable products in, near or
on the appliance.
WARNING!
Do not touch the compressor or the con-denser. They are hot.
WARNING!
• The cooler is suitable for cooling and freezing foods.
• Use the travel box exclusively for cooling and storing closed beverages and snacks.
• Do not store any perishable food in the travel box.
• Food may only be stored in its original packaging or in suitable containers.
• The travel box is not intended to be brought into contact with food.
• The travel box is not intended for the proper storage of medicines. See the instructions
in the package leaflet for the medicinal product.

16
TB 31-41
TB31-41_28-01-2019
MAINTENANCE
Before carrying out any maintenance operation on the refrigerator, take the power cable out of its
socket.
CLEANING
• Regularly clean the inside and outside of the refrigerator using only warm water and a neutral detergent.
• Subsequent to washing, rinse with clean water and dry thoroughly using a soft cloth.
• Do not use the following: special glass and mirror cleaning products, liquid, powder, or spray detergents,
alcohol, ammonia or abrasive products.
• If you are not using the refrigerator, we suggest cleaning it well inside and leaving the door ajar to
ventilate the interior.
SUGGESTIONS
Should the device fail to work or work badly, before referring to our after-sales service, make sure that:
a) the feeding voltage is not missing;
b) the voltage is the same as the one shown on the plate;
c) the connections and the polarities are right;
d) the airing grids are not covered over;
e) the refrigerator unit is not near any heat source;
f) the fuse of the feeding line is not blown.
The power supply cable must be replaced only by qualified technical personnel and in any case by an
after sales service authorised by the Manufacturer.
Indel B is not liable in any way if you do not comply strictly with all the previsions in this manual.
FAULTS
ERROR
CODE ERROR TYPE
E1
Battery protection cut-out
(The voltage is outside the cut-out setting).
E2
Fan over-current cut-out
(The fan loads the electronic unit with more than 1Apeak).
E3
Motor start error
(The rotor is blocked or the dierential pressure in the refrigeration system is too high (>5 bar)).
E4
Minimum motor speed error
(If the refrigeration system is too heavily loaded, the motor cannot maintain minimum speed
1,850 rpm).
E5
Thermal cut-out of electronic unit
(If the refrigeration system has been too heavily loaded, or if the ambient temperature is high,
the electronic unit will run too hot).
E6
Faulty temperature sensor, or not properly connected to the control unit

17
ESPAÑOL
Se ruega leer con atención estas instrucciones y la sección de Seguridad antes de usar
la nevera.
CABLE DE CONEXIÓN CC
MODELO
CARACTERÍSTICAS TÉCNICAS
DIMENSIONES
HXLXP MM
PESO
NETO
CLASE DE
PRODUCTO TENSIÓN GAS
REFRIGERANTE Y CARGA
TB31
380 x 350 x 585 11,6 Kg 30 L DC 12/24V R134a 0,035 kg
CFC Free (CO2eq. 0,050 t)
TB41
445 x 350 x 585 12,6 Kg 40 L DC 12/24V R134a 0,035 kg
CFC Free (CO2eq. 0,050 t)
Este equipo contiene gas fluorado de efecto invernadero R134a dentro de un sistema sellado
herméticamente cuyo funcionamiento depende de la presencia de dicho gas.
TB31
TB41
585 mm
350 mm
380 mm
585 mm
350 mm
445 mm
189A1183

18
TB 31-41
TB31-41_28-01-2019
INSTALACIÓN
- Coloque la nevera en una superficie seca, protegida y lejos de bordes. La nevera no debe usarse sin
protección al aire libre o expuesta a salpicaduras o lluvia.
- La nevera requiere buena ventilación, especialmente en la parte posterior, deje un hueco de, al menos,
15 cm alrededor de los lados, parte posterior y superior. No utilice nunca la nevera en el maletero de un
coche o frente a él.
- No instale la nevera cerca de fuentes de calor, bajo la luz solar.
- Si el aparato se deja durante períodos prolongados bajo el sol en el coche o en otros medios móviles, se
recomienda protegerlo para evitar que el plástico de la tapa se dañe o se deforme.
- Para arreglarlo en el interior del coche y evitar daños durante el transporte, sugerimos asegurar la nevera
con abrazaderas metálicas colocadas en los lados.
- Evite introducir líquidos o hielo fuera de los recipientes.
- No coloque alimentos calientes en la nevera.
- Evite el uso de la nevera en la lluvia, o en la presencia de agua.
USO DE LA NEVERA EN UN VEHÍCULO
- Conecte el cable de alimentación a una corriente directa a un generador de 12 ó 24 V CC.
- Asegúrese de que la polaridad es correcta.
- La línea de suministro está protegida por un fusible de 15 A situado en la caja.
- Si se conecta al encendedor de cigarrillos, compruebe con atención que la corriente es suficiente.
- Si el cable suministrado no se utiliza, véase el cuadro que contiene la información relativa a la sección del
cable:
ÁREA DEL CABLE LONGITUD MÁXIMA DEL CABLE METROS PIES
12V 24V
2,5 AWG 13
2,5 (8 FT) 5 (16FT)
4 AWG 11
4 (13 FT) 8 (26 FT)
6 AWG 9
6 (20 FT) 12 (40 FT)
This manual suits for next models
1
Table of contents
Languages:
Other Indel B Cooling Box manuals
Popular Cooling Box manuals by other brands
Seifert
Seifert KG 4305 user manual
Bühler technologies
Bühler technologies CU-EMA+ Assembly, installation and operation instructions
Dometic
Dometic COOL ICE WCI13 operating manual
Dometic
Dometic mobilCooler RC1500 operating instructions
EVAPCO
EVAPCO ESW Series Operation and maintenance instruction
Pfannenberg
Pfannenberg DTI Series operating manual
