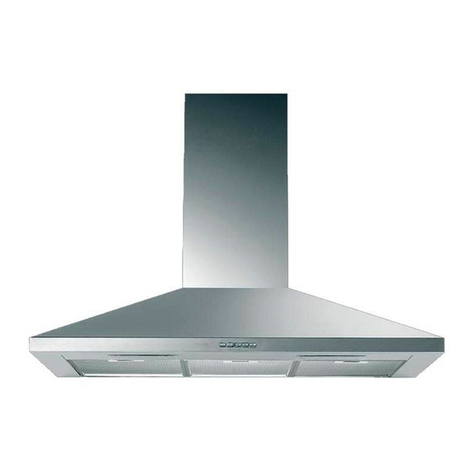
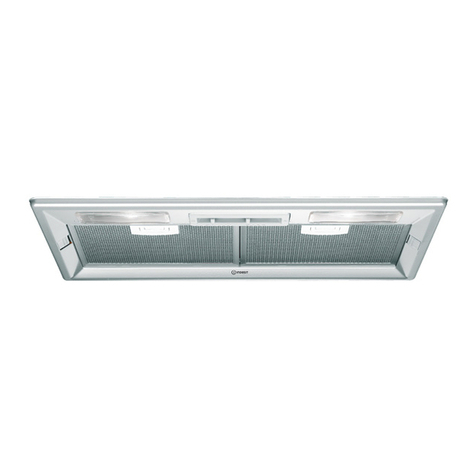
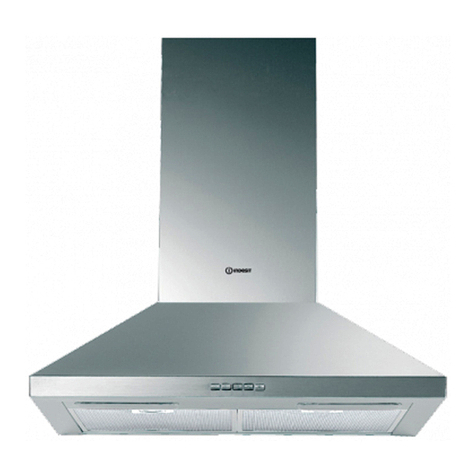
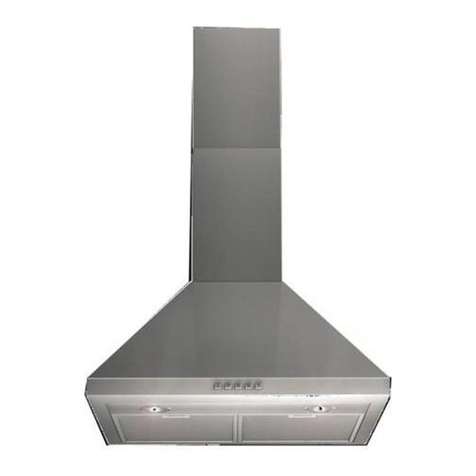
manuals.online logo
Brands
  1. Home
  2. •
  3. Brands
  4. •
  5. Indesit
  6. •
  7. Ventilation Hood
  8. •
  9. Indesit HI561 IXUK User manual

Indesit HI561 IXUK User manual

Aura
Instruction Booklet
Indesit
HI561 IXUK
Commercial Codes
28113 + 28114
HI591 IXUK
2
○○○○○○○○○○○○○○○○○○○○○○○○○○○○○○○○○○○○○○○
○○○○○○○○○○○○○○○○○○○○○○○○○○○○○○○○○○○○○○○○○○○○○○○
3
○○○○○○○○○○○○○○○○○○○○○○○○○○○○○○○○○○○○○○○
○○○○○○○○○○○○○○○○○○○○○○○○○○○○○○○○○○○○○○○○○○○○○○○
INSTALLATION .......................................................................................................................... 4
Safety warnings .................................................................................................................................... 4
Components ......................................................................................................................................... 4
Instructions for Installation ................................................................................................................... 5
Fixing the wall brackets (and splashback) .................................................................................... 5
Fixing the canopy hood ................................................................................................................. 6
Ducting or Recirculation fitting .......................................................................................................
Electrical connection and working test ..........................................................................................8
Fitting the telescopic chimney stack .............................................................................................. 8
USE 9
Safety warnings .................................................................................................................................... 9
Instruction for Use ................................................................................................................................ 9
MAINTENANCE........................................................................................................................ 10
Metal grease filters ............................................................................................................................. 10
Charcoal filters ................................................................................................................................... 10
Wor top illumination ........................................................................................................................... 11
Cleaning ............................................................................................................................................. 11
4
○○○○○○○○○○○○○○○○○○○○○○○○○○○○○○○○○○○○○○○
○○○○○○○○○○○○○○○○○○○○○○○○○○○○○○○○○○○○○○○○○○○○○○○
B
○○○○○○○○○○○○○○○○○○○○○○○○○○○○○○○○○○○○○○○○○○○○○○○
INSTALLATION
This canopy hood is designed to be fixed to any rigid vertical surface, over a gas or
electric hotplate and can be used either in the extraction mode (ducted to the outside) or
in the recirculation mode (internal recycling).
Safety warnings
• Before commencing the installation, consideration should be given to the difficulties
to be found during installation and to the bulky weight of the hood. The installation
work must be undertaken by a qualified and competent person in conformity to the
rules concerning the evacuation of contaminated air. The manufacturer disclaims all
liability for any damage or injury caused as a result of not following the instructions
for installation contained in the following text.
• When used in the extraction mode the cooker hood ducting must not be connected to
a flue which is used for exhausting fumes from appliances supplied with energy other
than electric such as a central heating flue or water heating flue.
• When istalled, the hood must be positioned at least 65 cm above a cooking appliance.
• Never do flambé cooking under this cooker hood.
• Never leave frying pans unattended during use as overheated fats and oils may catch
fire.
• If the room where the cooker hood is to be used contains a fuel burning appliance
such as a central heating boiler then this must be of the room sealed or balanced flue
type. If other types of flue or appliance are fitted ensure that there is an adequate
supply of air into the room. When the cooker hood is used in conjunction with other
appliances supplied with energy other than electric, the negative pressure in the room
must not exceed 0,04 mbar to prevent fumes being drawn back into the room by the
cooker hood.
Components
The coo er hood is made up of the following
components (fig 1):
• n. 1 hood canopy C complete with controls,
lighting and fan motor.
• n. 1 telescopic chimney stac formed by:
n. 1 U-shaped upper section item S
n. 1 U-shaped lower section item I
• n. 1 reduction flange Ø 150-120 A
• n. 1 recirculation spigot item R
• n. 1 deflector D (special versions only)
• n. 1 plastic bag containing:
n. 1 wall brac ets 1 to fix the canopy hood
n. 2 wall brac ets 2 to fix the chimney, rawl
plugs, screws, and documentation
• n. 1 splashbac B (optional)
Fig. 1
2
1
A
R
D
S
I
C
B
5B
○○○○○○○○○○○○○○○○○○○○○○○○○○○○○○○○○○○○○○○
○○○○○○○○○○○○○○○○○○○○○○○○○○○○○○○○○○○○○○○○○○○○○○○
Instructions for Installation
For easy installation proceed as follows:
• Fix the wall brac ets and Splashbac .
• Fix the canopy.
• Set the hood for recirculation or evacuation.
• Connect the hood to the mains supply and ensure that it wor s properly.
• Fix the telescopic metal frame.
Fixing the wall brackets (and splashback)
Ref. to Fig. 2a-b
•Draw a vertical line on the wall, from the centre of the coo ing appliance up to the ceiling,
using a mar ing pen. This is to ensure the correct vertical alignment of many components.
Fixing the wall brackets 1:
•Put the brac et I to the wall, aligning its mar ed centre across the vertical line, ensuring
that the distance between the centres of the holes and the coo ing area is as follows:
•Draw a horizontal line on the wall ensuring that the distance from the coo top is as
follows:
a) when the splasbac is to be installed: d = 270 mm + H, where H is the height of the
visible part of the splashbac ; as the splashbac can be of different heights, the correct
H figure can only be obtained by measuring the actual height of the splashbac to be
fitted.
b) without splashbac d = 875 mm minimum.
Fig. 2
ba
243_A02
2
1
2
1
B
B
X
115
140
d = 875 min
650 min 265
X
115
140
d
H265
H
6
○○○○○○○○○○○○○○○○○○○○○○○○○○○○○○○○○○○○○○○
○○○○○○○○○○○○○○○○○○○○○○○○○○○○○○○○○○○○○○○○○○○○○○○
B
Note: ensure that the wall bracket (I) is levelled. The hood can be aligned or adjusted
in height by rotating the adjustment screws (see below).
•Mark on the wall the centres of the two eyholes of the brac et.
Fixing the wall brackets item 2:
•Place one of the two brac ets (item 2 fig. 1) 15 mm from the ceiling or from a horizontal
line drawn between the top of the adjoining wall cabinets, ensuring that the brac et is
level and mar the centres for the eyhole brac et fixing screws.
• Place the other wall brac et (item 2 fig. 1) on the wall at “X” distance. This measurement
should be determined by the height of the upper chimney stac and mar the centres for
the eyhole brac et fixing screws.
• Pilot drill all the hole positions as mar ed on the wall using an 8 mm drill and fix the wall
brac ets 1-2 using the rawl plugs and screws supplied.
Splashback (optional)
When a splashbac is to be fitted, the distance between the coo er hood and the coo ing
appliances will be determined by the height of the splashbac , item B. The splashbac is
to be installed before installing the canopy. If the splashbac is to be fixed to the wall
using both the top and bottom fixing holes care must be ta en to ensure that the
splashbac is fitted at the correct height before fixing it into position. The fitting should
be underta en by a a competent person with experience in this type of installation. If the
splashbac is to be fixed through only the top fixing holes proceeds as follows:
•Put the splashbac on the wor top as illustrated in fig. 2a; then holding it against the wall
to ensure that it is correctly positioned mar the holes for the top fixing screws on the
wall.
•Pilot drill the wall using an 8 mm drill and fix the splashbac using the 8 mm rawl plugs
and screws supplied.
• If the fixing holes in the bottom of the splashbac are not to be used to secure the
splashbac to the wall the installer should ensure that the bottom edge is tuc ed down
behind the rear of the wor top.
Fixing the canopy hood
•Adjust the two screws V (on the canopy
connection points) to approximately
half way.
•Hook the rear of the canopy to the wall
brac et 1, after anchoring the latter to
the wall.
•Turn the screws V to adjust the canopy
vertically and level it horizontally.
•Fit and loc the central fixing screw V1
(provided) to loc the canopy in place
(fig.3).
Fig. 3
7B
○○○○○○○○○○○○○○○○○○○○○○○○○○○○○○○○○○○○○○○
○○○○○○○○○○○○○○○○○○○○○○○○○○○○○○○○○○○○○○○○○○○○○○○
Ducting or Recirculation fitting
Ducting fitting
• The coo er hood can be ducted to the outside using
either rigid or flexible fire retardant ducting of 120 or
150 mm. The choice is left to the installer. When 120
mm ducting is to be used it will be necessary to install
the reduction flange item A on the air outlet fig. 4.
• The installer should provide suitable ducting and sealing
material for the installation.
• The coo er hood can also be ducted to the outside
through one of the rectangular openings located in either
side of the lower section of the chimney stac . In this
case the deflector (item D) should be fitted into the
spigot (item R) to close the aperture which is not used
(fig. 5).
• If the hood is provided with the charcoal filters fitted,
the filters should be removed (see paragraph
Maintenance).
Recirculation fitting
• The filtered air is returned to the room through the two
side grilles on U-shaped lower section I, which are either
formed in the metal itself (fig. 6).
• Fit the recirculation spigot item R into the round outlet
on top of the canopy while pressing down on the spigot
until it snaps into position.
• Install the charcoal filters inside the canopy as instructed
in paragraph Maintenance).
Fig. 4
243_A04
A
A
R
D
243_A05
Fig. 6 Fig. 5
R
8
○○○○○○○○○○○○○○○○○○○○○○○○○○○○○○○○○○○○○○○
○○○○○○○○○○○○○○○○○○○○○○○○○○○○○○○○○○○○○○○○○○○○○○○
B
Electrical connection and working test
• Before connecting to the mains supply ensure that the mains voltage corresponds
with the voltage on the rating plate inside the hood.
• Connect the cooker hood to the mains via a double pole switch which has 3 mm
clearance between the contacts.
• The appliance must be earthed.
• Once the electrical connection has been completed, check that worktop illumination,
motor and speed work properly.
Fitting the telescopic chimney stack
•Fit the two plastic supports provided to the top part of the hood.
• To fit the upper section item S first expand the chimney slightly to allow it to fit over the
wall brac ets (item 2 fig. 1) and then secure the upper section using the 4 screws supplied.
• The lower section item I of the chimney stac should be fitted between the lower brac et
2 and the wall.
•Fix the U-shaped section to the plastic supports, using two of the screws provided in the
bag of accessories (fig. 7).
Part 2
a
OPERATION AND MAINTENANCE INSTRUCTIONS
Fig. 7
S
I
9B
○○○○○○○○○○○○○○○○○○○○○○○○○○○○○○○○○○○○○○○
○○○○○○○○○○○○○○○○○○○○○○○○○○○○○○○○○○○○○○○○○○○○○○○
○○○○○○○○○○○○○○○○○○○○○○○○○○○○○○○○○○○○○○○○○○○○○○○
USE
Safety warnings
• Before carring out any kind of maintenance or cleaning, disconnect the hood from the
mains supply.
• The grease filters and the charcoal filter should be cleaned or replaced as recommended
by the manufacturer or more frequently if the hood is used consistently over 4 hours
per day.
• When using a gas hob in connection with the cooker hood never leave the burners of
the hob uncovered while the hood is in use or when the pans have been removed.
Switch off the gas before removing the pan, or for just short periods and never leave
the hob unattended.
• Always ensure that the flame is kept at the correct intensity to prevent the flame from
licking round from the bottom of the pan; this will save energy and will avoid a
dangerous concentration of heat.
• Always ensure that the appliance is used in accordance with the manufacturer’s
instructions for the removal of contaminated air and odours during cooking.
Instruction for Use
Control panel
BUTTON T1 = Turns the lighting system on and off;
BUTTON T2 = Turns the on and off at low speed. This is ideal to obtain a particularly
silent but continuous flow of air when the level of coo ing fumes is
low;
BUTTON T3 = Medium speed, suitable for most normal operating conditions. This
gives an excellent ratio between treated air flow and noise level;
BUTTON T4 = High speed, suitable to deal with heavy coo ing fumes, even for long
periods of time.
23
T4T3T2 T1
10
○○○○○○○○○○○○○○○○○○○○○○○○○○○○○○○○○○○○○○○
○○○○○○○○○○○○○○○○○○○○○○○○○○○○○○○○○○○○○○○○○○○○○○○
B
○○○○○○○○○○○○○○○○○○○○○○○○○○○○○○○○○○○○○○○○○○○○○○○
MAINTENANCE
Regular maintenance and cleaning will ensure good performance and reliability, while
extending the wor ing life of the hood. Special attention should be paid to the grease
filters and to the charcoal filters when the hood is used in the recirculation mode.
Metal grease filters
Cleaning
The metal grease filter should be cleaned
every two months with normal usage and can
be cleaned in a dishwasher or by hand using
a mild detergent or liquid soap.
Replacement
•Remove the filters one at a time, pushing the
handle towards the rear of the hood (fig. 8).
• When replacing, ensure that the handle faces
outwards.
ATTENTION - THERE COULD BE A
POSSIBLE FIRE HAZARD IF THE FILTERS
ARE NOT REPLACED ACCORDIN TO
THESE INSTRUCTIONS.
Charcoal filters
Functioning
In the recycling mode the charcoal filters
absorb smells and odours. This hood is
designed to be fitted with two charcoal filters
on both sides of the fan unit (fig. 9). The
charcoal filter cannot be washed and should
be replaced at least every 4 months or more
frequently if the hood is used consistently.
Replacement
• To remove the charcoal filters place on hand
on one filter at a time and turn it toward the
front part.
• The charcoal filter can now be removed.
• Always ensure to replace both filters at the
same time.
ATTENTION - THERE COULD BE A
POSSIBLE FIRE HAZARD IF THE FILTERS
ARE NOT REPLACED ACCORDIN TO
THESE INSTRUCTIONS.
Fig. 8
Fig. 9
11B
○○○○○○○○○○○○○○○○○○○○○○○○○○○○○○○○○○○○○○○
○○○○○○○○○○○○○○○○○○○○○○○○○○○○○○○○○○○○○○○○○○○○○○○
Worktop illumination
Wor top illumination is provided by 2
40W bulbs.
To replace the lighting elements
proceed as follows:
•Remove the metal clips T.
• The glass diffuser is ept in position by
the retaining lugs Z.
•Pull the glass diffuser slightly to one
side until it disconnects from the lug on
the other side (arrow 1), then pull
slightly downwards (arrow 2) and slide
in the opposite direction (arrow 3) until
the glass diffuser can be removed.
•Replace the lamps or the neon strip
and replace the glass diffuser by
repeating the above operations in
reverse order (fig. 10).
Cleaning
When cleaning the hood:
• Never use a wet cloth or sponge, or
running water.
• Never use thinners or products
containing alcohol, as they might
damage the paintwor .
• Never use abrasive cleaning materials,
in particular when cleaning stainless
steel surfaces.
It is recommended to use a damp
cloth and mild liquid household
cleaner.
Fig. 10
Z
T
Z
T
436000718 01 020522
This appliance complies with European regulations on low voltages, EEC Directive 73/23 on
electrical safety, and with the following European regulations: EEC Directive 89/336 on
electromagnetic compatibility and EEC Directive 93/68 on EC mar ing.

This manual suits for next models

5

Other Indesit Ventilation Hood manuals

Indesit LI178D User manual

Indesit

Indesit LI178D User manual

Indesit H 563 L User manual

Indesit

Indesit H 563 L User manual

Indesit H562 IX User manual

Indesit

Indesit H562 IX User manual

Indesit H 161 WH Technical manual

Indesit

Indesit H 161 WH Technical manual

Indesit ISLK 66F LS W User manual

Indesit

Indesit ISLK 66F LS W User manual

Indesit H661.1 User manual

Indesit

Indesit H661.1 User manual

Indesit IHVP 6.4 LL K User manual

Indesit

Indesit IHVP 6.4 LL K User manual

Indesit H 361 User manual

Indesit

Indesit H 361 User manual

Indesit H 661 User manual

Indesit

Indesit H 661 User manual

Indesit H 991 IX User manual

Indesit

Indesit H 991 IX User manual

Indesit HIBS 9.7F LB X User manual

Indesit

Indesit HIBS 9.7F LB X User manual

Indesit LI178D User manual

Indesit

Indesit LI178D User manual

Indesit HHBS 6.4 F LM X User manual

Indesit

Indesit HHBS 6.4 F LM X User manual

Indesit H 151.2 User manual

Indesit

Indesit H 151.2 User manual

Indesit H 391 F User manual

Indesit

Indesit H 391 F User manual

Indesit IHPC 9.5 LM X User manual

Indesit

Indesit IHPC 9.5 LM X User manual

Indesit Aria IHF 6.5 LM X User manual

Indesit

Indesit Aria IHF 6.5 LM X User manual

Indesit H 461 IX.1 User manual

Indesit

Indesit H 461 IX.1 User manual

Indesit IHT6.5CMIX Operating and installation instructions

Indesit

Indesit IHT6.5CMIX Operating and installation instructions

Indesit HIP 6 P IX User manual

Indesit

Indesit HIP 6 P IX User manual

Indesit IHT 6.5 C M IX User manual

Indesit

Indesit IHT 6.5 C M IX User manual

Indesit IHP 6.5 C M IX User manual

Indesit

Indesit IHP 6.5 C M IX User manual

Indesit H 361 User manual

Indesit

Indesit H 361 User manual

Indesit HD 79 User manual

Indesit

Indesit HD 79 User manual

Popular Ventilation Hood manuals by other brands

Miele DA 3460 Operating and installation instructions

Miele

Miele DA 3460 Operating and installation instructions

Gemini GCH70S Instruction manual and installation instructions

Gemini

Gemini GCH70S Instruction manual and installation instructions

KOBE CH7630SQB Installation instructions and operation manual

KOBE

KOBE CH7630SQB Installation instructions and operation manual

ELICA SERENDIPITY IX/A/90 Instruction on mounting and use

ELICA

ELICA SERENDIPITY IX/A/90 Instruction on mounting and use

Novy Up 40 00 Series installation instructions

Novy

Novy Up 40 00 Series installation instructions

ELICA Hidden PRF0097676 Instruction on mounting and use

ELICA

ELICA Hidden PRF0097676 Instruction on mounting and use

ELICA SPOT PLUS Instruction on mounting and use

ELICA

ELICA SPOT PLUS Instruction on mounting and use

ELICA ISMART EFL HAC LTW 60 Instruction on mounting and use

ELICA

ELICA ISMART EFL HAC LTW 60 Instruction on mounting and use

Smeg KSMD910X1 Instruction on mounting and use

Smeg

Smeg KSMD910X1 Instruction on mounting and use

AIRFORCE F153 Clock Instruction on mounting and use

AIRFORCE

AIRFORCE F153 Clock Instruction on mounting and use

Lapetek APOLLO-V RST Maintenance instructions

Lapetek

Lapetek APOLLO-V RST Maintenance instructions

Rubine MCH-EBANO-90BL instruction manual

Rubine

Rubine MCH-EBANO-90BL instruction manual

AEG DU 3150 Operating and installation instructions

AEG

AEG DU 3150 Operating and installation instructions

Häfele HH-WVGS90A instruction manual

Häfele

Häfele HH-WVGS90A instruction manual

KitchenAid KXW9748YSS Installation Instructions and Use & Care Guide

KitchenAid

KitchenAid KXW9748YSS Installation Instructions and Use & Care Guide

Lapetek TREKK 50 X1 Installation and user manual

Lapetek

Lapetek TREKK 50 X1 Installation and user manual

Think Appliances GEH6019 user manual

Think Appliances

Think Appliances GEH6019 user manual

Broan Elite RMPE Series instructions

Broan

Broan Elite RMPE Series instructions

manuals.online logo
manuals.online logoBrands
  • About & Mission
  • Contact us
  • Privacy Policy
  • Terms and Conditions

Copyright 2025 Manuals.Online. All Rights Reserved.