manuals.online logo
Brands
  1. Home
  2. •
  3. Brands
  4. •
  5. Indesit
  6. •
  7. Washer
  8. •
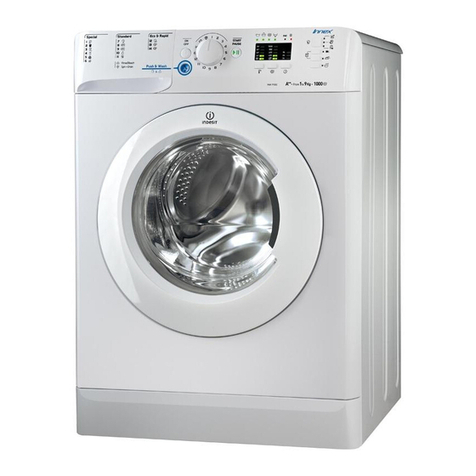
  9. Indesit BWSA 71052 User manual

Indesit BWSA 71052 User manual

Other Indesit Washer manuals

Indesit IWSNE 61253 User manual

Indesit

Indesit IWSNE 61253 User manual

Indesit XWA 71051 User manual

Indesit

Indesit XWA 71051 User manual

Indesit IWSD 51251 User manual

Indesit

Indesit IWSD 51251 User manual

Indesit IWC 8105 B User manual

Indesit

Indesit IWC 8105 B User manual

Indesit WIXL 163 User manual

Indesit

Indesit WIXL 163 User manual

Indesit WIXL 125 User manual

Indesit

Indesit WIXL 125 User manual

Indesit IWC 8105 User manual

Indesit

Indesit IWC 8105 User manual

Indesit IWSB 61151 User manual

Indesit

Indesit IWSB 61151 User manual

Indesit WDG 1095 WG User manual

Indesit

Indesit WDG 1095 WG User manual

Indesit IWC71252WUKN User manual

Indesit

Indesit IWC71252WUKN User manual

Indesit XWD 61252 User manual

Indesit

Indesit XWD 61252 User manual

Indesit IWC 6145 User manual

Indesit

Indesit IWC 6145 User manual

Indesit TIDW70111 Installation guide

Indesit

Indesit TIDW70111 Installation guide

Indesit BWE 91284 User manual

Indesit

Indesit BWE 91284 User manual

Indesit PWSE 6128 W User manual

Indesit

Indesit PWSE 6128 W User manual

Indesit W 93 User manual

Indesit

Indesit W 93 User manual

Indesit IWSC 5105 User manual

Indesit

Indesit IWSC 5105 User manual

Indesit PWC 7105 W User manual

Indesit

Indesit PWC 7105 W User manual

Indesit IWD 61430 User manual

Indesit

Indesit IWD 61430 User manual

Indesit IWC 81481 User manual

Indesit

Indesit IWC 81481 User manual

Indesit IWSB 61051 User manual

Indesit

Indesit IWSB 61051 User manual

Indesit WITL 851 User manual

Indesit

Indesit WITL 851 User manual

Indesit bwe 71683x w eu User manual

Indesit

Indesit bwe 71683x w eu User manual

Indesit XWA 71283 User manual

Indesit

Indesit XWA 71283 User manual

Popular Washer manuals by other brands

Zanussi ZWF 14080 W user manual

Zanussi

Zanussi ZWF 14080 W user manual

Zanussi FV 825 N Instruction booklet

Zanussi

Zanussi FV 825 N Instruction booklet

LG WM8000HVA Specifications

LG

LG WM8000HVA Specifications

Whirlpool 3RGSC9400 Use and care guide

Whirlpool

Whirlpool 3RGSC9400 Use and care guide

Zanussi TJ 1284 H instruction manual

Zanussi

Zanussi TJ 1284 H instruction manual

AEG KO-LAVAMAT 74740 User information

AEG

AEG KO-LAVAMAT 74740 User information

Beko WSRE7512PRA user manual

Beko

Beko WSRE7512PRA user manual

Whirlpool LA5OOOXP Use and care guide

Whirlpool

Whirlpool LA5OOOXP Use and care guide

Miele PW 6207 operating instructions

Miele

Miele PW 6207 operating instructions

GE GE Profile WWSE3160AAA Specifications

GE

GE GE Profile WWSE3160AAA Specifications

Bush WMNB712EB instruction manual

Bush

Bush WMNB712EB instruction manual

ALLIANCE UW60AV Information manual

ALLIANCE

ALLIANCE UW60AV Information manual

Bosch WAN280H3 User manual and installation instructions

Bosch

Bosch WAN280H3 User manual and installation instructions

Maytag MAT15MNAW installation instructions

Maytag

Maytag MAT15MNAW installation instructions

LG T2109VSAL owner's manual

LG

LG T2109VSAL owner's manual

Electrolux EWF12843 user manual

Electrolux

Electrolux EWF12843 user manual

Whirlpool Cabrio WTW6400SW2 quick start guide

Whirlpool

Whirlpool Cabrio WTW6400SW2 quick start guide

Bosch WGB25400BY User manual and installation instructions

Bosch

Bosch WGB25400BY User manual and installation instructions

manuals.online logo
manuals.online logoBrands
  • About & Mission
  • Contact us
  • Privacy Policy
  • Terms and Conditions

Copyright 2025 Manuals.Online. All Rights Reserved.

GB
1
Contents
Installation, 2-3
Unpacking and levelling
Connecting the electricity and water supplies
The first wash cycle
Technical data
Care and maintenance, 4
Cutting off the water or electricity supply
Cleaning the washing machine
Cleaning the detergent dispenser drawer
Caring for the door and drum of your appliance
Cleaning the pump
Checking the water inlet hose
Precautions and tips, 5
General safety
Load balancing system
Disposal
Description of the washing machine
and starting a wash cycle, 6-7
Control panel
Indicator lights
Starting a wash cycle
Wash cycles, 8
Push & Wash
Table of wash cycles
Personalisation, 9
Setting the temperature
Setting the spin speed
Functions
Detergents and laundry, 10
Detergent dispenser drawer
Preparing the laundry
Garments requiring special care
Troubleshooting, 11
Service, 12
BWSA 71052
Instructions for use
WASHING MACHINE
English,1
GB
SK
RU CZ
RO HU
UA
Slovensky,37
Русский,13 Česky,25
Română,49 Magyar,61
Українська,73
2
GB
Levelling the machine correctly will provide
it with stability, help to avoid vibrations and
excessive noise and prevent it from shifting
while it is operating. If it is placed on carpet or
a rug, adjust the feet in such a way as to allow
a sufficient ventilation space underneath the
washing machine.
Connecting the electricity and water
supplies
Connecting the water inlet hose
1. Insert seal A into
the end of the inlet
hose and screw the
latter onto a cold wa-
ter tap with a 3/4 gas
threaded mouth (see
figure).
Before making the
connection, allow the
water to run freely un-
til it is perfectly clear.
2. Connect the inlet
hose to the washing
machine by screwing
it onto the correspon-
ding water inlet of the
appliance, which is
situated on the top
right-hand side of the
rear part of the ap-
pliance (see figure).
3. Make sure that the hose is not folded over
or bent.
!The water pressure at the tap must fall within
the range of values indicated in the Technical
data table (see next page).
!If the inlet hose is not long enough, contact a
specialised shop or an authorised technician.
!Never use second-hand hoses.
!Use the ones supplied with the machine.
Installation
!This instruction manual should be kept in a
safe place for future reference. If the washing
machine is sold, transferred or moved, make
sure that the instruction manual remains with
the machine so that the new owner is able to
familiarise himself/herself with its operation
and features.
!Read these instructions carefully: they con-
tain vital information relating to the safe instal-
lation and operation of the appliance.
Unpacking and levelling
Unpacking
1. Remove the washing machine from its
packaging.
2. Make sure that the washing machine has
not been damaged during the transportation
process. If it has been damaged, contact the
retailer and do not proceed any further with
the installation process.
3. Remove the 4 pro-
tective screws (used
during transportation)
and the rubber wa-
sher with the cor-
responding spacer,
located on the rear
part of the appliance
(see figure).
4. Close off the holes using the plastic plugs
provided.
5. Keep all the parts in a safe place: you will
need them again if the washing machine ne-
eds to be moved to another location.
!Packaging materials should not be used as
toys for children.
Levelling
1. Install the washing machine on a flat sturdy
floor, without resting it up against walls, furni-
ture cabinets or anything else.
2. If the floor is not
perfectly level, com-
pensate for any une-
venness by tightening
or loosening the
adjustable front feet
(see figure); the angle
of inclination, measu-
red in relation to the
worktop, must not
exceed 2°.
A
GB
3
Connecting the drain hose
Connect the drain
hose, without bending
it, to a drain duct or
a wall drain situated
between 65 and 100
cm from the floor;
alternatively, placed
it over the edge of a
basin, sink or tub, fa-
stening the duct sup-
plied to the tap (see
figure). The free end
of the hose should
not be underwater.
!We advise against the use of hose extensions;
if it is absolutely necessary, the extension must
have the same diameter as the original hose
and must not exceed 150 cm in length.
Electrical connections
Before plugging the appliance into the electri-
city socket, make sure that:
• thesocketisearthedandcomplieswithall
applicable laws;
• thesocketisabletowithstandthemaximum
power load of the appliance as indicated in the
Technical data table (see opposite);
• thepowersupplyvoltagefallswithintheva-
lues indicated in the Technical data table (see
opposite);
• thesocketiscompatiblewiththeplugofthe
washing machine. If this is not the case, repla-
ce the socket or the plug.
!The washing machine must not be installed
outdoors, even in covered areas. It is extremely
dangerous to leave the appliance exposed to
rain, storms and other weather conditions.
!When the washing machine has been instal-
led, the electricity socket must remain within
easy reach.
65 - 100 cm
!Do not use extension cords or multiple sockets.
!The cable should not be bent or compressed.
!The power supply cable must only be repla-
ced by authorised technicians.
Warning! The company shall not be held re-
sponsible in the event that these standards are
not observed.
The first wash cycle
Once the appliance has been installed, and
before you use it for the first time, run a wash
cycle with detergent and no laundry, using the
wash cycle “Auto Clean” (see “Cleaning the
washing machine”).
Technical data
Model BWSA 71052
Dimensions
width 59.5 cm
height 85 cm
depth 43.5 cm
Capacity from 1 to 7 kg
Electrical
connections
please refer to the technical
data plate fixed to the ma-
chine
Water
connections
maximum pressure
1 MPa (10 bar)
minimum pressure
0.05 MPa (0.5 bar)
drum capacity 48 litres
Spin speed up to 1000 rotations per minute
Test wash
cycles in
accordance
with re-
gulations
1061/2010
and
1015/2010.
Programme 9:
Eco Cotton 60°.
Programme 9:
Eco Cotton 40°.
This appliance conforms to
the following EC Directives:
- EMC - 2014/30/EU (Elec-
tromagnetic Compatibility)
- LVD - 2014/35/EU (Low
Voltage)
- 2012/19/EU (WEEE)
Obsah je uzamčen
Dokončete, prosím, proces objednávky.
Následně budete mít přístup k celému dokumentu.
Proč je dokument uzamčen? Nahněvat Vás rozhodně nechceme. Jsou k tomu dva hlavní důvody:
1) Vytvořit a udržovat obsáhlou databázi návodů stojí nejen spoustu úsilí a času, ale i finanční prostředky.
Dělali byste to Vy zadarmo? Ne*. Zakoupením této služby obdržíte úplný návod a podpoříte provoz a
rozvoj našich stránek. Třeba se Vám to bude ještě někdy hodit.
*) Možná zpočátku ano. Ale vězte, že dotovat to dlouhodobě nelze. A rozhodně na tom nezbohatneme.
2) Pak jsou tady „roboti“, kteří se přiživují na naší práci a „vysávají“ výsledky našeho úsilí pro svůj
prospěch. Tímto krokem se jim to snažíme překazit.
A pokud nemáte zájem, respektujeme to. Urgujte svého prodejce. A když neuspějete, rádi Vás uvidíme!