manuals.online logo
Brands
  1. Home
  2. •
  3. Brands
  4. •
  5. Indesit
  6. •
  7. Washer
  8. •
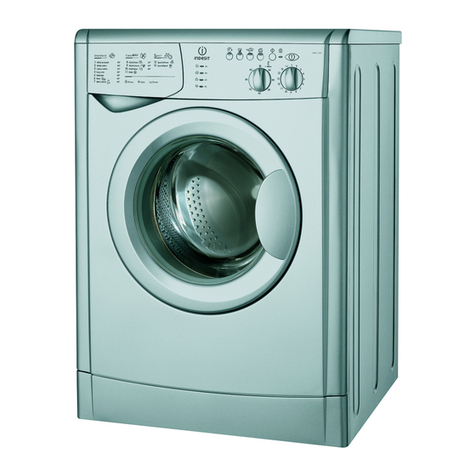
  9. Indesit WIL113UK User manual

Indesit WIL113UK User manual

Other Indesit Washer manuals

Indesit WIB 111 User manual

Indesit

Indesit WIB 111 User manual

Indesit IWD 6125 User manual

Indesit

Indesit IWD 6125 User manual

Indesit IWSE 51251 User manual

Indesit

Indesit IWSE 51251 User manual

Indesit EWE 81484 User manual

Indesit

Indesit EWE 81484 User manual

Indesit IWSND 61253 User manual

Indesit

Indesit IWSND 61253 User manual

Indesit WAX 120 User manual

Indesit

Indesit WAX 120 User manual

Indesit TIDW7020HK User manual

Indesit

Indesit TIDW7020HK User manual

Indesit IWTE 51251 User manual

Indesit

Indesit IWTE 51251 User manual

Indesit XWA 81082 User manual

Indesit

Indesit XWA 81082 User manual

Indesit IWSE 61051 User manual

Indesit

Indesit IWSE 61051 User manual

Indesit WITL 62 User manual

Indesit

Indesit WITL 62 User manual

Indesit WITL 1051 User manual

Indesit

Indesit WITL 1051 User manual

Indesit Aqualtis 2008 User manual

Indesit

Indesit Aqualtis 2008 User manual

Indesit WIN 122 User manual

Indesit

Indesit WIN 122 User manual

Indesit IWTE 71282 User manual

Indesit

Indesit IWTE 71282 User manual

Indesit WIXXL106 User manual

Indesit

Indesit WIXXL106 User manual

Indesit IWC 6165 User manual

Indesit

Indesit IWC 6165 User manual

Indesit IWC 6105 User manual

Indesit

Indesit IWC 6105 User manual

Indesit WIXXE 127 User manual

Indesit

Indesit WIXXE 127 User manual

Indesit EWSE 61251 User manual

Indesit

Indesit EWSE 61251 User manual

Indesit SISL 129 S User manual

Indesit

Indesit SISL 129 S User manual

Indesit W 431 TX User manual

Indesit

Indesit W 431 TX User manual

Indesit BWA 81283 User manual

Indesit

Indesit BWA 81283 User manual

Indesit XWE 101683 User manual

Indesit

Indesit XWE 101683 User manual

Popular Washer manuals by other brands

Zanussi ZWF 14080 W user manual

Zanussi

Zanussi ZWF 14080 W user manual

Zanussi FV 825 N Instruction booklet

Zanussi

Zanussi FV 825 N Instruction booklet

LG WM8000HVA Specifications

LG

LG WM8000HVA Specifications

Whirlpool 3RGSC9400 Use and care guide

Whirlpool

Whirlpool 3RGSC9400 Use and care guide

Zanussi TJ 1284 H instruction manual

Zanussi

Zanussi TJ 1284 H instruction manual

AEG KO-LAVAMAT 74740 User information

AEG

AEG KO-LAVAMAT 74740 User information

Beko WSRE7512PRA user manual

Beko

Beko WSRE7512PRA user manual

Whirlpool LA5OOOXP Use and care guide

Whirlpool

Whirlpool LA5OOOXP Use and care guide

Miele PW 6207 operating instructions

Miele

Miele PW 6207 operating instructions

GE GE Profile WWSE3160AAA Specifications

GE

GE GE Profile WWSE3160AAA Specifications

Bush WMNB712EB instruction manual

Bush

Bush WMNB712EB instruction manual

ALLIANCE UW60AV Information manual

ALLIANCE

ALLIANCE UW60AV Information manual

Bosch WAN280H3 User manual and installation instructions

Bosch

Bosch WAN280H3 User manual and installation instructions

Maytag MAT15MNAW installation instructions

Maytag

Maytag MAT15MNAW installation instructions

LG T2109VSAL owner's manual

LG

LG T2109VSAL owner's manual

Electrolux EWF12843 user manual

Electrolux

Electrolux EWF12843 user manual

Whirlpool Cabrio WTW6400SW2 quick start guide

Whirlpool

Whirlpool Cabrio WTW6400SW2 quick start guide

Bosch WGB25400BY User manual and installation instructions

Bosch

Bosch WGB25400BY User manual and installation instructions

manuals.online logo
manuals.online logoBrands
  • About & Mission
  • Contact us
  • Privacy Policy
  • Terms and Conditions

Copyright 2025 Manuals.Online. All Rights Reserved.

1
GB
English, 1
Contents
Installation, 2-3-4-5
Unpacking and levelling, 2
Electric and water connections, 2-3
The first wash cycle, 4
Technical details, 5
Washing machine description, 6-7
Control panel, 6
eds, 7
tarting and Programmes, 8
Briefly: how to start a programme, 8
Programme table, 8
Personalisations, 9
Setting the temperature, 9
Functions, 9
Detergents and laundry, 10
Detergent dispenser, 10
Bleach cycle, 10
Preparing your laundry, 10
Special items, 10
Precautions and advice, 11
General safety, 11
Disposal, 11
Saving energy and respecting the environment, 11
Care and maintenance, 12
Cutting off the water or electricity supply, 12
Cleaning your appliance, 12
Cleaning the detergent dispenser, 12
Caring for your appliance door and drum, 12
Cleaning the pump, 12
Checking the water inlet hose, 12
Troubleshooting, 13
ervice and Guarantee, 14-15-16
Before calling for Assistance, 14
Guarantee, 15-16
WA HING MACHINE
WIL 113
Instructions for use
GB
2
GB
Keep this instruction manual in a safe place for
future reference. Should the appliance be sold,
transferred or moved, make sure the instruction
manual accompanies the washing machine to inform
the new owner as to its operation and features.
Read these instructions carefully: they contain vital
information on installation, use and safety.
Unpacking and levelling
Unpacking
1. Unpack the washing machine.
2. Check whether the washing machine has been
damaged during transport. If this is the case, do not
install it and contact your retailer.
3. Remove the 3
protective screws and
the rubber bush with the
respective spacer,
situated on the rear of
the appliance (see also
the installation leaflet).
NB:The plastic spacers
may fall down inside the
machine once the bolt
has been removed, and will not interfere with the
operation of the machine.
4. Seal the gaps using the plastic plugs provided.
5. Keep all the parts: you will need them again if the
washing machine needs to be moved to another
location.
Packaging materials are not children's toys.
Levelling
Your machine may make a considerable amount of noise
if the two front feet have not been adjusted correctly.
1. Install the washing machine on a flat sturdy floor,
without resting it up against walls, furniture cabinets
or other.
2. If the floor is not
perfectly level, compen-
sate for any unevenness
by tightening or
loosening the adjustable
front feet (see figure);
the angle of inclination,
measured according to
the worktop, must not
exceed 2°.
evelling your appliance correctly will provide it with
stability and avoid any vibrations, noise and shifting
during operation. If it is placed on a fitted or loose
carpet, adjust the feet in such a way as to allow
enough room for ventilation beneath the washing
machine.
Electric and water connections
Connecting the water inlet hose
1. Insert seal A into the
end of the inlet hose
and screw the latter
onto a cold water tap
with a 3/4 gas threaded
mouth (see figure).
Before making the
connection, allow the
water to run freely until
it is perfectly clear.
2. Connect the other end
of the water inlet hose to
the washing machine,
screwing it onto the
appliance's cold water
inlet, situated on the top
right-hand side on the
rear of the appliance (see
figure).
3. Make sure there are no kinks or bends in the
hose.
The water pressure at the tap must be within the
values indicated in the Technical details table
(on the next page).
If the water inlet hose is not long enough, contact
a specialist store or an authorised serviceman.
Ensure that the supply taps are allowing water
through. Old taps may seize in the closed position
and thus prevent water reaching the machine.
Installation
A
3
GB
erviceTroubleshootingPrecautions CareProgrammes DetergentsInstallation Description
Connecting the drain hose
Connect the drain hose,
without bending it, to a
draining duct or a wall
drain situated between
65 and 100 cm from
the floor;
The drain hose may be
connected to an
under-sink trap. Before
connecting the drain
hose from the machine
ensure that any blanks
or removable ends
have been taken off
the spigot.
If it is place over the
edge of a basin or sink
be sure the free end of
the hose should not be
underwater.
 We advise against the use of hose extensions; in
case of absolute need, the extension must have the
same diameter as the original hose and must not
exceed 150 cm in length.
Ensure that if the drain hose is pushed into a
standpipe, that the end does not go down more
than 15cms (6 inches). If the hose is pushed down
too far, this may cause the machine to self -syphon
ie. continuously empty as it is filling.
Electric connection
Before plugging the appliance into the mains
socket, make sure that:
 the socket is earthed and in compliance with the
applicable law;
 the socket is able to sustain the appliance's
maximum power load indicated in the Technical
details table (see page 5);
 the supply voltage is included within the values i
ndicated on the Technical details table
(see page 5);
 the socket is compatible with the washing
machine's plug. If this is not the case, replace
the socket or the plug.
Your appliance is now supplied with a 13 amp fused
plug it can be plugged into a 13 amp socket for
immediate use. Before using the appliance please
read the instructions below.
WARNING - THIS APP IANCE MUST BE EARTHED.
THE FO OWING OPERATIONS SHOU D BE
CARRIED OUT BY A QUA IFIED E ECTRICIAN.
Replacing the fuse:
When replacing a faulty fuse, a 13 amp ASTA
approved fuse to BS 1362 should always be used,
and the fuse cover re-fitted. If the fuse cover is lost,
the plug must not be used until a replacement is
obtained.
Replacement fuse covers:
If a replacement fuse cover is fitted, it must be of
the correct colour as indicated by the coloured
marking or the colour that is embossed in words on
the base of the plug. Replacements can be obtained
directly from your nearest Service Depot.
Removing the plug:
If your appliance has a non-rewireable moulded plug
and you should wish to re-route the mains cable
through partitions, units etc., please ensure that
either:
the plug is replaced by a fused 13 ampere re-
wearable plug bearing the BSI mark of approval.
or:
the mains cable is wired directly into a 13 amp cable
outlet, controlled by a switch, (in compliance with
BS 5733) which is accessible without moving the
appliance.
Disposing of the plug:
Ensure that before disposing of the plug itself, you
make the pins unusable so that it cannot be
accidentally inserted into a socket.
Instructions for connecting cable to an alternative plug:
Important: the wires in the mains lead are coloured
in accordance with the following code:
Green & Yellow Earth
Blue Neutral
Brown Live
65 - 100 cm
Where it connects
to the waste water
pipe cut end off
spigot or remove the
blanking cap
4
GB
As the colours of the wires in the lead may not
correspond with the coloured markings identifyng
the terminals in your plug, proceed as follows:
Connect Green & Yellow wire to terminal marked E
or or coloured Green or Green & Yellow.
Connect Brown wire to terminal marked L or
coloured Red.
Connect Blue wire to terminal marked N or coloured
Black.
If a 13 amp plug (BS 1363) is used it must be fitted
with a
13 amp fuse, either in the plug or adaptor or at the
distribution board.
If you are in any doubt the electrical supply to your
machine, consult a qualified electrician before use.
How to connect an alternative plug:
The wires in this mains lead are coloured in
accordance with the following code:
BLUE NEUTRAL (N)
BROWN LIVE (L)
GREEN & YELLOW EARTH (E)
Disposing of the appliance:
When disposing of the appliance please remove the
plug by cutting the mains cable as close as possible
to the plug body and dispose of it as described
above.
 The washing machine should not be installed in an
outdoor environment, not even when the area is
sheltered, because it may be very dangerous to
leave it exposed to rain and thunderstorms.
 When the washing machine is installed, the mains
socket must be within easy reach.
 Do not use extensions or multiple sockets.
 The power supply cable must never be bent or
dangerously compressed.
 The power supply cable must only be replaced by
an authorised serviceman.
GREEN &
YELLOW
BROWN
BLUE
13 ampere fuse
CROSS-BAR
CORD GRIP
Warning! The company denies all liability if and when
these norms are not respected.
The first wash cycle
Once the appliance has been installed, and before
you use it for the first time, run a wash cycle with
detergent and no laundry, setting the 90°C
programme without a pre-wash cycle.
5
GB
Technical details
Model WI 113
Dimensions
59.5 cm wide
85 cm high
52.5 cm deep
Capacity from 1 to 5 kg
Electric
connections
please refer to the technical data plate
fixed to the machine
Water
connections
maximum pressure 1 MPa (10 bar)
minimum pressure 0.05 MPa (0.5 bar)
drum capacity 46 litres
pin speed up to 1100 rpm
Control
programmes
according to EN
60456 directive
programme 2; temperature 60°C;
run with a load of 5 kg.
This appliance is compliant with the
following European Community
Directives:
- 73/23/CEE of 19/02/73 ( ow
Voltage) and subsequent amendments
- 89/336/CEE of 03/05/89
(Electromagnetic Compatibility) and
subsequent amendments
- 2002/96/CE
erviceTroubleshootingPrecautions CareProgrammes DetergentsDescriptionInstallation
6
GB
Washing machine description
Control panel
Detergent dispenser
ON-OFF
Button
TART/RE ET
Button
TEMPERATURE
Knob
PROGRAMME
Knob
Leds
FUNCTION
Buttons
ON-OFF/
DOOR
LOCK
ed
Detergent dispenser: to add detergent and fabric
softener (see page 10).
LED : to find out the wash cycle progress.
If the Delay Timer function has been set, the time
left until the programme starts will be indicated (see
page 7).
FUNCTION buttons: to select the functions
available. The button corresponding to the function
selected will remain on.
TEMPERATURE knob: to set the temperature or
the cold wash cycle (see page 9).
TART/RE ET button: to start the programmes or
cancel any incorrect settings.
ON-OFF/DOOR LOCK ed: to find out whether the
washing machine is on and if the appliance door can
be opened (see page 7).
ON/OFF button: to turn the washing machine on
and off.
PROGRAMME knob: to select the wash
programmes. The knob stays still during the cycle.
7
GB
erviceTroubleshootingPrecautions CareProgrammes DetergentsInstallation Description
ON-OFF/DOOR LOCK led:
If this ED is on, the appliance door is locked to prevent it from being opened accidentally; to avoid any
damages, wait for the ED to flash before you open the appliance door.
 The rapid flashing of the ON-OFF/DOOR OCK ed together with the flashing of at least one other ED
indicates there is an abnormality. Call for Technical Assistance (see page 13).
Cycle progress:
During the wash cycle, the EDs gradually illuminate
on to indicate the cycle progress:
Prewash
Wash
Rinse
Spin cycle
Note: during draining, the ED corresponding to
the Spin cycle phase will be turned on.
Function buttons
The FUNCTION BUTTONS also act like EDS.
When a function is selected, the corresponding
button is illuminated.
If the function selected is incompatible with the
programme set, the button will flash and the function
will not be enabled.
If you set a function that is incompatible with another
function you selected previously, only the last one
selected will be enabled.
Leds
The EDS provide important information.
This is what they can tell you:
Delay set:
If the Delay Timer function has been enabled (see
page. 9), once you have started the programme,
the ED corresponding to the delay set will begin to
flash:
As time passes, the remaining delay will be
displayed, and the corresponding ED will flash:
Once the set delay is complete, the flashing ED will
turn off and the programme set will start.
8
GB
Type of fabric and
degree of soil Progr. Te m p e -
rature
Detergent Fabric
softener
Stain removal
option/bleac
Cycle
lengt
(minutes)
Max.
Spin
Speeds
(r.p .m .)
Description of was cycle
pre-
wash wash
tandard
C otton: Extremely soiled whites
(sheets, tablecloths, etc.) 190°C    135 Max. Pre-wash, wash cycle, rinse cycles,
intermediate and final spin cycles
C otton: Extremely soiled whites
(sheets, tablecloths, etc.) 290°C   Delicate/
Traditional 125 Max. Wash cycle, rinse cycles,
interm ediate and final spin cycles
C otton: Heavily soiled w hites
and fast colours 260°C   Delicate/
Traditional 110 Max. Wash cycle, rinse cycles,
interm ediate and final spin cycles
C otton: Heavily soiled w hites
and delicate colours 240°C   Delicate/
Traditional 105 Max. Wash cycle, rinse cycles,
interm ediate and final spin cycles
C otton: Sligh tly soiled w hites
and delicate colours (shirts,
jum pers, etc.) 340°C   Delicate/
Traditional 70 Max. Wash cycle, rinse cycles,
interm ediate and final spin cycles
Synt etics: Heavily soiled fast
colours (baby linen, etc.) 450°C   Delicate 72 800 Wash cycle, rinse cycles, anti-
crease or delicate spin cycle
Synt etics: Heavily soiled fast
colours (baby linen, etc.) 440°C   Delicate 60 800 Wash cycle, rinse cycles, anti-
crease or delicate spin cycle
Synt etics: Delicate colours (all
types of slightly soiled garments) 540°C   Delicate 60 800 Wash cycle, rinse cycles, anti-
crease or delicate spin cycle
Wool 640°C   50 600 Wash cycle, rinse cycles anti-
crease or delicate spin cycle
Very delicate fabrics
(curtains, silk, viscose, etc.) 730°C   45 no W ash cycle, rinse cycles , anti-
crease or draining cycle
Tim e 4 you
C otton: Heavily soiled w hites
and fast colours 860°C   60 Max. Wash cycle, rinse cycles,
interm ediate and final spin cycles
C otton: Sligh tly soiled w hites
and delicate colours (shirts,
jum pers, etc.) 940°C   50 Max. Wash cycle, rinse cycles,
interm ediate and final spin cycles
Synt etics: Delicate colours
(all types of slightly soiled
garments) 10 40°C  40 800 Wash cycle, rinse cycles,
delicate spin cycle
Synt etics: Delicate colours
(all types of slightly soiled
garments) 11 30°C   30 800 Wash cycle, rinse cycles and
delicate spin cycle
port
Sports shoes (MAX. 2 pairs) 12 30°C  50800 Cold w ash (w ithout detergents),
wash cycle, rinse cycles, and
delicate spin cycle
Fabrics for sportswear
(Tracksuits, shorts, etc.) 13 30°C   60 600 Wash cycle, rinse cycles,
interm ediate and final spin cycles
PARTIAL PROGRAMME
Rinse  Delicate/
Traditional 800 Rinse cycles and spin cycle
Spin cycle 800 Draining and spin cycle
Draining no Draining
tarting and Programmes
Programme table
Notes
-For programmes 8 and 9, we advise against exceeding a wash load of 3.5 kg.
-For programme 13 we advise against exceeding a wash load of 2 kg.
-For the anti-crease function: see Easy iron, opposite page. The information contained in the table is purely indicative.
pecial programme
Dail (programme 11 for Synthetics) is designed to wash lightly soiled garments in a short amount of time: it only lasts
30 minutes and allows you to save on both time and energy. By setting this programme (11 at 30°C), you can wash
different fabrics together (except for woollen and silk items), with a maximum load of 3 kg.
We recommend the use of liquid detergent.
Briefly: starting a programme
1. Switch the washing machine on by pressing button .
All the EDS will light up for a few seconds and
the ON-OFF/DOOR OCK ed will begin to flash.
2. oad your laundry into the washing machine and
shut the appliance door.
3. Set the PROGRAMME knob to the programme
required.
4. Set the wash temperature (see page 9).
5. Add the detergent and any fabric softener (see page 10).
6. Start the programme by pressing the START/RESET
button for one second. Once the programme has
been accepted all of the option and status ED's
will illuminate momentarily, the Door ock ED
will be lit and the relevant wash cycle progress
ED will also be lit.
To cancel it, keep the START/RESET button pressed
for at least 2 seconds.
7. When the programme is finished, the ON-OFF/
DOOR OCK ed will flash to indicate that the
appliance door can be opened. Take out your
laundry and leave the appliance door ajar to allow
the drum to dry thoroughly. Turn the washing
machine off by pressing button .
9
GB
erviceTroubleshootingPrecautions CareProgrammes DetergentsInstallation Description
Personalisations
C
etting the temperature
Turn the TEMPERATURE knob to set the wash temperature (see Programme table on page 8).
The temperature can be lowered, or even set to a cold wash ( ).
Functions
To enable a function:
1. press the button corresponding to the desired function, according to the table below;
2. the function is enabled when the corresponding button is illuminated.
Note: The rapid flashing of the button indicates that the corresponding function cannot be selected for the
programme set.
Function Effect Comments Enabled wit
programmes:
Delay Timer
Delays the start
of the wash by
up to 9 hours.
Press the button repeatedly until the ED corresponding to the
desired delay is turned on.
The fifth time the button is pressed, the function will be disabled.
N.B.: Once you have pressed the Start/Reset button, the delay
can only be decreased if you wish to modify it.
All
Stain
removal
Bleaching cycle
designed to
remove the
toughest stains.
Please remember to pour the bleach into extra compartment 4
(see page 10).
This function is incompatible with the EASY IRON function.
2, 3, 4, 5,
Rinse cycle.
Easy iron
This option
reduces the
amount of
creasing on
fabrics, making
them easier to
iron.
When this function is set, programmes 4, 5, 6, 7 will end with the
laundry left to soak (Anti-crease) and the Rinse cycle phase
ED will flash.
- to conclude the cycle, press the START/RESET button;
- to run the draining cycle alone, set the knob to the relative
symbol and press the START/RESET button.
This function is incompatible with the STAIN REMOVA function.
3, 4, 5, 6, 7,
8, 9, 10,
Rinse cycle.
Extra Rinse
Increases the
efficiency of the
rinse.
Recommended when the appliance has a full load or with large
quantities of detergent.
1, 2, 3, 4, 5,
8, 9, 10, 12,
13, Rinse
cycle.
 The machine has an intelligent built in check for out of balance loads. To let protect your machine it may reduce the final spin
speed if an unbalanced load is detected.
The balancing attempts may extend the total duration of the cycle, up to a maximum of 10 minutes.
10
GB
Detergent dispenser
Good washing results also depend on the correct
dose of detergent: adding too much detergent won't
necessarily make for a more efficient wash, and may
in fact cause build up on the interior of your
appliance and even pollute the environment.
Open up the detergent
dispenser and pour in
the detergent and fabric
softener, as follows.
compartment 1: Detergent for pre-wash
(powder)
Before pouring in the detergent, make sure that
extra compartment 4 has been removed.
compartment 2: Detergent for the wash cycle
(powder or liquid)
iquid detergent should only be poured in
immediately prior to the wash cycle start.
compartment 3: Additives (fabric softeners, etc.)
The fabric softener should not overflow from the grid.
extra compartment 4: Bleach
 Do not use hand wash detergent because it may
form too much foam.
Bleach cycle
 Traditional bleach should be used on sturdy
white fabrics, and delicate bleach for coloured
fabrics, synthetics and for wool.
Place extra
compartment 4,
provided, into
compartment 1.
When pouring in the
bleach, be careful not to
exceed the "max" level
indicated on the central
pivot (see figure).
To run the bleach cycle alone, pour the bleach into
extra compartment 4, set the Rinse programme
and enable the Stain removal option (see page 9).
To bleach during a wash cycle, pour in the detergent
and fabric softener, set the desired programme and
enable the Stain removal option (see page 9).
The use of extra compartment 4 excludes the
possibility of using the pre-wash cycle.
Preparing your laundry
 Divide your laundry according to:
- the type of fabric/the symbol on the label.
- the colours: separate coloured garments from
whites.
 Empty all pockets and check for loose buttons.
 Do not exceed the weight limits stated below,
which refer to the weight when dry:
Sturdy fabrics: max 5 kg
Synthetic fabrics: max 2.5 kg
Delicate fabrics: max 2 kg
Wool: max 1 kg
How much does your laundry weigh?
1 sheet 400-500 g
1 pillow case 150-200 g
1 tablecloth 400-500 g
1 bathrobe 900-1,200 g
1 towel 150-250 g
pecial items
Curtains: fold curtains and place them in a pillow
case or mesh bag. Wash them separately without
exceeding half the appliance load. Use programme 7
which excludes the spin cycle automatically.
Quilted coats and windbreakers: if they are
padded with goose or duck down, they can be
machine-washed. Turn the garments inside out and
load a maximum of 2-3 kg, repeating the rinse cycle
once or twice and using the delicate spin cycle.
Wool: for best results, use a specific detergent,
taking care not to exceed a load of 1 kg.
Detergents and laundry
123
4