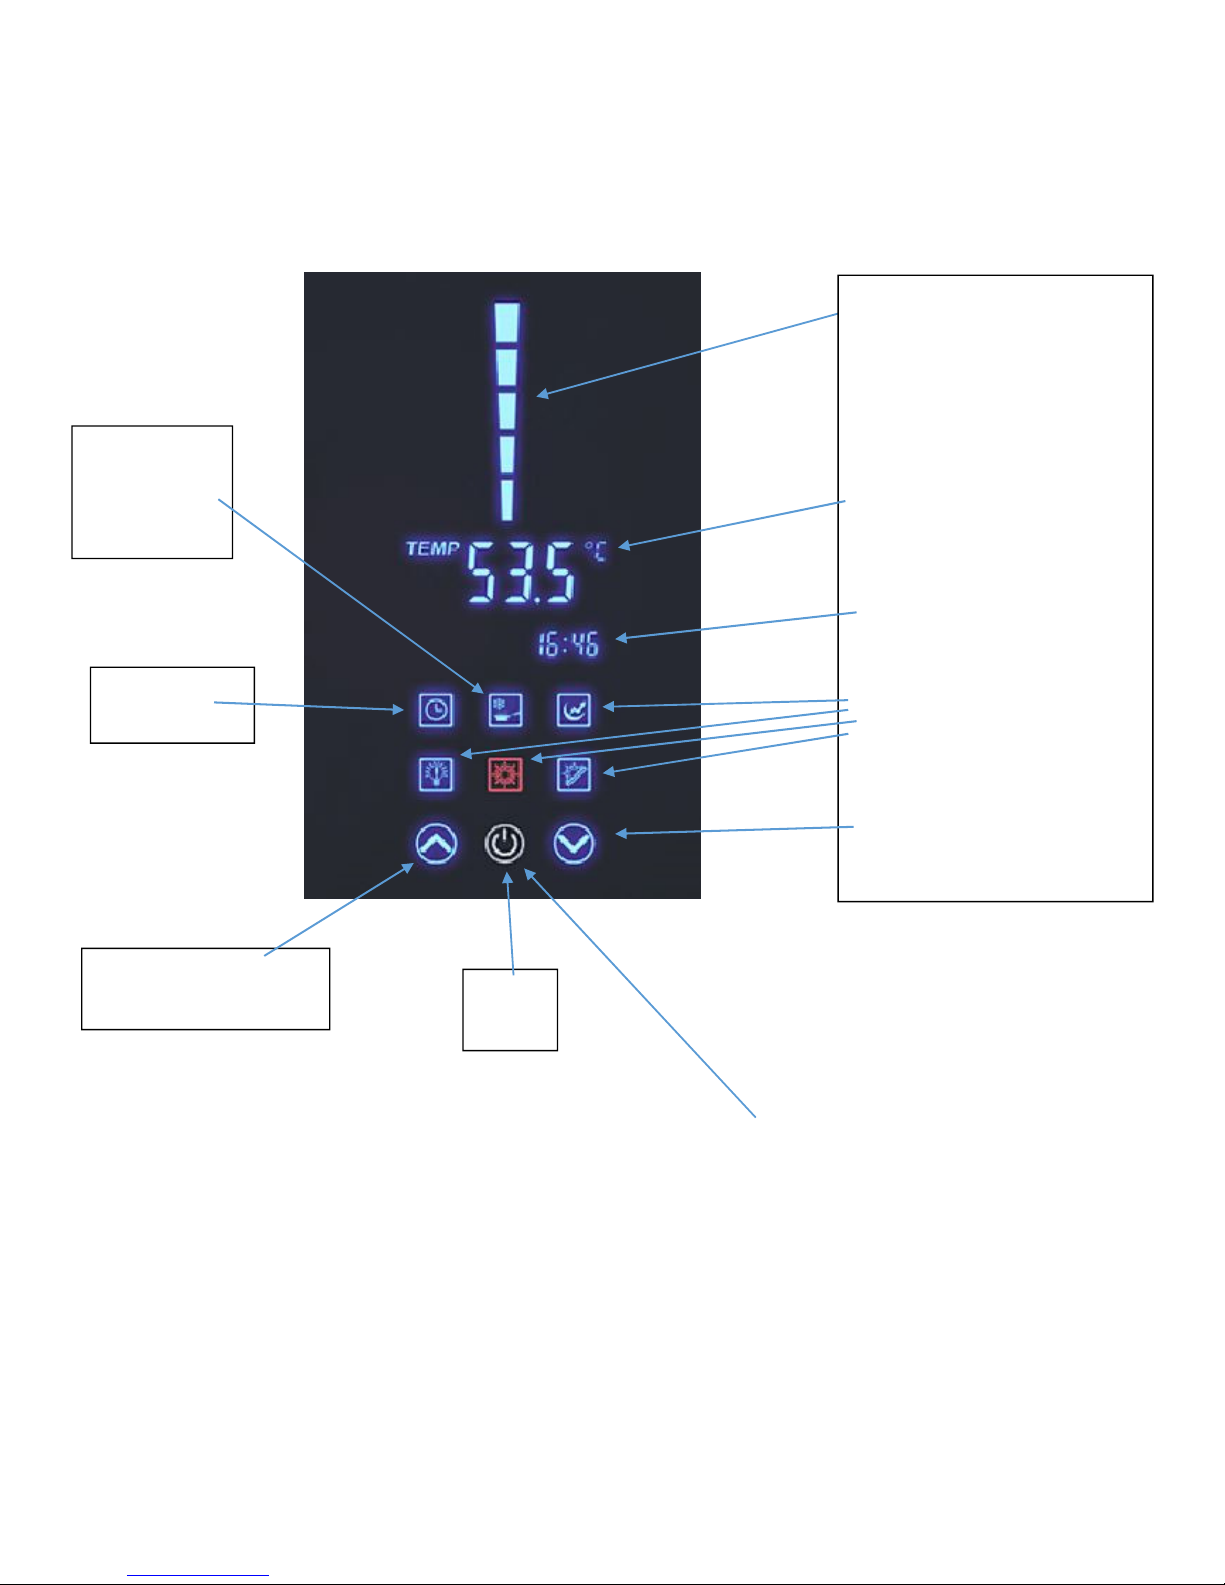
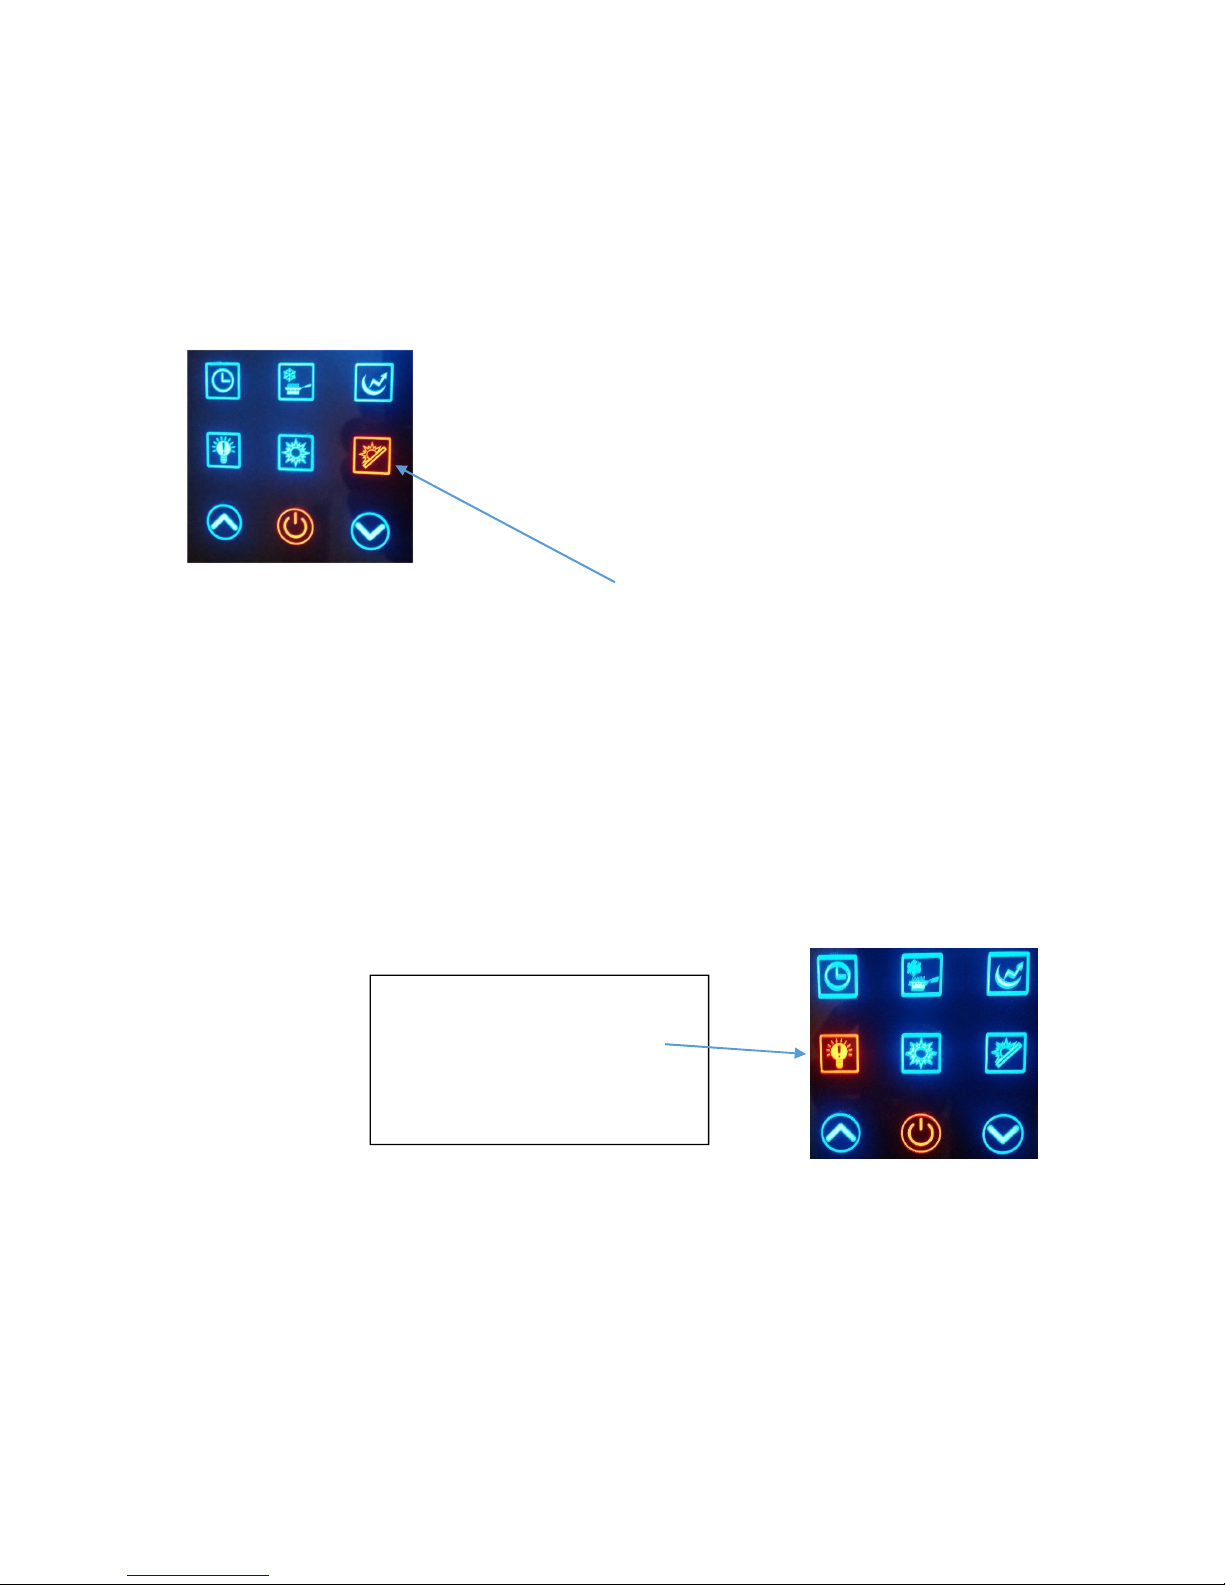
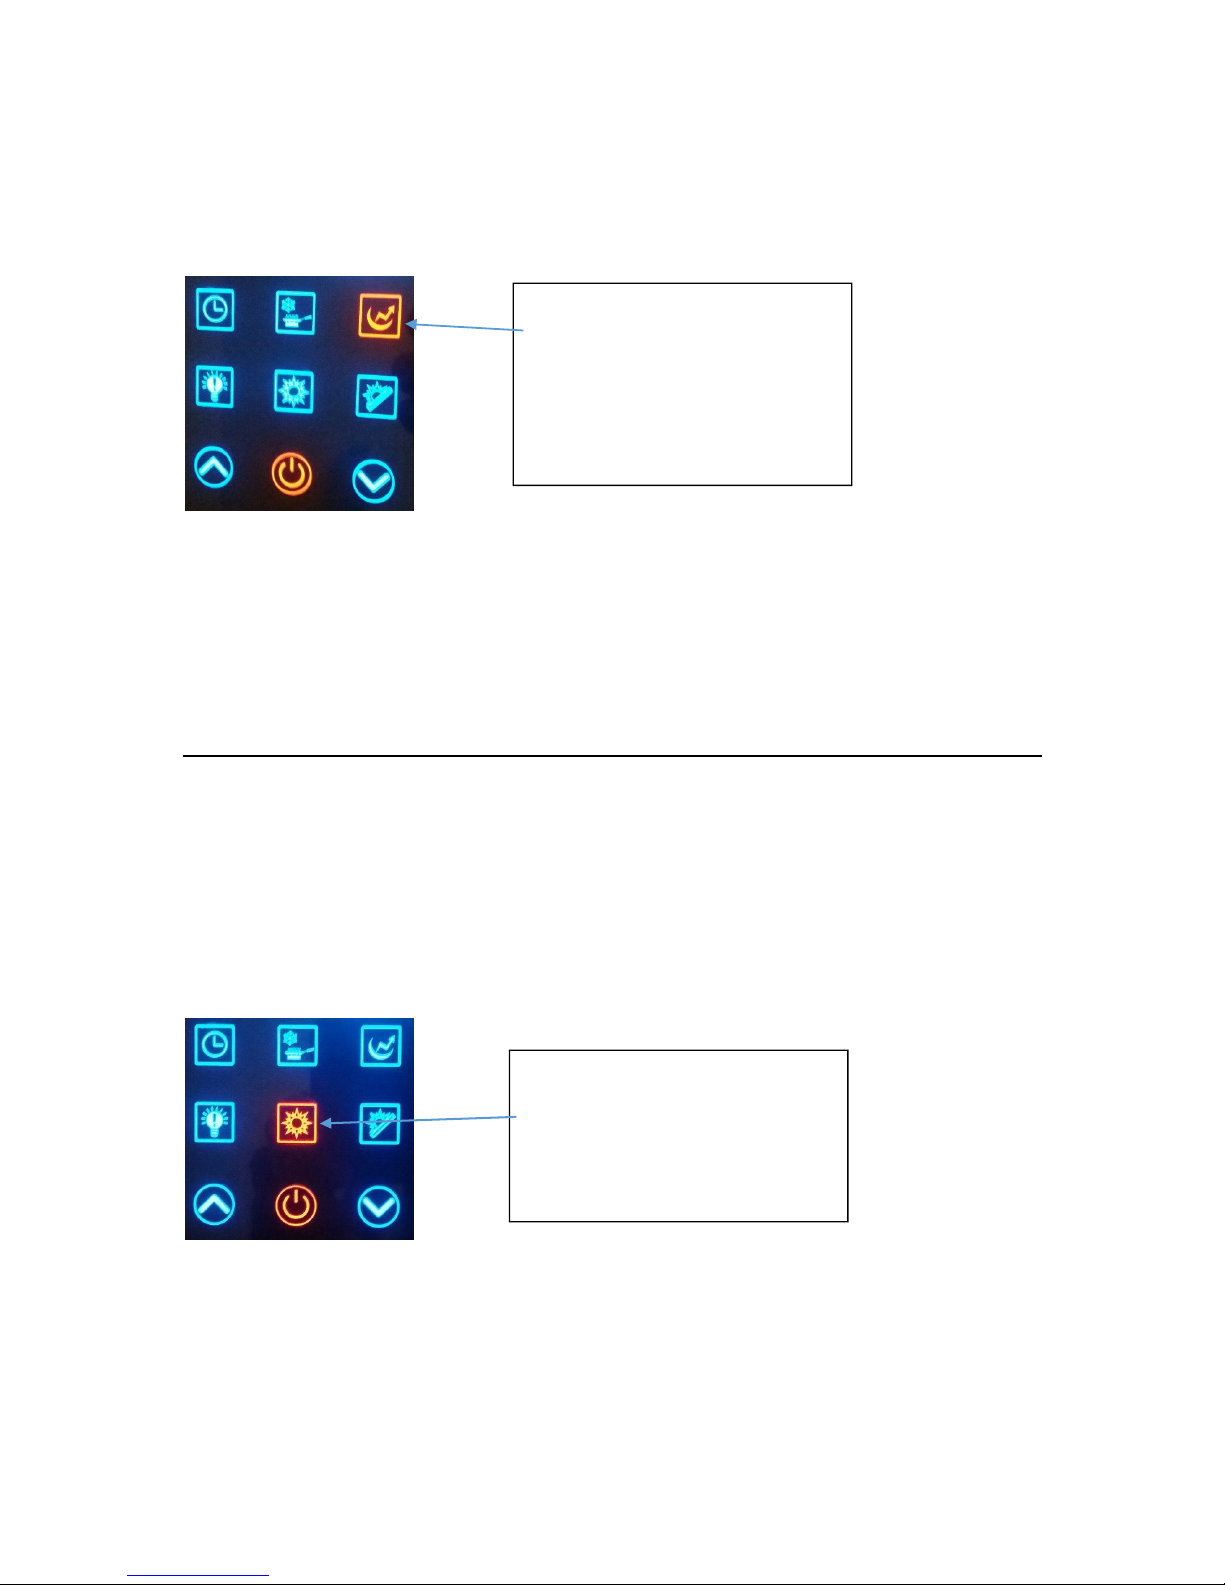
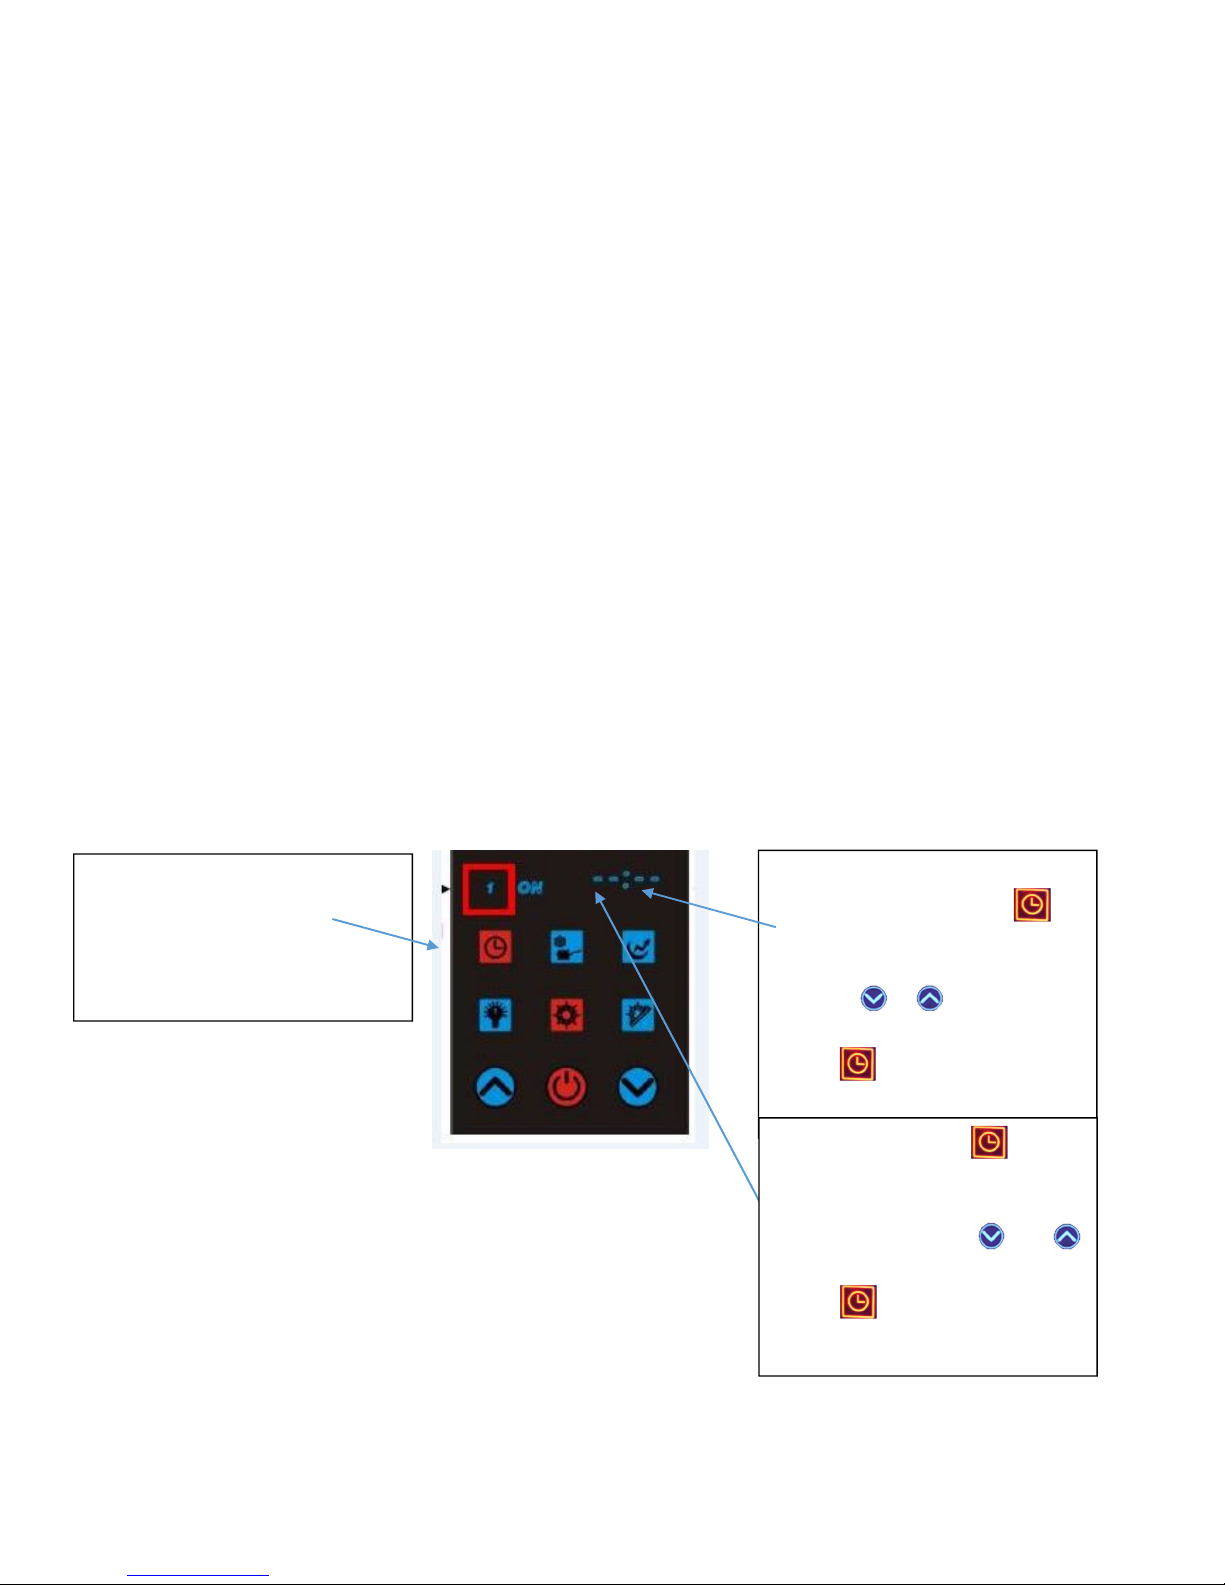
Indol Supreme User manual


Other Indol Boiler manuals


Popular Boiler manuals by other brands

Protherm
Protherm Panther 30 KTV user manual

Viadrus
Viadrus Hercules U 24 Manual, operation and installation

ACV
ACV Comfort E Series Installation, operating & servicing instructions

Navien
Navien NFC-250/175H installation manual

Vaillant
Vaillant ecoVIT exclusiv VKK 226/4-H operating instructions

MHG Heating
MHG Heating GK 4 Installation and operating manual

Unical
Unical GHISS 16R AP user manual

Daikin
Daikin Rotex GW-30 H12 installation instructions

Lochinvar
Lochinvar CB--CW 495 -745 Replacement parts list

Hoval
Hoval UltraOil 16 Technical information installation instructions

Viessmann
Viessmann VITODENS 050-W Installation and service instructions

Radiant
Radiant RK 100 instruction manual

CHAFFOTEAUX
CHAFFOTEAUX ALIXIA S Installation and servicing instructions

Biasi
Biasi RINNOVA ADAPTIVE 25S User manual and installation instructions

Vaillant
Vaillant ecoTEC plus SERIES Instructions for installation and servicing

Biasi
Biasi RIVA COMPACT HE M96.24SM/C Service manual

Bryan Boilers
Bryan Boilers A-H-FS-15-12-50-D operati Installation and operating service manual

Smith
Smith 19HE series installation instructions