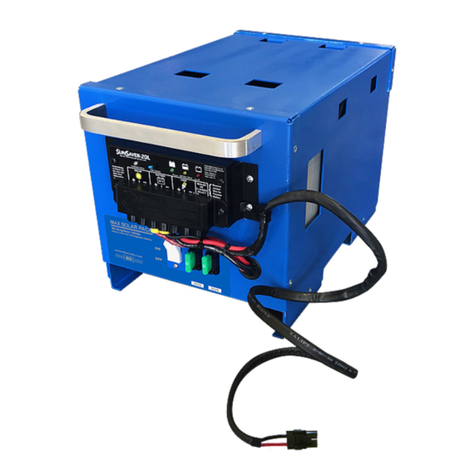
Industrial Scientific Solar Power Supply User manual

A Quick Start Guide to Setting up the Solar Power Supply
for the Radius® BZ1 and RGX® Gateway
www.indsci.com
SUPPLIES YOU WILL NEED
For unpacking and assembly
•
Utility knife
•
Compass or compass app on smartphone
•
Level (optional)
•
Mallet for driving stakes (optional)
For battery installation or removal
•
Flathead screwdriver
•
Adjustable wrench
•
Socketsetwith6” extension
•
Volt meter

A Quick Start Guide to Setting up the Solar Power Supply
for the Radius® BZ1 and RGX® Gateway
STEP 1: SITE SELECTION
Before setting up the Solar Power Supply (SPS), carefully select the site.
1.
Select anopen, outdoor location with abundant sunshine.
2.
Avoid obstacles (e.g. trees, buildings, etc.) that may block the sun and
also areas subject to frequent flooding.
STEP 2: INSTALL BATTERY IN ENCLOSURE
IMPORTANT: Safety Team –Install battery* before moving SPS to deployment site!
1.
From the box labeled “ALL OTHER EQUIPMENT”, remove the insert
assembly (with the enclosure) and the battery.
2.
On the back of the enclosure, make sure the power switch is OFF.
3.
Open the enclosure. Remove the battery holder, place the battery inside,
replace the battery holder, and secure using provided hardware.
4.
Connect the red lead to the positive (+) terminal, the black lead to the
negative (-) terminal of the battery, and secure.
5.
Check the battery voltage to ensure that the battery is fully charged
(about 12 volts DC). Shut enclosure door and secure.
*Note: Always install battery in a nonhazardous or declassified location!
STEP 3: DEPLOY TO SITE
1.
Gather insert assembly and other SPS components and transport to
selected site.
Note: Radius® BZ1 and RGX® Gateway are ordered and shipped separately.
2.
Remove stand assembly (legs) from box labeled LEGS, place in an
upright position, and spread apart, slightly.
3.
As needed, adjust the length of each leg using the adjustment pins.
STEP 4: INSTALL INSERT ASSEMBLY IN STAND
1.
After placing the stand upright, locate the label on top that reads “FRONT”.
2.
On the orange insert assembly, locate the matching “FRONT” label.
3.
With both labels facing you, align the pegs on the insert assembly with the
pockets (tubes) on the legs and insert.
4.
Optional: Secure the orange insert by installing 2 cotter pins. For added stability,
use the j-hook stakes to secure the legs and feet of the stand.
STEP 5: INSTALL SOLAR PANEL
1.
From the box labeled “ALL OTHER EQUIPMENT”, remove the solar assembly
(panel, mount, and cable with minilocks).
2.
Thesolarassemblyarrivesreadyforuse, attached to the panel.Place the
solarassembly on top of the connectoronthestand
.
Attach the other end of
the cable to the port marked “Solar Panel” on the back of the enclosure
.
3.
For maximum charging efficiency, orient the solar panel to due south
(northern hemisphere) or due north (southern hemisphere).
4.
Secure the solar assembly by hand-tightening the two adjusting knobs.
Then, snap the plastic minilocks onto both ends of the solar cable.
www.indsci.com

A Quick Start Guide to Setting up the Solar Power Supply
for the Radius® BZ1 and RGX® Gateway
STEP 6: MOUNT RADIUS® BZ1 ON THE SPS
1.
PlacetheRadius ontopofthe orangeinsertwith the instrument
LCD screen in line with the
“FRONT”
labels.
2.
Secure to stand by positioning the two hold down clamps over the
edge of the Radius boot and hand-tightening.
3.
Connect the blue Radius power cableto either the Output 1 or 2 port on the
back of the enclosure and the IS power input port on the Radius.
STEP 7: MOUNT THE RGX® GATEWAY ON THE SPS (IF NEEDED)
1.
Connect the blue RGX power cable to the Output 1 or 2 port on the
back of the enclosure and to the IS power input port on the side of
the RGX.
2.
Attach the RGX to the back of the orange insert by aligning the
magnet mounts on the back of the RGX to the black flat washers on
the insert.
STEP 8: POWER ON AND CONFIRM CHARGING
1.
Power on the SPS by setting the switch on back of the enclosure to ON.
2.
Power on the Radius: You should see a lightning bolt symbol on the Radius
BZ1 LCD screen to confirm charging.
3.
Power onthe RGX: You should see a solid green light on the side of the RGX
Gateway.
CAUTION: Never connect or disconnect power cables for any SPS-compatible device
when the SPS power switch is set to ON.
To view the entire Solar Power Supply product manual, visit
www.indsci.com/SolarPowerSupply
Warnings and Cautionary Statements
IMPORTANT: Failure to perform certain procedures or note certain conditions may impair the performance of the product. To ensure
safe and proper operation read and follow the procedures and conditions listed below.
WARNING: When the Solar Power Supply (SPS) is located in a hazardous-classified area NEVER open the SPS enclosure to install
or remove, or to connect or disconnect the SPS battery.
WARNING –EXPLOSION HAZARD. DO NOT REMOVE OR REPLACE FUSE WHEN ENERGIZED.
WARNING: Substitution of components may impair intrinsic safety and may cause an unsafe condition.
www.indsci.com

A Quick Start Guide to Setting up the Solar Power Supply
for the Radius® BZ1 and RGX® Gateway
Warnings and Cautionary Statements
CAUTION: Never connect or disconnect intrinsically safe (IS) cables for any SPS-compatible device when the SPS power switch is set
to on (energized). This can damage the SPS IS barriers.
IMPORTANT: There are no user serviceable parts contained inside.
IMPORTANT: Always set the SPS power switch to off before connecting or disconnecting the SPS battery.
IMPORTANT: When a compatible Industrial Scientific product powered by the SPS is placed in a hazardous-classified location, ensure
that any unused ports are capped.
IMPORTANT: Read and understand this manual before operating the equipment.
IMPORTANT: This equipment has been tested and found to comply with the limits for a Class A digital device, pursuant to part 15 of
the FCC Rules. These limits are designed to provide reasonable protection against harmful interference when the equipment is
operated in a commercial environment. The instrument complies with part 15 of the FCC Rules. Operation is subject to the following
two conditions:
This device may not cause harmful interference.
This device must accept any interference received, including interference that may cause undesired operation
IMPORTANT: This device complies with Industry Canada license-exempt RSS standard(s). Operation is subject to the following two
conditions: (1) this device may not cause interference, and (2) this device must accept any interference, including interference that
may cause undesired operation of the device.
IMPORTANT: Refer to Control Drawing 18109634-200 for approved Industrial Scientific accessories for hazardous location installation
parameters..
CAUTION: For safety reasons, this equipment must be operated and serviced by qualified personnel only. Read and understand the
instruction manual completely before operating or servicing.
If it appears that the SPS or a device powered by the SPS is not working correctly, contact Industrial Scientific.
IMPORTANT: Only clean using a damp cloth.
The Magnet Mount Kit for use with the RGX Gateway and individual kit items can cause injury. To avoid injury, Industrial Scientific
recommends the following.
•Persons with a pacemaker or implantable cardio defibrillator (ICD) should maintain a minimum separation distance of 90 cm (36 ″)
between the pacemaker or ICD and the magnet. Please consult your physician or pacemaker or ICD manufacturer for additional
guidance and recommendations.
•Neodymium magnets have a strong attractive force. Each can attract quickly when in close proximity to another magnet or metal
surface and cause injury. The magnet material is brittle; it can crack or splinter on impact to cause injury and potentially become a
flying hazard. Use protective gloves and eyewear to avoid a potentially severe pinch injury, cut, or splinter.
•Keep magnets away from electronic devices, identification cards, and credit cards that use microchips, magnets, or magnetic
fields.
Fully charge the batteries of compatible Industrial Scientific products before the first use of such products with the SPS.
PN 17160088-1
REV 1
www.indsci.com
AMERICAS
Phone: +1-412-788-4353
1-800-DETECTS (338-3287) | info@indsci.com
ASIA PACIFIC
Phone: +65-6561-7377
Fax: +65-6561-7787 | info@ap.indsci.com
EMEA
Phone: +33 (0)1 57 32 92 61
Other manuals for Solar Power Supply
1
This manual suits for next models
1
Table of contents
