Industrial Temperature Sensors Series P400 User manual
SerieP400
Operating Instructions
®
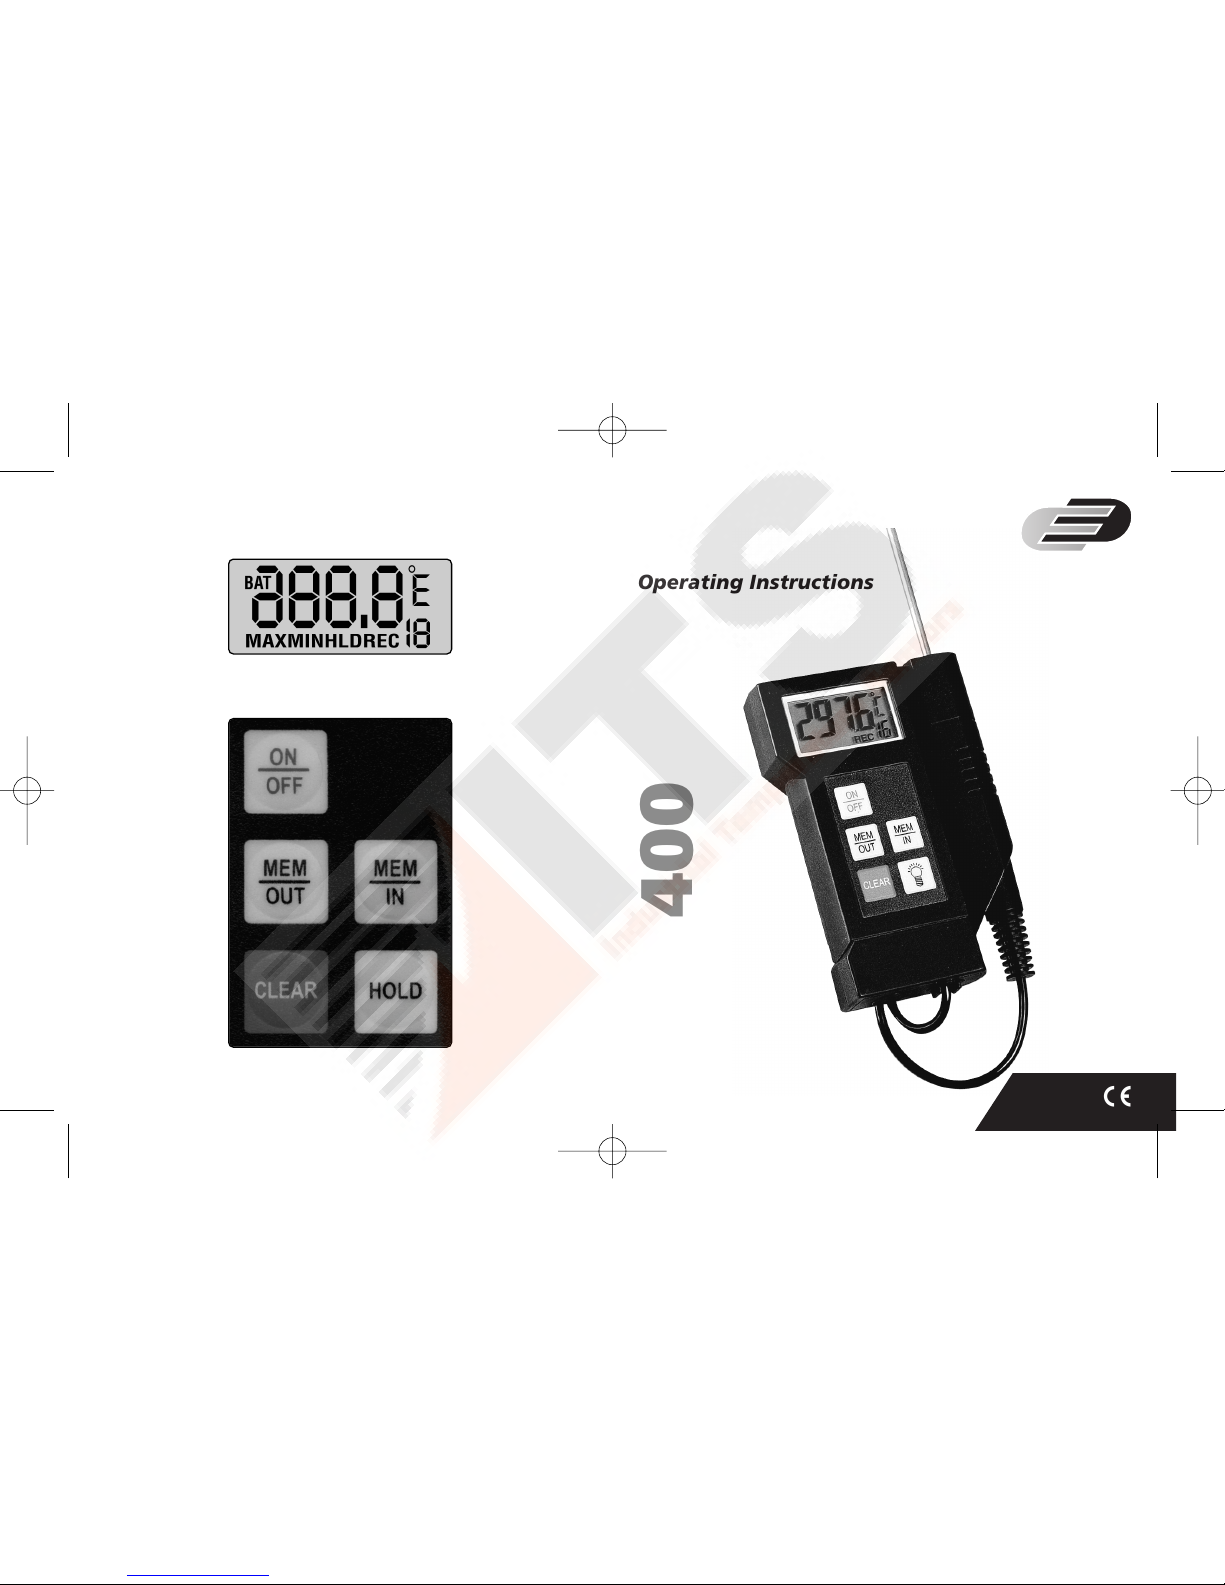
Fig. 1
Fig. 2
Summary
1. Handling
1.1. General advice
1.2. Operation
1.3. Switching on/off
1.4. Functions
1.4.1. Measuring unit switching °C/°F
1.4.2. Calibration (Offset-adjustment)
1.5. Recalling memory data (HOLD/MAX/MIN/AVG)
1.6. 19-measurment memory
1.7. AUTO-OFF-function
2. Power supply / Changing the battery
3. Guarantee
4. Technical data
10
P400 Series – Precision measuring instruments
When the instrument displays the "BAT" segment, it indica-
tes that the batteries need replacing and the instrument
allows app. 1 hour of further measurement time.
Note: For protection of our environment please dispose of
the batteries according to current local regulations.
3. Guarantee
With normal use, the guarantee lasts for 12 months for the
instruments and 6 months for the probes and sensors.
Opening of the instruments leads to expiration of guaran-
tee.
The producer guarantees that his product will not have any
material defect or defect in workmanship during the
above-mentioned period if the product is accordingly used
and maintained. Exceptions are defined in the following
way:
The guarantee does not apply for batteries and fuses. The
guarantee does not cover products that are damaged, used
improperly or negligent, practised or stored incorrectly.
These guarantee conditions replace all possible expressly or
tacitly confirmations. No liability will be assumed for spe-
cial, casual or constructive damages when it occurs through
unauthorized act or through another way even if it is with-
in the contract.
15
P400 Series – Precision measuring instruments
DE Anl. P400.bel 09.02.2005 11:10 Uhr Seite 10

1.6 19-Measurement Memory
The instruments series P400 provides a 19 measure-
ment memory function. For saving the displayed
measurement push the MEM IN-Button. On the bot-
tom of the display the memory position will shown.
To readout the memory push the MEM OUT-button.
On the bottom of the display "REC” and the position
of the memory will be displayed (REC 1-19). For clear-
ing the memory push once the CLEAR-Button while
displaying the memory measurements.
1.7 AUTO-OFF-function
P400 and P410 instruments will switch off automati-
cally after 15 minutes without pressing any key. Pres-
sing the CLEAR-Button and switching on the instru-
ment simultaneously can disable this function when
”dAo” is displayed.
2. Power supply
For the power supply of the instrument two 1,5 Volt bat-
tery (AA size) are used. To exchange the batteries switch
off the instrument and open the battery cover on the back
of the instrument. Replace the used batteries with new
ones.
14
P400 Series – Precision measuring instruments
1. Handling
1.1 General advice
• For cleaning the instrument please do not use abra-
sive cleaner, but a dry or damp cloth.
• Please store the measuring instrument in a dry and
clean place when not in use.
• Avoid any force like shocks or pressure to the instru-
ment.
• Do not use force to connect the probe or interface
plugs in. The interface plug is different from the
probe plug.
• If no sensor is connected to the instrument while
switching on "OPN" shows on the display.
• A retractable stand on the back of the instrument
allows it to be used as a bench top instrument.
1.2. Operation
Before switching on the instrument, connect the
probe/s to the instrument and insert the battery
(Please refer to chapter 6. Power supply / battery
changing). A number on the instrument’s housing
marks each port.
1.3. Switching on and off
By operating the ON/OFF-key the instrument switches
on or off. After switching on the instrument indicates
11
P400 Series – Precision measuring instruments
DE Anl. P400.bel 09.02.2005 11:10 Uhr Seite 11

value. By using the Hold button you will switch to the
next figure or you will end the adjustment.
Note: The mentioned offset will add or subtract
(negative value) from the measurement.
Note: When the offset is not equal to 00.0 the Celsius-
sign "°C" will be not completely displayed.
Offset has been not Offset has been
changed e.g.: 00.0 changed e.g.: -00.5
1.5 Recalling the memory data (HOLD MAX MIN AVE)
After pushing first time the key [HOLD MAX MIN AVE]
the actual value will be held on the display. Pushing
again the key [HOLD MAX MIN AVE], the saved maxi-
mum-, minimum and average value will be displayed.
Note: During the recall of the memory data the extre-
mes (MAX MIN) and the average value (AVE) will not
be calculated or carried on.
Clearing the memory (MAX MIN AVE)
Press [CLEAR] key once to erase the stored maximum,
minimum and average from memory
13
a full segment test (Fig. 1) for 1,5 sec. afterwards the
instrument starts operating in measurement mode
indicating the actual measurement temperature.
1.4 Functions
1.4.1 Measuring unit switching °C and °F (Celsius / Fahren-
heit)
To change the measuring unit push ON/OFF- and
MEM/OUT-Button simultaneously until the measure-
ment value will shown.
1.4.2 CAL-option (how to adjust the instrument)
The instrument offers an easy calibration function to
adjust the temperature at one point – to compensate
sensor tolerances.
Push once the Hold-Button. On the bottom of the dis-
play you will see HLD and the displayed measurement
value is "frozen”. By using now the MEM IN-Button
the instrument switch to CAL-mode. On the instru-
ment you will see:
00.0
The first ”0” is blinking. By using the MEM IN-Button
you increase the blinking figure and by using the
MEM OUT-Button you decrease the measurement
12
P400 Series – Precision measuring instruments
P400 Series – Precision measuring instruments
DE Anl. P400.bel 09.02.2005 11:10 Uhr Seite 12


