manuals.online logo
Brands
  1. Home
  2. •
  3. Brands
  4. •
  5. Infinity
  6. •
  7. Amplifier
  8. •
  9. Infinity reference series User manual

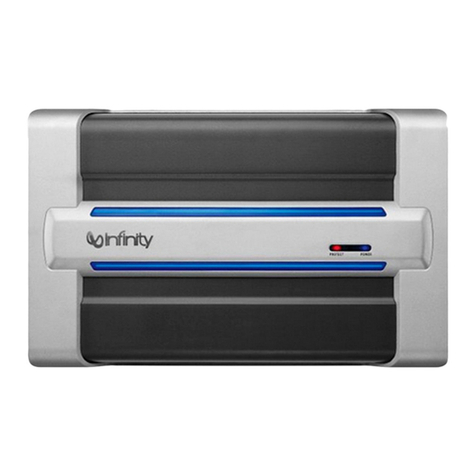
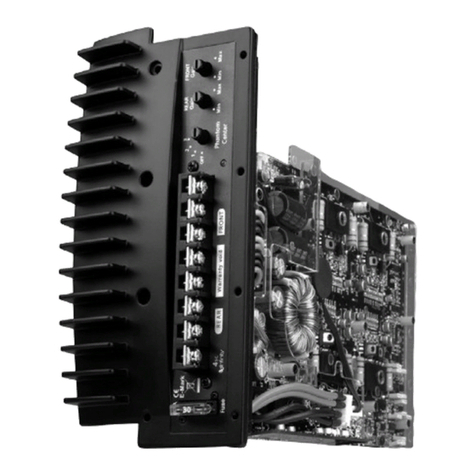
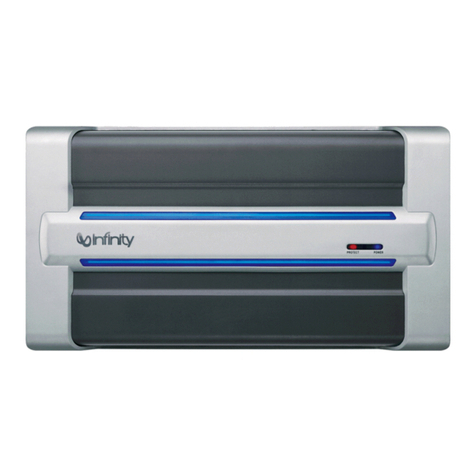
Infinity reference series User manual

Other manuals for reference series

3

This manual suits for next models

1

Other Infinity Amplifier manuals

Infinity KAPPA FIVE User manual

Infinity

Infinity KAPPA FIVE User manual

Infinity Reference 5350A User manual

Infinity

Infinity Reference 5350A User manual

Infinity 7520a User manual

Infinity

Infinity 7520a User manual

Infinity Kappa 255A User manual

Infinity

Infinity Kappa 255A User manual

Infinity Basslink 4SC User manual

Infinity

Infinity Basslink 4SC User manual

Infinity Beta Powersource Digital 300 Programming manual

Infinity

Infinity Beta Powersource Digital 300 Programming manual

Infinity 5760a User manual

Infinity

Infinity 5760a User manual

Infinity Kappa Center User manual

Infinity

Infinity Kappa Center User manual

Infinity 310a User manual

Infinity

Infinity 310a User manual

Infinity Kappa 102a User manual

Infinity

Infinity Kappa 102a User manual

Infinity K600 User manual

Infinity

Infinity K600 User manual

Infinity 7540a User manual

Infinity

Infinity 7540a User manual

Infinity KAPPA K2 Programming manual

Infinity

Infinity KAPPA K2 Programming manual

Infinity kappa series User manual

Infinity

Infinity kappa series User manual

Infinity Kappa 202a User manual

Infinity

Infinity Kappa 202a User manual

Infinity REF-704a User manual

Infinity

Infinity REF-704a User manual

Infinity RS KAPPA PS-8 User manual

Infinity

Infinity RS KAPPA PS-8 User manual

Infinity Basslink 4SC User manual

Infinity

Infinity Basslink 4SC User manual

Infinity 475a User manual

Infinity

Infinity 475a User manual

Infinity 7521A User manual

Infinity

Infinity 7521A User manual

Infinity Kappa 54a 4-Ch User manual

Infinity

Infinity Kappa 54a 4-Ch User manual

Infinity Reference 1300A User manual

Infinity

Infinity Reference 1300A User manual

Infinity 1211a User manual

Infinity

Infinity 1211a User manual

Infinity 311a User manual

Infinity

Infinity 311a User manual

Popular Amplifier manuals by other brands

Magnat Audio EDITION FOUR Owner's manual/warranty document

Magnat Audio

Magnat Audio EDITION FOUR Owner's manual/warranty document

Inter-m PA-2000A Operation manual

Inter-m

Inter-m PA-2000A Operation manual

Yamaha TX6n owner's manual

Yamaha

Yamaha TX6n owner's manual

Peavey TNT 150 user guide

Peavey

Peavey TNT 150 user guide

Bosch LBB 1903/10 Installation and user instructions

Bosch

Bosch LBB 1903/10 Installation and user instructions

Avocent Emerge DA1200D Installer/user guide

Avocent

Avocent Emerge DA1200D Installer/user guide

Redgum RGi35 operating instructions

Redgum

Redgum RGi35 operating instructions

Cambridge Audio AXA25 user manual

Cambridge Audio

Cambridge Audio AXA25 user manual

Alpine MRP-M200 owner's manual

Alpine

Alpine MRP-M200 owner's manual

Technical Pro H1502UrBT user manual

Technical Pro

Technical Pro H1502UrBT user manual

FMS EMGZ307 operating manual

FMS

FMS EMGZ307 operating manual

Racal Instruments 5601 user manual

Racal Instruments

Racal Instruments 5601 user manual

Valcom V-1094A Technical specifications

Valcom

Valcom V-1094A Technical specifications

Cambridge Audio 851D user manual

Cambridge Audio

Cambridge Audio 851D user manual

QSC 3800 Specifications

QSC

QSC 3800 Specifications

NAD C300 owner's manual

NAD

NAD C300 owner's manual

Rotel RMB-1077 owner's manual

Rotel

Rotel RMB-1077 owner's manual

Peavey Monitor 300 Series operating guide

Peavey

Peavey Monitor 300 Series operating guide

manuals.online logo
manuals.online logoBrands
  • About & Mission
  • Contact us
  • Privacy Policy
  • Terms and Conditions

Copyright 2025 Manuals.Online. All Rights Reserved.

Reference Series
475a
4,3,2 CHANNEL POWER AMPLIFIER
SERVICE MANUAL
Infinity Systems, Inc.
250 Crossways Park Dr.
Woodbury, New York 11797 Rev0 8/2007
Released 2007
Discontinued XXXX
- CONTENTS -
BASIC SPECIFICATIONS ………………..……….……..1
DETAILED SPECIFICATIONS ………….…..…….……..2
PACKING……………………….……………..……………3
APPLICATIONS……………………………………………4
INSTALLATION/SETUP…………………………...…...…6
BASIC TROUBLESHOOTING..…….…….………………6
EXPLODED VIEW/PARTS LIST………………………....7
AMPLIFIER BLOCK DIAGRAM……………………..……8
P.C.B. DRAWINGS….………………………………..……9
ELECTRICAL PARTS LIST ……………………………. 15
IC/TRANSISTOR PINOUTS..…………………………….20
SCHEMATICS……………….……..…………..……..…..21
Reference 475a Basic Specifications
Output Power: 75W RMS x 4 @ 4 ohms; ≤1% THD + N
(14.4 VDC) 90W RMS x 4 @ 2 ohms; ≤1% THD + N
Signal-to-noise ratio: 85dBA (reference 1W into 4 ohms)
Dynamic power: 117W channels @ 2 ohms
Effective damping factor: 6.3 @ 4 ohms
Frequency response: 10Hz – 100kHz (-3dB)
Maximum input signal: 6.0V
Maximum sensitivity: 100mV
Output regulation: 0.21dB @ 4 ohms
Dimensions (L x W x D): 14-3/16" x 9" x 2-11/16" (361mm x 229mm x 69mm)
Fuse: 2 x 35A
Infinity continually strives to update and improve existing products, as well as create new ones. The specifications
and details in this and related JBL publications are therefore subject to change without notice.
475a Reference Series
1
INFINITY REFERENCE 475a AMPLIFIER SPECIFICATIONS
TEST VOLTAGE 14.4 +0.1V
Specification Rating Unit Remarks
Power Output 4ohm loads @1kHz
(stereo mode) for each ch @<1.0%THD
(Unit:W)(LPF=22K)
≥75W x 4 Watts
Power Output 2ohm loads @1kHz
(stereo mode) for each ch @<1.0%THD
(Unit:W)(LPF=22K)
≥90W x 4 Watts
Bridged (Stereo) Mode 4ohm loads @1kHz ≥240W x 2 Watts
THD Power 4 ohm loads
and 1MD@Reference (Unit:%) LPF=22K ≤0.5% @1kHz %
THD Power 2 ohm loads
and 1MD@Reference (Unit:%) LPF=22K ≤0.5% @1kHz %
THD Power 4 ohm loads
Bridged (Stereo) Mode (Unit:%) LPF=22K ≤0.5% @1kHz %
Channel Separation
@full rated power (+80KHZ) @1kHz ≥45dB
Full rated power Distortion 1KHz LPF=22KHz ≤0.1% %
Signal/Noise Ratio
a: 1 watt into 4 ohms
b: full rated power (dB)
>90
dBA
1 watt into 4 ohms
1V signal input
Input Sensitivity
Low Level Input(v) @:full rated power 100mV-6V Volts ±20%
Frequency response (Unit:-3dB) 10Hz~100kHz Hz -3dB
High-Pass Crossover Frequency limits +20% 40Hz – 450Hz Hz
Low-Pass Crossover Frequency limits +20% 40Hz – 450Hz Hz
Bass Boost:(Unit:dB) @50Hz (±5Hz ) 0~6dB dB ±1dB
Idle Current ( @ 4ohm) 0.5A A ±0.15A
MAX current : rated power
(All channel 2 ohm loads) ≤65A A
DC Offset: ≤30mV mV
Damping Factor (4ohm): >200
Effective damping factor (4ohm): 6.395
Dynamic Power @ 2 ohms 130W Watts
Output Regulation @ 4 ohms 0.03dB dB
Remote Operating Voltages: ON 5V OFF 4V Volts ±1V
Turn on delay time 2 to 3 Sec
Circuit Protection
a. Temperature
b. Speaker Short Circuit
c. Operating Voltage Range
95 ±5 deg C
Yes
8~16V
+0.5V
Dimensions (L x W x H): 14-3/16" x 9" x 2-11/16"
(361mm x 229mm x69mm)
Inches
mm
Fuses 35A x 2 A
475a Reference Series
2
PACKAGING
Item Part Number Description Qty
1 CH4482901203 Outer Carton 1
2 REF475a REF475a Amplifier 1
3 Plastic Bag 1
4 BZL279112001 Packing Foam 1
5 Visit Infinitysystems.com Owner's manual 1
6 Plastic Bag 1
7 Accessory kit consisting of: 1
LS1CJ0402507 Mounting Screws 4
1601-353G-00 SPARE 35A FUSES 2
475a Reference Series
3
To Head Unit
Front Output
To Head Unit
Rear Output
Rear SpeakersFront Speakers
Figure 5. 475a connected to full-range speakers. Note
crossover and channel assignment settings.
Figure 6. 475a connected to four satellite speakers
and used in conjunction with an additional
subwoofer amplifier or powered subwoofer.
Note crossover and channel assignment settings.
To Head Unit
Front Output
To Sub Amp
To Head Unit
Rear Output
Rear SpeakersFront Speakers
The 475a can be set up for stereo 4-channel,
3-channel or bridged 2-channel operation, as
shown in Figures 5 through 8.
NOTE:
• Minimum speaker impedance for stereo
operation is 2 ohms. Minimum speaker
impedance for bridged operation is 4 ohms.
• Not all possible applications are shown here;
e.g., the applications shown in Figures 5, 6 or 8
could include a separate subwoofer driven by
an additional amplifier. In that case, the user
should refer to Figure 6 for crossover and sub
amp connection suggestions.
APPLICATIONS – 475a
475a Reference Series
4
APPLICATIONS – 475a
To Head Unit
Front Output
To Head Unit
Sub Output
SubwooferFront Speakers
Figure 7. 475a connected in tri-mode to a subwoofer
and a pair of satellite speakers. Note crossover and
channel assignment settings.
Figure 8. 475a connected in bridge mode to a pair of
full-range speakers. Note crossover and channel
assignment settings.
To Head Unit
Left
To Head Unit
Right
Right SpeakerLeft Speaker
475a Reference Series
5
SETTING INPUT SENSITIVITY
1. Initially turn the INPUT LEVEL control(s) to
the minimum (counterclockwise) position.
2. On the source unit, increase the volume
control to 3/4 volume. Slowly increase the
INPUT LEVEL control(s) toward three o’clock
until you hear slight distortion in the music.
Then reduce the INPUT LEVEL slightly until
distortion is no longer heard.
NOTE: After the source unit is on, blue LEDs (on
the top panel) will light, indicating the amplifier
is on. If not, check the wiring, especially the
remote connection from the source unit. Also
refer to “Troubleshooting.”
REMOTE LEVEL CONTROL
The 1300a, 1600a and 5350a include a remote
level control. This will allow the subwoofer level
to be adjusted from the listening position.
Connect the remote level control using the
RJ11 jack on the side of the amplifier. Install
the control module in the front of the vehicle
within easy reach of the driver. Both the under-
side of the dash and the center console are
suitable locations.
UNDER-DASH MOUNTING
Select a mounting location that allows easy
access to the control while driving. Using the
REMOTE LEVEL control as a template, mark and
drill holes in the mounting surface. Attach the
REMOTE LEVEL control using the mounting
screws provided (Figure 11).
Figure 11. Under-dash mounting of the
REMOTE LEVEL control.
Refer to the illustrations on the previous pages
for control location.
Reconnect the (–) negative lead to the vehicle’s
battery. Apply power to the audio system and
play a dynamic music track.
SETTING THE CROSSOVER(S)
Determine your system plans and set the
crossover-mode switch accordingly. If your
system design does not include a subwoofer,
set the crossover mode to FULL and skip to
“Setting Input Sensitivity.”
If your system includes a subwoofer, set the
crossover mode to HP (high-pass) for your
full-range speakers. Adjust the crossover
frequency to limit bass, and provide increased
system volume with less distortion.
Mode Switch:
Full: Allows a full-range signal through to the
speakers; can be used with larger full-range
speakers such as 6" x 9"s.
HP: Allows a high-pass signal through to
the speakers; should be used with most
loudspeakers (can protect your full-range
speakers from being overdriven with low
frequencies, one cause of speaker damage).
LP: Allows only bass to pass through to the
speakers; should be selected when powering
subwoofers.
High-Pass Filters: Initially set the crossover-
frequency control midway. While listening
to music, adjust the crossover for the least
perceived distortion from the speakers, allowing
them to reproduce as much bass as possible.
Low-Pass Filters: For subwoofers, choose
the highest frequency that removes vocal
information from the sound of the subwoofer.
If using the 475a to drive a subwoofer(s), set
the crossover mode to LP (low-pass) on the
channels connected to the subwoofer.
NOTE: The 1300a, 1600a and the subwoofer
output of the 5350a are low-pass only and
do not have a crossover-mode switch.
INSTALLATION AND SETUP
Route the cable behind the dash or other
interior panels and under the carpet. Do not
route the cable outside the vehicle. Connect the
RJ11 cable between the RJ11 receptacle on the
amp and the receptacle on the REMOTE LEVEL
control (Figure 12).
Figure 12. REMOTE LEVEL control electrical
connection.
SETTING THE BASS BOOST
The Bass Boost control will allow you to enhance
the bass output of your system at 50Hz up to 6dB.
AUX OUTPUT
Reference amplifiers (except 5350a) are
equipped with full-range outputs that can be
used to connect additional amplifiers.
STATUS LEDs
Power: Indicates the amplifier is on.
Protection: Refer to “Troubleshooting” for specific
indications.
Figure 13. LED status.
TROUBLESHOOTING
• PROBLEM: No audio (POWER LED is off).
CAUSE and SOLUTION: No voltage at BATT+
and/or REM terminals, or bad or no ground
connection. Check voltages at amplifier
terminals with VOM.
• PROBLEM: No audio (PROTECT LED glows red).
CAUSE and SOLUTION: DC voltage on amplifier
output. Amplifier may need service; see
enclosed warranty card for service information.
• PROBLEM: No audio (PROTECT LED glows red).
CAUSE and SOLUTION: Amplifier is overheated.
Make sure amplifier cooling is not blocked at
mounting location; verify that speaker-system
impedance is within specified limits.
• PROBLEM:
No audio (PROTECT LED glows red).
CAUSE and SOLUTION: Voltage less than 9V on
BATT+ connection. Check vehicle charging system.
• PROBLEM: No audio (PROTECT LED glows red).
CAUSE and SOLUTION: Voltage greater than
16V or less than 8.5V on BATT+ connection.
Check vehicle charging system.
• PROBLEM: Distorted audio.
CAUSE and SOLUTION: Input sensitivity is
not set properly, or amplifier or source unit is
defective. Check INPUT LEVEL setting, or check
speaker wires for shorts or grounds.
•PROBLEM: Distorted audio (PROTECT LED glows
intermittently).
CAUSE and SOLUTION: Short circuit in speaker
or wire. Remove speaker leads one at a time to
locate shorted speaker or wire, then repair.
•PROBLEM: Music lacks “punch.”
CAUSE and SOLUTION: Speakers are not
connected properly. Check speaker connections
for proper polarity.
475a Reference Series
6
Item# Part Number Description Qty
1 SG-0016-2601 Top cover 1
2 GD-600011400 Light panel 1
3 SR-F475-0117 Main heat sink 1
4 LSIFM0300011 Screw 5
5 Main PCB 1
6 MK-0005-2601 Front panel 1
7 LS5KP0300807 Screw for F/RP 8
8 LS5KJ0301007 Screw for terminal, RCA jacks 6
9 XN-10500-012 Knob 6
10 LSIAP0300607 Screw 6
11 LSIAM0300607 Screw 2
12 XG-0017-2601 Bottom plate 1
13 LSIAY0301201 Screw 2
14 PL-L0007-000 Transistor spring clip (2) 4
15 PL-L0006-000 Transistor spring clip (1) 6
16 ZL-10037A-15 Space Pole 2
17 HG-0006-2601 Rear panel 1
18 LSIAA0200501 Screw 1
19 LS1AM0250401 Screw 4
20 LED PCB 1
21 CP-B00011400 LED lens 1
7
475a Reference Series
1 2 3 4 56
A
B
C
D
6
54321
D
C
B
A
INPUT L
AUX OUT L
AUX OUT R
INPUT R
OP
OP
OP
OP
1
2
3
4
IMS INPUT
23
1
4
A
MODE:FRONT/REAR/SUB
23
1
4
A
MODE:FRONT/REAR/SUB
23
1
4
A
23
1
4
A
MODE:RIGHT/STEREO/LEFT
1 3
2
A
1 3
2
A
OP
OP
10 100K32 320
MODE HP/FLAT/LP
VARIABLE LPF/HPF
32Hz-320Hz/12dB
10 100K32 320
MODE HP/FLAT/LP
VARIABLE LPF/HPF
32Hz-320Hz/12dB
10 100K50
10 100K50
BASS BOOST
VARIABLE
0dB-6dB/50Hz
BASS BOOST
VARIABLE
0dB-6dB/50Hz
AMP
AMP
INPUT RL
INPUT RR
OP
OP
1
2
3
4
IMS INPUT
23
1
4
A
MODE:FRONT/REAR/SUB
23
1
4
A
MODE:FRONT/REAR/SUB
23
1
4
A
23
1
4
A
MODE:RIGHT/STEREO/LEFT
1 3
2
A
1 3
2
A
OP
OP
10 100K32 320
MODE HP/FLAT/LP
VARIABLE LPF/HPF
32Hz-320Hz/12dB
10 100K32 320
MODE HP/FLAT/LP
VARIABLE LPF/HPF
32Hz-320Hz/12dB
10 100K50
10 100K50
BASS BOOST
VARIABLE
0dB-6dB/50Hz
BASS BOOST
VARIABLE
0dB-6dB/50Hz
AMP
AMP
MAIN AMP
FRONT L
MAIN AMP
FRONT R
MAIN AMP
REAR RL
MAIN AMP
REAR RR
4 ohm/2 ohm
4 ohm/2 ohm
speaker
speaker
speaker
BTL-4ohm
4 ohm/2 ohm
4 ohm/2 ohm
speaker
speaker
speaker
BTL-4ohm
power supply Battery
+VCC
-VCC
+15V
-15V
475a Reference Series
8
475a Reference Series
9