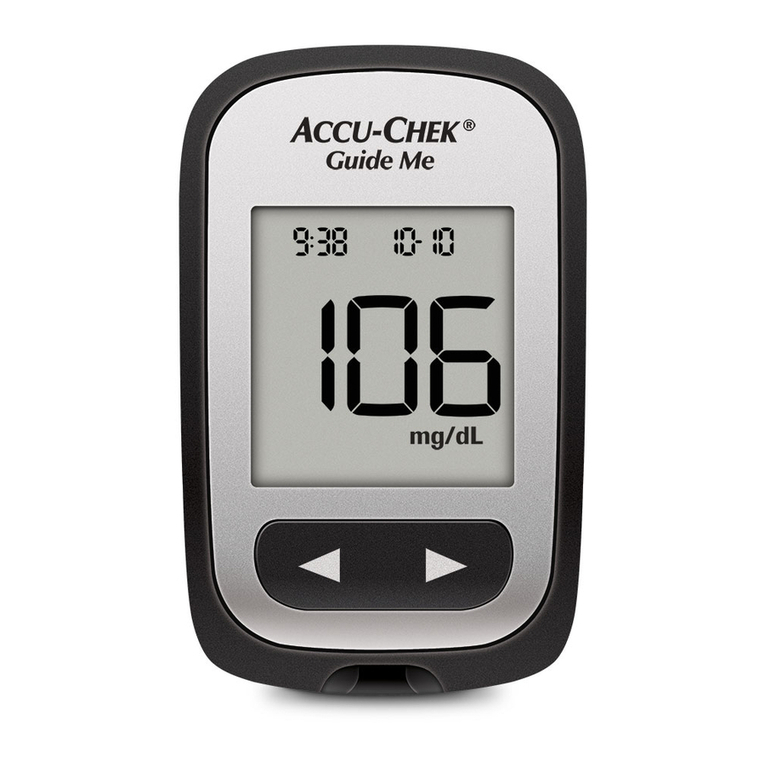
INFINOVO MEDICAL i3 User manual

Continuous Glucose Monitoring
Systems
Transmitter, Sensor, App
USER MANUAL
Model:i3
INFINOVO MEDICAL CO.,LTD.
JN-STP-I3-SMS-001
version no. V01
effective date: 2022.05.25

Table of Contents
Terminology .......................................................................................................................... 1
1 Product overview ................................................................................................................ 2
1.1 Sensor overview ........................................................................................................ 2
1.2 Transmitter overview ............................................................................................... 4
1.3 App overview ............................................................................................................4
1.4 Analysis overview ..................................................................................................... 5
2 Safety Information ..............................................................................................................6
2.1 Application definition ............................................................................................... 6
2.2 Important user information ......................................................................................6
2.3 Contraindications ..................................................................................................... 6
2.4 Warning ....................................................................................................................7
2.5 Precautions ............................................................................................................... 8
3 Risk and Efficacy ................................................................................................................9
3.1 Risk .......................................................................................................................... 9
3.2 Efficacy .....................................................................................................................9
4 Installation and Use .......................................................................................................... 10
4.1 Installation ..............................................................................................................10
4.2 Use ..........................................................................................................................13
4.3 End session and remove sensor ...............................................................................15
4.4 Calibration ............................................................................................................. 16
5 App interface introduction and function application ........................................................ 20
5.1 Main interface ........................................................................................................ 20
5.2 Function Bar ...........................................................................................................22
5.3 Alarm/Alert ............................................................................................................ 23
6 Faults and Troubleshooting .............................................................................................. 24
The Sensor pad is not sticky enough .............................................................................24
Calibration troubleshooting ......................................................................................... 25
Sensor low power ......................................................................................................... 25
Notification failure ....................................................................................................... 25
7 Maintenance ..................................................................................................................... 25
8 Travel information ............................................................................................................25
9 EMC Statement ................................................................................................................ 27
10 User help .........................................................................................................................29
11 The warranty .................................................................................................................. 30
11.1 The scope and duration of warranty .....................................................................30
11.2 The following conditions are not in the scope of warranty .................................... 30
11.3 Warranty liability ................................................................................................. 30
11.4 Warranty Statement ............................................................................................. 30
12 Label symbol and graphic description ............................................................................ 31
13 Date of manufacture ....................................................................................................... 32
Appendix ............................................................................................................................. 33

1
Terminology
Sensor
Component of the monitoring system, containing the applicator,
sensor electrode and sensor base. The applicator inserts the
sensor electrode under the skin to measure glucose level in
interstitial fluids.
CGM
Abbreviation for Continuous Glucose Monitoring
CGMS
Abbreviation for Continuous Glucose Monitoring Systems
Applicator
A disposable component that inserts the sensor electrode under
the skin and will be removed after the sensor electrode is
inserted.
Sensor
electrode
A device inserted under the skin that reacts with the interstitial
fluid and converts biological signals into electrical signals.
Sensor base
A small plastic base attached to the abdomen skin to hold the
transmitter.
Releaser
A plastic part, used for removing the transmitter from the sensor
base.
Transmitter
The transmitter is a component of the Continuous Glucose
Monitoring system, which is embedded in the sensor base and
sends the blood glucose information to the Mobile Application
wirelessly via Bluetooth Low Energy.
Transmitter
serial number
Consisting of numbers and letters, it is unique for each
transmitter and can be found on the back of the transmitter and
on the transmitter package.
App
The mobile software that receives blood glucose information,
displays blood glucose readings, trend curves, trend arrows and
transmitter status.
Default value
The values that come with the system.
Calibration
Blood glucose value measured by a blood glucose meter and
entered into the App for calibration to ensure the accuracy of the
CGMS reading.
Blood Glucose
value
Values measured by blood glucose meter.
Sensor Glucose
readings
Values measured by Continuous Glucose Monitoring Systems
Trend curve
Displays changes and tendencies of glucose readings over a
period of time and current blood glucose status.
Trend arrow
Indicate the speed and tendency of changes of glucose readings.
Data receiving
range
The communication distance between the App and the
transmitter, which shall be within 2 m without obstacle.
Repeat prompt
When the first notification is not confirmed, the prompt
information will be repeated.

2
1 Product overview
The Continuous Glucose Monitoring Systems consists of a disposable Sensor, a
Transmitter, the Mobile Application,and Analysis Software. It is recommended to
wear the sensor on the abdomen and avoid movements where the sensor is applied.
The sensor electrode chemically reacts with glucose in the hypodermic interstitial
fluid to generate an electrical signal. Transmitter analyzes and calculates the
electrical signal, and generates the blood glucose values, which is sent to the mobile
App. The user analysis software downloads and collects data from the mobile App
for processing and analysis, then gives reports.
During the monitoring period, at least two blood glucose values (from fingerstick
testing with BG meter) need to be entered into the CGM App every day (every 12
hours) for calibration. The CGMS measures a glucose reading every three minutes,
totaling 480 readings each day. The system is indicated for continuous monitoring
of the blood glucose data for 14 days and form a continuous blood glucose curve. In
addition, dining, sport, medication and other activities can be recorded as an event.
Glunovo i3 CGM
Analysis Software
1.1 Sensor overview

3
Safety lock
Button
Sensor base and
Adhesive patch
Sensor
The continuous glucose monitoring sensor is a product in a sterile sealed pouch. The
sensor is mainly made up of an applicator, a sensor base and a sensor electrode. An
adhesive pad is attached to the sensor base. Insert the sensor electrode into the
subcutaneous tissue of the abdomen and remove the applicator. The sensor base is
attached to the skin for up to 14 days of monitoring. Please dispose of the sensor
according to your local regulations for medical waste, after the sensor session is
finished,
The performance parameters of sensor
Model No.
SI3-WL-03
Measurement range
2.2-22.2 mmol/L
Effective working time
14 days
Calibration method
Glucose Meter
Calibration range
2.2-22.2 mmol/L
Storage conditions
Temperature:2oC-25 oC;
Relative humidity:15%-85%
Transport conditions
Room temperature for transportation
Rated voltage
d.c. 3V
Working conditions (After
the transmitter placed in the
sensor base)
Temperature:10 oC-40 oC;
Relative humidity:10%-95%
Battery lifetime
No less than 14 days
Sterilization method
Irradiation sterilization
Validity period
Details see the product label
Power support
Internal power supply

4
1.2 Transmitter overview
The continuous glucose monitoring transmitter is a component connected to the
sensor base. Once the transmitter is embedded in the sensor base and the sensor
electrode is activated through the App, the transmitter sends the sensor glucose
value to the App. When properly worn, the transmitter and App have a transmission
range of 2 meters without obstruction. Wireless connection might be disrupted in
swimming pools, bathtubs and waterbed.
The performance parameters of transmitter
Model No.
TI3-WL -03
Size
length33.1 mm *width19.35 mm *height 8.3mm
Weight
3.7 g
Display interval
3 mins
Calibration method
Blood Glucose meter
Calibration frequency
twice per day(24h)
Data receiving range
2 m(without obstruction)
Expect product service life
Reused up to 8 times
Validity period
36 months
Operation mode
Continuous performance
Protection grade
IP27
Working conditions (After
the transmitter placed in the
sensor base)
Temperature:10 oC-40 oC;
Relative humidity:10%-95%
Atmospheric pressure
70kPa-106 kPa
Transport and Storage
conditions
Temperature:0oC-45 oC;
Relative humidity:10%-95%
Wireless
Bluetooth 5.0, 2402-2480 MHz, GFSK, 0 dBm
1.3 App overview
The App is a mobile medical application for its continuous glucose monitoring
system to receive and process glucose readings. The software displays real-time
blood glucose readings, trend curves, trend arrows, and transmitter status. It has
functions such as adding Notes, Alarms/Alerts, Logbook Entries, Reports, Data
Export feature and so on.

5
Main interface of App
The main interface of App displays blood glucose readings, trend curves and trend
arrows. App and transmitter can be connected through Bluetooth, pairing for data
communication. A blood glucose meter is also needed to use the Continuous
Glucose Monitoring System.
The performance parameters of App
Item
Detail
Operating system
Android 6.0 and above/IOS 13.2 and above
Connection
One App can only connect to one transmitter at
the same time
Data transmission
Transmitter and App (phone) transmit data via
Bluetooth protocol
The file exported by the app is transferred to
the analysis software.
Storage Format
App export data storage format is Excel file
1.4 Analysis overview
Analysis software downloads and collects data from the Mobile App for processing
and analysis, then produces reports.
Warning

6
The software does not provide any medical advice and cannot be used for such
purpose. Do not adjust your treatment plan without consulting your medical
diabetes team.
2 Safety Information
2.1 Application definition
The device is intended for continuous or periodic recording of glucose levels in
interstitial fluid for adult patients with diabetes aged 18 or older. The information is
intended to support, rather than to replace standard glucose meter and is intended for
detecting trends and track pattern to provide reference information for patients to
better manage diabetes. The system provides real-time blood glucose value, which
is received and displayed by the App. The blood glucose value data can be further
imported into the software for analyzing historical blood glucose values.
Apply site:
Abdomen
Frequency of data interaction:
Once every 3mins
Reuse:
Sensor is disposable;The transmitter can be reused up to 8 times.
Warning
CGMS(i3) does not provide any medical advice and cannot be used for such
purpose. Do not adjust your treatment plan without discussing it with your
medical diabetes team.
2.2 Important user information
In order to use this product safely, please review your product instructions before
using your Continuous Glucose Monitoring System. The instructions include
contraindications, warnings, cautions, and other important user information. Discuss
with your doctor how to use the information to help you control your blood glucose.
The instruction manual contains important information about system
troubleshooting and equipment performance characteristics.
2.3 Contraindications
Part of the sensor shall pierce the skin, so it is recommended that people with
delicate skin use the device cautiously. The product must be removed before you
undergo magnetic resonance imaging (MRI).
Intake of acetaminophen while wearing the sensor may falsely raise your sensor
glucose readings.

7
2.4 Warning
Read the instructions thoroughly. incorrect use of the continuous blood glucose
monitoring system may lead to misunderstanding of the information provided
by the system or affect the performance of the system and miss low/high blood
glucose incidents.
Continuous glucose monitoring cannot be used as a basis for diabetes diagnosis,
such as for insulin injection treatment. It cannot replace blood glucose meter.
The value of blood glucose may differ from the reading of blood glucose. Using
glycemic readings as a diagnostic basis for diabetes may result in low/high
blood glucose.
Do not ignore the symptoms of high / low blood glucose levels. If the sensor
glucose reading does not match the symptoms, a blood glucose meter should be
used to measure the blood glucose even if the CGM reading is within the
normal range.
Calibrate at least twice a day, or the sensor glucose readings might be
inaccurate and you might miss a low or high blood glucose value.
In rare cases, the sensor electrode may be fractured. If the sensor electrode
breaks and there is no visible sensor electrode on the skin, do not attempt to
remove it yourself. Seek professional medical help in the condition of infection
or inflammation - redness, swelling or pain. If the sensor electrode ruptures,
please report to our technical support.
Do not use sensors when its sterile packaging is damaged. Using unsterilized
sensors may lead to infection.
The storage temperature of the sensor is 2oC-25oC. The sensor can be
transported at room temperature. The storage time is the shelf life of the sensor.
If the temperature range of the refrigerator is 2oC-25oC, the sensor can be stored
in the refrigerator. Improper storage results in inaccurate blood glucose readings
and missing low/high blood glucose levels. If the sensor is stored in the
refrigerator, please take it out half an hour before use. The sensor can be used at
room temperature.
The device is not designed to remain in the body long-term, or to be replaced
‘immediately’ with a similar or identical device.
Your transmitter communicates with your App via Bluetooth. The
communication might be affected by strong electro-magnetic field, keep your
CGMS away from any strong electro-magnetic field. Otherwise, degradation of
the performance of this equipment could result in malfunctioning of the system.
With the prompt function turned off, the App cannot give a prompt (notification)
even if the Transmitter and the App are within communication range.
Symptoms that may be caused by high/low blood glucose should not be ignored.
If the symptoms you are experiencing do not match the CGMS readings, or you
suspect that the CGMS readings may be inaccurate, check the glucose by
performing a fingerstick blood test using a blood glucose meter.
When CGMS shows that your glucose level is low or near the low limit,

8
perform a fingerstick blood test using a blood glucose meter.
The CGMS contains small parts that may cause choking once swallowed, keep
them off the reach of children.
2.5 Precautions
The sensors and transmitters of the CGMS should be matched. The products of
different generations cannot be connected and cannot work. Make sure that the
system uses the correct software version.
Before opening the sensor package, wash your hands with soap and water and
dry them.
Before inserting the sensor, clean the skin with alcohol wipes and let it dry up.
This helps prevent infection. Do not insert the sensor until the skin is dry so that
the tape on the sensor base can be better attached to the skin.
Change the insertion site each time. Using the same insertion site too often may
not allow the skin to heal, and may cause scars or skin allergies.
Do not insert sensors in areas that may be bent, squeezed, tattooed, hairy or
allergic. These sites are not ideal for measuring blood glucose. Inserting sensors
in these places may affect the performance, missing low/high blood glucose
values.
Do not insert sensors within 5 cm of insulin injection and placement of insulin
pump. Insulin may affect the performance of the sensor, missing low/high blood
glucose levels.
To make calibration, enter the exact blood glucose value measured by the
glucometer within 3minutes. Inaccurate input or input exceeding 3minutes may
affect the performance of the sensor and result in missing low/high blood
glucose values.
Rapid changes in blood glucose level might not be displayed in time, such as
during exercise or after meals. There is always a time lag between glucose level
in the blood and glucose level in the interstitial fluid, the lag time is different
from person to person.
When properly worn, the transmitter and App have a transmission range of 2 m
without obstruction. Wireless connection in the water is not very well, so the
range of connections in places like swimming pools, bathtubs and waterbeds
will be reduced. If the distance between the transmitter and App is more than 2
m or if the distance between them is blocked, they may not be connected or the
connection distance may be shorter. You may miss the low/high blood glucose
level. Yet all the data will still be stored in your transmitter, so your App is able
to display all the data when there is good communication again.
The transmitter can be reused up to 8 times in its lifetime, so do not discard it.
In rare cases, the sensor may give inaccurate glucose readings. If the glucose
reading is believed to be incorrect or inconsistent with your symptoms, perform
a fingerstick glucose test and check to ensure that the sensor is not loose.

9
Intense exercise may cause the sensor to be detached or loosened. If the Sensor
is loose, you may not get a reading or the reading may not be reliable and may
not match how you feel. Follow instructions on selecting the appropriate site for
wearing the sensor.
Severe dehydration or excessive water loss may result in inaccurate CGMS
readings.
On rare occasions, patients may experience mild skin redness and swelling on
the insertion site.
3 Risk and Efficacy
3.1 Risk
Inserting sensors and wearing adhesive tapes are less likely to cause infection,
bleeding, pain or skin irritation (redness, swelling, bruising, itching, scarring or
discoloration). If these symptoms occur, the patient may feel uncomfortable at the
location where the sensor is inserted.
In rare cases, the sensor electrode may break and remain in the body. This
phenomenon did not appear in the clinical study. If you feel the sensor is broken
inside your skin, contact your medical diabetes team and technical support.
When the prompt function is turned off or the transmitter and App are not within the
communication range, the prompt cannot be obtained.
When you cannot hear the tone or feel the vibration, you may not notice the prompt.
Sometimes the sensor glucose readings may be slightly different from the values
measured by blood glucose meter. In most cases, the sensor glucose reading moves
with the blood glucose level and will remind you when the glucose level exceeds the
target range.
If you are at high/low blood glucose levels and you miss the reminding and warning
message, you might not test your blood glucose with blood glucose meter and miss
high/low blood glucose values.
3.2 Efficacy
The Continuous Glucose Monitoring Systems provides more effective and
comprehensive information than the blood glucose meter. In 14-day monitoring, the
continuous blood glucose monitoring system provides a blood glucose reading every
three minutes to help you observe the trend of blood glucose changes. Dynamic
information can help you check the current blood glucose status, as well as the
direction and speed of changes in blood glucose. Recognizing trends in blood
glucose can help you take steps to avoid high/low blood glucose levels.
App alerts when blood glucose levels exceed your target blood glucose range or
when blood glucose drops or rises rapidly. The alerts can remind you to take
measures to avoid low/high blood glucose.

10
4 Installation and Use
This chapter describes how to use your i3 systems, please read carefully before use,
and follow the indication step-by-step.
4.1 Installation
4.1.1 App installation and setting
a) Download App from Google Play / App Store;
b) After installed, please complete personal information.
c) Setting your target and Alarm/Alert Sound type.
4.1.2 Prerequisites
Turn on the Bluetooth of the mobile phone and keep the phone within 2 meters of
the Transmitter in an accessible state. Allow the App to access your smart device
location for Android system.
4.1.3 Sensor Insertion
1)Prepping
a) Do NOT use if the sensor package seems to be damaged or is already opened.
b) Do NOT use after the sensor expiry date.
c) Wash your hands
d) Clean bottom of transmitter with alcohol wipe;
e) Let the transmitter dry.
Note:Be careful, don’t touch its metal dots on the back of the transmitter and
scratch it (that may damage the water-resistant seal).
2)Insertion site
a) Only on the Abdomen;
b) 5 cm away from the belly button;
c) 5 cm away from the insulin Injection site;
d) Avoid position where it can be pressed when you are wearing a belt;
e) Avoid fatty clotting site
f) Avoid tattoos, excessive hair, scars, inflammation etc.
Note
:
Change insertion site after previous use
Clean the skin condition before insertion
Check whether package is broken
Check expiration date before insertion

11
Insertion site
3)Clean insertion site
a) Clean the insertion site with an alcohol wipe and allow it to dry before
proceeding.
b) Make sure area is clean and free of lotions, perfumes, and medications.
4)Apply Sensor
Remove the protective liners from the bottom of
the sensor base, and don't touch the adhesive tape.
Place sensor horizontally on the abdomen;
Press the applicator to ensure that the tape is firmly
attached on the skin.
Hold the applicator and pull the Safety Lock to
unlock mode.

12
Press the top button of the applicator, and the
sensor electrode will be inserted automatically;
Gently pull applicator up until you see adhesive
patch.
Ensure the tape firmly bonded.
Run your fingers around the adhesive.
Slide transmitter (pointy side) into the slot against one end of the sensor base.

13
Press the other end of the transmitter until it clicks into the holder, you will hear 2-
clicks sound.
If the transmitter is not embedded properly,it may cause the transmitter to break
away.
Warning
The sensors (Model No. SI3-WL-03 )and transmitters (Model No. TI3-
WL-03 )of the Continuous Glucose Monitoring Systems (i3 )should be
suitable for each other. The products of different generations cannot be
connected to each other and thus cannot work. Make sure that the system uses
the correct Glunovo software version.
4.2 Use
4.2.1 Pairing Transmitter
Enter Transmitter SN and PIN Code to start pairing.
Note: For problems in pairing, check
<Troubleshooting>.
Enter sensor LOT number to “Start CGM”.

14
Warm up time: 190 Mins.
Note: No High/Low Alarm during warming up; Keep
the connection between transmitter and smart phone
during warming up.
Initial calibration after warm-up;
Note: Do the calibration before meal.
4.2.2 Sensor glucose readings and curve
Blood glucose readings and trend curve are shown in App’s Home Screen.
Home Screen

15
Logbook
Caution
Continuous glucose monitoring cannot be used as a basis for diabetes
diagnosis, such as insulin injection. It cannot replace the blood glucose meter.
The value of blood glucose may not be consistent with the reading of blood
glucose. Using glycemic readings as a diagnostic basis for diabetes may result
in low/high blood glucose.
4.3 End session and remove sensor
Settings→EXPORT NOW
Note: After 14 days’ monitoring, CGMS will be
stopped automatically, also can be removed manually.

16
Settings→Device Information→Remove Current
Device
Note: After the sensor is ended
,
the App will not
receive BG readings and Alarm/Alert.
Note:Data for this session will be reserved for future
export
Take off adhesive pad.
Note: Remove sensor and transmitter together.
Take out transmitter with the releaser.
Put the transmitter back to package, if not using.
Note:
Transmitter can store data up to 14 days, and it will
erase all data once it is removed from the sensor.
Take out the transmitter, after you remove transmitter
and sensor together from your body.
Warning
In rare cases, the sensor electrode may fracture. Don't ignore it. If the sensor
electrode breaks and there is no visible sensor electrode on the skin, do not attempt
to remove it yourself. Seek professional medical help in case of infection symptoms
or inflammation - redness, swelling or pain. If the sensor electrode ruptures, please
report to our technical support.
No safety hazard was found in the patient's residual rupture sensor electrode during
in vitro NMR test. There was no obvious migration or heating of the sensor
electrode, and the imaging was limited to the area around the sensor electrode.
4.4 Calibration
The glucose readings need to be calibrated for the display of the readings and trend
curves, and to maintain the accuracy throughout the monitoring process. The time
points for calibration are:
Initial calibration:

17
After the sensor is activated and the sensor warm-up is complete, App will send a
notification for the first calibration. The App will not display the blood glucose
readings and trend curves until the first reference blood glucose is entered for
calibration.
Calibrate twice per day:
Calibration shall be done twice a day (ideally every 12 hours). The purpose of
calibration is to keep the sensor glucose readings more accurate.
Calibrate to check blood glucose and CGMS
Caution
Blood glucose must be entered manually during calibration. It must be
calibrated by accurate blood glucose values in order to obtain accurate sensor
glucose readings.
4.4.1 How to calibrate
Accurate blood glucose values need to be entered for each calibration. Blood
glucose for calibration must be between 2.2 and 22.2 mmol/L (40 mg/dL and 400
mg/dL) and shall be within 3 minutes after testing.
a) If the blood glucose measured by the glucose meter is outside the range of 2.2-
22.2 mmol/L (40 mg/dL - 400 mg/dL), it cannot be used for calibration.
b) Before calibration, make sure the transmitter and mobile App are connected.
c) Use a blood glucose meter to routinely test blood glucose for calibration. Do
not replace the glucometer during the monitoring process. The accuracy of
different brands of blood glucose meters and test strips will vary.
d) The accuracy of blood glucose readings used for calibration may affect the
accuracy of sensor glucose readings.
Caution
Blood glucose should not be calibrated during rapid change of glucose levels
and the general rate of change is 0.11 mmol/L (1.98 mg/dL) per minute. Do
not calibrate when the single arrow or double arrow is displayed on the App
interface which indicates that your blood glucose level increases/decreases by
0.11-0.17 mmol/L (1.98 mg/dL - 3.06 mg/dL) or over 0.17 mmol/L (3.06
mg/dL) per minute. Calibration can significantly affect the accuracy of sensor
glucose readings when glucose value rises or falls.
In order to obtain more accurate data, it is recommended to test and calibrate
the blood glucose before going to bed at night and during fasting the next
morning.
Warning
Calibrate at least twice per day. Calibrating less often than twice per day
might cause sensor glucose readings to be inaccurate, and you might miss a
low or high blood glucose value.

18
The steps to enter the blood glucose value during calibration are as follows:
a) Wash hands and dry, make sure the blood glucose test strips are stored properly
during the shelf life, and make sure the blood glucose meter can work normally;
b) Follow the instructions and use the blood glucose meter to test the blood
glucose;
c) Enter the Calibration screen from Home Screen;
d) Using a BG meter, do a fingerstick test and enter the value in the calibration
entry box. Press “Calibrate” button.
Other manuals for i3
1
Table of contents
Other INFINOVO MEDICAL Blood Glucose Meter manuals

