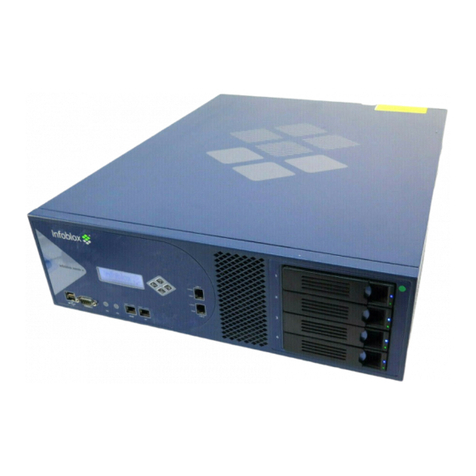
Infoblox Infoblox-550 User manual

Version 4.0
Infoblox User Guide
For the Infoblox-550 Appliance
P/N 400-0106-100 Rev. A

Infoblox User Guide For the Infoblox-550 Appliance 1
Contents
Introduction . . . . . . . . . . . . . . . . . . . . . . . . . . . . . . . . . . . . . . . . . . . . . . . . . . . . . . . . . . . . . . . . . . 3
Product Overview . . . . . . . . . . . . . . . . . . . . . . . . . . . . . . . . . . . . . . . . . . . . . . . . . . . . . . . . . . . . . . . . . . . . . . . . . . . . . . .3
Infoblox-550 Network Identity Appliance . . . . . . . . . . . . . . . . . . . . . . . . . . . . . . . . . . . . . . . . . . . . . . . . . . . . . . . . . . . .4
System, Environmental, and Power Specifications . . . . . . . . . . . . . . . . . . . . . . . . . . . . . . . . . . . . . . . . . . . . . . . . . . . .7
Installing the Device. . . . . . . . . . . . . . . . . . . . . . . . . . . . . . . . . . . . . . . . . . . . . . . . . . . . . . . . . . . . 9
Rack Mounting . . . . . . . . . . . . . . . . . . . . . . . . . . . . . . . . . . . . . . . . . . . . . . . . . . . . . . . . . . . . . . . . . . . . . . . . . . . . . . . . .9
Powering the Device. . . . . . . . . . . . . . . . . . . . . . . . . . . . . . . . . . . . . . . . . . . . . . . . . . . . . . . . . . . . . . . . . . . . . . . . . . . . .9
Cabling the Device to a Network . . . . . . . . . . . . . . . . . . . . . . . . . . . . . . . . . . . . . . . . . . . . . . . . . . . . . . . . . . . . . . . . . 10
Accessing the Device . . . . . . . . . . . . . . . . . . . . . . . . . . . . . . . . . . . . . . . . . . . . . . . . . . . . . . . . . .11
Infoblox GUI . . . . . . . . . . . . . . . . . . . . . . . . . . . . . . . . . . . . . . . . . . . . . . . . . . . . . . . . . . . . . . . . . . . . . . . . . . . . . . . . . 12
Infoblox CLI . . . . . . . . . . . . . . . . . . . . . . . . . . . . . . . . . . . . . . . . . . . . . . . . . . . . . . . . . . . . . . . . . . . . . . . . . . . . . . . . . . 13
Configuration Examples . . . . . . . . . . . . . . . . . . . . . . . . . . . . . . . . . . . . . . . . . . . . . . . . . . . . . . . .15
Example 1 – Single Infoblox-550 Appliance for External DNS . . . . . . . . . . . . . . . . . . . . . . . . . . . . . . . . . . . . . . . . . . 15
Task 1.1 Cable the Device to the Network and Turn On Power . . . . . . . . . . . . . . . . . . . . . . . . . . . . . . . . . . . . 16
Task 1.2 Specify Initial Network Settings . . . . . . . . . . . . . . . . . . . . . . . . . . . . . . . . . . . . . . . . . . . . . . . . . . . . 16
Task 1.3 Specify Device Settings . . . . . . . . . . . . . . . . . . . . . . . . . . . . . . . . . . . . . . . . . . . . . . . . . . . . . . . . . . . 17
Task 1.4 Define a NAT Address . . . . . . . . . . . . . . . . . . . . . . . . . . . . . . . . . . . . . . . . . . . . . . . . . . . . . . . . . . . . . 18
Task 1.5 Enable Zone Transfers on the Legacy Name Server . . . . . . . . . . . . . . . . . . . . . . . . . . . . . . . . . . . . . 18
Task 1.6 Import Zone Data . . . . . . . . . . . . . . . . . . . . . . . . . . . . . . . . . . . . . . . . . . . . . . . . . . . . . . . . . . . . . . . . 19
Task 1.7 Designate the New Primary on the Secondary Name Server (at the ISP Site). . . . . . . . . . . . . . . . . 21
Task 1.8 Configure NAT and Policies on the Firewall . . . . . . . . . . . . . . . . . . . . . . . . . . . . . . . . . . . . . . . . . . . . 22
Example 2 – HA Pair for Internal DNS and DHCP . . . . . . . . . . . . . . . . . . . . . . . . . . . . . . . . . . . . . . . . . . . . . . . . . . . . 23
Task 2.1 Cable Devices to the Network and Turn On Power . . . . . . . . . . . . . . . . . . . . . . . . . . . . . . . . . . . . . . 24
Task 2.2 Specify Initial Network Settings . . . . . . . . . . . . . . . . . . . . . . . . . . . . . . . . . . . . . . . . . . . . . . . . . . . . 24
Task 2.3 Specify Device Settings . . . . . . . . . . . . . . . . . . . . . . . . . . . . . . . . . . . . . . . . . . . . . . . . . . . . . . . . . . . 25
Task 2.4 Enable Zone Transfers on the Legacy Name Server . . . . . . . . . . . . . . . . . . . . . . . . . . . . . . . . . . . . . 27
Task 2.5 Import Zone Data . . . . . . . . . . . . . . . . . . . . . . . . . . . . . . . . . . . . . . . . . . . . . . . . . . . . . . . . . . . . . . . . 27
Task 2.6 Define Networks, Reverse-Mapping Zones, DHCP Ranges, and Infoblox Hosts . . . . . . . . . . . . . . . 29
Task 2.7 Define Multiple Forwarders . . . . . . . . . . . . . . . . . . . . . . . . . . . . . . . . . . . . . . . . . . . . . . . . . . . . . . . . 32
Task 2.8 Enable Recursion on External DNS Servers. . . . . . . . . . . . . . . . . . . . . . . . . . . . . . . . . . . . . . . . . . . . 32
Task 2.9 Modify the Firewall and Router Configurations. . . . . . . . . . . . . . . . . . . . . . . . . . . . . . . . . . . . . . . . . 33
Task 2.10 Enable DHCP and Switch Service to the Infoblox Device . . . . . . . . . . . . . . . . . . . . . . . . . . . . . . . . 34
Task 2.11 Manage and Monitor . . . . . . . . . . . . . . . . . . . . . . . . . . . . . . . . . . . . . . . . . . . . . . . . . . . . . . . . . . . . 35
Joining an ID Grid . . . . . . . . . . . . . . . . . . . . . . . . . . . . . . . . . . . . . . . . . . . . . . . . . . . . . . . . . . . . .37
Infoblox User Guide
For the Infoblox-550 Appliance

Contents
2 Infoblox User Guide
Copyright Statements
© 2006, Infoblox Inc.— All rights reserved.
The contents of this document may not be copied or duplicated in any form, in whole or in part, without the prior
written permission of Infoblox, Inc.
The information in this document is subject to change without notice. Infoblox, Inc. shall not be liable for any
damages resulting from technical errors or omissions which may be present in this document, or from use of this
document.
This document is an unpublished work protected by the United States copyright laws and is proprietary to Infoblox,
Inc. Disclosure, copying, reproduction, merger, translation, modification, enhancement, or use of this document by
anyone other than authorized employees, authorized users, or licensees of Infoblox, Inc. without the prior written
consent of Infoblox, Inc. is prohibited.
For Open Source Copyright information, see Open Source Copyright and License Statements in the Online Help.
Trademark Statements
Infoblox, the Infoblox logo, and DNSone are trademarks or registered trademarks of Infoblox Inc.
All other trademarked names used herein are the properties of their respective owners and are used for
identification purposes only.
Warranty Information
Your purchase includes a 90-day software warranty and a one year limited warranty on the Infoblox appliance, plus
an Infoblox Warranty Support Plan and Technical Support. For more information about Infoblox Warranty
information, refer to Infoblox website, or contact Infoblox Technical Support.
Company Information
Infoblox is located at:
4750 Patrick Henry Drive
Santa Clara, CA 95054-1851, USA
Web: www.infoblox.com
www.infoblox.com/support
Phone: 408.625.4200
Toll Free: 888.463.6259
Outside North America: +1.408.716.4300
Fax: 408.625.4201

For the Infoblox-550 Appliance 3
Introduction
This guide provides an overview of the Infoblox-550 network identity appliance with Infoblox NIOS (Network Identity
Operating System) version 4.0 or later, and it explains how to install and configure it. Two configuration examples
are presented. The first example describes how to deploy a single device as an independent external DNS server.
The second describes how to deploy two devices as an HA (high availability) pair for internal DNS and DHCP
services.
Figure 1 Tasks in This Guide
Product Overview
The Infoblox-550 appliance provides a powerful, cost-effective solution for small and medium-sized businesses
that need integrated DNS (Domain Name System) and DHCP (Dynamic Host Configuration Protocol) services. In
addition to DNS and DHCP services, it also includes RADIUS (Remote Authentication Dial-In User Service) proxy and
TFTP (Trivial File Transfer Protocol) network services.
You can configure and manage the Infoblox-55o appliance through an easy-to-use GUI (graphical user interface)
that works seamlessly in both Windows and Linux environments using standard web browsers. This appliance
provides DNS and DHCP services for up to 500 users, 1000 host devices, and 5000 records while serving 10,000
DNS queries per second.
The Infoblox-550 appliance is RoHS and WEEE compliant, and its hardware meets the mechanical requirements for
FIPS 140-2 compliance.
12
34
Infoblox >
Learn about the Infoblox-550 device.
“Introduction” on p. 3
Install the device.
“Installing the Device” on p. 9
Equipment
Rack
Power
Source
Management
System
To
Network
Access the device.Configure the device.
Infoblox GUI
Infoblox CLI
“Accessing the Device”
on p. 11
“Configuration Examples” on p. 15

Introduction
4 Infoblox User Guide
Infoblox-550 Network Identity Appliance
The Infoblox-550 appliance is a 1-U platform that you can easily mount in a standard equipment rack using the
mounting brackets and bolts shipped with the device. The front panel components include the LCD (liquid crystal
display) panel and navigation buttons, communication ports, and indicator lights. The back panel components
include the power connector and switch, fan and air vent, and the model and serial number label.
Figure 2 shows the components on the front and back of the Infoblox-550, and Table 1 provides descriptions.
Figure 2 Infoblox-550 Appliance, Front and Back Views
HA Port
Console Port
Drive Indicator
Power Indicator
LAN1 Port
LAN2 Port
Navigation
Buttons
USB Port
LCD Panel
Power Outlet
On/Off SwitchFanAir VentModel Number
Serial Number
MGMT Port

Infoblox-550 Network Identity Appliance
For the Infoblox-550 Appliance 5
Table 1 Infoblox-550 Component Descriptions
Component Description
LCD Panel An LCD screen that displays HA (high availability) status, network settings, software
version number, hardware serial number, and software licenses. Additionally, you can
view and configure the IP address, netmask, and gateway for the LAN1 port.
Navigation
Buttons
Buttons that allow you to enter the IP address, subnet mask, and gateway of the LAN1
port through the LCD. Use the Up and Down arrow buttons to specify numbers and the
Left and Right buttons to navigate across digits. You must specify whether to save input
(OK) or discard it (CNCL). Selecting CNCL at any time returns you to the previous entry.
Entering OK on the third screen returns you to the system status screen.
USB Port Reserved for future use.
Console Port A male DB-9 serial port for a console connection to change basic configuration settings
and view basic system functions through the CLI (command line interface). Use the
serial cable and connection adapters that ship with the device to make a console
connection to this port.
Drive Indicator An LED that flashes green to indicate when the hard drive processes data.
Power Indicator An LED that glows green to indicate when there is power to the device.
MGMT Port A 10/100/1000-Mbps fast ethernet port that you can use for device management or
DNS service. You can enable the MGMT port and define its use through the GUI.
HA Port A 10/100/1000-Mbps fast ethernet port through which the active node in an HA (high
availability) pair connects to the network using a VIP (virtual IP) address. HA pair nodes
also use their HA ports for VRRP (Virtual Router Redundancy Protocol) advertisements.
LAN1 Port A 10/100/1000-Mbps fast ethernet port that connects a single device to the network. If
the MGMT port is not in use, a single device uses the LAN1 port for management traffic.
The passive node in an HA pair uses this port to synchronize the database with the
active node.
LAN2 Port Reserved for future use.
Model Number An identifier of the hardware model type, software type, and power cord type.
Serial Number The serial number of the device. Use it to register the device to obtain software upgrades
and technical support services.
Air Vent An air vent that allows warm air to flow out of the device. Do not obstruct.
Fan A fan to help maintain optimum operating temperature. Do not obstruct.
Power Outlet A three-prong power outlet for connecting the device to a standard AC power source.
On/Off Switch A power switch to turn the device on and off.

Introduction
6 Infoblox User Guide
Connector Pin Assignments
The Infoblox-550 appliance has three types of ports on its front panel:
•USB port (reserved for future use)
•Male DB-9 console port
•RJ-45 10Base-T/100Base-T/1000Base-T ethernet ports
Figure 3 shows the DB-9 and RJ-45 connector pin assignments. The DB-9 pin assignments follow the EIA232
standard. To make a serial connection from your management system to the console port, you can use the RJ-45
rollover cable and two female RJ-45-to-female DB-9 adapters that ship with the device, or a female DB-9-to-female
DB-9 null modem cable. The RJ-45 pin assignments follow IEEE 802.3 specifications. All Infoblox ethernet ports are
auto-sensing and automatically adjust to standard straight-through and cross-over ethernet cables.
10Base-T ethernet and 100Base-T fast ethernet use the same two pairs of wires. The twisted pair of wires
connecting to pins 1 and 2 transmit data, and the twisted pair connecting to pins 3 and 6 receive data. For
1000Base-T connections, all four twisted-pair wires are used for bidirectional traffic.
Figure 3 Connector Pin Assignments
21 345
6789
21346578
78653421
DB-9 Connector Pin Assignments
RJ-45 Connector Pin Assignments
Pin 10Base-T
100Base-T
Signal
1000Base-T
Signal T568A
Straight-Through
Wire Color
T568B
Straight-Through
Wire Color
1Transmit+ BI_DA+ White/Green White/Orange
2Transmit- BI_DA- Green Orange
3Receive+ BI_DB+ White/Orange White/Green
4 (not used) BI_DC+ Blue Blue
5 (not used) BI_DC- White/Blue White/Blue
6Receive- BI_DB- Orange Green
7 (not used) BI_DD+ White/Brown White/Brown
8 (not used) BI_DD- Brown Brown
Male DB-9 Console Port
RJ-45 Ethernet Ports
Pin Signal Direction
1 (not used)
2Receive Input
3Transmit Output
4DTEReady Output
5 Ground —
6 DCE Ready Input
7 RTS (Request to Send) Output
8 CTS (Clear to Send) Input
9 (not used)
Legend: BI_D = bidirectional; A, B, C, D = wire pairings
(Looking into the console
port on an Infoblox device)
(Looking into RJ-45
ethernet ports on an
Infoblox device)

System, Environmental, and Power Specifications
For the Infoblox-550 Appliance 7
Ethernet Port LEDs
To see the link activity and connection speed of an ethernet port, you can look at its Link/Act and Speed LEDs. The
status the LEDs convey through their color and illumination (steady glow or blinking) are presented in Figure 4.
Figure 4 LEDs
System, Environmental, and Power Specifications
Understanding the full range of specifications for the Infoblox-550 appliance is critical for maintaining and
protecting the hardware from misuse. There are three types of specifications. System specifications describe the
physical characteristics of the device. Environmental specifications describe the temperature and moisture limits
the device can withstand. Power specifications describe the electrical range within which the device circuitry can
operate.
System Specifications
•Form Factor: 1-U rack-mountable device
•Dimensions: 1.75” H x 17.25” W x 15” D (4.45 cm H x 43.82 cm W x 38.1 cm)
•Weight: Approximately 13 pounds
•Ethernet Ports: MGMT, HA, LAN1, LAN2 – auto-sensing 10Base-T/100Base-T/1000Base-T
•Serial Port: DB-9 (9600/8n1, Xon/Xoff)
•LCD Panel: LCD (liquid crystal display) with input buttons
Environmental Specifications
•Operating Temperature: 41 to 95 degrees F (5 to 35 degrees C)
•Storage Temperature: -40 to 122 degrees F (-40 to 50 degrees C)
•Relative Humidity: 5% to 95%, relative humidity (non-condensing)
SpeedLink/Act SpeedLink/Act
SpeedLink/Act SpeedLink/Act
Label Color Port Status
Link/Act Steady Green Link is up but inactive
Blinking Green Link is up and active
Dark Link is down
Speed Steady Amber 1000 Mbps
Steady Green 100 Mbps
Dark 10 Mbps
MGMT
LAN1
HA
LAN2

Introduction
8 Infoblox User Guide
Electrical Power Specifications
•Input Voltage: 100 – 240 VAC switchable, 47 – 63 HZ, 3A
•Output Power: 250 watts
•Power plug and cable specifications by region:
Region Plug Type Cable Type Maximum
Power
Rating
Maximum
Temperature
Rating
North America NEMA5-15P
3-prong male plug
VCTF 3C 18 AWG 7A, 125 V 75° C
Japan NEMA5-15P
3-prong male plug
VCFI 3G 12A, 125 V 60° C
Europe CEE7 standard VII
2-prong male plug
H05VV-F 6A, 250 V 70° C
United Kingdom LP-60L
3-prong male plug
with fuse
H05VV-F 10A, 250 V 70° C

For the Infoblox-550 Appliance 9
Installing the Device
Follow these instructions to rack mount the device, connect it to a power source, and cable it to a network. However,
before proceeding review the Safety Guide and follow the necessary precautions.
Rack Mounting
The device mounts into a standard 19” (48 cm) equipment rack. In addition to the screws and brackets that ship
with the product, you also need a screwdriver with a cross-headed tip.
Attach the brackets to the device, and mount it to an equipment rack.
1. Remove the four screws that ship attached to the left and right sides of the device—two screws per side.
2. Remove the pair of brackets from the accessory kit that ships with the device.
3. Position one bracket so that the two holes in the bracket align with two of the holes on one side of the device.
Note: There are five evenly spaced holes on each side of the device. You can secure the brackets to any two
adjacent holes so that you can mount the device more or less deeply in the rack.
4. Secure the bracket to the device with two of the screws that you removed previously.
5. Secure the second bracket in the same position on the other side of the device.
6. Using the screws from the accessory kit, attach the brackets to the equipment rack.
Powering the Device
Use the power cable that ships with the Infoblox-550 appliance to connect it to a power source.
1. Make sure the power switch on the device is turned off.
2. Connect a power cable between the power connector on the back of the appliance and a properly grounded and
rated power circuit that meets the provisions of the current edition of the National Electrical Code, or other
wiring rules that apply to your location. Make sure the outlet is near the appliance and is easily accessible.
3. Turn on the power switch.

Installing the Device
10 Infoblox User Guide
Cabling the Device to a Network
Use the ethernet cables shipped with the product to connect the device to the network.
1. Connect an ethernet cable from the LAN1 port on the device to your network switch or router.
2. If you want to connect your device for HA (high availability), connect the HA ports on both devices to a switch
on your network. The VIP (Virtual IP), LAN1, and HA port addresses must be on the same subnet and must be
unique for that subnet.
Figure 5 Cabling a Single Device and an HA Pair to a Network
Note: By default, an Infoblox device automatically negotiates the optimal connection speed and transmission
type (full or half duplex) on the physical links between its LAN1, HA, and MGMT ports and the ethernet ports
on a connecting switch. If the two devices fail to auto-negotiate the optimal settings, see the
Infoblox
Administrator Guide
for steps you can take to resolve the problem.
3. HA pair: To ensure that VRRP (Virtual Router Redundancy Protocol) works properly, configure the following
settings on the connecting switch:
—Portfast: enable
—Trunking: disable
—Port list: disable
—Port channeling: disable
4. Use the Infoblox GUI to access the Infoblox device from a management system. Through the GUI, you can set
up and administer the device. For management system requirements and access instructions, see Accessing
the Device on page 11.
Infoblox-550
Appliance Switch or
Router Management
System
When cabling a single Infoblox-550 appliance to the
network, connect an ethernet cable from the LAN1 port
on the device to a switch or router.
When cabling a pair of devices to the network for high
availability, connect ethernet cables from the LAN1 and
HA ports on each device to a switch.
Infoblox-550 Appliance
LCD
Navigation Buttons
MGMT HA
LAN1
Switch
LAN2
Ethernet
Ports

For the Infoblox-550 Appliance 11
Accessing the Device
The management system is the computer from which you configure and monitor the Infoblox device. You can access
the device from the management system remotely across an ethernet network or directly through a serial cable.
After completing the steps in Cabling the Device to a Network on page 10, you can make an HTTPS connection to the
device and access the Infoblox GUI through JWS (Java Web Start) or make an SSHv2 connection and access the CLI
through an SSHv2 client. You can also access the CLI by connecting a serial cable directly from the console port of
a management system to the console port on the device, and then using a terminal emulation program.
The management system must meet the following requirements to operate an Infoblox device.
Table 2 Software and Hardware Requirements for the Management System
Management System Software Requirements Management System Hardware Requirements
GUI ACCESS
•Microsoft Internet Explorer®6.0 or higher on
Microsoft Windows NT®4.0, Microsoft Windows®
2000, Microsoft Windows XP®
or
•Mozilla 1.7 or higher on Linux or variants of UNIX
(Irix, Solaris, HP-UX, AIX)
and
•Sun® Java Runtime Environment (JRE) versions
1.5.0_06 or later
•JWS application, which is automatically installed
with JRE 1.5.0_06 or later
CLI ACCESS
•Secure Socket Shell (SSH) client that supports
SSHv2
•Terminal emulation program, such as minicom or
Hilgraeve Hyperterminal®.
•Minimum System: 500 MHz CPU with 256 MB RAM
available to the product GUI, and 56 Kbps
connectivity to an Infoblox device
•Recommended System: 1 GHz (or higher) CPU with
512 MB RAM available for the product GUI, and
network connectivity to an Infoblox device
•Monitor Resolution: 1024 x 768 (minimum) to 1600
x 1200 (maximum)

Accessing the Device
12 Infoblox User Guide
Infoblox GUI
You can view data and configuration settings and make configuration changes through the Infoblox GUI. When an
Infoblox device functions as an independent device, you launch the ID Device Manager to access the GUI. When the
device is in an ID grid, you log in to the grid master and launch the ID Grid Manager.
Figure 6 Infoblox GUI Overview
When you make an HTTPS connection to the device and access the Infoblox GUI through JWS, the Java installation
typically associates JNLP file types with the JWS application automatically, although not in all UNIX environments.
If the browser does not automatically associate a JNLP file with the JWS application, when you click Launch ID Grid
Manager or Launch ID Device Manager, you receive a prompt. Internet Explorer running on a Windows system and
Mozilla running on a Linux system provide different prompts:
Internet Explorer prompts you to save the JNLP file. Click Cancel, and make the file association as follows:
1. Click Start -> Control Panel -> Folder Options -> File Types -> New.
2. In the File Extension field, type JNLP, and then click Advanced.
3. From the Associated File Type drop-down list, choose JNLP File, and then click OK.
4. To close the Folder Options dialog box, click Close.
5. You can now continue logging in to the device.
Mozilla prompts you to save the JNLP file or choose an application to open it.
1. Select the Open with button, and then choose Other from the drop-down list.
2. Navigate to the Java directory—typically in a standard system directory like /usr/java/ on Linux systems.
3. Open the jre1.5.0_06 (or later) subdirectory, and select the JWS application, which is usually named javaws.
Although the exact path and directory names can differ, it might be in a directory named javaws or bin.
Editor
Enter and edit informati
o
Properties Viewer
View object properties.
Panels
View and select
items to edit.
Perspectives
Tool Bar
Menu
Detach and move
panels, viewers and
editors to customize
the GUI layout.

Infoblox CLI
For the Infoblox-550 Appliance 13
Infoblox CLI
The Infoblox CLI allows you to configure and monitor the device using a small set of Infoblox commands. There are
some tasks, such as resetting the device, that you can only do through the CLI. You can access the Infoblox CLI
through a direct console connection from your management system to the Infoblox device. You can also enable
remote console access—that is, SSHv2 (Secure Shell version 2) access—through the GUI or CLI, and then access the
CLI from a remote location using an SSHv2 client.
Using the Console Port
The Infoblox device has a male DB-9 console port on its front panel. You can log in to the device through this port
to access the Infoblox CLI.
1. Connect a console cable from the console port on your management system to the console port on the Infoblox
device.
2. Using a serial terminal emulation program such as Hilgraeve Hyperterminal®(provided with Windows®
operating systems), launch a session. The connection settings are:
—Bits per second: 9600
—Data bits: 8
—Parity: None
—Stop bits: 1
—Flow control: Xon/Xoff
3. Log in using the default user name and password admin and infoblox. User names and passwords are
case-sensitive.
Using an SSHv2 Client
In addition to making a direct serial connection to the Infoblox device through its console port, you can also access
the Infoblox CLI remotely across a network connection by using an SSHv2 (Secure Shell version 2) client. By default,
remote console access (SSHv2 access) is disabled. To access the Infoblox CLI using SSHv2, perform the following
steps:
1. Make either an HTTPS or console connection to the Infoblox device, and then log in.
2. To enable remote console access through the GUI:
From the ID Grid perspective, click id_grid -> Edit -> Grid Properties -> Security, select Enable remote
console access, and then click the Save icon.
From the ID Device perspective, click hostname -> Edit -> ID Device Properties -> Security, select Enable
remote console access, and then click the Save icon.
To enable remote console access through the CLI:
Infoblox > set remote_console
Enable remote console access (grid-level)? (y or n): y
Confirm the setting.
3. On the management system, open a remote console connection using an SSHv2 client.
4. In a shell window (or terminal window), log in through SSHv2 using an account with superuser privileges. Enter
5. Optionally, you can launch a graphical SSHv2 client and enter the information into the appropriate fields.

Accessing the Device
14 Infoblox User Guide
Using CLI Help
You can display a list of available CLI commands by typing help at the command prompt. For example:
> help
exit exit command interpreter
help display help
ping send ICMP ECHO
reboot reboot device
reset reset system settings
set set current system settings
show show current system settings
shutdown shut down the device
traceroute route path diagnostics
dig perform a DNS lookup and print the results
To view an in-depth explanation of a CLI command and its syntax, type help command after the command
prompt. For example:
> help ping
Synopsis:
ping [ hostname | IP address ] <numerical>
Description:
Send 5 sequential ICMP ECHO requests to a remote host and display the
results. Use optional <numerical> to avoid DNS lookups.
The two main groups of Infoblox CLI commands are set and show. To see the complete list of the set commands,
enter help set after the command prompt. Likewise, to see a complete list of the show commands, enter help
show.
The following are some CLI commands that you might find particularly useful:
reset all
Resets the system to factory defaults.
set network
Sets the system network settings.
show interface
Displays network interface details.
show network
Displays current network settings.

For the Infoblox-550 Appliance 15
Configuration Examples
This chapter explains two possible deployment scenarios as examples that you can refer to when setting up your
Infoblox-550 appliance:
•Example 1 – Single Infoblox-550 Appliance for External DNS on page 15
•Example 2 – HA Pair for Internal DNS and DHCP on page 23
To perform the configuration examples in this chapter, you need to use the Infoblox device LCD or console, and the
Infoblox GUI and CLI. For management system requirements and an introduction to the Infoblox GUI and CLI, see
Accessing the Device on page 11.
Example 1 – Single Infoblox-550 Appliance for External DNS
In this example, you configure the Infoblox-550 appliance as the external primary DNS server for corp100.com. Its
FQDN (fully-qualified domain name) is ns1.corp100.com. The interface IP address of the LAN1 port is 10.1.5.2/24.
Because this is a private IP address, you must also configure the firewall to perform NAT (network address
translation), mapping the public IP address 1.1.1.2 to 10.1.5.2. Using its public IP address, ns1 can communicate
with devices on the public network.
The FQDN and IP address of the external secondary DNS server are ns2.corp100.com and 2.2.2.2. The ISP hosts this
server. The primary and secondary servers answer queries for the following public-facing servers in the DMZ:
•www.corp100.com
•mail.corp100.com
•ftp.corp100.com
When you create the corp100.com zone on the Infoblox-550 appliance, you import zone data from the legacy DNS
server at 10.1.5.3.
Figure 7 Example 1 Network Diagram
Infoblox Device
External Primary
DNS Server
ns1; 10.1.5.2
A
ll host names shown here belong
to the corp100.com domain.
The Infoblox device is the
external primary DNS server for
the corp100.com domain. It
answers queries from the Internet
for the three public-facing servers
in the DMZ network:
• www.corp100.com
• mail.corp100.com
• ftp.corp100.com
Switch
ISP
To Internal
Network
www
10.1.5.5
mail
10.1.5.6
ftp
10.1.5.7
DMZ Network
10.1.5.0/24
Internet
NTP Server
3.3.3.3
The Infoblox device is in the
Pacific time zone (UMT – 8:00).
NAT on Firewall
1.1.1.2 → 10.1.5.2
1.1.1.5 → 10.1.5.5
1.1.1.6 → 10.1.5.6
1.1.1.7 → 10.1.5.7
ethernet1
1.1.1.1/24
ethernet2
10.1.5.1/24
Firewall
External Secondary DNS Server
ns2; 2.2.2.2
Legacy Primary DNS Server
ns1; 10.1.5.3
(Replaced by the Infoblox device)

Configuration Examples
16 Infoblox User Guide
Task 1.1 Cable the Device to the Network and Turn On Power
Connect an ethernet cable from the LAN1 port of the Infoblox-550 appliance to a switch in the DMZ network and turn
on the power. See Installing the Device on page 9.
Task 1.2 Specify Initial Network Settings
Before you can configure the Infoblox-550 appliance through the GUI, you must be able to make a network
connection to it. The default network settings of the LAN1 port are 192.168.1.2/24 with a gateway at 192.168.1.1
(the HA and MGMT ports do not have default network settings). To change these settings to suit your network, use
either the LCD or the console port. In this example, you change the IP address/netmask of the LAN1 port to
10.1.5.2/24, and the gateway to 10.1.5.1.
LCD
The Infoblox-550 appliance has an LCD and navigation buttons on its front panel. At startup, the Infoblox logo
appears in the LCD on the front panel of the device. Then the LCD scrolls repeatedly through a series of display
screens.
1. To change the network settings from the default, press one of the navigation buttons.
The LCD immediately goes into input mode, in which you can enter the IP address, netmask, and gateway for
the LAN1 port.
2. Use the navigation buttons to enter the following information:
—IP Address: 10.1.5.2
—Netmask: 255.255.255.0
—Gateway: 10.1.5.1
Note: To learn how to disable LCD input functionality, see the Infoblox Administrator Guide.
Console Port
The Infoblox-550 appliance has a male DB-9 console port on the front panel. You can log in to the device through
this port and specify initial network settings using the Infoblox CLI.
1. Connect a console cable from the console port of the management system to the console port of the
Infoblox-550 appliance. For more information, see Using the Console Port on page 13.
2. Access the Infoblox CLI. For more information, see Infoblox CLI on page 13.
3. To change the network settings from the default, enter the set network command. Then enter information
as prompted to change the IP address, netmask, and gateway for the LAN1 port.
Infoblox > set network
NOTICE: All HA configuration is performed from the GUI. This interface is used only
to configure a standalone node or to join an ID grid.
Enter IP address: 10.1.5.2
Enter netmask: [Default: 255.255.255.0]:
Enter gateway address [Default: 10.1.5.1]:
Become grid member? (y or n): n
After you confirm your network settings, the device automatically restarts.

Example 1 – Single Infoblox-550 Appliance for External DNS
For the Infoblox-550 Appliance 17
Task 1.3 Specify Device Settings
When you make the initial HTTPS connection to the Infoblox-550 appliance, you see the Appliance Startup Wizard,
which guides you through the basic deployment of the device on your network. Use the wizard to enter the following
information:
•Deployment: single independent device (standalone node)
•Host name: ns1.corp100.com
•Password: SnD34n534
•NTP (Network Time Protocol) server: 3.3.3.3; time zone: (UMT – 8:00 Pacific Time (US and Canada), Tijuana
Note: For more information about using an NTP server, refer to the Infoblox Administrator Guide, or use the
integrated online Help and perform a search for “NTP”.
1. Open a browser window and enter https://10.1.5.2.
2. Accept the certificate when prompted.
Several certificate warnings appear during the login process. This is normal because the preloaded certificate
is self-signed (and, therefore, is not in the trusted certificate stores in your browser, Java application, and Java
Web Start application) and has the hostname www.infoblox.com, which does not match the destination IP
address you entered in step 1. To stop the warning messages from occurring each time you log in to the GUI,
you can generate a new self-signed certificate or import a third-party certificate with a common name that
matches the FQDN (fully-qualified domain name) of the device. This is a very simple process. For information
about certificates, see the Infoblox Administrator Guide.
3. Click LAUNCH ID DEVICE MANAGER.
4. If the browser prompts you for an application to use, see Infoblox GUI on page 12.
5. Log in using the default user name and password admin and infoblox.
Note: User names and passwords are case-sensitive.
6. The Infoblox Appliance Startup Wizard opens with a splash screen that provides basic information about the
wizard, and then displays license agreement information. Beginning on the third screen, enter the following:
The last screen of the wizard states that the changed settings require the application to restart. When you
click Finish, the Infoblox GUI application restarts.
Wizard Screen Enter or Select
Deployment type Standalone
Node type Standalone appliance
Node information Host name: ns1.corp100.com
Default password Change admin’s password: (select), SnD34n534
Time settings Enable NTP: (select)
NTP Server: 3.3.3.3 (click Add)
Time zone: (UMT – 8:00 Pacific Time (US and Canada), Tijuana

Configuration Examples
18 Infoblox User Guide
7. Log back in to the device. When you log in the second time, you access the Infoblox GUI application. For system
requirements to use the GUI, see Table 2 on page 11.
Task 1.4 Define a NAT Address
Because the firewall translates the public IP address 1.1.1.2 to the interface IP address 10.1.5.2, all DNS queries
originating outside the firewall use 1.1.1.2 (not 10.1.5.2) to reach the Infoblox device. Accordingly, you must
configure the device to indicate to other external DNS servers that its address is 1.1.1.2.
1. From the ID Device perspective, click ns1.corp100.com -> Edit -> ID Device Properties.
2. In the ID Device editor, click NAT and enter the following:
—Enable NAT compatibility: Select check box.
—Group: None
—NAT (V)IP Address: 1.1.1.2
3. Click the Save icon.
The glue record is an A record for a name server. The device automatically generates the A record for
ns1.corp100.com using either the interface address or NAT address (if configured). To verify that the A record uses
the NAT address (1.1.1.2) instead of the interface address (10.1.5.2):
1. Click DNS to open the DNS perspective, and then click DNS Members -> +(for Infoblox) -> ns1.corp100.com ->
Edit -> Member DNS Properties.
2. In the Member DNS Properties editor, click General.
3. In the table labelled Member address for glue record inside view, select the default view and click Modify.
4. In the Select Member Address dialog box, select NAT IP address.
5. Click the Save and Restart Services icons.
Task 1.5 Enable Zone Transfers on the Legacy Name Server
To allow the device to import zone data from the legacy server at 10.1.5.3, you must configure the legacy server to
allow zone transfers to the device at 10.1.5.2.
Legacy BIND Server
1. Open the named.conf file using a text editor and change the allow-transfer statement as shown below:
For All Zones — To set the allow-transfer statement as a global statement in the named.conf file for all zones:
options {
zone-statistics yes;
directory "/var/named/named_conf";
version "";
recursion yes;
listen-on { 127.0.0.1; 10.1.5.3; };
…
allow-transfer { 10.1.5.2; };
transfer-format many-answers;
};

Example 1 – Single Infoblox-550 Appliance for External DNS
For the Infoblox-550 Appliance 19
For a Single Zone — To set the allow-transfer statement in the named.conf file for the corp100.com zone:
zone "corp100.com" in {
type master;
allow-transfer { 10.1.5.2;};
notify yes;
};
2. After editing the named.conf file, restart DNS service for the change to take effect.
Legacy Windows 2000/2003 Server
1. Click Start -> All Programs -> Administrative Tools -> DNS.
2. Click +(for ns1) -> +(for Forward Lookup Zones) -> corp100.com.
3. Right-click corp100.com, and then select Properties -> Zone Transfers.
4. On the Zone Transfers page in the corp100.com Properties dialog box, enter the following:
—Allow zone transfers: Select check box.
—Only to the following servers: Select.
—IP address: Enter 10.1.5.2, and then click Add.
5. To save the configuration change and close the corp100.com Properties dialog box, click OK.
Task 1.6 Import Zone Data
You can import zone data from a legacy server or manually enter it. When you import both forward- and
reverse-mapping zone data, the Infoblox device automatically creates Infoblox host records if corresponding A and
PTR records are present. You can then modify the host records to add MAC addresses. However, if you only import
forward-mapping zone data, the Infoblox device cannot create host records from just the A records. In that case,
because you cannot later convert A records to host records, it is more efficient to create the corp100.com zone, and
define host records manually.
Infoblox host records are data models that represent IP devices within the Infoblox semantic database. The Infoblox
device uses a host object to define A, PTR, and CNAME resource records in a single object as well as a DHCP fixed
address if you include a MAC address in the host object definition. The host object prevents costly errors because
you only maintain a single object for multiple DNS records and a DHCP fixed address. Therefore, it is advantageous
to use host records instead of separate A, PTR, and CNAME records.
Note: If you only have forward-mapping zones on your legacy servers and you want to add reverse-mapping zones
and automatically convert A records to host records in the imported forward-mapping zones and create reverse host
records in corresponding reverse-mapping zones, create the reverse-mapping zones on the Infoblox device and
then import the forward-mapping zones data. The Infoblox device automatically converts the imported A records to
host records in the forward-mapping zones and creates reverse host records in the reverse-mapping zones.
You also have the option of using the Data Import Wizard for loading DNS and DHCP configurations and data. For
large data sets, this option is an efficient approach. To download the Data Import Wizard, visit
www.infoblox.com/support, log in with your support account, and then click the Data Import Wizard hyperlink.
Table of contents
Other Infoblox Firewall manuals
Popular Firewall manuals by other brands
Symantec
Symantec 10521146 - Network Security 7120 Administration guide
SonicWALL
SonicWALL ESA 5000 Getting started guide
McAfee
McAfee ATD-3000 Hardware guide
Fortinet
Fortinet FortiGate FortiGate-500 quick start guide
Draytek
Draytek Vigor2860 Series quick start guide
Symantec
Symantec ASG-S400-20 Product installation guide
Fortinet
Fortinet FortiBridge 1000 Configuration

FIBER SENSYS
FIBER SENSYS Fiber Defender FD348R user manual
D-Link
D-Link DFL-300 - Security Appliance Quick install guide
D-Link
D-Link DFL-870 Quick installation guide

Dell
Dell SonicWALL Installation and implementation
NETGEAR
NETGEAR FVG318 - ProSafe 802.11g Wireless VPN Firewall 8... Reference manual
