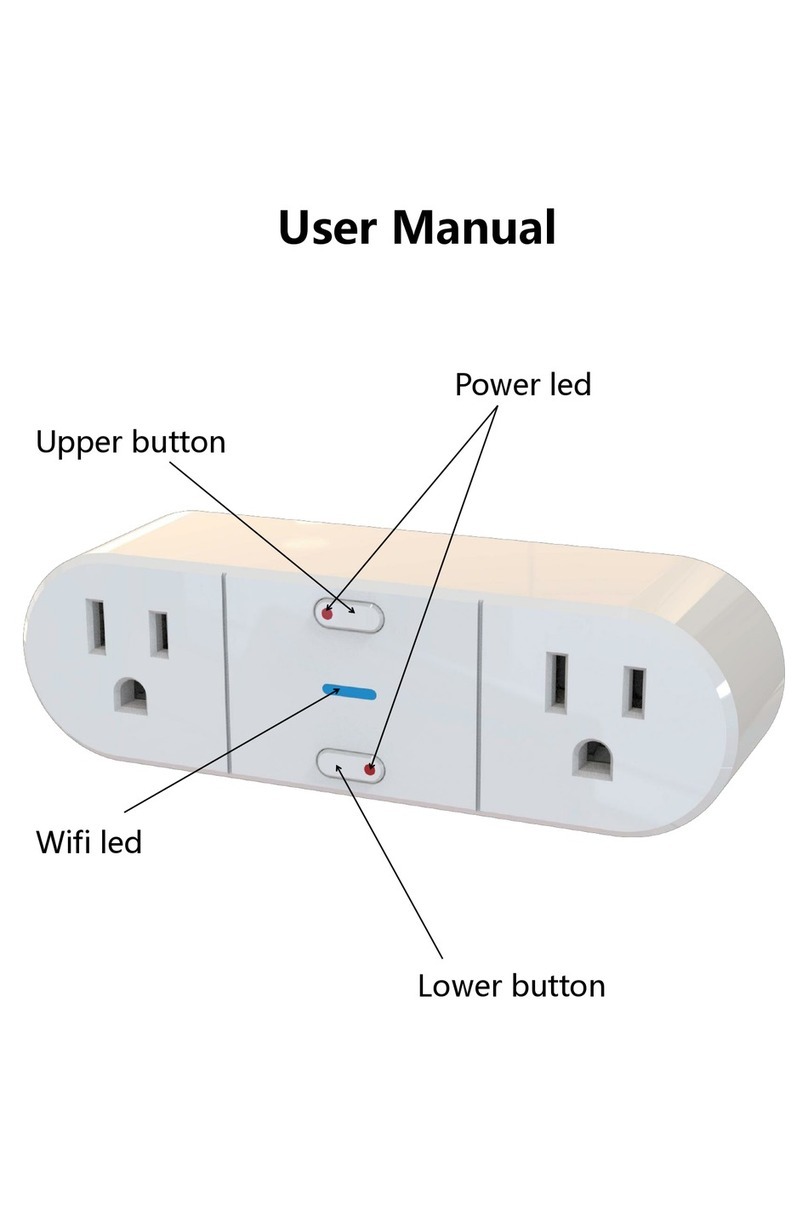
Innogy WDS User manual

DE Tür-/Fenstersensor Seite 2
EN Door/window sensor Page 10
FR Capteur de porte/fenêtre Page 18
NL Deur-/raamsensor Pagina 26

2
DE
Herzlichen Glückwunsch!
Mit dem innogy Tür-/Fenstersensor haben Sie ein bewähr-
tes Gerät für Ihr SmartHome erworben. Anhand dieser
Anleitung können Sie den Sensor schnell und leicht mon-
tieren und in Betrieb nehmen.
Noch schneller geht‘s allerdings über die innogy
SmartHome App, erhältlich per Download im App Store
von Apple oder im Google Play Store.
Besitzen Sie bereits die App, klicken Sie auf dem
Homescreen einfach auf das Plus-Zeichen oben
rechts und warten, bis das eingeschaltete Gerät
in der Suche auftaucht. Sie können aber auch unter
dem Menüpunkt Geräte das Raumthermostat
manuell einbinden – animierte Grafiken zu Montage
und Einbindung unterstützen Sie dabei.
Inhalt
Gefahrenhinweise 4
Funktion 4
Montieren und Einbinden 6
Funktionstest 6
Zurücksetzen in den Auslieferungszustand 7
Technische Daten 8
Entsorgungshinweis 8
Allgemeiner Hinweis 9

3
DE
Wir sind für Sie da!
Wenn Sie bei der Installation weitere Informationen oder
Unterstützung benötigen, haben wir für Sie die passende
Hilfe:
Online-Hilfe
https:/service.startsmarthome.de
Kostenfreie Hotline
T 0800 1234060
Allgemeine Fragen rund um innogy SmartHome
(Mo– Fr 8–20 Uhr · Sa 8–14 Uhr)
SmartHome Community
https://innogy.com/community
Facebook
https://facebook.com/innogysmarthome
Helfer vor Ort: innogy friends von mila
Erfahrene und geprüfte SmartHome User kom-
men zu Ihnen und helfen bei Montage und
Einrichten Ihre SmartHome
Weitere Infos: https://innogy.mila.com

4
Gefahrenhinweise
Bei Sach- oder Personenschäden, die durch unsachge-
mäße Handhabung oder das Nichtbeachten der Sicher-
heitshinweise verursacht werden, übernehmen wir
keine Haftung. In solchen Fällen erlischt jeder Gewähr-
leistungsanspruch! Für Folgeschäden übernehmen wir
keine Haftung!
Öffnen Sie das Gerät nicht. Es enthält keine durch den
Anwender zu wartenden Teile. Im Fehlerfall nehmen
Sie bitte Kontakt mit unserem Service auf.
Das Gerät nicht verwenden, wenn es von außen erkenn-
bare Schäden z. B. am Gehäuse, an Bedienelementen
oder an den Anschlussbuchsen bzw. eine Funktionsstö-
rung aufweist. Im Zweifelsfall das Gerät von unserem
Service prüfen lassen.
Aus Sicherheits- und Zulassungsgründen (CE) ist das
eigenmächtige Umbauen und/oder Verändern des Pro-
dukts nicht gestattet.
Betreiben Sie das Gerät nur in trockener, staubfreier
Umgebung, setzen Sie es keinem Einfluss von Feuchtig-
keit, Vibrationen, ständiger Sonnen- oder anderer Wär-
meeinstrahlung, Kälte und keinen mechanischen Belas-
tungen aus.
Das Gerät ist kein Spielzeug, erlauben Sie Kindern
nicht, damit zu spielen. Lassen Sie das Verpackungsma-
terial nicht achtlos liegen. Plastikfolien/-tüten, Styro-
porteile etc. könnten für Kinder gefährlich werden.
DE

5
Reinigen Sie das Gerät mit einem trockenen Tuch, das
bei starken Verschmutzungen leicht angefeuchtet sein
kann. Verwenden Sie zur Reinigung keine lösemittel-
haltigen Reinigungsmittel. Achten Sie darauf, dass
keine Feuchtigkeit in das Geräteinnere gelangt.
Jeder andere Einsatz als in dieser Bedienungsanleitung
beschrieben ist nicht bestimmungsgemäß und führt zu
Gewährleistungs- und Haftungsausschluss. Dies gilt
auch für Umbauten und Veränderungen. Das Gerät ist
ausschließlich für den privaten Gebrauch gedacht.
Batterien dürfen niemals aufgeladen werden. Batterien
nicht ins Feuer werfen. Batterien nicht übermäßiger
Wärme aussetzen. Batterien nicht kurzschließen:
Explosionsgefahr!
Funktion
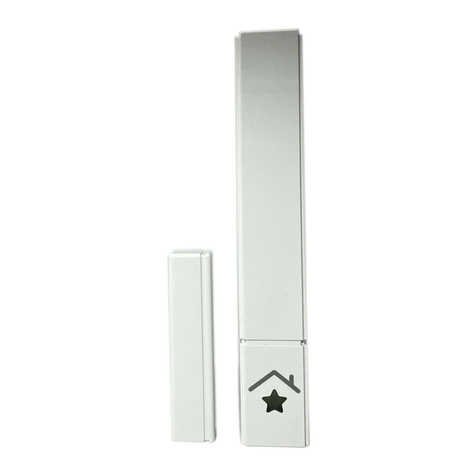
Der Tür-/Fenstersensor erkennt, ob ein Fenster bzw. eine
Tür geöffnet oder geschlossen ist. Sobald sich dieser
Zustand ändert, wird diese Information über eine ver-
schlüsselte Funkverbindung sicher an die Zentrale und
andere eingebundene SmartHome Geräte übermittelt.
So lässt sich bei geöffnetem Fenster die Heizung automa-
tisiert herunterregeln oder die Sirene löst bei einem Ein-
bruchsversuch aus.
DE

6
Montieren und Einbinden
1. Bringen Sie die doppelseitigen Klebestreifen auf die
jeweilige Rückseite des Magneten und der Befesti-
gungshalterung an.
Die Befestigungshalterung sollte mit der Einrast-
lasche nach oben zeigen.
2. Kleben Sie zuerst den Magneten an den beweglichen
Tür-/Fensterteil. Kleben Sie anschließend die Befes-
tigungshalterung der Elektronikeinheit parallel zum
Magneten an den Fenster- bzw. Türrahmen.
Der Abstand zwischen den beiden Elementen
muss kleiner als 8 mm sein!
3. Bringen Sie den Magneten mittig zur Befestigungs-
halterung an.
4. Legen Sie die Batterien (Typ AAA) polrichtig in die
Elektronikeinheit ein.
5. Schieben Sie die Elektronikeinheit auf die Befesti-
gungshalterung.
6. Binden Sie das Gerät über die SmartHome App
(Plus-Zeichen oben rechts) in Ihr SmartHome ein.
Tipps und Tricks zur Montage finden Sie unter:
https://service.startsmarthome.de/tuer-fenster-sensor/montage
DE

7
DE
Funktionstest
Öffnen und schließen Sie das Fenster bzw. die Tür. Dabei
sollte die LED im SmartHome Symbol jeweils kurz auf-
leuchten, verringern Sie ansonsten den Abstand zwi-
schen Magnet und Befestigungshalterung.
Blinkt die LED dreimal, sind Zentrale und Sensor zu weit
voneinander entfernt. Versuchen Sie, die Geräte näher
zusammenzubringen. Erfolgt kein Blinksignal, sind die
Batterien möglicherweise leer und müssen gegen
typengleiche ausgetauscht werden.
Weitere mögliche Fehlerursachen finden Sie unter:
https://service.startsmarthome.de/tuer-fenster-sensor/test
Zurücksetzen in den Auslieferungszustand
1. Nehmen Sie das Gerät aus seiner Halterung.
2. Halten Sie die Taste am unteren Ende des Geräts für
mindestens 10 Sekunden gedrückt. Die LED leuch-
tet in dieser Zeit dauerhaft.
3. Sobald die LED fünfmal aufblinkt, lassen Sie die
Taste los.
Das Gerät ist nun zurückgesetzt und kann neu eingebun-
den werden.

8
DE
Entsorgungshinweis
Gerät nicht im Hausmüll entsorgen!
Elektronische Geräte sind entsprechend der Richtli-
nie für Elektro- und Elektronik-Altgeräte über die
örtlichen Sammelstellen für Elektronik-Altgeräte zu
entsorgen. Verbrauchte Batterien gehören nicht in
den Hausmüll! Bitte entsorgen Sie diese in der ört-
lichen Batteriesammelstelle.
Technische Daten
Gerätebezeichnung WDS
Stromversorgung 2 x LR03 (Micro/AAA)
Batterielebensdauer bis zu 2 Jahre
Funkfrequenz 868,3 MHz
Max. Sendeleistung 10 mW
Freifeldreichweite ca. 100 m
Empfängerklasse SRD category 2
Umgebungstemperatur +5 °C bis +35 °C
Abmessungen 17 x 117 x 32 mm (B x H x T)
Gewicht 36 g (ohne Batterien)
Technische Änderungen vorbehalten.

9
DE
Allgemeiner Hinweis
Hiermit erklärt die eQ-3 AG, dass sich dieses Gerät in
Übereinstimmung mit den grundlegenden Anforderun-
gen und den anderen relevanten Vorschriften der Richtli-
nie 2014/53/EU befindet. Die vollständige Konformitäts-
erklärung finden Sie unter:
www.eq-3.de/service/downloads.html
eQ-3 AG,
Maiburger Str. 29
26789 Leer
6. Ausgabe Deutsch 03/2019
Dokumentation © 2011-2019 innogy SE, Deutschland.
Alle Rechte vorbehalten. Für Fehler technischer oder
drucktechnischer Art und ihre Folgen übernehmen wir
keine Haftung. Alle Warenzeichen und Schutzrechte wer-
den anerkannt.
Änderungen im Sinne des technischen Fortschritts kön-
nen ohne Vorankündigung vorgenommen werden.
innogy SE
Freistuhl 7
44137 Dortmund
Deutschland

10
EN
Congratulations!
With the innogy door/window sensor you have purchased
a proven device for your SmartHome. These instructions
will help you mount and commission the sensor quickly
and easily.
Even faster is the innogy SmartHome App, available for
download from Apple‘s App Store or the Google Play
Store.
If you already own the app, simply click on the plus
sign in the upper right corner of the Home screen
and wait for the device to show up in the search.
However, you can also manually integrate the door/
window sensor under the menu item Devices - ani-
mated graphics formounting support you in this.
Content
Safety note 12
Function 12
Mounting and integrating 14
Function test 15
Reset to the factory settings 15
Technical data 16
Information about disposal 16
General information 17

11
EN
We are here for you!
If you require further information or support during
installation, we have the perfect help for you:
Online help
https:/service.startsmarthome.de
Free Hotline
T 0800 1234060
General questions about innogy SmartHome
(Mo– Fr 8 o‘clock - 20 o‘clock
Sa 8 o‘clock - 14 o‘clock)
SmartHome Community
https://innogy.com/community
Facebook
https://facebook.com/innogysmarthome
On site helper: innogy friends of mila
Experienced and qualified SmartHome users
come to you and help you install and integrate
your SmartHome.
Further information: https://innogy.mila.com

12
Safety note
We do not assume any liability for damage to property
or personal injury caused by improper use or the failure
to observe the safety instructions. In such cases, any
warranty claim is invalid. We do not assume any liability
for any resulting damages.
Do not open the device. It does not contain any parts
to be serviced by the user. If a fault occurs, please con-
tact our Customer Service.
Do not use the device if you can see from the outside
that it is damaged , e.g. on the housing, controls or
connection sockets, or if it malfunctions. If you have
any doubts, have the device checked by our Customer
Service.
For safety and approval reasons (CE), unauthorised
modifications/changes to the product are not permit-
ted.
Operate the device in a dry, dust-free environment
only. Do not expose it to moisture, vibrations, constant
heat from sunlight or other sources, cold or mechanical
stress.
The device is not a toy, so do not let children play with
it. Do not leave the packaging lying around. Plastic film
and bags, polystyrene parts and so on can be danger-
ous in the hands of children.
EN

13
Clean the device with a dry, linen cloth, which may be
slightly moistened in case of stubborn dirt. Do not use
any solvent-based cleaning agents. Make sure that no
moisture gets inside the device.
Any use other than that described in these operating
instructions is not intended and will result in exclusion
of warranty and liability. This also applies to modifica-
tions and alterations. The device is intended exclu-
sively for private use.
The batteries must never be charged. Do not dispose
of batteries in a fire. Do not expose batteries to exces-
sive heat. Do not short-circuit batteries. Risk of explo-
sion!
Function
The door/window sensor detects whether a window or
door is open or closed. As soon as this state changes, this
information is securely transmitted to the central unit
and other integrated SmartHome devices via an encrypted
radio link.
When the window is open, for example, the heating can
be automatically lowered or the siren triggered in the
event of a burglary attempt.
EN

14
Installing and integrating
1. Attach the double-sided adhesive strips to the back
of the magnet and mounting bracket respectively.
The latching tab on the mounting bracket should
point upwards.
2. First, stick the magnet to the moving part of the
door/window. Then stick the mounting bracket of
the electronic unit parallel to the magnet on the
window or door frame.
The distance between the two elements must
be less than 8 mm.
3. Place the magnet in the middle of the mounting
bracket.
4. Insert the batteries (type AAA) into the battery com-
partment ensuring the correct polarity.
5. Place the electronic unit on the mounting bracket.
6. Integrate the device in the SmartHome system using
the app (plus sign in the upper right corner).
You can find tips and tricks for installation at:
https://service.startsmarthome.de/door-window-sensor/installation
EN

15
EN
Function test
Open and the close the window or door. The LED in the
SmartHome Symbol will light up briefly for this purpose.
Otherwise, reduce the distance between the magnet and
the mounting bracket.
If the LED flashes three times, the central unit and sensor
are too far apart. Try to place the devices closer together.
If it does not flash at all, the batteries may be exhausted
and must be replaced with the same type.
You can find more on possible error causes at:
https://service.startsmarthome.de/door-window-sensor/test
Resetting to the factory settings
1. Remove the device from its holder.
2. Press and hold the button at the bottom of the unit
for at least 10 seconds. The LED lights up perma-
nently during this time.
3. As soon as the LED flashes five times, release the
button.
The device is now reset and can be re-integrated.

16
EN
Information about disposal
Do not dispose of the device in the household
waste!
Electronic devices are to be disposed of via the
local collection points for old electronic devices in
accordance with the Waste Electrical and Electronic
Equipment Directive. Used batteries do not belong
in the household waste! Please take them to your
local battery collection point for disposal.
Technical data
Name of device WDS
Power supply 2 x LR03 (Micro/AAA)
Battery service life up to 2 years
Radio frequency 868,3 MHz
Max. transmission power 10 mW
Free-field range approx. 100 m
Receiver class SRD category 2
Ambient temperature +5 °C to +35 °C
Dimensions 17 x 117 x 32 mm (W x H x D)
Weight 36 g (excluding batteries)
Technical changes reserved.

17
EN
General information
eQ-3 Entwicklung GmbH hereby declares that this device
meets the basic requirements and the other relevant reg-
ulations laid down in Directive 2014/53/EC. You can find
the complete declaration of conformity at:
www.eq-3.de/service/downloads.html
eQ-3 AG,
Maiburger Str. 29
26789 Leer
Germany
6th English edition 03/2019
Documentation © 2011-2019 innogy SE, Germany.
All rights reserved. We accept no liability for errors of a
technical or typographical nature or their consequences.
All trademarks and property rights are recognised.
Changes in response to technical progress can be made
without prior notice.
innogy SE
Freistuhl 7
44137 Dortmund
Germany

18
FR
Félicitations!
Avec le capteur de porte/fenêtre innogy, vous avez
acheté un appareil éprouvé pour votre SmartHome. Ces
instructions vous aideront à monter et à mettre en ser-
vice le capteur rapidement et facilement.
Mais c’est encore plus rapide avec l’innogy SmartHome
App, disponible en téléchargement sur l’App Store
d’Apple ou le Google Play Store.
Si vous possédez déjà l‘application, cliquez simple-
ment sur le signe plus dans le coin supérieur droit
de l‘écran d‘accueil et attendre que l’appareil soit
allumé dans la recherche. Mais vous pouvez égale-
ment intégrer manuellement le capteur de porte/
fenêtre sous le point de menu Appareils - des gra-
phiques animés pour le montage et l‘intégration vous
y aident.
Content
Remarques relatives aux risques potentiels 20
Fonction 21
Installation et intégration 22
Test de fonctionnement 23
Remise aux réglages d’usine 23
Caractéristiques techniques 24
Remarque relative à l’élimination 24
Généralités sur la télécommande 25

19
FR
Nous sommes là pour vous !
Si vous avez besoin d’autres informations ou d’aide pour
l’installation, nous mettons à votre disposition l’aide
nécessaires :
Aide en ligne
https:/service.startsmarthome.de
Hotline gratuite
T 0800 1234060
Questions générales sur innogy SmartHome
(Lun – Ven 8 h - 20 h · Sam 8 h - 14 h)
SmartHome Community
https://innogy.com/community
Facebook
https://facebook.com/innogysmarthome
Un assistant sur place : innogy friends de
mila
Des utilisateurs expérimentés et certifiés
SmartHome viennent chez vous et vous aident
pour le montage et l’installation de votre
SmartHome.
Plus d’informations : https://innogy.mila.com

20
Remarques relatives aux risques potentiels
Nous excluons toute responsabilité en cas de préju-
dices matériels ou corporels liés à un maniement non
conforme ou au non-respect des remarques relatives à
la sécurité. Dans ces cas, tout droit à garantie expirera
! Nous déclinons toute responsabilité en cas de dom-
mages consécutifs !
N’ouvrez pas l’appareil. Il ne contient aucune pièce
pouvant faire l’objet d’un remplacement ou d’une
maintenance par l’utilisateur. En cas de défaut ou d’er-
reur, veuillez contacter notre SAV.
N’utilisez pas l’appareil s’il présente des dommages
visibles de l’extérieur (au niveau du boîtier, des élé-
ments de commande ou des prises de raccordement,
par exemple) ou un dysfonctionnement. Dans le doute,
faites contrôler l’appareil par notre SAV.
Pour des raisons de sécurité et d’autorisation (CE), les
transformations et/ou modifications apportées de
manière arbitraire au produit ne sont pas permises.
N’utilisez l’appareil que dans un environnement sec et
exempt de poussières. Ne l’exposez pas à l’humidité,
aux vibrations, au soleil ou à toute autre source perma-
nente de chaleur ou de froid ou à des contraintes méca-
niques.
L’appareil n’est pas un jouet. Ne laissez pas des enfants
jouer avec. Ne laissez pas traîner les matériaux d’em-
ballage. Les films et sacs en plastique et le polystyrène,
FR
Other manuals for WDS
1
Table of contents
Languages:
Other Innogy Accessories manuals
Popular Accessories manuals by other brands
Record
Record RIC 290 Mounting and adjustment instructions
Milesight
Milesight EM300 Series user guide
Optex
Optex HX-80N installation instructions
Kogan
Kogan KAPEN4GSPYA user manual

Lowrance
Lowrance LMF-400 Installation and operation instructions
Iceking
Iceking ICE-BF150K.E Installation and operating manual
