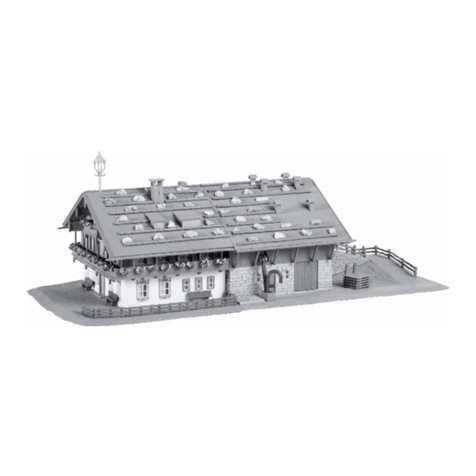
Innovative Hobby Supply BK 1300 User manual

GeneralAssemblyInstructions–PhotoRealBuildKits
byInnovativeHobbySupply
MakingTraditionalHobbiesBetter!
INSTRUCTIONSFOR:
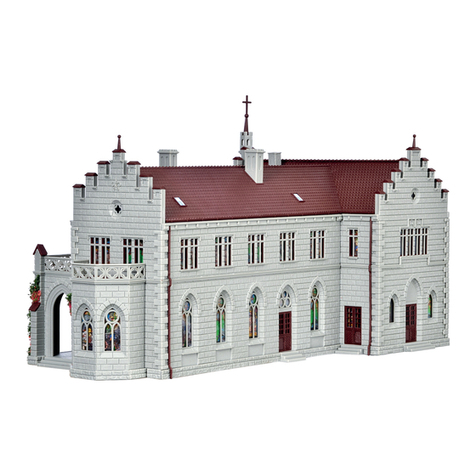
Kit#BK1300BrickRamblerBuildKit~‘HO’and‘O’scale
Kit#BK3500Newlarge1/32‐1/24scalebuildkit/ComingSoon!~January2013
Freereplacementpartsareavailablesimplybycalling866‐712‐4059.
Includestwo(2ea.)sampleUltraSignsign‐posts,two(2ea.)standardpaperclips,andone(1ea.)1x1in.ball‐
clumpburnt‐grassfoliage.
ViewsofthecompletedPhotoReal“BrickRambler”buildkitshownbelowareforreferencepurposesandasanaidinassembly.
FrontBackTopthree‐quartersview
RightsideFrontentrancedetailSideentrancedetail
RoofandchimneydetailRooftop‐downviewCornerdetail
InnovativeHobbySupply
11610JaySt.NW,Minneapolis,MN55448
CustomerService:866‐712‐4059~email:info@innovativehobbysupply.com

InnovativeHobbySupply BK1300/3500BrickRambler
MakingTraditionalHobbiesBetter!
2of11©2012InnovativeHobbySupply.Allrightsreserved.
INTRODUCTION
Pleasereadthesestep‐by‐stepinstructionsthoroughlybeforeyouundertakeanycuttingorassembly.Thenfollowthesimplestep‐by‐stepinstructions.This
buildkitisabeginnerskill‐levelkitinourPhotoRealBuildingKitsproductline.Assemblytimeisapproximately1‐1/2hours.Withjustalittlepatienceand
therighttools,thisamazingkitcanbeconstructedbyanyhobbyist,offeringamorerealistic‐lookingmodelthanpaintedplasticforms.Printedonour
exclusivehigh‐definition‘FlexStock’material,thesekitsonceassembledareveryruggedandwillprovidemanyyearsofenjoymentonyourtrainlayout,slot
cartrack,ordiorama.
Afteryou’vereadthroughtheassemblyinstructionsonce,startagainatthebeginningandfollowthestepscarefullytocutandassemblethemodel.We
stronglyrecommendusingahot‐meltmini‐gluegunforassemblingthiskit.(Mini‐gluegunsareavailableatyourlocalcraftstore,aswellasmanyhardware
storesanddrugstores,forlessthan$5.00.)Hotmeltglueiseasilycontrolledandsets‐upfast,whichgreatlyspeeds‐uptheassemblytimesinceyoudon’t
needtowaitforthegluetodry.Usehot‐meltgluesparingly:applyanamountjustsufficienttotacktheitemstogether.Youcanreinforcethebondsurfaces
withafinalbeadofhotglue–orwithwhiteglue–onceyouaresatisfiedwithplacementofcomponentpieces.
Theseinstructionsincludeplentyofclear,full‐colorphotographstomakeassemblyeasier.Aswithallmodelassembly,somepatienceisrequired.Theskills
acquiredinconstructingyourfirstbuildingkitwillcarryovertoourotherkits,whichwillmakeiteasyforyoutoaddasmanybuildingstoyourlayoutasyou
desire–savingyoutimeandmoneyandgivingyoubetterresultsthanformostmoldedplastickits.Enjoythemostinnovativeandrealisticscale‐model
buildingkitsavailable.
GETTINGSTARTED
IMPORTANT:Themostimportantskillingettingagoodresultisthetechniqueof‘scoring’thematerialwhereindicated(fig.1).Scoring
issimplymakingashallowcutthoughthetoplayerofthepaperwithasharphobbyknife(e.g.,anX‐actoknife)whileusingaruleror
otherstraightedge.
Figure1‐Scoringthematerial.
Thistechniqueissimpletolearn,yetvitaltogettingaperfectfold–evenonsmallparts!Usingthistechniquehelpstoensureabeautiful
trouble‐freeassembly.Withoutit,thefoldededgestendtobuckleunevenlyandlookbadwhenassembled.
Practiceonascrappieceuntilyouhaveperfectedyourtechniquesufficientlytohaveconfidence.Thehobbyknifeshouldbeusedfor
scoringonly!Whencuttingoutpartscompletely,useasharpscissorsasthismaterialistoughanddoesnotcuteasilywithaknife.
Remembertoalwayswearsafetyglasseswhenusingsharptoolsorhotglueguns.Keepallmaterialsawayfromextremeheatorflames.
Adultsupervisionisrequiredforthoseunderage16.
ThesearetheImportant“Do’s”ForSuccessfulModelBuilding
•Dohavethetoolsyouneedon‐hand.
•Dopracticescoringandfoldingcomponentparts.
•Dodetailthecutedgeswithmarkerbeforeassembly.
•Dotest‐fitpartsbeforegluing.

BK1300/3500BrickRambler InnovativeHobbySupply
MakingTraditionalHobbiesBetter!
©2012InnovativeHobbySupply.Allrightsreserved.3of11
GathertoolsneededCut‐outcarefullyAlwaysscoreFoldondeskedgeDetailalledges
TOOLSANDTIPS
1) Gathertools:Thetoolsyou’llneedincludeahobbyknife,aminihot‐gluegun,arulerorstraight‐edgeforscoringparts;asharp,
modernscissors;aclearplasticbagortrayforstoringandseparatingcomponentsfromscrap,andagood‐sizetweezers–handyfor
removinganyhot‐gluestringsorwebbingandforpositioningandgluingsmallcomponents.
Youshouldalsohaveon‐handsomewhiteglueforcementingrightandleftcomponentstogetherandaweightyobjectsuchasan
inexpensiveheavybookorcatalogtoplaceoverpartsandholdthemflatwhiletheydry.Gatherwaterproofmarkers(suchasSharpie‐
brandmarkers)inred,black,brown,greenandsilverfordetailingthecutwhiteedgesofparts.Apencilisusefulformarkingassembly
pointsandmargins,suchasaroofoverhang.Zip‐lockplasticbagsareusefulforstoringsmallcomponentpieceswaitingtobeassembled.
Cleartapecanbeusedtotemporarilyholdcomponentstogetherfromtheinsideareaspriortogluing.Paintisnotneeded.
Tip:Keepallyourscrapinasmallclearplasticbagortraytoseparateitfromyourcomponents.Keepingyourworkbenchclearofscrap
willhelptopreventlosingormisplacingparts.Ifyoudomisplaceapart,you’llknowwheretolookforit.
2) Carefullycutoutallmaincomponentsincludingthefloor,base,wallsandroof.Usetheappropriatecoloredmarkertocolorthecut
edgesbyrunningthemarkeralongtheedgeofeachcomponentpart.Forexample,foragrassbaseuseagreenmarker,andsoon.
3) It’simportanttotest‐fitpartspriortogluing,sincehot‐gluesetsupquickly.Beingfamiliarwithhowcomponentpiecesfittogether
greatlyreducesassemblytime.
4) Followtheinstructionsbelowinpreppingandthenassembleusingthecolorphotosasareferencetothewritteninstructions.The
illustrativephotosprovideageneralguidetoassemblyandshowpartssimilartotheactualpartsyou’llbeassembling.
GeneralAssemblyGuide~FastTrackPhotosA‐Z
PreppingComponents
Cut‐outmainpartsScorelightlyalonglinesCut‐outalldetailitemsScoredetailitems

InnovativeHobbySupply BK1300/3500BrickRambler
MakingTraditionalHobbiesBetter!
4of11©2012InnovativeHobbySupply.Allrightsreserved.
FoldandshapedetailitemsFoldcomponentpartsDetailandtest‐fitpartsGluefrontsandbacks
DetailallcutedgesAssemblewithhotglueCutdoorswithhobbyknifeOpen‐upthedoors
DetaildooredgesDetailpieceswithcorrectcoloredmarkerPre‐assembleaccessories

BK1300/3500BrickRambler InnovativeHobbySupply
MakingTraditionalHobbiesBetter!
©2012InnovativeHobbySupply.Allrightsreserved.5of11
ScoreallillusionroomsFoldillusionroomInstallillusionroomsbehinddoorsforaddedrealism
Cut‐outawningsScoreandfoldawningTest‐fitfoldedawningCreatehot‐gluespacers
DetailedgesonsignsCementsignstopostsScorenotchedpartsCreategluespacersforsigns

InnovativeHobbySupply BK1300/3500BrickRambler
MakingTraditionalHobbiesBetter!
6of11©2012InnovativeHobbySupply.Allrightsreserved.
AssemblingtheBuildKit
StartwiththefrontwallReinforcefromthebackGlue3rdwallto½thebasePerfectcornerjoint
FoldthescoredroofTestfit,gluefirstatpeakFinishattachingroofInvertflatroofandtrace
withpencil
SpindletopreproofGluetosideofbasefirstGluedowncornersAddroofventswithspacers

BK1300/3500BrickRambler InnovativeHobbySupply
MakingTraditionalHobbiesBetter!
©2012InnovativeHobbySupply.Allrightsreserved.7of11
DetailingwithplantsFigurinesaddmovementandrealismTypicalcompletedillusionroom
Important:Wearsafetyglasseswhenusingsharptoolsor
heatedglueguns.Keepallmaterialsawayfromextremeheator
flames.Adultsmustcarefullysuperviseanyoneundertheageof
16andassistincuttingandgluing.Remembertounplugyour
gluegunwhennotinuseandfollowthemanufacturer’ssafety
guidelines.
Note:Preppingallcomponentsforassemblyisveryimportant
sincedetailingisnoteasilydoneafterassembly.Pleaseread
andfollowthesestepscarefully.
1. Cutting:Carefullycut‐outallmaincomponentswitha
sharpscissorsincludingthewalls,roofandbase.Besure
youcutstraightandsmooth,takinglongstrokes.Setthe
componentsasideforlaterassembly.
2. Cutoutallcomponentsthathaveafrontandbackorleft
andrightsides.Thesearethecomponentsthatwillshow
bothsidessuchasflags,largesigns,signsupports(ifany)
andsoforth.
3. Useaverythinlayerofwhiteglueappliedtoonesideonly
ofleft/rightmatchingpieces.Linethemupcarefullyand
pressthemtogether.Wipeoffanyexcessglueandlay
themunderaheavyobjectsuchasabookforabout10‐15
minutestodry.Thiswillkeepthemperfectlyflatasthey
dry.Thegluewillsetwhileyouarepreppingotherparts.
4. Cutoutsmallcomponentsandprops.Cutouttherestofany
smallcomponentssuchasprops,roof‐vents,garbagecans,
signswithcornernotches(seeSectionL‐notching)andother
smallcomponents.Keeptheseinaseparateziplockbagsorted
incategories.
5. Scoringandfoldingcomponents:Scoreallcomponents
thatwillbefolded,suchas3Dsigns,chimneys,garbage
dumpsters,gaspumps,awningsanditemswithanotchin
eachcornersuchasgaspumps,canopies,andthelike.
Theseitemsareeasilyidentifiedbythewhiteorgray
linesontheprintedsurface.
Important:Scoringofcomponentsthataredesignedtobe
foldediscrucialinobtainingacrispfoldwithcleanstraight
lines!Otherwise,thematerialwillcreaseunevenlywhenyou
foldit.
6. Scoringmethod:Practiceyourscoringcutseveraltimes
onscrapmaterialbeforeyoumoveontoscoring
components.Lineupyourrulerorotherstraightedgealong
thethinscorelineshown.Usesufficientpressuresothe
componentpiecedoesnotmoveorshiftwhileyouscoreit.
Withonepassofasharphobbyknifeandgentleeven
pressurecutjustdeepenoughtotheuppermostlayerof
thematerial.
7. Usingthesharpedgeofatableofdesk,folditalongthe
scoreline.Thefoldshouldcomeoutverycrispandstraight.
Usingthistechnique,perfectfoldsasnarrowas1/8in.
widecanbeachievedeverytime.
8. Whenyouaresatisfiedwithyourscoringtechnique,score
andfoldthosecomponentsandsetthemasideforlater
assembly.
9. Detailingedges:Forthebestlooking,mostrealistic
outcome,it’simportanttodetailthewhite,exposededges
ofcomponentspriortofinalassemblybycoloringthem
withtheappropriatecoloredmarker.Usingthesideedge
ofthemarker,carefullybutquicklyfollowalongthecut
edgeofeachcomponentuntiltheexposedwhitematerial
iscolored‐in.Movethemarkeralongwithoutpausingto
avoidstainingthecomponentsurfacesbyallowinginkto
soakin.
10. Don’tforgettodetailthedouble‐sidedcomponentsthat
yougluedtogetherpreviously.Theyshouldnowbedry
readyfordetailing,aswell.
11. Componentswithfoldscannowalsobelightlymarkedto
coveranyexposedwhitematerialalongthefold.Dothis
withthetipofanappropriatecoloredmarkerbyjustlightly
dottingitoverthecornerareatobreak‐upthewhiteline
causedbyscoringandfolding.
12. Preppingillusionroomsandrevealingdoors:It’snow
timetopreptherevealingdoorssothey’llopentoshow
theinteriorillusionrooms‐‐suchasstockrooms,rest
roomsandstoreshelves–forenhancedrealism.Referto
thephotographsandbesureyouunderstandthemethod
beforeproceeding.
GeneralAssemblyGuide~FastTrackInstructionsA‐Z
PreppingComponents

InnovativeHobbySupply BK1300/3500BrickRambler
MakingTraditionalHobbiesBetter!
8of11©2012InnovativeHobbySupply.Allrightsreserved.
13. Notallbuildkitshaveillusionrooms,butsomehave
severalofthem.Illusionroomsaredenotedbytheirthree‐
sidedform,whichwillneedtobescoredandfoldedatthe
sidewalls.Cutthemout,scoreandfoldthem.Thendetail
themwiththeappropriatecoloredmarkeratthebottom
edgeonly.
14. Topreptherevealingdoors,firstlookforthehingeside
oppositeofthedoorknob.Lightlyscorethematerialatthe
hingeside.Usingthehobbyknifeandastraight‐edge,cut
outthedoortopinsidethedoorframe.Thiswillusually
takeseveralpasseswiththehobbyknifetocutalltheway
throughthematerial.Usethefirstpasswithjustmedium
pressuretoscoretheuppersurfaceandcreateatrackfor
thebladetofollowonsubsequentpasses.
15. Nowcutthebottomoftherevealingdoorabovethe
foundation,whichgenerallyextendsabout3/16in.upfrom
thebottom.Thencutthedoor‐knobsidejustinsidethe
doorframetocompletefreeingthedoor.
Important:Donottearopenthedoor!Thiswillcreaterough
edgesandmaydamagethedoororframe.
16. Cutcarefullyandtesttherevealingdoortoseeifitwill
openeasily.Ifnot,takeadditionalpasseswiththehobby
knifeuntilitdoes.Donottearthematerial!Oncefree,fold
therevealingdoortotheinwardsideandthenoutward.
Edgearoundthedoorperimeterwithabrownmarkerand
useasilvermakertodetailtheinsidejamb.
17. Installingillusionrooms:Plugintheminiglue‐gunand
letitpre‐heatfor5minutes.Usinghotglue,attachthe
illusionroomscenteredbehindtheircorresponding
revealingdoors.Tacktheillusionroomcomponentfrom
behindthedoortotheinsidewallsurfacewhilekeeping
thebottomperfectlyflushwithyourworksurfaceto
ensurethereisnogapwhereitwillbefastenedtothe
base.
18. Setasidethewallsthatarepreppedwithillusionrooms
andrevealingdoors.
19. Preptheawnings:useasharpscissorstocarefullycut‐
outandscorethebacksideoftheawningthatwillbe
foldeddownandusedastheattachmentstrip.Forruffled
awnings,rotatethematerialinsteadofthescissors.If
desired,leaveamarginofwhiteborderattheedgesto
representabastededge,asshowninthephoto.Usethe
appropriatecolormarkettodetail‐outthewhiteedges
alongthecoloredportions.Usingthesharpedgeofadesk
ortable,shapetheawningtogiveitasoftgradualcurveas
shown.Setthepiecesasideforlaterassembly.
20. Prepthedetailitems:Therearebonusitemsincluded
withmostbuildkitsthatyoumayormaynotwanttouse
suchaspennants,roadsigns,garbagecansanddumpsters.
Shouldyouchoosenottousethem,werecommendthat
stillyoucutthemout,score,foldandedgethem.Then
storethesefinishedcomponentsinasafeplaceforfuture
usewithotherbuildkits.
21. Preptheroofvents:Mostbuildkitscomewithadditional
3Droofventsthatattachdirectlyovertheprintedvents.
The3Dventsenhancethesenseofrealism.Aftercutting
outandedgingthemwiththeappropriatecoloredmarker,
applyasinglethickdollopofhotglueinthecentertoactas
aspacer.Thisspacerwilltoliftuptheventsabouta1/8‐in.
offthesurfaceoftheroofforaddedrealism.Applythe
glue,allowittocool,andsetasidetheroofventsforlater
assembly.
22. Prepthesigns:Someofthebuildkits–suchasthegas
station–havelargesignswithaseparateborder
component.Thesebordersshouldbeinstalledwithwhite
glue.Ifrequired,scoreandfoldthebordercomponents
nowandsetthemasideforlaterassembly.Othersignscan
becutoutandedgedwiththeappropriatecolormarker
andsetaside.
23. Propernotchingtechnique:Tonotchandcutoutitems
withshallow90‐degreecorners,usejustthetipofthe
scissorstocutuptothestoppointandthencutthe
remainingsidebyrotatingthematerial90‐degrees.
Notcheditemsarealwaysintendedtobefoldedtoforma
box,soscoringatthescorelinespriorfoldingisessential.
Tip:Everythingshouldnowbepreparedforfinalassembly.We
recommendthatyoutakeashortbreakbeforeundertaking
completionofyourPhotoRealbuildkit.
FinalAssembly
Notes:Forbestresults,refertothephotosprovidedinthe
previoussectionthatshowthefront,side,rearandclose‐up
viewsforassemblyreference,inadditiontofollowingthe
instructionsbelow.
Theword“tacking”isoftenusedthroughouttheseinstructions
andsimplymeansapplyingaminimalamountofglueinasmall
spotjustsufficienttoholdacomponentinplaceforfinal
assembly.Ifthecomponentisnotplacedperfectly,itcaneasily
berepositioned.Tackingcomponentsinplaceandreinforcing
themlaterisanimportanttechniqueinachievingaperfect
assembly.
AssemblingtheWallsandBase
Therearethreetypesofwalls:
1stType~Withsmallerbuildkits–suchasgardenhouses
–thewallsarecontinuous.Thesecomponentsjustneedto
bescored,foldedandtackedinplacetothebasebefore
reinforcingthem,sincethereisonlyonecornerjoint.
2ndType~Forothermodels–suchasthegeneralstore–
thewallscomein2sectionsthatagainjustneedtobe
scoredandfoldedwithtwocornerjointstocomplete.
3rdType~Buildkitsforlargermodelshavefourseparatewalls
andmustbeattachedateachofthefourcornerjoints.
Examinethebaseforvisualfeaturessuchassidewalks,
porches,etc.thatindicatewheretoattachthefrontwallto
thebase.Forexample,thefrontdoorwillcorrespondto
thefrontwalk.
Tip:Hardenedhot‐meltgluedisreactivatedbysimplytouching
thetipofthehotmeltglueguntoanyareasthatyouwantto
re‐meltorsmoothout.
Tip:Beforeyouattempttoassemblethewallsofabuildkitfor
thefirsttime,practicegluingseveralverticalwalljointstoa
baseusingpiecesofscrapmaterial.Readtheinstructionsbelow
andpracticeonsomethrowawaypiecesofFlexStockmaterial.
1. FrontWall~Startwiththefrontmainwall,usinghotglue
tackabout½‐in.ofthelowerleft‐handcornerinplace
alongthebottomedgeofthewall.Makesurethe
placementiscorrect:squarewiththefoundationandlined
upcorrectly.
2. Next,applyingslighttensiononthewalltoalignitwiththe
baseandkeepingthewallstraight,tacktheothercorner
down.Holdinplaceuntilthegluecoolsandthewallstands

BK1300/3500BrickRambler InnovativeHobbySupply
MakingTraditionalHobbiesBetter!
©2012InnovativeHobbySupply.Allrightsreserved.9of11
uprightonitsown.Carefullyinspecttheplacementto
ensurethewall‐to‐basejointiscorrect,sincetheother
threewallswill“key”offthisfirstjoint.Whenyouare
satisfied,youcanaddmorehotgluetoreinforceitthe
wall/basejoint.Simplyrunasmallbeadalongthejointand
allowthegluetocool,whilecontinuingtoholdthewall
upright.Youarenowreadytoattachthenextwall.
3. FirstSideWall~Tackoneofthesidewallstothebase
andcornersimultaneouslyfrominsidetheassemblyatthe
cornerjoint,makingsurebothwallsmeettomakea90‐
degreeangle.Tackthetopcornerwherethetwowalls
meet,thentackthemiddleofthewallsjoint.Whenyouare
satisfiedthatthewallsandbaseareproperlypositioned,
applyabeadofgluealongtherestofthejoint,holdingit
togetheruntilthegluecoolsabit.
4. Tacktheremainingbottomcornerofthesidewalltothe
basewhileapplyingslighttensiontokeepitstraightand
holdingthewallupright.Allowthegluetocool.Whenyou
aresatisfiedwiththeplacement,tackthesidewalltothe
baseinseveralplacesalongthewall‐to‐basejointfrom
insidetheassembly.Allowthegluetocool.Carefully
examinetheassemblytothispoint.Onceyouaresatisfied,
startatthecornerjointandrunabeadofhotgluenomore
thanhalfwayalongthebottomjointtoreinforcethebond.
ProceedtoStep5.
5. Tip:Thesecrettosuccessistofirsttackthewallsand
cornerstogetherintheproperpositions.Forthecorner
joints,you’llwanttotackthetwowallstogetherandtothe
baseatthesametime.Thiswillholdeverythinginplace
perfectlytoassembletheremainingwalls.
6. SecondSideWall~RepeatSteps3and4toattachthe
secondsidewall.Again,onlyapplythefinalreinforcing
beadofgluehalfwayalongthejoint.Thisprovides
sufficientflexibilitytoensurethelastcornerjointcanbe
gluedtogetherwithoutleavinganygaps.
7. BackWall~Dryfitthebackwallfullyincontactwiththe
twosidewallsandthebase.Ensurethatallthecorner
jointsfitperfectly.Frominsidetheassembly,tackthe
bottomcornerofthebackwalltothefirstsidewall.Tack
thetopcornersofthetwowallstogetherthentackthe
jointinthemiddle.Allowthegluetocool.Whenyouare
satisfiedwiththeplacement,runareinforcingbeadofglue
halfwayalongthewallsjointfromaboutthemiddletothe
base.Allowthegluetocoolbeforeproceeding.
8. Makesurethebottomcornerofthebackwallisflushwith
boththebottomcornerofthesidewallandthebase.Tack
thebottomcornerintoplaceandallowthegluetocool.
NowfollowthesameprocedureinStep6toattachthe
oppositesideofthebackwalltothesecondsidewall.
9. Examinetheassembly.Ifalllooksgood,finishtackingthe
backwalltothebasealongthejoint.Allowthegluetocool.
Nowfinishapplyingareinforcingbeadalongthefourwall
jointsandfourbasejointstocompletethisportionofthe
assembly.
AssemblingtheRoof
Therearefivetypesofroofs:
I.Flatroofs~areoftenfoundoncommercialbuildingslike
hotelsandhospitals.Buildkitswithflatroofsoverhangthe
wallsbysmallmarginorbordertoprovideaworkingspacefor
gluing.Forthistypeofroof,itisveryimportanttotestfitthe
roofpriortofinalassemblytoseehowmuchmarginis
provided.
a.Inverttheassemblyandlayitontopoftheroofcomponent
showingbottomsideup.Adjustthepositionoftheassemblyso
themarginisevenonallsides.Thentracetheoverhangmargin
withasharppencil.Thispencillineshowsproperplacementof
theupperwallstotheroofandwheretoapplytheglue.
b.Tacktherooftothefrontwallinseveralplaces.Thentack
thebackwallwhileapplyingslightdownwardpressureto
keeptherooftighttothebackwall.Allowthegluetocool.
Nowattacheachofthefourcorners,oneatatime,while
applyingdownwardpressureandallowingthegluetocool.
c.Examinetheassemblyandwhenalllooksgood,reinforce
thefourjointsallalongtheroof.Slipthetipofthemini
glue‐gunjustbetweentheroofandwalltorunathinbead
ofgluearoundtheperimeter.Attachonesideatatime
whileapplyingslightdownwardpressureandallowone
sidetocoolbeforeproceedingtothenext.
Tip:Oncetheroofisfullyattachedandthegluehascooled,the
structuralstrengthoftheassemblybecomesreadilyapparent.
II.Pitchedroofs~areoftenfoundonresidentialhomesand
smallercommercialbuildingssuchaschainrestaurants.Build
kitswithpitchedroofsarealwaysscoredandfolded.Startby
makingsuretheangleofthefoldiscorrect.Testfittheroofto
theassemblytodeterminehowmuchtheroofoverhangsthe
wallswhilemakingsureisevenlypositionedfronttobackand
sides.
a.Lookforanycutoutsintheroofforchimneys,vents,etc.
andremovetheseusingahobbyknifebeforeattachingthe
roof.
b.Holdtheroofinpositionandtracealongthewallswitha
pencilwherethewallsmeettheroof.Thispencillinewill
indicatetheproperplacementoftheupperwallstothe
roofandshowyouwheretoapplytheglue.
c.Startwiththefrontpeakandtackitintopositionwhile
applyinggentlepressuretoensurethepeakmakesgood
contactwiththewall.Allowthegluetocool.Dothesame
fortheoppositeside.Ataboutthemid‐lineoftheroofover
onesidewall,applygentlepressureandtacktheroofto
thesidewall.Dothesamefortheoppositeside.
Note:Someangledroofs(suchasthe‘SugarCreekFarm’kit)
haveaslightupliftattheend.Pre‐shapetheroofcomponentby
gentlybendingtheendsoftheroofupwardsandtestthefit.
Repeatasnecessaryuntilyouachieveconsistentcontactall
around.TheFlexStockmaterialwillconformexactlywhenyou
applyslightdownwardpressurewhilegluingdownthecorner
areasoftherooftothesidewalls.
d.Tackeachcorneroftheroofinplace.Thenapplya½‐in.
beadofgluealongthepencillineononesideat2‐inch
intervalswhileapplyinggentlypressuretotheroofand
walltoensuregoodcontact.Allowthegluetocool.Dothe
samefortheoppositeside.Thenfollowthisprocedurefor
theremainingtwowalls.Oncethetackingglueisfullyset
andyouaresatisfiedwiththeresults,applyabeadofglue
alongtheentirewall‐to‐roofjointonallfoursides.
III.Curvedroofs~areoftenfoundonspecializedcommercial
buildingssuchasQuonsethutsandairplanehangars.Curved
roofsareformedfirstbyshapingtheroofcomponentonthe
sharpedgeofadeskortableprint‐side‐upjustenoughtogeta
curvestarted.Nowrollthematerialinaloosespindlebeing
carefulnottocreaseittoshapethecurvealittlemore.

InnovativeHobbySupply BK1300/3500BrickRambler
MakingTraditionalHobbiesBetter!
10of11©2012InnovativeHobbySupply.Allrightsreserved.
a.Checkthematchtothecurvedwallsoftheassembly.Ifa
tightercurvatureisneeded,spindletheroofcomponenta
littletighterthanbeforeandcheckthefitagain.Repeat
thisprocessuntiltherightamountofcurvatureisachieved.
Makesurethecurvedroofmakesgoodcontactwiththe
curvedwallsand,whenyouaresatisfied,inverttheroof
andassemblyandtacktheroofinplaceusingplacestarting
atthecrownattachingfirstonecurvedwallandthenthe
remainingwall.Thentackthesidesoftherooftothebase.
Completetheassemblybyrunningathinbeadofglue
alongallfourjoints.
IV.Hiproofs:Thispyramidtypeofroofisusedonthelight
coloredgardenhouseandissimpletoassembleandinstall.
Cutthefournotchesatthetips,scoreandfold.Cutoutthefour
anglednotchesandassemblefromthebacksideusinghotglue.
Justtacktogethersmallareasatatime.Whenyouaresatisfied,
reinforcetheassemblythenfromthebackside.
V.Conicalroofs:Thistyperoofisusedongrainsilosandbins.
Justscoreatallthefoldareas,foldatthescorelinesandshape
intoacone.Thedistinctivemulti‐facetedroofshapewill
happennaturally.Thenglueattheflapfromunderneath.
AssemblingOtherStructuresandDetailItems
I.Cylindrical/tubularstructures~areusedforspecialized
structuressuchassilos,grainbinsandchimneys.Likecurved
roofs,youfirstshapethetubebystroppingitgentlyonthe
sharpedgeofadeskortabletostartthecurve.Thenspindle
thematerialintoalooseroll.Workcarefullytoavoidcreasing
it.Keepworkingthematerialuntilyouachievetheproper
tubularshapeandcircumference,allowingaslightoverlapfor
bondingtheedgestogether.
a.Usecleartapeinthreeplacesatthetopbottomandmid‐
pointofthejointtoholdthetubeinshapeforgluingwhile
makingsurethetopandbottomopeningsareflush.Tack
thetubeatthetopofthejoint,thentackthebottomand
finallytackthemiddle.Allowthegluetocool.Toreinforce
thejoint,tuckthetipofthegluegunundertheoverlapto
injectathinbeadofgluealongthejointandpressthetwo
sidesofthematerialtogether.
II.Chimneys:Squareandrectangulartube‐typestructures
suchaschimneysfirstmustbescoredwithahobbyknife
andthenfoldedonthesharpedgeofadeskortable.
a.Priortoassembly,detailtheinsidesurfaceswithblackor
darkbrownmarkertosimulatesoot.Allowthemarkerto
dry.
b.Formthechimneyintoitspropershapeandusecleartape
onthetopandbottomofthejointtoholdthetubein
shapeforgluing.Tackalongthejointinseveralplacesand
allowthegluetocool.
c.Nowgluealongthejointaninchatatime,presstheedges
togetherandallowthegluetocool.Ifthereisathru‐holeinthe
roofforatallexterior‐typechimney,slidethechimneythrough
theholeandattachittothebaseonlyinastraightupright
position.
d.Ifthechimneyistheangledtype,youcanattachit
anywhereontheroofthatyoudesire.Applyagenerous
beadofglueontheinsideofthechimneyonthelower‐
mostbottomedgeplaceitinpositionontheroof.Theglue
willslowlyrundownwhilestillhotandattachthechimney
totherooffromtheinside.Usingthismethod,nogluewill
show.Gluealight,thinswatchofcottontotheinsideof
thechimneytosimulatesmoke.
III.Roofvents:Inmostcases,roofventsarealreadyprinted
ontheroofcomponent.Ifyouprefer,foraddedrealism,you
caninstall3Ddetailroofventsoverthetopoftheprinted
vents.These3Ddetailventslookgreatwheninstalledwitha
smallspacebetweentheroofandthevent.Youcreatea1/8‐in.
spacerbyapplyingaraiseddropofglueonthebacksideofthe
detailventandallowingittocool.Thenre‐heattheglueoradd
asmallextradropandpositionthe3Ddetailventsoverthe
printedvents.
a.Forevengreaterrealism,cuta3/8‐in.pieceofacommon
plasticdrinkingstrawandusesilvermarkettocolorit.Cut
thestrawatthesameangleasthepitchoftheroof(ifany).
Glueitfromtheinsideofthestrawsonoglueshows.These
canbeaddedtoanybuilding.
IV.Gardens:Somekitsincludesmallflowerandvegetable
gardens.Tomakethesemoredramatic,usethegluespacer
technique.Placeasizabledollopofglueinthemiddleofthe
gardencomponentandallowittocool.Thengluetheedges
downbypressingdownfirmlyalongtheedgesasyouattach
thegardencomponenttothebase.
a.Thecenterwillberaisedtoprovideaddedrealism.Youcan
thenaddbitsofdriedmossorlichenforanevenmore
impressivelook.TheSugarCreekFarmbuildkithasaraised
garden.Firstnotch,foldandgluethecorners.Thenadd
raisedandspaceddropsofgluetothebacksidefor
support.Finally,gluetheraisedgardentothebase.
V.Spacersforbigsigns:Somebuildkitsincludetwo‐sided
signs,suchasthedrive‐intheatermarqueesign.Experienced
modelersmaywanttoincludealight‐weightspacersuchasthin
foamcorematerialbetweenthetwohalvestoobtainmore
thickness.Youarelimitedonlybyyourpatienceandcreativity!
VI.Wallsigns:Buildkitsforcommercial‐typebuildingsinclude
extrabusinesssignsandwallsigns.Thesecanbeattachedover
existingprintedsignsontheexteriorsurfaces,oraddedona
blankpartofthewall.Cutoutanddetailtheedgesandgluein
placewithwhiteglue.Or,foramoredramaticlook,makea
gluespaceraroundthebacksideperimetertosuspendthe
signsoffthewallabit.
VII.Streetsigns:FindtheUltraSignsamplepostincludedand
attachitasshowninphotos.Useadropofhotgluetoattachit
tothebase.
VIII.Touching‐upgluejointsandcorners:Thiscanbedone
fromtheoutsideoftheassembly.Firstpreheattheminigluegun
forfiveminutestosoftenanyextraneousglueonthenozzleand
wipeitoffusingathickcleanrag.Then,withacleannozzle,usethe
sidetoironoutanyprotrudinggluebumps.Withanappropriate
coloredmarker,dotthecornerslightlytoblendinanycolorneeded
tomakethecornerlooksmoothandsolid.Anyunwantedhotglue
canbegentlyscrapedoffwithafingernailorPopsiclestick.
a.Smallmistakesonyourassemblycanbecoveredwith
lichenortouched‐upwithamarker.Housesandbuildings
areseldomperfectinreal‐lifeandslightimperfections
shouldnotbenoticedinnaycase.
IX.Racesponsorfencing:Thistypeoffencing–orfence
barrier–isfortheRaceTowerandRacewayTicketBoothbuild
kits.Thefirststepistocarefullycutoutthefencingjustoutside
theredline,thendetailtheedgeswitharedmarkerusingthe

BK1300/3500BrickRambler InnovativeHobbySupply
MakingTraditionalHobbiesBetter!
©2012InnovativeHobbySupply.Allrightsreserved.11of11
sideedgeofthemarker.Quicklyfollowalongtheedgeofthe
materialtopreventsaturationstains.
a.Next,gluethefrontandbacksidesofthefencingtogether
usingathincoatofwhiteglue.Placethejoinedhalves
underaheavyobjectsuchasabookfor15minutesto
preventwarpingwhilethegluesetsup.Dothesameforall
fencingorbarriersprovidedwithyourkit.
b.Aftertheglueisset,youcanbeginshapingthecurvesas
showninthephotos.Becarefultonotcreasethefence
componentswhileyouareshapingthem.Priortoattaching
thefencecomponentstothebase,detailthemagainwith
redmarkertoensurethatnowhiteedgesshow.Testfitall
fencecomponentsatthesametimebeforeattachingthem
tothebaseusinghotglue.
X.Usinglichenandplants:Werecommendusingdried
lichenorother,better‐lookingscaleplantmaterialtoyourscale
projecttorepresentplants,trees,bushesandshrubs.Youcan
attachthesematerialstothebasequicklyandefficientlyusing
hotglue.Sidewalksthatareborderedwithshrubslook
especiallygoodandcreateanenhancedsenseofrealism.
Placingafewshrubsorbushesalongthefoundationofany
buildingbreaksupthestraightlinesandaddsscale‐realistic
detailtoanyPhotoRealbuildkit.
XI.Flags:Cutoutrightandleftsidesorfrontandback.Glue
togetherwithasmallamountofwhiteglue.Theprintedpoles
shouldbecutoff.Detailtheedgeswithcorrectcolormarker
whendry.
a.Straightenapaperclipandcutsmallstraightsectionsas
desiredforuseasaflagpole.Hotglueedgeofflagtopole.
Placepolewheredesiredusinghotglue.
XII.Pennantsandbanners:pennantsaremainlyusedwith
automotive‐themedbuildkits.Trimthemusingthetipofthe
scissorswhilemakingsuretonotgettooclosetothesimulated
stringarea.
b.Snip‐cutonesideofapennantflagangleandthenflipover
thematerialanddothesameuntilthescraptrianglepieces
fallaway.Forpatientmodelers,eachcoloredtrianglecan
becutoutandhotgluedontoapieceofstring.Colorthe
edgeswiththeappropriatecoloredmarkersforenhanced
realism.
XIII.Bonusbanners:Ifincluded,bonusbannerscanbe
carefullycutoutandappliedtoblankareasofyourassemblyor
attachedtoanUltraFencelayoutasexplainedbelow.Abanner
willhavesmall,printedropesbutyoucanremovetheseand
addsimulatedrope(suchasthickstring)toeachcornerwitha
dabofhotglueonthebackside.
XIV.Chain‐link/hurricanefencing:InnovativeHobbySupply
offersaproperlyscaledmodelaccessorycalledUltra‐Fencethat
simulateschain‐linkorhurricanefencing.Ultra‐Fenceisusually
availablewherethiskitwassold,orisavailableforpurchase
online.YoucanuseUltra‐FencewithUltraSignsignpost,also
availableatyourfavoritehobbystoreoronline.Scalefencing
createsgreatlyenhancedrealismwhenusedwithyourfavorite
buildkits.
XV.Detailingthebase:Attachthebasetoyourlayoutusing
yourfavoritecementoradhesive.Useofthebuildkitbase
componentisentirelyuptoyou.However,pleaseincludethe
basecomponentduringassemblytoensureagoodassembly
result.Afterassemblyiscomplete,ifdesired,trimoffthebase
towithin¼‐in.ofthebuildingfoundation.Youcanalsotrimoff
certainportionsofthebasetofityourexistingprojectlayout.
a.Basecomponentsaredesignedtoblendintoyourexisting
layoutbydecoratingthemwithscalelandscapematerials.
Youalsocanattachpopularsubstratestoanyofourbases
usingwhiteglue,suchasstandardsand,rock,andgrass
materials.
Theskillsyouhavelearnedinassemblingthisbuildkitwill
makeconstructinganyofourlineofPhotoRealBuildKits
fasterandeasier.Checkoutourentirelineofphoto‐
realisticbuildkitsatwww.innovativehobbysupply.com
EnterOurPhotoContest!
WouldyouliketoshowoffyourcompletedPhotoRealbuild
kit?Enterourphotocontestandbethefirsttoreceiveour
newest,unreleasedbuildkitscompletelyfreeforoneyear!
Wewillfeaturethebestphotosofyourfinishedassembliesand
layouts.ThecontestendsSeptember1,2013.Toenter,visitus
onlineat:
www.innovativehobbysupply.com

ASSEMBLY INSTRUCTIONS:
BK 1300/3500 ~ “Brick Rambler” Build Kit
Footprint Dimensions: Building – 4-5/8 x 8-3/8 in. Base – 7-1/2 x 9-3/8 in.
•Finally,anewalternativetoscalebuildingmodels.
•PhotoRealBuildKitsmaybethemostrealistickitsavailable.
•Greatforuseonmodeldioramas,slotcarandtrainlayouts.
•Easytoassemble!Comeswithfull‐colorinstructions.
SuitableforHOandO‐scalebutcanbeusedin1:43scaleandbig1:32scaleprojects.
Look for These Exciting Build Kits ~ Coming Soon!
•PoliceStationandJailwithHeliportRoof•HardwareStore
•OldPostOffice•BankofSugarCreek
•VintageGasStation•FoodStands
•Hi‐wayRoadsideCafé•MotorcycleShop
•TentandCampgroundsBuildkit•UsedCarDealership
•SugarCreekMotel•SugarCreekIceCreamShop
•MilitaryBuildingModels•SkiResort/SugarCreekMountain
•SupperClub•LogStyleCabin
•VintageBar•HighTopBarn
•Small‐townMovieTheater•SugarCreekCoffeeShop
•FarmImplementDealer•SmallVintageSawmill
Giant Photo Real Build Kits ~ Coming January 2013!
•FamilyCircusBigTop•High‐riseBuildings/Various
•3DIllusionBackdropsforLayoutsKit•BaseballDiamond
•ConcertStage•HighSchoolandFootballField
•CondoGarage•SugarCreekArena
•Self‐storageGarages•SugarCreekAirport
This manual suits for next models
1
Table of contents
Other Innovative Hobby Supply Toy manuals

Innovative Hobby Supply
Innovative Hobby Supply Clock Tower BK 6425 User manual

Innovative Hobby Supply
Innovative Hobby Supply Porta Potty's BK 6430 User manual
Innovative Hobby Supply
Innovative Hobby Supply BK 6424 User manual
Innovative Hobby Supply
Innovative Hobby Supply BK 2100 User manual
Innovative Hobby Supply
Innovative Hobby Supply Wynn BK 6435 User manual

Innovative Hobby Supply
Innovative Hobby Supply Bait Shop BK 6415 User manual

