Inscape RockIt at Home User manual
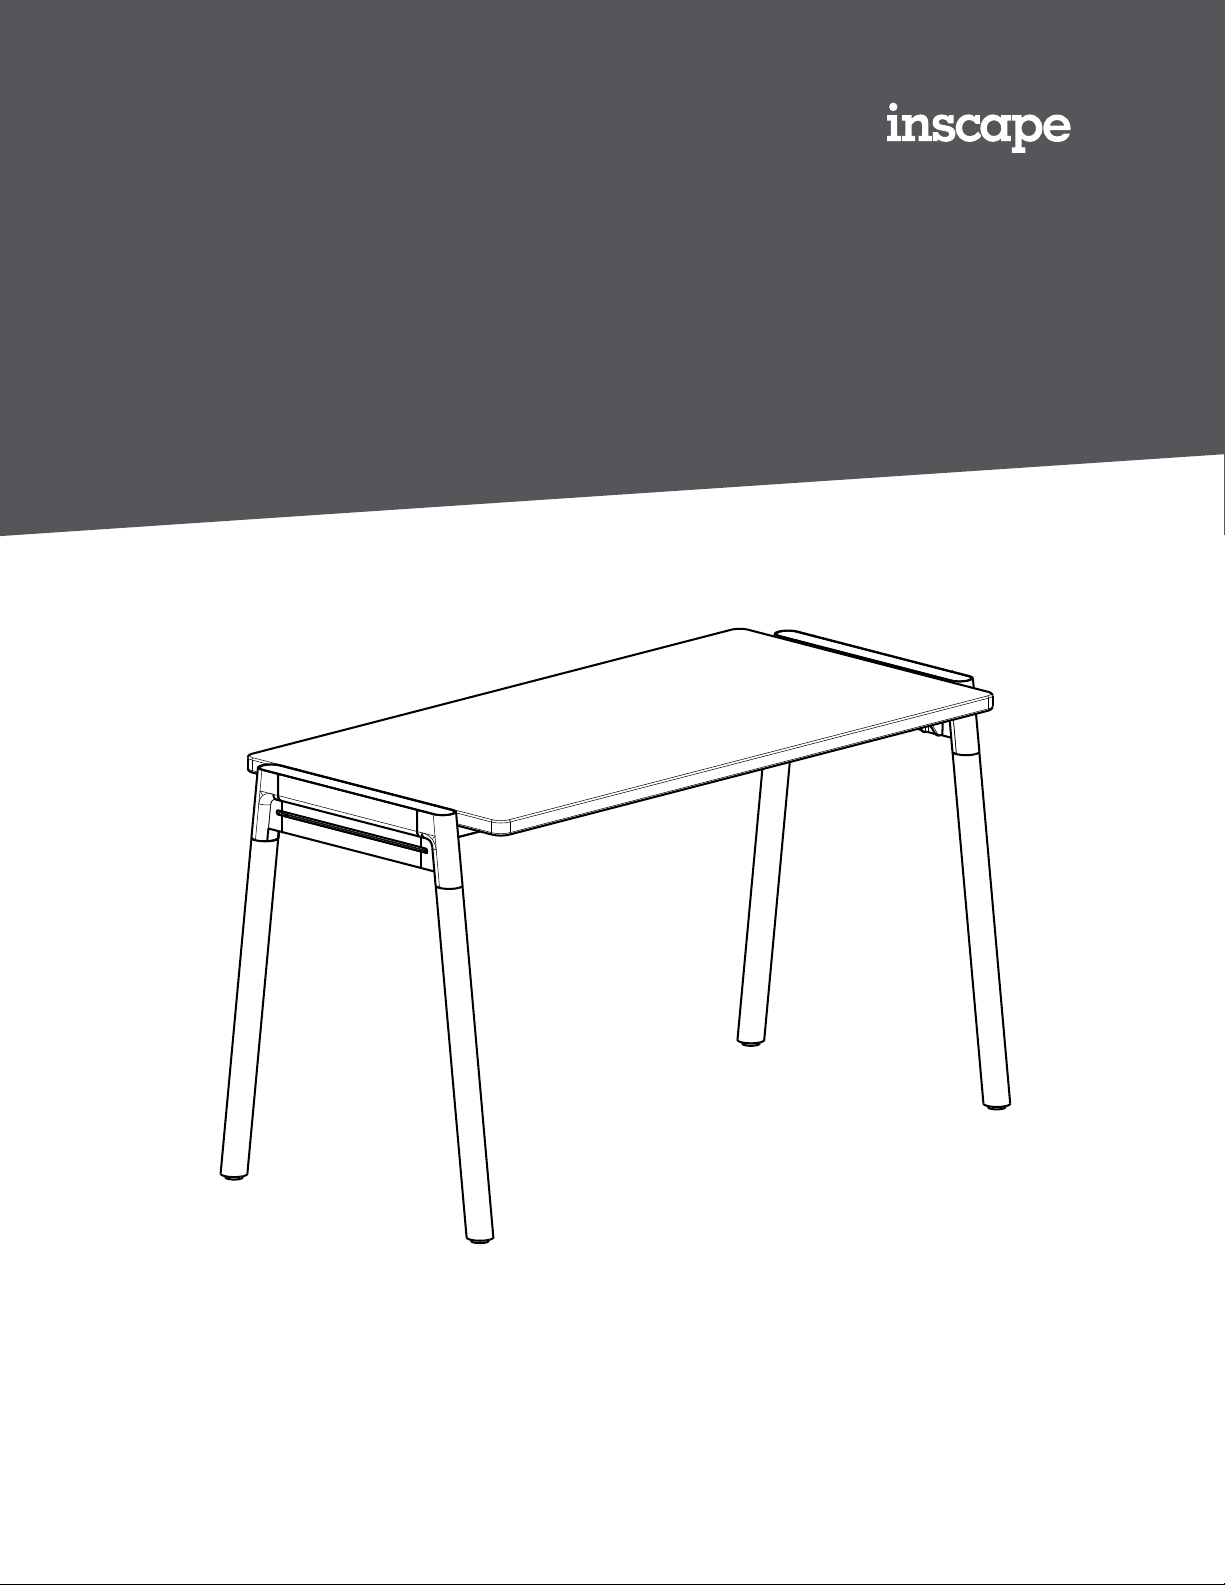
Installation Manual
RockIt at Home
Let’s Get
Started

1 RockIt at Home Installation Manual
IMPORTANT SAFETY INSTRUCTIONS
Failure to follow these recommendations could result in substandard product performance, property damage and/or personal
injury. The desk is for indoor use only; any other uses would be unsafe and are at the user’s own risk.
General Safety and Cautions
• Read Installation Manual before desk assembly.
• Do not overload the table.
• Sit/Stand pneumatic mechanism not for children's use without adult supervision.
• Do not use power tools.
• For indoor use only. Do not use outdoors.
• Do not sit, stand or lean heavily onto the desk surface.
• Do not expose the surface to harsh chemicals.
• Do not pull or push the desk to relocate it. To move/relocate desk, two people are recommended.
• Remove corded items before moving/relocating the desk. To move/relocate desk, two people are recommended.
Safety and Cautions
• Maximum loading capacity 25 lbs for RockIt Sit/Stand desk and 214 lbs for RockIt desk.
• Watch for pinch points.
• For Sit/Stand desk, be aware of pinch hazards between the adjustable arms and the desk frame.
• Keep objects and wall xtures out of the desktop travel path.
Care and Cleaning
• For general cleaning, use a damp cloth with warm soapy water or a mild household cleanser.
• Avoid exposure to extreme heat, cold and humidity.
• Do not place hot appliances directly on desktop.
• Avoid dragging sharp objects across the desktop.
• Do not use abrasive cleansers or highly solvent based chemicals such as gasoline, acetone or toluene on the desk.
Set up and Installation
• Assemble the desk according to the assembly instructions.
• Place the desk a safe distance from window frames, radiators, furniture, etc. allowing ample space for a person to
pass through safely.
• Level the desk with the adjustable feet, ensuring that the table is stable.
• Check that no cables of corded items can get jammed.
• For Sit/Stand desk, locate desk, accessories, and nearby objects to allow movement of the desktop through full range
without being obstructed.
• For Sit/Stand desk, maintain more than a 1" (25mm) gap between desk and adjacent objects, including objects on
desk at max height.
Liability: The manufacturer does not accept warranty claims or liability claims for personal damages arising from improper
use or handling of the desk frame other than that described in this operation manual.

RockIt at Home Installation Manual 2
Contents
RockIt Desk
Tools Required 3
Parts Included 3
Desk Assembly 4
Accessory Hook
How to Attach the Hook to the Desk 7, 13
RockIt Sit/Stand Desk
Tools Required 8
Parts Included 8
Sit/Stand Desk Assembly 9
3 RockIt at Home Installation Manual
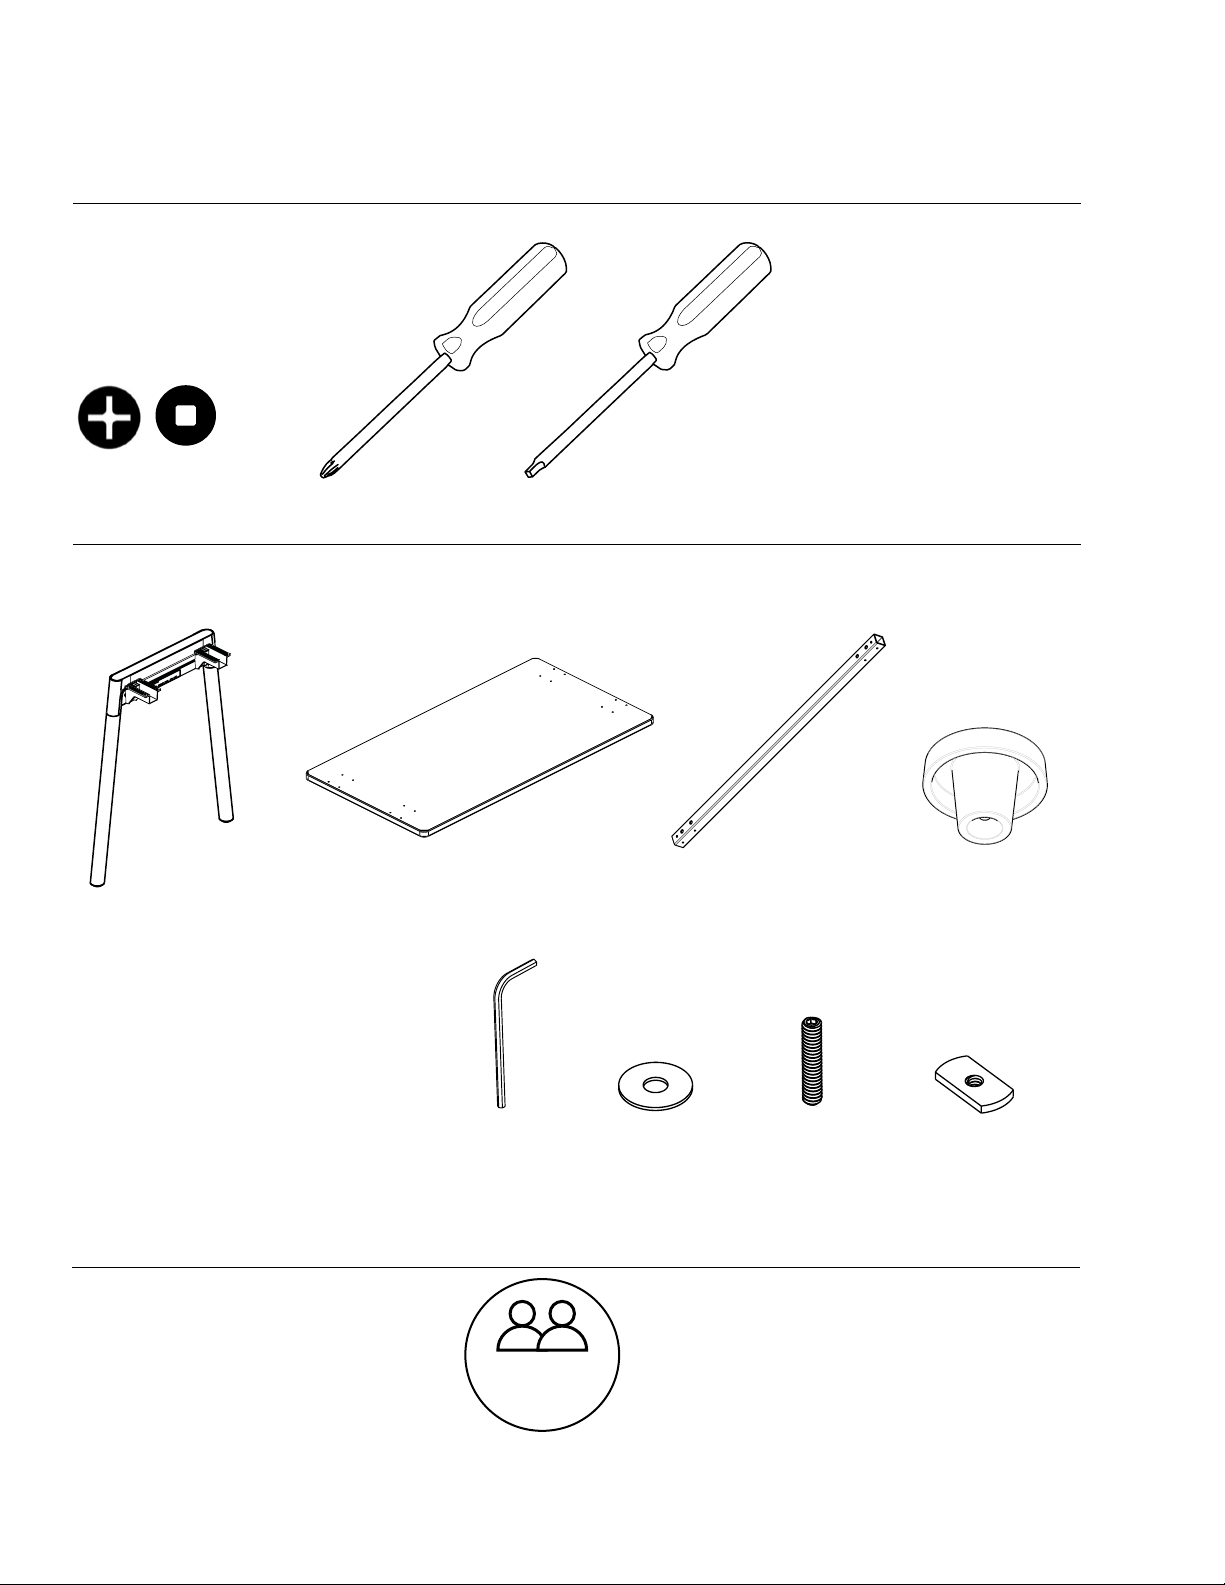
Tools
What’s in the box
#2 Phillips screwdriver
OR #2 Robertson screwdriver
Allen Key (Included)
Desk Assembly
4x
#10-24 x 1/2"
2x
Legs
1x
Desktop
2x
Support Bars
16x
#10-9 x 7/8"
Recommendation
This desk is heavy. Two people
are recommended to assemble
this desk.
2 People
Required
1x
Accessory Hook
1x
Clear Washer
1x
Set Screw
#10-24 x 1"
1x
Connector Nut
#10-24
1x
Allen Key 3/32"
RockIt at Home Installation Manual 4
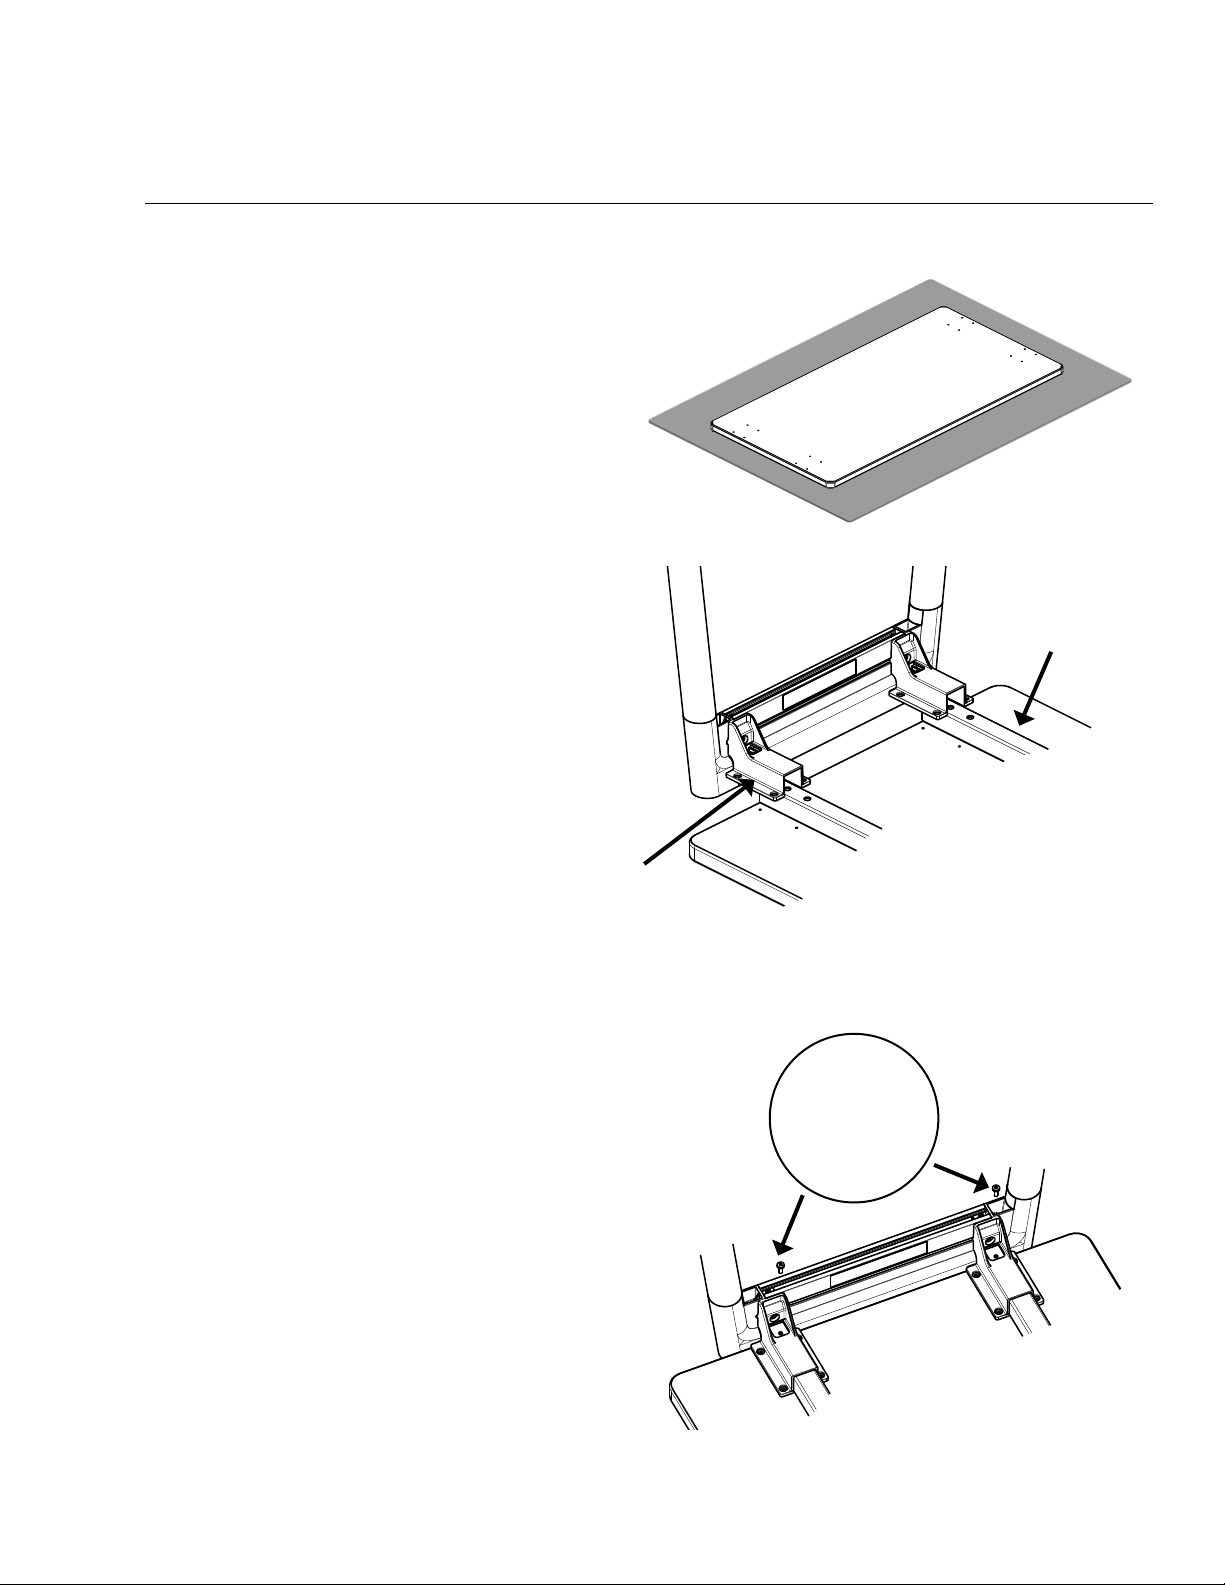
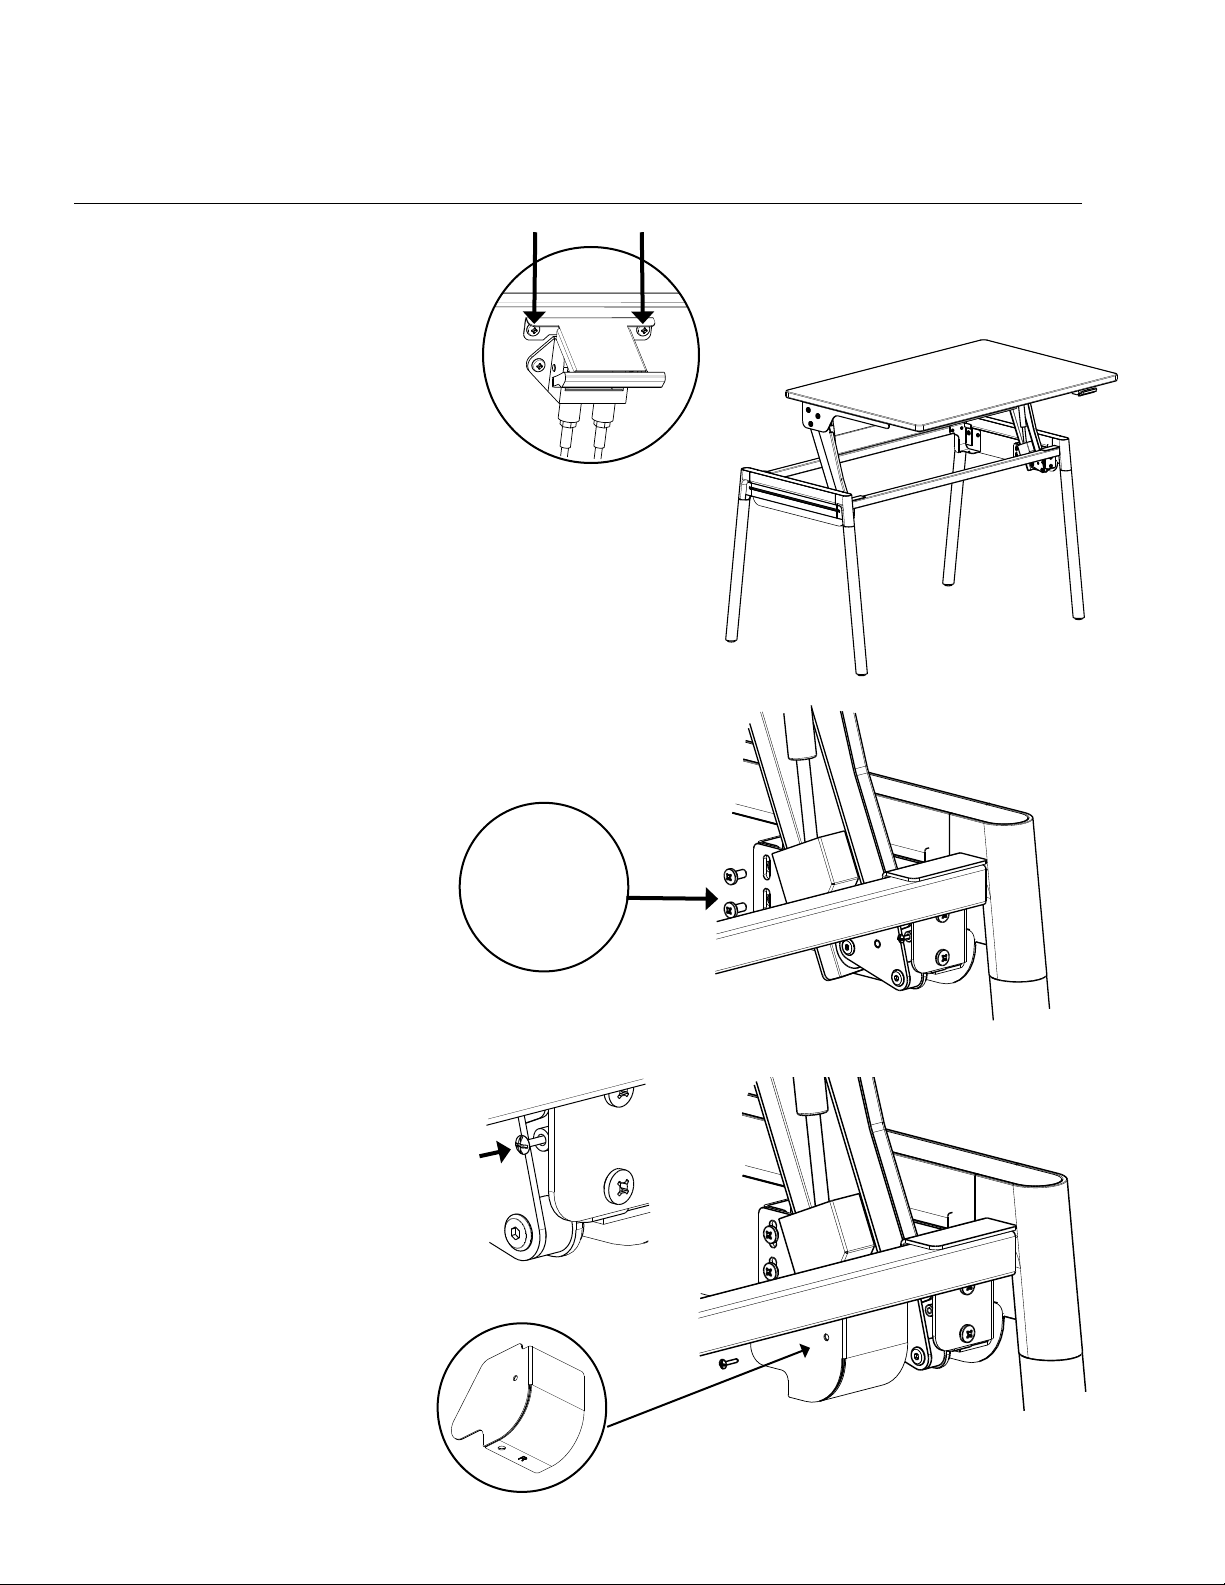
Desk Assembly
Step 1
Step 2
Step 3
Place the desktop face down on a soft, clean
blanket and set aside.
Turn one set of legs upside down and place
beside the desktop, as shown. Slide support
bars into leg brackets.
Note: Ensure the position of the three holes on
the support bars are facing upwards, as shown.
You may use a rubber mallet to help tap
into place.
Secure the support bars to the bracket using
a #10 x 1/2" screw. One screw per bracket.
Screws holes should line up when inserting the
support bar.
Bracket
Support Bar

5 RockIt at Home Installation Manual
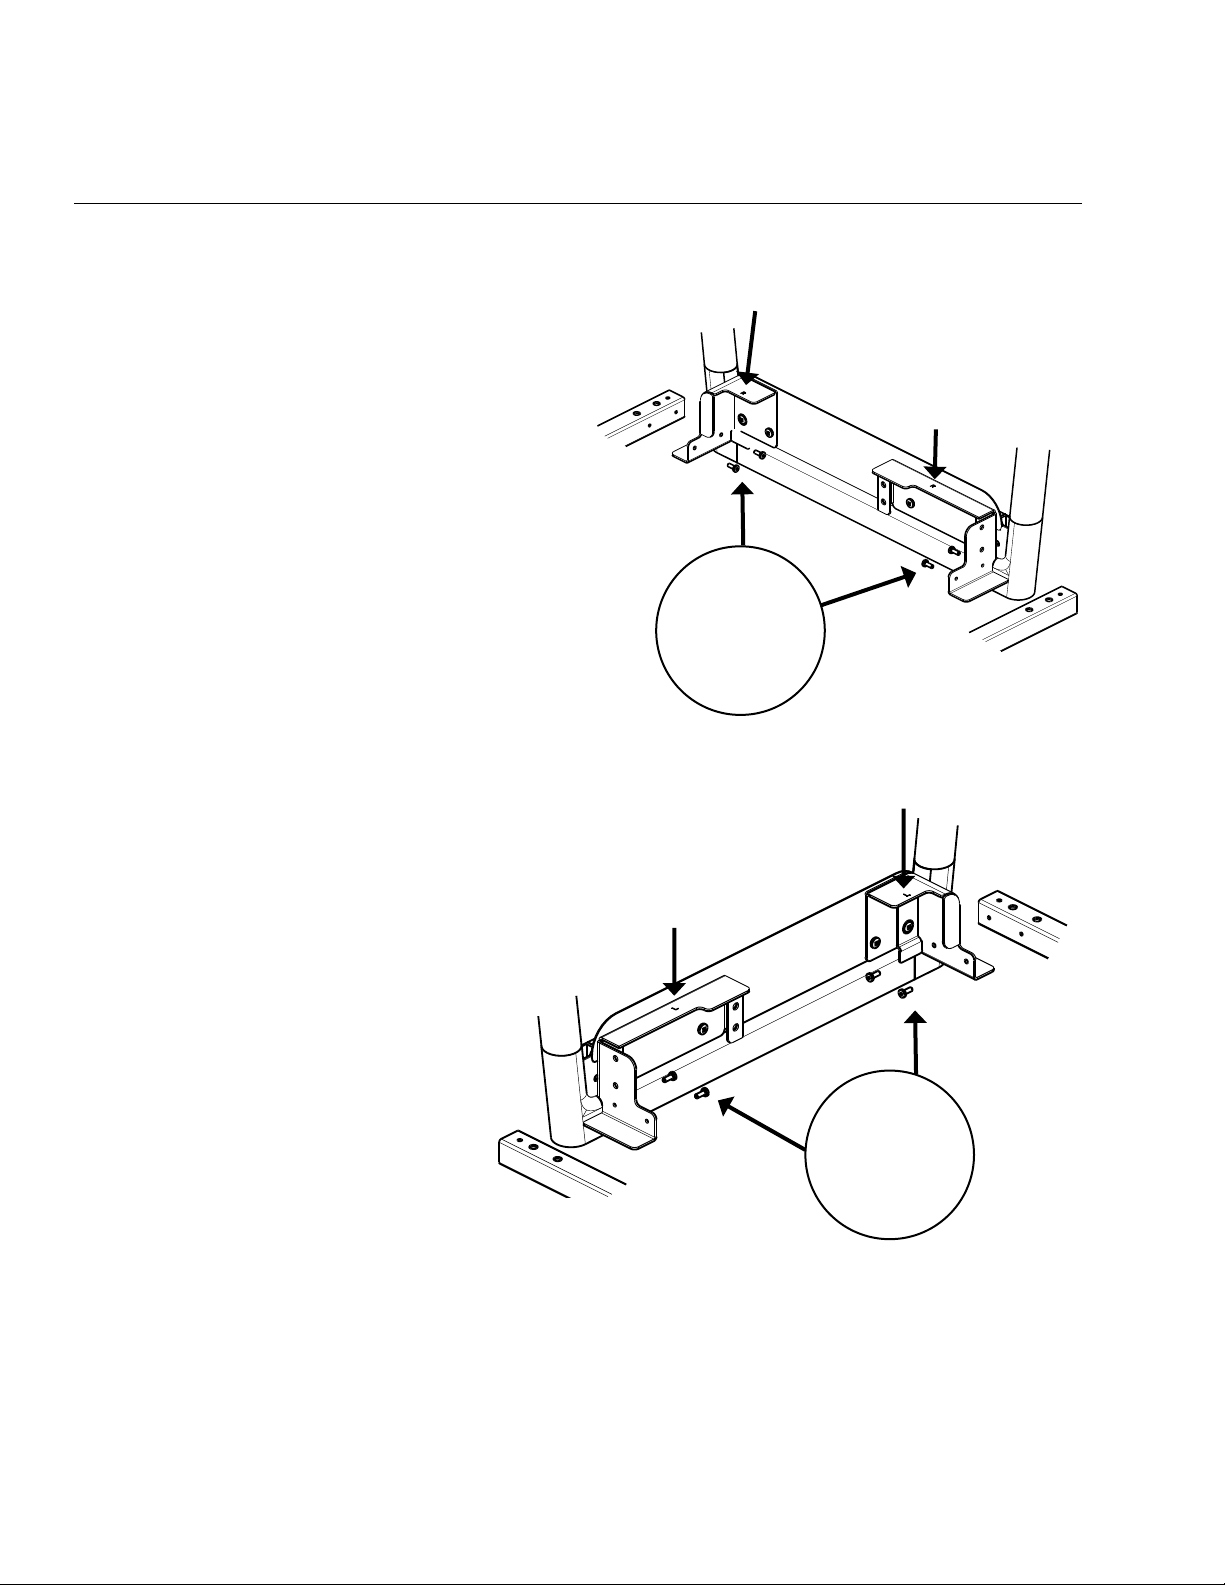
Step 4
Step 5
Align the pre-drilled holes in the desktop
with the bracket mounting holes. Secure
the front and rear bracket to the desktop
using #10 X 7/8" wood screws. Four screws
per bracket.
Slide the second leg onto the support bars
and tap into position.
Note: You may use a rubber mallet to help tap
into place.
Desk Assembly

RockIt at Home Installation Manual 6
Step 6
Step 7
Secure the support bars to the bracket using
a #10 x 1/2" screw. One screw per bracket.
Screws holes should line up when inserting the
support bar.
Align the pre-drilled holes in the desktop
with the bracket mounting holes. Secure
the front and rear bracket to the desktop
using #10 X 7/8"wood screws. Four screws
per bracket.
Ensure all screws are tightened before
moving on to the next step.
Desk Assembly

7 RockIt at Home Installation Manual
Final Step
Desk Assembly
With a friend, rotate the desk to an upright
position. Place the desk in desired location.
Rotate leveling glides as necessary, to ensure
desk is level and free from wobbles.
Congratulations you have completed
the assembly.
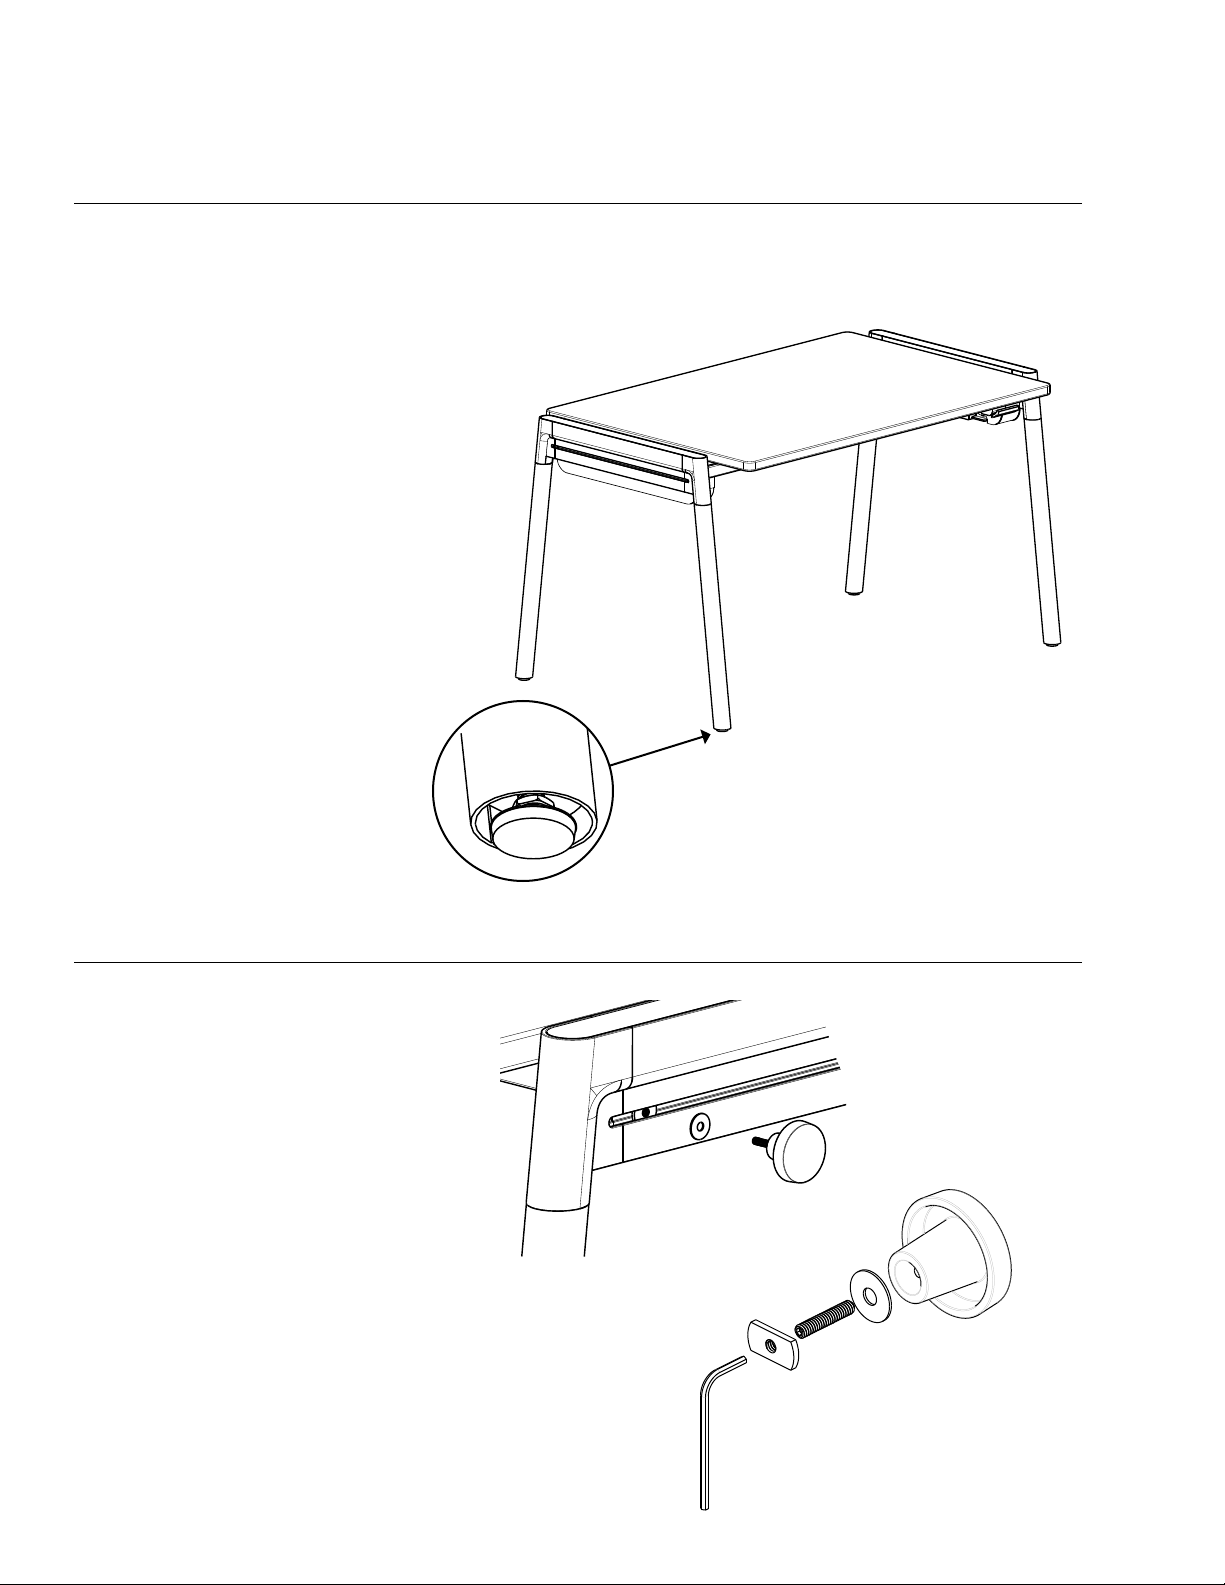
How to Attach the
Hook to the Desk
Thread set screw into accessory hook.
Slide the connector nut into the leg rail.
Ensure the smooth part of the connector nut
is facing you.
Add the washer, then thread the set screw
and accessory hook into the connector nut in
the leg rail.
Accessory
Hook
Washer
Set Screw
Connector Nut
Allen Key
Stabilize desk from uneven oor
surfaces by adjusting leveling glides.

RockIt at Home Installation Manual 8
Tools
What’s in the box
Recommendation
8x
#10-24 x 1/2"
8x
#1/4-20 x 1/2"
1x
Left
Leg Rail
1x
Right
Leg Rail
1x
Desktop
2x
Support Bars
1x
Right
Cover Cap
1x
Left
Cover Cap
#2 and #3 Phillips screwdrivers
OR #2 and #3 Robertson screwdrivers
Allen Key (Included)
This desk is heavy. Two people
are recommended to assemble
this desk.
Sit/Stand Desk Assembly
2 People
Required
1x
Accessory
Hook
4x
Clear Bumper
1x
Clear Washer
1x
Set Screw
#10-24 x 1"
1x
Connector Nut
#10-24
1x
Allen Key
3/32"
9 RockIt at Home Installation Manual
Sit/Stand Desk Assembly
Step 1
Locate the RIGHT leg, marked with a “R”,
and place it upside down on a soft, clean
blanket as shown. The rear bracket is the
smaller bracket. Secure the front and rear
support bars to the front and rear brackets,
as shown, using #10 X 1/2" screws.
Note: Ensure the position of the three
holes on the support bar are facing upwards,
as shown.
Step 2
Locate the LEFT leg, marked with a “L”,
and place it upside down on the blanket,
as shown. The rear bracket is the smaller
bracket. Secure the front and rear support
bars to the front and rear brackets, as
shown, using #10 X 1/2" screws.
Ensure all screws are tightened before
moving on to the next step.
Note: Ensure the position of the three
holes on the support bar are facing upwards,
as shown.
R
R
L
LRear
Bracket
Rear
Bracket
Front
Bracket
Front
Bracket

RockIt at Home Installation Manual 10
Step 3
Step 4
Step 5
Step 6
When you have completed the assembly of the
support bars to the legs, with a friend, rotate
the desk to an upright position.
Locate the desktop with the height adjustable
paddle, already attached. With a friend, place
desktop gently onto the two support bars
between the legs.
Note: The front edge of the desktop has the
height adjustable paddle handle on it. This is
the front of the desk and should be placed on
the side with the longer front bracket.
Secure the desktop to the desk frame using
two #1/4-20 X 1/2" bolts on the right hand
side, as shown.
Ensure all screws are tightened before
moving on to the next step.
Secure the desktop with height adjustable
mechanism to the desk frame using two
#1/4-20 X 1/2" bolts on the left hand side,
as shown.
Ensure all screws are tightened before
moving on to the next step.
Sit/Stand Desk Assembly
Front Bracket
Height Adjustable
Paddle
11 RockIt at Home Installation Manual
Step 7
Step 8
Before the desk is raised, remove the safety
bracket by removing the two screws on the top
and discard the safety bracket.
Stand in front of the desk and place one hand on
the top of the desk and one hand on the paddle.
Gently squeeze the paddle and pull forward. The
desk will then raise to the highest position and
you can release the paddle.
Note: Do not move back down until the desk has
been fully secured. (See steps 9–11)
Sit/Stand Desk Assembly
Step 9
With the desk fully raised, secure the height
adjustable mechanism to the rear of the front
bracket, as shown using two #1/4-20 X 1/2"
bolts per side.
Ensure all screws are tightened before
moving on to the next step.
Step 10
Locate the RIGHT hand front cover
cap, marked with a “R”.
Remove the mounting screw and
secure the RIGHT cover cap over the
front mounting bracket.
Step 10: Cover Cap Screw location
Safety Bracket
Mounting
Screw

RockIt at Home Installation Manual 12
Step 11
With the desk fully raised, secure the height
adjustable mechanism to the rear of the front
bracket, as shown, using two #1/4-20 X 1/2"
bolts per side.
Ensure all screws are tightened before
moving on to the next step.
Step 12
Locate the LEFT hand front cover
cap, marked with a “L”.
Remove the mounting screw and
secure the LEFT cover cap over the
front mounting bracket.
Sit/Stand Desk Assembly
Step 12: Cover Cap Screw location
Step 13
With the desktop in the fully raised position,
peel and stick a clear bumper to the top
of both the right and left hand side rear
mounting brackets, as shown.
Protective bumper location
on mounting bracket
Mounting
Screw
13 RockIt at Home Installation Manual
Sit/Stand Desk Assembly
Final Step
With one hand on the desktop, squeeze
the paddle with the other hand and move
it up and down a couple of times to ensure
operation is free and easy.
Place the desk in desired location. Rotate
leveling glides as necessary to ensure desk
is level and free from wobbles.
Congratulations you have completed
the assembly.
Stabilize desk from uneven oor
surfaces by adjusting leveling glides.
Maximum loading capacity 25 lbs
How to Attach the
Hook to the Desk
Thread set screw into accessory hook.
Slide the connector nut into the leg rail.
Ensure the smooth part of the connector nut
is facing you.
Add the washer, then thread the set screw
and accessory hook into the connector nut in
the leg rail.
Accessory
Hook
Washer
Set Screw
Connector Nut
Allen Key

RockIt at Home Installation Manual 14
Notes:

© 2020 Inscape Corporation myinscapehome.com
Other Inscape Indoor Furnishing manuals

Popular Indoor Furnishing manuals by other brands


meubar
meubar ARUBA BAR6 Assembly instruction

Gaviota Simbac
Gaviota Simbac Esenzia 80210001 Assembly instructions

Ergomotion
Ergomotion STYLE 2001 owner's manual

Furniture of America
Furniture of America CM7129TV Assembly instructions

Broyhill
Broyhill A208059801 Assembly instructions

Drive DeVilbiss Healthcare
Drive DeVilbiss Healthcare SUPPLITO Instructions for use


