3
www.insignia-products.com
Welcome
Congratulations on your purchase of a
high-quality Insignia product. Your NS-M10OHD
represents the state of the art in automobile DVD
player design and is designed for reliable and
trouble-free performance.
Contents
Safety information . . . . . . . . . . . . . . . . . . . . . . . . .3
Features. . . . . . . . . . . . . . . . . . . . . . . . . . . . . . . . .3
Setting up your DVD player . . . . . . . . . . . . . . . . . .5
Using your DVD player. . . . . . . . . . . . . . . . . . . . . .7
Maintaining. . . . . . . . . . . . . . . . . . . . . . . . . . . . . .11
Troubleshooting . . . . . . . . . . . . . . . . . . . . . . . . . .12
Specifications. . . . . . . . . . . . . . . . . . . . . . . . . . . .13
Warranty information . . . . . . . . . . . . . . . . . . . . . .13
Français. . . . . . . . . . . . . . . . . . . . . . . . 14
Español . . . . . . . . . . . . . . . . . . . . . . . . 26
Safety information
• The player is designed for use in a 14 V DC
vehicle.
• Do not operate the player in any way other
than described within this guide. Failure to
follow the instructions within the guide will
invalidate your warranty.
• Safety first—Do not install the player where it
may obstruct the driver’s vision, impair the
performance of any of the vehicle’s operating
systems or safety features, including airbags,
or impair the driver’s ability to safely operate
the vehicle.
• When using the player, make sure that you
are firmly secured by your seat belt to make
sure that you do not accidentally hit your
head on the screen during sudden braking or
other incidents. If you are ever in an accident,
injuries can be more severe if the seat belt is
not correctly buckled.
• Do not try to install or service your player by
yourself. Installation or servicing of the player
by persons without training and experience in
electronic equipment and automotive
accessories may be dangerous and could
expose you to the risk of electric shock or
other hazards.
• Be careful not to drain the vehicle battery
while using the player with the engine
stopped. To avoid draining the battery, we
suggest that the engine always run while
using the player.
• Do not disassemble or alter the player in any
way, or you may damage the player and
invalidate the warranty.
• Never clean the surface of the screen with a
chemical solvent or corrosive detergent,
which may cause permanent damage to the
TFT LCD screen.
• Avoid installing the player where it will be in
direct sunlight or near a hot air vent. Note
that the normal working temperature of the
player is between 23° to 122°F (-5° to 50°C).
If the internal temperature of the vehicle is
extremely high, a short cooling down period
is necessary before operating the player.
If the temperature inside the vehicle is very
low and the player is used soon after
switching on the heater, moisture may form
on the display. Turn off the player
immediately, or internal components may
short circuit. Keep the player turned off for
about an hour until the condensation
evaporates.
• In extremely cold temperatures, the
movement of the picture may be slow and the
picture may be dark. This is not a
malfunction. The player will work normally
once it reaches its operating temperature.
• Do not drop or hit the LCD panel with a hard
object. Doing so may cause permanent
damage to the LCD panel. Should the LCD
panel break, avoid touching any glass and
fluid. If you do come in contact with the glass
or fluid, wash your skin with plenty of water
and seek medical attention immediately.
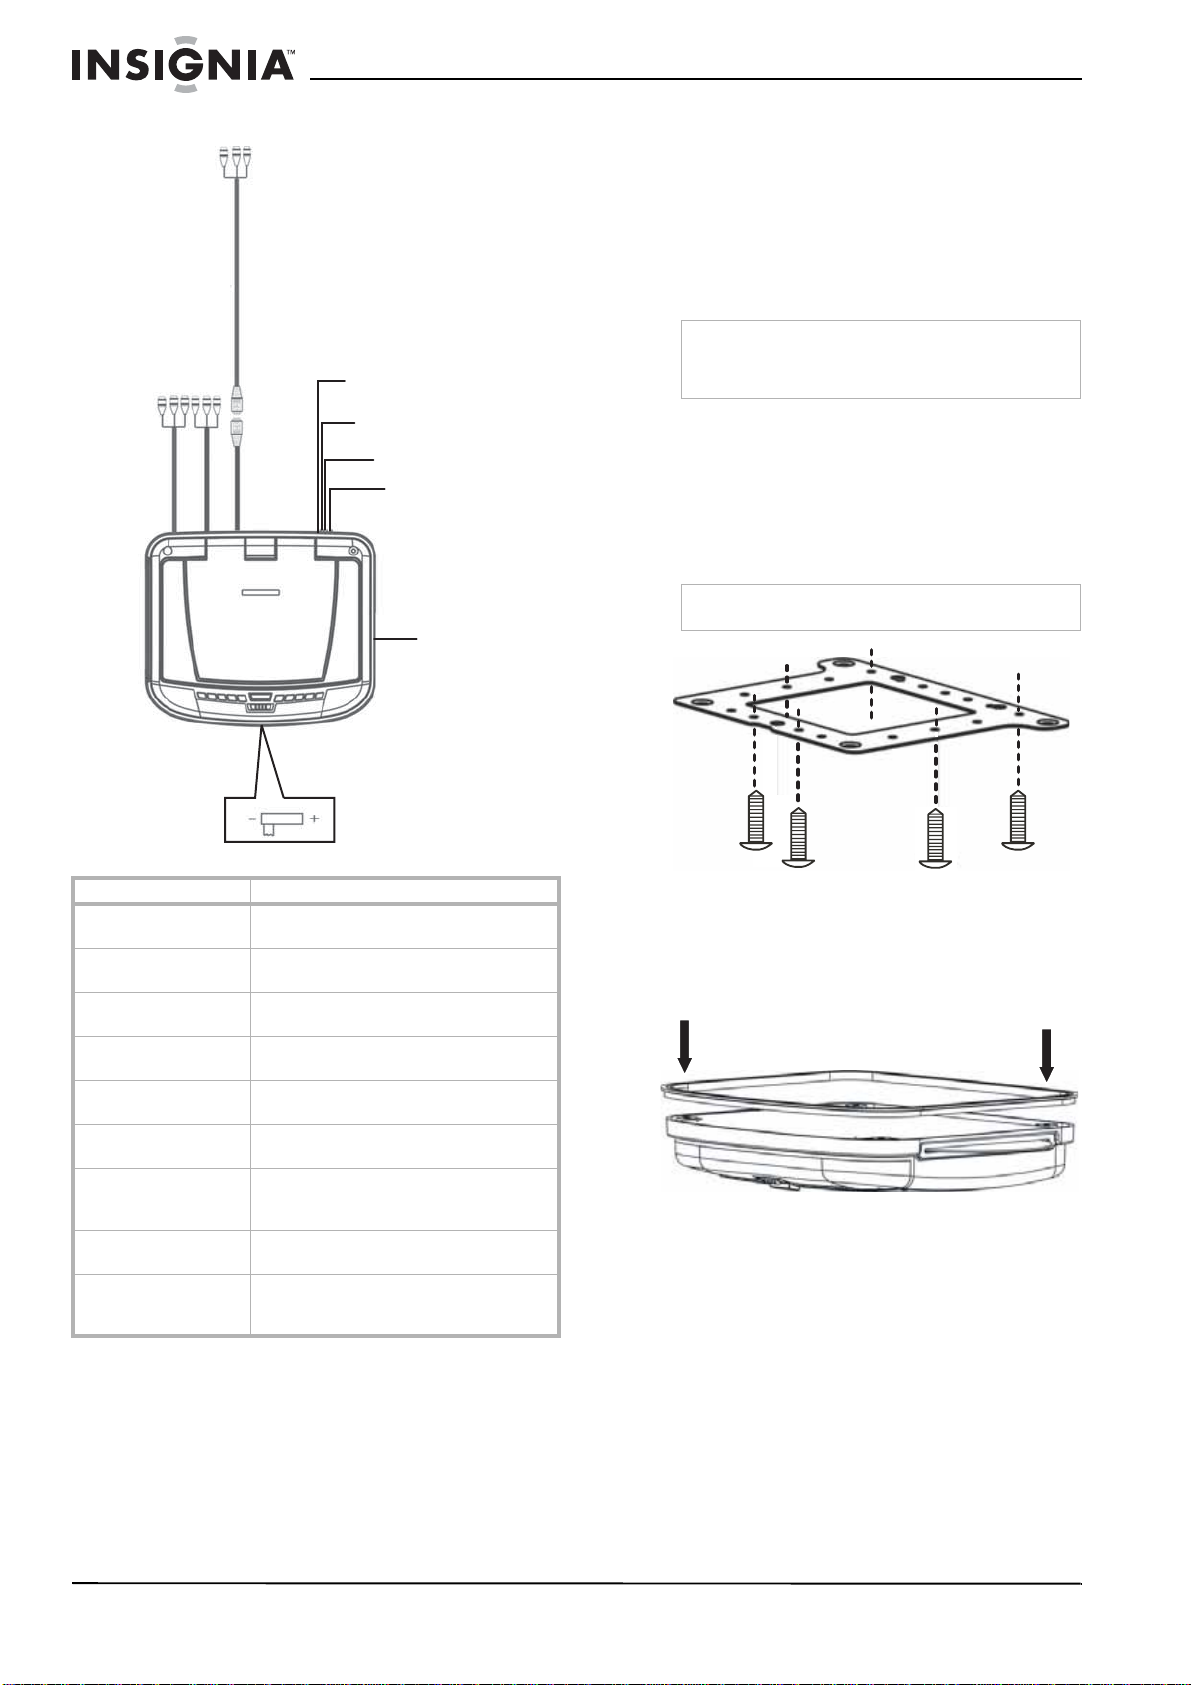
• Due to different vehicle specifications, make
sure that the player is correctly located and
not obstructing the rear view mirror and
air-conditioning vent.
• Use the supplied screws to attach the metal
mounting plate.
• Refer any questions to Insignia technical
support.
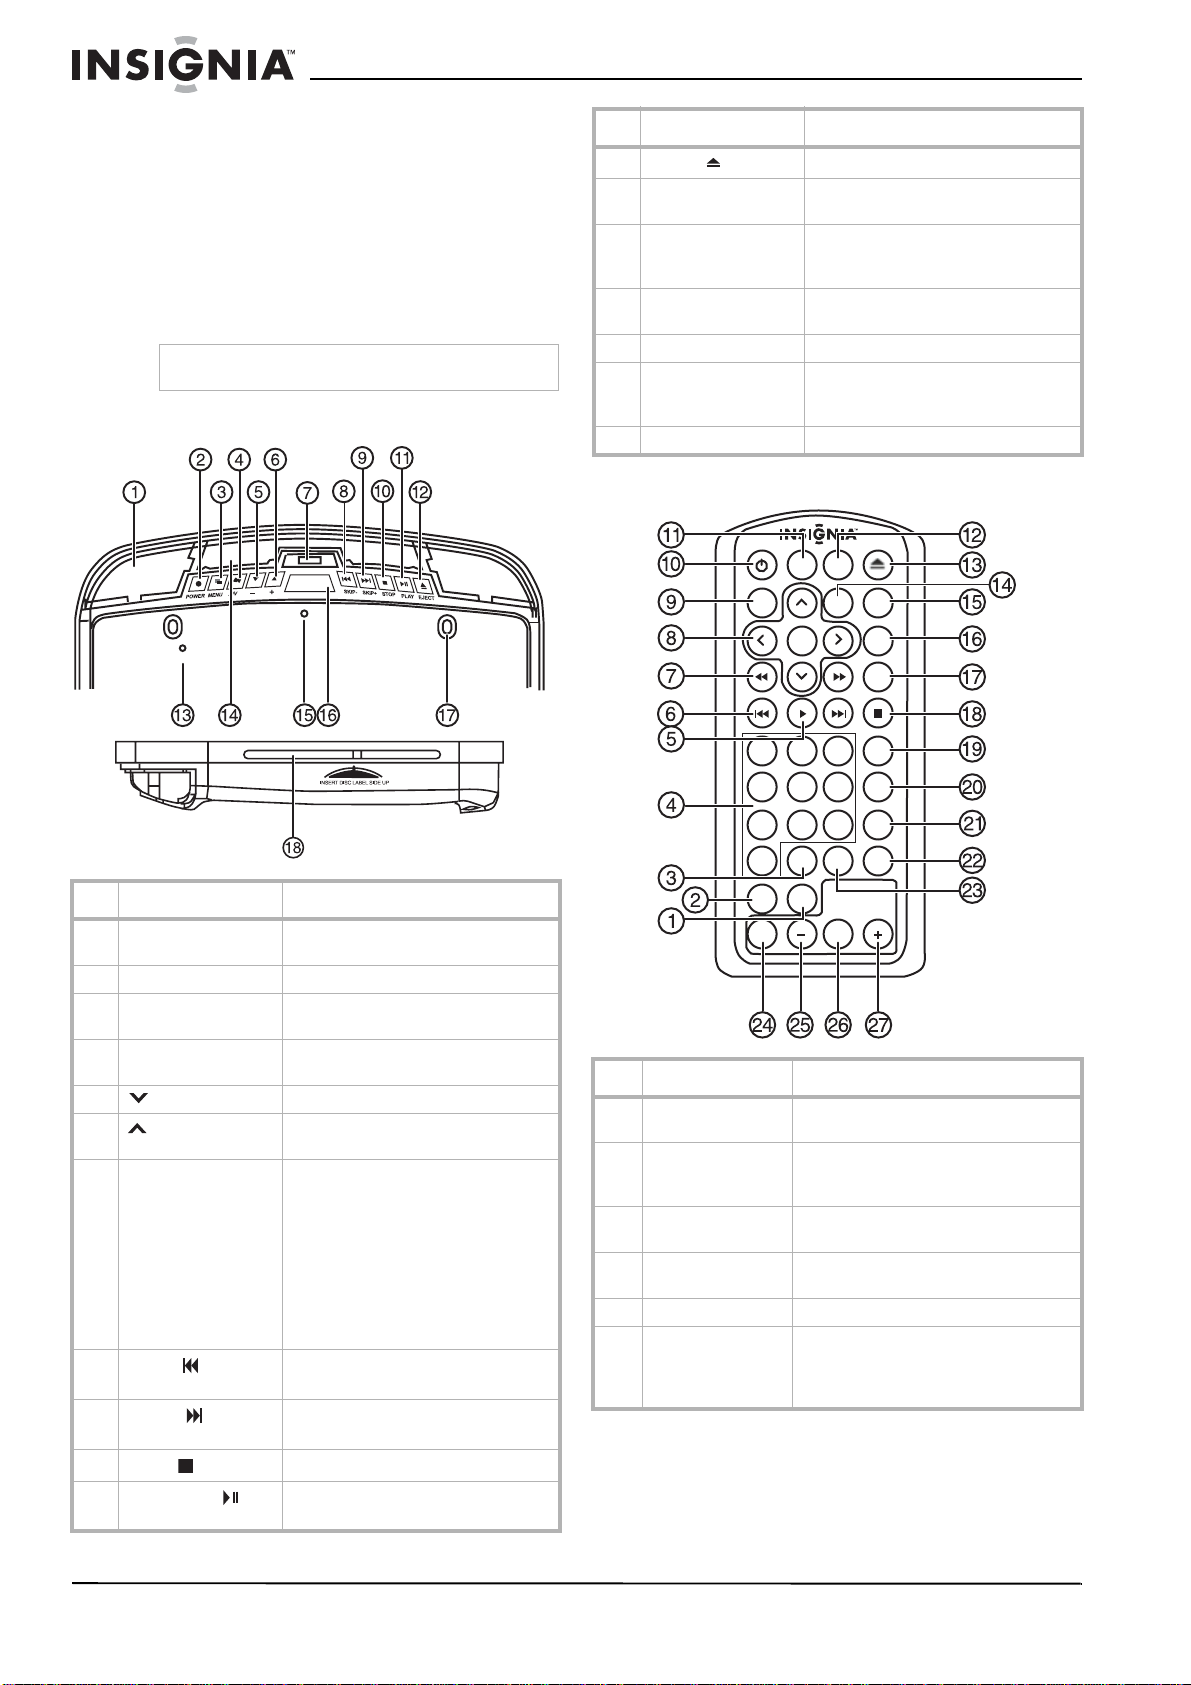
Features
This player is a roof mount 10.2" TFT-LCD color
display with a DVD player that can be used as a
stand-alone player. It can also be integrated into
a mobile multimedia system. The player has the
following features:
• 10.2" TFT-LCD color monitor (16:9)
• Roof mounting hardware
• Pixels: 800 x 480
• High brightness: 350 cd/m2
• NTSC and PAL compatible
• Adjustable color, contrast, brightness, and
tint
• Manual viewing angle adjustable up to 150°
• Built-in white LED dome light
• Automotive startup protection
• Built-in IR transmitter for wireless
headphones
• IR remote control
• On-screen display
• Two AV inputs
• One AV output
•SlotDVDmechanism
• FM transmitter
Caution
Before installing this player, check your localtraffic
rules and regulations for restrictions on placement
or use of the player.
NS-M10OHD_FINAL4.fm Page 3 Wednesday, March 29, 2006 4:12 PM