manuals.online logo
Brands
  1. Home
  2. •
  3. Brands
  4. •
  5. Insignia
  6. •
  7. LCD TV
  8. •
  9. Insignia NS-LCD32-09 Dimensions

Insignia NS-LCD32-09 Dimensions

FAQs
Insignia 32” LCD HDTV 720p (NS-LCD32-09)
September 30, 2008
My picture is not filling the screen. I have black bars around my picture.
•This is due to the aspect ratio. An increasing amount of digital TV programming and movies are presented in wide
screen (16:9).
•To change the appearance of the screen, cycle through these four options by pressing the Zoom button on the remote:
oNormal: Selects the aspect ratio that matches to source’s aspect ratio (4:3 or 16:9)
oWide: Displays a full-screen image
oZoom: Enlarges the picture. The top and bottom may be cropped.
oCinema: Stretches the image at the edges while maintaining a clear image in the center of the screen.
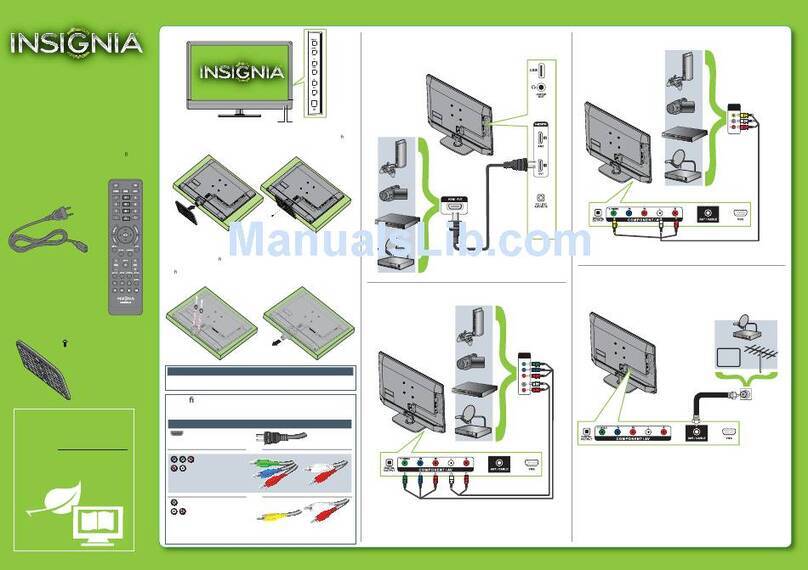
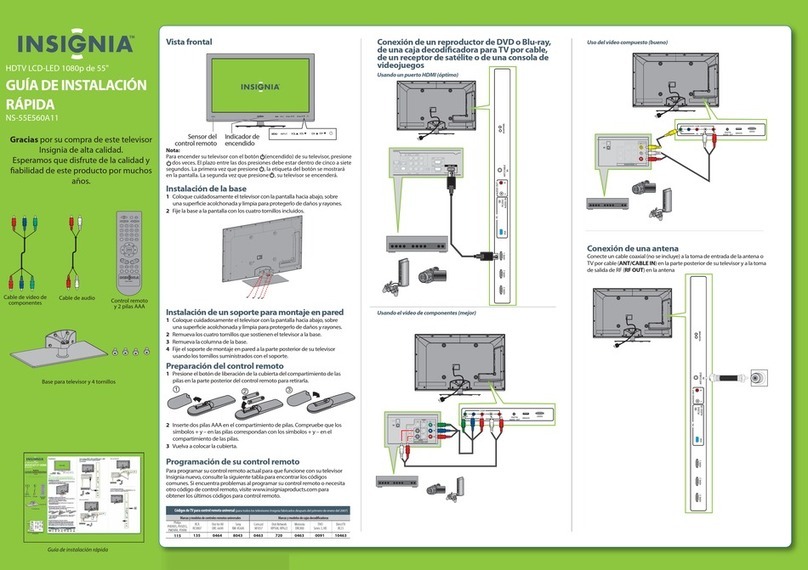
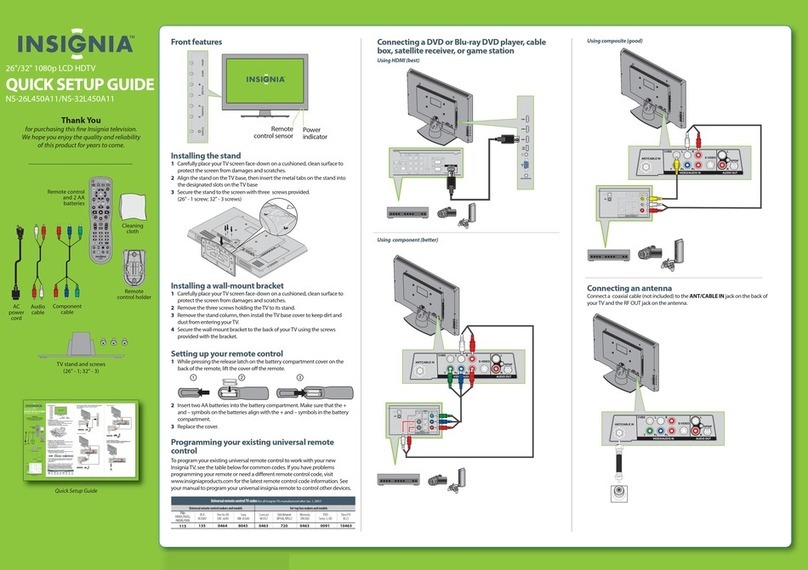
How do I hook up my external device (e.g., game system, DVD player, VCR, etc.)?
•What type of cable are you using?
oHDMI
Connect an HDMI cable to the HDMI 1 or HDMI 2 jack on the back of your TV or HDMI 3 jack on the
side of your TV and to the HDMI Out jack on the HDMI device.
To play from an HDMI device:
•Turn on the HDMI device, then set it to the correct mode. See the documentation that came
with the device for further instructions.
•Turn on your TV, then press INPUT. The Source List menu opens.
•Press ^or vto select HDMI 1, HDMI 2, or HDMI 3, then press ENTER.
oComponent Video Cables are red, green and blue. The audio cables will be red and white.
Connect a component cable to the COMPONENT 1 or COMPONENT 2 jacks on the back of your TV
and to the COMPONENT Out jacks on the component device.
To play from a component device:
•Turn on the component device, then set it to the correct mode. See the documentation that
came with the device for further instructions.
•Turn on your TV, then press INPUT. The Source List menu opens.
•Press ^or vto select Component 1 or Component 2, then press ENTER.
oS-Video Cable has a round end with prongs in a semi-circle and Audio Cables that are red and white.
Connect an S-Video cable to the S-VIDEO REAR jack on the back of your TV or S-VIDEO SIDE jack
on the side of your TV and to the S-VIDEO Out jack on the S-Video device.
Connect an audio cable to the L AV 1 IN and R AV 1 IN jacks on the back of your TV or L AV 2 IN and
R AV 2 IN and to the Audio Out jacks on the S-Video Device.
To play from an S-Video device:
•Turn on the S-Video device, then set it to the correct mode. See the documentation that came
with the device for further instructions.
•Turn on your TV, then press INPUT. The Source List menu opens.
•Press ^or vto select S-VIDEO REAR or S-VIDEO SIDE, then press ENTER.
oComposite (A/V Cables, RCA Cables) have a yellow video cable, and red and white audio cables.
Connect a composite cable to the AV 1 IN jacks on the back of your TV or AV 2 IN jacks on the side of
your TV and to the Video Out and Audio Out jacks on the composite device.
To play from a composite device:
•Turn on the Composite device, then set it to the correct mode. See the documentation that
came with the device for further instructions.
•Turn on your TV, then press INPUT. The Source List menu opens.
•Press ^or vto select Composite Rear or Composite Side, then press ENTER.
2
I am programming my universal remote, what code is needed?
•Please use the Insignia universal remote code website to determine the universal remote code you need:
www.insignia-products.com/universalcontrolcodes.aspx
I am receiving the error message “No Signal.”
•Make sure that your cable is properly plugged into your TV and the source device.
•Press INPUT and make sure you have selected the correct input for the device or service you are trying to use.
•Are you using a cable/satellite box, cable connected directly to the TV, or an antenna?
oIf you are using a cable or satellite box you must use the remote that came with that box to change channels.
Make sure you have the correct input selected to view channels via the cable or satellite box. For
example, if the cable or satellite box is connected via component cables please press input and select
Component 1 or Component 2 to view your channels.
oIf you are using cable connected directly to the TV, you need to run an autochannel search.
To run an autochannel search:
•Press MENU. The on-screen menu opens.
•Press ^or vto select Setup, then press >to enter Setup menu.
•Press ^or vto select Tuning Band, then press >to select Cable.
•Press ^or vto select Auto Ch Search, then press >to begin searching for channels. Your TV
memorizes all cable channels you receive.
oIf you are using an antenna, you need to run an autochannel search.
To run an autochannel search:
•Press MENU. The on-screen menu opens.
•Press ^or vto select Setup, then press >to enter Setup menu.
•Press ^or vto select Tuning Band, then press >to select Air.
•Press ^or vto select Auto Ch Search, then press >to begin searching for channels. Your TV
memorizes all analog and digital channels you receive.
I have no sound or my sound has static noise.
•Check volume levels.
•Make sure the TV volume is not muted.
•You may have accidentally turned off the TV Speakers.
oPress MENU. The on-screen menu opens.
oPress ^or vto select Audio, then press >to enter Audio menu.
oPress ^or vto select TV Speaker, then press >to select On.
•Make sure your connections are connected correctly to the jacks on the TV.
•Check the signal strength of the channel (Please note that the signal strength is only displayed on digital channels):
oPress MENU. The on-screen menu opens.
oPress ^or vto select Setup, then press >to enter Setup menu.
oPress ^or vto select DTV Signal, then press >to view Signal Level display.
If the signal level is Weak:
•Make sure your antenna is connected securely to the TV.
•Move the antenna around the room or close to a window.
•Use a basic indoor set-top antenna designed to pick up both VHF and UHF.
OR
Use a set-top antenna that has a built-in signal amplifier.
OR
Use an antenna mounted on your roof or in your attic.
•For more information about antennas and the available channels in your area, visit
www.antennaweb.org.
oPress EXIT to close the Signal Level display.
oIt is possible you are receiving marginal reception. Both the picture and sound may freeze or break up due to
poor reception.
•The audio cables you are using may be bad, try a new set.
3
I have poor picture quality.
•Make sure your cable connections are connected securely.
•If you are receiving service from a cable or satellite provider, reception can vary by channel depending on the broadcast
power level of a given station. Contact your cable or satellite provider.
•If you are using an antenna, the signal strength of the channel may be low.
oCheck the signal strength of the channel (Please note that the signal strength is only displayed on digital
channels):
Press MENU. The on-screen menu opens.
Press ^or vto select Setup, then press >to enter Setup menu.
Press ^or vto select DTV Signal, then press >to view Signal Level display.
•If the signal level is Weak:
oMake sure your antenna is connected securely to the TV.
oMove the antenna around the room or close to a window.
oUse a basic indoor set-top antenna designed to pick up both VHF and UHF.
OR
Use a set-top antenna that has a built-in signal amplifier.
OR
Use an antenna mounted on your roof or in your attic.
oFor more information about antennas and the available channels in your area, visit
www.antennaweb.org.
•Press EXIT to close the Signal Level display.
Press EXIT to close the Signal Level display.
oThe UHF band (channels 14 and higher) is more directional than VHF (channels 2-13) and more sensitive to
obstacles (such as trees, tall buildings, and mountains) that lie between your antenna and the broadcast tower.
Getting good UHF reception can be more difficult than VHF.
oIf you're getting marginal reception of digital signals, both the picture and sound might freeze or break up to the
point that it's not watchable. If you're really on the fringes—either too far from a tower or with too many
obstacles in the way—you'll see a black screen that says "No signal."
oReception can vary by channel, depending on the location and broadcast power level of a given station.
•The video cables you are using may be bad, try a new set.
I am missing channels or want to run an autochannel search.
•It is possible that the Favorite button was pressed accidentally.
oPress the Favorite button on the remote.
•Make sure the channel is not blocked by Parental Controls.
•Are you using a cable/satellite box, cable connected directly to the TV, or an antenna?
oIf you are using a cable or satellite box you must use the remote that came with that box to change channels.
Make sure you have the correct input selected to view channels via the cable or satellite box. For
example, if the cable or satellite box is connected via component cables please press input and select
Component 1 or Component 2 to view your channels.
Reception can vary by channel depending on the broadcast power level of a given station. Contact
your cable or satellite provider.
oIf you are using cable connected directly to the TV:
Try running an autochannel search:
•Press MENU. The on-screen menu opens.
•Press ^or vto select Setup, then press >to enter Setup menu.
•Press ^or vto select Tuning Band, then press >to select Cable.
•Press ^or vto select Auto Ch Search, then press >to begin searching for channels. Your TV
memorizes all cable channels you receive.
OR
Try manually adding the channel:
•Press MENU. The on-screen menu opens.
•Press ^or vto select Setup, then press >to enter Setup menu.
•Press ^or vto select Manual Channel Set then press >to enter Manual Channel Set menu.
•Press ^or vto select the channel.
•Press ENTER to toggle between Not Viewable and Viewable.
4
•Press EXIT to close the Manual Channel Set menu.
Reception can vary by channel depending on the broadcast power level of a given station. Contact
your cable provider.
oIf you are using an antenna:
Try running an autochannel search:
•Press MENU. The on-screen menu opens.
•Press ^or vto select Setup, then press >to enter Setup menu.
•Press ^or vto select Tuning Band, then press >to select Air.
•Press ^or vto select Auto Ch Search, then press >to begin searching for channels. Your TV
memorizes all analog and digital channels you receive.
OR
Try manually adding the channel:
•Press MENU. The on-screen menu opens.
•Press ^or vto select Setup, then press >to enter Setup menu.
•Press ^or vto select Manual Channel Set then press >to enter Manual Channel Set menu.
•Press ^or vto select the channel.
•Press ENTER to toggle between Not Viewable and Viewable.
•Press EXIT to close the Manual Channel Set menu.
The signal strength of the channel may be low.
•Check the signal strength of the channel (Please note that the signal strength is only displayed
on digital channels):
oPress MENU. The on-screen menu opens.
oPress ^or vto select Setup, then press >to enter Setup menu.
oPress ^or vto select DTV Signal, then press >to view Signal Level display.
•If the signal level is Weak:
•Make sure your antenna is connected securely to the TV.
•Move the antenna around the room or close to a window.
•Use a basic indoor set-top antenna designed to pick up both VHF and
UHF.
OR
Use a set-top antenna that has a built-in signal amplifier.
OR
Use an antenna mounted on your roof or in your attic.
•For more information about antennas and the available channels in your area,
visit www.antennaweb.org.
oPress EXIT to close the Signal Level display.
The UHF band (channels 14 and higher) is more directional than VHF (channels 2-13) and more
sensitive to obstacles (such as trees, tall buildings, and mountains) that lie between your antenna and
the broadcast tower. Getting good UHF reception can be more difficult than VHF.
If you're getting marginal reception of digital signals, both the picture and sound might freeze or break
up to the point that it's not watchable. If you're really on the fringes—either too far from a tower or with
too many obstacles in the way—you'll see a black screen that says "No signal."
Reception can vary by channel, depending on the location and broadcast power level of a given station.
I am having issues with the picture on my TV (e.g., stripe on the screen, blue lines/dots, red line, etc.).
•Make sure your cables are connected correctly and securely to the jacks on the TV.
•The cables you are using may be bad, try a new set.
•If you are using an antenna, the signal strength of the channel may be low.
oCheck the signal strength of the channel (Please note that the signal strength is only displayed on digital
channels):
Press MENU. The on-screen menu opens.
Press ^or vto select Setup, then press >to enter Setup menu.
Press ^or vto select DTV Signal, then press >to view Signal Level display.
•If the signal level is Weak:
oMake sure your antenna is connected securely to the TV.
oMove the antenna around the room or close to a window.
5
oUse a basic indoor set-top antenna designed to pick up both VHF and UHF.
OR
Use a set-top antenna that has a built-in signal amplifier.
OR
Use an antenna mounted on your roof or in your attic.
oFor more information about antennas and the available channels in your area, visit
www.antennaweb.org.
Press EXIT to close the Signal Level display.
oThe UHF band (channels 14 and higher) is more directional than VHF (channels 2-13) and more sensitive to
obstacles (such as trees, tall buildings, and mountains) that lie between your antenna and the broadcast tower.
Getting good UHF reception can be more difficult than VHF.
oIf you're getting marginal reception of digital signals, both the picture and sound might freeze or break up to the
point that it's not watchable. If you're really on the fringes—either too far from a tower or with too many
obstacles in the way—you'll see a black screen that says "No signal."
oReception can vary by channel, depending on the location and broadcast power level of a given station.
•Other devices (e.g., surround sound receiver, external speakers, fans, etc) may be interfering with your TV. Try turning
one device off at a time to determine which device is causing the interference.
oOnce you have determined which device is causing interference, please move it further from the TV to eliminate
the interference.
How do I turn on/off closed captioning?
•Press the CCD button on the remote to select CC Off, CC On, or CC On When Mute.
•Advanced closed captioning settings can be found in the Menu under the Feature menu.
.
I am trying to connect my computer and I have poor picture quality.
•You may need to adjust the resolution settings on your computer.
oTo adjust the resolution on Windows XP:
Click Start to open the Start menu.
Select and click on Control Panel.
In category view:
•Click on Appearance and Themes.
•Click Display.
•In the Display Properties dialog box, click on the Settings tab.
•Select monitor number 2.
•Drag the screen resolution slider to the left to decrease the resolution of your monitor, making
text and pictures appear larger or drag the slider to the right to increase the resolution of your
monitor, making text and pictures appear smaller.
•Click Apply to have the new resolution take effect.
•If the Monitor Settings dialog box appears, look at your display. If you like the new resolution,
click Yes. If you do not like the resolution, click No and adjust the resolution using the screen
resolution slider.
•Click OK.
In classic view:
•Double-click Display.
•In the Display Properties dialog box, click on the Settings tab.
•Select monitor 2.
•Drag the screen resolution slider to the left to decrease the resolution of your monitor, making
text and pictures appear larger or drag the slider to the right to increase the resolution of your
monitor, making text and pictures appear smaller.
•Click Apply to have the new resolution take effect.
•If the Monitor Settings dialog box appears, look at your display. If you like the new resolution,
click Yes. If you do not like the resolution, click No and adjust the resolution using the screen
resolution slider.
•Click OK.
oTo adjust the resolution on Windows Vista:
Click the Windows icon to open the Start menu.
6
Select and click on Control Panel.
Click on Appearance and Themes.
Click Personalization.
Click Display Settings.
Select Monitor 2.
Drag the screen resolution slider to the left to decrease the resolution of your monitor, making text and
pictures appear larger or drag the slider to the right to increase the resolution of your monitor, making
text and pictures appear smaller.
Click Apply to have the new resolution take effect.
•If the Monitor Settings dialog box appears, look at your display. If you like the new resolution,
click Yes. If you do not like the resolution, click No and adjust the resolution using the screen
resolution slider.
Click OK.
oTo adjust the resolution on Mac OS 9 and earlier:
From the Apple menu select Control Panels > Monitors.
On the Monitors dialog box, make sure you have selected the Monitor panel (click the Monitor button –
it has a sun-like icon).
On the right of the Monitor panel is a Resolution list. Select one from the list and your monitor will
immediately change its resolution to the one you selected. A higher resolution will make the text and
pictures appear smaller.
When you are satisfied with your display resolution, close the Monitor/Display Control Panel (File > Quit
or just click the close box).
oTo adjust the resolution on Mac OS X:
Open the System Preferences (either from the Dock or from the Apple menu).
Open the Displays Panel and choose the Display tab.
On the left of the Displays tab you can select one of the Resolutions from the list. A higher resolution
will make the text and pictures appear smaller.
Quit or close the System Preferences when done.
•You may need to adjust the PC (VGA) picture settings on your TV.
oMake sure the TV is in VGA mode, then press MENU. The on-screen menu opens.
oPress ^or vto select Feature, then press >to enter the Feature menu.
oPress ^or vto select VGA Set, then press >to open the VGA Set menu.
oPress ^or vto select an option, then press <or > to adjust the option. You can adjust:
H-Position: Moves the image left or right
V-Postion: Moves the image up or down
Clock: Adjusts the sample frequency
Phase: Improves image stability
Auto Adjust: Automatically adjusts the image settings
Setting Preset: Resets the options to factory preset.
I am trying to connect my computer and I am receiving the error message “Unsupported Mode.”
•You may need to adjust the resolution settings on your computer.
oTo adjust the resolution on Windows XP:
Click Start to open the Start menu.
Select and click on Control Panel.
In category view:
•Click on Appearance and Themes.
•Click Display.
•In the Display Properties dialog box, click on the Settings tab.
•Select monitor number 2.
•Drag the screen resolution slider to the left to decrease the resolution of your monitor, making
text and pictures appear larger or drag the slider to the right to increase the resolution of your
monitor, making text and pictures appear smaller.
•Click Apply to have the new resolution take effect.
7
•If the Monitor Settings dialog box appears, look at your display. If you like the new resolution,
click Yes. If you do not like the resolution, click No and adjust the resolution using the screen
resolution slider.
•Click OK.
In classic view:
•Double-click Display.
•In the Display Properties dialog box, click on the Settings tab.
•Select monitor 2.
•Drag the screen resolution slider to the left to decrease the resolution of your monitor, making
text and pictures appear larger or drag the slider to the right to increase the resolution of your
monitor, making text and pictures appear smaller.
•Click Apply to have the new resolution take effect.
•If the Monitor Settings dialog box appears, look at your display. If you like the new resolution,
click Yes. If you do not like the resolution, click No and adjust the resolution using the screen
resolution slider.
•Click OK.
oTo adjust the resolution on Windows Vista:
Click the Windows icon to open the Start menu.
Select and click on Control Panel.
Click on Appearance and Themes.
Click Personalization.
Click Display Settings.
Select Monitor 2.
Drag the screen resolution slider to the left to decrease the resolution of your monitor, making text and
pictures appear larger or drag the slider to the right to increase the resolution of your monitor, making
text and pictures appear smaller.
Click Apply to have the new resolution take effect.
•If the Monitor Settings dialog box appears, look at your display. If you like the new resolution,
click Yes. If you do not like the resolution, click No and adjust the resolution using the screen
resolution slider.
Click OK.
oTo adjust the resolution on Mac OS 9 and earlier:
From the Apple menu select Control Panels > Monitors.
On the Monitors dialog box, make sure you have selected the Monitor panel (click the Monitor button –
it has a sun-like icon).
On the right of the Monitor panel is a Resolution list. Select one from the list and your monitor will
immediately change its resolution to the one you selected. A higher resolution will make the text and
pictures appear smaller.
When you are satisfied with your display resolution, close the Monitor/Display Control Panel (File > Quit
or just click the close box).
oTo adjust the resolution on Mac OS X:
Open the System Preferences (either from the Dock or from the Apple menu).
Open the Displays Panel and choose the Display tab.
On the left of the Displays tab you can select one of the Resolutions from the list. A higher resolution
will make the text and pictures appear smaller.
Quit or close the System Preferences when done.
My TV is not working at all (i.e., will not turn on using remote or button on TV, LED flashing).
•Unplug the power cord, wait 60 seconds, plug the cord back in again, then turn on your TV.
•Try plugging the TV into another outlet.
•Check to see if the outlet power is controlled by a switch (for example, for use with a lamp).
•Other devices (e.g., surround sound receiver, external speakers, fans, etc) may be interfering with your TV. Try turning
one device off at a time to determine which device is causing the interference.
oOnce you have determined which device is causing interference, please move it further from the TV to eliminate
the interference.
•If this troubleshooting does not work, please contact In-Home Service at 1-888-BEST BUY (1-888-237-8289).
8
I have sound but no picture.
•You may have accidentally turned the picture off.
oPress MENU. The on-screen menu opens.
oPress ^or vto select Audio, then press >to enter Audio menu.
oPress ^or vto select Audio Only, then press <or >to select Off.
•Make sure the cables are connected correctly and securely.
•The video cable(s) you are using may be bad, try a new set.
•If you are using an antenna, the signal strength of the channel may be low.
oCheck the signal strength of the channel (Please note that the signal strength is only displayed on digital
channels):
Press MENU. The on-screen menu opens.
Press ^or vto select Setup, then press >to enter Setup menu.
Press ^or vto select DTV Signal, then press >to view Signal Level display.
•If the signal level is Weak:
oMake sure your antenna is connected securely to the TV.
oMove the antenna around the room or close to a window.
oUse a basic indoor set-top antenna designed to pick up both VHF and UHF.
OR
Use a set-top antenna that has a built-in signal amplifier.
OR
Use an antenna mounted on your roof or in your attic.
oFor more information about antennas and the available channels in your area, visit
www.antennaweb.org.
Press EXIT to close the Signal Level display.
oThe UHF band (channels 14 and higher) is more directional than VHF (channels 2-13) and more sensitive to
obstacles (such as trees, tall buildings, and mountains) that lie between your antenna and the broadcast tower.
Getting good UHF reception can be more difficult than VHF.
oIf you're getting marginal reception of digital signals, both the picture and sound might freeze or break up to the
point that it's not watchable. If you're really on the fringes—either too far from a tower or with too many
obstacles in the way—you'll see a black screen that says "No signal."
oReception can vary by channel, depending on the location and broadcast power level of a given station.
•If this troubleshooting does not work, please contact In-Home Service at 1-888-BEST BUY (1-888-237-8289).
How do I set up my TV?
•Connecting Devices:
•Do you still have your quick start guide? Have you tried following those directions?
oSelecting the best connection:
To get the best digital audio and picture, use an HDMI connection.
Component is the 2nd best followed by S-Video and A/V cables (RCA Cables, Composite Cables).
oWhat type of cable are you using?
HDMI
•Connect an HDMI cable to the HDMI 1 or HDMI 2 jack on the back of your TV or HDMI 3 jack
on the side of your TV and to the HDMI Out jack on the HDMI device.
Component Video Cables are red, green and blue. The audio cables will be red and white.
•Connect a component cable to the COMPONENT 1 or COMPONENT 2 jacks on the back of
your TV and to the COMPONENT Out jacks on the component device.
S-Video Cable has a round end with prongs in a semi-circle and Audio Cables that are red and white.
•Connect an S-Video cable to the S-VIDEO REAR jack on the back of your TV or S-VIDEO
SIDE jack on the side of your TV and to the S-VIDEO Out jack on the S-Video device.
•Connect an audio cable to the L AV 1 IN and R AV 1 IN jacks on the back of your TV or L AV 2
IN and R AV 2 IN and to the Audio Out jacks on the S-Video Device.
Composite (A/V Cables, RCA Cables) have a yellow video cable, and red and white audio cables.
•Connect a composite cable to the AV 1 IN jacks on the back of your TV or AV 2 IN jacks on the
side of your TV and to the Video Out and Audio Out jacks on the composite device.
•Setting Up Channels:
9
oAre you using a cable/satellite box, cable connected directly to the TV, or an antenna?
If you are using a cable or satellite box you must use the remote that came with that box to change
channels.
•Make sure you have the correct input selected to view channels via the cable or satellite box.
For example, if the cable or satellite box is connected via component cables please press input
and select Component 1 or Component 2 to view your channels.
If you are using cable connected directly to the TV:
•Press MENU. The on-screen menu opens.
•Press ^or vto select Setup, then press >to enter Setup menu.
•Press ^or vto select Tuning Band, then press >to select Cable.
•Press ^or vto select Auto Ch Search, then press >to begin searching for channels. Your TV
memorizes all cable channels you receive.
If you are using an antenna:
•Press MENU. The on-screen menu opens.
•Press ^or vto select Setup, then press >to enter Setup menu.
•Press ^or vto select Tuning Band, then press >to select Air.
•Press ^or vto select Auto Ch Search, then press >to begin searching for channels. Your TV
memorizes all analog and digital channels you receive.
How do I adjust the color on my TV?
•Press MENU. The on-screen menu opens.
•Press ^or vto select Video, then press >to enter Video menu.
•Press ^or vto select Color, then press ENTER to enter Color adjustment menu.
•Press <or >to adjust the color level.
•Press EXIT when you are finished.
Where can I get more information on digital TV?
•For more information about the transition to digital TV signals, visit:
owww.fcc.gov/cgb/consumerfacts/digitaltv.html
owww.digitaltips.org
owww.dtvtransition.org
owww.dtvanswers.com
Can I get more information about this TV?
•Refer to the manual that came with your TV or the Insignia Website: www.insignia-products.com/pc-320-1-insignia-32-
720p-flat-panel-lcd-hdtv-high-gloss-black.aspx
I need to change my in-home service appointment or my in-home service agent did not show up.
•Please contact In-Home Service at 1-888-BEST BUY (1-888-237-8289).
Can I get more information on wall mounting?
•You will need to remove the base before you can wall mount the TV.
•Any wall mount that is capable of holding at 32” TV can be used with this TV.
•The pitch of the mounting holes is 200 mm both horizontally and vertically.
•We recommend keeping your TV at least 2.36 in (60 mm) from the wall to prevent cable interference.
•Mounting a TV of this size, it is required that you fasten the mounting brackets using the properly rated hardware
securely to wall studs. If you are not sure how to do this, please contact a professional installer. Improper mounting can
lead to damage of your TV and even injury to persons nearby if the mounting fails.
•For more information or to purchase a wall mount please visit www.initproducts.com/c-17-tv-wall-mounts.aspx.
oAdditional help can be accessed by clicking the “Click to Talk” button on a wall mount product page. The “Click
to Talk” button will only be available if the item is currently in-stock.
oOnce you click the button all you have to do is enter your Country, phone number, and when to call. A sales
expert will call you to assist you with any questions you may have or to assist you in purchasing the mount.
How do I remove my base?
10
•The base is attached via 4 screws that can be found on the back of the TV directly above the base.
oLay the TV face down on the edge of a table or work bench. Make sure to put your TV on a cushion or soft
covering to prevent damaging the case or screen.
oRemove the 4 screws that secure the stand column to your TV.
oSlide the stand away of the TV.
How do I get headphones to work with my TV?
•Connect the headphones cable to the headphone jack on the side of your TV.
•A headphone icon will appear in the upper right corner of the screen.
•Sound will only be heard through the headphones when they are plugged in.
•Use the volume buttons on the remote to adjust the volume level.
•To hear sound again through the TV speaker, unplug the headphones. A speaker symbol will appear in the upper right
corner of the screen.
Can I get an additional remote?
•Additional remotes can be purchased from Parts. Please call support at 877-467-4289, where an agent can transfer
you to PartSearch.
How do I program my clock/time?
•Press MENU. The on-screen menu opens.
•Press ^or vto select Feature, then press >to enter Feature menu.
•Press ^or vto select Time Set, then press ENTER to enter Time Set adjustment menu.
•Press ^or vto select Time Set Mode, then press >to choose from: Manual or Auto.
oIf you choose Manual, you can manually set the clock on your TV.
Press ^or vto select Time Zone, then press >to choose from: Pacific,Alaska,Hawaii,Eastern,
Central, or Mountain.
Press ^or vto select Time, then press <or >to set the time.
oIf you choose Auto, the TV will automatically set the time based on the digital or cable signal received.
Press ^or vto select Time Zone, then press >to choose from: Pacific,Alaska,Hawaii,Eastern,
Central, or Mountain.
•Press EXIT when you are finished.
Nothing happens when I push buttons on my remote.
•Make sure the TV is plugged in.
•The supplied batteries are wrapped tightly in clear plastic. Have you removed the plastic from the batteries before you
installed them?
•Are the batteries installed correctly?
oRemove the battery compartment cover on the back of the remote control.
oInsert the two AAA batteries into the battery compartment. Make sure that the + and – on the batteries align
with the + and – symbols in the battery compartment.
oReplace the battery compartment cover.
•Point the control directly at the remote sensor on your TV. The remote sensor is located below the Insignia logo on your
TV.
•Remove any obstacles between the remote control and the remote sensor.
•Replace dead batteries with new ones.

Other manuals for NS-LCD32-09

3

Other Insignia LCD TV manuals

Insignia NS-LCD52HD-09 User manual

Insignia

Insignia NS-LCD52HD-09 User manual

Insignia NS-50L240A13 Installation and operation manual

Insignia

Insignia NS-50L240A13 Installation and operation manual

Insignia NS-42L260A13A User manual

Insignia

Insignia NS-42L260A13A User manual

Insignia NS-LCD37-09 - 37" LCD TV Quick start guide

Insignia

Insignia NS-LCD37-09 - 37" LCD TV Quick start guide

Insignia NS-L47Q09-10A User manual

Insignia

Insignia NS-L47Q09-10A User manual

Insignia NS-40D40SNA14 Parts list manual

Insignia

Insignia NS-40D40SNA14 Parts list manual

Insignia NS-37L550A11 Quick start guide

Insignia

Insignia NS-37L550A11 Quick start guide

Insignia NS-LCD26F, NS-LCD32F, NS-CL26C User manual

Insignia

Insignia NS-LCD26F, NS-LCD32F, NS-CL26C User manual

Insignia NS-32E570A11 User manual

Insignia

Insignia NS-32E570A11 User manual

Insignia NS-L22X-10A User manual

Insignia

Insignia NS-L22X-10A User manual

Insignia NS-32E740A12 Installation and operation manual

Insignia

Insignia NS-32E740A12 Installation and operation manual

Insignia NS-42L260A13 User manual

Insignia

Insignia NS-42L260A13 User manual

Insignia NS-19E450WA11 User manual

Insignia

Insignia NS-19E450WA11 User manual

Insignia NS-32L121A13 User manual

Insignia

Insignia NS-32L121A13 User manual

Insignia NS-46L550A11 Quick start guide

Insignia

Insignia NS-46L550A11 Quick start guide

Insignia NS-19E320A13 Installation and operation manual

Insignia

Insignia NS-19E320A13 Installation and operation manual

Insignia NS-32E740A12 User manual

Insignia

Insignia NS-32E740A12 User manual

Insignia NL19W2QP-10A - 19" LCD TV Quick start guide

Insignia

Insignia NL19W2QP-10A - 19" LCD TV Quick start guide

Insignia NS-15LCD - 15" LCD TV User manual

Insignia

Insignia NS-15LCD - 15" LCD TV User manual

Insignia NS-46L400NA14 User manual

Insignia

Insignia NS-46L400NA14 User manual

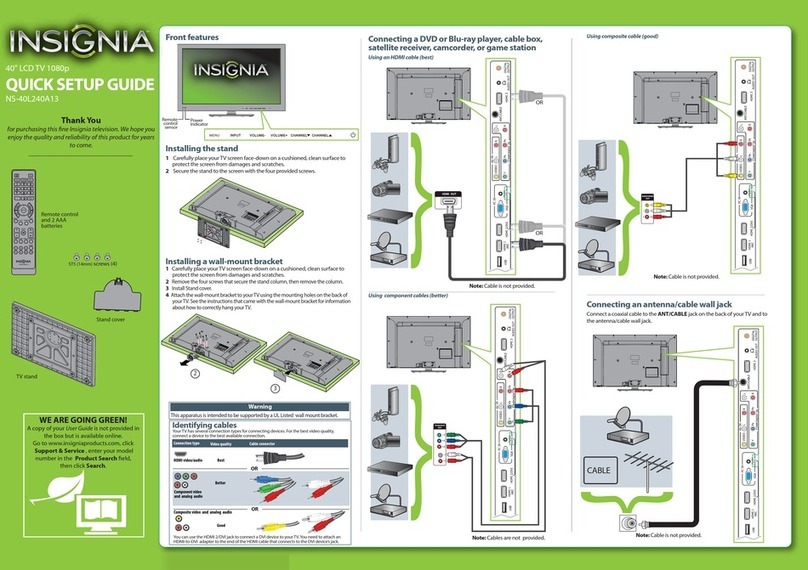
Insignia NS-40L240A13 User manual

Insignia

Insignia NS-40L240A13 User manual

Insignia NS-LCD15-09CA User manual

Insignia

Insignia NS-LCD15-09CA User manual

Insignia NS-42E760A12 Owner's manual

Insignia

Insignia NS-42E760A12 Owner's manual

Insignia NS-L32Q09-10A - 31.5" LCD TV User manual

Insignia

Insignia NS-L32Q09-10A - 31.5" LCD TV User manual

Popular LCD TV manuals by other brands

ViewSonic N3251W user guide

ViewSonic

ViewSonic N3251W user guide

Symphonic LCD-B15E6 Service manual

Symphonic

Symphonic LCD-B15E6 Service manual

LG 32LT560C Quick reference guide

LG

LG 32LT560C Quick reference guide

Toshiba 32BV504B owner's manual

Toshiba

Toshiba 32BV504B owner's manual

AOC Envision L42W665 Service manual

AOC

AOC Envision L42W665 Service manual

Philips 22HFL5662H user manual

Philips

Philips 22HFL5662H user manual

F&U FL2D5505UH manual

F&U

F&U FL2D5505UH manual

LG SIGNATURE OLED65G6P Easy setup guide

LG SIGNATURE

LG SIGNATURE OLED65G6P Easy setup guide

Haier HL32XK2 owner's manual

Haier

Haier HL32XK2 owner's manual

Panasonic TX-L32GW10 operating instructions

Panasonic

Panasonic TX-L32GW10 operating instructions

LG 22LE5300-CA Service manual

LG

LG 22LE5300-CA Service manual

Samsung BN68-01736A-00 user manual

Samsung

Samsung BN68-01736A-00 user manual

Hisense LCD24V88APAM Service manual

Hisense

Hisense LCD24V88APAM Service manual

Philips 26PFL3404H/12 quick start

Philips

Philips 26PFL3404H/12 quick start

Toshiba 55SL417U Specifications

Toshiba

Toshiba 55SL417U Specifications

Philips 15HF5234 Specifications

Philips

Philips 15HF5234 Specifications

Philips 32PF9730 brochure

Philips

Philips 32PF9730 brochure

TCL LCD32E9A-MS91LA Service manual

TCL

TCL LCD32E9A-MS91LA Service manual

manuals.online logo
manuals.online logoBrands
  • About & Mission
  • Contact us
  • Privacy Policy
  • Terms and Conditions

Copyright 2025 Manuals.Online. All Rights Reserved.