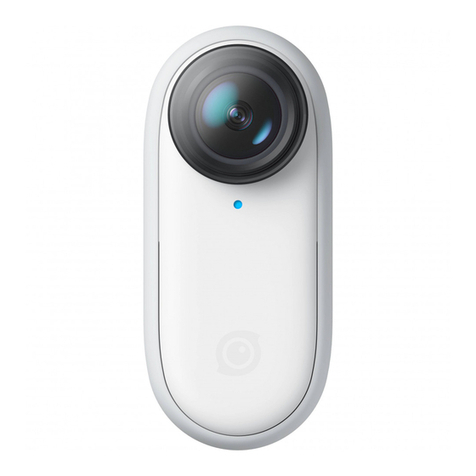
Insta360 ONE X2 User manual

QUICKSTART GUIDE
快速入门指南
English · 简体中文


Insta360 ONE X2 Protective Pouch
Charge Cable Lens Cloth &
Documentation
Battery
1 What's Included
This package includes the following items. If any item is missing or
broken, please contact Insta360.
1

2 Names of Parts
❶Lens
❷Microphone
❸Status Indicator
❹USB Lock Cover (removable)
❺USB Lock Buckle
❻USB Type C Port
❼Battery Lock Buckles
❽Standard 1/4'' Mounting Point
❾Touch Screen
❿Speaker
⓫Power / Function Button
⓬Shutter Button
❶
❹
❺
❻
❼
❸
❸
❷❿
⓫
⓬
❽
❾
❷
❷
❷
2

3 Before You Start
❶ Ensure the battery has been fully charged. Please connect the
included charge cable to ONE X2 in case of low or depleted battery.
Connect to a 5V 2A
power adapter to
charge the camera.
❷ Insert a Micro SD card
Note:
You can also use the official Insta360 ONE X2
Smart Charger (sold separately).
a. First, remove the battery. Squeeze the battery lock buckles as the
two small arrows indicate, then the battery will pop out automatically.
3

b. Insert a Micro SD card
(With its label facing outward towards the
touch screen)
Supported Micro SD cards:
Please use exFAT Format MicroSD cards
of speed classes UHS-I and V30 to
ensure normal recording. The maximum
supported storage space is 1TB.
UP
❸Be sure to close the battery lock cover and USB lock cover
completely (The yellow indication marks should be covered) to
ensure waterproofing is not affected.
The yellow
indication marks
should be covered
4

1h3m
5.7K/30
4 Know Your Insta360 ONE X2
Power on / off
When the camera is turned off, press the Power / Function button to
power it on.
In standby mode, press the Power / Function button to turn the
touch screen light off / on.
In standby mode, long press the Power / Function button for 2
seconds to power it off.
Using the Touch Screen
Remaining Battery Remaining
Recording Time
360° Mode
Current Mode: Video
Front / Rear Camera
Current Parameters
* The first time you turn on the camera, the following will be
displayed on the screen.
Important: When using ONE X2 in water, please lock the touch screen
to avoid accidental presses. After locking the touch screen, you can
use the Power / Function Button to change modes. 5

Swipe down to access System modes
Swipe up to change capture mode
❶ Download the Insta360 app. The first time you use it, please follow
onscreen instructions to activate the app.
❷Turn on the WiFi and Bluetooth of your mobile device.
❸When the camera is turned off, press the Power / Function button
to power it on.
❹After installing the app, tap the camera icon at the bottom of
the app homepage and select "Connect now" in the WiFi panel. Then,
follow the onscreen instructions to connect your device.
❺After successfully connecting the camera, you can take photos or
Swipe right to access
Media Gallery
Swipe left to adjust
camera settings
5 Control via WiFi
* Basic operations for the touch screen:
6

* For more product information, visit
https://www.insta360.com/support/product-support
Note:
The WiFi connection range is 10 meters (33 ft) in optimal
conditions with no interference.
Please read this Disclaimer carefully. Using the camera and its
relevant accessories means that you acknowledge and accept the
terms of this disclaimer.
By using this camera, you hereby acknowledge and agree that you
are solely responsible for your own conduct when using this camera
and any consequences thereof. You agree to use this camera only for
proper and lawful purposes. You understand and agree that Arashi
Vision Inc. (hereinafter referred to as 'Insta360') accepts no liability
for any and all misuse, consequences, damages, injuries, penalties,
or any other legal responsibility directly or indirectly incurred by your
using this camera and associated accessories.
Before every use, make sure that your accessories are functioning
properly. If there’s any damage or irregularity, stop using them
immediately.
Within the scope of state laws and regulations, Insta360 reserves the
right of final explanation and revision for the commitment.
* Disclaimer
shoot videos via the app.
7

FCC Statement
This equipment has been tested and found to comply with the
limits for a Class B digital device, pursuant to Part 15 of the FCC
Rules. These limits are designed to provide reasonable
protection against harmful interference in a residential
installation. This equipment generates uses and can radiate radio
frequency energy and, if not installed and used in accordance
with the instructions, may cause harmful interference to radio
communications. However, there is no guarantee that
interference will not occur in a particular installation. If this
equipment does cause harmful interference to radio or television
reception, which can be determined by turning the equipment
off and on, the user is encouraged to try to correct the
interference by one or more of the following measures:
-- Reorient or relocate the receiving antenna.
-- Increase the separation between the equipment and receiver.
-- Connect the equipment into an outlet on a circuit different
from that to which the receiver is connected.
-- Consult the dealer or an experienced radio/TV technician for
help.
This device complies with part 15 of the FCC Rules. Operation is
subject to the following two

conditions:
(1) This device may not cause harmful interference, and (2) this
device must accept any interference received, including interference
that may cause undesired operation.
Changes or modifications not expressly approved by the party
responsible for compliance could void the user's authority to
operate the equipment.
IC STATEMENT
This device complies with Industry Canada’s licence-exempt RSSs.
Operation is subject to the following two conditions:
(1) This device may not cause interference; and
(2) This device must accept any interference, including interference
that may cause undesired operation of the device.
Le présent appareil est conforme aux CNR d'Industrie Canada
applicables aux appareils radio exempts de licence. L'exploitation
est autorisée aux deux conditions suivantes :
(1) l'appareil ne doit pas produire de brouillage, et
(2) l'utilisateur de l'appareil doit accepter tout brouillage
radioélectrique subi, même si le brouillage est susceptible d'en
compromettre le fonctionnement.
5.2 GHz band is restricted to indoor use only
The distance between user and device should be no less than 20cm.
la distance entre l'utilisation et l'appareil ne doit pas être inférieure à
20 cm.

1. 物品清单
Insta360 ONE X2 相机 便携收纳袋
充电线 擦镜布 & 文档资料
打开包装,请确认包含以下物件。如有缺失或破损,
请联系 Insta360。
电池
9

2. 认识部件
❶ 镜头
❷ 麦克风
❸ 状态指示灯
❹ USB 护盖(可拆卸)
❺ USB 护盖拨钮
❻ USB Type -C 接口
❼ 电池盖拨钮
❽ 标准 1/4 螺口
❾ 触摸屏
❿ 扬声器
⓫ 电源 / 功能键
⓬ 快门键
❶
❹
❺
❻
❼
❸
❸
❷❿
⓫
⓬
❽
❾
❷
❷
❷
10

3. 使用前准备
❶ 确保电池电量充足。请使用随附的充电线连接机身一侧的
USB Type-C 接口,对相机进行充电。
请使用 5V 2A 电源
适配器对相机进行
充电
❷ 插入 Micro SD 卡。
温馨提示:
您还可以使用 Insta360 ONE X2 官方适配的充电座
(另售)对电池进行充电。
a. 取出电池:根据箭头示意方向,拨动电池盖拨钮,电池会自
动弹出。
11

支持的 Micro SD 卡:
请使用 UHS-I、V30 及以上和 exFAT 格式
的Micro SD/TF 存储卡,速度过低可能导
致无法正常录像;Micro SD 卡最大内存可
支持 1TB。
b. 插入 Micro SD 卡
( 标签朝向相机有屏幕的一侧 )
UP
❸ 确保电池盖和护盖已完全锁紧(黄色标识显示不可见),否
则将影响整机的防水性能。
确保黄色标识
显示不可见
12

1h3m
5.7K/30
4 了解 Insta360 ONE X2
开机 / 关机
关机时,按压电源 / 功能键,相机开机。
开机时,按压电源 / 功能键,相机熄屏 / 亮屏。
开机时,长按电源 / 功能键 2 秒 ,相机关机。
使用触摸屏
剩余录制时长
当前模式参数
前后镜头切换
剩余电量
全景镜头
录像模式
* 下图为首次开机,屏幕预览界面:
重要:
当相机在水下使用时,请使用锁屏功能,将屏幕锁定,以防误触屏。
此时,使用机身电源 / 功能键可切换拍摄模式。
13

上滑切换拍摄模式
下拉系统模式
左滑设置参数右滑查看相册
5 WiFi 连接
❶ 移动设备下载、安装 app。首次使用,请先根据 app 页面提
示激活 app。
❷ 打开移动设备蓝牙和 WiFi 功能。
❸ 相机关机状态下,按压电源键,相机开机。
❹ 打开 app,点击 app 页面下方的相机图标 ,在“使用
WiFi 连接”一项点击“立即连接”。当 app 页面跳转至提示【搜
寻相机中 ......】,选择你需要连接的相机,然后按照 app 页面
提示完成操作。
* 触摸屏基本操作说明:
14

* 更多产品信息,请访问:
https://www.insta360.com/support/product-support
注意:
WiFi 连接有效距离为 10 米(无干扰无遮挡)。
❺ 连接成功后,可在 app 页面进行拍照、录像、设置等操作。
请仔细阅读本声明,一旦使用相机及其相关配件,即视为对
本声明的全部认可和接受。
每次使用前,请仔细检查相机及其相关配件,若出现破损、
变形,请勿使用。使用本相机,就意味着您认可并同意,您将
对使用本相机的行为和可能产生的后果负全部责任。您承诺仅
会出于正当合法的目的使用本相机。您理解并同意,对于直接
或间接因使用本相机而造成的滥用、不利影响、损害、伤害、
惩罚或者其他法律后果,影石创新科技股份有限公司(以下简
称“Insta360”)将不承担任何责任。用户应遵循包括但不限
于本文提及的使用注意事项。
在国家法律法规范围内,本承诺解释权、修改权归 Insta360
所有。
* 免责声明
15

Arashi Vision Inc.
ADD: 6F, Building A, Logan Century Center, 23 Haixiu Road, Bao'an
District, Shenzhen, Guangdong, China
WEB: www.insta360.com
TEL: 400-833-4360 +1 800 6920 360
EMAIL: [email protected]
Table of contents
Other Insta360 Digital Camera manuals
Popular Digital Camera manuals by other brands
Insignia
Insignia NS-DSC1110A Guide de l'utilisateur

Sony
Sony DSC-RX0M2 Service manual
Trust
Trust FAMILYC@M 300 DIGITAL MOVIE instruction manual
Canon
Canon 8120A001 - PowerShot G3 Digital Camera quick start guide
CONCORD
CONCORD Eye-Q 2040 quick start guide
Datalogic
Datalogic LaneHawk Quick reference guide
