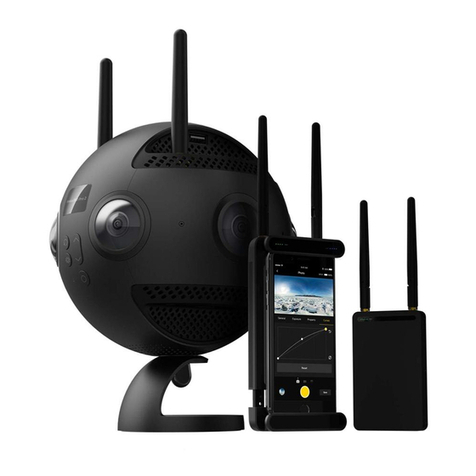
Insta360 Pro2 User manual

Pro2
User Manual
English

目
录
Dierence between Pro 2 and Pro 1 (users updating from Pro 1 to Pro 2 are recommended to read)
0.1 Dierence in appearance and interface
0.2 Special functions of Pro 2
0.3 Comparison of detailed functional parameters
Chapter 1 Preparation for Basic Shooting
1.1 Base preparation
1.1.1 Know the camera
1.1.2 Introduction to oicial accessories
1.1.3 Selection and formatting of storage media
1.1.4 Camera debugging
1.1.5 Connection mode of camera
1.1.6 Download oicial soware
1.1.7 Selection of tripod
1.1.8 Import from multiple storage cards
Chapter 2 Photographing
2.1 Preparation before photographing
2.1.1 [Beginner] Preparation of photography
2.1.2 [Beginner] Selection of accessories for shooting
2.1.3 [Advanced] Selection of advanced accessories for photographing
2.1.4 [Advanced] Preparation of special photographing scene (aerial photography)
2.2 Production
2.2.1 [Beginner] Shooting mode screen and settings
2.2.2 [Advanced] Shooting in special format (Raw, AEB, Timelapse, Burst, super-resolution)
2.2.3 [Advanced] Method for aerial-shooting panoramic picture
2.3 Post-Production
2.3.1 [Beginner] Photo stitching by Stitcher
2.3.2 [Advanced] How to stich Super Resolution photo with Burst photo
2.3.3 [Advanced] Stitching by third party soware, such as PTgui, etc.
2.3.4 [Advanced] Color matching and modification of Photoshop panorama
2.4 Distribution
2.4.1 [Beginner] Fast acquisition of real-time stitching images and sent to SNS
2.4.2 [Beginner] Insta360 Player
2.4.3 Introduction of VR helmet for photo playback (about VR glasses)
2.4.4 Create simple VR roaming (about platform presentation)
Chapter 3 Video Recording
3.1 Preparation before shooting
3.1.1 [Beginner] Setup for recording preparation

目
录
3.1.2 [Beginner] Selection of accessories for shooting
3.1.3 [Advanced] Selection of Advanced accessories for video recording
3.1.4 [Advanced] Recording equipment
3.1.5 [Advanced] Introduction of stabilizer
3.1.6 [Advanced] Special scene shooting preparation (aerial photograph)
3.1.7 [Advanced] Create and set logo for real time stitching
3.2 Production
3.2.1 [Beginner] Shooting Mode Screen and Settings
3.2.2 [Advanced] Recording panoramic sound
3.2.3 [Advanced] High FPS Mode
3.2.4 [Advanced] Panoramic aerial photography
3.3 Post-Production Stage
3.3.1 [Beginner] Video stitching by Stitcher
3.3.2 [Beginner] Video Frame Rate Adjustment and Optical Flow Interpolation
3.3.3 [Beginner] Introduction to Premiere cc 2018 Editing
3.3.4 [Beginner] Introduction to FCPX Editing
3.3.5 [Beginner] Quick editing of oicial plugins on Premiere
3.3.6 [Beginner] Application of LUT
3.3.7 [Advanced] Stitching by third-party soware of Mistika VR, AutoPano Video
3.3.8 [Advanced] Other panoramic plugins and their attribute applications
3.3.9 [Advanced] Post production of panoramic sound
3.3.10 [Advanced] Mending Sky for Aerial Photography
3.3.11 [Advanced] Erasing Tripod for Ground Shoot
3.3.12 [Advanced] Introduction of other stabilization methods
3.4 Distribution
3.4.1 [Beginner] Insta360 Player
3.4.2 [Beginner] Introduction of CrystalView 8K, the panorama player
3.4.3 [Beginner] Introduction to other players (Gopro VR Player & PotPlayer)
3.4.4 [Advanced] Upload to various VR platforms
3.4.5 [Advanced] Introduction of VR headset for photo playback (about VR glasses)
Chapter 4 Live-streaming
4.1 Preparation before shooting
4.1.1 [Beginner] Basic preparation for shooting
4.1.2 [Beginner] Selection of accessories for live-streaming
4.1.3 [Beginner] Connection and Stitching Calibration before live-streaming
4.1.4 [Intermediate] Preparation of 4G network Live-streaming (Outdoor live-streaming)
4.1.5 [Intermediate] OBS Computer forwarding push for live-streaming
4.1.6 [Advanced] How to add or edit logo for live-streaming
4.2 Shooting stage
4.2.1 [Beginner] Live Interface and parameter setting

目
录
4.2.2 [Beginner] Push mode: internal push, server push, HDMI output
4.2.3 [Beginner] Live-streaming while storing
4.2.4 [Beginner] External audio setting
4.2.5 [Intermediate] Indoor live-streaming scheme
4.2.6 [Intermediate] Outdoor Live-streaming scheme
4.3 Distribution
4.3.1 [Beginner] YouTube live-streaming
4.3.2 [Beginner] Facebook live-streaming
4.3.3 [Beginner] Weibo live-streaming
4.3.4 [Intermediate] Charging platform live-streaming, Utovr (Arcvideo, Tencent Cloud, etc.)
Chapter 5 Street View
5.1 Preparation before shooting
5.1.1 Basic preparation for Street view
5.1.2 Introduction of shooting accessories for special street view
5.2 Production
5.2.1 Parameter setting of car mounted shooting of street view
5.3 Post-Production
5.3.1 Upload street view through Stitcher
5.4 Distribution
5.4.1 Watch street view content via Stitcher
Chapter 6 Manual Exposure, Curve Adjustment, Customize and Template
6.1 [Advanced] Manual exposure and curve adjustment
6.2 [Advanced] Customize and template
Chapter 7 Common Problems
7.1 Common camera problems
7.2 Common problems for Insta Pro app
7.3 Common problems for Insta360 Pro Stitcher
7.4 Other common problems
7.5 Error message summary
7.6 Oicial technical support and Forum

1 Dierence in appearance and interface
1. Compared to the Pro 1, the Pro 2 adds a AP (WiFi) antenna and a GPS antenna to the top.
The stable communication distance of Pro 2 AP signal is twice as long as that of Pro 1.
Dierent from Pro 1, which needs to purchase additional accessories in order to use GPS module, Pro 2 has integrated
GPS module in the camera itself.

2. A new USB2.0 port, a 3.5mm port, and a 1/4 tapped hole are added to the top of the Pro 2 to make it easier for users
to use some external USB or 3.5mm microphones and hold them directly above the camera. It is especially suitable
for panoramic acoustic microphones that must be placed in the center of the camera for recording.
3. The largest change in Pro 2 is the addition of six TF (Micro SD) card slots to the bottom interface, because of the
multi-card mechanism, Pro 2 allows you to record six high-quality original films while recording a real-time stitching
video. Single video rate is up to 120Mbps (8K3D@30fps, 8K2D@60fps, 4K3D@120FPS and other video gear), the rate is
equivalent to three times that of Pro 1, and the video quality details will be better.

In the process of using, as the number of storage cards increases, the file directory structure will be more complex
than that of Pro 1, but the stitching soware, Stitcher, provides a tool to import Pro 2 content with only one key. User
only needs to choose storage device reading mode in the camera, and then connect Pro 2 to computer through the
Type-C data line or the network cable to easily transfer the material from the multiple Pro 2 storage cards to the
computer by using the one-key import tool. Please refer to 1.1.8 for detailed instructions of how to import files from
multiple storage cards.
2 Special functions of Pro 2
(1) FlowState Stabilization
Pro 2 hardware is equipped with nine-axis gyroscopes and implements FlowState super stabilization against moving
scenes.
(2) Automatic Exposure Bracketing (AEB) photography, which allows you to select 3, 5, 7, 9 photos
Pro 2 adds AEB photography mode (HDR mode needing post synthesis in Pro 1 equals 3 AEB photos). You can choose to
shoot 3, 5, 7, 9 photos with equal intervals for post synthesis to be high dynamic range photos.
(3) All photo modes can be photographed in Raw+jpg formats
Raw+jpg formats are available to all the shooting modes of Pro 2 (general single shooting, AEB shooting, Burst 10 groups
of photos, Time-lapse delay photography). Images in both dng and jpg formats will be stored.
(4) HDR video
Some video modes in Pro 2 allow you to shoot videos with HDR high dynamic range eect and are suitable for shooting
scene with large light ratio.
(5) Multi-channel shooting, higher rate, wider color gradation and better quality
Pro 2 has 7 cards stored inside, including 6 TF (MicroSD) cards plus 1 SD card. While storing real-time stitching with low
bitrate proxy video into SD card, it can store high bitrate original chip into 6 TF (MicroSD) cards, up to 120 Mbps rate,
which is equivalent to 3 times that of Pro 1 bitrate, with better image quality details. Pro 2 takes YUVJ420P, a wider range
of colors than Pro 1, which is able to show brighter colors and darker colors.
(6) Dual antenna, far and more stable signals
An external antenna is added to ensure smooth control preview within 0 ~ 20 m and the distance is doubled compared
with Pro 1. GPS module and antenna are added to the camera itself and no extra GPS accessory is needed, so as to avoid
the clutter of external accessories and interference to signal when shooting street view.
(7) Farsight system support
Pro 2 carries Farsight, which is the latest invented graph transmission system by Insta360, which can achieve smooth
manipulation of long distance. Communication distance is as long as 300 meters in the ground-to-ground open
environment without shelter and 1 km in the air-to-air environment without shelter. Moreover, Farsight can also support
Pro 1 for manipulation.

3 Comparison of detailed functional parameters
Pro 2 Pro
Weight 1550g 1228g
Diameter φ143mm φ143mm
Material aluminum alloy aluminum alloy
Lens 200°6 x F2.4 fish-eye lens 200°6 x F2.4 fish-eye lens
Photo
Specification
real-time stitching:
7680 x 7680(8K 3D)
7680 x 3840(8K 2D)
post stitching:
7680 x 7680(8K 3D)
7680 x 3840(8K 2D)
real-time stitching:
7680 x 7680(8K 3D)
7680 x 3840(8K 2D)
post stitching:
7680 x 7680(8K 3D)
7680 x 3840(8K 2D)
Video
specification
post stitching:
7680 x 3840@30 FPS HDR (8K 2D)
7680 x 7680 @30 FPS(8K 3D)
7680 x 3840 @60 FPS (8K 2D)
6400 x 6400 @60 FPS (6K 3D/2D)
3840 x 3840 @120 FPS (4K 3D/2D Binning)
real-time stitching:
3840x3840@30fps (4K 3D)
3840x1920@30fps (4K 2D)
post stitching:
6400 x 6400@30fps(3D)
7680 x 3840@30fps(2D)
3840 x 3840 @60 FPS(4K 3DBinning)
3840 x 1920 @120FPS(4K 2D Binning)
real-time stitching:
3840 x 3840@24fps(4K 3D)
3840 x 1920@30fps(4K 2D)
Photo Files JPEG/ DNG JPEG/ DNG
Video Files mp4 mp4
Video Color
Space YUVJ420P, oering a wider color range YUV420P
Video Coding
Format
H264 directly from camera, H265 in post
production
H264 directly from camera, H265 in post
production
Live-
streaming
Modes
Built-in server
Custom server
HDMI output
3840x1920@30fps (4K 2D live) simultaneously
store 8K
3840x3840@30fps (4K 3D live) simultaneously
store 6K 3D
Note: live while storage supported.
Built-in server
Custom server
HDMI output
3840x1920@30fps (4K 2D live) can store 4K
3840x3840@24fps (4K 3D live) can store 4K 3D
24frame
Note: live while storage supported.
Live-
streaming
Protocol
rtsp, rtmp, hls rtsp, rtmp, hls
Storage 6 MicroSD Card+1 SD Card 1SD Card / USB 3.0
ISO Range 100-6400 100-6400

Pro 2 Pro
Exposure
Modes
Auto
Manual
Lens-by-Lens Custom
Shutter Priority (photo only)
ISO Priority (photo only)
video mode can set ISO upper limit
Auto
Manual
Lens-by-Lens Custom
Shutter Priority (photo only)
ISO Priority (photo only)
White
Balance
Modes
Auto, Manual Auto, Manual
Photo Modes
Single shot
Burst (10 continuous shots)
Timelapse
AEB (Auto Exposure Bracket, optional 3, 5, 7,
and 9 photos for in-camera HDR photos)
Raw and JPG are both available in all modes
Single shot
Burst (10 continuous shots)
RAW
HDR
Video mode
General video (opening i-Log color)
High-frame rate video (Binning) (open i-Log
color)
Note: partial video levels support HDR eect
General video High-frame rate video (Binning)
Time-lapse photography
Note: optionally to open Flat-color
Bitrate per
Lens Up to 120Mbps Up to 40Mbps
Power 12V 5A 12V 5A
Battery
Capacity 5100mAh 5100mAh
Working
Temperature 0-40℃0-40℃
Storage
Temperature -20 ~ 40℃-20 ~ 40℃
WiFi
Specifications
802.11 b/g/n, 2.4GHz. Signal range is about 20
meters in open space. Max preview framerate of
30 FPS, supported in roughly 5-meter range.
802.11 b/g/n, 2.4GHz. Signal range is about 10
meters in open space. Max preview framerate of
1 FPS, supported in roughly 5-meter range.
GPS Signal
Antenna Supported Not supported
AP Signal
Antenna Supported Not supported
Ethernet Port Supported Supported
Video
Transmission
Insta360 Farsight provides ground-to-ground
range of up to 300 meters and ground-to-air
range of up to 1000 meters, with 30 FPS preview.
Insta360 Farsight provides ground-to-ground
range of up to 300 meters and ground-to-air
range of up to 1000 meters, with 1 FPS preview.
Audio 4 x Mono Mic 4 x Mono Mic
Audio Coding
Format AAC AAC
Spatial Audio Ambisonic Ambisonic
Gyroscope Ultra-precise 9-axis gyroscope Ultra-precise 6-axis gyroscope
Stabilization FlowState stabilization General stabilization

Pro 2 Pro
Stitching OpticalFlow / Template OpticalFlow / Template
Exposure
Range 12 stop 12 stop
Control
Soware Windows / Mac / iOS / Android Windows / Mac / iOS / Android
1.1.1 Know the camera

Specification parameter
Specification Parameter

Specification Parameter
Lenses 6 * 200°F2.4 fish-eye lenses
Maximum resolution of single-path
photograph 4000 * 3000
360°panoramic photo shooting Real-time Stitching/ Post-Processing Stitching, 7680 * 3840 (8K) at the
maximum.
360°panoramic video recording
Real-time Stitching in the camera, 3840 * 1920@30fps (4K) at the
maximum.
Post-Processing Stitching, 7680 * 3840@60fps (8K) at the maximum.
360°3D panoramic photo shooting Real-time/ Post-Processing Stitching, 7680 * 7680(8K 3D)at the maximum.
360°3D panoramic video recording
Real-time stitching in the camera, 3840 * 3840@30fps (4K)at the
maximum.
Post-Processing Stitching, 7680 * 7680@30fps (8K 3D) at the maximum.
File format Photo: JPG, DNG (RAW format)
Video: MP4
Storage support 6 TF (MicroSD) cards of V30 speed level, UHS-I
SD card of V30 speed level, UHS-I, Sandisk Extreme Pro is recommended
Power and endurance
5100mAh removable battery (endurance time about 50min)
12V/5A power adapter (Continuous recording for several hours at room
temperature)
Audio recording
Built-in Mic * 4
External 3.5 standard audio input interface * 2
Recordable Ambisonic panoramic sound frequency
Power 12V 5A
Camera weight (containing battery) About 1.550kg
Camera size Sphere diameter of 143
㎜
1.1.2 Introduction to oicial accessories

Note: according to international aviation regulations, if you check in your luggage, please remove lithium batteries and
carry them around.

1.1.3 Selection and formatting of storage media
6 TF (MicroSD) cards and one SD card must be inserted to use Insta360 Pro 2 to shoot.

Selection and notes for storage devices
Both TF (MicroSD) cards and SD card required by Insta360 Pro 2 needs to reach the read-write speed level of V30
memory card.
It is recommended to purchase SanDisk SD card (JD.com purchase link, Amazon purchase link) and TF (MicroSD) card
(JD.com purchase link, Amazon purchase link). When selecting memory cards, note that:
①
To choose Extreme Pro instead of Extreme card;
②
V30 mark is a must. Although some high-speed cards have high read-write speed per second, they are not suitable
for simultaneous multi-channel file writing. Aer using for a period of time, accumulation of file fragments will result
in loss of frame or directly stop recording video;
③
Please make sure the format of the card is exFat, if not, it should be formatted as exFat.

Pro 2 does not have maximum capacity limits on SD card / TF (MicroSD) card
Note for removing storage card
As the file directory structure is more complex in Pro 2, please make sure to turn o the camera before pulling out
storage cards. If the storage card is pulled out when the camera is on, files may fail to be stored completely in very
few cases. Therefore please make sure to turn o the camera first before removing any storage card.
How to use camera to format a SD card
Frequent recording of high-resolution video will lead to accumulation of data fragments generated by multiple files,
aecting the card speed. So, it is recommend to periodically format storage devices, especially before important
shooting.
Pro 2 has feature of standby formatting and is easy to operate. Using Pro 2 camera to format saves hours and is more
completed than using computer soware. It is strongly recommended to use the camera to format storage devices.
Detailed operation steps are shown below.
1. Select camera settings on the screen menus, sequentially, Settings -Storage-Storage Space
2. Under this menu, you can view the amount of available capacity / residual capacity information of storage devices
inserted in the current camera. Press the Power button to click on a storage device into the next step to be
formatted, and then the camera will remind you whether to proceed with formatting, continue to click on the
Power button to confirm and then it will start to format the selected storage device. (Please note that before
formatting, you must backup the original data on storage devices and the data cannot be restored once
formatting completes.)
(1) Once formatted, if you are prompted by Formatted success, it means that formatting succeeds.
(2) If it shows "Formatted completed with fragments le", it means formatting is completed, but there are still
some file fragments existing. The SD card cannot be formatted into the required format, please contact the
manufacturer of the card to fix it or replace with a new card.

3. Once formatting is completed, if it prompts "Failed", it represents a format failure. Please check whether this
storage device’s write-protection is turned on or it has been corrupted. Please try formatting again aer you
remove write-protection.
4. Pro 2 camera can format 6 MicroSD cards together at the same time. Choose any one of the MicroSD cards and
proceed to the next step. There will be two selections for you to choose: format this card to exFat or format all
devices to exFat.
About card speed test
Insta360 Pro 2 use multi-card mechanism to store files and the single video rate in each storage card is up to
120Mbps, so Pro 2 has high standards on storage card’s write speed and stability. Please use storage card which
meets our oicial recommended standards.
When using new SD cards or MicroSD cards on your camera to record video or record livestream for the first time, you
can follow the instruction on the camera to start a card speed test to ensure the storage card meets recording
standards.
You can also go to camera settings on the screen menus and choose Storage. There is Test Write Speed function
shown below Storage Space. Using Test Write Speed function can start a card speed test.
If the test result is “All storage devices write speed are suicient”, all the storage cards’ write speed meet the
recording requirement.

If the test result shows some card’s write speed isn’t suicient, it means recording process may be aected with this
card. Please follow the instructions above to format this SD card using formatting function on camera. Please make
sure to back up your files before formatting. Aer formatting, please start a speed test again on the formatted card.
Using storage cards which meet the requirements on write speed and stability is a key precondition for recording
video successfully. Therefore, please make sure to have a speed test before recording.
1.1.4 Camera debugging
When we get Insta360 Pro 2 camera, before starting your professional panorama experience, please learn some necessary
knowledge first.
Lens protection and cleaning
Insta360 Pro 2 is a six-eye panorama camera, whose fish-eye wide-angle lens is parallel to one lap of the camera itself.
Because of protruding shape, please be careful during use and shooting lest and avoid grinding or unnecessary
damage.
The camera is equipped with rubber protective jacket for lens. When normally packed or in working non-shooting
status, please use protective jacket to possibly minimize lens damage risk.
It is also easy to leave fingerprint on convex lens, so we’ve equipped the camera with camera cloth. Please keep the
camera clean, avoid any stain that impacts quality and stitching eect.
About power supply and electricity quantity
For panoramic photography, electricity guarantee is important. Insta360 Pro 2 provides two types of power supply.
You can use multiple batteries or connect directly to the power supply at suitable locations to extend camera usage
time.
For details please refer to the following information.

Power adapter:
The camera adopts12V 5A power adapter with DC interface.
Battery type and duration:
The camera uses 5100 mAh replaceable battery. Without WiFi, the battery life is about 50 min. To fully charge a battery
takes about 2.5 hours.
Charging with power o:
When the camera is not fully charged, the red power indicating lamp will go on;
When the camera is fully charged, the green power indicating lamp will go on.
Charging with power on:
When the electricity quantity of the camera is below 10%, the red power indicating lamp will go on until the low-point
protection is enabled or the camera is shut down upon exhaust of electricity;
When the electricity quantity of the camera is between 11% and 20%, the yellow power indicating lamp will go on;
When the electricity quantity of the camera is between 21% and 100%, the white power indicating lamp will go on;
When the camera operates, the work indicating lamp will be in the same color as the power indicating lamp. Refer to the
section about camera operation instructions for the flashing description of the work indicating amp.
Tip: With WiFi connection, Pro 2 preview mode consumes more power, so please try to return to the homepage when
standby (as shown in the figure)

About real-time stitching and stitching calibration
Insta360 Pro 2 has an accurate stitching parameter which can be used in most shooting scenarios. The stitching eect
shown on the preview screen is based on this default stitching parameter. However, the stitching eect may vary due
to dierences between specific shooting scenes. If the stitching eect doesn't meet the requirement, users can use
calibrate the stitching eect on the camera or control app.
Please note that the calibrate stitching only takes eect in the following situations:
preview screen of video recording
real-time stitching video from recording
preview screen of live-streaming
real-time stitching video stored during live-streaming
Stitching eects shown in the other situations, such as photo using real-time OpticalFlow stitching and the preview
screen before shooting, are based on the default stitching parameter.
1. Calibrate stitching eect in Pro 2 camera
(1) Turn on the camera and go to the setting menu, choose Calibrate Stitching function.
Other manuals for Pro2
1
Table of contents
Other Insta360 Digital Camera manuals

