Contents
Getting Started
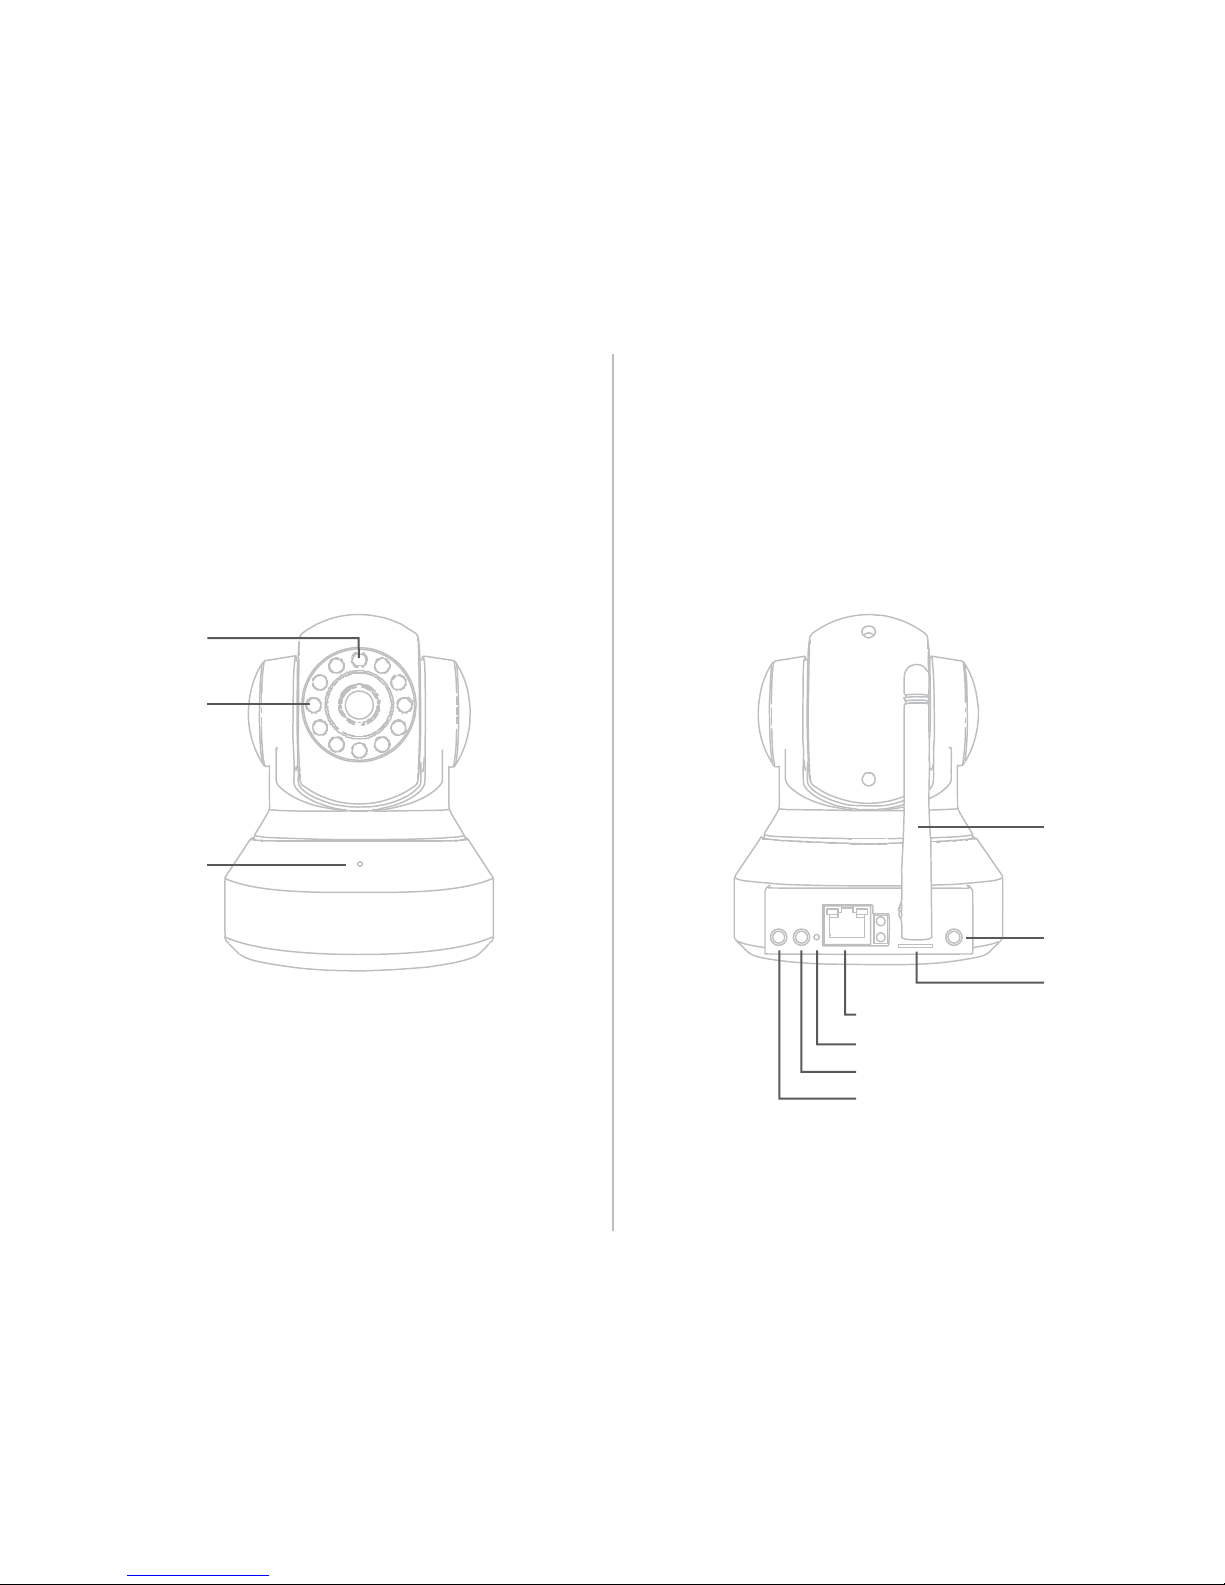
HD Wi-Fi Camera 4
Overview
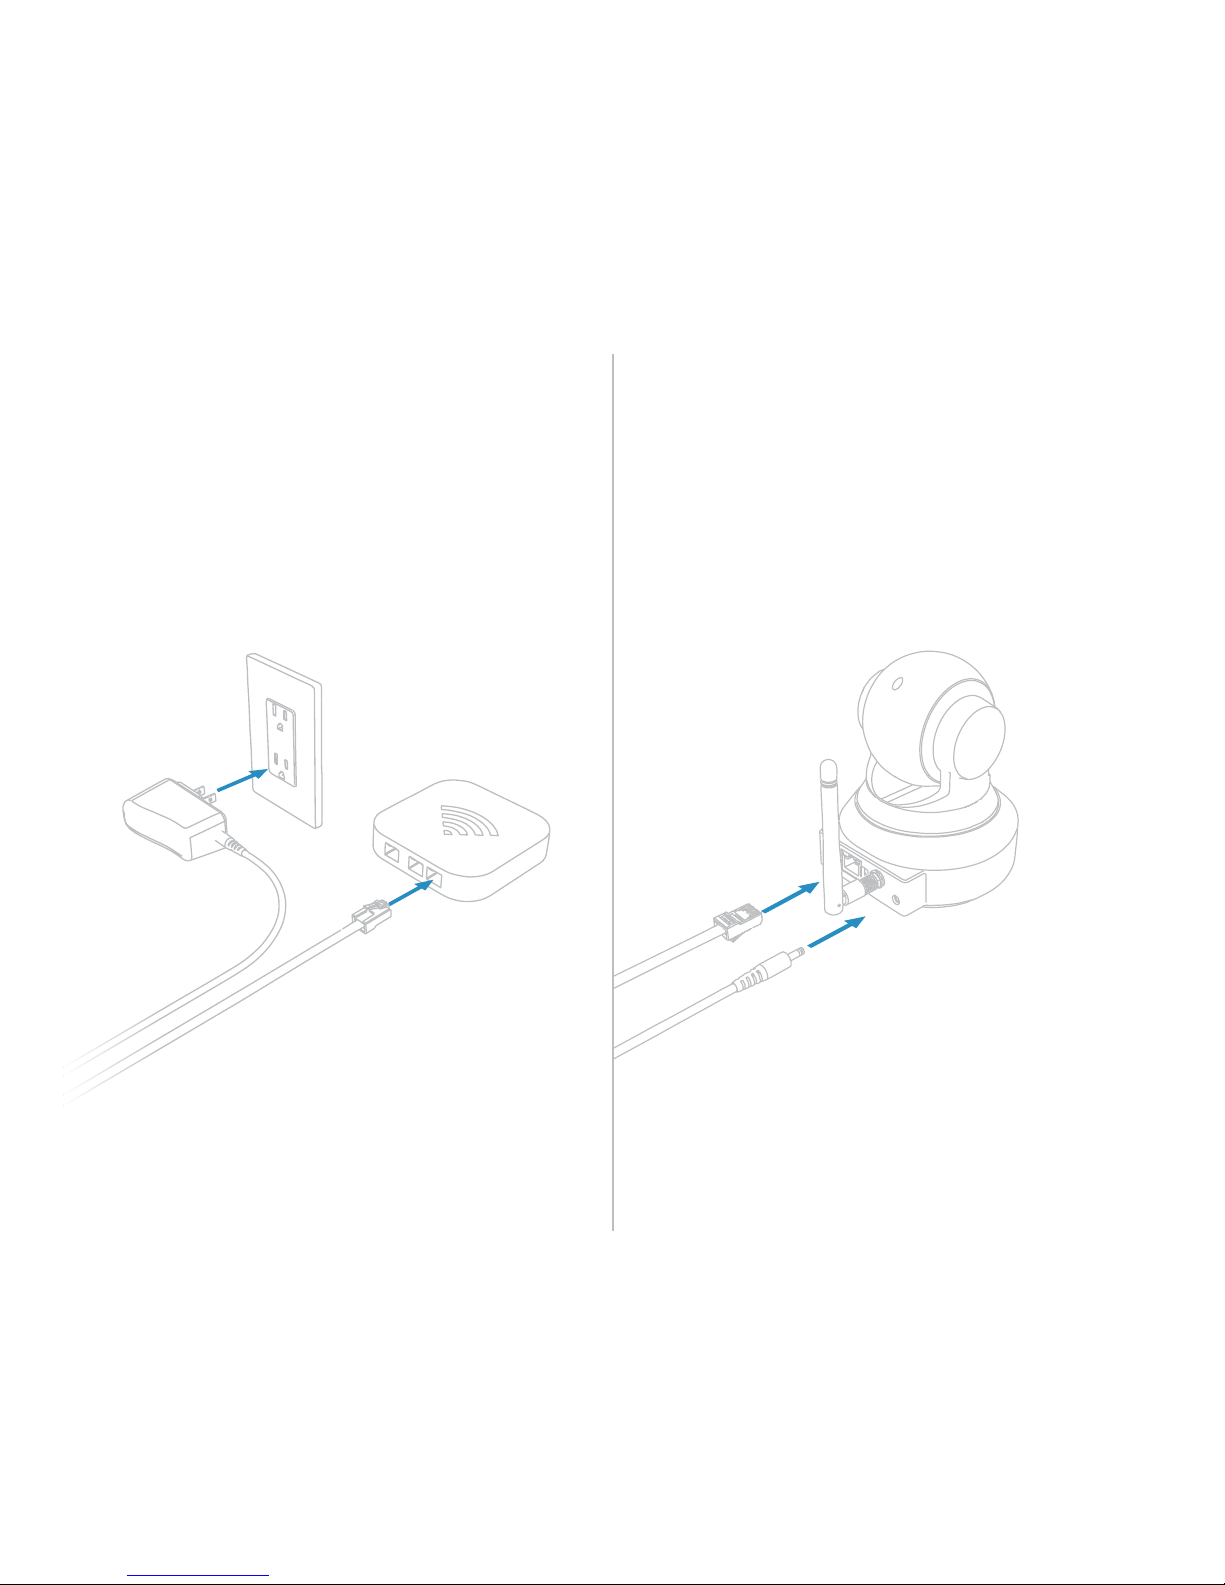
Installation 5
Mounting 6
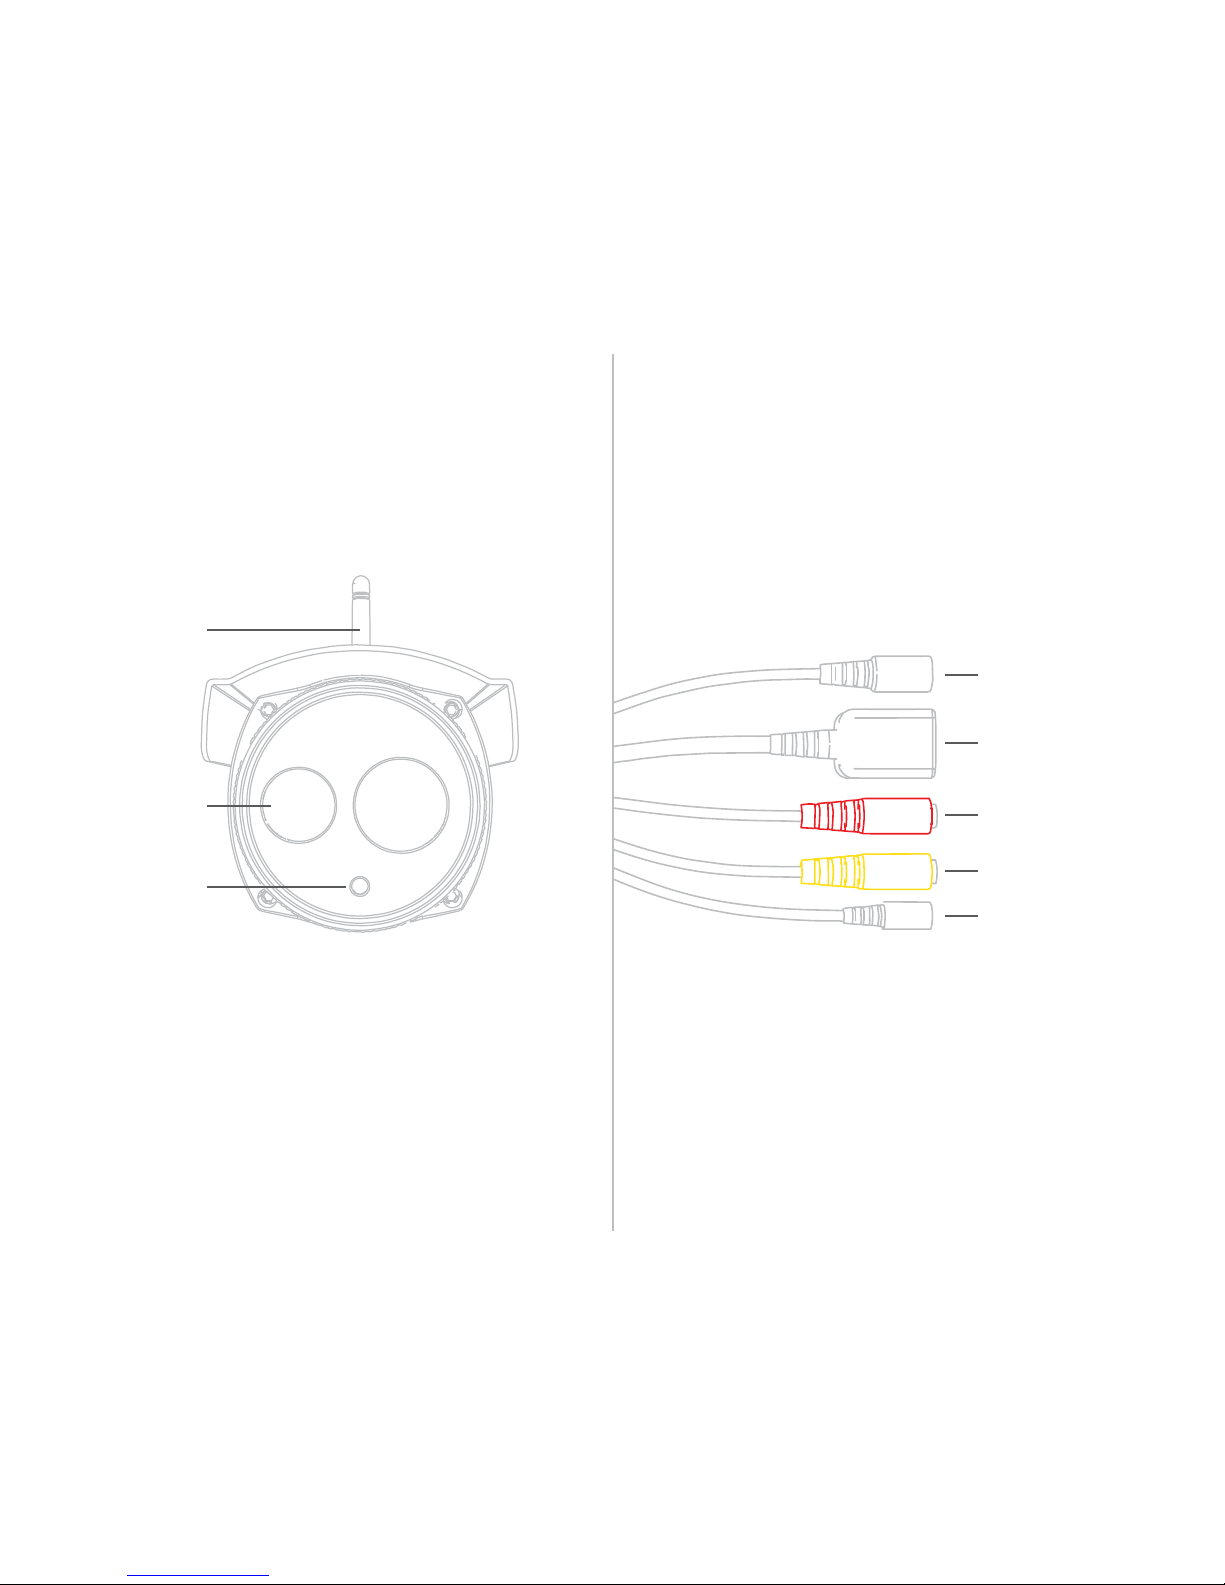
HD Outdoor Wi-Fi Camera 7
Overview
Installation 8
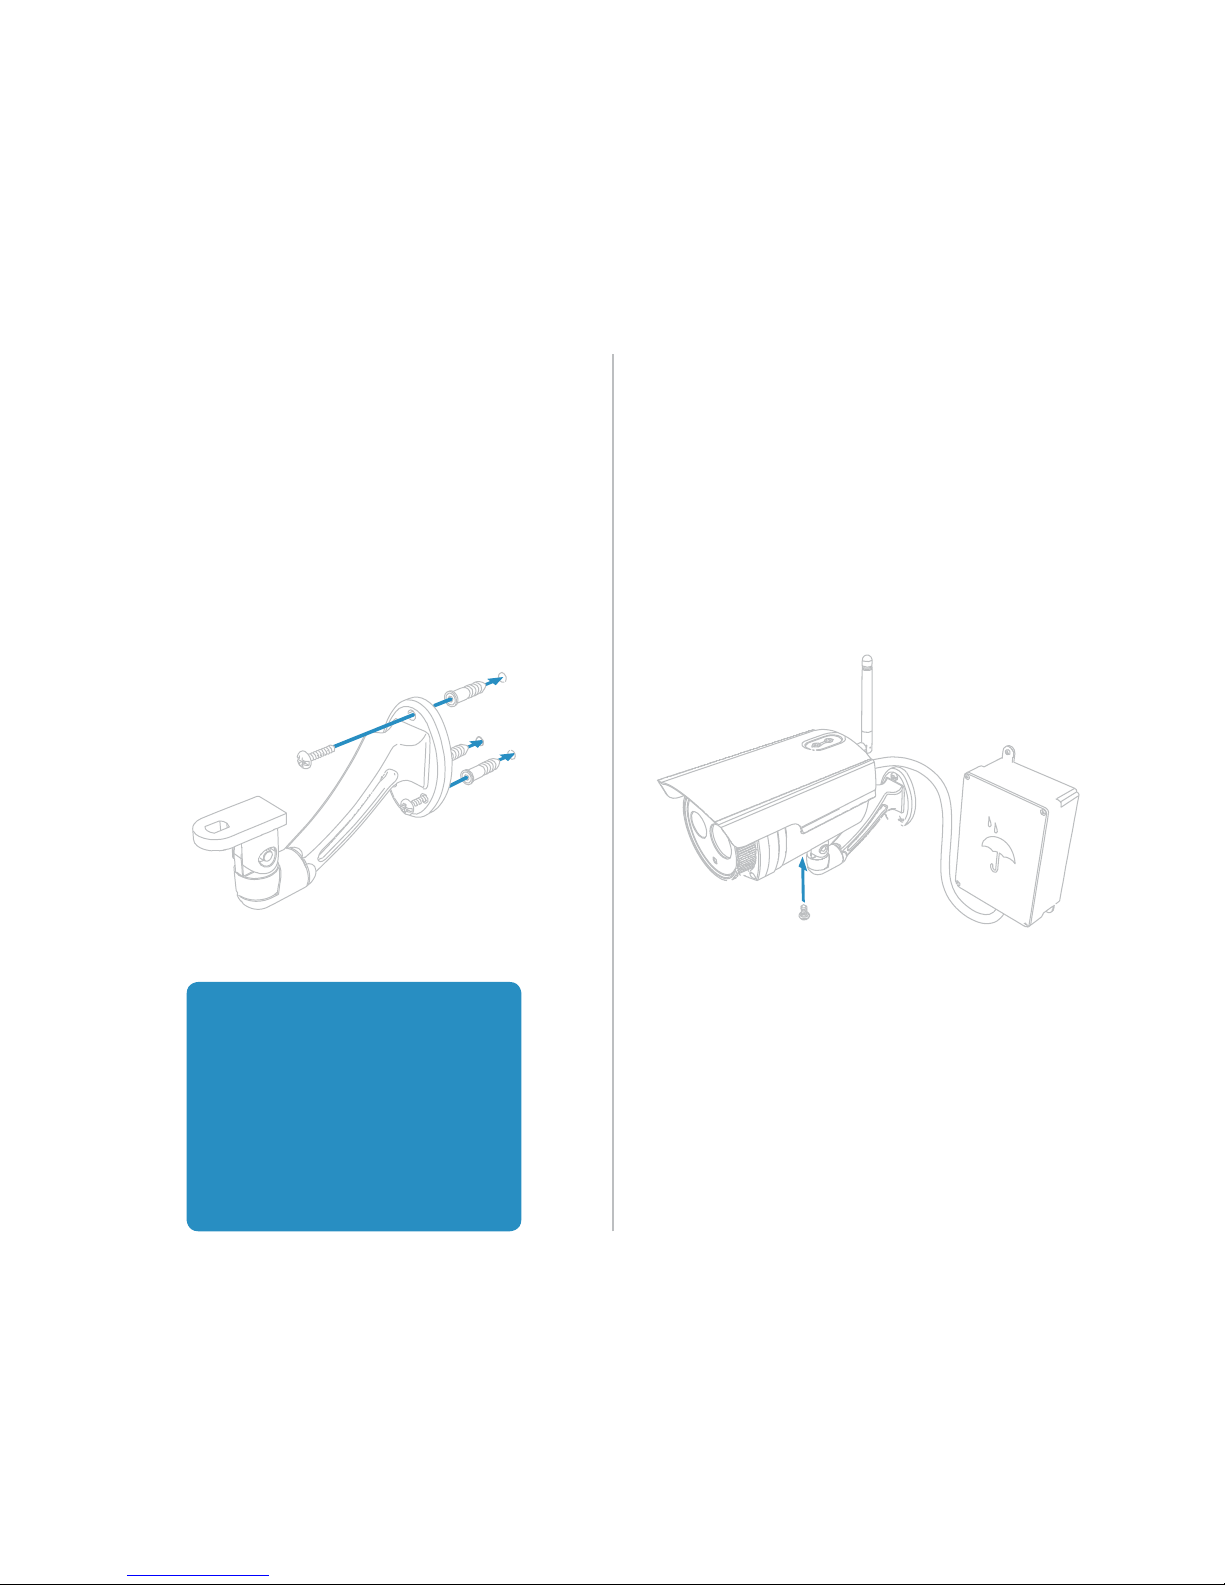
Mounting 9
Insteon app for iPhone, iPad and iPod touch
Congure a Camera for Wired Ethernet 11
Congure a Camera for Wi-Fi 13
Add an Already Congured Camera 15
Add a Remote Camera 18
Advanced Camera Conguration 20
Automatic Remote Access 23
Insteon app for Android
Congure a Camera for Wired Ethernet 25
Congure a Camera for Wi-Fi 27
Automatic Remote Access 30
Web Browser Interface
Web Interface 32
Firmware Update 34
Factory Reset
Indoor Camera 36
Outdoor Camera
Appendix
Specications 38
Troubleshooting 41
Certications and Warnings 42
Declaration of Conformity 43
Product Warranty 44