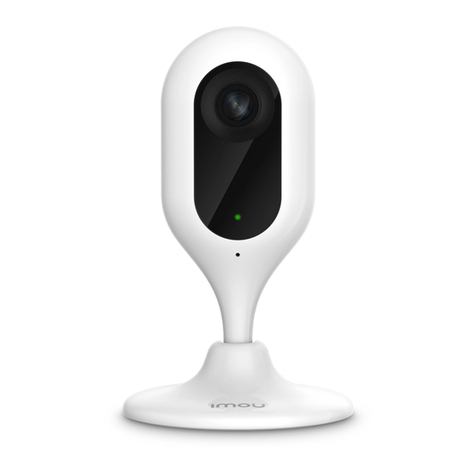
INSYGROW Mini Battery Cam User manual

INSTRUCTION MANUAL
Customers Service
email: support@insygrow.com

English
Italiano
Deutsch
Français
Espanol
P3-P17
P19-P33
P35-P50
P51-P65
P67-P81
Customers Service
email: support@insygrow.com

3
DescriptionSymbols
• SD, TF (TransFlash) SDHC, and SDXC memory cards are referred to as“memory
cards”in this manual.
• Smartphones and tablets are referred to as“smart devices”.
• The setting at the time of purchase is referred to as the“default setting.”
• The names of menu items displayed on the app screen, and the names of
buttons or messages displayed on a computer screen appear in bold.
• In this manual, images are sometimes omitted from screen display samples so
that screen indicators can be more clearly shown.
This icon marks cautions and information that should be read before
using the camera.
This icon marks notes and information that should be read before
using the camera.
This icon marks other pages containing relevant information.
Read This First

4
About the Manuals
• No part of the manuals included with this product may be reproduced,
transmitted, transcribed, store d in a retrieval system, or translated into any
language in any form, by any means, without Insygrow prior written permission.
• Illustrations and screen content shown in this manual may dier from the actual
product.
• Insygrow reserves the right to change the specications of the hardware and
software described in these manuals at any time and without prior notice.
• Insygrow will not be held liable for any damages resulting from the use of this
product.
• While every eort was made to ensure that the information in these manuals is
accurate and complete, we would appreciate it were you to bring any errors or
omissions to the attention of the Insygrow representative in your area (address
provided separately).
Comply with Copyright Notices
Under copyright law, photographs or recordings of copyrighted works made with the
camera can not be used without the permission of the copyright holder. Exceptions
apply to personal use, but note that even personal use may be restricted in the case of
photographs or recordings of exhibits or live performances.
Disposing of Data Storage Devices
Please note that deleting images or formatting data storage devices such as memory
cards does not completely erase the original image data. Deleted les can sometimes
be recovered from discarded storage devices using commercially available software,
potentially resulting in the malicious use of personal image data. Ensuring the privacy
of such data is the user’s responsibility. Before discarding a data storage device or
transferring ownership to another person, make sure to reset all of the camera’s settings
or Restore default settings. After resetting, erase all data in the device using commercial

5
deletion software, or format the device in Format card in the setup menu (rif), then
completely rell it with videos containing no private information (for example, images
of empty sky). Care should be taken to avoid injury or damage to property when
physically destroying memory cards.
For Your Safety
To prevent damage to property or injury to yourself or to others, read“For Your Safety”
in its entirety before using this product. Keep these safety instructions where all those
who use this product will read them.
DANGER
WARNING
CAUTION
Failure to observe the precautions
marked with this icon carries a high risk
of death or severe injury.
Failure to observe the precautions
marked with this icon could result in
death or severe injury.
Failure to observe the precautions
marked with this icon could result in
injury or property damage.

6
WARNING
• Do not use while walking or operating a vehicle. Failure to observe this
precaution could result in accidents or other injury.
• Do not disassemble or modify this product. Do not touch internal parts that
become exposed as the result of a fall or other accident. Failure to observe
these precautions could result in electric shock or other injury.
• Should you notice any abnormalities such as the product producing smoke,
heat, or unusual odors, immediately disconnect charging power source.
Continued operation could result in re, burns or other injury.
• Keep dry. Do not handle with wet hands. Do not handle the plug with wet
hands. Failure to observe these precautions could result in re or electric shock.
• Do not let your skin remain in prolonged contact with this product while
it is on or plugged in. Failure to observe this precaution could result in low-
temperature burns.
• Do not use this product in the presence of ammable dust or gas such as
propane, gasoline or aerosols. Failure to observe this precaution could result in
explosion or re.
• Do not aim the ash at the operator of a motor vehicle. Failure to observe this
precaution could result in accidents
• Keep this product out of reach of children. Failure to observe this precaution
could result in injury or product malfunction. In addition, note that small parts
constitute a choking hazard. Should a child swallow any part of this product, seek
immediate medical attention.
• Do not entangle, wrap or twist the cable around your neck. Failure to observe
this precaution could result in accidents.
• Do not use chargers, AC adapters, or USB cables not specically designated
for use with this product. When using batteries, chargers, AC adapters, and

7
USB cables designated for use with this product, do not:
1. Damage, modify, forcibly tug or bend the cords or cables, place them under
heavy objects, or expose them to heat or ame.
2. Use travel converters or adapters designed to convert from one voltage to
another or with DC-to-AC inverters. Failure to observe these precautions could
result in re or electric shock.
• Do not handle the plug when charging the product or using the AC adapter
during thunderstorms. Failure to observe this precaution could result in electric
shock.
• Do not handle with bare hands in locations exposed to extremely high or
low temperatures. Failure to observe this precaution could result in burns, or
frostbite.
CAUTION
• Do not leave the lens pointed at the sun or other strong light sources. Light
focused by the lens could cause re or damage to product’s internal parts. When
shooting backlit subjects, keep the sun well out of the frame. Sunlight focused
into the camera when the sun is close to the frame could cause re.
• Turn this product o when its use is prohibited. Disable wireless features
when the use of wireless equipment is prohibited. The radio-frequency
emissions produced by this product could interfere with equipment onboard
aircraft or in hospitals or other medical facilities.
• Disconnect the AC adapter if this product will not be used for an extended
period. Failure to observe this precaution could result in re or product
malfunction.
• Do not leave the product where it will be exposed to extremely high
temperatures, for an extended period such as in an enclosed automobile
or in direct sunlight. Failure to observe this precaution could result in re or
product malfunction.

8
DANGER for Device
• Do not mishandle camera. Failure to observe the following precautions could
result in the batteries leaking, overheating, rupturing, or catching re:
1. Use only rechargeable batteries approved for use in this product.
2. Do not expose batteries to ame or excessive heat.
3. Do not disassemble.
4. Do not short-circuit the terminals by touching them to necklaces, hairpins, or
other metal objects.
5. Do not expose batteries or the products in which they are inserted to powerful
physical shocks.
• If battery liquid comes into contact with the eyes, rinse with plenty of clean
water and seek immediate medical attention. Delaying action could result in
eye injuries.
WARNING for Device
• Keep device out of reach of children. Should a child swallow the device, seek
immediate medical attention.
• Do not immerse device in water or expose to rain. Failure to observe this
precaution could result in re or product malfunction. Immediately dry the
product with a towel or similar object should it become wet.

9
Camera Body
1 2 3 4 5 6 7
1098 1211
13
14
15
15 3M Double-sided Tape
1Blu Light
2Red Light (Charging)
3Switch ON/OFF
4Charging Port
5IR LED
6Reset Button
7Microphone
8Proximity Sensor
9Camera Lens
10 Air Cooling Holes
11 Screws
12 Mount Support
13 Magnet
14 Joint

10
Note. The BluecamCloud APP is constantly updated, screenshots and functions may
change from this version of the manual.
• For an updated manual please visit www.insygrow.com/manual/manual_low.pdf
• To read the SD video, from your pc please, download our free software
www.insygrow.com/software/SDCardPlayer.zip or similar free apps to read H264 format
le.
Note: Please set up your camera correctly in accordance with the guidelines of this
quick steps.
Please install the memory card TF (TransFlash) before turning on the camera. This
unit support up to 64Gb memory card (FAT32/ CLASS 10 or above). Please format the
memory card befor use.
1. Charging the camera, and install memory card.The camera starts recording
after booting.Turn o camera, take out the memory card and connect in to the
computer though a card reader for video playback.
2. Use the BluecamCloud APP, connect Wi-Fi. Download the APP on the APP Store
(iOS) or Google Play (Android)
How to record?
Instructions
3. Switch ON the camera using (3). After booting, it will be initialized in about 30
seconds. The device enters in the work standby state, the blu light (1) is alwasy
on.
4. whenever the power switch (3) is turned to the OFF position the device will turn

11
o and the blu light (1) will go out.
5. The device can be connected to a mobile power source or a power adapter (NOT
included) to charge the device. When the device is turned on during charging, it
can perform functions such as recording, taking photos and Wi-Fi connection.
6. When the device is faulty for some reason, it can be reset and the device will
return to the factory setting. Reset as long as you press and hold the reset button
(6) for about 10 seconds.
7. the device will automatically restart after the reset operation. After resetting the
factory setting, the setting used in the previous settings need to set again.
How to connect the app
How to connect the app
Turn on the camera
Please install a micro SD card (TransFlash) before turnig on
the camera
Turn on the camera, and long press reset button(6) for about
10 seconds.
STEP 1: After devide is turned on, the camera enters in
initialization, and after about 30 seconds, the initialization
ends and the blu light (1) starts ashing.
STEP 2: After the device is initialized, open the BlucamCloud
APP:
For any camera conguration problems write us at:
support@insygrow.com, you will receive assistance.
Our team will follow you step by step.

12
Tap ADD device, or click “+” symbol.
Now you must select Mini Battery
CAM and select Insigrow CAM (Mini
Battery CAM)
(Pic1)
(Pic2)
If you do not see blue light ashing press and hold the reset button for 10s, and go to
STEP 2
STEP 3: click NEXT (Pic3) and tap
Connect to Wi-Fi.(Pic4)
Pic1 Pic2
Pic3

13
Note: if the camera working environment without Wi-Fi
network, the user can connect the camera via AP hot spot.
First, click“AP hotspot connection”, it will show that the
hotspot’s password had been copied, go to Wi-Fi setting to
nd the hotspot and click“Conrm”.
Second, input the password to connect the hotspot(HOW-
xxxxxx), the password is 168168168;
STEP 4: select your network and write the password for your
Wi-Fi network (Pic5)
Note: the password must be no
longer than 28 characters, and
special characters allowed (_-
!”#$%&’()*+,./:;=?@[\]^`{|}~)
STEP 5: click NEXT and keep your
device (tablet or phone) near the
camera.(Pic6)
Pic4
Pic5 Pic6

14
STEP 6: click NEXT and wait for the comunication between
your device and the camera. (Pic7)
Now after the cam conguration si complete, click“add device”
button and you will see the Divice List.(pic8)
You can click play button (Pic9) and now you can monitor your
room at any time you want. To see on line camera when you
are out you must tap to my account and create an account
for free.
You can connect the app in another two ways:
Manual connection and QR code connection
Pic7
Pic8
Pic9

15
Manual Connection
QR code connection
Click the enter icon (25) and insert the ID: (ex HOW-XXXXXX-
XXXXX), user admin, and password admin (admin for the rst
use)
click the QR icon (26) and scan che QR code back on the
camera.
25
26

16
How to set alarm settings
How to set alarm settings
Tap setting menu icon, and search for Alert Settings. Activate
motion alarm to have pushing alert from camera.

17
16 17 201918 21
22 23 24
16 audio ON/OFF
17 Resolution SD: 720p, HD: 1080p
18 IR auto/OFF
19 vertical mirroring
20 horizontal mirroring
21 horizontal monitor
22 video recorder
23 audio recorder
24 take a picture
Resolution HD:1920*1080, SD:1280*720
Features
AP model Device AP hot spot
Night vision 5m
Recording 24/7, Alert trigger recording
Video format H.264
Storage Max 64 GB
Power supply DC5V/1A
Battery Li-PO Battery
System IOS 8.0 and up, Android 7.0 and up

18

19
DescrizioneSimboli
• Schede di memoria SD, TF (TransFlash) SDHC e SDXC verranno chiamate
“schede di memoria” in questo manuale.
• Smartphone e tablet verranno chiamati “dispositivi”.
• L’impostazione al momento dell’acquisto viene chiamata“impostazione di
default”.
• I nomi delle voci di meno visualizzate sullo schermo dell’app e i nomi dei
pulsanti o messaggi visualizzati su uno schermo di computer appaiono in
grassetto.
• In questo manuale, le immagini sono talvolta omesse dagli esempi di
schermate in modo da mostrare chiaramente gli indicatori a schermo.
Questa icona contrassegna cautele e informazioni da leggersi prima
di utilizzare la camera.
Questa icona contrassegna note e informazioni da leggersi prima di
utilizzare la camera.
Questa icona contrassegna altre pagine contenenti informazioni
rilevanti.
Si Prega Di Leggere Prima Questo

20
Informazioni sui Manuali
• Nessuna parte di manuali inclusi con questo prodotto può essere riprodotta,
trasmessa, trascritta, conservate in un sistema di recupero o tradotta in alcuna
lingua in alcun formato, tramite alcun mezzo, senza il precedente permesso
scritto di Insygrow.
• Le illustrazioni e il contenuto della schermate mostrate in questo manuale
possono dierire dal prodotto reale.
• Insygrow si riserva il diritto di modicare le speciche hardware e software
descritte in questi manuali in qualsiasi momento e senza preavviso.
• Insygrow non sarà ritenuta responsabile per qualsivoglia danno risultante
dall’uso di questo prodotto.
• Benché venga fatto ogni sforzo per assicurare l’accuratezza e la completezza delle
informazioni contenute in questi manuali, apprezzeremo molto se potessi portare
all’attenzione del rappresentante Insygrow della tua zona qualsiasi errore od
omissione (indirizzo fornito separatamente).
Confomrità con gli Avvisi di Copyright
Sotto la legge del copyright, fotograe o registrazioni di materiale protetto da
copyright realizzati con la fotocamera non possono essere usati senza il permesso del
detentore del copyright. Eccezioni si applicano all’uso personale, ma si noti che anche
l’uso personale può essere limitato in caso di fotograe o registrazioni di mostre o
performance dal vivo.
Smaltimento dei Dispositivi di Conservazione Dati
Si prega di notare che l’eliminazione delle immagini o la formattazione dei dispositivi
di conservazione dati come le schede di memoria non cancella completamente i dati
immagine originali. I le eliminati possono talvolta essere recuperati dai dispositivi
di archiviazione scartati utilizzando software commercialmente disponibile, dando
potenzialmente come risultato l’uso doloso dei dati immagine personali. Assicurare
Table of contents
Languages:


