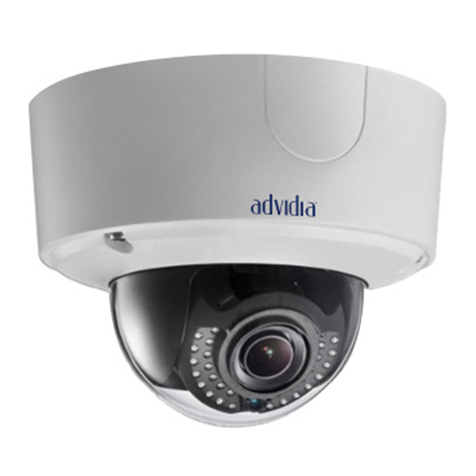
Intelbras VIP 3430 B G2 User manual

User’s Manual
VIP 3430 B G2
VIP 3430 D G2

VIP 3430 B G2 and VIP 3430 D G2 IP Cameras
Congratulations, you have just purchased a product with Intelbras quality and safety.
Intelbras IP cameras are security cameras with 2 megapixel resolution and high denition
images for IP video monitoring and surveillance systems. They can be used with Intelbras
CCTV systems, for a safe, stable and integrated monitoring system. Their installation and
management can be done through the web interface quickly and easily.

Care and Safety
» Electrical safety: installation and operations must be in compliance with local electrical safety codes. We are not
responsible for re or electrical shock caused by improper handling or installation.
» Transport safety: care must be taken to avoid damage caused by weight, violent vibrations, or splashing water during
shipping, storage, and installation.We are not responsible for any damage or problems arising from the use of integrated
packaging during transport.
» Installation: do not touch the camera lens in order not to affect the video quality.
» Need for qualied technicians: the entire installation process must be conducted by qualied technicians. We are not
responsible for any problems arising from unauthorized modications or repair attempts.
» Environment: the camera must be installed in a location protected from exposure to ammable, explosive or corrosive
substances.
» Camera Care: do not install the camera on unstable places. The camera may fall, possibly causing serious injury to a
child or adult. Use it only with the bracket recommended by the manufacturer. Do not aim the camera at the sun as this
may damage the CMOS. Do not install the camera in locations where the temperature exceeds the levels allowed in the
technical specications. Avoid exposing the camera to strong magnetic elds and electrical signals.
» Accessories care: always use the accessories recommended by the manufacturer. Before installation, open the
packaging and check that all components are included. Contact your local reseller immediately if you cannot nd a
component in the package.
» Save the packaging for future use: carefully save the Intelbras VIP camera packaging in case it needs to be sent to
your local reseller or to the manufacturer for maintenance services. Packaging other than the original may cause damage
to the device during transport.
» LGPD - General Personal Data Protection Law: this product has the option of encrypting data in transit and cannot
encrypt it while idle. Intelbras does not access, transfer, capture, or perform any other type of personal data processing
with this product, with the exception of data required to operate the services. For more information, see the chapter on
equipment security methods.
The use of this Product allows you to collect personal data from third parties, such as facial image, biometrics, vehicle
identier, email, phone. Therefore, in order to process such data you must comply with local legislation ensuring the
protection of the rights of the personal data subjects by implementing measures including, but not limited to: informing,
in a clear and visible way, the personal data subject about the existence of the surveillance area and providing contact
information for any questions and rights guarantees.
Attention:
» Use a dry cloth to clean the dome and/or the transparent camera lens protector. If any dirt is difcult to remove, use a
mild (neutral) detergent and wipe gently. Do not clean the dome and/or transparent lens protector with any other type
of product (e.g. alcohol), as this may stain the equipment, impairing image viewing;
» To ensure the recording of images, it is recommended to use the regular recording mode and not the motion detection mode;
» Avoid installing the camera in environments with frequent movement, for example, bushes and foliage, since they could
block the images of interest and could also consume storage (processing) unnecessarily;
» For use in critical scenarios, such as high security or law enforcement situations, use the regular recording mode. Do not
use motion detection recording for critical scenarios.

Summary
1. Products 6
1.1. VIP 3430 B G2 and VIP 3430 D G2..............................................................6
1.2. Physical features of the camera ................................................................6
1.3. Installation requirements for intelligent video analytics ...............................................8
2. Access to the interface 8
3. View 10
3.1. Stream setup .............................................................................10
3.2. Camera Functions .........................................................................11
3.3. Video display control .......................................................................11
3.4. System Menu.............................................................................12
3.5. Play....................................................................................13
4. System conguration 15
4.1. General .................................................................................15
4.2. Video...................................................................................16
4.3. Network ................................................................................17
4.4. Maintenance .............................................................................19
4.5. Services .................................................................................20
4.6. Interface ................................................................................32
4.7. Parameters ..............................................................................34
4.8. Photo ..................................................................................37
4.9. Activate Analysis ..........................................................................38
5. Congure Settings 38
5.1. Users...................................................................................38
5.2. Default Conguration.......................................................................40
5.3. Backup .................................................................................41
5.4. Scheduling...............................................................................41
5.5. Location ................................................................................43
5.6. Update .................................................................................46
5.7. Recording ...............................................................................46
5.8. Media destination .........................................................................47
5.9. Audio. . . . . . . . . . . . . . . . . . . . . . . . . . . . . . . . . . . . . . . . . . . . . . . . . . . . . . . . . . . . . . . . . . . . . . . . . . . . . . . . . . .47
6. Congure Event 48
6.1. Motion detection ..........................................................................48
6.2. Audio detection ...........................................................................50
6.3. Object Detection ..........................................................................51
6.4. Anomaly ................................................................................54
6.5. Video Masking............................................................................56
6.6. Area of interest ...........................................................................56

7. Congure Information 57
7.1. Version .................................................................................57
7.2. Logs ...................................................................................57
7.3. Logged user..............................................................................58
7.4. Alarm ..................................................................................58
8. Logout 60
9. Frequently Asked Questions 60
Warranty Terms 61

6
1. Products
1.1. VIP 3430 B G2 and VIP 3430 D G2
Connections
The following gure illustrates the camera’s multi-function cable.
1
2
1
2
1. Red
2. Black
1
8
1. Gray
2. Gray
3. Blue
4. Yellow
5. Yellow
6. Orange
7. Purple
8. Brown
1. Blue
2. Orange
3. Purple
4. Brown
5. Black
6. NC
7. NC
8. Red
9. Gray
10. NC
11. Yellow
12. NC
1
12
VIP 3430 B G2 and VIP 3430 D G2 multifunction cable
Model Function Connector Description
1Power Supply P4 12 V Direct Current power input
2Network and PoE RJ45
Ethernet
network input, PoE power (802.3af)
1
2
1
2
1. Red
2. Black
1
8
1. Gray
2. Gray
3. Blue
4. Yellow
5. Yellow
6. Orange
7. Purple
8. Brown
1. Blue
2. Orange
3. Purple
4. Brown
5. Black
6. NC
7. NC
8. Red
9. Gray
10. NC
11. Yellow
12. NC
1
12
VIP 3430 B G2 and VIP 3430 D G2 multifunction cable
Attention: in the event of cable breakage, the above color guide can be used for the maintenance of the connectors. It
is recommended that this procedure be done by an authorized technical service.
1.2. Physical features of the camera
» Use the following images as a reference for the dimensions of the camera. Units are in millimeters (mm).
166,2 (6,54) 68,7 (2,7)
93,7 (3,69)
82,2 (3,24)
Ø70 (Ø2,76)
Ø56 (Ø2,20)
3 - Ø 4,5 (Ø0,18)
VIP 3430 B G2

7
99,1 [3,9”]
83,3 (3,28) 4 - 4,5 ×5,5
Ø 84 (Ø 3,31)
Ø 109,9 (Ø 4,33)
VIP 3430 D G2
Attach the camera using the screws and plugs that come with the product.The following illustration shows the details:
Detailed view VIP 3430 B G2
Detailed view VIP 3430 D G2
On the bottom of the camera there is a cover that can be opened, where the camera reset button is located (in case of loss
of password, the user can perform a factory reset by pressing and holding this button for more than 10 seconds) and the
micro-SD card slot (not included). The camera supports cards of up to 256 Gb.

8
Bottom Cover VIP 3430 B G2
Reset
Button
SD
Bottom Cover VIP 3430 D G2
Reset
Button
1.3. Installation requirements for intelligent video analytics
The VIP 3430 G2 camera has video analytics features that provide a more complete and reliable monitoring system. Please
observe the following details during installation to use video analytics:
» In bright environments it is recommended to use WDR or another compensation feature to balance the lighting, in dark
environments auxiliary lighting should be used.
» Install the camera rmly to avoid shaking.
» Avoid placing the camera in locations with mirrors, water or other reective surfaces.
» Avoid installing the camera in places that are obstructed by bushes, foliage, and the like, since these not only block the
objects of interest but also consume unnecessary bandwidth.
Keep in mind that the video analysis functions have the following limitations:
» They are dependent on the free processing of the camera, and other functions such as motion detection, high resolution
and high bit rate can compromise the performance of this feature.
» The accuracy rate is approximately 80%, but can be higher or lower depending on the installation and processing
parameters.
» Fast moving objects such as cars and motorcycles are difcult to detect.
» Weather conditions such as rain and fog can impair the performance of the detections.
» Video analysis functions should not be used in critical scenarios, life or death situations, or for law enforcement.
» It is recommended that motion detection recording be done in scenarios that do not have constant motion.
2. Access to the interface
The interface provides the user with all the camera controls. To access it, simply double-click on the camera in the Ip Utility
Next program or simply type the camera’s IP in a web browser.
Access interface

9
Note: the client is asked to set up a password on rst access.
Startup Conguration
Note: » After 5 login attempts with an incorrect password, the system automatically blocks further attempts for this user
for 30 minutes.
» When accessing the camera for the rst time, you will be prompted to download and install the video viewer plugin
in Internet Explorer.
» If the camera is connected to a network with no DHCP server, the camera’s default IP is:
192.168.1.108.
» By clicking on the item Forgot your password?, below the
Password
eld, a message will be displayed as shown in
the following image, so that it can be sent to the registered e-mail and cell phone, containing a security code (the
Send button must be clicked for the camera to send the e-mail).The security code received in the registered e-mail
must be lled in the Security Code eld and then go to the next step, where the password must be changed. The
e-mail must be dened on rst access, as the gure User Conguration shows.
Change Password

10
3. View
Once logged into the camera, you will be in the
View
tab:
View
1. Stream setup.
2. Camera Functions.
3. Video display control.
4. System menu.
5. Play.
3.1. Stream setup
The cameras have two video streams: the main stream and the extra stream.
You can select which stream to display in the browser, as well as which protocol will be used for display.
Stream conguration
Function Description
Main stream For use in an environment with available bandwidth. Can record video les and be used in monitoring softwares
Extra stream For use in a limited bandwidth environment, as it has lower video resolution. Can record video les and be used in
monitoring software
Protocol You can select the media control protocol. The available protocols are
TCP/UDP/Multicast

11
3.2. Camera Functions
In the
View
interface you can perform some functions such as recording the displayed video and taking pictures. These
functions are listed below.
1 2 34 5
Camera Functions
1. Photo: takes a picture of the video being played. The photos are saved¹ in the directory specied in item 5.8
Media destination
.
2. Digital Zoom: after clicking on this icon, select an area in the video to digitally zoom into it.
3. Record: when clicked, the video being played starts being saved¹ in the directory specied in item 5.8
Media destination
.
To stop recording, click the icon again.
4. Audio: enables/disables receiving audio coming from the camera’s microphone.
5. Enable Analysis: when clicked, the Video Analysis rules will appear in the video that is being displayed. It is important
to note that this is only a function for viewing the rules, not for enabling or disabling the function.
¹ It is necessary to be running Internet Explorer® as administrator for photos or videos to be saved to the hard disk.
2
Audio function available only in the Dome model.
3
These functions are all available only in the Internet Explorer® browser.
3.3. Video display control
The video display control buttons are located in the lower left corner of the video stream. They are:
Video display controls
Colors
Allow changing of color parameters
When you click on the button, a new screen will open, as shown in the following image::
Color Properties

12
Color adjustment details
The changes made here apply only to the stream viewed in the browser and to the photos taken using the
Photo
button,
seen in item
3.2. Camera Functions.
Full Screen
Expands the video until it takes up the whole screen. This option is affected by the
Video Aspect Ratio
option.
The same result is achieved by double-clicking on the video, only in the Internet Explorer browser.
3.4. System Menu
Through the following menu you will have access to the camera´s settings:
System Menu
Tab Description
Settings Used to perform settings for camera, network, event, storage, system, and camera information
Logout Logs out from the camera´s web page
Intelbras Cloud Enables you to access your security system quickly and easily, without port redirection and complicated congurations
Intelbras Cloud
Although it does not appear in the
Services
menu, the Intelbras Cloud is a service, and its conguration will be described
below. This service allows you to access your security system quickly and easily, eliminating the need for port redirection
and complicated congurations.
Connection status
» Connected: reports that the camera is registered on the Intelbras Cloud server and is ready for use.
» Disconnected: reports that the camera is without network access or does not have access to the Intelbras Cloud server.
If the camera does not have access to the server, we suggest checking if the Enable eld is selected.
» Access denied: reports that the camera is not registered on the Intelbras Cloud server.
Note: The
Disconnected
status can also be reported when the camera has no Internet access. In this case we suggest
checking the connections and the local network.

13
Intelbras Cloud
» Enable: by default this feature comes enabled. If you don’t want to use it, just uncheck the check-box next to the word
Enable.
» Serial Number: camera serial number, registered in the
Intelbras Cloud
service
.
» Status: If your network is functioning normally and the serial number is enabled on the server, the Status eld will show
the status Connected highlighted in green. If there is a problem in your network or serial number, it will show the status
Disconnected highlighted in red.
Intelbras Cloud
Attention!
» The Intelbras Cloud service grants access to your device without the need for port redirection.
» To help you remotely manage your device, Intelbras Cloud will be activated. After activating and con-
necting to the internet, we need to collect the IP address, MAC address, device name, device ID, etc. All
information collected is only used for the purpose of providing remote access to the user. If you do not
agree to activate the
Intelbras Cloud
feature, please uncheck the option.
3.5. Play
The
Play
tab lets you view and download photos and recordings from a previously congured memory card in the camera.
Using the
S.I.M. Next
software you won’t be able to view the recordings from the memory card.
Playback
1. Recording Details.
»Extension: you can choose between viewing video
(.dav)
or photos
(.jpeg).
» The
Origin
eld is for information only.
2. Calendar.
To nd recordings and photos select the desired day (days with available recordings and photos are highlighted in blue).

14
3. Playback controls.
1 2 3 4 5 6 7
Playback options
Item Function
1 Play
2Stop
3Next frame
4Slow forward
5Fast forward
6Volume
7Video analysis display
4. Type of recordings.
The system generates the les according to the pre-congured events, there are different search options:
All, Regular,
Event, Alarm, and Manual.
5. Timeline.
Choose the time you want to play a recording and the system will start playing the video, the timeline colors are
representations of the recording types.
6. Timeline Scale.
Select which interval should be displayed on the timeline.
7. Download recordings.
To download a recording, choose the start time on the timeline and click the
Select start
button (as in image 1), then
choose the end time on the timeline and click the
Select end
button (as in image 2), conrm the chosen period and
click
Download
(as in image 3)
.
3
2
1
Video editing example
8. Display list of recordings.
Displays the recordings and photos in a list and then it will be possible to download directly from the list of recordings,
for videos the formats are
.dav
and .
mp4,
for photos the download is in .
jpg
format.

15
4. System conguration
Through this menu you can make general settings, video, network, maintenance, services, interface, activate analysis, parameters,
and of the photos captured by the camera.
4.1. General
Within this item are settings for Device Name, Language, Date Format, Time Format, Time Zone, Current Time, Summer
Time, Synchronize with NTP, and Alternative NTP.
Date and time
» Device Name: it is the name of the device, which by default is the serial number.
» Date format: it has the options
Year-Month-Day, Month-Day-Year, and Day-Month-Year.
» Time Format: choice of time system: 12-hour or 24-hour.
» Time Zone: adjusts the time zone according to the desired region.
» Current time: enables manual adjustment or synchronization of the clock to the time of the computer the session is
running on.
» PC Sync: Synchronizes the camera’s time with that of the computer.
» Summer Time: selects the start and end date/time of daylight saving time for the current year.
» Mode: sets the summer time period by Date or Week.
» Synchronize with NTP: enables clock synchronization with
NTP
servers, being possible to congure up to two servers,
a main one and an alternative one, the latter used when the main one is not accessible.
» Update period: time interval in which the device will query the server and synchronize the time.

16
4.2. Video
In this menu you can make video settings. The device has two streams or viewing planes. The Main Stream is always
enabled, while the Extra Stream can be disabled.
Video
» Compression type: there are four options: H.264, H264B, H.265 and Smart Compression (H.265+).
H.264B
uses a
lower compression level compared to H.264. Smart compression is more efcient than H.264 because, at scale, it requires
fewer bits for a sharper image.
H.265+
is a variant of H.265 that lowers the bit rate even further while maintaining the
image´s quality.
Note: using H.265+ limits some functions (most of the Video Analysis, UDP and Multicast) and requires the device to
reboot.
» Resolution: The camera has the following resolution settings:
Main stream resolution
Note: see MHDX 1108 recorder restriction in section 9. Frequently Asked Questions.
» Frame rate: is the amount of images per second (1~30). When increasing the frame rate, it is necessary to increase the
bit rate as well, in order to maintain the same quality in the video.
» Bit rate type: there are two options:
CBR
and
VBR.
» CBR: uses a constant bit rate all the time. However, at times of little movement the image quality could still be the
same with a lower bit rate. With CBR it is easy to predict the required storage size.
» VBR: uses variable bit rate, optimizing space use. Allows greater space utilization at times of need, reducing the
bitrate to a minimum at times of low trafc.
» Bit Rate Range: displays the minimum and maximum rates to be used, based on the selected Compression Type,
Resolution, Frame Rate, and I-Frame Interval.
» Bit rate: determines the value when the bit rate type is CBR.
Note: the bit rate values must respect the minimum and maximum values of their reference.
» I-Frame interval: I-Frame is a frame in the video that has a larger size than the others. The smaller the number of
I-Frames, the lower the bitrate, but as a consequence a video that has fast movements (a car at high speed, for example)
may be shown with poor quality. The smaller the value, the more I-Frames will be sent.

17
» Watermark: watermarks are intended to ensure that a video generated by the camera is not altered. The watermark
text can be up to 126 characters long.
Attention: the watermark is not shown on the video. It can be used to check if the video has been altered using a
specic software.
» Extra Stream
Lower resolution stream used to transmit at a lower bitrate. It comes enabled from the factory, but can be disabled by
un-checking the checkbox next to the
Extra Stream
column.
» Compression type: there are four options:
H.264B, H.264, MJPEG, and H265
.
H.264B
uses a lower compression
level compared to H.264.
H.264
is more efcient than MJPEG because it requires fewer bits for a sharper image.
H.265 is more efcient than H.264 because, in scale, it needs fewer bits for a sharper image. If the
MJPEG
encoder is
used, the user must increase the bitrate to a higher value than the one used by H.264.
» Resolution: it has lower resolutions compared to the main Stream.
Extra stream resolution
Note:
the other settings are similar to those of the main Stream
.
4.3. Network
Under
Network
you will nd all the network settings that the camera has. From IP address conguration to port
conguration. In this menu IP settings are performed on the camera.
TCP/IP - version 4
» Mode: in
Mode
there are two options:
» Static: when
Static
is selected, you need to set the IP Address, Subnet Mask and Gateway manually. These settings
will be static and if you move the network camera, you may need to access it to recongure these options.
» DHCP: When in DHCP, the camera receives the IP Address, Subnet Mask and Gateway automatically from a server
connected to the network. If the camera is moved to another network that also has a
DHCP
server, it will receive these
settings from this new server without the need to access it for reconguration.
» MAC address: eld where the camera’s MAC address is displayed.

18
» IP Version: the camera operates with both IP protocols,
IPv4,
as shown in
TCP/IP Version 4
image, and
IPv6
, as shown
in the following image.
TCP/IP - version 6
» IP address: in
Static
mode you can set the desired IP.
Attention: it is necessary to check an available IP on the network to avoid conict between two devices.
» Subnet Mask: eld to congure the subnet mask of the device, when in
Static
mode. This eld will only appear when
IPv4 is enabled.
» Local Link: local IPv6 address for camera access. Each device has its own local link. To access the camera using this
address, simply be on the same network as the camera. This option appears only when
IP version - IPv6
is selected.
» Gateway: eld to set the gateway of the device, when in
Static
mode.
» Primary DNS: eld to congure the IP address of a
DNS
server.
» Secondary DNS: eld to congure the IP address of a
DNS
server. This is the alternate server that will be used when
the Primary DNS is inaccessible.
» Simultaneous Connections: denes the maximum number of simultaneous connections to the camera’s web
interface. The maximum allowed is 20 connections. For video stream access, for example: via web interface, iSIC, RTSP,
etc., the maximum allowed is 4 independent video streams.
»
TCP
port: the default value is
37777
. It can be changed to values between 1,025 and 65,535.
»
UDP
port: the default value is
37778
. It can be changed to values between 1,025 and 65,535.
» HTTP Port: the default value is
80.
It can be changed to other values if necessary.
»
HTTPs
Port: port used to access the IP camera via HTTP over an additional security layer.At this layer, data is transmitted,
encrypted and the authenticity of the camera is veried using digital certicates. The default value is
443
. It can be
changed to values between 1,025 and 65,535.
Note:
To change the HTTPs port, you must disable the HTTPs service so that you are then allowed to change the
port.
»
RTSP
port: the default value is 554, but it can be changed.
Note:
to access the camera’s video stream through software, you can use the camera’s RTSP path, which is
:
»
For the Main Stream
rtsp://USER:PASSWORD@IP:PORT/cam/realmonitor?channel=1&subtype=0
»
For the Extra Stream
rtsp://USER:PASSWORD@IP:PORT/cam/realmonitor?channel=1&subtype=1

19
Being:
»
IP: the device’s IP address.
»
Port: port congured in the RTSP Port eld. It can be left blank if the default value is 554
.
»
User/Password: username and password for access to the web interface. These elds can also be excluded if
verication is not required. In this case the address will be: rtsp://IP:PORT/cam/realmonitor?channel=1&subtype=0
Because the video is encoded and decoded in real time, there can be a delay of up to 4 seconds between the video
stream in the web interface and the video stream over the RTSP protocol.
» Enable ARP/Ping for setting the IP address service: with this option enabled, it is possible to modify the camera’s
IP via ARP/Ping commands. During camera startup, you will be able to congure the camera’s IP by this method for 2
minutes.
To make this change open the command terminal and type:
Reboot the camera and try to access it through the new IP you dened.
4.4. Maintenance
This menu makes it possible to restart the device automatically, instant restart.
Maintenance
» Restart automatically: sets the time at which the camera will restart.
» Restart now: restarts the camera instantly.

20
4.5. Services
This menu makes it possible to congure various functions.These are: PPPoE, DDNS, RTSP, Multicast, UPnP®, IP Filter, QoS,
IEEE 802.1X ,Bonjour, SIP, Onvif, HTTPs, SMTP (E-mail), RTMP and Security.
PPPoE
In this option the camera’s PPPoE authentication settings are made. Simply enter the user name and password and enable
the function. It is generally used when the camera is directly connected to a modem.
PPPoE
» Enable: enables PPPoE authentication.
» User: user of your internet service provider.
» Password: password of your internet service provider.
After conguring it with valid data, this same screen will display the IP address that the camera received from the PPPoE
server, as shown in the following example.
Registered IP
Note
:
Only your Internet provider can provide you with the user name and password. This camera model has both PAP
and CHAP authentication types.
DDNS
DDNS references a name to the device’s IP, making it easy for the user to access it even with an IP change.
DDNS
The device supports some
DDNS
service providers, which are congured as shown in the following image:
DDNS
This manual suits for next models
1
Table of contents
