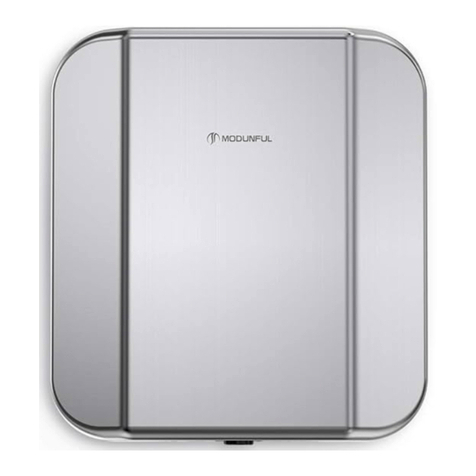
Intelligent Facility Solutions Machflow Series User manual

SECADOR DE MANOS / HAND DRYERS / SÉCHE-MAINS /
HÄNDETROCKNER / SECADOR DE MÃOS / ASCIUGAMANI /
/
GFM201 /GFM202 / GFM203
MANUAL DE INSTALACIÓN Y UTILIZACIÓN
INSTALLATION AND OPERATING MANUAL
MONTAGE-UND BENUTZERHANDBUCH
MANUAL DE INSTALAÇÃO E UTILIZAÇÃO

https://www.intelligenthanddryers.com/
Antes de realizar cualquier operación, por favor, lea atentamente y tenga en cuenta todas
y cada una de las siguientes instrucciones de seguridad:
- Sólo un técnico cualificado puede instalar, ajustar y realizar el mantenimiento de este aparato.
Todas las operaciones que se realicen sobre él deben estar de acuerdo con la legislación y la
normativa de seguridad, tanto europea como local, que estén en vigor en ese momento.
- Tener mucho cuidado cuando se retire la carcasa ya que partes activas del aparato pueden
quedar al descubierto con el consecuente riesgo de electrocución.
- Antes de realizar cualquier manipulación eléctrica, se debe cortar la tensión eléctrica de
entrada con el objetivo de evitar el riesgo de electrocución.
- El aparato debe ser fijado fuera del alcance de cualquier fuente de agua, cumpliendo en todo
momento las distancias de seguridad marcadas en la normativa IEC actual, tal y como se
muestra en la figura siguiente:
- Tener en cuenta también las normativas y especificaciones locales de instalación, ya que
puede darse el caso que requiera de una distancia de seguridad a una fuente de agua de más
de un metro de distancia.
- Se deben prever medios de desconexión de la red de alimentación, con una separación de
contacto de al menos 3 mm en todos los polos. Dichos medios de desconexión deben ser
incorporados a la red fija, de acuerdo con la normativa legal europea vigente.
- Este aparato pueden utilizarlo niños con edad de 8 años y superior y personas con
capacidades físicas, sensoriales o mentales reducidas o falta de experiencia y conocimiento, si
se les ha dado la supervisión o formación apropiadas respecto al uso del aparato de una
manera segura y comprenden los peligros que implica. Los niños no deben jugar con el
aparato. La limpieza y el mantenimiento a realizar por el usuario no deben realizarlo los niños
sin supervisión.
- El aparato no debe ser instalado en una superficie inflamable.
- Para fijar el secador a la pared deben seguirse las instrucciones de este manual y usar la
plantilla de montaje que también se suministra con el aparato. Fijar la máquina a la pared con
adhesivos o métodos similares está totalmente prohibido por las normas de seguridad
europeas.
INSTRUCCIONES DE SEGURIDAD
ESPAÑOL

3
Los secadores de manos que integran la familia ‘Machflow’ ofrecen las siguientes
características técnicas:
Funcionamiento automático. La detección de las manos está basada en el uso de
sensores de movimiento del tipo IR.
Son aparatos del tipo clase I, con toma de tierra.
Proporcionan un haz de aire potente, concentrado y homogéneo.
La distancia de detección de las manos es ajustable.
La velocidad del aire generado por el secador de manos también se puede ajustar,
consiguiendo un equilibrio óptimo entre la potencia de secado y el nivel de ruido
acústico.
Incorporan un sistema inteligente de detección y discriminación de ‘blancos’ fijos
(mármoles, repisas o similares). Al detectar un ‘blanco’ fijo, el secador se desconecta a
los pocos segundos.
Incorpora un sistema antivandálico con parada automática. El tiempo máximo de
funcionamiento continuo es de 60 segundos.
Incorpora un motor universal de alta velocidad y el accionamiento del mismo se realiza
de forma progresiva para controlar la inercia de su par de arranque y así garantizar la
máxima vida útil del secador.
SÓLO UN TÉCNICO CUALIFICADO PUEDE REALIZAR LA INSTALACIÓN, LOS AJUSTES
NECESARIOS Y EL MANTENIMIENTO DE ESTE SECADOR DE MANOS, CON EL FIN DE
CUMPLIR LOS REQUERIMIENTOS LEGALES.
Extracción de la carcasa.
El secador de manos se suministra con la carcasa atornillada a la base. (Figura nº 1).
Extraer con cuidado la carcasa, ya que está unida a la base por una pestaña que
ensambla ambos elementos (carcasa y base) por su parte trasera (Figura nº 2).
Retirar la carcasa manteniéndola siempre inclinada (Figura nº 3) hasta extraer
completamente la pestaña superior, con precaución de:
no dañar los componentes internos, especialmente el circuito electrónico,
no rayar ni deteriorar el visor de los sensores LED,
no dañar la superficie de la carcasa.
ATENCIÓN: AL DESMONTAR LA CARCASA PARTES ACTIVAS DEL APARATO QUEDAN
ACCESIBLES.
INTRODUCCIÓN
INSTALACIÓN
Figura nº 1.
Figura nº 2.
Figura nº 3.

https://www.intelligenthanddryers.com/
Montaje.
La conexión a la red eléctrica se realizará preferentemente a través de canalización posterior.
Para realizar el montaje del secador de manos seguir los siguientes pasos:
Realizar cuatro taladros de 8 mm. (0,31”) de diámetro en la pared, utilizando la plantilla
suministrada (Figura nº 4).
Limpiar todo el polvo de los agujeros realizados e insertar los tacos.
Pasar los cables de alimentación procedentes de la red eléctrica a través del agujero
de diámetro 22 mm. (0,87”) que está situado sobre la regleta de conexión del aparato
(Figura nº 5)
Atornillar con firmeza la base del aparato a la pared (Figura nº 6), asegurando que los 4
silent-blocks quedan correctamente colocados entre la base y la pared.
Realizar la conexión eléctrica de los cables de la alimentación a la regleta del secador
de manos. Conectar los cables correspondientes a las dos fases (N y L) y a la toma de
tierra en los alojamientos correspondientes de la regleta, tal y como indican sus letras
serigrafiadas (Figura nº 7).
Figura nº 4.
Figura nº 5.
Figura nº 6.
Figura nº 7.
Al llevar a cabo esta conexión se deben prever medios de
desconexión de la red de alimentación, con una separación
de contacto de al menos 3 mm. (0,12”) en todos los polos.
Dichos medios de desconexión deben ser incorporados a la
instalación fija.
El secador de manos debe ser instalado únicamente sobre
una superficie cerrada (pared, tabique o similar).
Colocar cuidadosamente la carcasa en la base del aparato.
Para ello posicionarla de arriba abajo, con una cierta
inclinación sobre la base, de manera que la pestaña de la
carcasa se inserte correctamente en su correspondiente
alojamiento de la base (Figuras nº 8 y nº 9).
Colocar los tornillos de fijación de la carcasa a la base,
apretándolos con la llave especial suministrada (Figura nº 10).
Figura nº 8.
Figura nº 10.

5
En todo este proceso de acoplamiento de la carcasa a la base se debe tener mucho
cuidado de no dañar el circuito electrónico que se encuentra bajo la tobera del secador
de manos (Figura nº 11)
También es muy importante asegurarse que la carcasa una vez montada y atornillada
sobre la base tiene el protector de plástico correctamente alojado en la ventana inferior
que tiene forma de “U” invertida (Figura nº 12).
lavamanos (Figura nº 13). Evitar en lo posible la presencia de superficies reflectantes en
la zona de actuación del sensor IR del secador de manos.
Ajuste de la velocidad del motor y de la distancia de
detección.
El secador de manos incorpora medios de ajuste manual que permiten la regulación de la
distancia de detección de las manos y también de la velocidad del aire de secado.
Estos ajustes de la velocidad del motor y de la distancia de detección deben ser
realizados únicamente por un técnico cualificado.
Los ajustes se llevarán a cabo moviendo los respectivos cursores de los dos potenciómetros
lineales, tal y como se ilustra en la figura nº 14.
Figura nº 11.
Figura nº 12.
Figura nº 13.
Figura nº 14.

https://www.intelligenthanddryers.com/
Resistencia calefactora.
Aquellos modelos que incorporan resistencia calefactora, disponen de un
interruptor ‘ON/OFF’ para encenderla o apagarla.
Figura nº 15.
La puesta en marcha del secador se realiza de forma automática, por aproximación de las
manos a la zona de detección de los LEDs, que se encuentra justo debajo de la salida de aire.
La detección de las manos y posterior encendido del aparato se basa en la emisión-reflexión-
recepción de un haz de luz IR procedente de los sensores. La distancia de detección está
aproximadamente entre 120 y 150 mm. (4,72 –5,9”).
Para conseguir un buen secado de las manos es aconsejable realizar
previamente un buen aclarado de las mismas, eliminando totalmente
los restos de jabón.
Para iniciar el proceso de secado de las manos éstas se deben
acercar a una distancia aproximada de 60 - 70 mm. (2,36 - 2,76")
de la salida de aire y frotarlas (ver figura nº 15). El secador se
detendrá a los 2 -3 segundos, una vez retiradas las manos.
El rango de detección puede ser ajustado haciendo girar el
potenciómetro tal y como se indica en la figura nº 14.
El tiempo máximo de funcionamiento continuo del secador de manos es de 60 segundos.
Superado este tiempo las manos deberán ser retiradas de la zona de detección y acercarlas de
nuevo a la misma zona si se quiere volver a arrancar de nuevo el secador de manos.
Este aparato no está preparado para que lo utilicen personas con alguna discapacidad
física, sensorial o mental o sin experiencia y/o conocimientos previos, ni niños, a no ser
que con antelación hayan recibido instrucciones sobre su uso o lo hagan bajo la
supervisión de un responsable de seguridad.
CUANDO UN NIÑO UTILICE ESTE SECADOR DE MANOS, UNA PERSONA
RESPONSABLE DEBE SUPERVISAR QUE REALIZA UN BUEN USO DEL MISMO Y
ASEGURARSE DE QUE NO ESTÁ JUGANDO CON EL.
MODO DE EMPLEO
Figura nº 15.

7
Una adecuada limpieza del secador de manos alargará su vida útil. Se recomienda extraer todo
el polvo que se haya acumulado en el interior del secador como mínimo una vez al año.
Para realizar una correcta limpieza del secador de manos se deben seguir los siguientes
pasos:
Desconectar el secador de manos de la red eléctrica.
Extraer los dos tornillos inferiores de fijación de la carcasa a la base con ayuda de la
llave especial suministrada.
Retirar la carcasa tal y como se indica en el apartado “Extracción de la carcasa” y
depositarla con cuidado sobre un paño, evitando en todo momento rozarla o rayarla.
Limpiar el polvo y extraer la suciedad que aparezca en el interior del secador de
manos, utilizando un paño seco o un cepillo de cerdas suaves.
Limpiar desde la entrada de aire al interior del motor (parte superior de la tobera)
evitando en lo posible la caída de polvo o de suciedad en el interior del conjunto
turbina-motor.
Limpiar cuidadosamente el polvo de la zona próxima al circuito electrónico de
accionamiento, ubicado en el interior de su alojamiento a modo de caja. Realizar dicha
operación con el máximo cuidado, evitando dañar en todo momento cualquier
componente de dicho circuito electrónico.
Con un paño suave limpiar la superficie de la pantalla protectora de los sensores IR.
Limpiar la carcasa utilizando una gamuza humedecida en un disolución de agua y
jabón neutro. Una vez limpiada toda la superficie se procederá a aclarar el jabón de la
carcasa con otra gamuza humedecida en agua y se secará totalmente con un paño
seco.
Cerrar el secador de manos montando nuevamente la carcasa, fijar los tornillos de
sujeción de la carcasa a la base y conectar a la red eléctrica.
Poner en marcha 2 ó 3 veces seguidas el secador de manos para asegurar la
expulsión de todo el polvo remanente.
LIMPIEZA CARCASAS CROMADAS Y DORADAS
Para la limpieza usar solo una gamuza humedecida con agua. No usar
detergentes de ningún tipo, ni ácidos, lejias, abrasivos, salfumanes, etc.
ATENCIÓN: en todo momento se debe poner mucha atención en no dañar ni
forzar ningún componente del secador de manos.
MANTENIMIENTO PREVENTIVO Y LIMPIEZA

https://www.intelligenthanddryers.com/
DIAGRAMA DE CONEXIÓN
PELIGRO.
Riesgo de shock
eléctrico
- El instalador debe asegurarse que el aparato está
conectado a tierra de acuerdo con la normativa vigente.
- Debe asegurarse que la instalación eléctrica tiene un
interruptor de alta sensibilidad I n ≤ 0.03 A.
- Asegurarse que la máquina está desconectada de la
tensión principal de entrada, antes de realizar cualquier
operación de mantenimiento.

9
COMPONENTE
NÚMERO
CÓDIGO
Carcasa de acero pintada en blanco
1
RC9224008SMD
Carcasa de acero inoxidable acabado brillante
1
RC9213008SMD
Carcasa de acero inoxidable acabado satinado
1
RC9212008SMD
Conjunto motor
2
RC9111003SMD
Circuito electrónico
3
RC9121011SMD
Elemento calefactor
4
RC9141009SMD
DESPIECE BÁSICO
1
2
3
4

https://www.intelligenthanddryers.com/
Before to carry on any operation, please read carefully and take into account the
following safety instructions:
-Only a qualified technician can install, adjust and maintain this device. All this operations must
be always done according to the current legal European Standards of installation and
according the local installation regulations as well.
-Be careful when the casing of the appliance is dismantled because active parts of the device
become accessible and then there is a potential risk of an electric shock.
-Before any electrical manipulation, the electrical current must be cut in order to avoid any
electric shock risk
-The device must be fixed out of reach of a water source in order to fulfil the security distances
marked into the current IEC standards and as the following figure shows:
-Be careful because local installation requirements can ask more than 1 m of safety distance.
Take into account these local requirements as well.
-Hairdryers must be fixed out of reach of a person taking a bath or a shower.
-Means for disconnection, with contact separations at least 3 mm (0.12"), must be incorporated
in the fixing wiring involving all poles, accordingly to the current legal European Standards.
-The installer must make sure that the electric system is grounded in accordance with the law
in force.
-This appliance can be used by children aged from 8 years and above and persons with
reduced physical, sensory or mental capabilities or lack of experience and knowledge if they
have been given supervision or instruction concerning use of the appliance in a safe way and
understand the hazards involved. Children shall not play with the appliance. Cleaning and user
maintenance shall not be made by children without supervision.
-The device could not be installed on a normally inflammable surface.
-To fix the hand dryer to the wall follow the instructions of this manual and use the template
provided with the device as well. To fix the machine with adhesives or similar methods is
forbidden by the European safety standards.
INTRODUCTION
ENGLISH

11
‘Machflow’ range hand dryers offer the following technical features:
Automatic operation. Hand detection is based on IR-type movement sensors.
They are class I devices, with earthing.
They provide a potent beam of air, intense and even.
The distance for detecting hands is adjustable.
The speed of the air generated by the hand dryer can also be adjusted, to achieve an
optimum balance between the drying power and noise level.
The hand dryers include an intelligent detection system which eliminates static ‘targets’
(marble, shelves or similar). After detecting a static target, the dryer will disconnect a
few seconds later.
It includes a vandal-proof system with an automatic stop. Maximum continuous
functioning time is 60 seconds.
It includes a universal high speed motor that is activated gradually to control the inertia
of its ignition torque and thus ensure a longer useful life of the hand dryer.
ONLY A QUALIFIED TECHNICIAN CAN INSTALL, ADJUST AND MAINTAIN THIS HAND
DRYER, IN ORDER TO ACCOMPLISH THE LEGAL REQUIREMENTS.
Removal of the casing.
The hand dryer is supplied with the casing fitted to the base without tightening (Figure
1).
Carefully remove the casing since it is connected to the base by a tab that joins the two
pieces (casing and base) at the rear (Figure 2).
Remove the casing keeping it at an angle at all times (Figure 3) until the upper tab is
completely withdrawn, taking care to:
not damage the internal components, in particular the electronic circuit,
not scratch or damage the LED sensor screen,
not damage the surface of the casing.
ATTENTION: WHEN THE CASING IS DISMANTLED ACTIVE PARTS OF THE DEVICE
BECOME ACCESSIBLE.
INTRODUCTION
INSTALLATION
Figure 1.
Figure 2.
Figure 3.

https://www.intelligenthanddryers.com/
Assembly
Connection to the power grid will be preferably through the rear plug.
In order to assemble the hand dryer complete the following steps:
Make four drill holes with an 8 mm (0,31”) diameter in the wall, using the provided
template (Figure 4).
Clean the dust away from the holes and insert the wall plugs.
Pass the electrical cables from the power grid through the hole with the 22 mm (0,87”)
diameter which is situated above the device’s terminal strip (Figure 5).
Firmly screw the base of the device to the wall (Figure 6), ensuring that the 4 silent-
blocks are correctly placed between the base and the wall.
Connect the electrical cables to the hand dryer’s terminal strip. Connect the cables
corresponding to the two phases (N and L) and to earth in the corresponding sockets of
the terminal strip, as indicated by the engraved letters (Figure 7).
Figure 4.
Figure 5.
Figure 6.
Figure 7.
When making these connections contemplate means for
disconnecting from the power grid with a minimum contact
separation of at least 3 mm (0,12”) for all poles. These
disconnection means must be incorporated into the fixed
installation.
The hand dryer must be installed against a solid surface only (wall,
partition, or similar).
Carefully place the casing on the base of the device. To do so
place it over the base with a slight incline from top to bottom, in
such a way that the tab in the casing correctly inserts into the
corresponding slot in the base (Figures 8 and nº 9).
Place the screws for fixing the casing to the base, fixing them
tightly using the special spanner provided (Figure 10).
Figure 8.
Figure 9.
Figure 10.

13
During this process of fitting the casing to the base take care not to damage the
electronic circuit that is below the hand dryer’s nozzle (Figure 11).
It is also very important to ensure that once mounted and screwed to the base the
casing has the plastic protector correctly placed on the lower inverted “U” shaped
window (Figure 12).
tops or wash basins (Figure 13). Avoid as much as possible the presence of reflecting
Adjust the speed of the motor and the detection
distance.
The hand dryer has means to adjust manually the distance for detecting hands and the speed of
the drying air.
These adjustments of the motor speed and detection distance must be made by a
qualified technician only.
The adjustments can be made by moving the respective cursors of the two linear
potentiometers, as shown in figure 14.
Figure 11.
Figure 12.
Figure 13.
Figure 14.

https://www.intelligenthanddryers.com/
Heating element.
Some models of ‘Machflow’ hand dryer incorporate an internal heater that may be
enabled by a switch.
Figure nº 14.1.
The hand dryer starts automatically when the hands are placed near the LEDs detection zone,
which is just next to the air outlet. Hand detection and the ensuring starting of the machine is
based on emission-reflection-reception of an IR light beam coming from the sensors. The
detection distance is between 120 and 150 mm approximately. (4.72 –5.9”).
For good hand drying it is advisable to rinse the hands properly in order
to remove totally any remains of soap.
In order to start the hand drying process, the hands must be rubbed
together at an approximate distance of 60 - 70 mm (2,36 - 2,76")
from the air output (see figure 15). The hand dryer will stop within 2 -
3 seconds, once the hands are removed.
The detection range can be adjusted by turning the potentiometer as
shown in figure 14.
The maximum time for which the hand dryer will function continuously is 60 seconds. After this
time, the hands must be removed from the hand dryer and placed next to it in the same zone
once more in order to start the hand dryer up again.
This appliance is not intended for use by persons (including children) with reduced
physical, sensory or mental capabilities, or lack of experience and knowledge, unless
they have been given supervision or instruction concerning use of the appliance by a
person responsible for their safety.
CHILDREN SHOULD BE SUPERVISED TO ENSURE THAT THEY DO NOT PLAY WITH THE
APPLIANCE.
HOW TO USE
Figure 15.

15
Adequate cleaning of the hand dryer will extend its useful life. It is recommended to remove any
dust accumulated inside the hand dryer at least once a year.
To clean the hand dryer correctly, take the following steps:
Disconnect the hand dryer from the power supply.
Remove the two lower screws that fix the casing to the base using the special spanner
provided.
Remove the casing as instructed in the chapter “Removing the casing” and place it on a
cloth, to prevent scratching or rubbing at all times.
Clean away the dust and remove any dirt accumulated inside the hand dryer, using a
dry cloth or a soft brush.
Clean from the air input to inside the motor (upper part of the nozzle) preventing dust or
dirt falling inside the turbine-motor assembly.
Carefully clean the dust away from around the electronic circuit located inside its box-
type housing. Carry out this operation taking maximum care not to damage any
component of the electronic circuit.
Use a soft cloth to clean the surface of the IR sensor protector screen.
Clean the casing using a damp cloth moistened in a solution of neutral soap and water.
After cleaning the entire surface rinse the soap from the casing using another cloth
moistened in water and dry using a dry cloth.
Close the hand dryer by assembling the casing once more, tightening the screws that
fix the casing to the base and connect to the power grid.
Start the hand dryer up 2 or 3 times in a row to ensure that all remaining dust is
extracted.
CLEANING OF CHROMED AND GOLD PLATED COVERS
For cleaning purposes only a wet cloth is to be used. Do not use any kind of
detergent, acids, lye, abrasives, hydrochloric acid, etc.
Take care not to damage or force any component.
PREVENTIVE MAINTENANCE AND CLEANING

https://www.intelligenthanddryers.com/
CONNECTION DIAGRAM
DANGER.
Electric shock
risk
- The installer must make sure that the electric system is
grounded in accordance with the law in force.
- Make sure that the electric system has a high-sensitivity
breaker I n ≤ 0.03 A.
-Make sure the machine is disconnected from electric
power supply, before performing maintenance operation.

17
COMPONENT
NUMBER
CODE
Steel casing painted white
1
RC9224008SMD
Stainless steel casing with a polished finish
1
RC9213008SMD
Stainless steel casing with a satin finish
1
RC9212008SMD
Motor assembly
2
RC9111003SMD
Electronic circuit
3
RC9121011SMD
Heating element
4
RC9141009SMD
BASIC EXPLODED VIEW

https://www.intelligenthanddryers.com/
Avant toute opération, veuillez lire attentivement et respecter les consignes de sécurité
suivantes :
-Seul un technicien qualifié peut installer, régler et effectuer l’entretien de cet appareil. Toutes
ces opérations doivent être exécutées conformément aux normes d’installation établies par la
législation européenne en vigueur, ainsi que par la réglementation locale.
-Soyez prudent lorsque le boîtier de l’appareil est retiré : certaines parties actives deviennent
alors accessibles et peuvent transmettre des décharges électriques.
-Coupez le courant avant toute manipulation électrique, afin d’éviter tout risque de décharge.
-Afin de respecter les distances de sécurité établies par les normes CEI en vigueur, l’appareil
doit être fixé hors de portée de tout point d’eau, comme le montre le schéma ci-dessous :
-Attention : les normes d’installation en vigueur dans votre région peuvent exiger une distance
de sécurité supérieure à 1 mètre. Veillez à également respecter ces normes locales.
-Les sèche-cheveux doivent être fixés hors de portée des personnes qui prennent une douche
ou un bain.
-Un système de coupure du courant, avec une séparation des contacts d’au moins 3 mm (0,12"),
doit être intégré dans le raccordement électrique de chaque pôle, conformément aux normes
européennes en vigueur.
-L’installateur doit s’assurer que le système électrique est relié à la terre, conformément à la
législation en vigueur.
-Cet appareil peut être utilisé par les enfants dès 8 ans, les personnes à capacités physiques,
sensorielles ou mentales réduites, ou les personnes inexpérimentées, si elles sont supervisées
par une autre personne ou si elles ont reçu des explications pour apprendre à se servir de
l’appareil en toute sécurité, et qu’elles comprennent les risques encourus. Les enfants ne
doivent pas jouer avec l’appareil. Le nettoyage et l’entretien habituel de celui-ci ne doivent pas
être effectués par un enfant sans surveillance.
-Cet appareil ne doit pas être installé sur une surface inflammable.
-Pour fixer le sèche-mains au mur, suivez les instructions de ce manuel et aidez-vous du modèle
fourni avec l’appareil. Fixer la machine au moyen d’adhésifs, ou par le biais de méthodes
similaires, est interdit par les normes de sécurité européennes.
CONSIGNES DE SÉCURITÉ
FRANÇAIS

19
Les sèche-mains de la famille ‘Machflow’ proposent les caractéristiques techniques suivantes :
Fonctionnement automatique La détection des mains est basée sur l’utilisation de
capteurs de mouvement de type IR.
Ce sont des appareils de classe I, avec prise de terre.
Ils fournissent un faisceau d’air puissant, concentré et homogène.
La distance de détection des mains est réglable.
La vitesse de l’air fourni par le sèche-mains peut aussi être réglée, pour obtenir un
équilibre optimal entre la puissance de séchage et le niveau de bruit acoustique.
Ils sont munis d’un service intelligent de détection et de discrimination des ‘cibles’ fixes
(marbre, rebords ou autres). S’il détecte une ‘cible’ fixe, le sèche-mains se déconnecte
au bout de quelques secondes.
Il comporte un système antivandalisme avec arrêt automatique. La durée maximale de
fonctionnement continue est de 60 secondes.
Il est muni d’un moteur universel à haute vitesse qui est actionné de façon progressive
pour contrôler l’inertie de son couple de démarrage et garantir ainsi une durée de vie
maximale du sèche-mains.
CONFORMÉMENT AUX EXIGENCES LÉGALES, ALLATION, LES RÉGLAGES
NÉCESSAIR SÈCHE-MAINS NE PEUVENT ÊTRE RÉALISÉS
QUE PAR UN TECHNICIEN SPÉCIALISÉ.
Extraction du capot.
Le sèche-mains est livré avec le capot ajusté sur la base sans être vissé (Figure nº1).
Extraire soigneusement le capot, qui est uni à la base par un ergot, qui assemble les
deux éléments (capot et base) via sa partie arrière (Figure nº2).
Retirer le capot en le maintenant toujours incliné (figure nº3) jusqu’à pouvoir extraire
complètement l’ergot du dessus, en prenant soin de :
ne pas endommager les composants internes, en particulier le circuit
électronique.
ne pas rayer ni détériorer l’écran des capteurs à DEL,
ne pas endommager la surface du capot.
ATTENTION : LORSQUE LE CAPOT EST DÉMONTÉ, DES PARTIES ACTIVES DE
INTRODUCTION
INSTALLATION
Figure nº1
Figure nº2
Figure nº3

https://www.intelligenthanddryers.com/
Montage.
Le branchement au réseau électrique sera effectué de préférence via un canal situé à l’arrière.
Pour effectuer le montage du sèche-mains, suivre les étapes ci-dessous :
Percer quatre trous de 4 mm (0,31”) de diamètre dans le mur, en utilisant le patron
fourni (Figure nº 4).
Nettoyer toute la poussière des trous percés et insérer les chevilles.
Passer les câbles d’alimentation provenant du réseau électrique à travers l’orifice de 22
mm (0,87”) de diamètre qui se trouve sur la barrette de connexion de l’appareil (Figure
nº 5)
Visser solidement la base de l’appareil au mur (Figure nº6) en s’assurant que les 4
supports élastiques sont placés correctement entre la base et le mur.
Effectuer le raccordement électrique des câbles d’alimentation sur la barrette du sèche-
mains. Relier les câbles correspondant aux deux phases (N et L) et à la prise de terre
sur les logements correspondants de la barrette, comme indiqué par les lettres gravées
(Figure nº7).
Figure nº4
Figure nº5
Figure nº6
Figure nº7
Pour effectuer ce raccordement, on devra prévoir des moyens
de déconnexion du réseau d’alimentation, avec une
séparation de contact d’au moins 3 mm (0,12”) sur tous les
pôles. Ces moyens de déconnexion doivent être incorporés à
l’installation fixe.
Le sèche-mains doit obligatoirement être monté sur une
surface fermée (mur, cloison ou autre).
Placer soigneusement le capot sur la base de l’appareil. Pour
ceci, l’insérer sur la base de haut en bas, avec une certaine
inclinaison, de sorte que l’ergot du capot s’insère
correctement dans son emplacement correspondant sur la
base (Figures nº8 et nº9).
Mettre en place les vis de fixation entre le capot et la base, et
les serrer avec la clé spéciale fournie à cet effet (Figure nº10).
Figure nº8
Figure nº9
Figure nº10
This manual suits for next models
3
Table of contents
Languages:
Other Intelligent Facility Solutions Dryer manuals
Popular Dryer manuals by other brands

Candy
Candy CDC 268EX User instructions

American Dryer Corp.
American Dryer Corp. Phase 6 Microprocessor Controls ML-190HS Service manual

Hoover
Hoover 9 kg Vision HD Instruction book
Huebsch
Huebsch ZDE4BR Specifications

Speed Queen
Speed Queen ST050 Brochure & specs

Electrolux
Electrolux TWSL5E300 user manual

