Intelligent Facility Solutions ATC-Premblade15 Instruction Manual

INTELLIGENT FACILITY SOLUTIONS
Electric Works, 3 Concourse Way
Sheffield, S1 2BJ, United Kingdom
Phone UK: +44 (0) 114 354 0047
Phone Eire: +353 190 36387
https://www.intelligenthanddryers.com/
1
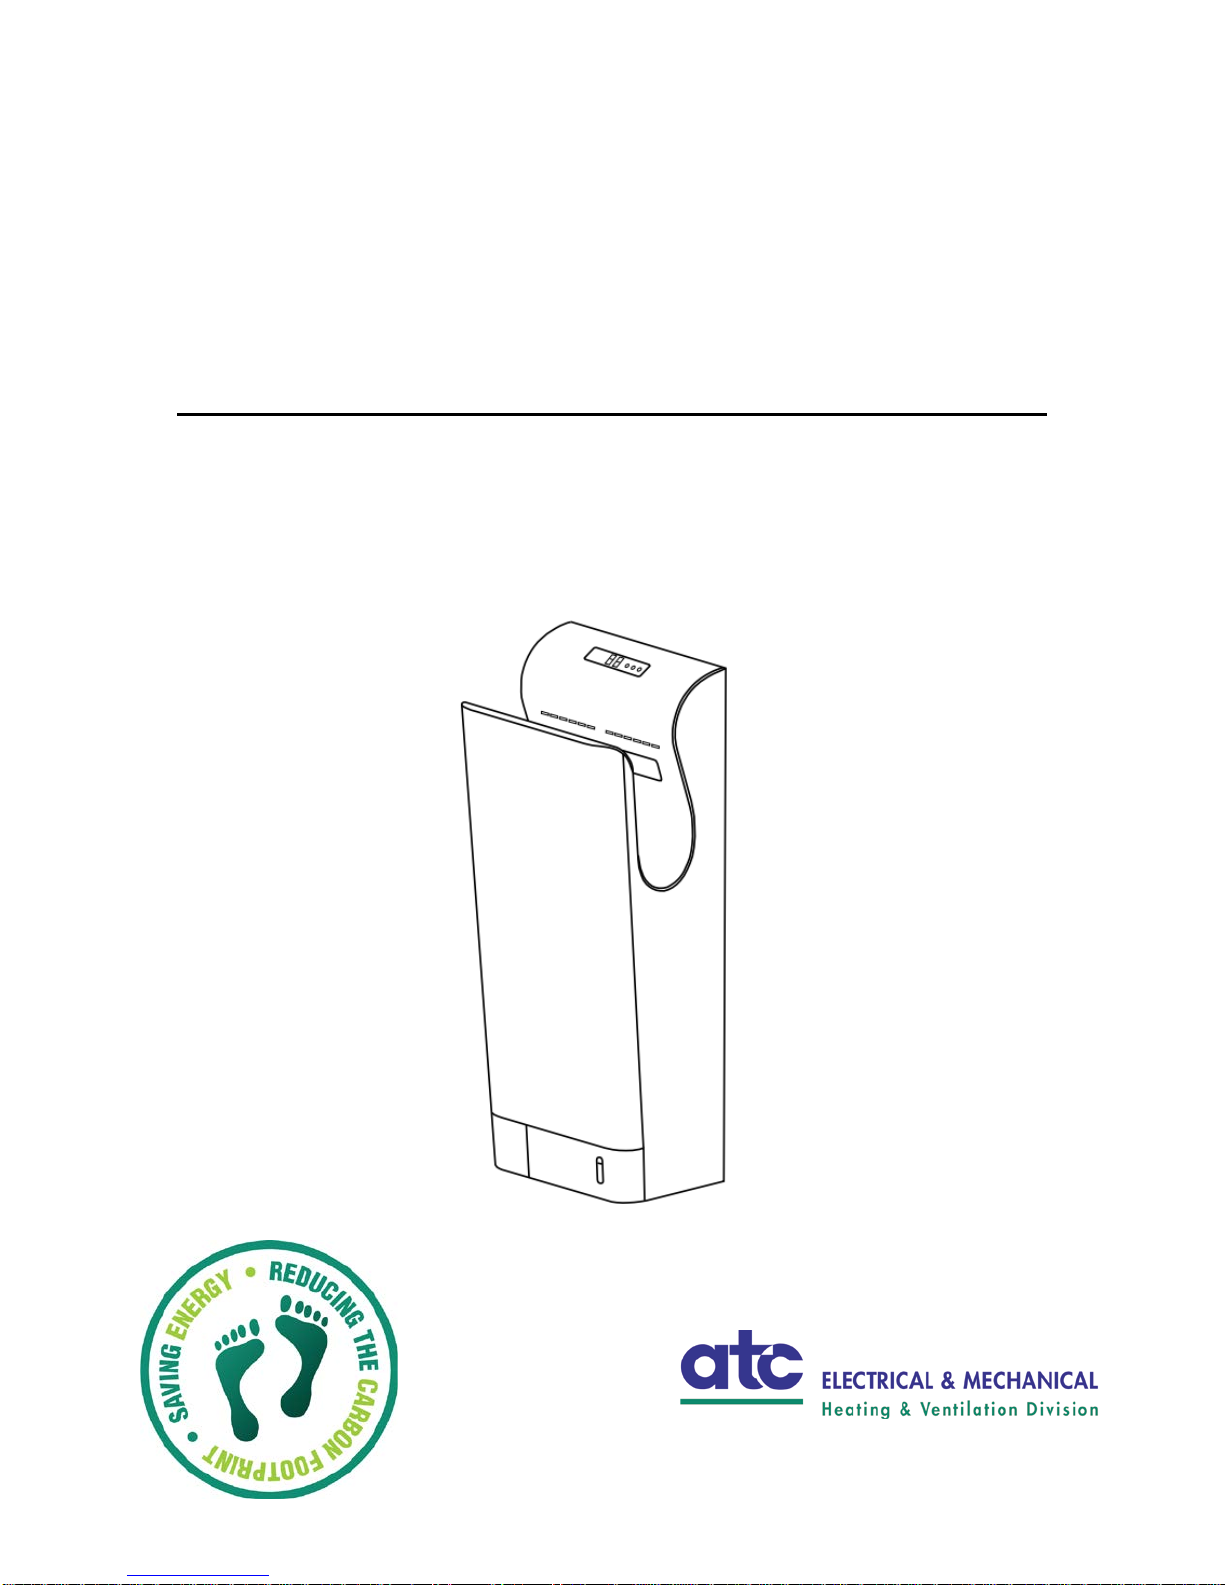
Hand Dryer
Model: ATC-Premblade15
Installation & User Manual
Issue number 1

2
Contents
Contents 2
Specification, Packing List, Mounting Height 3
Precautions before installation &
Installation Location 4
Installation 5
Operation 8
Routine Cleaning 7
Troubleshooting & Electrical Diagram 8
Part Names and Dimensions 9
Warranty 10
►This hand dryer should be installed by a qualified electrician or a trained service technician.
►Read this manual thoroughly before using the hand dryer to ensure safe and correct operation. Please
keep this manual in a safe place for reference at a later date

3
Specification
Product Code
ATC-PremBlade15
Finish
Silver
Warranty
3 years
Activation
Automatic
Voltage
220-240V AC 1~
Frequency (Hz)
50/60
Power output (W)
975 + 1000 (heater)
@ 230V
Motor power (W)
975
Current (A)
Air Speed
8.5 @ 230V
95 m/s
Sensor (Adjustable or Fixed)
Fixed
Noise Level (dB @1m)
70
Filter
Replaceable HEPA
Approvals
RoHS CE CB UL
Motor thermal Protection
Turns unit off at 95ºC
Heater Thermal Protection
Turns unit off at 100ºC
IP Rating
X4
Dimensions (WxHxD mm)
300 x 700 x 215
Weight
9.5kg
Packing List
ATC-PremBlade15
1
Installation Plate
1
Cleaning Brush
1
5mm Plastic Wall Plug
6
5x 30mm Self tapping screws
6
User Manual
1
Usage label
1
4
Precautions before installing
Do not install the unit in the following locations; installation in these areas will cause the
unit to malfunction:
•Locations where the unit is under direct sunlight or where direct sunlight can pass
over the unit.
•Locations where the unit can come into direct contact with water.
•Locations where there is high levels of humidity and condensation.
•Locations where corrosive, reductive or neutral gases are present.
•Locations where the temperature can fall below -10ºC or exceed 40ºC.
•Locations that are lower than -20m or higher than 2000m above sea level.
Installation Location
•Install the unit where is will be easy to use as shown in the figure below.
•Please use a dedicated fused spur for each hand dryer.
•The hand Dryer must be reliably earthed.
•The bottom of the unit must be at least 150mm above the floor to allow for
airflow into the hand dryer.
•The left side of the unit must be at least 150mm away from walls as the power
switch is accessed from the left side of the hand dryer.
•Do not mount the hand dryer behind doors where the opening of the door may
damage the dryer.
•The Mounting plate must be mounted on a completely flat surface. If the wall is
not flat, mount a flat timber or board on the wall to give a completely flat surface
to mount the hand dryer on to.
•Do not install the hand dryer with the power connected; the dryer must be
connected by a qualified electrician when being installed
5
Installation
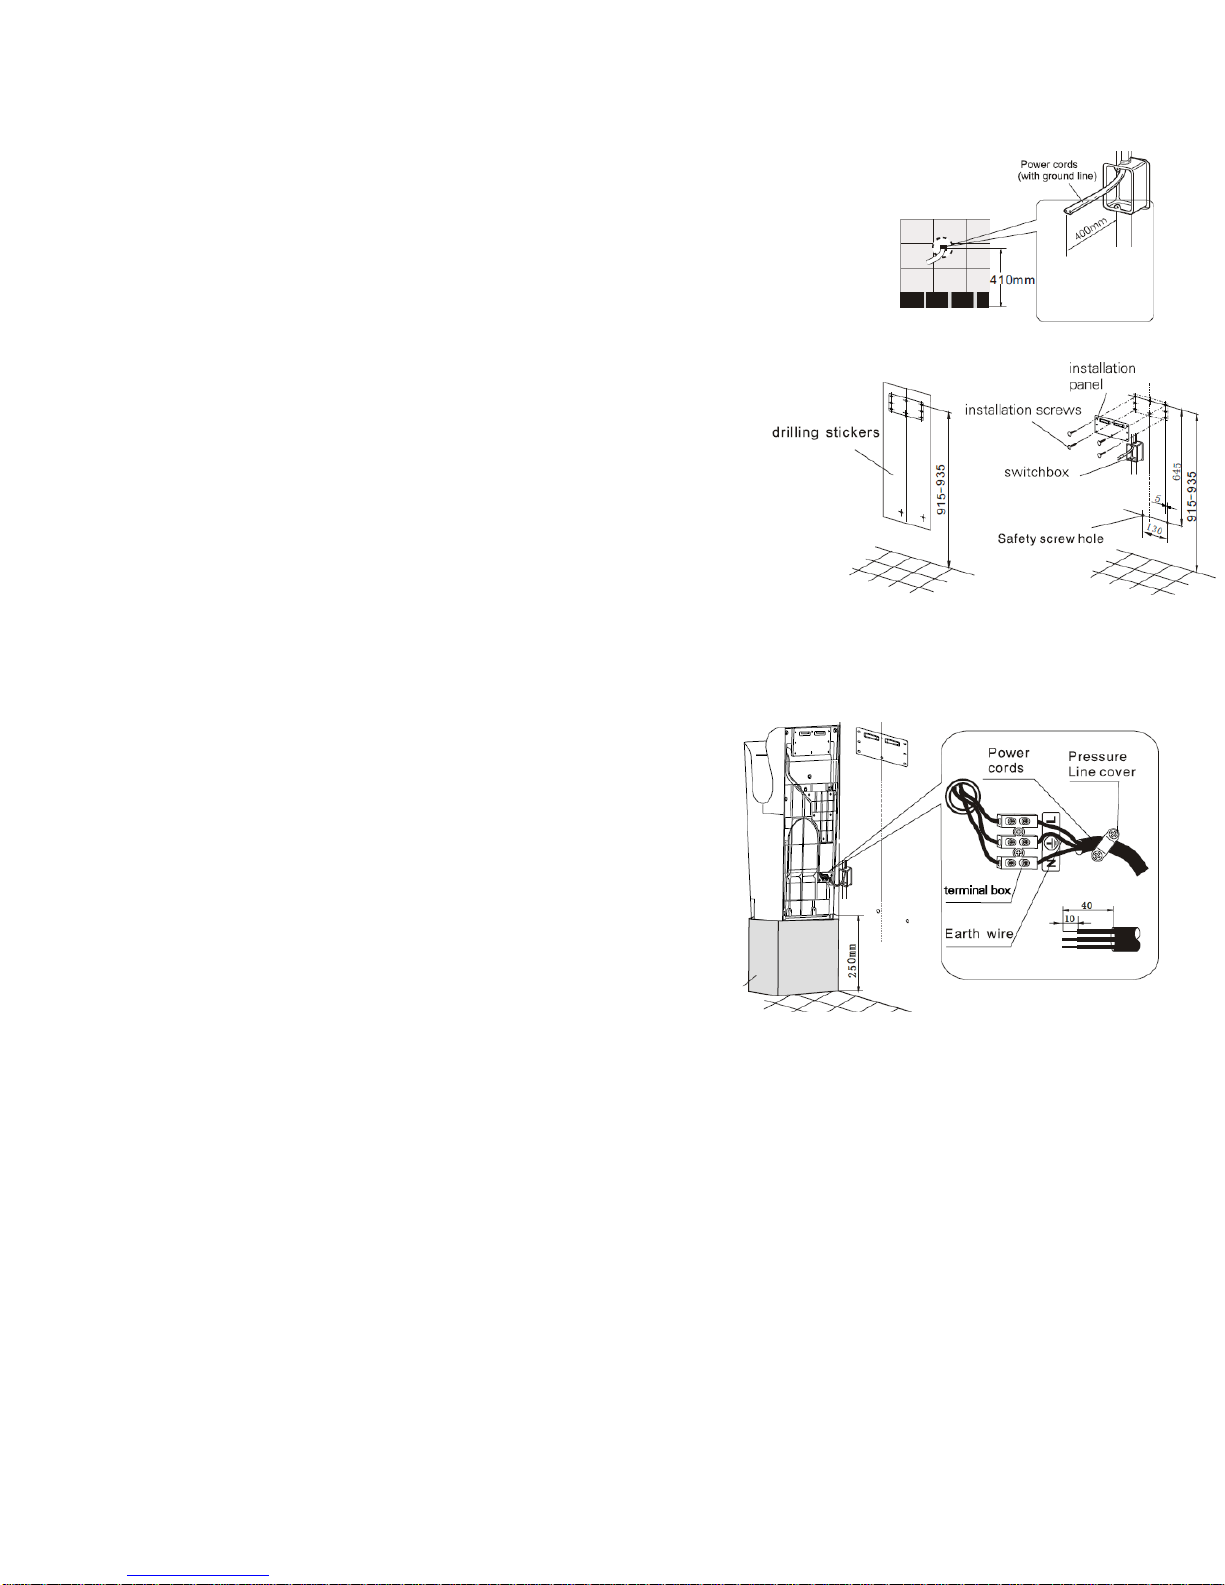
1. Install a wall box.
Install a flush mounting wall box as per diagram 1
NB. If a wall box is not used the power cable will
not sit flush with the wall and prevent the unit from
being firmly installed against the wall.
2. Install the mounting panel to the wall
Install the mounting plate supplied with the hand
dryer to the wall using appropriate fixings. At least
6 fixings should be used as indicated.
Make sure wall is capable of suporting the weight
of the dryer before installing the installation panel
Connecting to Fixed wiring
1) Terminate the cable from the hand dryer into the
flush mounting wall box.
2) Attach the dryer to the wall using the 3 hooks on
the mounting panel.
3) Secure the dryer to the mounting plate with the
fixing screw in the lower right side (behind the drip
tray)
The installation screw will not tighten if the lower
hook is not completely inserted. Ensure the dryer is
fixed to the installation panel with the fixing screw
otherwise the dryer is liable to be damaged when it is
subjected to knocks etc during use.
Important
Do not operate the power or heat switches with your hands inside the dryer opening.
If the self check indicator on the display lights or is flashing, turn off the power switch,
wait 1 minute, and then turn the power switch back on

6
Operation
Stretch out both wet hands and insert them all the way into
the hand dryer until the dryer starts
Pull your hands out slowly, letting the air blow the water
off. This will take between 10 and 15 seconds
Pull your hands out completely
Should a malfunction or occur the self check indicator pilot light on the right hand side of
the display will either light up or flash. Alternatively an error code such as E2 may come
up on the display.
If this happens turn off the hand dryer and wait one minute until all the indicators and the
display turn off. After this time switch the power back on. If the indicator is still flashing
and/or the error code is on the display please contact the ATC Technical Department for
advice.
7
Routine Cleaning
Cleaning the Unit body
•Before cleaning switch off the power to
the hand dryer. Do not spray water on the
hand dryer
•Wear gloves when cleaning the hand
dryer.
•Clean the unit with a soft cloth,
If the Unit gets very dirty clean with a soft
cloth dampened with a neutral cleaning
agent, and then clean with a dry soft cloth.
•Remove dirt from the sensor areas
NOTE
•Only use Neutral cleaning agents
•Do not use thinner, acidic, or
alkaline cleaners or Nylon
brushes;
these will damage the
finish of the unit.
•Only use denatured
alcohol to
clean the hand drying area
•If chemically impregnated cloths
are used, read their instructions
first and make sure
that they
comply with the above.
•The antibacterial coating is effective when
bacteria are exposed to the coated
surfaces. The coating is not effective when
the unit becomes very dirty
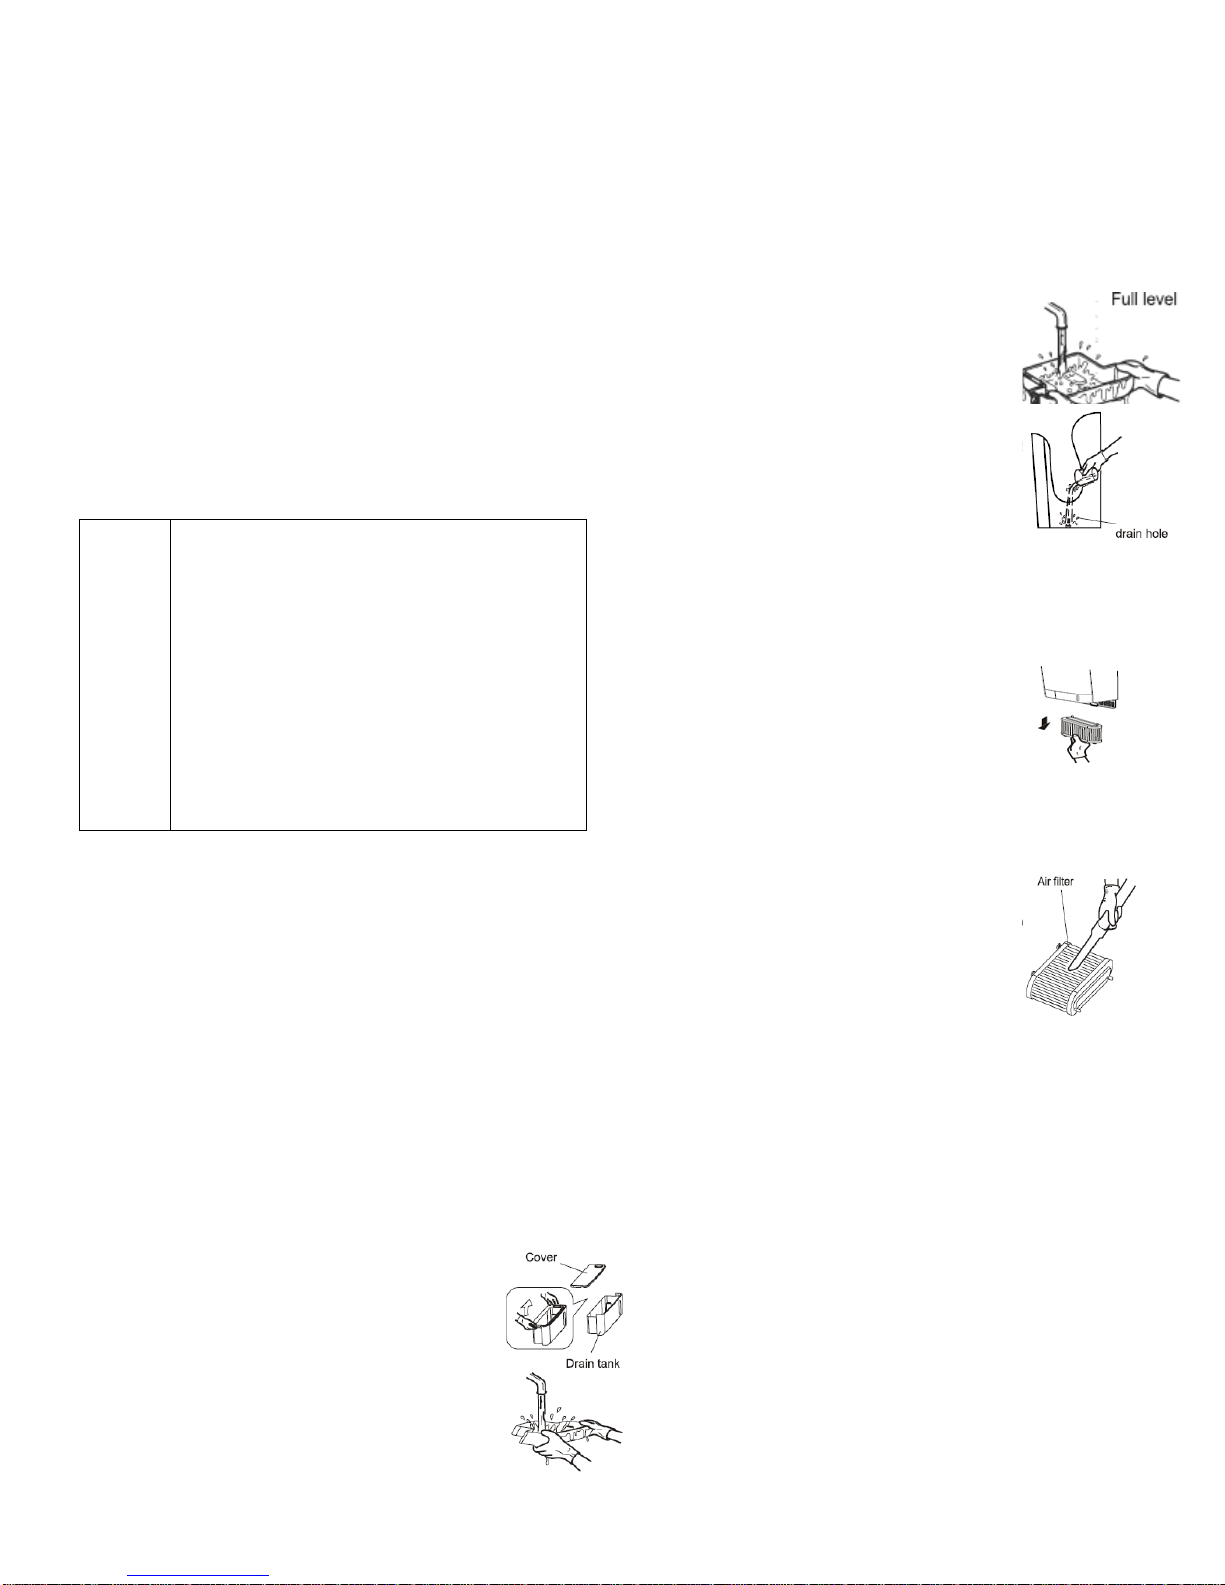
Draining and Cleaning the Drain tank.
(Every Week or as necessary)
•Empty and wash the water collection tray
located at the bottom of the dryer
whenever it is full or at least once per
week
•If accumulated water is standing in the
tank for too long a period it will start to
smell.
1. Pull the tank out in a
horizontal direction
toward you. `
2. Open the cover and
empty the water from
the tank, (pull the cover
in the direction of the
arrow on top of the cover. and then
remove the cover completely.
3. Wash out the interior of the drain
tray
4. Re-install the cover
of the drain tray and
re-attach to the hand
dryer
•After confirming the
tank is in the correct
position, pour 200ml of
water through the drain
hole to prevent it
clogging up. (empty the
drain try after this procedure)
Cleaning the Filter (Every week or as
necessary)
•Remove the air filter by
pulling out the filter by
the handle
•To clean the air filter,
lightly beat the edge of the filter by
hand or use a vacuum
cleaner
•If the filter is very dirty
wash in warm soapy
water, rinse and dry.
•Replace the filter back
into the dryer, making
sure it is inserted
completely. Failure to use the dust
filter will impact on the efficiency of
the hand dryer and may affect the
service life of the unit.
NOTE:
•If you wash the air filter make sure it is
completely dry before placing back into
the hand dryer.
•Do not expose the filter to fire or high
temperatures as this will damage the
filter

8
Troubleshooting guide
Symptom
Inspect
Solution
No airflow even when hands are
inserted.
Do the display indicators light
up?
Is the power switch on?
Are you putting your hands all
the way into the dryer to activate
the sensors?
Check the main circuit breaker and also the fused spur to
make sure there is power to the hand dryer.
Make sure you cover both sensors with your hands when
using the hand dryer.
The dryer continues to operate
even after hands are removed
and eventually shows E2.
Is there any dirt or obstruction in
front of the sensors?
Turn off the power switch and then clean the inside of the
hand dryer paying particular attention to the sensors located
near the LED lights. When finished turn power back on.
The airflow is cold.
There is a built in heater in the
hand dryer, Check to see if the
heat switch is turned on.
Check to see if the fuse in the
terminal block or inline fuse to
the element is blown.
Check to see if there is any dirt
or obstruction on the heater
element.
Check to make sure there is
continuity through the element.
Turn off the power switch and check the heat switch, if it is
off then turn it on.
Check the fuse; if it is blown replace it with one of the same
size and type. Check the element for continuity, dirt, or
obstructions.
The airflow is not fast enough.
Check the air speed switch.
If the switch is on low then change it to high.
If the above solutions do not solve the problem, turn off the power to the hand dryer and call your installer or the ATC Technical
Department for advice.
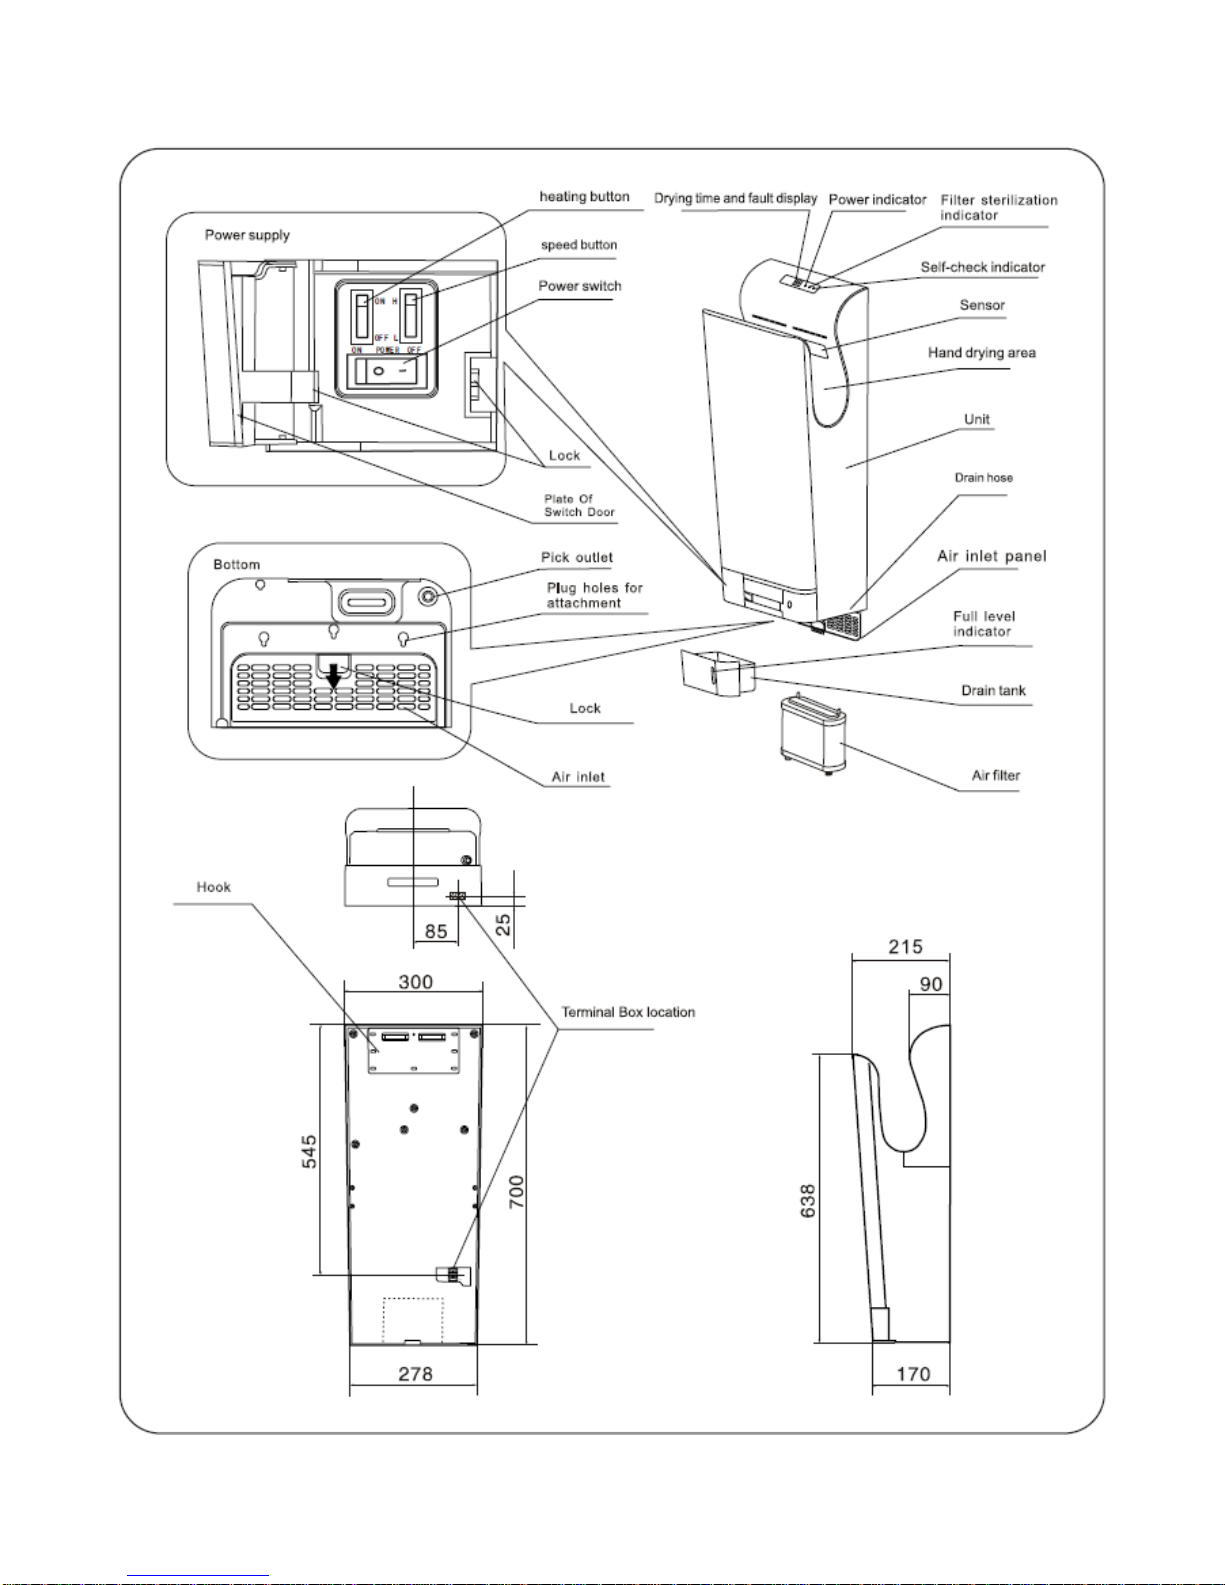
9
Part Names and Dimensions

10
Warranty
ATC Electrical &Mechanical provides a limited 3-year parts warranty for the ATC-PremBlade15 blade
hand dryer as long as the following conditions are followed:
1. Installation and use of the ATC-PremBlade15 blade hand dryer is in accordance with the instruction
manual, which is packed with each ATC-PremBlade15 blade hand dryer.
In order to arrange service for the hand dryer the following information is required.
Receipt number ________________________________
Serial number of the Hand Dryer: __________________________________
Date of Manufacture __________________________________
Date of Purchase __________________________________
•Environmental Protection
Waste electrical products should not be disposed of with household waste, please recycle this
product where the facilities exist. Please check with your local authority.
For Sales and Service enquiries please contact ATC on the numbers below.
ATC Electrical & Mechanical, ATC Electrical & Mechanical
ATC House, Innovation Centre
Broomhill Drive Gallows Hill
Tallaght Warwick
Dublin 24 CV34 9PL
IRELAND UNITED KINGDOM
PH 003531 4625111 PH 0044 203 5649164
FX 003531 4520887 FX 00353 1452 0887
Table of contents
Other Intelligent Facility Solutions Dryer manuals


Popular Dryer manuals by other brands


Frigidaire
Frigidaire 137196700A Use and care guide

Speed Queen
Speed Queen HE5003 operating instructions

LG
LG Steam Dryer DLGX2451 Series owner's manual

American Dryer Corp.
American Dryer Corp. ML-410 Installation & operator's manual

LG
LG TD-V75120E use and care manual

Frigidaire
Frigidaire 137118700A Use & care manual