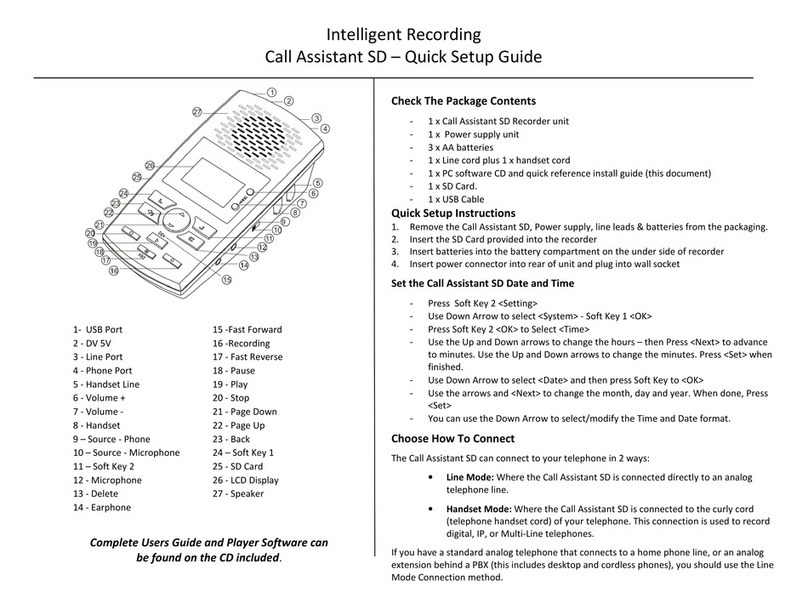
Intelligent Recording Digital 01 Operating and maintenance instructions

©Copyright Intelligent Recording LTD 2008 Page 1 of 25
Xtension Recorder Digital 01
Desktop 3.0
General Description
Date & Issue: Issue 7 – May 2008
www.usbcallrecord.com
US Office +1 949.587.1226 UK Office +44 1302.835.812

©Copyright Intelligent Recording LTD 2008 Page 2 of 25
Introduction
This document describes the features and capabilities of the Desktop Digital 01 hardware
and XTR Desktop software solution.
The Xtension Recorder Desktop Digital solution consists of a low-cost USB device that
taps across the digital extension pair of a proprietary PBX telephone (such as Nortel
Meridian or Avaya Definity) and Desktop Software that combines to deliver a professional
recording solution for one user or hundreds.
PBX extension recording has traditionally been limited to:
Expensive multi port devices installed at the PBX equipment
Expensive single port digital devices (very few are available)
Low cost analogue ‘handset tap’ devices
Our unique ‘PBX-2-USB’ technology elegantly addresses the problems associated with low-
cost desktop recording. The USB device provides all of the advantages of the expensive
digital recording solutions, at a price in line with many ‘handset tap’ solutions while
delivering much greater value and performance.
Advantages of Digital Recording
The advantages of Digital Recording over analogue ‘handset tap’ devices are clear:
xHigher quality recording
xSeparate channel recording (send/receive) is possible
xAutomatic start/stop of recording when phone is in use
xAssociation of caller ID or other call related information
xDoesn’t tie up a PC sound card
xEasy plug n’ play installation (via USB)
xSpeakerphone conversations can be recorded
xUsers cannot easily disconnect the recording device with a disconnect warning
being given.
It is no wonder that a product, which has so many advantages over traditional handset tap
devices, and is available at a small premium over handset tap devices, has been so
successful around the world with thousands of users installed.

©Copyright Intelligent Recording LTD 2008 Page 3 of 25
Connectivity
The diagram below shows the connection configuration of the Desktop Digital 01USB
device and the local desktop PC.
The Xtension Recorder hardware simply connects in-line at the telephone users desktop. No
power is required and because the in-line connection is simply a metallic wiring of the ‘in’
and ‘out’ connections, Xtension Recorder does not affect in any way the telephone
operation with or without connection of the host PC via USB.

©Copyright Intelligent Recording LTD 2008 Page 4 of 25
The USB Device
This section describes the Intelligent Recording low-cost USB device hardware
specification.
The device is constructed in a UL94 V-0 black polymer and measures 84mm x 72mm x
25mm (or 3ѿ” x 2 ¾” x 1”).
Device Connections
The USB recording device has 3 connectors:
One PC USB connector, from which the device derives its power and streams all
speech and control channel information up to the host PC and the Xtension
Recorder application.
Two Digital Phone line connectors that passively ‘tap’ across the PBX/Keyset
digital connection and ‘listen’ in high impedance mode to the signalling on the
line.

©Copyright Intelligent Recording LTD 2008 Page 5 of 25
Device Performance
The device does not interfere with the communication between the PBX and the Digital
telephone. The device does not require USB power or a connection to the PC to maintain
the functionality of the telephone in its normal manner.
The device meets the appropriate FCC, CE and UL requirements required for this type of
communications device.
Device Firmware
The device is ‘soft up-loadable’ i.e. its firmware and FPGA low-level protocol decryption is
uploaded from the PC driver and Xtension Recorder application at runtime. This allows
easy upgrade and enhancement of the product in the field as required.
Device Contents & Packaging
Xtension Recorder is supplied in suitable packaging including:
Xtension Recorder hardware device
Software CD
USB cable
Telephone connection lead
This document
PBX Compatibility
The device is compatible with the following PBX’s and digital telephones:
xAvaya Definity
xAvaya Magix
xAvaya IP office
xToshiba DK & CTX
xNortel Norstar & BCM
xNortel Meridian
xVodavi/LG
xInter-Tel
xSiemens Hicom/HiPath
xNEC Electra Elite/IPK
xNEC NEAX 2000/2400
xPanasonic KXTD/KXTD-A/DBS
xSamsung DCS
xTelrad
xTadiran Coral
Other protocols will be provided as and when developed. For specific requests, please
contact Intelligent Recording LTD.

©Copyright Intelligent Recording LTD 2008 Page 6 of 25
Basic Installation
The installation of the Digital 01 Desktop Recorder is very simple:
1) Insert USB Cable into an available and working USB port on the Host PC.
2) Windows should respond with ‘Found New Hardware’ Wizard
a. If not, go to Device Manager under Control Panel> System>Hardware
b. Browse to Universal Serial Bus controllers and locate ‘unknown device’
c. Click on device and select ‘Update Driver’-this will launch Wizard
3) Insert provided CD
4) Load Driver from Driver folder located on provided CD
5) Choose ‘continue anyway’ is warning regarding Driver Signing appears.
Next,
6) Browse on CD and click on Setup file
7) Follow installation instructions on CD
8) Please be sure to choose correct Telephone System Type as well as US(Mu-law) or
UK/Euro(A-law) location, as choosing wrong location will greatly affect the
recording quality.
9) Connect Telephone with leads provided, one side from the ‘wall’ the other to the
phone. Note it does not make any difference which port is ‘in’ or ‘out’.
10) You are now ready to record!
Advanced Program Settings & Restriction of Feature Use
Please see page 18 and 19 of this document in order to further customize your installation.
Options include the ability to prevent users from Stopping, Pausing, Deleting Recordings
and many more.
Xtension Recorder Desktop Software
The Xtension Recorder Desktop software is delivered on a Compact Disk delivered with the
Digital 01 device.

©Copyright Intelligent Recording LTD 2008 Page 7 of 25
The CD contains all the appropriate files and installation procedures to operate to this
specification, including USB device drivers, software application and help files.
PC Compatibility
The Xtension Recorder application supports Microsoft operating systems that support USB
devices. The list of existing operating systems, which meet this requirement, are:
xWIN 98SE (version 2.43 or less)
xWIN Millennium Edition (ME) (version 2.43 or less)
xWIN 2000 (all versions)
xWIN XP (all versions)
xWindows Vista (32 bit only) (all versions)
Important Note – Xtension Recorder will not support WIN 95 and below, or WIN NT
or any 64 bit operating systems.

©Copyright Intelligent Recording LTD 2008 Page 8 of 25
Xtension Recorder Desktop Software User Interface
The Xtension Recorder application software when loaded is
accessible through a desktop shortcut as well as by right-clicking
on the icon that is loaded in the system tray of the PC. This
system tray icon will also flash yellow and red to indicate an
active call being recorded.
View Recorder
This view allows the user to interact with the
live recording if desired. The user can pause or
stop the recording (if enabled) as
well as add notes about the call either by typing
in as desired or selecting from a list of
predefined comments that can be customized by
each user- see page 18 of this document.
By clicking on the Snapshot
Icon, the current call is placed into the Player
for immediate playback while continuing to
record.
The Speaker icon routes the audio
from both sides of the recording through the PC
Speakers. (Note: there is a slight delay as this is
not the ‘live’ call, but a recording of what has
just occurred).

©Copyright Intelligent Recording LTD 2008 Page 9 of 25
View Player
The Basics of the Player are quite simple. In default, the player will be directed to your
storage folder that is set up in the Options Area under File Management. By selecting the
Home icon the Player will return to view calls from this location.
While this view is displayed, new calls will appear as they are generated. You can view
calls from other locations by selecting the Browse function and selecting the location
from which to view calls, either on your local PC or network location.
The Refresh option will perform a new scan of the folder in view.
Select Search to enable searching for calls in
view by User ID, Caller ID/Number Dialled,
Comment or All. The search will then bring into
view results from the current view that matches your
criteria. To return to previous view, select the
Refresh option.

©Copyright Intelligent Recording LTD 2008 Page 10 of 25
E-Mailing Recordings
E-Mailing recordings couldn’t be easier. To email as a proprietary and secured formatted
recording select the first email icon option. This will attach the recording to an
outbound email message; an auto-text will be generated with a link to where the recipient of
the email can download a free player.
The other E-Mail option is to select the E-Mail as WAV icon , this first converts the
recording to a wav file, then attaches to an outbound e-mail message.
Save Files to Other Locations / Convert Direct to WAV Format
It is often desirable to Save and Move important calls from one storage location to another.
This is done quickly and easily by selecting the recording in the Player then clicking on the
Save icon. This XTR option will save the recording to another location in the native
‘.xtr’ file format. By selecting the WAV option, it will convert the file to a WAV format
and then allow the recording to be saved in the desired location.
Deleting Recordings
To delete an unwanted call, simply select the call or calls and then press the Delete icon
Adding Notes to a Recording
By selecting the Notes icon , the
user can add notes to be stored as part of the
call record.
Any item in the notes filed can then be used
later to find the particular call.
Note: The ability for a user to Stop, Pause, Email, Delete, and Convert
Recordings as well as view the player and sys tray icon can be restricted
on a per user basis. This is explained in the Advanced Set-Up Options
located within this document.
d

©Copyright Intelligent Recording LTD 2008 Page 11 of 25
Bookmark
A Book-Mark can be added to a Recording at any place. This can be used to highlight an
important part of the call making it easy to find in the future. To Bookmark a part of the
recording simply select Bookmark icon at the point desired and the graphic will
display area book-marked in blue as shown below:
Important Calls
Calls can be marked as Important by selecting the call and simply clicking on the
Important icon. This will highlight the call in the list as well as remove it from any
auto-delete routine established in the Options Area.
Playing Calls
Click on the desired recording in the Play Back List and the call select will be loaded into
the Player. You can simply ‘click’ on the wave form in the player to move from one point
in the recorder to another or use options shown below:
F-FWD
30 secs
F-FWD
10 secs
Stop
Play
PlayRewind
10 secs
Rewind
30 secs

©Copyright Intelligent Recording LTD 2008 Page 12 of 25
Sorting Calls in View
Calls loaded into View in the Player can be sorted by each individual column by clicking on
the column header. For example, sort for all ‘important’ calls, or perhaps all calls that have
comments associated with them. To return to the previous view, simply hit the Refresh
icon.
Options
The View Options tab enables the installer and or user to set up the options available for
that user. Once set, this view can be eliminated to the user, thereby making it impossible for
them to change (see Advanced Setup Options).

©Copyright Intelligent Recording LTD 2008 Page 13 of 25
This setting determines whether all calls are automatically recorded or if the recorder is
intended for Manual Start/Stop only. Other options to record only incoming or outgoing
calls are not available on all PBX types. For those PBX systems that can identify incoming
versus outgoing calls, these options are available. By selecting the ‘Prefix’ option, a ‘<’
sign will be placed in from of the Caller ID to identify and incoming call and a ‘>’ sign
designates an outgoing call. In the case where the software cannot distinguish between
incoming or outgoing it will be identified as ‘unrecognized’ and a ‘?’ will be placed as a
prefix.
Record Format - allows the user to select the recording format.
‘Perfect Digital Recording’ stores the recording in the PCM format taken directly from the
digital line. This is the highest quality possible but can use a significant amount of space on
the PC disk (35 Hours per GByte).
‘GSM 06.10’ (recommended) uses a compression technique to store the recording more
efficiently (168 Hours per GByte). In practice, the difference in discernable quality is
negligible so the default is for this format to be selected.

©Copyright Intelligent Recording LTD 2008 Page 14 of 25
Call Selection
This setting determines the minimum length of a call that is saved. All calls are recording
from the very beginning of the call, but unless the call lasts longer than the period set, it
will not be saved. This prevents short calls, miss-dials, internal pages etc from being saved.
Prompt at Start of Call option will pop forward the Recorder View window. Note, this
will occur any time the Recorder is active, even on very short calls.
Prompt at End of Call option is often preferred, as this will pop a box that allows the user
to Save or Delete the call (if enabled) and also to add notes about each call if desired
(shown below). This screen pop will only occur if the call has lasted the minimum period as
defined in previous option.

©Copyright Intelligent Recording LTD 2008 Page 15 of 25
Record Levels
Each user can adjust the Recording Levels of either side of the conversation. The Local
Volume is the recording level of the user; the Remote volume is that of the outside caller.
If left at the default of 100% and 100%, no adjustment is made to the recording. Often the
outside party is more difficult to hear in the recording due to level loss on the line; in that
case an adjustment can be made to boost the level to the desired level, perhaps 150%, on
Remote. Note it is also possible, and often desirable, to decrease the volume if the Local
side is too loud in the resultant recording.
Call Storage Settings
If the local user desires to manage their own calls, then using the default storage location
created is often preferred, a My Calls folder is created under My Documents.
If however, the calls are to be stored on a Network Drive for Centralized Call
Management, then it is recommended that a local Buffer location be created on the Local
PC. When a Local Buffer is created, the live call is buffered in the folder created (i.e.
C:\Buffer) as an ‘.xtr.tmp’ file. Once the call is completed, the recorder checks if the
network location is available and if so, sends the call to the network storage location. If the
network is not available, calls will continue to be recorded in the Buffer location. When one

©Copyright Intelligent Recording LTD 2008 Page 16 of 25
call is successfully sent to the network location, the entire buffer will also be transferred
with no user intervention required.
Auto-Delete
This option automates the task of deleting calls after a predefined time or after a certain
amount of space has been consumed. Note, any calls marked as Important will not be Auto-
Deleted by this routine.

©Copyright Intelligent Recording LTD 2008 Page 17 of 25
Room Recorder
Room Recorder, when activated, switches the Recording Source from the Telephone to the
user’s mic on their PC. This allows for Live Interview recordings, Dictation and many other
uses. It is recommended that an Omni-directional mic be used in this case. The auto gain
control provides consistent recording results in most cases.
Note- this function can be eliminated if desired, see advanced set-up options.

©Copyright Intelligent Recording LTD 2008 Page 18 of 25
Advanced Program Settings
Comvurgent has also provided the dealer or user the option of making additional
adjustments to the use and functionality of the user interface.
Customize Pre-Defined Comments
Located in the Program directory, which is loaded in default to C:\Program
Files\Comvurgent\XT Recorder, you will find a file called Comments.txt. To edit this file,
click on the file and it will display the content as shown below:
Simply type in a column any number
of comments and how you would like
them to appear.
Once completed, select File>Save and
replace the existing Comments.txt file.
The new list will then appear in your
drop-down menus.
This will place the selected text in the
comments field; more text can be
appended to the notes if desired.

©Copyright Intelligent Recording LTD 2008 Page 19 of 25
Restricting Access to Features and Functions
This special configuration program can only be accessed by browsing to the installation
location (default C:\Program Files\Comvurgent\XtRecorder) and then clicking on the file
circled below:
Note: The customer takes all responsibility to ensure they are meeting legal requirements.
Comvurgent provides the user option settings in order to meet customer demands and
cannot be responsible for the miss-application of the product.
This opens the following program:
Note: The customer takes all responsibility to ensure they are meeting legal requirements.
Intelligent Recording provides the user option settings in order to meet customer demands
and cannot be responsible for the miss-application of the product.

©Copyright Intelligent Recording LTD 2008 Page 20 of 25
Installing on Shared PC
This first setting is used when installing on a PC that has multiple user log-on Ids. If it is
preferred that all calls, regardless of the user that is logged in, are stored in the same folder
and have all the same settings- then select the ‘Everyone’ option.
It is also possible to have each user have their own settings, i.e. different storage folders etc.
If this is desired select the ‘Just Me’ option. It will then be necessary to install the
application under each user log-in on the PC.
Restricting Features and Functions
The following features can be restricted on a per user basis:
Note- the User ID Header on each recording is taken from the
PC User Log-in ID, so if each user logs into the PC with a unique
lo
g
in the recordin
g
s will be searchable and sort-able b
y
the
Table of contents
Other Intelligent Recording Voice Recorder manuals
