Inteno EX400 User manual

VERSION 1.2
Content:
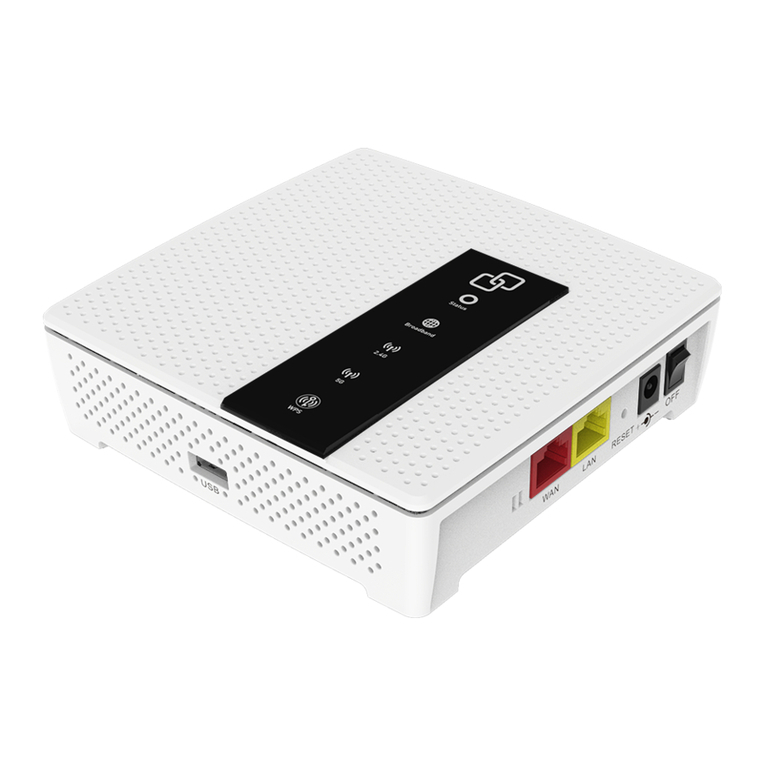
Connections:
Ethernet connection: WAN, red color
Ethernet connection: LAN, yellow color
USB 2.0
Reset switch
Power plug connector
Power switch ON/OFF
WAN
USB
RESET OFF
ON
LAN
For more information, please visit
www.intenogroup.com/ex400
WIFI MULTI DEVICE
EASY INSTALLATION
EX400
RF Exposure Statement: The minimum distance between the user and/or any bystander and
the radiating structure of the transmitter is 20cm.
RF Output Power /Frequence usage: All operational modes: 2.4GHz: 802.11b, 802.11g,
802.11n (HT20), 802.11n (HT40), 5GHz: 802.11a, 802.11ac (VHT20), 802.11ac (VHT40), 802.11ac (VHT80)
The frequency, mode and the maximum transmitted power in EU: 2400 MHz – 2483.5 MHz: 19.99
dBm (EIRP), 5150 MHz – 5250 MHz: 22.91 dBm (EIRP), 5250 MHz – 5350 MHz: 22.91 dBm (EIRP), 5470
MHz – 5725 MHz: 29.95 dBm (EIRP)
RF Restriction: In EU, 5150 to 5350 MHz is restricted to indoor.

How to place your EX400:
Problem area,
improved by EX400
Area that is good
for placing EX400
Area covered
by your router
k
MD
K/FU
2
3
4
5
2
3
4
5
+9,39
k
MD
K/FU
2
3
4
5
2
3
4
5
+9,39
k
k
ROUTER
EX400
Router / Access Point (cable connection)
EX400 can be used as a router if congured as
such. Connect EX400 WAN to your Internet service
provider outlet.
One device,
three possibilities:
EX400
ROUTER
For more information, please visit
www.intenogroup.com/ex400
The wireless way:
EX400: Press and hold the WPS icon
until the LEDS starts blinking. Then
release and wait until only the WPS LED
starts blinking.
Your router: Press WPS. The installation
process is now in progress. It will take
1-2 minutes to complete. When the
”Broadband” LED is yellow it means that
WPS pairing was successful and your
EX400 is connected to your router with
the same name (SSID) and password as
your router has. But if ”Broadband” is
still black, you must try again.
With your PC:
Connect your PC to the LAN of EX400.
Do not connect any cable on WAN of
EX400. Start your web browser and type
th e addres s h t tp://192.168.1.1 ,
- a guide will show conguration options.
WAN
USB
RESET OFF
ON
LAN
WAN
USB
RESET OFF
ON
LAN
Installation
Repeater (wireless connection)
Place the EX400 in a good place (as shown below).
The EX400 now works as a repeater.
Extender (cable connection)
Place the EX400 in a good place (as shown below).
Connect the EX400 with an ethernet cable to your
router. Put the cable in one of the LAN ports in your
router and the other in the WAN port of EX400. This
setup gives you the best performance.
Other installation options may be supported Please
check www.intenogroup/ex400 for latest updates.
WIFI:
WIFI:

How to place your EX400:
Problem area,
improved by EX400
Area that is good
for placing EX400
Area covered
by your router
k
MD
K/FU
2
3
4
5
2
3
4
5
+9,39
k
MD
K/FU
2
3
4
5
2
3
4
5
+9,39
k
k
ROUTER
EX400
Router / Access Point (cable connection)
EX400 can be used as a router if congured as
such. Connect EX400 WAN to your Internet service
provider outlet.
One device,
three possibilities:
EX400
ROUTER
For more information, please visit
www.intenogroup.com/ex400
The wireless way:
EX400: Press and hold the WPS icon
until the LEDS starts blinking. Then
release and wait until only the WPS LED
starts blinking.
Your router: Press WPS. The installation
process is now in progress. It will take
1-2 minutes to complete. When the
”Broadband” LED is yellow it means that
WPS pairing was successful and your
EX400 is connected to your router with
the same name (SSID) and password as
your router has. But if ”Broadband” is
still black, you must try again.
With your PC:
Connect your PC to the LAN of EX400.
Do not connect any cable on WAN of
EX400. Start your web browser and type
the address ht tp://192.168.1.1 ,
- a guide will show conguration options.
WAN
USB
RESET OFF
ON
LAN
WAN
USB
RESET OFF
ON
LAN
Installation
Repeater (wireless connection)
Place the EX400 in a good place (as shown below).
The EX400 now works as a repeater.
Extender (cable connection)
Place the EX400 in a good place (as shown below).
Connect the EX400 with an ethernet cable to your
router. Put the cable in one of the LAN ports in your
router and the other in the WAN port of EX400. This
setup gives you the best performance.
Other installation options may be supported Please
check www.intenogroup/ex400 for latest updates.
WIFI:
WIFI:

How to place your EX400:
Problem area,
improved by EX400
Area that is good
for placing EX400
Area covered
by your router
k
MD
K/FU
2
3
4
5
2
3
4
5
+9,39
k
MD
K/FU
2
3
4
5
2
3
4
5
+9,39
k
k
ROUTER
EX400
Router / Access Point (cable connection)
EX400 can be used as a router if congured as
such. Connect EX400 WAN to your Internet service
provider outlet.
One device,
three possibilities:
EX400
ROUTER
For more information, please visit
www.intenogroup.com/ex400
The wireless way:
EX400: Press and hold the WPS icon
until the LEDS starts blinking. Then
release and wait until only the WPS LED
starts blinking.
Your router: Press WPS. The installation
process is now in progress. It will take
1-2 minutes to complete. When the
”Broadband” LED is yellow it means that
WPS pairing was successful and your
EX400 is connected to your router with
the same name (SSID) and password as
your router has. But if ”Broadband” is
still black, you must try again.
With your PC:
Connect your PC to the LAN of EX400.
Do not connect any cable on WAN of
EX400. Start your web browser and type
the address ht tp://192.168.1.1 ,
- a guide will show conguration options.
WAN
USB
RESET OFF
ON
LAN
WAN
USB
RESET OFF
ON
LAN
Installation
Repeater (wireless connection)
Place the EX400 in a good place (as shown below).
The EX400 now works as a repeater.
Extender (cable connection)
Place the EX400 in a good place (as shown below).
Connect the EX400 with an ethernet cable to your
router. Put the cable in one of the LAN ports in your
router and the other in the WAN port of EX400. This
setup gives you the best performance.
Other installation options may be supported Please
check www.intenogroup/ex400 for latest updates.
WIFI:
WIFI:

VERSION 1.2
Content:
Connections:
Ethernet connection: WAN, red color
Ethernet connection: LAN, yellow color
USB 2.0
Reset switch
Power plug connector
Power switch ON/OFF
WAN
USB
RESET OFF
ON
LAN
For more information, please visit
www.intenogroup.com/ex400
WIFI MULTI DEVICE
EASY INSTALLATION
EX400
RF Exposure Statement: The minimum distance between the user and/or any bystander and
the radiating structure of the transmitter is 20cm.
RF Output Power /Frequence usage: All operational modes: 2.4GHz: 802.11b, 802.11g,
802.11n (HT20), 802.11n (HT40), 5GHz: 802.11a, 802.11ac (VHT20), 802.11ac (VHT40), 802.11ac (VHT80)
The frequency, mode and the maximum transmitted power in EU: 2400 MHz – 2483.5 MHz: 19.99
dBm (EIRP), 5150 MHz – 5250 MHz: 22.91 dBm (EIRP), 5250 MHz – 5350 MHz: 22.91 dBm (EIRP), 5470
MHz – 5725 MHz: 29.95 dBm (EIRP)
RF Restriction: In EU, 5150 to 5350 MHz is restricted to indoor.
Other manuals for EX400
2
Table of contents
Other Inteno Network Router manuals
Popular Network Router manuals by other brands
Allied Telesis
Allied Telesis AT-WR4662n Quick installation guide
ZyXEL Communications
ZyXEL Communications ES-2108 Declaration of conformity
Tangerine
Tangerine Netcomm NF18ACV Wireless setup guide
Allied Telesis
Allied Telesis AT-AR441S datasheet

Tenda
Tenda TEI480T Technical specifications
Teltonika
Teltonika RUT955 user manual
