Pag. 2
A
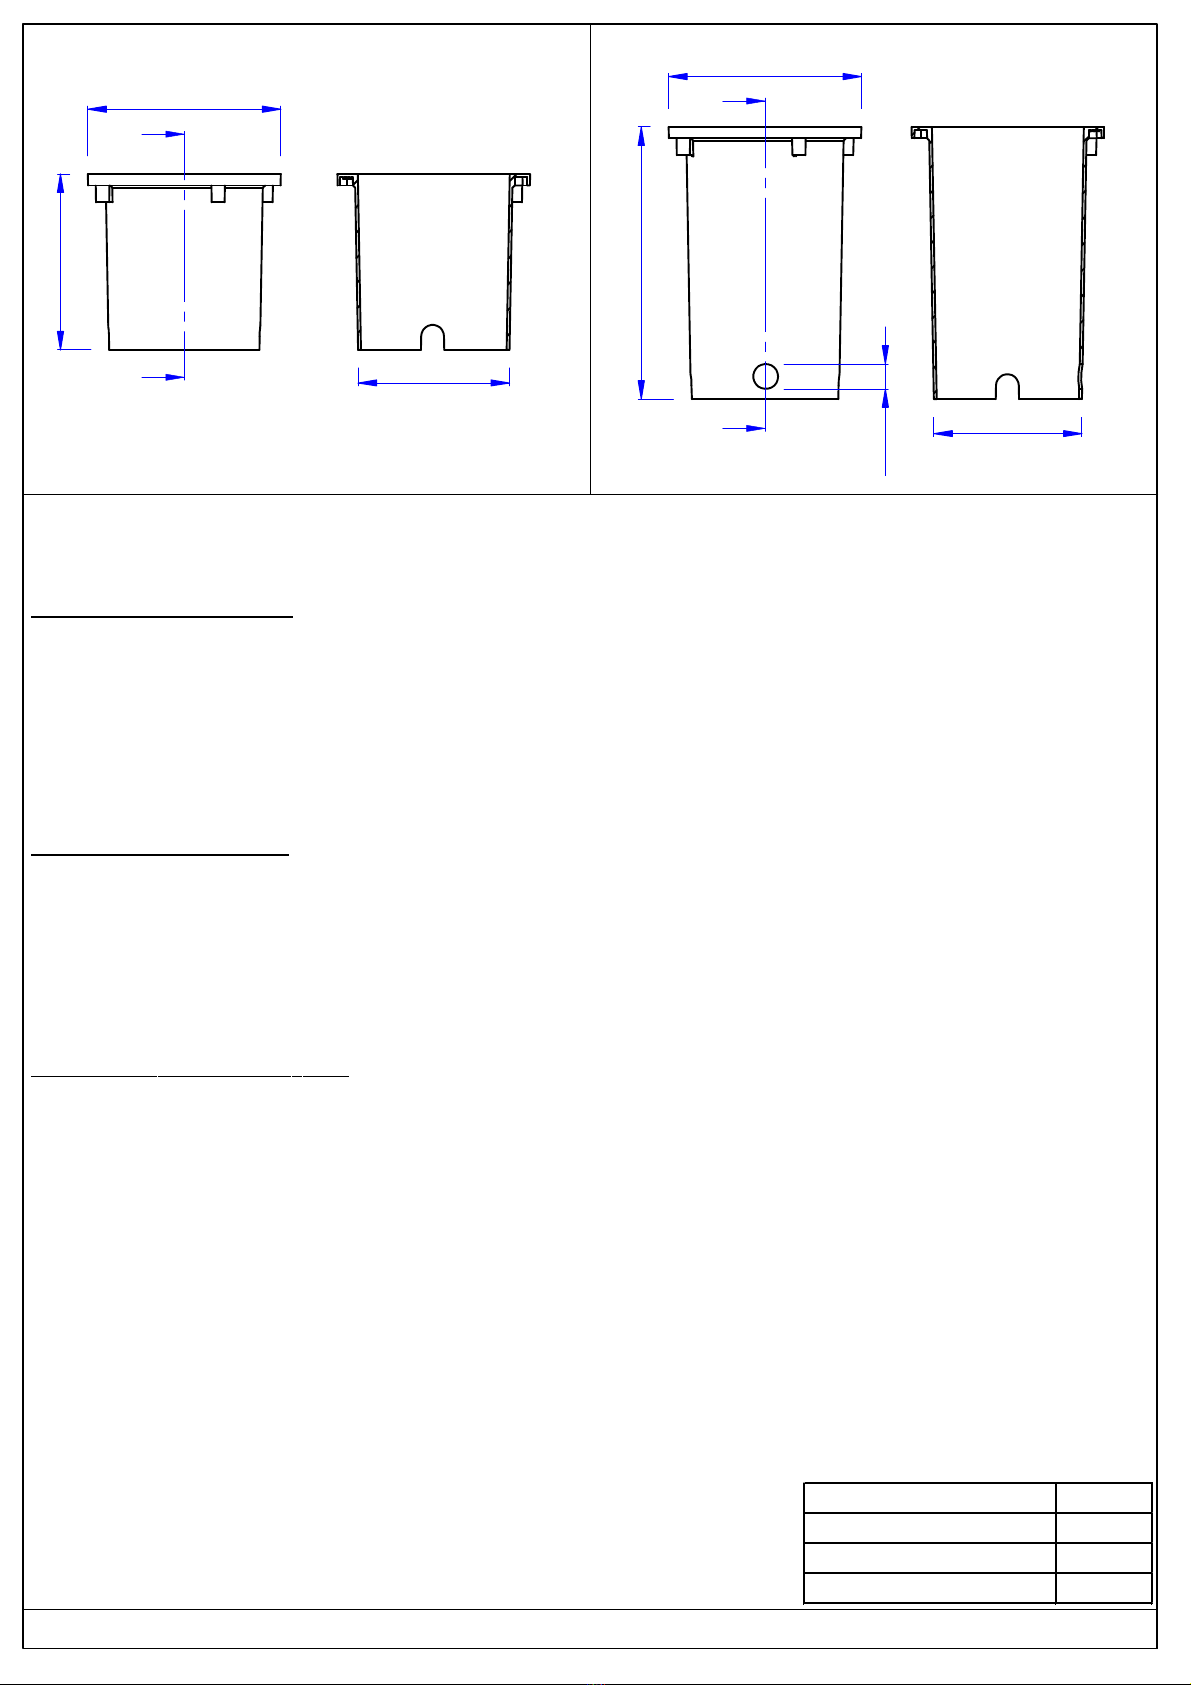
ASECTION A-A
B
BSECTION B-B
6,1"
6,7"
5,3"
9,4"
6,7"
5,1"
OUTERCASING COD.E84933 OUTERCASING COD.E84932
O0,9"
THIS PRODUCT MUST BE INSTALLED IN ACCORDANCE WITH THE APPLICABLE INSTALLATION CODE BY A
PERSON FAMILIAR WITH THE CONSTRUCTION AND OPERATION OF THE PRODUCT AND THE HAZARDS INVOLVED
MOUNTING INSTRUCTIONS
READ ALL OF THESE INSTRUCTIONS BEFORE INSTALLING FIXTURES
· Keep all of the instructions for future reference
· Turn off power before installing fixture
· Installation is to be performed by a qualified electrician only
· All installations must conform to the National Electrical Code as well as all local jurisdictional codes and regulations
· Any modification of the luminaire will void any and all written or implied warranties
· The manufacture accepts no responsibility for damage to persons or property airing through improper use or installation
Colours Secondary Cable Pole
Wire black number 1 +
Wire black number 2 -
Wire green Ground
INSTALLATION SEQUENCE
- Mount remote driver in accessible well ventilated space
- Ensure power is off before connecting driver to line voltage
- Fix the outercasing on the ground, the surface must be perfectly flat
- Connect secondary wiring to fixture wiring
- Insert the Suelo into the outercasing and fix it with the screws [1.A-1.B]
- WARNING - Be sure secondary wiring is connected to driver BEFORE energizing to avoid LED failure
- Energize
SEQUENCE FOR ADJUST TILTING
- Ensure power is off before opening the Suelo
- Unscrew the flange and remove the glass [2.A]*
- Unscrew slightly the screw to facilitate tilting, adjust the tilting and tighten the screw [3.A]
- Insert the glass and tighten the flange [4.A]**
- Energize
* Only for Suelo Stainless Steel finish, unscrew the ring, remove the flange and the glass
** Only for Suelo Stainless Steel finish, insert the glass, insert the flange and tighten the ring


