manuals.online logo
Brands
  1. Home
  2. •
  3. Brands
  4. •
  5. Inter-lux
  6. •
  7. Outdoor Light
  8. •
  9. Inter-lux Tadpole User manual

Inter-lux Tadpole User manual

Other Inter-lux Outdoor Light manuals

Inter-lux i-LED linea light SUELO-R 13W User manual

Inter-lux

Inter-lux i-LED linea light SUELO-R 13W User manual

Inter-lux VEDETTE-R User manual

Inter-lux

Inter-lux VEDETTE-R User manual

Popular Outdoor Light manuals by other brands

Sealey LED37 instructions

Sealey

Sealey LED37 instructions

nordlux VEJERS Mounting instruction

nordlux

nordlux VEJERS Mounting instruction

SImx ELITE LED LHTC637 installation instructions

SImx

SImx ELITE LED LHTC637 installation instructions

GEV CAROLINE 10833 manual

GEV

GEV CAROLINE 10833 manual

WE-EF PFL540 LED Installation and maintenance instructions

WE-EF

WE-EF PFL540 LED Installation and maintenance instructions

Lindby 9949029 Intended use

Lindby

Lindby 9949029 Intended use

HEPER DOGO Side LW6048.585-US Installation & maintenance instructions

HEPER

HEPER DOGO Side LW6048.585-US Installation & maintenance instructions

Maretti VIBE S 14.6080.04.A quick start guide

Maretti

Maretti VIBE S 14.6080.04.A quick start guide

BEGA 84 253 Installation and technical information

BEGA

BEGA 84 253 Installation and technical information

HEPER LW8034.003-US Installation & maintenance instructions

HEPER

HEPER LW8034.003-US Installation & maintenance instructions

HEPER MINIMO Installation & maintenance instructions

HEPER

HEPER MINIMO Installation & maintenance instructions

LIGMAN BAMBOO 3 installation manual

LIGMAN

LIGMAN BAMBOO 3 installation manual

Maretti TUBE CUBE WALL 14.4998.04 quick start guide

Maretti

Maretti TUBE CUBE WALL 14.4998.04 quick start guide

Maxim Lighting Carriage House VX 40428WGOB installation instructions

Maxim Lighting

Maxim Lighting Carriage House VX 40428WGOB installation instructions

urban ambiance UQL1273 installation instructions

urban ambiance

urban ambiance UQL1273 installation instructions

TotalPond 52238 instruction manual

TotalPond

TotalPond 52238 instruction manual

Donner & Blitzen 0-02661479-2 owner's manual

Donner & Blitzen

Donner & Blitzen 0-02661479-2 owner's manual

LIGMAN DE-20023 installation manual

LIGMAN

LIGMAN DE-20023 installation manual

manuals.online logo
manuals.online logoBrands
  • About & Mission
  • Contact us
  • Privacy Policy
  • Terms and Conditions

Copyright 2025 Manuals.Online. All Rights Reserved.

Tadpole
Installation and Maintenance
Instructions
IMPORTANT: All wiring connections must be made before switching on mains power.
MSL Star Oslon Square 2.9VF2W @ 700mA
European Conformity
Please retain these instructions for future reference
This product should not be disposed of in your general waste
Suitable for Exterior Use
IP66 Dust tight and protected against powerful jets of water.
Class III - Extra Low Voltage
1
410 381 1497 inter-lux.com [email protected]
Inter-lux reserves the right to make technical changes without notice.
1
Electrical Supply
Installation must be carried out by a qualified electrician in
accordance with BS 7671:2008 Wiring Regulations.
230/240V AC 50/60Hz mains supply to a suitable SELV
LED Driver.
Site conditions: LED equipment is more susceptible to
static damage and overvoltage than previous technology.
Before handling or connecting to the mains supply ensure
that all MSL products are protected from static discharge
and that the mains supply is to regulation. (230V +10
-6%)
Mains cables must be double insulated, strain relieved
and separated from E.L.V output cables.
Dimming control circuit source must be of SELV insulation
class.
This unit requires a constant current driver. 700mA Max.
Observe polarity:
Positive (+) is marked as RED.
Incorrect supply or reverse polarity can cause irreparable
damage.
All connections must be made before switching on mains.
If the supply is energised prior to making the connections
to the fitting then the resulting surge will damage the LED.
Multiple LEDs should be wired in series, refer to driver
instructions for minimum/maximum load.
All lighting equipment is delicate and easily damaged
through misuse or inappropriate installation (mechanical
or electrical). Repairs and replacements may cause
delays and will be chargeable. Contact MSL for support if
required. For full warranty terms & conditions please visit
our website.
The light source contained in this luminaire shall only be
replaced by the manufacturer or his service agent or a
similar qualified person.
Ensure supply driver and connectors are housed indoors
OR in a suitably IP rated enclosure.
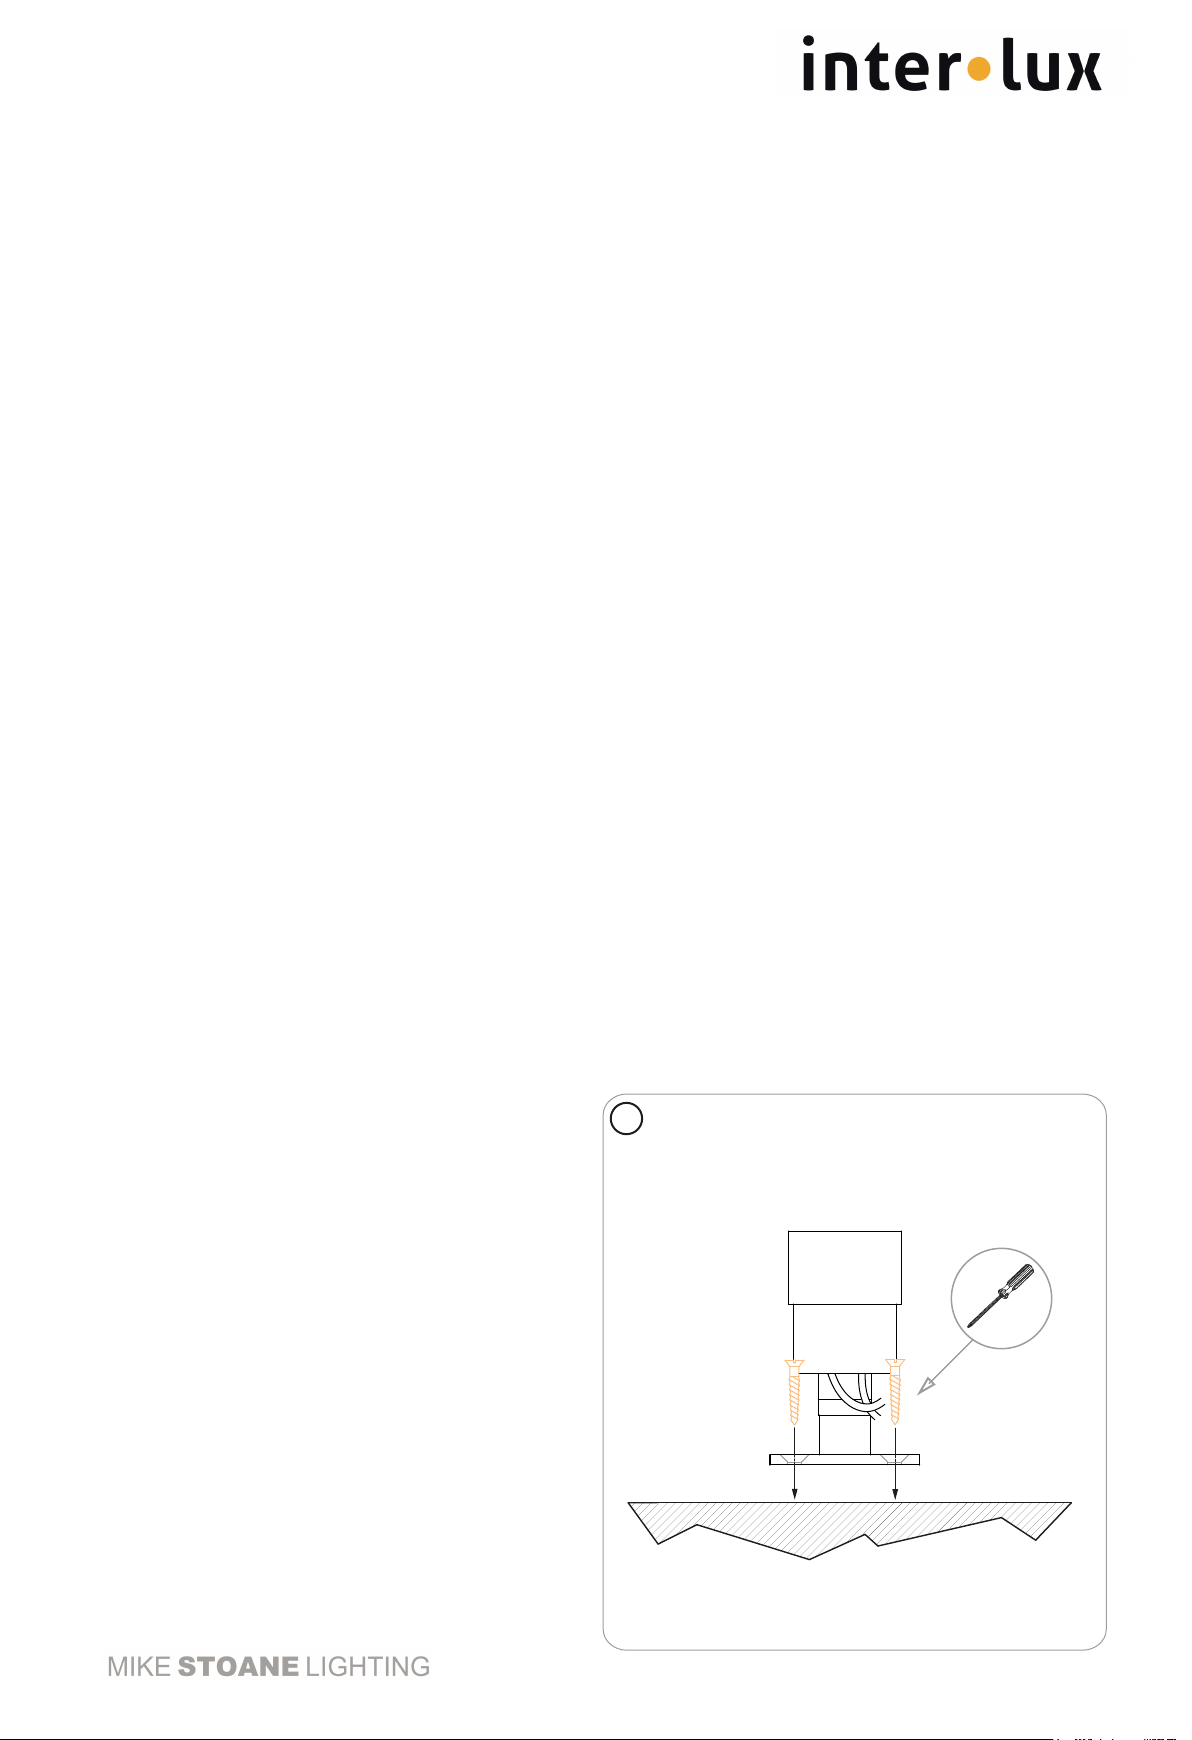
Installation
Check that the mounting surface is suitable for the
installation of this fitting.
Step 1 Using two suitable fixings, screw the fitting to
the surface.
Step 2 Make mains connections to SELV LED driver
and extra low voltage connections to the
fitting.
After opening the sealed portion of the luminaire for
any reason, MSL recommends running the fitting for
15 minutes with the lid open to expel moisture before
closing it up. This will prevent condensation on the
lens and protect the fitting from corrosion.
WARNING: Do not look at exposed LED lamps in
operation. Eye injury can result.
Cleaning:
Fully isolate the fitting and allow to cool.
Clean the fitting with a slightly damp lint free cloth
from a mild solution of soap and water. The fitting
must be completely dry before reconnecting power.
Incompatible or abrasive chemicals can damage the
fitting, contact MSL for advice if required.
2
410 381 1497 inter-lux.com [email protected]
Inter-lux reserves the right to make technical changes without notice.
30mm
Tilt Lock Pan Lock
ADJUSTMENT
Using the suppled 1.5mm Allen key, the tilt and pan
can be unlocked and adjusted.
When locking take care not to overtighten, the fixings
should be tightened until the fitting is just locked.
Optic
Bezel
OPTIC CHANGE
To change the optic, unscrew the front bezel and remove
the black optic holder.
The optic can be pushed out of its holder and replaced
by another 20mm XPE optic from Mike Stoane Lighting.
To replace the optic place the new optic into the optic
holder. Replace the optic holder in the tadpole body
being sure to line the pins of the holder up with the slots
on the LEDs circuit board.
Once in place fully tighten the bezel to close the fitting.
3
410 381 1497 inter-lux.com [email protected]
Inter-lux reserves the right to make technical changes without notice.