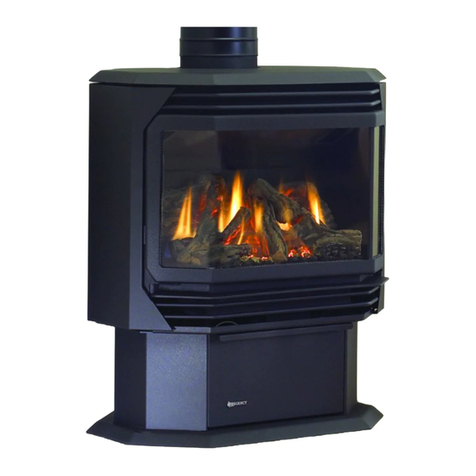
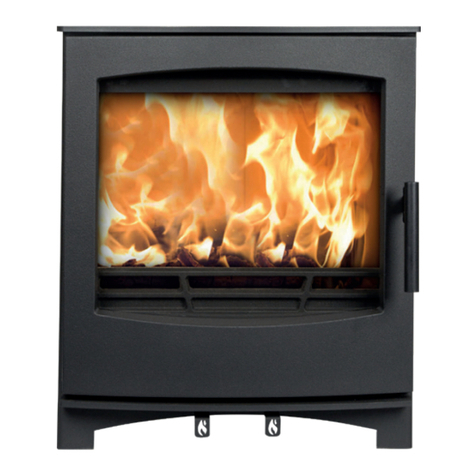
Intertek Jotul GF 400 DV Sebago User manual

1
137750_Rev_L 11.16.12
Installation and
Operation Instructions
Jøtul GF 400 DV Sebago
Direct Vent Gas Stove
– Do not store or use gasoline or other
flammable vapors and liquids in the vicinity
of this or any other appliance.
– WHAT TO DO IF YOU SMELL GAS
•Donottrytolightanyappliance.
•Donottouchanyelectricalswitch;donot
use any phone in your building.
•Immediatelycallyourgassupplierfroma
neighbor’sphone.Followthegassupplier’s
instructions.
•Ifyoucannotreachyourgassupplier,call
the fire department.
– Installation and service must be performed
byaqualifiedinstaller,serviceagencyorthe
gas supplier.
– IntheCommonwealthofMassachusetts,
a carbon monoxide (CO) detector shall be
installed in the same room as the appliance.
WARNING: If the information in these
instructionsisnotfollowedexactly,afire
or explosion may result causing property
damage,personalinjuryorlossoflife.
INSTALLER:Leavethismanualwiththeappliance.
CONSUMER: Retain this manual for future reference.
– QUEFAIRESIVOUSSENTEZUNEODEURDEGAZ:
•Nepastenterd’allumerl’appareil.
•Netouchezàaucuminterrupteur.Ne
pas vous servir des téléphones se trouvant
danslebâtimentoùvoustrouvez.
•Appelezimmédiatementvotre
fournisseurdegazdepuisunvoisin.
Suivezlesinstructionsdufournisseur.
•Sivounepouvezrejoindrele
fournisseurdegaz,appelezleservicedes
incendies.
– L’installatione l’entretien doivent être
assurés par un installateur ou un service
d’entretien qualifié ou par le fournisseur
degaz.
– Ne pas entreposer ni utiliser d’essence ni
d’autres vapeurs ou liquides inflammables
dans le voisinage de cet appareil ou de tout
autre appareil.
AVERTISSEMENT:Assurez-vousdebien
suivreles instructions données dans cette
notice pour réduire auninimum le risque
d’incendie ou d’explosion ou pour éviter
toutdommagematériel,touteblessureoula
mort.
ATTENTION : CES INSTRUCTIONS DOIVENT
DEMUERER AVEC LE PROPRIÉTERE D’UNE
MAISON.
Thisappliancemaybeinstalledinanaftermarket,
permanentlylocated,manufacturedhomeormobile
home,wherenotprohibitedbylocalcodes.
Thisapplianceisonlyforusewiththetypesofgas
indicated on the ratingplate. A conversionkit is
suppliedwiththeappliance.

2
137750_Rev_L 11.16.12
We recommend that
our gas products be
installed and serviced by
professionals who are
certified in the U.S. by
the National Fireplace
Institute® (NFI) as NFI
Gas Specialists.
Installation Requirements
fortheCommonwealthof
Massachusetts
THIS PRODUCT MUST BE INSTALLED BY
A LICENSED MASTER OR JOURNEYMAN
PLUMBER OR GASFITTER WHEN
INSTALLED IN THE COMMONWEALTH OF
MASSACHUSETTS.
1. If there is not one already present,
on each floor level where there are
bedroom(s), a carbon monoxide
detector and alarm shall be placed in
the living area outside the bedroom(s).
The carbon monoxide detector shall
comply with NFPA 720 (2005 Edition).
2. A carbon monoxide detector shall:
a) Be located in the room that houses
the appliance or equipment;
b) Be either hard-wired or battery
powered or both; and
c) Shall comply with NFPA 720 (2002
Edition).
3. A Product-approved vent terminal
must be used, and if applicable, a
Product-approved air intake must
be used. Installation shall be in strict
compliance with the manufacturer’s
instructions. A copy of the installation
instructions must remain with
the appliance or equipment at the
completion of the installation.
THIS OWNER’S MANUAL PROVIDES INFORMATION TO
ENSURESAFEINSTALLATIONANDEFFICIENT,DEPENDABLE
OPERATION OF YOUR FIREPLACE INSERT. PLEASE READ
THESE INSTRUCTIONS IN THEIR ENTIRETY AND MAKE THEM
AVAILABLETOANYONEUSINGORSERVICINGTHISGAS
INSERT.
DO NOT ATTEMPT TO ALTER OR MODIFY THE CONSTRUCTION
OF THIS APPLIANCE OR ITS COMPONENTS. ANY
MODIFICATIONORALTERATIONWILLVOIDTHEWARRANTY,
CERTIFICATION AND LISTING OF THIS APPLIANCE.
THISHEATERMUSTBEINSTALLEDANDMAINTAINEDBYA
QUALIFIED SERVICE AGENCY.
Suggested Tools for
Installation and Service
• Externalregulator(forPropaneonly)
• Pipingwhichcomplieswithlocalcode
• Manualshut-offvalve-
T-HandlerequiredinMassachusetts
• Sedimenttrap-ifrequiredbycode
• Teejoint
• Pipewrench
• Pipesealant
• 10mmopenendwrench
• 1/2”,7/16”openendwrench
• Phillipsheadscrewdriver
• Flatheadscrewdriver
• 1/4”nutdriver
• Gloves
• Safetyglasses
• TorxT-20screwdriver
•Tinsnips
61.6%
Jøtul GF 400 DV

3
137750_Rev_L 11.16.12
Table of Contents
Service Tools .............................................2
Specifications ............................................4
General Information................................5
Safety Information ..................................6
Installation Requirements
Location ................................................6
Hearth Protection ...............................6
Clearances ............................................. 7
Mantel&Trim ......................................7
Alcove ....................................................7
Vent Requirements ..................................8
Adding Restriction...............................8
Vertical Termination ...........................9
Co-linear Termination.................... 12
Coaxial Chimney Conversion ......13
Horizontal Termination.................... 14
Vent Terminal Clearances ................15
MobileHomeInstallation ....................16
Fuel Conversion.......................................16
Gas Connection....................................... 18
Gas Pressure ............................................19
HighAltitudeAdjustment ...................19
AirShutterAdjustment ...................... 20
Wall Thermostat.................................... 20
Remote Control...................................... 20
Log Set Installation ................................ 21
System Check ..........................................22
Operation .................................................23
Maintenance ...........................................24
Glass Replacement.............................24
Optional Blower Installation ..............25
Optional Brick Kit Installation ............27
Illustrated Parts Breakdown ................28
Replacement Parts List......................... 29
Warranty Statement ............................ 30
Lighting Instructions ..............................31
Jøtul GF 400 DV Sebago
Direct Vent Gas Heater
Manufactured and Distributed by:
Jøtul AS
Fredrikstad,Norway
Jøtul North America
55 Hutcherson Dr.
Gorham,Maine04038-2634
Test Standards
This appliance complies with
National Safety standards
and is tested and listed by
Intertek Testing Services of
Middleton,Wisconsinto
ANSI Z21.88-2009,
ANSIZ21.88/CSA2.33-2009,
CAN/CGA2.17-M91,andCSA
P.4-01.2
DO NOT ATTEMPT TO ALTER OR MODIFY THE
CONSTRUCTION OF THE APPLIANCE OR ITS COM-
PONENTS. ANY MODIFICATION OR ALTERATION
WILLVOIDTHEWARRANTY,CERTIFICATIONAND
LISTING OF THIS APPLIANCE.
Your stove has a unique serial number stamped on the
rating plate which is hung on the back. Please record
the serial number in the space below. You may also wish
to attach your purchase receipt to this page for future
reference.
MODELNAME:JøtulGF400 DV Sebago Gas Stove
SERIALNUMBER:_______________________________
DATEOFPURCHASE:____________________________
AUTHORIZEDDEALER:__________________________
ADDRESS___________________________________
PHONE:____________________________________
INSTALLER:__________________________________
FUELTYPE:____________________________________
FUELCONVERSION:NO_______YES_____
NOTES:________________________________________
______________________________________________
______________________________________________

4
137750_Rev_L 11.16.12
THIS FIREPLACE IS SHIPPED FROM THE FACTORY
FOR USE WITH NATURAL GAS ONLY. IF USE
WITHPROPANEISDESIRED,THEAPPLIANCE
MUSTFIRSTBECONVERTEDUSINGTHE
FUELCONVERSIONKITPROVIDED,#155351.
CONVERSIONSHOULDBEMADEBEFORETHE
APPLIANCEISINSTALLED.SEEPG.16.
Jøtul GF 400
Input Rates
Natural Gas
32,000BTU/hr.maximuminput
18,000BTU/hr.minimuminput
Propane
32,000BTU/hr.maximuminput
16,000BTU/hr.minimuminput
Inlet Pressure: MIN MAX
NaturalGas: 5.0WC(1.24kPa)7.0WC(1.74kPa)
Propane: 12.0WC(2.99kPa)14.9WC(3.71kPa)
Manifold Pressure: MIN MAX
Natural Gas: 1.2 WC (.30 kPa) 3.8 WC (.95 kPa)
Propane: 2.9WC(.722kPa)11.0WC(2.74kPa)
PiezoIgnitor/StandingPilot
261/2”
673mm
13”
330 mm
DV Sebago
Specifications
Top Exit
29”
737 mm
191/2”
495mm
121/4”
311 mm
7”
178 mm
C
L
281/2”
724mm
261/2”
673mm
10”
254mm Gas Inlet
*Forheightwith6”Legs,subtract21/4”
Rear Exit
251/2”*
647mm
281/2”*
724mm
195/8”
500 mm
C
L

5
137750_Rev_L 11.16.12
HardwareBagContents
• FuelConversionKit-LP.................................... 155351
• EmberBag,4oz. ............................................... 129123
• RockWool,1oz,..................................................157259
General Information
THISHEATERMUSTBEINSTALLEDANDMAINTAINED
BY A QUALIFIED SERVICE AGENCY.
The installation and repair of this appliance must be
done by a qualified service person. Failure to properly
install and maintain this heater could result in an
unsafe or hazardous installation, which may result in
afire,explosion,propertydamage,personalinjuryor
loss of life.
This appliance should be inspected before use and
atleastannually.Morefrequentcleaningmaybe
required due to excessive lint from carpeting, bedding
material, etc. It is imperative that control compart-
ments, burners, and circulating air passageways of
the appliance be kept clean.
THISAPPLIANCEMUSTNOTBECONNECTEDTOA
CHIMNEYORFLUESERVINGANYOTHERAPPLIANCE.
The installation must conform to local codes. Your lo-
calJøtuldealercanassistyouindeterminingwhatis
required in your area for a safe and legal installation.
Some areas require a permit to install a gas burning
appliance. Always consult your local building inspec-
tor,orauthorityhavingjurisdiction,todetermine
what regulations apply in your area.
CODECOMPLIANCE:Yourlocalofficialshavefinal
authority in determining if a proposed installation is
acceptable. Any requirement that is requested by the
localauthorityhavingjurisdiction,thatisnotspecifi-
cally addressed in this manual, defaults to local code.
In the absence of local codes, the installation require-
ments must comply with the current National codes.
In the U.S., these requirements are established in the
NationalFuelCode,ANSIZ223.1.(NFPA54).InCanada,
thecodeshavebeenestablishedinCAN/CGAB149
Fuel Installation Code.
Installer l’appareil selon les codes ou reglements
locaux, ou, en l’absence de tels reglements, selon les
Codesd’installationCAN/CGA-B149.
DO NOT OPERATE THIS STOVE IF ANY PART HAS BEEN
UNDER WATER. Call a qualified service technician to
inspect the heater and to replace any part of the con-
trol system and any gas control which may have been
under water.
Ne pas se servir de cet appareil s’il a ete’ plonge dans
l’eau, completement ou en partie. Appeler un tech-
nicien qualifie pour inspecter l’appareil et remplacer
toute partie du syste’me de controle et toute com-
mande qui ont ete plonges dans l’eau.
Glass Panel
Do not operate this appliance with the glass
front removed, cracked, or broken. Replacement
of the glass should be done by a licensed or
qualified service person. Only remove glass for
routine service. Always handle glass carefully.
Unpacking your stove
1. Remove the Top Plate of the stove by simply lifting it
straight off of the stove body.
2. To open the firebox, disengage the two Glass Frame
Latches located on top of the firebox. Pull each handle
forward to clear the latch from the notch in the frame.
3. Familiarize yourself with the installation requirements
specified in this manual,before beginning the installation.
Glass Frame
Latch

6
137750_Rev_L 11.16.12
Location
In selecting a location for the stove, consider the
following points:
1) Heat distribution
2) Vent termination requirements
3) Gas supply line routing
4)Trafficareas,furniture,draperies,etc.
TheGF400DVSebagomaybelocatedonornear
conventional construction materials, however, proper
clearance to combustibles must be maintained in order
to provide adequate air circulation around the appliance.
Also, it is important to provide adequate access around
the stove for servicing and proper operation.
The clearance and hearth specifications listed in this
manual are the minimum requirements for combustible
material. A combustible material is anything that can
burn (i.e. sheet rock, wall paper, wood, fabrics etc.). These
surfaces are not limited to those that are visible and also
include materials that may be located behind non-com-
bustibles.
If you are not sure of the combustible nature of a
material, consult your local fire officials. Remember,“Fire
Resistant”materialsareconsideredcombustible:theyare
difficulttoignite,butwillburn.Also,“fire-rated”sheet
rock is considered combustible.
Hearth Requirements
This appliance CANNOT be installed directly on carpeting,
vinyl, linoleum or Pergo®.
If this appliance will be installed on any combus-
tible material OTHER THAN WOOD, a floor pad must be
installed that is either metal, wood, ceramic, stone, or a
listed hearth pad. This floor protection must extend the
full width and depth of the appliance. It is not necessary
to remove carpeting, vinyl or linoleum from underneath
the floor protection. See fig. 1.
Figure 1. Minimum Hearth Protection.
14”
(356mm)
27”
(686mm)
Safety Information
Due to the high operating temperatures this appliance
shouldbelocatedoutoftrafficandawayfrom
furniture,draperies,etc.Maintainproperclearanceto
combustible mantels and fireplace trim.
Childrenandadultsshouldbealertedtothehazards
ofhighsurfacetemperaturesandshouldstayawayto
avoid burns or clothing ignition.
Enfants et adultes doivent être avertis des dangers des
températuresdesurfaceélevéesetdevraientresterà
l’écart pour éviter les brûlures ou l’inflammation des
vêtements.
Youngchildrenshouldbesupervisedwhiletheyare
inthesameroomastheappliance.Toddlers,young
children and others may be susceptible to accidental
contactburns.Aphysicalbarrier,suchasachild
guard,isrecommendedtobeusedifthereareat-risk
individuals in the house. To restrict access to a fireplace
orstove,installanadjustablesafetygatetokeep
toddlers,youngchildrenandotherat-riskindividuals
outoftheroomandawayfromhotsurfaces.
Lesjeunesenfantsdoiventêtresurveilléspendant
qu’ils sont dans la même pièce que l’appareil. Les
tout-petits,lesjeunesenfantsetd’autrespeuventêtre
sensibles aux brûlures par contact accidentel. Une bar-
rièrephysique,commeungardedel’enfant,estrecom-
mandépourêtreutilisésiilyadespersonnesàrisque
danslamaison.Pourrestreindrel’accèsàunecheminée
ouunpoêle,installerunebarrièredesécuritéréglable
pourgarderlestout-petits,lesjeunesenfantsetautres
personnesàrisqueàsesortirdelasalleetàl’écartdes
surfaces chaudes.
Any safety screen or guard removed for servicing an
appliance must be replaced prior to operating the
appliance.
Tout écran ou grille de protection pour l’entretien d’un
appareil doit être remplacé avant de faire fonctionner
l’appareil.
Clothing or other flammable materials should not be
placed on or near the fireplace.
Surveillerlesenfants.Garderlesvêtements,les
meubles,l’essenceouautresliquidesàvapeur
inflammables lin de l’appareil.
Neverallowanyonetousethefireplaceiftheyare
unfamiliarwithitsoperation.
NEVER store or use gasoline or any other flammable
vapors or liquids in the vicinity of this appliance.
Neverburnanysolidmaterials(wood,cardboard,paper,
coal,etc.)inthisappliance.Usewithnaturalgasor
propane fuel ONLY.
Do not slam or strike the glass panel.
ThisapplianceisNOTforusewithaftermarketglassdoors.
Cet appareil ne sert pas avec des portes en verre de
marché des accessoires.
Wear gloves and safety glasses while installing or
performing maintenance procedures on this appliance.

7
137750_Rev_L 11.16.12
Stove and Vent Clearance
Requirements
Minimum Clearances from the Stove
to Combustibles: Seefigs.2-4.
Rear: 2”(51mm)
Ceiling: 321/4”(819mm)
Corner: 2”(51mm)
Sides: 3”(76mm)
Figure 4a. Mantel and Trim Clearance specifications. Back of
bottom plate is flush with the fireplace face. Subtract 2 1/4” with
Short Legs.
Figure 2.
Parallel
Installation
Clearances.
Figure 3.
Corner Clearances.
2”
51 mm
2”
51 mm
3”
(76mm)
2”
(51 mm)
To Rear Wall
3”
(76mm)
Alcove Installation
MaximumAlcoveDepth:24”(61cm)
MinimumAlcoveWidth: 313/4”(80.6cm)
)MinimumCeilingHeight:61”(155cm)
WithShortLegs(6”): 59”(150cm)
Alcove dimensions result from test configurations,
not stove clearance specifications.
Minimum Clearances from the Vent Pipe to
Combustibles:
HorizontalRun:
Offthetopofthepipe 2”(51mm)
Offthesidesandbottom1”(25mm)
Vertical Run:
Allsides 1”(25mm)
Figure 4b
Stove is installed with the top plate flush with the fireplace face.
Figure 4c. Stove is installed recessed half-way into fireplace.
Top plate extends 6.5” forward of the fireplace face.
12.5
10.25
8
5.75
Max. Mantel Depth
Min. Mantel
Depth
Max. Trim
Depth = 1
3.5
61.75
156.8 cm
63.25
160.7 cm
64.75
164.5 cm
66.25
168.3 cm
67.75
172.1 cm
6.5
58.75
149.2 cm 29
74.7 cm
12.5
10.25
8
5.75
Max. Mantel Depth
Min. Mantel
Depth
Max. Trim
Depth = 1
3.5
28.5
72.3 cm
53.75
136.5 cm
55.25
140.3 cm
56.75
141.1 cm
58.25
148 cm
52.25
132.7 cm
48.25
122.5 cm

8
137750_Rev_L 11.16.12
Vent Restriction
This appliance is equipped with Restrictor Plates which
enable you to regulate the flow of incoming combustion
air and exhaust gas. The plates prevent overly strong draft
that can cause poor combustion and weak flame picture.
Followtheguidelinesbelow,andonthefollowingpages,
to determine the correct restrictor plate setting for your
particular installation configuration.
Intake Air Restrictor
This plate is located at the rear of the firebox behind the
burner plate. It is set in a CLOSED position at the factory
and should be left there for most vent configurations.
It should be opened only for snorkel terminations and
some short run horizontal terminations as specified on
thefollowingpages.ToadjusttheAirRestrictortothe
OPEN position, locate and loosen the wing nut under the
burnerandpushitbackasfarasitwillgo.SeeFig.6.
Exhaust Restrictor
TheExhaustRestrictorisanadjustableshutterlocatedat
thetopofthefirebox.Itisadjustedbymovingapivotpin
into one of four positions. It is set in the FULLY OPEN posi-
tion at the factory. See Fig. 7.
Use the chart in Table 1 to determine the correct
position for your installation and follow the instructions
belowtoadjustitifnecessary.
Additional restriction may be needed depending the
overall vent height. Use Simpson Dura-Vent Restrictor
Disk #929.
AdjustingExhaustRestrictorPlate:
1. Remove the Top Plate.
2. Locate the pivot pin at the left side of the firebox top.
Loosen the wing nut on the pivot pin and push the
pin to the left to disengage it from the current setting
position.Movethepintowardtherearandthenright
to engage it in the appropriate position indicated on
the firebox. See fig. 7.
3. Tighten the lock nut and replace the Top Plate.
Venting Requirements
This appliance may be installed with a vertical or horizon-
tal termination and must conform to the configuration
requirements described below.
This appliance is approved for use with vent systems
from the following manufacturers:
•SimpsonDura-VentGS
•Metal-FabSure-SealDV
•AmeriventCorporation
•SecurityVentLtd.
•SelkirkMetalbestos
•InternationalChimneyCorp.(ExcelDirect)
•BernardDelsinMfg.(ProForm)
Usepartsofonemanufactureronly-DONOTMIX
VENTCOMPONENTSFROMDIFFERENTMANUFACTURERS
INTHESAMESYSTEM.
Installation of any components not manufactured or
approvedbyJøtulorfailuretomeetallclearancerequire-
ments will void all warranties and could result in property
damage,bodilyinjury,orseriousfire.
The approved vent configurations described in this
manual are derived from extensive testing under con-
trolled laboratory conditions. Gas appliance performance
can be negatively affected by variables present in the
installation environment, i.e: atmospheric pressure, strong
prevailingwinds,adjacentstructuresandtrees,snow
accumulation, etc. These conditions should be taken into
consideration by the installer and stove owner when plan-
ning the vent system design.
IMPORTANT
• JOINT SEALING REQUIREMENT: APPLYA1/8”BEADOF
HIGH-
TEMPERATURE(750°F)SEALANTTOTHEMALESEC-
TION OF THE INNER VENT PIPE. THE
CEMENTSHOULDFORMASEAL
BETWEEN THE INNER AND OUTER
PIPES.
• NEVERMODIFYANYVENTING
COMPONENT,ORUSEANYDAM-
AGED VENTING PRODUCT.
• THEGASAPPLIANCEAND
VENTSYSTEMMUSTBE
VENTED DIRECTLY TO THE
OUTSIDE OF THE BUILDING
AND NEVER ATTACHED TO
ACHIMNEYSERVINGASOLIDFUELORGASBURNING
APPLIANCE.EACHDIRECTVENTGASAPPLIANCEMUST
HAVEITSOWNSEPARATEVENTSYSTEM.
COMMONVENTSYSTEMSAREPROHIBITED.
• IFVENTINGSYSTEMISDISASSEMBLEDFORANYREA-
SON, REINSTALL PER THE INSTRUCTIONS PROVIDED FOR
THE INITIAL INSTALLATION.
Fig. 5.

9
137750_Rev_L 11.16.12
Vertical Vent Termination
This appliance can be vertically vented through a ceiling
or to a roof termination with the following guidelines:
The termination should fall within the shaded areas
of the grids depicted in the Vent Window diagrams on
the pages 10-11.
MaximumVerticalrunshouldnotexceed35ft.(10.66
m).
MinimumVerticalrunmustbeatleast8ft.(2.43m).
Max.ColinearHorizontalrunis2ft.(61cm).
Vent Terminus Clearance: In no case shall any dis-
chargeopeningonthecapbelessthan18in.(610mm)
horizontally from the roof surface.
Steep roofs, nearby trees, and predominantly windy
conditionscancontributetopoordraftand/orpro-
mote down-draft occurances. Increasing the height of
the vent may alleviate these conditions.
Use Wall Straps to support an offset pipe run at three
feet intervals to avoid excessive stress on the offsets.
Elbows:Four45°,ortwo90°elbowsmaybeused.Do
notincludethe45°elbowattachedtothestove.When-
everpossibleuse45°elbowsinsteadof90°elbowsas
they are less restrictive to exhaust gas and intake air
flow.
A firestop is required at every floor. The opening
shouldbeframedto10"X10"insidedimension.
Any venting that is exposed above the first floor,
regardless of attic space or living space, must be en-
closed. Always maintain the required 1" clearance from
all sides of the vertical vent system.
Figure 7. Adjusting the Exhaust Restrictor plate - Top Plate
removed. Viewed from front of stove.
Figure 6. Adjusting the Air Inlet Restrictor plate - View is
from the right side of the stove.
Figure 8. Vertical vent termination height above roof.
Push the
Pivot Pin into
the slot
FRONT
LEG BACK
LEG
Default
Factory
Setting is
“D”
Front of Stove
Horizontal Overhang
Vertical Wall
Termination
Cap
18.
min.
Lowest Discharge
Opening
18 min.
18.
min.

10
137750_Rev_L 11.16.12
Figure 9. Coaxial Vent Termination Window / NG Figure 10 . Colinear Termination / NG
• ALL VENTING MUST TERMINATE (END) WITHIN ONE OF
THE SHADED AREAS.
• SETSTOVEEXHAUSTRESTRICTORTOTHEPOSITIONTHAT
CORRESPONDS TO THE VENT TERMINATION AREA IN THE
DIAGRAMABOVE.
• ALWAYSMAINTAINTHEPROPERCLEARANCESTOCOM-
BUSTIBLES.
The circled letter designations in the vent diagram correspond
to the Exhaust Restrictor Setting on the stove. First, determine
which vent termination zone is appropriate for your installation
andfueltype,thenadjusttherestrictortothecorresponding
position as shown in Figure 7, page 9.
VentTerminationZones-NaturalGas Vertical
Termination for
COLINEAR VENT
HorizontalandVertical
Terminations for COAXIAL VENT
• VENTING MUST TERMI-
NATE (END) WITHIN THE
SHADED AREA.
• AdjusttheExhaustRe-
strictortopositionBfor
any NG colinear termi-
nation.

11
137750_Rev_L 11.16.12
Figure 11. Coaxial Vent Termination Window / LP Figure 12 . Colinear Termination / LP
VentTerminationZones-Propane
• VENTING MUST TER-
MINATE (END) WITHIN
THE SHADED AREA.
• AdjusttheExhaust
Restrictor to position
Cfor a straight vertical
colinear termination.
• AdjusttheExhaust
Restrictor to position
Dfor a vertical colinear
termination with maxi-
mum 2 ft. offset.
• VENTING MUST TERMINATE (END) WITHIN ONE OF THE DESIGNAT-
ED AREAS. ZONE “A” IS FOR VERTICAL TEMINATIONS ONLY.
• SETSTOVEEXHAUSTRESTRICTORTOTHEPOSITIONTHATCOR-
RESPONDS TO THE VENT TERMINATION AREA IN THE DIAGRAM
ABOVE.
• OPENAIRINLETRESTRICTORFORTERMINATIONS5FTANDUNDER.
SEEFIG.6,PAGE9.
• ALWAYSMAINTAINTHEPROPERCLEARANCESTOCOMBUSTIBLES.
The circled letter designations in the vent diagram correspond
to the Exhaust Restrictor Setting on the stove. First, determine
which vent termination zone is appropriate for your installation
andfueltype,thenadjustthestoverestrictorplatetothecor-
responding position as shown in Figure 7, page 9.
Vertical
Termination for
COLINEAR VENT
HorizontalandVertical
Terminations for COAXIAL VENT

12
137750_Rev_L 11.16.12
Co-linearVentInstallation
This appliance may be vented through a masonry or Class
A prefabricated chimney using a Co-linear Flexible Vent
system approved for use with a solid-fuel burning fire-
place. When installed in the manner described below, this
system can improve the performance of the appliance in
cold climate situations, as well as simplify the vent instal-
lation. See fig. 13.
These installation requirements must be followed:
1. Use the guidelines for Co-linear Vent Termination ap-
propriate for your gas type on pages 10 - 11.
1. Prior to the installation the chimney flue must be thor-
oughly cleaned and inspected by a qualified chimney
service person.
2. In a masonry chimney, a fireclay liner must be present
the entire length of the chimney.
3. PrefabricatedchimneysmustbeUL103orULCS-629
listedandhaveaminimumINSIDEdiameterof6
inches, (150 mm).
4. Noappliancecanbeinstalledintoachimneyflueserv-
ing any other appliance of any kind.
5. THEAIRINTAKEFLEXPIPEMUSTEXTEND6FEETBE-
YONDTHEDAMPERAREAOFTHEFIREPLACE.
6. Iftheintakeflexductdoesnotextendthefulllength
of the chimney and connect to both the unit and the
terminationcap,AMETALBLOCKOFFPLATEMUST
BE CONSTRUCTED AND INSTALLED ABOVE THE UNIT
PRIORTOTHEENDOFTHEINTAKEFLEXANDMUST
COMPLETELYSEALTHECHIMNEYFLUEFROMTHE
ROOM.
Consultwiththelocalcodeauthorityhavingjurisdic-
tion before proceeding with this type of installation.
Refer to the vent manufacturer’s instructions for
specific installation requirements.
WARNING: FAILURE TO POSITION THE PARTS AND
STOVE IN ACCORDANCE WITH THESE DIAGRAMS OR
FAILURE TO USE ONLY PARTS SPECIFICALLY APPROVED
FOR USE WITH THIS APPLIANCE MAY RESULT IN PROPERTY
DAMAGEORPERSONALINJURY.BESURETOMAINTAIN
THEPROPERCLEARANCESTOCOMBUSTIBLESASDEFINED
IN THIS MANUAL AND IN THE INSTRUCTIONS PROVIDED
WITH EACH VENT COMPONENT.
Figure 13. Co-linear Adaptor installed through a masonry
chimney. Components shown may differ somewhat from
manufacturer to manufacturer.
Figure 14. Simpson Dura-Vent #923GCL Co-linear Adaptor
is shown - other manufacturer’s components may differ.
Subtract 2 1/4” for Short Legs.
Max.offset
24”
(609mm)
The Air
Intake Flex
pipe must
extend
beyond the
damper.
The chimney
must be sealed
off from the
room by a steel
plate at the
damper area.
High Wind Cap
Exhaust Gas
Intake Air
Max.Co-linear
Height - 35 ft.
(10.66m)
Min.Co-linear
Height - 10 ft.
(3.05 m)
Dual3”Flex
Liners
251/2”
to center
of flue collar
29”
to top of
Co-linear
Adapter

13
137750_Rev_L 11.16.12
Masonry or Prefabricated Chimney
Conversion
This appliance is approved for use with listed chimney
conversion kits from any of the manufacturers listed on
page 8. These kits are for use in a masonry chimney or a
prefabricated solid fuel listed chimney. See fig. 15.
These installation requirements must be followed:
1. Use the guidelines for Coaxial Vent Termination ap-
propriateforyourgastypeonpages11-12.
2. In masonry chimney, a fireclay liner or listed steel liner,
must be present the entire length of the chimney.
3. Chimneyheightshouldnotexceed35ft.(10.66m).
4. Thelinermusthaveaninsidedimensionof6”roundor
greater.
5. PrefabricatedchimneysmustbeUL103orULCS-629
listedandhaveaminimumINSIDEdiameterof6inch-
es, (150 mm). Prefabricated chimneys must be listed for
the specific Chimney Conversion Kit you choose.
Figure 15. Vent System through a masonry chimney using
a chimney conversion kit. May also be used in listed
prefabricated chimneys. Drawing is for illustrative purposes
only - DO NOT VENT TWO APPLIANCES INTO A SINGLE
CHIMNEY.
Vertical Termi-
nation Cap
Cap Adaptor-
included in
#934Kit
Support/Wall
Thimble Cover
Exhaust
Gas
Intake Air
Use standard
vent pipe
from stove
to thimble
from the same
manufacturer
4”FlexPipe
not included
in kit
IMPORTANT NOTICE
THE USE OF AN EXISTING CHIMNEY AS AN AIR
INTAKE IS NOT COVERED UNDER THE ANSI
Z21.88-1999-CSA2.33-M99TESTMETHODSAND
RESULTING ITS/WHI PRODUCT CERTIFICATION.
THE CODE AUTHORITY HAVING JURISDICTION
MUSTBECONSULTEDPRIORTOPROCEEDING
WITH THIS INSTALLATION METHOD.

14
137750_Rev_L 11.16.12
HorizontalTermination
Any horizontal termination must fall within the shaded
portion of the vent window graph illustrated in figs. 9
or 11. For Snorkel Terminations, see below.
Any horizontal termination except a snorkel termina-
tion, must include:
1) Minimumriseof2ft.
2) Minimumhorizontalrunof12in.whenvertical
runislessthan8ft.
3) Maximumriseof35ft.
4) Maximumhorizontalrunof27ft.
5) Nomorethanfour45°ortwo90°Elbows
Follow all termination clearance guidelines as specified
in fig. 19.
The horizontal termination cap must maintain a 3"
clearancetoanyoverheadcombustibleprojections
21/2"orless.Itmustalsomaintain12"clearancefrom
projectionsexceeding21/2".Seefig.20.
WallCut-outOpening:Aminimum10"X10"(250mmx
250 mm) square hole is required for proper pipe clear-
ances through a combustible wall. Usealistedwall
thimbleforthewallpenetration.
DO NOT FILL AIR SPACE WITH ANY TYPE OF INSULA-
TION.
Anyhorizontalrunofventmusthavea1/4"riseforev-
ery foot of run toward the termination cap. NEVER AL-
LOWTHEVENTINGTORUNDOWNWARDFROMSTOVE
TOTERMINATION;DOWNWARD VENT RUNS TRAP HEAT
ANDCAUSEHIGHTEMPERATURESTODEVELOPWITHIN
THE VENT THAT COULD START A FIRE.
Install a Vinyl Siding Standoff between the vent termi-
nation and an exterior wall covered by vinyl siding ma-
terial to prevent potential heat damage to the siding.
Do not recess the termination cap into a wall or siding.
Figure 16.
• Minimum vent for horizontal termination.
• 14” Maximum horizontal run directly off rear of stove
with 14” Snorkel termination.
Figure 17. Maximum Horizontal and Vertical Run with 36”
Snorkel Termination.
Max.
6ft.
183 cm
36in.
Snorkel
(915 mm)
Figure 18. Corner Installation with 14” Snorkel Termination.
Snorkel Terminations
THEAIRINLETRESTRICTORMUSTBESETFULLYOPEN
FOR ANY SNORKEL TERMINATION.SeeFig.6,pg.9.
Witha14”Snorkel:
The horizontal run made directly off the rear of the
stoveintoa14”snorkelcapshouldincludenomore
thanasingle12”straightsectionasshowninfig.17.
One45°Elbowmaybeusedforacornerinstallationas
shown in fig. 18.
Witha36”Snorkel:
The maximum horizontal run may be no more than
6ft.(182cm.)
12 in.
Straight Pipe
Max.14”
355 mm
Wall Thimble
and Trim Collar
45°Elbow
See Note F
Fig. 20
14”
355 mm
Max.
12 in.
(305 mm)
12”
Vent
Pipe or
less
57”
(1448mm)
24in.
Snorkel
(305 mm)
251/2in.
Snorkel
(648mm)

15
137750_Rev_L 11.16.12
Figure 19. Vent Terminal Clearances per National Fuel Gas Code.
Figure 20. Termination Clearance to overhangs
A = Clearance above grade, veranda, porch , deck, or balcony
: 12 inches (30 cm) minimum.
B = Clearance to window or door that may be opened:
**Min.9inches,U.S./*12inches(30cm)CAN.
We recommend 12in. minimum to prevent condensation
on the window.
C = Clearance to permanently closed window:
**Min.9inches,U.S./*12inches(30cm)CAN
We recommend 12 in. minimum to prevent condensation
on the window.
D = Vertical clearance to ventilated soffit located above the
terminalwithinahorizontaldistanceof2feet(60cm)
from the centerline of the terminal: 18 inches
(46cm)minimum.
E=Clearancetounventilatedsoffit:12inches(46cm)
minimum.
F=Clearancetooutsidecorner:**Min.9inches,U.S./*12
inches (30 cm) CAN.We strongly recommend 12 inches,
particularly where windy conditions pevail.
G=Clearancetoinsidecorner:**Min.6inches,U.S./*12
inches (30 cm) CAN.We strongly recommend 12 inches,
particularly where windy conditions pevail.
H=*Nottobeinstalledwithin15feet(4.5m)aboveame-
ter/regulatorassemblywithin3feet(90cm)horizontally
from the center-line of the regulator.
I = Clearance to service regulator vent outlet:
3 feet (91 cm) minimum.
J=Clearancetononmechanicalairsupplyinlettobuilding
or the combustion air inlet to any other appliance:
12 inches (30 cm) minimum.
K = Clearance to a mechanical air supply inlet:
**Min.3feet(91cm)aboveifwithin10feethorizontally,
U.S./*6feet(1.83m)minimum/CAN
L = 1Clearance above paved sidewalk or a paved driveway
located on public property: 7 feet (2.1 m) min.
* InaccordancewithCSAB149InstallationCodes.
**InaccordancewiththecurrentANSIZ223.1/NFPA54,National
Fuel Gas Code. Note: Local Codes and Regulations may require
different clearances.
***InaccordancewiththecurrentNFPA58LiquifiedPetroleum
Gas Code
1A vent shall not terminate directly above a sidewalk or driveway
which is located between two single family dwellings and serves
both dwellings.
2Only permitted if veranda, porch, deck, or balcony, is fully open
on a minimum of two sides beneath the floor.*
M=Clearanceunderveranda,porch,deck,orbalcony:
12inches(30cm)minimum.2
N = Clearance to propane tank relief valve and filler connection***:
5feet(1.52m)minimumtotanksnotfilledonsite
10feet(3.05m)minimumtotanksfilledonsitefrombulktruck
HorizontalTerminationClearance

16
137750_Rev_L 11.16.12
Tools required:
• 1/2”openendedwrenchordeep-wellsocket,TorxT20
orslottedscrewdriver,4mmallenwrench.
Conversion Kit Contents:
• 1,regulatortowerlabeledforpropane
• 3,regulatortowerscrews
• 1,burnerorifice(#33forNG,1.65mmforLPG)
• 1,pilotorifice(#51forNG,#30forLPG)
• LabelA-tobecompletedandappliedto
the back of the stove
• LabelB-applytothestove’sRatingPlate
• Smallvalvelabel-applytovalvebody
Conversion instructions are also shipped in the stove
with the conversion kit.
Mobile Home Installation
This appliance can be installed for use in a mobile home
in the U.S. and Canada provided:
1. The stove is secured to the floor of the mobile home.
UseJøtulFloorBracketKit#750304.
2. Provision must be made to secure an electrical ground
between the stove and the mobile home chassis.
3. ThestoveisinstalledinaccordancewithTitle24CFR,
Part3280-ManufacturedHomeConstructionand
Safety Standard, in the U.S. In Canada, comply with CSA
Z240.4,GasEquippedRecreationalVehiclesandMobile
Housing.
4. Alwayscontactyourlocalofficialsaboutinstallation
restrictions and requirements in your area.
THISAPPLIANCEMAYBEINSTALLEDINANAFTERMAR-
KETPERMANENTLYLOCATED,MANUFACTURED(MOBILE)
HOME,WHERENOTPROHIBITEDBYLOCALCODES.THIS
APPLIANCE IS ONLY FOR USE WITH THE TYPE OF GAS THAT
IS INDICATED ON THE STOVE’S RATING PLATE. A GAS
CONVERSIONKITISPROVIDEDWITHTHEGF400SEBAGO
DIRECT VENT GAS STOVE.
CET APPAREIL PEUT ETRE INSTALLE DANS UN MAISON
PREFABRIQUEE(MOBILE)DEJAINSTALLEEADEMEURESI
LES REGLEMENTS LOCAUX LE PERMETTENT. CET APPAR-
EIL DOIT ETRE UTILISE UNIQUEMENT AVEC LES TYPES DE
GAS INDIQUES SUR LA PLAQUE SIGNALETIQUE. NE PAS
L’UTILISER AVEC D’AUTRES GAS SAUF SI UN KITDE CON-
VERSION CERTIFIE EST INSTALLE.
Fuel Conversion
This appliance is shipped from the factory equipped to
burn NATURAL GAS only. If PROPANE gas is to be used as
fuel, the appliance must first be converted for use with
propane. Use Propane Conversion Kit 155351, supplied with
the appliance.
Order and install NG Conversion Kit 155352 to change
back to use with natural gas.
WARNING:
THECONVERSIONKITISTOBEINSTALLEDBYAN
AUTHORIZED JØTUL SERVICE TECHNICIAN IN AC-
CORDANCE WITH THE MANUFACTURER’S INSTRUC-
TION AND ALL CODES AND REQUIREMENTS OF THE
AUTHORITY HAVING JURISDICTION. FAILURE TO
FOLLOW THESE INSTRUCTIONS COULD RESULT IN
SERIOUS INJURY OR PROPERTY DAMAGE. THE QUAL-
IFIED AGENCY PERFORMING THIS WORK ASSUMES
RESPONSIBILITYFORTHISCONVERSION.
IN CANADA:
THECONVERSIONSHALLBECARRIEDOUTINAC-
CORDANCE WITH THE REQUIREMENTS OF THE PRO-
VINCIAL AUTHORITIES HAVING JURISDICTION AND
IN ACCORDANCE WITH THE REQUIREMENTS OF THE
CAN1-B149.1AND.2INSTALLATIONCODE.

17
137750_Rev_L 11.16.12
Fuel Conversion Procedure
Refertofig.47,IllustratedPartsBreakdown,toidentifypart
numbers below.
1. Turn off gas supply to stove.
2. RemovethestoveTopPlate(41).
3. Disengage the two Glass Frame Latches at the top of
the firebox. See illustration on page 5. Carefully lift the
glass panel up and out of the stove.
4. Ifinstalled,removetheEmbersandLogSetusingcare
not to damage the fragile log parts.
5. Lift out the Burner Skirt (33). Tilt the skirt at an angle
to clear the firebox sides and front.
6. ReachunderthestoveandremovetheAirShutter
wingnut from its stud. As you face the right side, it is
the one closest to you. See fig. 21.
7. Lift out the Burner Plate: NOTE: There are no screws
securing the Burner to the floor of the firebox. Pull the
Air Shutter forward and lift the burner together with
shutter up and out of the stove as a unit. See fig. 22.
8. ChangetheMainBurnerOrifice.Seefig.23.Usinga
1/2”openendedwrenchordeep-wellsocketremove
the burner orifice from its brass elbow housing and
replace with the appropriate orifice supplied in the kit.
#33 for NG
1.65mmforLP
9. Replace the Air Shutter with its gasket and push it all
the way back to allow replacement of the Burner Plate.
10. Replace the Burner Plate. Engage the Air Inlet Tube
with the Air Shutter and burner orifice. Properly
seated, the burner plate will be engaged at its front
corners with the two support brackets located at the
front of the firebox.
•Replacethewingnutlooselyontheairshutterstem
underthestove.Airshutteradjustmentwillbedone
last.
11. CHANGE THE PILOT ORIFICE: From within the firebox,
remove the Pilot Head by pulling it straight up from
the pilot base. See fig. 25.
Usingthe4mmallenwrenchthatisincludedwiththe
conversion kit, unscrew the pilot orifice (counterclock-
wise). Replace with the appropriate orifice:
# 51 for natural gas
#30 for propane gas
12. Tighten orifice into the base of the pilot assembly.
To prevent bypass leaks, be sure the orifice is secured
tightly and flush with the base. Replace pilot head by
pushing it down onto the pilot base.
13. Replace the Variable Regulator. Using a Torx T-20 screw-
driver, remove the three screws from the front of the
valveregulator.Seefig.26.
Figure 21. Locate and remove the Air Shutter wingnut
from under the right side of the stove.
Figure 22. Remove the Air Shutter and Burner as a unit.
BurnerPlate
Air Shutter
Figure 23. Change the Burner Orifice.
Burner
Orifice
BrassElbow
Figure 24. Air Shutter Setting
Air Shutter
Opening
Dimension
Air
Shutter
Wingnut
BurnerPlate
Air Inlet
Tube
FRONT
LEG
BACK
LEG

18
137750_Rev_L 11.16.12
Gas Supply Connection
Connectthegassupplylinetothestove,before
installingtheoptionalBlower.
Iftheblowerwillbeinstalled,usea45°elbowoffthe
controlvalvetocreateclearancerequiredfortheblower
installation.
The gas supply line connection is made to the left side of
thevalve.Thegassupplylineshouldbe3/8”nptwitha
1/2”diametersupply,ortheappropriatesizetoprovide
sufficient gas pressure to the valve regardless of the input
setting.
The use of Flexible Gas Appliance Connectors is ac-
ceptable in many areas in the U.S. However, Canadian
methods vary depending on local code.
ALLINSTALLATIONSMUSTCOMPLYWITHLOCALCODE
ORINTHEABSENCEOFLOCALCODE,MUSTCOMPLYWITH
THEMOSTRECENTEDITIONOFTHENATIONALFUELGAS
CODEANSIZ223.1/NFPA54ORCAN-B149.
All codes require a gas shut-off valve (gas cock) and
union, to be installed in the supply line, and in the same
room as the appliance. This allows for the disconnection
of the stove for servicing and maintenance. See fig. 27.
Figure 27. Supply valve coupling.
Pilot Head
Orifice Retainer
Clip
PilotBase
Figure 25. Pilot orifice removal and replacement.
14.RemovetheRegulatorTower,Gasket,whiteplastic
disk, and Spring.
15. Install the new regulator: Be sure the new gasket is
properly positioned and tighten screws securely.
16. Installtheidentificationlabelstothestovesothat
they can be seen by any person that may be servicing
the stove.
Label A: apply to back of stove.
Label B: apply to stove’s rating plate.
Small valve Label: apply to valve.
17. Reassemble the stove, apply gas to the system and
check for leaks using a soapy water solution.
18.AdjusttheAirShutter:
CAUTION!USEWORKGLOVES.SURFACESMAYBEHOT!
Youwillneedtoadjusttheshuttertotheposition
that supplies the correct amount of air mixture to
achieve the best flame picture with your particular in-
stallation. Start with the shutter stem at the midway
position in the slot in the bottom of the stove. See fig.
21. Pushing the stem back will restrict air, while push-
ing it forward will open the shutter. Too much air will
produce a lighter flame, while too little will promote
long,darkflamesandmaypromotesooting.Make
adjustmentsinsmallincrements.Withsomeexperi-
mentation, you will find the shutter position that
works best for your installation.
NEVERUSEANOPENFLAMETOCHECKFORGASLEAKS.
Correct gas pressure is essential for efficient and
safe operation of this appliance. Correct gas pres-
sure must be established at the time of installation.
For more details, see the Gas Pressure section of this
manual (page 19).
ALWAYS REFER TO THE LIGHTING INSTRUCTIONS ON THE
INSIDEBACKCOVEROFTHISMANUALWHENLIGHT-
ING YOUR STOVE.
Figure 26. Regulator assembly.
Apply small
label here
Remove black
gasket
Regulator
Tower

19
137750_Rev_L 11.16.12
Gas Pressure
Correct gas pressure is essential for efficient and safe
operationoftheGF400DVSebagogasstove.Itisim-
portant that the correct pressure is established at the
time of the installation. Proper gas pressure provides
a consistent flow of gas to the appliance and is instru-
mental in checking for gas leaks.
Pressure Test: Attach a manometer to the appro-
priate test point on the valve. See fig. 28.The gauge
connections are located on the front of the valve under
theOn/Off/Pilot-knob.Gaugeconnectionsareidenti-
fied by:
E - for Inlet or Supply Pressure (the amount of gas
coming to the valve.)
A-forManifoldPressure(theamountofgasthat
is coming out of the valve to the burner.)
ALWAYS TEST PRESSURES WITH VALVE CONTROL
KNOB SET ON HIGH.
HighAltitudeAdjustment
Installationslocatedataltitudesfrom2000-4500ft.
(610m-1370m)DONOTrequireadjustmentforaltitude.
DO NOT DERATE THIS APPLIANCE FOR ALTITUDE.
Figure 28. Pressure test points.
EA
Leak test:
1. Mixa50-50solutionofwateranddish
soap.
2. Light appliance- see lighting instructions
on the inside back cover of this manual or
on the stove’s rating plate.
3. Brushorsprayalljointsandconnections
with the soapy water solution.
4. Ifbubblesappearatanyconnectionor
seam or a gas odor is detected, imme-
diately turn gas control knob to the OFF
position.
5. Tightenorreconnecttheleakingjoint
and retest for any gas leaks.
AT-HANDLEGASCOCKISREQUIREDIN
MASSACHUSETTSTOCOMPLYWITHCODE248CMR.
Securealljointstightlyusingappropriatetoolsand
sealing compounds. For propane units be sure to use com-
pounds that are propane resistant. Turn on gas supply and
test for gas leaks using a soapy water solution. Never use
an open flame to check for leaks.
INLET GAS PRESSURES
(inches water column)
MIN MAX
NATURAL GAS 5.0 7.0
PROPANE 12.0 14.9
The appliance and its appliance main gas
valve must be disconnected from the gas supply
piping system during any pressure testing on that
systemattestpressuresinexcessof1/2psig(3.5
kPa).
The appliance must be isolated from the gas
supply line by closing its individual manual gas
shut-off valve (gas cock) during any pressure test-
ing of the gas supply piping system that is equal
toorexceedspressuresof1/2psig(3.5kPa).
MANIFOLDPRESSURES
(inches water column)
MIN MAX
NATURAL GAS 1.2 3.8
PROPANE 2.9 11.0

20
137750_Rev_L 11.16.12
Optional Wall Thermostat or
Remote Control
Use only a 750 millivolt DC two-wire circuit thermostat
with this appliance. The thermostat should be placed
in the same room as the heater, typically 5 feet off the
floor. Avoid drafty areas or any area that may affect the
accuracy of the thermostat.
The thermostat should be connected to this appli-
anceusingaminimumof16gaugewirewithamaxi-
mumlengthof25feetofwire.
Connect the two thermostat wire leads to the two
lower terminals on the terminal block located directly
above the ignitor button. Do not overtighten the con-
nections. IT IS NOT NECESSARY TO DISCONNECT ANY
OTHER WIRES. See Fig. 30.
Forthermostaticoperation,theOn/Off/T-Statswitch
on the back of the stove must be in the T-stat position,
and the pilot light must be running, as it is the power
source for the thermostat.
At the thermostat, the two wires should be connect-
ed to the two connection screws on the thermostat base
plate per the manufacturer’s instructions.
Remote Control
When using a remote, the remote receiver should be
wired to the terminal block the same way the thermo-
stat would be. See the instructions above.
Follow the operating instructions included with the
Remote Control unit.
CAUTION:
LABELALLWIRESPRIORTODISCONNECTIONWHENSERVICING
THE CONTROLS. WIRING ERRORS CAN CAUSE IMPROPER OR
DANGEROUS OPERATION. ALWAYS VERIFY PROPER OPERATION
AFTER SERVICING THE APPLIANCE.
Figure 30. Accessory wiring diagram.
Flame Appearance / Air Shutter
Adjustment
This appliance is shipped from the factory equipped to
burn natural gas with the air shutter set half-open.
Be aware, however, that this initial setting may not provide
the optimal flame picture in your particular installation.
No single setting will be appropriate for all vent configu-
rations, fuel types, or installation environments.The air
shuttersettingcanalsobeadjustedtoachievethede-
sired flame appearance. Flame appearance is a matter of
individualpreference,however,mostpeopleenjoyawarm
yellowish flame.
Toomuchair- the appliance will generate a flame that
isblueandtransparent,oran“anemic”flame.
Too little air - the appliance may generate very long
yellow flames resulting in soot. Sooting produces black
deposits on the logs, on the inside walls of the appliance,
and potentially, on the exterior termination cap. Sooting is
caused by incomplete combustion and lack of combustion
air entering the air shutter opening.
Toadjusttheairshutter:CAUTION!USEWORKGLOVES.
SURFACESMAYBEHOT!
1. Reach under the right side of the stove and loosen the
wingnut located closest to you. See fig. 29. Slide the
wingnut stem forward to open the air shutter and
increase air. Slide the shutter stem back to decrease the
air supply.
2. Tighten the wingnut to secure the shutter at the de-
sired setting.
3. Operate the burner for 30 minutes on the HIGH setting,
observing the flame continuously. If the flame appears
weak,slow,orsooty,adjusttheairshuttertoamore
open position as described above until the flame is as
desired.Makeadjustmentsinsmallincrementsand
allow the burner to settle in before making further
adjustment
WARNING: AIR SHUTTER ADJUSTMENTS SHOULD ONLY
BEPERFORMEDBYAQUALIFIEDPROFESSIONALSERVICE
TECHNICIAN.
Figure 29.
Loosen the wingnut to adjust the air shutter stem.
FRONT
LEG
BACK
LEG
Table of contents
Other Intertek Stove manuals
Popular Stove manuals by other brands

Regency
Regency FG38NG2-BRA Owners & installation manual

Cleveland Ironworks
Cleveland Ironworks Single F500300 Operating instructions and owner's manual
Sportsman
Sportsman SSBGS instruction manual

United States Stove
United States Stove 5710-XH Owner’s Instruction and Operation Manual

Jetboil
Jetboil Genesis instructions
Palazzetti
Palazzetti ECOFIRE ANNA U.S. PRO2 DESCRIPTION / CLEANING / TECHNICAL DATA
